
Chocolate Milkshake
The Ultimate Chocolate Milkshake: A Creamy Indulgence to Satisfy Your Sweet Tooth
Hey there, fellow food lovers! I’m beyond thrilled to invite you into my kitchen today where we’re about to whip up something truly delightful: the ultimate chocolate milkshake. Let me tell you, this isn’t just any old milkshake; it’s a nostalgic blend of creamy, chocolatey goodness that encapsulates my childhood memories and has a special place in my heart.
Now, who doesn’t love a thick and frosty milkshake? Especially when it’s loaded with rich chocolate flavor that feels like a cozy hug with every sip! This is the kind of treat that takes me back to summer afternoons spent with friends at the local diner, where the ice cream was always perfectly scooped, and the laughter filled the air. It’s amazing how some flavors can transport you back in time, right?
As we make this dreamy milkshake together, I want you to feel the same joy that I experienced growing up. Whether you’re looking for a sweet treat to cool you down on a hot day, a fun dessert for your next gathering, or simply a self-care moment on a cozy night in, this chocolate milkshake is your ticket to happiness. So, grab a seat, and let’s dive into this sweet culinary adventure together!
Personal Story
I vividly remember being a kid with my best pals, running around the neighborhood on the hottest days of summer, our laughter echoing through the streets. After hours of playing tag and riding bikes, we’d make our way to the little ice cream shop just a few blocks away. It was a cozy spot with checkered floors and squeaky booths where the aroma of waffle cones filled the air.
Our ritual was simple but sweet: we’d order our chocolate milkshakes, double up on the whipped cream, and race to see who could finish theirs first. I can still picture us sitting there, straws in hand, chocolate mustaches dancing on our lips, and giggles spilling out uncontrollably. Those carefree days remind me of the beauty of simple pleasures and how food, in its most delicious form, has the power to create lasting memories.
Fast forward to today, and I still find joy in those same flavors. The thrill of blending ice cream with chocolate syrup, the anticipation of the first sip—it’s all part of the experience. With each milkshake I make, I not only recreate that magic but also pass it on! So, let’s do this and make some memories with our love for chocolate milkshakes!
Ingredients
Now that we’ve got our nostalgia flowing, let’s gather our ingredients! Here’s what you’ll need for that creamy, dreamy chocolate milkshake, along with a few tips from yours truly:
-
Ice Cream (2 cups): The star of our show! Use chocolate ice cream for a richer flavor or vanilla for a lighter base. You can also use dairy-free ice cream if you’re looking for a vegan option.
-
Milk (1 cup): Whole milk gives a creamy texture, but you can swap it for almond milk or oat milk for a lighter version. Remember to adjust the quantity depending on your desired thickness.
-
Chocolate Syrup (1/4 cup): Use store-bought or homemade. Drizzle some in the glass for a beautiful presentation before pouring in the shake!
-
Whipped Cream (for topping): A generous dollop of whipped cream can elevate your shake to new heights! You can try coconut whipped cream if you want a dairy-free version.
-
Chocolate Chips or Shaved Chocolate (optional, for garnish): Because you can never have too much chocolate, right?
-
Maraschino Cherry (for a classic touch): It’s like the icing on the cake! Plus, it adds a pop of color.
Step-by-Step Instructions
Ready to bring our chocolate milkshake to life? Let’s get shaking—literally! Follow these steps, and you’ll find it’s as easy as pie (or should I say milkshake?):
-
Start with the Ice Cream: Scoop 2 cups of your chosen ice cream into your blender. If you’re using chocolate ice cream, get ready for that rich chocolate flavor to take center stage! Want it extra thick? Try freezing your ice cream for a few minutes before blending!
-
Add the Milk: Pour in 1 cup of milk. Adjust the amount depending on how thick you want your shake to be. Less milk means a thicker shake, while more milk gives you a thinner, easier-to-sip version. A little chef hack: start with less milk and add more if needed!
-
Incorporate Chocolate Syrup: Add 1/4 cup of chocolate syrup to the blender. This will boost the chocolate flavor and make your shake irresistibly delicious. If you’re feeling adventurous, consider adding a pinch of sea salt to enhance the sweetness!
-
Blend: Secure the lid on the blender and blend everything until smooth and creamy, about 30-60 seconds. If you notice it’s getting stuck, pause and push the ice cream down to help it along. You want that beautiful, velvety texture!
-
Taste Test: Don’t be shy—give your milkshake a quick taste! Adjust the flavor by adding more chocolate syrup if you desire. This is the fun part where you can delight in your creation!
-
Serve it Up: Grab your favorite tall glass and drizzle some chocolate sauce inside the glass for a decadent look. Pour in your milkshake, leaving a little room at the top for whipped cream and garnishes.
-
Top it Off: Add a generous swirl of whipped cream and sprinkle chocolate chips or shaved chocolate over the top. And don’t forget the cherry for that classic touch!
And there you have it! A fabulous chocolate milkshake that looks as good as it tastes. You can feel the smiles already, can’t you?
Serving Suggestions
When it comes to serving your chocolate milkshake, presentation is key! Here are a few creative ideas to elevate your serving game:
-
Serve in Fun Glassware: Go for extra flair with colorful straws, or even mason jars! The visual appeal can enhance the experience, making it feel like a special treat.
-
Add a Side Dish: Pair your milkshake with homemade cookies or brownies for the ultimate dessert extravaganza. Think a warm brownie sundae alongside that icy shake.
-
Mix in Additional Toppings: Consider setting up a toppings bar for friends or family and let everyone add their favorite toppings, from crushed nuts to sprinkles!
Recipe Variations
Feeling a little adventurous? Here are some fantastic variations to put a unique spin on your classic chocolate milkshake:
-
Peanut Butter Chocolate Milkshake: Add a couple of tablespoons of creamy peanut butter to the blender for a delicious PB-choco combo.
-
Mint Chocolate Chip Shake: Swap out the chocolate ice cream for mint chocolate chip ice cream and a few drops of mint extract. Perfect for cooling off on a summer day!
-
Coffee Chocolate Milkshake: For a mocha twist, blend in a shot of espresso or a small amount of instant coffee granules. You’ll get a delightful coffee-flavored kick!
-
Dark Chocolate Shake: Use dark chocolate ice cream and drizzle some dark chocolate syrup for a richer taste. Perfect for chocolate lovers who enjoy a deeper flavor!
-
Cookies and Cream Milkshake: Blend in a few crushed Oreo cookies into your milkshake for a delightful crunch and texture.
Chef’s Notes
Let’s take a moment to share a little behind-the-scenes peek into my kitchen! Over the years, I’ve played around with countless milkshake recipes, and this chocolate version is timeless! There’ve been some memorable kitchen mishaps too—like the time I was so excited to try a new recipe that I accidentally grabbed salt instead of sugar. Luckily, I realized in time, and my taste buds were spared!
Through the years, I’ve learned that sometimes the simplest recipes bring the most joy and satisfaction. This chocolate milkshake is the perfect embodiment of that sentiment. It’s comforting, easy to make, and, best of all, it never fails to make you smile.
FAQs and Troubleshooting
You might have a few questions lurking in your mind as we start blending away. Here’s a quick FAQ section to address some common queries and potential hiccups:
-
Why is my milkshake too thick?
No worries! Just add a splash of milk, and blend again. Gradually adjusting is key to get the consistency you love. -
Can I make this in advance?
While it’s best enjoyed fresh, you can prep the ingredients in advance. Blend just before serving for the best flavor and texture. -
What if my milkshake is too thin?
If it turned out too thin, try adding a little more ice cream and blend again! -
Can I use non-dairy products?
Absolutely! There are countless delicious non-dairy ice creams available, and almond or coconut milk will work perfectly in this recipe.
Nutritional Info
While we all enjoy the delicious indulgence of dessert, it’s also nice to know what we’re consuming! A typical chocolate milkshake (around 16 ounces) will contain approximately:
- Calories: 600-800 kcal (depending on ice cream and other ingredients)
- Protein: 15-20g
- Fat: 20-30g
- Carbohydrates: 90-100g
- Sugar: 70-80g (keep in mind that this varies with toppings and syrups)
Remember, this is a treat, so enjoy it in moderation!
Final Thoughts
And there you have it, my dear foodie friends! The ultimate chocolate milkshake awaits you, ready to bring a smile to your face and a delightful taste to your palate. Whether you’re indulging on your own, hosting a gathering, or just enjoying a comforting moment, this recipe is bound to impress.
As you sip on your creamy shake, take a moment to savor not just the flavors but also the memories and connections that food can create. Here’s to many sweet moments ahead, filled with laughter, joy, and, of course, delicious chocolate milkshakes! Keep experimenting in the kitchen, share your creations, and remember: every meal tells a story. Cheers to your culinary adventures!
Print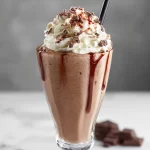
The Ultimate Chocolate Milkshake
- Total Time: 5 minutes
- Yield: 2 servings 1x
- Diet: Vegetarian
Description
A creamy and indulgent chocolate milkshake that brings back nostalgic flavors for a sweet treat anytime.
Ingredients
- 2 cups Ice Cream
- 1 cup Milk
- 1/4 cup Chocolate Syrup
- Whipped Cream (for topping)
- Chocolate Chips or Shaved Chocolate (optional, for garnish)
- Maraschino Cherry (for a classic touch)
Instructions
- Start with the ice cream: Scoop 2 cups of your chosen ice cream into your blender.
- Add the milk: Pour in 1 cup of milk.
- Incorporate chocolate syrup: Add 1/4 cup of chocolate syrup to the blender.
- Blend: Secure the lid on the blender and blend everything until smooth and creamy, about 30-60 seconds.
- Taste test: Give your milkshake a quick taste and adjust the flavor if necessary.
- Serve it up: Grab your favorite tall glass and drizzle some chocolate sauce inside the glass.
- Top it off: Add a generous swirl of whipped cream and sprinkle chocolate chips or shaved chocolate over the top.
Notes
Serve in fun glassware; pair with cookies or brownies for a dessert extravaganza.
- Prep Time: 5 minutes
- Cook Time: 0 minutes
- Category: Dessert
- Method: Blending
- Cuisine: American
Nutrition
- Serving Size: 1 milkshake
- Calories: 700
- Sugar: 75g
- Sodium: 200mg
- Fat: 24g
- Saturated Fat: 14g
- Unsaturated Fat: 8g
- Trans Fat: 0g
- Carbohydrates: 92g
- Fiber: 1g
- Protein: 16g
- Cholesterol: 50mg
Keywords: chocolate milkshake, dessert, summer treat, nostalgia, creamy drink

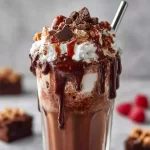
Brownie Milkshake Recipe
# Indulge in Bliss: The Ultimate Brownie Milkshake Recipe

### Introduction

Hey there, fellow food lovers! It’s your pal Beau Collier, and today I'm thrilled to share one of my ultimate guilty pleasures: the Brownie Milkshake! Trust me, this isn't just your ordinary milkshake—it’s a dessert that will make your taste buds do a happy dance. Imagine creamy vanilla ice cream blended with rich brownie chunks, swirls of velvety chocolate syrup, and a cloud of whipped cream on top. Is your mouth watering yet?

Let’s be real; we all have those moments when life throws a curveball, and you just need something sweet and satisfying to pull you back up. Whether it’s a hot summer day, a movie night, or just a cozy moment spent with friends, this brownie milkshake is your go-to. With every sip, you're not just enjoying a drink—you’re reliving a cherished memory, sharing joy, and maybe even creating new ones in the process.

When I think of milkshakes, I remember my childhood friends and I spending countless afternoons at the local soda shop, chatting away while we indulged in thick, creamy shakes. Nothing brought a smile quicker than a giant straw sticking out of a tall glass filled with the good stuff. Today, I’m about to give you a little sneak peek into not just my recipe for the dreamy brownie milkshake, but also the stories and experiences that make this treat so special. Grab your blender, and let’s whip up some nostalgia!

### Personal Story

This recipe takes me straight back to my college years, where late-night study sessions often turned into impromptu hangouts. We all gathered in my tiny kitchen, attempting to make sense of textbooks while honing our culinary skills. One particular evening, my friends and I decided to celebrate surviving finals week (barely!). With a box of brownie mix and a couple of ice cream tubs, we concocted what would become our go-to treat: the Brownie Milkshake.

As the blender whirred to life, laughter bounced off the kitchen walls, each of us taking turns at the blender while the other prepared toppings. After a flurry of brownie crumbles and whipped cream blasts, we toasted to our hard work (and the summer break ahead) with milkshakes so thick you could practically stand a spoon up in them. That night was about more than just dessert; it was about friendships, laughter, and memories made over a simple yet decadent treat. Years later, every sip of this milkshake still brings that joyful chaos back to me.

### Ingredients

Ready to get started? Here’s what you’ll need to whip up your own brownie milkshake:

- **2 cups vanilla ice cream**
  - *Why vanilla?* It’s the perfect base to complement the chocolatey richness of brownies. Feel free to substitute with chocolate ice cream if you’re feeling extra indulgent!

- **1 cup milk (whole or 2% preferred)**
  - *Chef insight:* The creaminess of whole milk makes everything richer. If you're looking for a lighter option, almond or oat milk can also work, but adjust the quantity for the desired thickness.

- **1 large brownie, plus more for garnish**
  - *Substitution tip:* You can use store-bought brownies or even those left over from a previous dessert party, but I highly recommend homemade for maximum flavor!

- **1 teaspoon vanilla extract**
  - *Why add this?* It enhances the overall flavor profile; never skip it! If you're feeling adventurous, a dash of espresso powder can also kick the chocolate flavor up a notch.

- **Whipped cream**
  - *Tip:* Store-bought is fine, but homemade whipped cream really takes it over the top! Just whip heavy cream with a little sugar and vanilla for a dreamy topping.

- **Chocolate syrup**
  - *Little hack:* Drizzle some chocolate syrup inside the glass before pouring in the shake for a professional touch!

### Step-by-Step Instructions

Now, let’s dive into the magic of blending this deliciousness together! Follow these steps, and you’ll be sipping your brownie milkshake in no time.

1. **Gather Your Tools**
   - Make sure you have a blender and a sturdy glass ready. If you want to take it to the next level, grab a large straw.

2. **Blend the Ice Cream and Milk**
   - Add the 2 cups of vanilla ice cream and 1 cup of milk into the blender. Start blending on a low setting just to combine, then increase to high until it’s smooth and creamy. *Tip: You want a thick consistency—if it’s too thick to blend, add a tad more milk.*

3. **Add the Brownie and Vanilla Extract**
   - Crumble that brownie (saving a small piece for garnish), and toss it into the blender along with the teaspoon of vanilla extract. Blend again until the brownie is well mixed but still slightly chunky. *Pro Tip: For more chocolate goodness, throw in some chocolate chips here!*

4. **Taste Test Time!**
   - Here’s where you get to be the chef! Pour a small amount into a glass for a taste test. Adjust sweetness if needed with a little sugar or more syrup.

5. **Drizzle the Glass**
   - Before pouring the whole milkshake, drizzle chocolate syrup along the sides of your glass. Not only does it look great, but it adds extra flavor! *Happy Dance Alert!*

6. **Pour and Top**
   - Pour the milkshake into the glass, filling it almost to the brim. Top generously with whipped cream. *Looks like dessert perfection!*

7. **Garnish and Serve**
   - Crumble the reserved brownie over the whipped cream, and add a final drizzle of chocolate syrup on top. Grab that straw and get ready to dive in!

### Serving Suggestions

While this milkshake is perfectly delightful on its own, there are a few ways to elevate your serving game:

- **Make it a Milkshake Bar:** Set up a fun milkshake station with various toppings like crushed nuts, sprinkles, or even a scoop of peanut butter or caramel drizzle. Let your guests customize their own!

- **Fluffy Pancake Stacks:** Pair your brownie milkshake with some chocolate chip pancakes stacked high for a brunch feast that’s sure to impress.

- **Cozy Evening Treat:** Serve it alongside warm cookies or a slice of pie for a comforting dessert spread.

### Recipe Variations

Now that you’ve got the classic brownie milkshake on lock, here are some fun variations to try out:

1. **Minty Chocolate:** Add a few mint leaves or a drop of peppermint extract for a refreshing twist. Perfect for those who love mint chocolate!

2. **Peanut Butter Bliss:** Swirl in a couple of tablespoons of peanut butter for a nutty flavor explosion. The combination with chocolate is truly divine.

3. **Cookie Crumble:** Swap the brownie for your favorite cookie, like Oreos or chocolate chip, for an equally indulgent treat.

4. **Vegan Delight:** Substitute vanilla ice cream for a dairy-free version, use plant-based milk, and opt for vegan brownies for a totally plant-based milkshake!

5. **Coffee Lover’s Dream:** Blend in a shot of espresso or strong coffee for a mocha brownie milkshake that will get you energized.

### Chef’s Notes

As I’ve perfected this recipe over the years, I’ve learned that there’s no one way to make a milkshake; it’s all about what flavors and textures you love. There was one time when I accidentally used too much milk and ended up with a more liquid dessert—instead of tossing it! I just called it “Milkshake Soup” and served it with tiny spoons. My friends loved it! That’s the beauty of cooking—don’t just follow the rules, have fun with them!

### FAQs and Troubleshooting

1. **What if my milkshake is too thin?**
   - No worries! Just add a bit more ice cream and blend again. If you had too much milk at the start, remember, it’s easy to thicken!

2. **Can I make it ahead of time?**
   - I recommend serving this fresh, but if you must, prepare the milkshake base (minus the whipped cream) and store it in the freezer. Just give it a quick blend before you’re ready to serve!

3. **How do I store leftovers?**
   - While leftover milkshake is rare, if you happen to have some, you can store it in the freezer! Just let it thaw a bit before enjoying again.

4. **Can I add alcohol?**
   - Absolutely! For an adult twist, add a shot of your favorite liqueur—like Baileys or Kahlua—for a boozy brownie treat!

### Nutritional Info

Now, I know we love our delicious treats, but it’s also good to consider what’s in them. Your brownie milkshake will have roughly:

- **Calories:** 600-800 (depends on ice cream and brownies used)
- **Fat:** 30g (saturated fat from ice cream and brownie)
- **Carbohydrates:** 80g (sugar from ice cream and brownies)
- **Protein:** 12g (from milk and ice cream)

This is definitely a treat to enjoy in moderation, but can you really put a price on happiness?

### Final Thoughts

There you have it! A classic Brownie Milkshake that’s ready to take you on a trip down memory lane, and maybe even create some new ones. So crack open your freezer, pull out that ice cream, and let’s blend our way to bliss!

Food is all about the joy it brings us, and this brownie milkshake is sure to deliver just that. Whenever I make it, I’m reminded of those sweet late-night study sessions, surrounded by good friends and laughter. I hope this recipe brings you a taste of that—whether you’re hosting a gathering or enjoying a quiet night in, do it with a brownie milkshake in hand. Cheers to delicious moments!

Now go ahead, whip one up, and let me know how it turns out! Happy blending!
Ultimate Brownie Milkshake
- Total Time: 10 minutes
- Yield: 2 servings 1x
- Diet: Vegetarian
Description
A decadent brownie milkshake blending creamy vanilla ice cream and rich brownie chunks for a delightful treat.
Ingredients
- 2 cups vanilla ice cream
- 1 cup milk (whole or 2% preferred)
- 1 large brownie, plus more for garnish
- 1 teaspoon vanilla extract
- Whipped cream
- Chocolate syrup
Instructions
- Gather Your Tools: Make sure you have a blender and a sturdy glass ready.
- Blend the Ice Cream and Milk: Add the ice cream and milk into the blender and blend until smooth and creamy.
- Add the Brownie and Vanilla Extract: Crumble the brownie into the blender along with vanilla extract and blend until mixed but slightly chunky.
- Taste Test Time: Pour a small amount into a glass for a taste test and adjust sweetness if needed.
- Drizzle the Glass: Drizzle chocolate syrup along the sides of the glass before pouring in the milkshake.
- Pour and Top: Fill the glass with the milkshake and top generously with whipped cream.
- Garnish and Serve: Crumble reserved brownie over the whipped cream and add a drizzle of chocolate syrup on top.
Notes
Customize your milkshake with different toppings and try variations like mint chocolate or peanut butter.
- Prep Time: 10 minutes
- Cook Time: 0 minutes
- Category: Dessert
- Method: Blending
- Cuisine: American
Nutrition
- Serving Size: 1 serving
- Calories: 700
- Sugar: 90g
- Sodium: 300mg
- Fat: 30g
- Saturated Fat: 15g
- Unsaturated Fat: 10g
- Trans Fat: 0g
- Carbohydrates: 80g
- Fiber: 3g
- Protein: 12g
- Cholesterol: 80mg
Keywords: brownie milkshake, dessert, chocolate shake, creamy shake, summer treat

1 Ingredient Chocolate Mousse
Indulge in Guilt-Free Indulgence: 1 Ingredient Chocolate Mousse
Hey there, fellow food lover! It’s your buddy Beau Collier here, and today I’ve got a dessert that’s guaranteed to satisfy your sweet tooth without any guilt—the iconic 1 Ingredient Chocolate Mousse! Now, before you raise an eyebrow at that title, let me assure you that this mousse is about to revolutionize your notion of dessert. Trust me; it’s not just delicious, it’s also a creamy, dreamy delight made with an unexpected superstar: the avocado!
The beauty of this mousse lies in its simplicity. With just a handful of ingredients, and one main player, you can whip up a dessert that feels luxurious yet is incredibly wholesome. This isn’t just about slapping some cocoa on an avocado; it’s about creating a dessert that speaks to the heart while being easy on the waistline. Mousse has often been the domain of heavy cream and sugar, but today, I’m inviting you to dive into a healthier version that’s just as rich, velvety, and satisfying.
Picture this: you get home after a long day and need something sweet to cap it off. Instead of reaching for store-bought goodies that are heavy on preservatives and sugar, you pop into your kitchen, grab an avocado, and turn it into a luscious chocolate treat that feels like a hug after a tough day. Sounds dreamy, right? So grab your favorite mixing bowl, and let’s get this sweet show on the road!
Personal Story
Let me take you back to one of my fondest kitchen memories. It was a rainy Sunday afternoon, and I was cozied up in my little apartment, listening to the sound of droplets dancing against my window. The kind of day that simply calls for chocolate! I was rummaging through my pantry, dreaming up a dessert while balancing my cat on my lap when I stumbled upon an avocado.
At first, I thought, “Avocado? In dessert? Nah!” But I decided to channel my inner chef and get creative. With a bit of cocoa powder and some sweetener to boot, I was on a mission. When I took my first bite of that mousse, I was in chocolate heaven! The creaminess of the avocado combined with the rich cocoa was nothing short of magical. I couldn’t believe how versatile and smooth it turned out!
Since that day, I’ve been a little obsessed with this mousse. I share it with friends during gatherings, and each time I do, the reactions are priceless. “Wait, there’s avocado in here?” always comes the shocked yet delighted voice! It’s a fun twist to the usual dessert narrative, and it proves that sometimes we just need to think outside the box. Or, in this case, outside the fruit bowl!
Ingredients
Here’s what you’ll need for this rich and velvety 1 Ingredient Chocolate Mousse:
-
1 ripe avocado
- This is the star of our show! Choose an avocado that’s ripe but not overripe—the flesh should be soft to the touch but not brown. Not only do they provide creaminess, but they also add healthy fats that pack a nutrient punch.
-
2 tablespoons cocoa powder
- Opt for unsweetened cocoa powder for that deep chocolate flavor—it’s intense and rich! If you’re a dark chocolate lover, go for Dutch process cocoa. Alternatively, if you want a milder flavor, use raw cacao powder.
-
Sweetener to taste (optional)
- Depending on your palate, you might want a little extra sweetness. Maple syrup, honey, agave, or even stevia work wonderfully. Sweeten to your liking; a little goes a long way!
-
1 teaspoon vanilla extract (optional)
- This is your secret weapon, adding depth and warmth to the mousse. If you’re feeling adventurous, try almond extract for a different flavor profile.
Step-by-Step Instructions
Now, let’s whip up this fabulous mousse! Follow these simple steps, and you’ll be savoring a heavenly dessert in no time.
-
Prepare the Avocado
- Start by slicing your ripe avocado in half. Use a spoon to scoop out the creamy flesh into a mixing bowl. If you’re new to avocados, here’s a little tip: use a knife to carefully remove the pit, making sure not to cut too deep.
-
Blend, Blend, Blend!
- Once you have the avocado in your bowl, grab your trusty blender or food processor. Blend the avocado on high speed until it’s completely smooth and creamy. This step is crucial! A smooth base results in a silky mousse, so take your time here. If you don’t have a blender, a fork can work in a pinch, but it’ll require some elbow grease!
-
Add Cocoa Powder
- Now comes the fun part—add your cocoa powder to the blended avocado. Blend again until it’s thoroughly mixed. You’ll want that gorgeous, chocolate hue to be consistent throughout. If you’re feeling sly, sneak a little taste at this point; it’s already divine!
-
Sweeten It Up
- Depending on your sweet tooth, drizzle in your sweetener of choice and the vanilla extract. Blend for a quick moment to combine. Remember, start with a little; you can always add more! It’s all about balance, darling.
-
Taste and Adjust
- Here’s where your chef instincts kick in! Give it a taste and see if it needs more cocoa powder, sweetness, or a splash more vanilla. Adjust to fit your taste buds—I promise, there’s no wrong answer!
-
Chill Your Mousse
- For the best texture, transfer your mousse into a serving bowl or individual cups and pop it in the fridge. Let it chill for at least 30 minutes to an hour—this helps it set up and intensify the flavors, making every spoonful even more heavenly.
Serving Suggestions
When it’s time to serve your dreamy mousse, the presentation can take it to next level! Here are some ideas:
-
Classic Presentation: Scoop the mousse into small dessert cups or ramekins. A light sprinkle of cocoa powder on top or a few chocolate shavings can add that gourmet touch!
-
Garnishes Galore: Get creative! Top with fresh berries, a dollop of whipped coconut cream, or a sprinkle of sea salt. The contrast of sweet and salty can take your mousse to new heights.
-
For the Adventurous: Why not serve it alongside a Banana Slices Pile? The creamy texture of the banana pairs beautifully with chocolate, creating a delightful contrast.
-
Endless Possibilities: The options are limitless! You can also drizzle some nut butter on top for an extra layer of flavor, or add a mint leaf for a fresh touch. Get whimsical, friends!
Recipe Variations
Want to switch things up a bit? Here are a few creative twists on this basic mousse recipe:
-
Peanut Butter Lover’s Delight: Add two tablespoons of natural peanut butter to the blend. It brings a nutty twist that’s simply irresistible.
-
Mint Chocolate Mousse: For a refreshing kick, mix in a few drops of peppermint extract. It’s like a sweet kiss of mint in every bite!
-
Spicy Chocolate: Feeling adventurous? Add a pinch of cayenne pepper or chili powder for a surprising heat that perfectly complements the chocolate.
-
Coconut Cream Dream: Substitute half of the avocado for canned coconut milk for a different creamy consistency and an indulgent tropical vibe.
-
Nutty Hazelnut: Swap in some hazelnut extract instead of vanilla for a different and delightful note.
Chef’s Notes
Oh, have I got stories for you! This recipe has evolved many times over the years. I’ve experimented with a myriad of ingredients as I’ve played in my kitchen. I’ll never forget the first time I tried adding a dash of cinnamon—it blew my mind!
I once had a friend who was skeptical about the avocado part, and I insisted they try it. The look on their face when they realized they had just devoured an avocado dessert was priceless! It reminded me how fun it can be to surprise people with unexpected flavors. It’s all about making delightful connections, right? Plus, this mousse is appropriate for any time of day—why not enjoy it as breakfast?
FAQs and Troubleshooting
-
Q: My mousse turned out grainy; what did I do wrong?
- A: Make sure your avocado is fully ripe; an under-ripe avocado can result in a chunky texture. Additionally, blending thoroughly helps achieve that smooth consistency!
-
Q: Can I make this mousse ahead of time?
- A: Absolutely! It stores well in the fridge for up to three days. Just make sure to cover it to prevent browning.
-
Q: How can I make this vegan?
- A: Good news! This recipe is already vegan. Just ensure the sweetener you choose is also plant-based.
-
Q: What if I don’t have cocoa powder?
- A: You can try using melted dark chocolate (just ensure it’s dairy-free if you’re vegan). Adjust the quantities since melted chocolate is denser than cocoa powder.
Nutritional Info
This 1 Ingredient Chocolate Mousse isn’t just delicious—it’s also packed with nutritional goodness! Here’s a quick breakdown:
- Calories: Approximately 180 per serving.
- Healthy Fats: The avocado offers a good dose of monounsaturated fats, which are great for heart health.
- Fiber: Avocados are loaded with fiber, which can aid digestion.
- Vitamins: This mousse is rich in vitamins C, E, and K. Plus, it’s a good source of potassium!
It’s the perfect blend of indulgence and nutrition—who knew dessert could be this good?
Final Thoughts
So, there you have it, my friends! A super simple, yet impressively decadent 1 Ingredient Chocolate Mousse that will leave your taste buds dancing. I hope you have as much fun making it as I have throughout my kitchen adventures.
Remember, the culinary world is all about experimenting and creating—don’t be afraid to get your hands a little messy! Feel free to make this mousse your own, involving loved ones in the process. After all, food is meant to be shared and enjoyed.
Until next time, keep exploring, keep cooking, and most importantly, keep loving what you create! Grab that fork (or just dig in with a spoon) and enjoy the indulgence of healthy chocolate goodness. Happy munching!
Print
1 Ingredient Chocolate Mousse
- Total Time: 40 minutes
- Yield: 2 servings 1x
- Diet: Vegan
Description
A rich and velvety chocolate mousse made with just one ingredient: ripe avocado. This guilt-free dessert is a creamy delight that’s both nutritious and indulgent.
Ingredients
- 1 ripe avocado
- 2 tablespoons cocoa powder
- Sweetener to taste (optional)
- 1 teaspoon vanilla extract (optional)
Instructions
- Prepare the avocado by slicing it in half and scooping the flesh into a mixing bowl.
- Blend the avocado on high speed until completely smooth and creamy.
- Add cocoa powder to the blended avocado and blend again until mixed.
- Sweeten the mixture with your choice of sweetener and vanilla extract, and blend briefly to combine.
- Taste and adjust the flavors as desired.
- Chill the mousse in the fridge for at least 30 minutes before serving.
Notes
For a unique twist, try adding a tablespoon of peanut butter or mint extract to enhance the flavor. Enjoy the mousse as a healthy dessert any time of day!
- Prep Time: 10 minutes
- Cook Time: 0 minutes
- Category: Dessert
- Method: Blending
- Cuisine: American
Nutrition
- Serving Size: 1 serving
- Calories: 180
- Sugar: 1g
- Sodium: 5mg
- Fat: 12g
- Saturated Fat: 2g
- Unsaturated Fat: 10g
- Trans Fat: 0g
- Carbohydrates: 15g
- Fiber: 7g
- Protein: 3g
- Cholesterol: 0mg
Keywords: chocolate mousse, vegan dessert, healthy recipe, avocado dessert, indulgent dessert

No-Bake Chocolate Cheesecake
Indulgence Awaits: No-Bake Chocolate Cheesecake Recipe
Introduction
Hey there, fellow food lovers! If you’re anything like me, the thrill of whipping up something scrumptious in the kitchen is hard to resist. And when it comes to desserts, let’s face it—nothing feels quite as decadent as a rich slice of chocolate cheesecake. But what if I told you there’s a way to enjoy this luscious treat without even turning on your oven? Yup, you guessed it! Today, we’re diving into the world of No-Bake Chocolate Cheesecake, the kind of dessert that’s both unbelievably delicious and incredibly easy to make.
I still remember the first time I discovered no-bake desserts. It was a sweltering summer afternoon, and I wanted to make something sweet for the family without heating up the house. My mom handed me her old, handwritten cookbook, and I stumbled upon a no-bake cheesecake recipe. I was intrigued! Could this really work? A quick trip to the kitchen, a few simple ingredients, and voilà—an amazing, creamy dessert appeared without the need for baking. That moment turned into a cherished family tradition, and to this day, my loved ones haven’t let me live it down when I “forget” to bring the cheesecake to gatherings!
So why does this No-Bake Chocolate Cheesecake stand out? It’s a delightful marriage of silky cream cheese filling, rich melted chocolate, and a crunchy Oreo crust that provides the perfect texture contrast. Plus, the beauty of this recipe is in its versatility! You can dress it up with toppings or keep it simple, and it’s absolutely foolproof.
Are you ready to become a no-bake cheesecake magician? Grab your apron—and maybe a spoon—because we’re about to embark on a chocolaty journey that will have your taste buds dancing with delight!
Personal Story
Just the other day, I found an old photo of my family gathered around the table for a backyard BBQ. There I was, grinning ear to ear, with my plate full of my famous No-Bake Chocolate Cheesecake. I can still hear my siblings arguing over who got the last piece, and the delightful chaos that followed. It was one of those perfect summer nights where laughter flowed as freely as the lemonade, and the stars twinkled overhead like a sparkle of happiness.
Reflecting on that memory takes me back to the kitchen, standing on a chair, eagerly mixing cream cheese and melted chocolate while sneaking bites (no shame!). Every time I make this cheesecake, I’m reminded of those joyful gatherings and how this one dessert can bring everyone together. It’s not just about satisfying a sweet tooth; it’s about creating moments that last a lifetime. So, let’s whip up this deliciousness and make some memories of our own!
Ingredients
To create this heavenly No-Bake Chocolate Cheesecake, you’ll need some simple ingredients that come together to make an unforgettable dessert. Here’s what you’ll need:
-
Oreo cookies (for crust): These delightful chocolate cookies bring the perfect crunch and flavor to the crust. You can substitute them with any chocolate cookie or graham crackers if you’re looking for a change or gluten-free option!
-
Butter (melted, for crust): Melted butter binds the cookie crumbs together to form a solid crust. If you want a lighter option, coconut oil can step in as a great alternative.
-
Cream cheese (softened): The star of our cheesecake! Make sure to use softened cream cheese for a creamy texture. If you’re after a lighter version, you can use reduced-fat cream cheese or even mascarpone cheese.
-
Sugar: A blend of granulated sugar adds sweetness to the filling. You could switch it for powdered sugar for a smoother texture.
-
Heavy cream: Whipping cream is key for that fluffy, velvety consistency. For a dairy-free version, coconut cream works wonderfully.
-
Chocolate (melted, for filling): Use high-quality dark chocolate for a rich, indulgent flavor. Milk chocolate or semi-sweet chocolate also make a delicious filling, depending on your preference.
-
Chocolate ganache (for topping): This decadent layer adds an extra touch of luxury. You can substitute with a simple chocolate glaze if you’re short on time!
-
Whipped cream (for topping): Light and airy, whipped cream completes the cheesecake beautifully. For a lower-cal option, whipped coconut cream is a fantastic substitute!
Step-by-Step Instructions
Now that we’ve gathered our ingredients, it’s time to dive into the fun part: making the No-Bake Chocolate Cheesecake! Follow these steps to create your masterpiece:
-
Prepare the Oreo Crust:
- In a food processor, pulse the Oreo cookies until they resemble fine crumbs. If you don’t have a food processor, you can place the cookies in a ziplock bag and crush them with a rolling pin—don’t forget to release your inner stress while doing so!
- In a medium bowl, mix the cookie crumbs with melted butter until fully combined. You want the mixture to hold together, so if it looks too dry, add a bit more butter.
-
Press the Crust:
- Take the crust mixture and firmly press it into the bottom of a 9-inch springform pan. Make sure it’s evenly spread and compact; you can use the bottom of a glass to help with this step. The firmer the crust, the better it will hold up once the cheesecake is chilling!
-
Make the Filling:
- In a large mixing bowl, beat the softened cream cheese with an electric mixer until smooth and creamy.
- Gradually add in the sugar, mixing until well-combined. If you’re like me and tend to sneak a taste, now’s your chance—just a little pinch won’t hurt!
-
Melt the Chocolate:
- You can melt your chocolate in the microwave in 30-second intervals or use a double boiler for precision. Allow the melted chocolate to cool slightly before adding it to the cream cheese mixture to prevent it from curdling the cheese.
-
Add Whipped Cream:
- In another bowl, whip the heavy cream until soft peaks form. This step is crucial for achieving that airy lightness in your cheesecake.
-
Combine Ingredients:
- Gently fold the melted chocolate into the cream cheese mixture until just combined. Then add the whipped cream, folding gently to maintain that fluffy texture. The key here is not to overmix!
-
Pour the Filling:
- Pour the cream cheese filling into the prepared crust and spread it evenly. This is the moment where every chocolate lover’s heart skips a beat!
-
Chill:
- Cover the cheesecake with plastic wrap and place it in the refrigerator for at least 4-6 hours, or overnight if you can wait. The longer it sets, the more flavorful and firm it becomes!
-
Prepare the Ganache:
- Once ready to serve, prepare the chocolate ganache by heating cream and pouring it over chopped chocolate. Let it sit for a minute, then stir until smooth. Pour over the chilled cheesecake for that stunning finish.
-
Serve:
- Decorate with dollops of whipped cream on top, maybe sprinkle a few crushed Oreos, or add a fresh berry for a pop of color. Slice and admire your creation before digging in!
Serving Suggestions
When it comes to plating, think about making it as visually appealing as it is delicious. Here are a few ideas to up your serving game:
-
Garnish: Top your cheesecake with whipped cream swirls and a sprinkle of crushed Oreo cookies for that extra touch. Add a chocolate drizzle for creativity that presents beautifully.
-
Plating: For a chic presentation, cut your cheesecake into elegant wedges and plate with a fresh raspberry or a mint leaf beside it. A drizzle of chocolate sauce on the plate can elevate the look!
-
Pairing: Serve with a side of fresh berries or a dollop of vanilla ice cream. The berry tartness contrasts nicely with the rich chocolate flavor, creating a flavor explosion in every bite!
Recipe Variations
Why stick to just one flavor when you can have a variety? Here are a few creative twists you might consider trying:
-
Peanut Butter Chocolate Cheesecake: Swirl in creamy peanut butter into the filling for a decadent twist!
-
Mint Chocolate Cheesecake: Add a few drops of peppermint extract to the filling for a refreshing minty experience.
-
Mocha Cheesecake: For a coffee kick, add a tablespoon of instant coffee granules to the melted chocolate—perfect for coffee lovers!
-
Fruit Toppings: Top with fresh strawberries, raspberries, or even caramelized bananas for a fruit-forward dessert that brings brightness to each bite.
-
Nutty Crunch: Mix crushed nuts such as pecans or walnuts into the crust for a luxurious crunch and nutty flavor.
Chef’s Notes
This recipe has seen many iterations over the years! Initially, it started as a simple dessert made with just cream cheese and chocolate. However, I have found that incorporating a rich buttery crust and a fluffy whipped cream texture takes it to the next level. Plus, my family has grown to love the variations—sometimes I even have to make two different cheesecakes to keep the peace at gatherings!
Oh, and I’ll admit, there have been some memorable moments in the kitchen where my siblings ‘helped’ by sneaking bites of the filling, leaving less for the cheesecake itself. Memories like that remind me that cooking isn’t just about the food; it’s about the laughter and love that fill the air.
FAQs and Troubleshooting
-
Why did my cheesecake not set well?
- Ensure your cream cheese was softened to room temperature and that you allowed enough time for it to chill in the refrigerator. A good 4-6 hours is essential for a firm texture.
-
Can I freeze the cheesecake?
- Absolutely! Just make sure to wrap it tightly in plastic wrap and aluminum foil. When you’re ready to serve, let it thaw in the fridge before slicing.
-
How long does the cheesecake last?
- This delightful dessert can last about 4-5 days in the fridge. Just be sure to cover it well!
-
Can I use flavored cream cheese?
- Sure thing! Chocolate or even strawberry flavored cream cheese can add an interesting twist to your cheesecake!
Nutritional Info
This No-Bake Chocolate Cheesecake is rich and creamy, perfect for indulgent moments! If you’re mindful of calories, a typical slice has about 350-400 calories. To reduce calories, consider using reduced-fat cream cheese and a lighter whipped cream option. Here’s a quick rundown of the average nutritional values per slice:
- Calories: 350
- Total Fat: 25g
- Saturated Fat: 15g
- Carbohydrates: 30g
- Sugars: 20g
- Protein: 5g
Final Thoughts
And there you have it! A No-Bake Chocolate Cheesecake that’s simple to make, deliciously decadent, and perfect for any occasion. Whether you’re hosting a dinner party, bringing a sweet treat to a potluck, or just indulging yourself on a cozy evening, this recipe promises to bring smiles and love to your table.
As you take your first bite, relish the creamy chocolate goodness and think of how easy it was to create! So get out there, get mixing, and remember: cooking is best when shared—and every slice comes with a side of joy. Happy baking (or should I say, mixing?)! Enjoy!
Print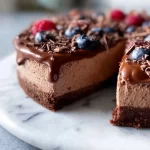
No-Bake Chocolate Cheesecake
- Total Time: 360 minutes
- Yield: 8 servings 1x
- Diet: Vegetarian
Description
Indulge in this rich and creamy No-Bake Chocolate Cheesecake, perfect for any occasion.
Ingredients
- 24 Oreo cookies (for crust)
- 1/2 cup melted butter (for crust)
- 16 oz cream cheese (softened)
- 3/4 cup granulated sugar
- 2 cups heavy cream
- 8 oz chocolate (melted, for filling)
- 1 cup chocolate ganache (for topping)
- 1 cup whipped cream (for topping)
Instructions
- Prepare the Oreo crust by pulsing cookies in a food processor until fine crumbs, then mix with melted butter.
- Press the crust mixture into the bottom of a 9-inch springform pan.
- Make the filling by beating softened cream cheese until smooth, then gradually adding sugar.
- Melt the chocolate in the microwave or double boiler and allow it to cool slightly.
- Add the cooled melted chocolate to the cream cheese mixture.
- Whip the heavy cream until soft peaks form, then fold it into the cream cheese mixture.
- Pour the cream cheese filling into the prepared crust and spread evenly.
- Chill in the refrigerator for at least 4-6 hours, or overnight.
- Prepare the chocolate ganache by heating cream and pouring it over chopped chocolate.
- Serve with dollops of whipped cream on top and enjoy!
Notes
For variations, consider adding peanut butter or mint extract for different flavors.
- Prep Time: 20 minutes
- Cook Time: 0 minutes
- Category: Dessert
- Method: No-Bake
- Cuisine: American
Nutrition
- Serving Size: 1 slice
- Calories: 350
- Sugar: 20g
- Sodium: 250mg
- Fat: 25g
- Saturated Fat: 15g
- Unsaturated Fat: 7g
- Trans Fat: 0g
- Carbohydrates: 30g
- Fiber: 1g
- Protein: 5g
- Cholesterol: 60mg
Keywords: chocolate cheesecake, no-bake dessert, easy dessert, cream cheese, Oreo crust
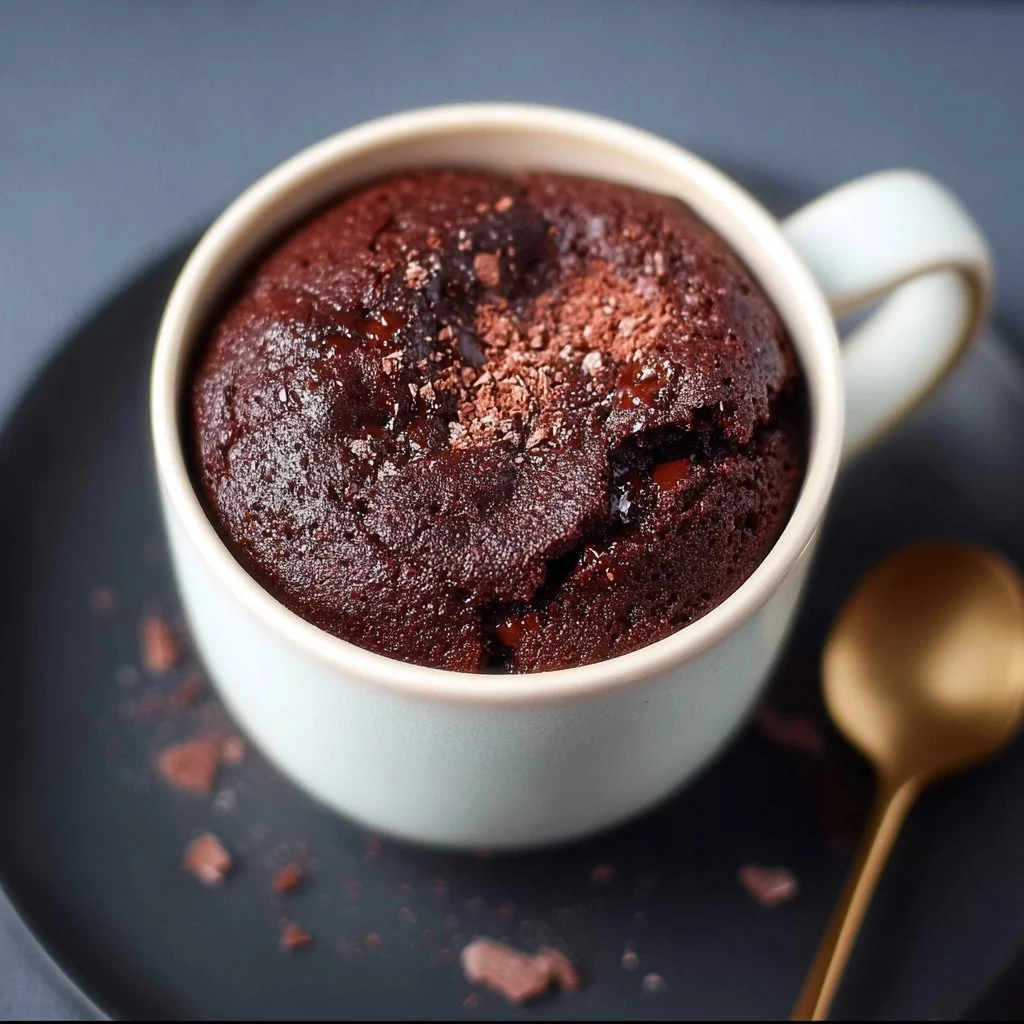
99 Calorie Chocolate Mug Cake
99 Calorie Chocolate Mug Cake: Your Go-To Sweet Escape!
Hey there, fellow foodie! 🎉 Are you ready to embark on a simple yet satisfying kitchen adventure? If you’re looking for a quick dessert that’s delightfully rich without the guilt, you’ve landed in the right spot! Today, we’re diving into the world of chocolatey goodness with a recipe that’ll have you smiling from ear to ear: the 99 Calorie Chocolate Mug Cake.
This decadent creation is like a hug in a cup, perfect for those late-night cravings or when you want to treat yourself without derailing your health goals. It’s quick, delicious, and made with wholesome ingredients that make it a guilt-free indulgence. Plus, it takes just minutes from start to finish—all you need is a mug, a microwave, and a sprinkle of love!
Now, I know what you might be thinking: "Can I really make a cake in a mug?" Absolutely! Mug cakes are the modern marvel of the culinary world. They capture that homemade charm without all the fuss. You can whip up this delightful treat in under five minutes, and that means more time to kick back and enjoy your well-deserved reward. So, grab your favorite mug, and let’s get baking!
Personal Story
Ah, mug cakes bring back some sweet memories for me! I remember one rainy afternoon when I was a teenager, stuck at home and craving something sweet. My mom, who was never one to keep desserts around, decided it was time for an impromptu baking session. We rummaged through the pantry and discovered a half-empty bag of cocoa powder and a collection of mismatched mugs. It felt like a culinary treasure hunt!
We mixed up the ingredients right there in a big old mug—definitely a “kitchen mishmash” sort of affair. As the mug cake puffed up in the microwave, our kitchen filled with the aroma of rich chocolate. It turned out heavenly, brightening up that dreary day. That experience sparked my love for easy, comforting desserts, and now I cherish the opportunity to share that spirit with all of you!
Ingredients
Let’s take a closer look at the ingredients we’ll be using for our 99 Calorie Chocolate Mug Cake. Each one plays a vital role in creating that soft, gooey goodness we crave:
-
2 tbsp plain/all-purpose flour: This is the base of our mug cake. It gives it structure! If you’re gluten-free, you can substitute it with almond flour or a gluten-free all-purpose blend.
-
1 tbsp unsweetened cocoa powder: This is where our chocolatey flavor comes from! For a deeper flavor, try using dark cocoa powder.
-
2 tbsp stevia or 0-calorie granulated sweetener: We want that sweetness without the extra calories! Choose your favorite no-calorie sweetener. Be cautious with the measurement if you’re using something more potent, like monk fruit sweetener.
-
¼ tsp baking powder: This little powerhouse gives our cake that lovely fluffiness. No substitutes are necessary here—just stick to the recipe!
-
½ tsp olive oil or oil of choice: This adds moisture! You can switch it out for coconut oil if you prefer a more tropical flavor.
-
3 tbsp unsweetened almond milk: A perfect way to add moisture without too many calories. You can replace it with any dairy milk or oat milk if you wish.
-
1-2 g chocolate chips (optional): For those moments when you want an extra chocolatey kick! Go wild—use dark chocolate chips, white chocolate, or even some carob chips for a unique twist.
With these ingredients in hand, we’re on our way to mug cake bliss!
Step-by-Step Instructions
Now, let’s get into the nitty-gritty of creating our 99 Calorie Chocolate Mug Cake! Follow these simple steps to achieve chocolatey perfection:
-
Gather Your Ingredients: Before you start, make sure you have all your ingredients ready. There’s nothing worse than realizing you forgot to grab the cocoa powder halfway through the process!
-
Mix Dry Ingredients: In your favorite microwave-safe mug, combine the flour, cocoa powder, stevia, and baking powder. Give it a good whisk with a fork until everything is well combined. This is where the magic begins!
-
Add the Wet Ingredients: Pour in the olive oil and almond milk into your dry mix. Stir well again until everything is nicely incorporated. The batter should be smooth and thick—just like the richness of a classic chocolate cake!
-
Optional Chocolate Chips: If you can’t resist, now is the time to fold in chocolate chips. Trust me, they’ll melt delightfully in the microwave, creating pockets of gooey joy in each bite.
-
Microwave Magic: Place your mug in the microwave and cook on high for about 1 minute. Keep an eye on it; microwaves may vary in power. You’re aiming for it to puff up and look set on the edges but slightly soft in the middle. Don’t overcook—it’s meant to be moist!
-
Cool It Down (Just a Bit): Once done, let your cake cool for a moment before devouring. It will be super hot when it comes out!
-
Top it Off (Optional): If you’re feeling fancy, drizzle a little more almond milk on top for a creamy finish or sprinkle some extra chocolate chips for good measure.
And there you have it! Your very own chocolate mug cake, ready to be enjoyed.
Serving Suggestions
How you serve your 99 Calorie Chocolate Mug Cake can elevate the experience even further! Here are my favorite serving suggestions:
-
Add Fresh Berries: Garnish your cake with a handful of fresh raspberries or strawberries for a pop of color and freshness. The tartness of the fruit complements the richness of the chocolate.
-
Whipped Cream: A dollop of low-calorie whipped cream is a delightful addition! It adds a creaminess that makes each bite even more indulgent.
-
Ice Cream Surprise: For the ultimate treat, throw a scoop of vanilla or mint chocolate chip ice cream on top while it’s still warm. The melting contrast is to die for!
-
Nut Butter Drizzle: If you’re a nut butter fan, adding a drizzle of almond or peanut butter on top brings a savory component that balances the sweet.
No matter how you choose to enjoy it, this mug cake is sure to impress!
Recipe Variations
Feeling adventurous? Here are some creative twists and variations to make this mug cake your own:
-
Mint Chocolate Mug Cake: Add a drop of peppermint extract along with your wet ingredients for a refreshing kick. Perfect for mint lovers!
-
Spiced Option: Sprinkle in a bit of cinnamon or cayenne pepper for a spicy chocolate twist. It adds such a delightful warmth!
-
Lavender Infusion: Try incorporating a few drops of food-grade lavender extract for a floral note that’s unexpected and wonderful.
-
Nutty Mug Cake: Mix in finely chopped nuts or a spoonful of nut butter in the batter for added texture and flavor. Almonds and hazelnuts work beautifully.
-
Protein-Packed: Substitute some of the flour with protein powder to create a mug cake that’s not only delicious but also power-packed!
Chef’s Notes
Ah, this recipe has evolved over the years! I first stumbled upon the idea of mug cakes during my baking experiments with friends. We were all trying to create healthier versions of our favorite desserts without sacrificing taste. This recipe stands out as my go-to, and I love how forgiving it is for less seasoned cooks. You can experiment and substitute almost any ingredient, which makes it a fun kitchen playground.
Funny story: the first time I made it, I got so excited about the idea that I accidentally mixed in salt instead of stevia! Let’s just say the result was not what I’d hoped for. But hey, that’s what the kitchen is all about—learning and growing!
FAQs and Troubleshooting
Here are some questions I often hear about mug cakes, along with some helpful solutions:
-
Why did my mug cake overflow?
- Every microwave is different! To prevent overflow, make sure you don’t overfill your mug and keep an eye on the cooking time. Remember, it puffs up as it cooks!
-
Can I use different sweeteners?
- You bet! Just remember that the sweetness can vary; start with a little less if you’re using a new sweetener, and adjust to taste.
-
It turned out dry; what did I do wrong?
- That might be due to overcooking. Lean towards the undercooked side, as it continues to cook a bit even after you take it out.
-
Can I double the recipe?
- I wouldn’t recommend it in one mug, as it may not cook evenly. Instead, make one mug cake per mug for best results.
Nutritional Info
Let’s break down the nutrition for our 99 Calorie Chocolate Mug Cake! This recipe is not only delicious but also health-conscious:
- Calories: 99
- Carbohydrates: 14-15g (depending on sweetener)
- Protein: 2-3g
- Fat: 3-5g (depends on the oil)
- Fiber: 1g (thanks to the cocoa powder and flour!)
This mug cake is a great option when you want to indulge without feeling guilty. Plus, it’s lower in sugar than traditional cakes, which is a huge win!
Final Thoughts
Whether it’s a cozy evening in or a quick treat after a long day, this 99 Calorie Chocolate Mug Cake is the perfect little indulgence to have up your sleeve. It embodies the joy of cooking—simple, rewarding, and just plain fun!
I hope this recipe sparks happiness in your kitchen and brings back fond memories like it has for me. Remember, cooking is all about creativity and sharing joy with those around you. So don’t be shy—experiment with this recipe, and make it uniquely yours.
Now, go grab that mug, and let’s make some magic happen! Happy baking! 🍫✨
Print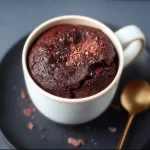
99 Calorie Chocolate Mug Cake
- Total Time: 6 minutes
- Yield: 1 serving 1x
- Diet: Vegetarian
Description
A quick and satisfying dessert that’s rich in chocolate flavor but low in calories, perfect for late-night cravings.
Ingredients
- 2 tbsp plain/all-purpose flour
- 1 tbsp unsweetened cocoa powder
- 2 tbsp stevia or 0-calorie granulated sweetener
- ¼ tsp baking powder
- ½ tsp olive oil or oil of choice
- 3 tbsp unsweetened almond milk
- 1–2 g chocolate chips (optional)
Instructions
- Gather Your Ingredients: Before you start, make sure you have all your ingredients ready.
- Mix Dry Ingredients: In a microwave-safe mug, combine the flour, cocoa powder, stevia, and baking powder. Whisk until well combined.
- Add the Wet Ingredients: Pour in the olive oil and almond milk into your dry mix. Stir well until the batter is smooth and thick.
- Optional Chocolate Chips: Fold in chocolate chips if desired.
- Microwave Magic: Place your mug in the microwave and cook on high for about 1 minute. Don’t overcook!
- Cool It Down: Let your cake cool briefly before enjoying.
- Top it Off: Drizzle some almond milk or sprinkle extra chocolate chips if you like.
Notes
Stir well to prevent lumps in the batter. Adjust cooking time as needed based on microwave wattage.
- Prep Time: 5 minutes
- Cook Time: 1 minute
- Category: Dessert
- Method: Microwaving
- Cuisine: American
Nutrition
- Serving Size: 1 serving
- Calories: 99
- Sugar: 1g
- Sodium: 210mg
- Fat: 4g
- Saturated Fat: 0.5g
- Unsaturated Fat: 3.5g
- Trans Fat: 0g
- Carbohydrates: 14g
- Fiber: 1g
- Protein: 3g
- Cholesterol: 0mg
Keywords: mug cake, chocolate, dessert, quick dessert, low calorie