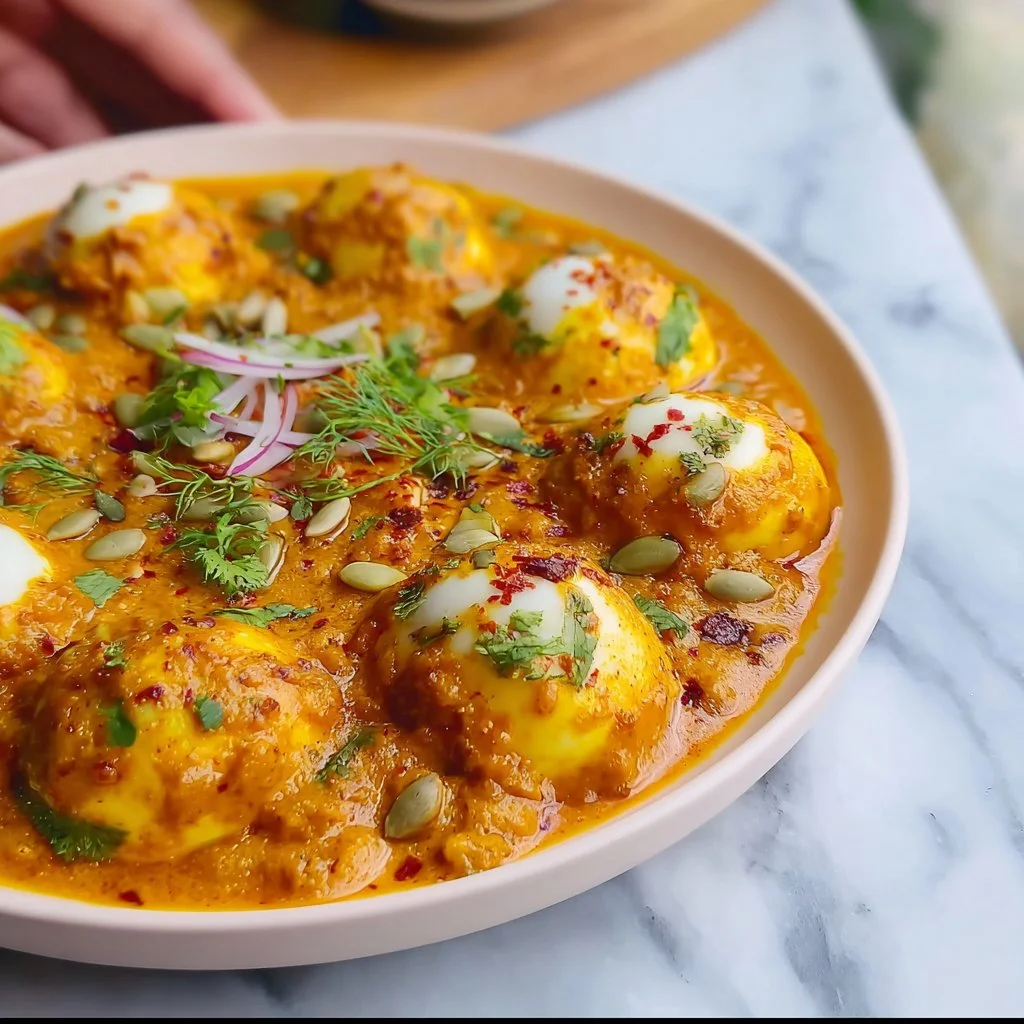
Royal Egg Curry
Royal Egg Curry: A Journey of Flavor and Comfort
Hey there, fellow food lovers! Today, we’re diving into a dish that effortlessly blends comfort and elegance—Royal Egg Curry. This delightful dish, with its rich and creamy sauce, will transport you to a world of tantalizing flavors and aromatic spices. Whether you’re gathering around the dinner table with loved ones or enjoying a cozy night in, this curry is an ultimate mood booster. So let’s lace up our aprons, roll up our sleeves, and make something truly special!
A Whisk of Nostalgia: My Personal Story
Growing up, my kitchen was my safe haven, filled with the scent of spices and the laughter of my family. One of my fondest memories is helping my grandmother prepare her famous egg curry for Sunday dinners. I remember standing on a stool, trying to reach the counter as she guided me through the process. The sizzle of onions hitting hot oil would send a wave of excitement through me, and as I stirred in the spices, I felt a connection to generations of cooks before me.
Egg curry was more than just dinner; it was love served on a plate. My grandmother always said that food is a celebration, and every meal is an opportunity to bring people together. Her take on egg curry was simply divine—each bite was a burst of flavor, and I could never get enough. Now, every time I whip up this dish, I’m reminded of those cherished moments, which makes me even more excited to share it with you!
Ingredients
Here’s what you’ll need to bring this Royal Egg Curry to life:
-
6 Hard-Boiled Eggs
A protein-packed star of the dish! You can substitute with tofu for a vegetarian option, or skip it altogether for a vegan version. -
1 Cup Plain Yogurt (Dahi)
This adds creaminess and tang; for a dairy-free version, try using coconut yogurt. Make sure to whisk it well to prevent curdling! -
2 Onions, Finely Sliced
Use sweet onions for a milder flavor, or red onions for a more robust taste. You can also caramelize them for extra sweetness! -
2 Tomatoes, Pureed
These contribute to the base of our gravy. Fresh tomatoes are great, but canned tomatoes in puree work just as well if you’re short on time! -
1/4 Cup Cashews, Ground
They add nuttiness and creaminess to the curry. Almonds can be a great alternative if you have a nut allergy. -
1/4 Cup Cream
For that luxurious finish! You can swap it with coconut cream or omit it entirely for a lighter dish. -
1 tsp Ginger-Garlic Paste
This is essential for flavor depth. If you’re in a pinch, fresh grated ginger and minced garlic both work perfectly! -
1 tsp Cumin Seeds
They add an earthy flavor! If they’re too strong for your taste, ground cumin can be used, but remember to adjust the quantity! -
1 tsp Coriander Powder
This balances the spices beautifully. If you’re feeling adventurous, you can also add fresh coriander stalks for extra zing! -
1/2 tsp Turmeric Powder
Besides its health benefits, it gives a warm color. Fresh turmeric can be used if you happen to have it on hand! -
1/2 tsp Garam Masala
A must for that aromatic finish! You can get creative and blend your own garam masala with your favorite spices. -
Salt to Taste
Essential for bringing all the flavors together! Remember to taste as you go for the best results! -
2 tbsp Cooking Oil or Ghee
Ghee adds a rich flavor but feel free to use any cooking oil of your choice—olive or canola work great too! -
Fresh Coriander Leaves for Garnish
They brighten up the dish! If you’re not a fan of coriander, fresh parsley can work nicely as a substitute!
Step-by-Step Instructions
Let’s get cooking! Here’s how we’ll bring this Royal Egg Curry to life:
Step 1: Prepare the Ingredients
Get everything ready before you start cooking. Chop the onions, puree the tomatoes, and grind the cashews. This will save you from frantic searching mid-cooking!
Step 2: Hard-Boil the Eggs
Place your eggs in a pot of cold water and bring them to a boil. Once boiling, lower the heat and let them simmer for about 9-12 minutes. Afterward, plunge them in ice water for a few minutes. This not only halts the cooking but also makes peeling easier. A little chef hack: tap the eggs gently on a hard surface to get a clean peel.
Step 3: Sauté the Onions
In a large skillet, heat up the oil or ghee over medium heat. Add the sliced onions and sauté them until golden brown and caramelized—about 10-12 minutes. Trust me; you want to take your time here. Those sweet, deep flavors are so worth it!
Step 4: Add Ginger-Garlic Paste
Mix in the ginger-garlic paste and sauté for another 2-3 minutes until fragrant. This will perfume your kitchen in the most delightful way!
Step 5: Incorporate the Spices
Sprinkle in the cumin seeds, coriander powder, turmeric, and salt. Stir them together, allowing the spices to toast slightly—this helps to enhance their flavors and aromas. Your kitchen is now officially in ‘heavenly scent’ territory!
Step 6: Pour in the Pureed Tomatoes
Next, add the pureed tomatoes to the skillet. Cook this mixture for about 5-7 minutes until the oil separates from the sauce—a great sign that your base is ready.
Step 7: Add Ground Cashews and Yogurt
Stir in the ground cashews, which will make the sauce rich and creamy. Then, reduce the heat and gently mix in the yogurt, stirring continuously to avoid curdling. You want a silky, smooth sauce that hugs the eggs beautifully.
Step 8: Finish with Cream and Garam Masala
Pour in the cream and sprinkle over the garam masala. Simmer the sauce for a few minutes to meld all those glorious flavors together. If you want a thinner sauce, feel free to add a bit of water or broth until you reach your preferred consistency.
Step 9: Place the Eggs
Carefully cut the hard-boiled eggs in half and place them, cut side up, into the sauce. Let them soak up those lovely flavors for a few minutes. You can optionally add a few sprigs of fresh coriander here for a fresh touch!
Step 10: Serve and Garnish
Remove the skillet from heat and transfer the curry to a beautiful serving dish. Garnish generously with fresh coriander leaves. Your Royal Egg Curry is ready to impress!
Serving Suggestions
For an authentic experience, serve your Royal Egg Curry alongside fluffy basmati rice or warm naan. You could even whip up a quick cucumber raita to cool down the spice and add a refreshing touch. Presentation makes a difference, so use your finest dishware and enjoy the vibrant colors of this delightful curry—your food loves a good spotlight, too!
Recipe Variations
Here are a few creative twists you can experiment with while making this Royal Egg Curry:
- Spicy Addition: For the heat lovers, toss in finely chopped green chilies when sautéing the onions to bring an extra zing.
- Vegetarian Delight: Substitute the hard-boiled eggs with paneer or potatoes for a vegetarian variation that holds its own!
- Herbal Twist: Add fresh mint along with the coriander for a refreshing herbal flavor. It’s unique and delightful!
- Coconut Curry: Swap the cream with coconut milk, giving the curry a tropical twist rich in flavor.
- Roasted Vegetables: Throw in some roasted veggies like bell peppers, eggplant, or zucchini for added texture and nutrition.
Chef’s Notes
This recipe has evolved over time—what started with simple eggs and spices in my grandmother’s kitchen has now transformed into this creamy, royal dish that feels festive. I remember a time when dinner guests raved about the curry, and I reluctantly had to share the recipe! And let’s not even mention the time I accidentally swapped sugar for salt—let’s just say it was a memorable meal.
FAQs and Troubleshooting
1. Why did my eggs crack when boiling?
Don’t worry; this can happen! Next time, try adding salt to the water; it can help prevent cracking. Also, use eggs at room temperature for better results!
2. What can I do if my curry is too thick?
If your curry is on the thicker side, simply add a splash of water or broth while simmering. Stir until you achieve your desired thickness.
3. My sauce curdled; how can I prevent that?
To prevent curdling, always reduce the heat when adding yogurt and stir continuously. Using room temperature yogurt instead of cold also helps!
4. Can I make this dish ahead of time?
Absolutely! In fact, the flavors deepen over time. Just reheat gently on the stove before serving, adding a splash of water if needed.
Nutritional Info
While the exact nutritional content can vary based on specific ingredients used, here’s a general breakdown per serving:
- Calories: 400-450
- Protein: 18-20g (depending on eggs)
- Fat: 25-28g
- Carbohydrates: 10-15g
- Fiber: 2-3g
This meal is rich in protein from the eggs and offers healthy fats from the cream and nuts. Adding vegetables can further enhance fiber content!
Final Thoughts
Cooking is a wonderful journey filled with stories, flavors, and cherished moments—and this Royal Egg Curry embodies all of that. As you replicate this dish in your kitchen, I hope it fills your home with delightful aromas and happy memories.
There’s something magical about a dish that feels both comforting and extravagant at the same time. So as you gather around the table to share your creation, remember that every bite carries the love and warmth that food brings us all closer.
Let’s keep the joy of cooking alive, friends! Don’t forget to share your own kitchen stories and variations in the comments below—let’s inspire each other. Until next time, happy cooking! 🍳✨
Print
Royal Egg Curry
- Total Time: 50 minutes
- Yield: 4 servings 1x
- Diet: Vegetarian
Description
A delightful dish of hard-boiled eggs in a rich and creamy sauce, blending comfort and elegance with aromatic spices.
Ingredients
- 6 Hard-Boiled Eggs
- 1 Cup Plain Yogurt (Dahi)
- 2 Onions, Finely Sliced
- 2 Tomatoes, Pureed
- 1/4 Cup Cashews, Ground
- 1/4 Cup Cream
- 1 tsp Ginger-Garlic Paste
- 1 tsp Cumin Seeds
- 1 tsp Coriander Powder
- 1/2 tsp Turmeric Powder
- 1/2 tsp Garam Masala
- Salt to Taste
- 2 tbsp Cooking Oil or Ghee
- Fresh Coriander Leaves for Garnish
Instructions
- Prepare the Ingredients: Get everything ready before you start cooking. Chop the onions, puree the tomatoes, and grind the cashews.
- Hard-Boil the Eggs: Place your eggs in a pot of cold water, bring to a boil, then simmer for 9-12 minutes. Submerge in ice water for easy peeling.
- Sauté the Onions: Heat oil or ghee and sauté onions until golden brown (10-12 minutes).
- Add Ginger-Garlic Paste: Mix and sauté for another 2-3 minutes until fragrant.
- Incorporate the Spices: Add cumin seeds, coriander powder, turmeric, and salt; stir to toast slightly.
- Pour in the Pureed Tomatoes: Cook this for 5-7 minutes until oil separates.
- Add Ground Cashews and Yogurt: Stir in cashews, reduce heat, then gently mix in yogurt.
- Finish with Cream and Garam Masala: Pour in cream and sprinkle garam masala, simmer to blend flavors.
- Place the Eggs: Cut boiled eggs in half and place them in the sauce.
- Serve and Garnish: Transfer to a serving dish and garnish with fresh coriander leaves.
Notes
For a vegetarian option, substitute hard-boiled eggs with paneer or potatoes. Serve with basmati rice or naan.
- Prep Time: 15 minutes
- Cook Time: 35 minutes
- Category: Main Course
- Method: Simmering
- Cuisine: Indian
Nutrition
- Serving Size: 1 serving
- Calories: 425
- Sugar: 6g
- Sodium: 500mg
- Fat: 28g
- Saturated Fat: 10g
- Unsaturated Fat: 12g
- Trans Fat: 0g
- Carbohydrates: 14g
- Fiber: 3g
- Protein: 20g
- Cholesterol: 300mg
Keywords: egg curry, Indian recipe, comfort food, vegetarian dish

Easy Homemade Chicken Korma with Flatbread or Rice
Easy Homemade Chicken Korma with Flatbread or Rice
Hey there, food lovers! It’s Beau Collier here, and today we’re diving into the world of aromatic spices and creamy comfort with my favorite easy homemade Chicken Korma. If you’ve ever strolled down the aisle of your local Indian restaurant and found yourself captivated by the rich, colorful dishes on display, then my friends, you are in for a treat! This dish is not just a recipe; it’s a warm embrace that will transport you to culinary bliss with every delectable bite.
Now, let’s chat about korma. It’s a dish that hails from the royal kitchens of Mughal emperors, where flavors were celebrated and food was an art form. In my kitchen, I like to think of korma as a love letter to the rich tapestry of Indian cuisine. What makes this Chicken Korma special is the glorious blend of spices, the luxurious creaminess from the coconut and yogurt, and the ease of making it at home. Yes, you heard that right! This dish is not just for professional chefs or those with culinary degrees; even if you’re a newbie in the kitchen, this recipe will have you feeling like a star!
As I guide you through this mouthwatering journey, I guarantee you’ll find joy in every step—whether it’s chopping onions with a little tear in your eye or savoring the heavenly scent that fills your kitchen. So, grab your spatula, roll up your sleeves, and let’s navigate this delicious adventure together. Ready? Let’s cook up a storm and indulge in some soulful Chicken Korma!
Personal Story
Before we dive right into the cooking, let me share a little story that’s close to my heart. Growing up, my family had a tradition of hosting monthly potlucks. Each month, we’d pick a different cuisine, and everyone would bring their own special dish to share. One evening, my aunt surprised us all with her Chicken Korma, a recipe passed down through generations.
I still remember the magical aromas wafting through the air as we gathered around the dinner table. My aunt’s korma was creamy, spicy, and oh-so-comforting; it felt like a warm hug on a cold day. We devoured it with fluffy chapati and rice, laughing, reminiscing, and creating memories that would last a lifetime. That unforgettable meal inspired my own love for cooking and sharing food with friends and family, which ultimately led me to create Feastical.
Cooking this Chicken Korma today reminds me of those cherished family gatherings. It’s the kind of dish that brings people together, allows for laughter, and creates lasting memories. Join me as we make our own version of this delightful recipe and create new stories in our kitchens!
Ingredients
Let’s talk about the magic that goes into making our Chicken Korma! Here’s what you’ll need:
For the Chicken Korma:
-
2 tbsp ghee or sunflower oil
Ghee adds a rich flavor and is a traditional cooking fat in Indian cuisine. If you don’t have ghee on hand, sunflower oil will work just fine; it has a neutral flavor that won’t overpower the spices. -
1 onion, peeled and finely chopped
Onions serve as the aromatic base of many dishes. Finely chopping them helps release their natural sweetness as they sauté, creating a delicious foundation for flavor. -
3 chicken breasts (approx. 525g / 1.1 lbs), cut into bite-sized pieces
Chicken breasts are lean and cook quickly, making them perfect for this dish. Feel free to substitute with chicken thighs for a richer flavor! -
2 garlic cloves, peeled and minced
Garlic adds a hint of pungency that complements the spices beautifully. If you’re feeling adventurous, use roasted garlic for a sweeter, mellower flavor! -
2 tsp minced ginger
Ginger adds warmth and a touch of zest. Fresh ginger is best, but if you only have ground ginger, use about 1 tsp. -
1 tsp ground cumin
Cumin brings an earthy, nutty flavor to the dish. It’s a must-have in any spice cabinet! -
1½ tsp ground coriander
Coriander offers a citrusy note that balances the savory spices wonderfully. Substitute with ground fennel seeds for a different flavor profile! -
1½ tsp garam masala
This is a quintessential spice blend that adds complexity. A good quality garam masala will transform your dish! -
½ tsp mild chili powder (optional, for gentle warmth)
If you prefer a milder korma, feel free to omit this. A pinch of cayenne pepper can also be used for more heat! -
½ tsp ground turmeric
Turmeric lends a warm, golden hue and subtly earthy flavor. It’s known for its health benefits too! -
¼ tsp salt
Enhances all the natural flavors of the dish. Always taste before adding more at the end! -
¼ tsp white pepper
A gentle alternative to black pepper, it provides a mild heat without the visual speckles. Black pepper is also fine if that’s what you have! -
2 tbsp tomato purée (paste)
Contributes a rich color and tangy flavor. If you have fresh tomatoes, you could puree them as a great alternative! -
½ cup (120 ml) full-fat plain or natural yogurt
This adds creaminess and a slight tang. Greek yogurt works well here too for added thickness! -
½ cup (120 ml) coconut cream
For a luxurious texture! If you don’t have coconut cream, you can use heavy cream instead, though it will change the flavor profile slightly. -
2 tbsp ground almonds
These boost the nuttiness and help thicken the sauce. Swap with cashew nut powder if you prefer! -
1 tbsp sugar
Balances the flavors and adds depth. Feel free to use honey or maple syrup for a more natural sweetness. -
4 tbsp (60 ml) double (heavy) cream
This enhances the richness and smoothness of the korma. Light cream can be used, but keep in mind it won’t be as indulgent!
To Serve:
-
2 tbsp freshly chopped coriander (cilantro)
A refreshing herbal note! If cilantro isn’t your thing, fresh mint can also be delightful! -
Boiled rice and/or flatbread (such as chapati or naan)
Rice soaks up all those delicious flavors, while flatbread gives you a way to savor every last drop of korma. Make your own or buy fresh—either way, they’re the perfect accompaniment!
Step-by-Step Instructions
Let’s roll up our sleeves and get cooking! This Chicken Korma is straightforward and yields amazing results, so let’s do this step by step.
Step 1: Heat the Oil
Heat your ghee or sunflower oil in a large saucepan over medium heat. If you’re using ghee, let it melt completely for about a minute until it’s shimmering, but not smoking. Chef Tip: You can test if the oil is ready by adding a small piece of onion; if it sizzles right away, it’s go-time!
Step 2: Sauté the Onions
Add the finely chopped onion to the oil. Sauté for about 5–7 minutes or until the onions are soft and translucent. Stir occasionally to prevent burning. The key here is to let that onion get sweet and golden, as it forms the heart of our dish. Chef Hack: If you want to speed up the process, pinch of salt can help draw out the moisture and cook them faster!
Step 3: Add Garlic and Ginger
Once the onions are ready, add in the minced garlic and ginger. Cook for another 1–2 minutes until fragrant, stirring frequently. When you smell that heavenly aroma, you know you’re almost there!
Step 4: Spice It Up
Now it’s time to add your spices: cumin, coriander, garam masala, chili powder (if using), turmeric, salt, and white pepper. Stir everything together and cook for about 1 minute to toast the spices, which will help release their oils and intensify their flavors. Dancing around the kitchen to some upbeat tunes while you do this is highly encouraged!
Step 5: Chicken Time
Add in the chicken pieces, stirring them to coat with the fragrant spice mix. Cook for about 5 minutes, or until the chicken is browned on all sides. Remember, we’re not looking to fully cook the chicken just yet; we only want to develop some lovely color. Fun fact: If you’ve got leftover rotisserie chicken, you can skip this step and add it in at the next stage!
Step 6: Tomato and Yogurt
It’s time to enrich our korma! Stir in the tomato purée, yogurt, and coconut cream. Mix everything well, then reduce the heat to low. Awesome Tip: Adding the yogurt slowly while stirring can prevent it from curdling—nobody wants that! Let the mixture bubble gently for about 15 minutes, allowing the chicken to cook through while soaking up all those amazing flavors.
Step 7: Finish with Cream and Almonds
Once the chicken is cooked, it’s time to stir in the ground almonds and double cream. This will thicken the sauce and give it that dreamy consistency. Allow it to simmer for another 5–10 minutes on low heat until it’s velvety. Chef Secret: If you want an extra thick korma, use a potato masher to mash a few chicken pieces against the side of the pan—this can help thicken the sauce naturally!
Step 8: Taste and Adjust
Don’t forget to taste your korma! Here’s where you can adjust salt, sweetness, or spiciness depending on your palate. Need more heat? Add a sprinkle of chili powder. Want it sweeter? A touch more sugar should do the trick!
Step 9: Garnish and Serve
Finally, remove the korma from heat and plop it into a serving dish. Garnish with freshly chopped coriander, and you’re ready to serve! This is when you get to plate it up with a big bowl of fluffy rice or warm flatbreads.
Serving Suggestions
Presentation is key when it comes to ‘wow-ing’ your guests (or family!). Here’s how you can beautifully serve your Chicken Korma:
-
Plating: Use nice, shallow bowls to serve. A generous ladle of chicken korma in the center will catch the eye. Top it off with a sprinkle of coriander for that lovely green touch!
-
Accompaniments: Serve with a side of fluffy basmati rice. You can sprinkle a few toasted almonds over the rice for added crunch. For flatbreads, layer them in a basket lined with a warm and cozy kitchen towel to keep them fresh and soft!
-
Condiments: Don’t forget the extras—yogurt raita (yogurt with diced cucumber and spices) does wonders in cooling down the heat and adding another dimension of flavor. A few lime wedges on the side will bring a zesty brightness!
Recipe Variations
Now that we’ve mastered the classic Chicken Korma, let’s mix things up! Here are some creative twists to try:
-
Vegetarian Delight: Swap out the chicken for vegetables like cauliflower, potatoes, and carrots. Just ensure to adjust cooking times accordingly, allowing the veggies to tenderize nicely.
-
Paneer Korma: For a delightful vegetarian version, use cubed paneer (Indian cottage cheese) instead of chicken. It soaks up the flavors beautifully!
-
Fruit Fusion: Add dried fruits like raisins or apricots during the simmering process for a sweet touch. It’s a delightful contrast that will surprise and charm your taste buds!
-
Keto-Friendly: For a low-carb alternative, replace the coconut cream with unsweetened almond milk, and enjoy this dish with cauliflower rice. It’s keto-friendly yet still packed with flavor!
-
Extra Creamy: For an indulgent korma, swap out the double cream for crème fraiche; it will add an extra tanginess without compromising on the creaminess!
Chef’s Notes
As I’m sure you can tell by now, this Chicken Korma is very close to my heart—it’s a comforting classic that can adapt to almost any palate. A funny memory I have is when I first attempted this dish during a dinner party. I confidently thought I’d impress my friends with my culinary skills, only to realize I had confused my measurements, doubling the chili powder. Let’s just say the fire brigade wasn’t necessary, but there was a lot of ice cream served post-meal to calm the heat!
Over the years, my Chicken Korma has evolved. I’ve played with spice levels, experimented with different types of cream, and added vegetables to cater to various dietary needs. The beauty of korma is, it’s all about personalizing the experience. Every family has their own secret ingredient or special touch.
FAQs and Troubleshooting
1. Why did my korma turn out too thick?
If your korma is too thick, you can add a splash of water or chicken broth while simmering to reach your desired consistency. Just remember to taste before serving!
2. How can I make it spicier?
If you want to boost the heat, consider adding fresh chopped green chilies or an extra sprinkle of chili powder. Just be cautious and add a little at a time until it’s to your liking.
3. What if I don’t have ground almonds?
Not to worry! You can simply omit them, or blend some cashews into a fine flour as a substitute. Alternatively, crushed peanuts can also add a nice crunch!
4. Can I make this dish ahead of time?
Absolutely! This Chicken Korma actually tastes even better the next day as the flavors deepen. Store it in the refrigerator for up to three days, or freeze it for future enjoyment!
Nutritional Info
While everyone loves a delectable meal, it’s also great to be mindful of nutrition! Here’s a general breakdown of the nutritional info for one serving of Chicken Korma (excluding rice or flatbread):
- Calories: 450-500 (depending on using cream or coconut cream)
- Protein: 35g
- Carbohydrates: 15g
- Fat: 30g (mostly healthy fats from ghee and cream)
- Fiber: 2g
This is a hearty dish, but when served with a side of veggies or whole grains, it can fit nicely into a balanced meal plan!
Final Thoughts
And there you have it, my friends—your very own Easy Homemade Chicken Korma recipe! Cooking this dish isn’t just about following a set of instructions; it’s a celebration of flavors, memories, and love that you pour into each ingredient. As you prepare this comforting meal, don’t forget to enjoy the process, the smells, and the laughter that come with it. There’s truly something magical about sharing home-cooked meals with those we care about.
Now that you have this recipe in your arsenal, I invite you to experiment with your own variations or simply enjoy it as is, diving into a plateful of creamy goodness. After all, cooking is about exploration, and every dish is a chance to tell your story. So until next time, keep cooking, keep sharing, and keep living your culinary adventures! Grab a fork, and dig in!
Print
Easy Homemade Chicken Korma
- Total Time: 45 minutes
- Yield: 4 servings 1x
- Diet: Non-Vegetarian
Description
Aromatic Chicken Korma recipe featuring a rich blend of spices, creamy coconut and yogurt, perfect for any culinary enthusiast.
Ingredients
- 2 tbsp ghee or sunflower oil
- 1 onion, peeled and finely chopped
- 3 chicken breasts (approx. 525g), cut into bite-sized pieces
- 2 garlic cloves, peeled and minced
- 2 tsp minced ginger
- 1 tsp ground cumin
- 1½ tsp ground coriander
- 1½ tsp garam masala
- ½ tsp mild chili powder (optional)
- ½ tsp ground turmeric
- ¼ tsp salt
- ¼ tsp white pepper
- 2 tbsp tomato purée
- ½ cup full-fat plain yogurt
- ½ cup coconut cream
- 2 tbsp ground almonds
- 1 tbsp sugar
- 4 tbsp double cream
- 2 tbsp freshly chopped coriander (for garnish)
- Boiled rice and/or flatbread (such as chapati or naan) for serving
Instructions
- Heat the ghee or sunflower oil in a large saucepan over medium heat.
- Sauté the finely chopped onion for about 5–7 minutes until soft and translucent.
- Add the minced garlic and ginger and cook for another 1–2 minutes until fragrant.
- Add the spices: cumin, coriander, garam masala, chili powder, turmeric, salt, and white pepper. Cook for about 1 minute.
- Add the chicken pieces and cook for about 5 minutes until browned on all sides.
- Stir in the tomato purée, yogurt, and coconut cream, then reduce heat to low and simmer for about 15 minutes.
- Finish by stirring in the ground almonds and double cream, and simmer for another 5–10 minutes.
- Taste and adjust seasoning as needed.
- Garnish with freshly chopped coriander and serve with rice or flatbread.
Notes
For a vegetarian option, replace chicken with vegetables or paneer. Korma tastes even better the next day!
- Prep Time: 15 minutes
- Cook Time: 30 minutes
- Category: Main Course
- Method: Cooking
- Cuisine: Indian
Nutrition
- Serving Size: 1 serving
- Calories: 450
- Sugar: 7g
- Sodium: 500mg
- Fat: 30g
- Saturated Fat: 15g
- Unsaturated Fat: 10g
- Trans Fat: 0g
- Carbohydrates: 15g
- Fiber: 2g
- Protein: 35g
- Cholesterol: 80mg
Keywords: Chicken Korma, Indian Cuisine, Spicy Dinner, Comfort Food, Homemade Korma

Chicken Chukka
Discover the Flavorful World of Chicken Chukka: A Soulful Delight
Introduction
Hey food lovers! Welcome back to Feastical! Today, I’m excited to share with you one of those dishes that wraps you in the warm embrace of home-cooked goodness—Chicken Chukka. This dish isn’t just a meal; it’s a celebration of flavors that transports you straight to a bustling kitchen filled with laughter, rich aromas, and cherished memories.
Chicken Chukka is a classic South Indian preparation that’s perfect for those evenings when you want to enjoy something tantalizing yet comforting. The way the spices dance together creates a bold, aromatic experience that makes every bite a delight. Whether you’re stirring up this magic for a family gathering or a cozy night in, there’s something undeniably satisfying about this dish.
As you navigate through the savory spices and succulent chicken pieces, you’ll find that Chicken Chukka is all about simplicity blended with depth of flavor. So, roll up your sleeves and let’s embark on this culinary adventure together. Trust me, by the end of this post, you’ll not only know how to make Chicken Chukka but also have a hefty serving of my kitchen stories to entertain you as you cook! Ready? Let’s dig in!
Personal Story
You know, every dish tells a story, and Chicken Chukka is no exception! I remember the first time I had this flavorful dish at my good friend Priya’s house during a festive celebration. The warm spices wafted through the air, mingling with the sweet sounds of laughter and chatter from the kitchen. Priya’s grandmother was the culinary genius behind it all, and she stood at the stove, artfully blending spices and keeping a watchful eye on the bubbling pot of chicken.
Watching her cook was like witnessing magic. Every toss of the chicken and sprinkle of spices was accompanied by a nostalgic tale from her childhood—how cooking was an expression of love and joy. After she plated up the Chicken Chukka, we gathered around the table, and I got my first taste of this incredible dish. The flavors exploded with warmth, comfort, and a surprising zing from the spices—each bite was better than the last. It became a memory etched in my heart, reminding me of the power of food to bring us together.
Since then, I’ve made my own version of Chicken Chukka countless times, tweaking it just a bit here and there, but always honoring that nostalgic first experience. The deliciousness of Chicken Chukka has turned it into one of my go-to comfort foods—one that I love whipping up for friends and family, just like Priya’s grandmother did.
Ingredients
Here’s a simple list of what you’ll need to create this delightful Chicken Chukka. Remember, great cooking starts with quality ingredients!
-
500 Grams Chicken: Choose bone-in pieces for extra flavor, or go skinless and boneless for a leaner option. Both work wonders!
-
2 Large Onions (Sliced): Sweet and caramelized, onions are the base of the flavor. You can swap with shallots or leeks for a milder taste.
-
2 Tsp Ginger Garlic Paste: A must for that aromatic depth. If you’re in a pinch, freshly minced ginger and garlic will do just fine.
-
2 Tsp Red Chili Powder: Spice it up with your preferred heat level! Adjust according to your taste—smoky paprika is a great milder replacement.
-
¼ Tsp Turmeric Powder: For warmth and a beautiful golden hue. No substitutes here; turmeric is a superstar for flavor and color.
-
½ Tsp Coriander Powder: This adds earthiness—you might also consider using ground cumin for a different flavor profile.
-
Black Pepper: Freshly cracked is best—it elevates the dish! (Feel free to dial back if you prefer less heat.)
-
¼ Tsp Garam Masala Powder: The perfect finishing touch that rounds out the flavors. If you don’t have it, a pinch of cinnamon and cloves will do the trick.
-
2 Tbsp Coconut Oil: Adds a nutty flavor. If you’re not a fan of coconut oil, feel free to swap with vegetable or olive oil.
-
Curry Leaves: These aromatic leaves are essential for that authentic flavor. If you can’t find them, try using bay leaves, though the taste won’t be the same.
-
Coconut Oil for Frying Onions: This gives the onions that delightful crispness. You can substitute with any cooking oil, but coconut oil brings a unique flavor.
-
Salt to taste: Always essential! Use Himalayan salt for added minerals.
Step-by-Step Instructions
Now, let’s roll up those sleeves and get cooking! Follow these instructions closely, and don’t forget to sprinkle in your personality along the way—cooking should be fun!
-
Marinate the Chicken: Start by cleaning and chopping your chicken into bite-sized pieces. In a bowl, combine the chicken with turmeric powder, red chili powder, coriander powder, and salt. Rub the spices into the chicken pieces well. Let this marinate for at least 30 minutes—this step is crucial for flavor!
-
Heat Your Pan: Grab a heavy-bottomed pan or kadhai and pour in the coconut oil (the aroma already takes me back to Priya’s house!). Heat it over medium flame until it shimmers. You want it hot but not smoking.
-
Sauté Your Onions: Add the sliced onions to the hot coconut oil and sauté until golden brown. This step requires patience; caramelizing the onions brings out their natural sweetness and is the foundation for your Chicken Chukka. Once your onions are golden, remove half of them to use as a garnish later.
-
Add Ginger Garlic Paste: Throw in the ginger garlic paste with those sautéed onions, stirring well. Cook this for about 2-3 minutes until the raw smell dissipates—this step pumps up the dish with hearty flavor!
-
In comes the Chicken: Add your marinated chicken to the pan. Stir well to coat it with the onion mixture. Cook for around 5-7 minutes on high flame, then lower it to medium. You want to seal in those juices while the chicken browns nicely.
-
Introduce Spices: Sprinkle in the black pepper and garam masala, mixing well. The smell should be divine right now.
-
Don’t Forget the Curry Leaves: Toss in those lovely curry leaves, stirring them into the pot. They’ll perfume the chicken wonderfully!
-
Simmer It Down: Cover the pan, letting it cook for about 20 minutes on low heat. Stir occasionally. This allows all those rich flavors to mingle. Your kitchen is about to smell like heaven!
-
Adjust Seasoning: Taste and adjust salt if needed. If it feels too thick, you can add a couple of tablespoons of water to loosen it up a bit.
-
Finish with Frying Onions: Finally, before serving, scatter the reserved crispy onions on top—this adds a delightful crunch that takes Chicken Chukka to the next level!
Serving Suggestions
Now that your Chicken Chukka is ready and smelling irresistible, it’s time to plate! For a classic presentation, serve it in a large, shallow bowl, garnished with freshly chopped cilantro and that crispy fried onion on top for texture.
Pair it with steamed rice or fluffy naan to soak up that luscious gravy. A side of cucumber raita or even a simple salad can add a refreshing contrast to the rich flavors of the Chicken Chukka. Trust me, your friends and family will gather around the table like moths to a flame!
Recipe Variations
Feeling adventurous? Here are some creative twists you can add while preparing this dish:
-
Vegetarian Delight: Swap the chicken for paneer or chickpeas, and follow the same method. You’ll have a scrumptious vegetarian version that’s equally fulfilling.
-
Add Some Vegetables: If you love your greens, toss in some bell peppers, carrots, or green peas during the cooking process. They’ll add more color and texture!
-
Coconut Milk Bliss: For a richer sauce, add about ½ cup of coconut milk halfway through cooking. It will provide creaminess and a slightly sweeter touch.
-
Fiery Chukka: Increase the red chili powder or add chopped green chilies if you’re craving extra heat.
-
Ginger Focus: Add a chunk of fresh ginger, julienned, toward the end for a spicier bite that packs a punch.
Chef’s Notes
I’ll let you in on a little kitchen secret: Chicken Chukka is one of those dishes that gets better with time. The flavors deepen and mesh beautifully, so if you can, make it a day ahead and let it sit in the fridge overnight. When you reheat it, the spices will have integrated perfectly, making the dish even more delightful!
I’ve had plenty of kitchen mishaps while trying to recreate this dish too. One time, I accidentally added twice the amount of turmeric—I turned a lovely chicken dish into a bright yellow, ‘slightly off’ experiment. The lesson? Always taste as you go and trust your instincts!
FAQs and Troubleshooting
-
What can I use instead of coconut oil?
- You can substitute with any neutral oil like vegetable or canola oil. However, coconut oil really enhances the dish’s flavor!
-
Why did my chicken become tough?
- Overcooking is usually the culprit! Aim to cook the chicken until just done to keep it juicy and tender.
-
Can I freeze Chicken Chukka?
- Absolutely! It freezes well. Just ensure it’s cooled completely before storing in an airtight container.
-
How do I make it less spicy?
- Reduce the amount of red chili powder and substitute with paprika. Balancing flavors is key!
Nutritional Info
Chicken Chukka is more than just delicious; it’s also packed with nutritional goodness! In one serving of this flavorful dish (assuming a serving size of one cup), you can expect approximately:
- Calories: 380
- Protein: 28g
- Fat: 24g (mostly from coconut oil and chicken)
- Carbohydrates: 14g
- Fiber: 1g
This dish is a great source of protein and, when paired with some veggies, can be part of a balanced meal. Enjoy responsibly!
Final Thoughts
And there you have it—your very own Chicken Chukka, ready to warm your heart and delight your taste buds! Cooking is an adventure, and this dish is just one of countless journeys we can take together in the kitchen. I hope you enjoy this recipe as much as I do, filled with nostalgic moments and flavors that comfort the soul.
Remember, every time you cook, you’re not just preparing food; you’re creating memories. So, gather your loved ones, dig into this savored flavorsome Chicken Chukka, and let the good times roll.
Happy cooking and until next time—keep those spatulas handy and your hearts hungry for joy!
Print
Chicken Chukka
- Total Time: 60 minutes
- Yield: 4 servings 1x
- Diet: Non-Vegetarian
Description
Chicken Chukka is a classic South Indian dish that combines succulent chicken with a medley of spices for a comforting and flavorful experience.
Ingredients
- 500 grams chicken (bone-in or skinless)
- 2 large onions (sliced)
- 2 tsp ginger garlic paste
- 2 tsp red chili powder
- ¼ tsp turmeric powder
- ½ tsp coriander powder
- Black pepper to taste
- ¼ tsp garam masala powder
- 2 tbsp coconut oil
- Curry leaves
- Coconut oil for frying onions
- Salt to taste
Instructions
- Marinate the chicken by cleaning and chopping it into bite-sized pieces. Combine with turmeric powder, red chili powder, coriander powder, and salt. Let marinate for 30 minutes.
- Heat a heavy-bottomed pan and add coconut oil over medium flame.
- Sauté the sliced onions until golden brown; remove half for garnish.
- Add ginger garlic paste and cook for 2-3 minutes until the raw smell disappears.
- Incorporate the marinated chicken and cook for 5-7 minutes on high flame to seal in juices.
- Sprinkle in black pepper and garam masala, mixing well.
- Toss in curry leaves and stir.
- Cover and simmer on low heat for about 20 minutes, stirring occasionally.
- Adjust seasoning and add water if the mixture is too thick.
- Finish by adding crispy onions on top before serving.
Notes
Chicken Chukka improves in flavor when made a day ahead. Reheat before serving.
- Prep Time: 30 minutes
- Cook Time: 30 minutes
- Category: Main Course
- Method: Stovetop
- Cuisine: Indian
Nutrition
- Serving Size: 1 serving
- Calories: 380
- Sugar: 2g
- Sodium: 600mg
- Fat: 24g
- Saturated Fat: 20g
- Unsaturated Fat: 4g
- Trans Fat: 0g
- Carbohydrates: 14g
- Fiber: 1g
- Protein: 28g
- Cholesterol: 70mg
Keywords: Chicken, South Indian, Spicy, Comfort Food, Chicken Chukka

Chilli Potato Recipe | Honey Chilli Potato Recipe
Honey Chilli Potato Recipe: A Flavorful Adventure You’ll Love!
Hello, food lovers! I’m Beau Collier, and today we’re diving into the world of comfort food with a delicious twist—let’s talk about Honey Chilli Potatoes! If you’re looking for a snack that’s crispy, sweet, spicy, and downright addictive, then grab your apron and join me as we whip up this delight!
Now, let’s paint a picture. Imagine a chilly evening, the aroma of frying potatoes wafting through the air, and the sizzle of ingredients meeting a hot pan. It’s the perfect moment for sharing stories, laughter, and, of course, food. Honey Chilli Potatoes are not just a dish—they’re an experience. This recipe takes humble potatoes and transforms them into crunchy bites of joy, coated with a sweet, spicy sauce that makes them irresistible.
This dish is perfect for serving guests, enjoying as a snack while binge-watching your favorite show, or even jazzing up a weeknight dinner. It’s simple, requires minimal ingredients, yet bursts with flavor! You’ll impress everyone with your culinary skills, and trust me, they’ll be coming back for seconds (and thirds)!
In this blog post, I’ll be guiding you step-by-step through this delightful recipe, sharing a personal story related to Honey Chilli Potatoes, some chef insights, and plenty of tips to help you create a dish that resonates with warmth and love. So let’s get cooking!
Personal Story
Growing up, my family had a tradition of gathering around the dinner table every Friday night. It was our happy place. I fondly remember the days when my mom would put on her apron, grab the biggest pot she could find, and start experimenting with whatever ingredients were left in the pantry. One rainy Friday evening, I walked into the kitchen, and there they were—Honey Chilli Potatoes sizzling in the pan.
The first bite was magic; the sweet honey contrasted perfectly with the heat from the chillies. My friends would raved about how addictive they were, and I half-joked that they could probably eat them all in one go. Now, every time I make this recipe, I think of those family nights and the playful banter that filled our home. Sharing food has this incredible way of bringing people closer, and I hope to share that sense of togetherness with you through this recipe!
Ingredients
Alright, let’s gather our cast of ingredients. Here’s what you’re going to need to create this mouthwatering Honey Chilli Potato dish:
-
4 medium-sized potatoes (small)
- Perfectly starchy and creamy, potatoes are the star of this dish! You could substitute with sweet potatoes for a slight twist.
-
1/4 cup cornflour
- This helps create that crispy coating! If you’re looking for a gluten-free option, use a gluten-free flour blend or arrowroot powder instead.
-
1/4 cup rice flour
- Adds an extra crunch! You could also use all-purpose flour for a similar effect.
-
1/4 teaspoon pepper powder
- A hint of warmth! Adjust this based on your spice tolerance.
-
Salt (to taste)
- Essential for enhancing all those flavors!
-
1 tablespoon oil
- Use any neutral oil for frying; sesame oil can give it a nice flavor!
-
1 tablespoon garlic (finely chopped)
- This adds a delicious aroma and rich flavor; you can substitute with garlic powder if in a pinch.
-
1 teaspoon ginger (finely chopped)
- A lovely zing! If you prefer, you can skip this or use ginger paste.
-
1 long green chili (sliced thin)
- For that spicy kick! Adjust the quantity based on your heat preference.
-
1/2 cup big onion (sliced thin)
- Adds sweetness and texture; red onions can offer a milder flavor.
-
1/2 cup capsicum (sliced thin)
- Colorful and crunchy! Feel free to use other bell peppers; it’s all about what you have on hand.
-
1 tablespoon spring onions (white part)
- For that extra oniony flavor.
-
1 teaspoon soya sauce
- Adds depth. For gluten-free, look for tamari.
-
2 to 3 tablespoon tomato sauce
- A little punch of sweetness; you can swap it with ketchup or salsa.
-
1 teaspoon chilli sauce / schezwan sauce
- For an extra layer of spice!
-
1/2 teaspoon pepper powder
- More heat, if you like it spicy!
-
1 teaspoon cornflour mixed with 2 tablespoons water
- This acts as your thickening agent for the sauce.
-
1 teaspoon vinegar (optional)
- This adds acidity. If you like a zesty bite, don’t skip this!
-
1 tablespoon spring onions (green part)
- For garnish and a pop of color!
-
Salt (to taste)
- Season throughout for maximum flavor!
-
2 tablespoons honey
- The star of the show! It binds everything and adds that sweet touch.
-
2 tablespoons sesame seeds
- Adds crunch and a nutty flavor; you can opt for toasted sesame seeds for an additional flavor boost.
Step-by-Step Instructions
Now that you have everything ready, let’s get to cooking! Follow these steps, and I promise you’ll end up with a plate of heavenly Honey Chilli Potatoes.
Step 1: Prep the Potatoes
Start by peeling your potatoes and cutting them into even matchstick pieces or wedges, depending on your preference. The key here is to make them uniform so they cook evenly. Soaking them in water for about 30 minutes removes excess starch and helps achieve that perfect crispiness—don’t skip this step!
Step 2: Coat the Potatoes
Once soaked, drain and pat the potatoes dry. In a mixing bowl, combine the cornflour, rice flour, pepper powder, and salt. Toss your potatoes in the flour mixture until they are well-coated. The coating makes all the difference! You can also give the potatoes a light spray of oil for an even crunchier texture.
Step 3: Fry ‘Em Up
Heat oil in a pan over medium heat. Make sure it’s hot enough to fry, but not so hot that it burns the coating. Fry the coated potatoes in batches, making sure not to overcrowd the pan. Fry until golden brown and crispy, about 6-8 minutes. Flip them occasionally for an even fry! Drain on paper towels to get rid of excess oil.
Step 4: The Flavor Bomb!
In another pan, heat a tablespoon of oil. Feel free to use the same oil from frying, just consider adding a dash more if needed. Add the finely chopped garlic and ginger, sautéing until fragrant. Toss in the green chili, onions, and capsicum, cooking until just softened but still vibrant. This is where the magic happens!
Step 5: Stir in the Sauces
Add the soy sauce, tomato sauce, Chilli/Schezwan sauce, and the prepared cornflour-water mixture to the pan. Stir vigorously, ensuring everything is well combined. Let it simmer for a couple of minutes until the sauce thickens. You’re going to want to keep this cooking until you achieve a glossy finish!
Step 6: Toss the Potatoes
Now comes the fun part! Gently toss your crispy potatoes into the pan with the sauce, coating them well. Add honey for sweetness and allow everything to simmer together for a couple of more minutes until the flavors are well melded. If you want that extra zing, drizzle in a bit of vinegar. It helps cut through the sweetness beautifully.
Step 7: Garnish and Serve
Turn off the heat and garnish with spring onions and sesame seeds. You’re all set to serve these gorgeous Honey Chilli Potatoes!
Serving Suggestions
Presentation can give your dish that gourmet touch! Serve the Honey Chilli Potatoes in a large bowl, sprinkled with additional spring onions and sesame seeds for that extra pop of color. You can also serve them on a rustic wooden platter, surrounded by some dipping sauces such as sweet chili sauce or a tangy yogurt dip. Pair with drinks like a chilled beer, zesty lemonade, or sparkling water to complete the experience.
Recipe Variations
There’s always room to get creative! Here are some fun variations to put your stamp on this dish:
-
Spicy Honey Garlic Potatoes: Add a teaspoon of red chili flakes or increase the heat with a touch more Sichuan sauce for a fiery bite.
-
Honey Mustard Potatoes: Mix some Dijon mustard with honey for a tangy twist.
-
Herb-infused Potatoes: Add dried herbs like oregano or cumin to your flour mixture for an aromatic touch.
-
Sweet and Savory: Mix in some diced pineapple for a pop of sweetness and texture.
-
Vegan Option: Simply replace honey with agave syrup or maple syrup for a plant-based alternative.
Chef’s Notes
Cooking is all about experimenting! I started making these Honey Chilli Potatoes from a friend’s recipe, adjusting it over the years based on my family’s preferences and the ingredients I have on hand. Sometimes, I throw in some leftover veggies or toss in a handful of nuts for extra crunch. The recipe has evolved, but the love for this dish remains unchanged. It’s a household favorite for a reason!
FAQs and Troubleshooting
Q: Why aren’t my potatoes crispy?
A: The most common culprit is moisture. Make sure to dry the potatoes thoroughly after soaking. Fry in small batches, and ensure the oil is hot enough!
Q: Can I bake these instead of frying?
A: Absolutely! For a healthier version, coat the potatoes and bake at 425°F (220°C) for about 25-30 minutes, flipping halfway through.
Q: What can I do if the sauce is too thick?
A: If the sauce thickens too much, just add a splash of water or stock to loosen it up.
Q: How do I store leftovers?
A: These are best enjoyed fresh, but you can store leftovers in an airtight container in the fridge for 2-3 days. Reheat in the oven for optimal crispiness!
Nutritional Info
Here’s a quick rundown of the nutritional benefits of Honey Chilli Potatoes (per serving):
- Calories: 250 (approximately)
- Fat: 12g
- Carbohydrates: 34g
- Protein: 3g
- Fiber: 3g
Keep in mind that the nutritional info may vary based on specific brands of ingredients used and portion size.
Final Thoughts
There you have it, folks! A tasty and soul-satisfying recipe for Honey Chilli Potatoes, perfect for any occasion. Remember, cooking is about joy, experimentation, and making memories. I hope you recreate this recipe in your kitchen and perhaps even share it with someone special, just as I’ve done with my family.
So don’t wait—get in that kitchen and create your own delectable dish today! Let me know how it goes, or if you have any questions, just reach out. Until next time, fellow foodies—keep it delicious, keep it fun, and keep it real! 🍽️❤️
Print
Honey Chilli Potatoes
- Total Time: 50 minutes
- Yield: 4 servings 1x
- Diet: Vegetarian
Description
Crispy Honey Chilli Potatoes coated in a sweet and spicy sauce, perfect for any occasion.
Ingredients
- 4 medium-sized potatoes (small)
- 1/4 cup cornflour
- 1/4 cup rice flour
- 1/4 teaspoon pepper powder
- Salt (to taste)
- 1 tablespoon oil
- 1 tablespoon garlic (finely chopped)
- 1 teaspoon ginger (finely chopped)
- 1 long green chili (sliced thin)
- 1/2 cup big onion (sliced thin)
- 1/2 cup capsicum (sliced thin)
- 1 tablespoon spring onions (white part)
- 1 teaspoon soya sauce
- 2 to 3 tablespoon tomato sauce
- 1 teaspoon chilli sauce / schezwan sauce
- 1/2 teaspoon pepper powder
- 1 teaspoon cornflour mixed with 2 tablespoons water
- 1 teaspoon vinegar (optional)
- 1 tablespoon spring onions (green part)
- Salt (to taste)
- 2 tablespoons honey
- 2 tablespoons sesame seeds
Instructions
- Prep the Potatoes: Peel and cut the potatoes into even matchstick pieces or wedges. Soak in water for 30 minutes.
- Coat the Potatoes: Drain and pat dry. In a bowl, mix cornflour, rice flour, pepper powder, and salt. Toss the potatoes until well-coated.
- Fry ‘Em Up: Heat oil in a pan. Fry the coated potatoes in batches until golden brown and crispy, about 6-8 minutes.
- The Flavor Bomb!: In another pan, heat a tablespoon of oil. Add garlic and ginger, sauté until fragrant. Add green chili, onions, and capsicum, cooking until softened.
- Stir in the Sauces: Add soy sauce, tomato sauce, Chilli/Schezwan sauce and cornflour-water mixture. Simmer until the sauce thickens.
- Toss the Potatoes: Gently toss the crispy potatoes into the sauce and add honey. Simmer together for a few minutes.
- Garnish and Serve: Turn off the heat and garnish with spring onions and sesame seeds.
Notes
Serve with dipping sauces like sweet chili or tangy yogurt dip. Can be made vegan by substituting honey with agave syrup.
- Prep Time: 30 minutes
- Cook Time: 20 minutes
- Category: Appetizer
- Method: Frying
- Cuisine: Indian
Nutrition
- Serving Size: 1 serving
- Calories: 250
- Sugar: 8g
- Sodium: 300mg
- Fat: 12g
- Saturated Fat: 2g
- Unsaturated Fat: 10g
- Trans Fat: 0g
- Carbohydrates: 34g
- Fiber: 3g
- Protein: 3g
- Cholesterol: 0mg
Keywords: Honey Chilli Potatoes, Vegetarian Snack, Appetizer, Indian Cuisine, Comfort Food

Homemade Butter Chicken
# Homemade Butter Chicken: A Taste of Comfort in Every Bite

Hey there, food lovers! I’m Beau Collier, and I’m here to take you on a delicious journey through one of the most heartwarming dishes you could ever whip up in your kitchen: **Butter Chicken**. If you’re like me, you know that food is not just about nourishment—it's about creating memories, sharing moments, and, of course, lots of flavor!

You'll often find me reminiscing about cozy evenings spent with family. Picture this: it’s a cool autumn evening, and the smell of spices wafts through the air. My mom was in the kitchen, bustling around with her apron wrapped snugly around her waist, and the clattering of pots and pans creating a melody of its own. Butter chicken was a staple at our family dinners, and it was more than just a meal; it was a tradition that brought us all together around the table.

The magic of butter chicken lies in its creamy, spiced sauce, which perfectly coats tender, juicy pieces of chicken. Served with warm naan or a fluffy scoop of rice, it’s the epitome of comfort food—what I like to call a warm hug on a plate. Whether you’re hosting friends or just cozying up after a long day, this recipe promises to bring joy to your heart and belly. So, let’s dive into this vibrant world of flavors and learn how to create an unforgettable butter chicken right in your own kitchen!

## A Little Nostalgic Story

Every cooking adventure starts with a story, right? For me, this one goes back to my childhood. I vividly remember one winter night when the snowflakes were dancing down, and the world turned into a winter wonderland. My family decided to break away from our usual routine. Rather than the pot roast we often had, my mom decided that butter chicken was on the menu—a far from ordinary choice, and oh boy, did it send our taste buds soaring!

That evening, I watched in awe as she combined fragrant spices and creamy goodness, the way the chicken transformed in the pot felt almost magical. The laughter and chatter at the dinner table that night were intertwined with every delicious bite, and believe me, the butter chicken didn't last long! It became a staple for not only our family meals but also gatherings with friends, turning strangers into friends over shared bowls of comfort.

Fast forward to today, and I’m thrilled to share this beloved recipe with you! It’s time to dig into the culinary treasure that is butter chicken and make your own cozy memories in the kitchen.

## Ingredients

Before we start cooking, let’s gather our ingredients! Here’s what you’ll need for this delectable butter chicken:

- **1 lb Chicken Breast (cubed)**
  The star of the show! Chicken breasts are perfect for this dish because they cook quickly and stay tender. If you prefer a richer flavor, feel free to substitute with boneless chicken thighs—just remember to adjust the cooking time.

- **1 cup Plain Yogurt**
  This helps tenderize the chicken and adds a lovely tanginess. If you’re dairy-free, you can use a non-dairy yogurt or even coconut yogurt for a subtle sweetness.

- **1 Onion (finely chopped)**
  The aromatic base of our sauce. Yellow onions work great, but if you prefer a milder flavor, opt for a sweet onion or shallots instead.

- **2 cloves Garlic (minced)**
  An essential element that adds depth to our dish. If you’re out of fresh garlic, garlic powder works in a pinch—just reduce the quantity to ½ teaspoon.

- **1 inch Ginger (grated)**
  Fresh ginger brings a zing that beautifully complements the other spices. Dried ginger can work, but the fresh stuff has this vibrant kick that’s hard to substitute.

- **2 tbsp Butter**
  Creamy, dreamy, and so delicious. You can substitute with ghee (a clarified butter) for a more authentic flavor, or use olive oil for a lighter option.

- **1 can Coconut Milk or Heavy Cream**
  For that luxurious, velvety sauce. Use full-fat coconut milk for a dairy-free alternative, or stick with heavy cream for the creamiest texture.

- **2 tbsp Tomato Paste**
  This adds a rich tomato flavor that balances all the spices. You can replace it with crushed tomatoes or even tomato sauce if that’s what you have on hand.

- **2 tsp Garam Masala**
  The warm spice blend that elevates this dish. It’s pretty flexible, so if you don’t have garam masala, a mix of cumin, coriander, and cinnamon could work well.

- **1 tsp Cumin**
  Earthy and aromatic, cumin adds depth. A quick swap with coriander can also work if you're looking to change things up.

- **1 tsp Paprika**
  This gives a lovely color and slight sweetness. For a spicier kick, you can use smoked paprika or cayenne pepper for some heat.

- **Salt and Pepper to taste**
  Essential for flavoring! Remember to season as you go for a well-balanced dish.

- **Fresh Cilantro (for garnish)**
  This adds a pop of freshness—don’t skip it! If you’re not a fan, parsley can work too, but the flavor won’t be quite the same.

- **Naan (for serving)**
  Pairs perfectly with butter chicken, perfect for scooping up that luscious sauce! You can also try rice, quinoa, or even cauliflower rice for a lighter option.

## Step-by-Step Instructions

Now that you’ve gathered everything, let’s get cooking! Follow these steps to create a butter chicken that’ll impress everyone at your dinner table.

1. **Marinate the Chicken**:
   In a bowl, combine the cubed chicken with plain yogurt. This is where the magic begins! The yogurt not only tenderizes the chicken but infuses it with flavor. Cover and refrigerate for at least 30 minutes, or up to overnight for an even deeper flavor. If you're in a hurry, even a quick 10-minute marination will do.

2. **Sauté the Aromatics**:
   In a large skillet or pot, melt the butter over medium heat. Once melted, toss in the chopped onion. Sauté until it becomes translucent, about 5 minutes—this is where your kitchen will start to smell heavenly! Adding a pinch of salt will help the onions release their moisture and cook evenly.

3. **Add Garlic and Ginger**:
   Stir in the minced garlic and grated ginger, cooking for another 1-2 minutes until fragrant. Don’t walk away during this step; garlic can go from golden to burnt in no time!

4. **Spice It Up**:
   Now it’s time to introduce our spices! Sprinkle in the garam masala, cumin, and paprika. Give it a good stir to toast the spices—this action blooms their flavors and will take your dish to another level. Cook for about 30 seconds until you can smell those incredible aromas.

5. **Incorporate Tomato Paste**:
   Add the tomato paste, stirring until it’s evenly combined. This is where the magic happens! Let it cook for another minute. The combination of all these ingredients begins to form the base of a luscious sauce.

6. **Add the Chicken and Coconut Milk**:
   Toss in the marinated chicken, stirring well to coat it with all those delicious spices. Then, pour in the coconut milk or heavy cream, stirring to create a rich, creamy sauce. Bring it to a gentle simmer and cover the pot. Let it cook for about 15-20 minutes, or until the chicken is cooked through and tender. If you prefer a thicker sauce, you can let it simmer uncovered for the last few minutes.

7. **Season and Garnish**:
   Taste and adjust with salt and pepper, remembering that seasoning can be a game-changer. Finally, chop up some fresh cilantro, sprinkle it on top, and let the flavors meld for a minute longer off the heat.

8. **Serve**:
   Dish up the butter chicken alongside warm naan and fluffy rice. You could drizzle some extra coconut milk on top if you're feeling indulgent. Enjoy every spoonful!

## Serving Suggestions

Now that you’ve whipped up this gorgeous butter chicken, let’s talk plating! Here’s how to serve it:

- **Plate the Sauce**: Use a large, shallow bowl to pour your creamy butter chicken sauce in the center, letting the sauce pool around the chicken. This presentation gives it a restaurant-like flair.

- **Garnish Generously**: Sprinkle fresh cilantro on top, perhaps with a wedge of lime on the side for an extra zing! It adds a lovely burst of color and brightness.

- **Naan or Rice**: Serve warm naan on the side, maybe cut into triangles to make for easy dipping. If you prefer rice, place a generous mound next to the chicken.

- **Coconut Flakes**: For a fun twist, sprinkle toasted coconut flakes over the dish for an added crunch and sweetness—an unexpected but delightful touch!

Feast on this visually stunning dish that feels like a warm embrace with every bite!

## Recipe Variations

Looking to mix things up a bit? Here are some creative twists you can apply to your butter chicken:

1. **Vegetarian Option**: Replace the chicken with cubed paneer or chickpeas for a delicious vegetarian version. You could also use cauliflower for an extra veggie-packed meal!

2. **Spicy Butter Chicken**: If you’re a fan of heat, toss in some chopped green chilies or add a teaspoon of cayenne pepper to bring the fire!

3. **Honey Butter Chicken**: Drizzling a little honey into the sauce just before serving can add a sweet undertone that beautifully contrasts with the spices. You could also try maple syrup if you’re feeling adventurous!

4. **Lemon Chicken Butter**: A squeeze of fresh lemon or lime juice just before serving adds a zesty brightness to the dish and balances out the richness nicely.

5. **Herb-Infused Butter**: Swap the plain butter with herb-infused butter or melted ghee for an aromatic twist. Adding fresh herbs like mint or dill to the garnish can elevate the experience.

## Chef’s Notes

This butter chicken recipe has been a work in progress for me over the years. It has evolved from a simple dish my mom made to a colorful, flavorful extravaganza. I’ve experimented with different spices, and each time, the result is a bit different but always delicious. Cooking is like painting—a few splashes of this and a dash of that can create your own masterpiece.

Also, don’t be afraid to make it your own; cooking should be fun and enjoyable! I remember once attempting to recreate the recipe without my staple spices. Let’s just say that evening was all about ordering takeout instead. Lessons learned, right?

## FAQs and Troubleshooting

Here are some common questions you might have while making this butter chicken:

1. **My sauce is too thin. What did I do wrong?**
   If your sauce turned out too runny, you can simmer it uncovered for a bit longer to reduce and thicken it. Alternatively, mix a teaspoon of cornstarch with a tablespoon of water and stir it into the sauce while it’s simmering.

2. **Can I freeze leftover butter chicken?**
   Yes! Let it cool completely before sealing it in an airtight container. It can last in the freezer for up to three months. Reheat on the stovetop or in the microwave until warmed through.

3. **I didn’t marinate the chicken long enough. Will this ruin the dish?**
   Not at all! While marinating contributes to tenderness and flavor, a shorter marinade will still provide a tasty result. Just be sure not to overcook the chicken, and it will turn out fine!

4. **What do I do if the spices taste too strong?**
   If you’ve accidentally added too much spice, try balancing it with more coconut milk or cream. Adding a touch of sweetness, like a small amount of sugar or honey, can also help round out the flavors.

## Nutritional Info

Let's take a moment to appreciate the nutrition packed in this butter chicken:

- **Calories**: Approximately 390 per serving, depending on the amount of coconut milk and butter used.
- **Protein**: High in protein from chicken and yogurt, offering about 30g of protein per serving, perfect for a post-workout meal.
- **Fats**: The richness primarily comes from the butter and coconut milk, contributing healthy fats to the dish.
- **Carbohydrates**: Minimal carbs from the chicken and yogurt, but pair it with rice or naan to increase your carb intake.
- **Vitamins & Minerals**: Packed with vitamins from the fresh ingredients, especially garlic, ginger, and onions, which are great for overall health benefits.

Keep in mind that this is a comfort food—balance is key! Enjoy it in moderation as part of a well-rounded diet.

## Final Thoughts

Butter chicken is more than just a dish; it’s an experience that brings people together, just like it did for my family all those years ago. It’s a celebration of flavors, memories, and the joy of cooking with love.

As you embark on this culinary adventure, remember that cooking is a journey. Embrace the process, get your hands a little messy, and savor the little moments in between. I can’t wait for you to share your butter chicken stories and make this dish a treasured recipe in your life.

So, grab that fork (or naan!), invite your loved ones, and dig into the warm, comforting world of homemade butter chicken. Let’s create beautiful memories one delicious bite at a time! Happy cooking!

Homemade Butter Chicken
- Total Time: 50 minutes
- Yield: 4 servings 1x
- Diet: Non-Vegetarian
Description
A comforting butter chicken recipe with a creamy, spiced sauce and tender chicken, perfect for cozy dinners.
Ingredients
- 1 lb Chicken Breast (cubed)
- 1 cup Plain Yogurt
- 1 Onion (finely chopped)
- 2 cloves Garlic (minced)
- 1 inch Ginger (grated)
- 2 tbsp Butter
- 1 can Coconut Milk or Heavy Cream
- 2 tbsp Tomato Paste
- 2 tsp Garam Masala
- 1 tsp Cumin
- 1 tsp Paprika
- Salt and Pepper to taste
- Fresh Cilantro (for garnish)
- Naan (for serving)
Instructions
- Marinate the Chicken: In a bowl, combine the cubed chicken with plain yogurt. Cover and refrigerate for at least 30 minutes.
- Sauté the Aromatics: In a skillet, melt the butter over medium heat. Add the chopped onion and sauté until translucent, about 5 minutes.
- Add Garlic and Ginger: Stir in the minced garlic and grated ginger, cooking for another 1-2 minutes until fragrant.
- Spice It Up: Sprinkle in the garam masala, cumin, and paprika. Toast the spices for about 30 seconds.
- Incorporate Tomato Paste: Add the tomato paste, stirring until evenly combined and let cook for another minute.
- Add the Chicken and Coconut Milk: Toss in the marinated chicken, stirring to coat it. Then pour in the coconut milk or heavy cream and bring to a gentle simmer.
- Season and Garnish: Taste and adjust with salt and pepper. Sprinkle fresh cilantro on top.
- Serve: Dish up the butter chicken alongside warm naan and fluffy rice. Enjoy!
Notes
Feel free to adjust spice levels and try using paneer as a vegetarian option.
- Prep Time: 30 minutes
- Cook Time: 20 minutes
- Category: Main Course
- Method: Braising
- Cuisine: Indian
Nutrition
- Serving Size: 1 serving
- Calories: 390
- Sugar: 4g
- Sodium: 500mg
- Fat: 24g
- Saturated Fat: 10g
- Unsaturated Fat: 12g
- Trans Fat: 0g
- Carbohydrates: 30g
- Fiber: 2g
- Protein: 30g
- Cholesterol: 85mg
Keywords: butter chicken, Indian cuisine, comfort food, creamy sauce

Quick & Easy Homemade Butter Chicken Recipe
Quick & Easy Homemade Butter Chicken Recipe
Hey there, fellow food lovers! I’m Beau Collier, your culinary guide here at Feastical, where we whip up feel-good food that’s as easy to make as it is to devour. Today, I’m excited to share one of my all-time favorite recipes—Butter Chicken. Now, if you’ve ever enjoyed the rich, creamy goodness of this dish at your favorite Indian restaurant, you’ll be thrilled to learn just how easy it is to replicate in your own kitchen!
Butter Chicken, or "Murgh Makhani," is a dish that radiates warmth and comfort. It’s a luscious blend of tender chicken thighs bathed in a buttery, tangy tomato sauce, with a delightful kick of spices. Whether it’s a cozy weeknight dinner or a show-stopping meal for friends, this recipe is guaranteed to impress. And the best part? You’ll have this dish on the table in less than an hour!
I’ll guide you through each step of the process, sprinkling in some of my chef insights and kitchen hacks, because I believe cooking should always be about joy, not stress. So, put on that apron, grab your favorite cooking playlist, and let’s dive into the heart of what makes Butter Chicken so special!
Personal Story
I’ll never forget the first time I tasted Butter Chicken. I was a wide-eyed teenager on a family trip to a local Indian restaurant. As the rich aroma filled the air, my taste buds danced with anticipation. When that first bite of chicken, drenched in that velvety sauce, hit my palate, it was like a flavor explosion! The combination of spices, the creaminess, and that touch of tomato—it was mesmerizing!
From that moment on, I was hooked. I began experimenting with Indian dishes at home, inspired by my love for the vibrant flavors and aromas. Over the years, I fine-tuned my Butter Chicken recipe, making it accessible, quick, and, yes, always comforting. It has become a staple in my kitchen, often bringing friends and family together around the dinner table, sharing laughter and stories—all while savoring every last bite.
Ingredients
Here’s what you’ll need to whip up your own batch of Butter Chicken:
-
1 ½ pounds skinless boneless chicken thighs: Tender chicken thighs add richness and flavor. If you prefer, you can substitute boneless chicken breasts, but they may dry out quicker, so be mindful of cooking time!
-
3 tablespoons vegetable oil: A neutral oil works best here to sauté the chicken without altering its flavors. Olive oil or canola oil are great alternatives.
-
3 tablespoons butter: The star of the show! Butter adds a creamy richness that is quintessential to Butter Chicken. If you’re looking for a dairy-free version, try using coconut oil.
-
6 garlic cloves (minced): Fresh garlic is essential for that pungent aroma. If you’re in a pinch, garlic powder can work, but fresh is always preferable!
-
1 medium onion (diced): Onions provide a fantastic base for the sauce. Yellow or white onions are perfect here. If you’re short on time, try using a pre-diced onion!
-
1 can (15 ounces) tomato sauce: This creates the rich tomato base. You could also use crushed tomatoes for added texture.
-
2 cups heavy cream: The magic ingredient that turns a simple sauce into something decadent! For a lighter option, you can swap with half-and-half, but it won’t be as creamy.
-
1 teaspoon salt: Essential for bringing out all the flavors.
-
1 teaspoon garlic powder: An extra punch of garlic flavor! You can skip it if you like, but more flavor never hurts, right?
-
1 teaspoon sweet paprika: Sweet paprika adds depth and color to the dish. If you want some smokiness, try smoked paprika as a substitution.
-
½ teaspoon curry powder: This blend typically includes turmeric, cumin, and coriander, offering a hint of warmth. Feel free to adjust the amount based on your taste preference.
-
1 tablespoon Greek yogurt: This adds a tangy creaminess to balance the richness of the sauce. You can substitute with sour cream or omit it entirely if you wish.
-
1 teaspoon sugar: A little sugar balances the acidity from the tomatoes. You can leave it out if you prefer a more savory dish.
-
½ teaspoon black pepper: Freshly ground black pepper brings in a subtle heat.
-
½ teaspoon cayenne pepper (optional): For those who like a kick! Adjust it based on your heat tolerance.
-
1 teaspoon garam masala: This aromatic blend is the finishing touch that elevates the flavors. If you don’t have it, a mixture of cumin, coriander, and cardamom can be a helpful substitute (though it won’t be exactly the same).
Step-by-Step Instructions
Ready to cook up this delight? Let’s do this!
-
Prep Your Station: Before we start cooking, gather all your ingredients and tools—this makes everything go super smoothly! You’ll need a large skillet or sauté pan, a spatula, and some measuring cups and spoons.
-
Sear the Chicken: Heat the vegetable oil in your skillet over medium-high heat. Once hot, add the chicken thighs (cut into bite-size pieces, if you prefer) and sprinkle with salt and pepper. Sear for about 6-8 minutes until golden brown on all sides. (Chef Tip: Don’t overcrowd the pan! Cook in batches if necessary to really get that nice color on the chicken.)
-
Sauté the Aromatics: Remove the chicken from the skillet and set it aside. In the same skillet, add the butter and let it melt. Toss in the diced onion and sauté for about 5 minutes until they’re translucent (nothing beats that sweet, sautéed onion aroma!). Now, add the minced garlic and sauté for an additional minute—just until fragrant.
-
Build the Sauce: Pour in the can of tomato sauce and mix it in. Now, add the heavy cream and stir until combined. Whoo! This is where things get creamy. Bring the sauce to a gentle simmer (don’t let it boil), and add in garlic powder, curry powder, and paprika. Let it simmer gently for about 10 minutes, stirring occasionally. This allows the flavors to meld beautifully.
-
Return the Chicken: Add the seared chicken back into the skillet and mix to coat the chicken in that gorgeous sauce. Reduce the heat to low and stir in the Greek yogurt, sugar, black pepper, and cayenne pepper (if using). Let everything simmer together for another 5-7 minutes so that the chicken becomes tender and flavorful.
-
Finishing Touches: Just before serving, stir in the garam masala. This herby spice blend is what really takes it over the top. Let it simmer for an additional minute, and voilà! Your Butter Chicken is ready!
Serving Suggestions
Now that your dish is all done, let’s talk presentation. A serving of Butter Chicken looks fantastic over a bed of fluffy basmati rice. You can also add some warm naan or roti on the side for digging into all that creamy goodness.
For the perfect finish, garnish with fresh cilantro (or parsley if you’re not a cilantro fan), a drizzle of cream, or even a squeeze of fresh lime for a pop of brightness.
Remember, it’s all about creating that inviting, cozy vibe—you want your guests (or family) to feel right at home while they dive into this delicious plate!
Recipe Variations
Get creative with this Butter Chicken recipe! Here are some fun variations and twists you can try:
-
Vegetarian Delight: Substitute chicken with chickpeas or paneer for a fantastic vegetarian alternative. Just make sure to sauté them slightly before adding them to the sauce.
-
Spicy Twist: Love heat? Add in diced green chilies or increase the cayenne pepper to kick it up another notch!
-
Creamy Coconut: Try using coconut milk instead of heavy cream for a tropical flair—this adds a mild sweetness that pairs beautifully with the spices.
-
One-Pot Wonder: Make it a one-pot meal by adding vegetables like bell peppers or peas!
-
Slow Cooker Version: For a hands-off approach, throw it all into a slow cooker on low for 4-6 hours. Just remember to add the cream toward the end to keep it rich and luscious!
Chef’s Notes
As much as I adore classic Butter Chicken, this dish has evolved for me over the years. I started experimenting with adding different spices or tweaking the level of creaminess. One time, in a rooftop dinner party frenzy, I accidentally added too much cayenne. Instead of despairing, I adjusted with extra cream and sugar—and guess what? It turned out to be a crowd-pleaser!
So, always feel free to adapt recipes to suit your taste. Cooking is a journey, not a destination—each tweak makes it more personal.
FAQs and Troubleshooting
Q: My sauce is too thin; how can I thicken it?
A: If your sauce isn’t thickening to your liking, you can mix a tablespoon of cornstarch with a bit of water to create a slurry and stir it into the simmering sauce. Let it cook for a couple more minutes until thickened.
Q: Can I make this ahead of time?
A: Absolutely! Butter Chicken tastes even better the next day after the flavors have melded together. Just store it in the fridge and reheat gently before serving.
Q: How can I reduce the creaminess of the dish?
A: If you’re looking for a lighter version, simply reduce the amount of heavy cream and substitute with low-fat milk or additional tomato sauce.
Q: Is this recipe dairy-free?
A: To make it dairy-free, swap out the butter and heavy cream for coconut oil and coconut milk. The taste will be different, but it will still be delicious!
Nutritional Info
While Butter Chicken is undeniably delicious, it’s also rich in calories and fat due to the cream and butter. Here’s a general idea of the nutritional information for a typical serving (1 cup, without rice):
- Calories: Approximately 500
- Total Fat: 35g
- Saturated Fat: 20g
- Cholesterol: 150mg
- Sodium: 800mg
- Carbohydrates: 10g
- Fiber: 1g
- Sugar: 5g
- Protein: 40g
Enjoy it in moderation, and it can be part of a delightful meal!
Final Thoughts
There you have it, friends! A quick and easy Butter Chicken recipe that you can whip up any night of the week. It’s packed with flavor, fun, and a whole lot of love. I hope you enjoy making this dish as much as I do, and remember to tag us at Feastical when you share your culinary creations!
Cooking is about joy and connection, and Butter Chicken is the perfect dish to bring everyone together around the table. So, roll up those sleeves, gather your loved ones, and dig into this warm, comforting delight. Until next time—happy cooking! 🍽️
Feel free to customize any portion of this recipe to suit your tastes and dietary preferences. Enjoy your culinary journey!
Print
Quick & Easy Homemade Butter Chicken
- Total Time: 45 minutes
- Yield: 4 servings 1x
- Diet: Non-Vegetarian
Description
A rich and creamy Butter Chicken recipe that’s easy to make at home, perfect for cozy dinners.
Ingredients
- 1 ½ pounds skinless boneless chicken thighs
- 3 tablespoons vegetable oil
- 3 tablespoons butter
- 6 garlic cloves (minced)
- 1 medium onion (diced)
- 1 can (15 ounces) tomato sauce
- 2 cups heavy cream
- 1 teaspoon salt
- 1 teaspoon garlic powder
- 1 teaspoon sweet paprika
- ½ teaspoon curry powder
- 1 tablespoon Greek yogurt
- 1 teaspoon sugar
- ½ teaspoon black pepper
- ½ teaspoon cayenne pepper (optional)
- 1 teaspoon garam masala
Instructions
- Prep your station: Gather all your ingredients and tools.
- Sear the chicken: Heat vegetable oil in skillet, add chicken, and sear until golden brown (6-8 minutes).
- Sauté the aromatics: Remove chicken, add butter and diced onion, sauté for 5 minutes, then add garlic for 1 minute.
- Build the sauce: Pour in tomato sauce, stir in heavy cream, and let it simmer for 10 minutes.
- Return the chicken: Add chicken back, reduce heat, and stir in yogurt, sugar, black pepper, and cayenne (if using). Simmer for 5-7 minutes.
- Finishing touches: Stir in garam masala and simmer for another minute.
Notes
Serve over basmati rice or with naan. Garnish with fresh cilantro and a drizzle of cream.
- Prep Time: 15 minutes
- Cook Time: 30 minutes
- Category: Main Course
- Method: Sautéing
- Cuisine: Indian
Nutrition
- Serving Size: 1 cup
- Calories: 500
- Sugar: 5g
- Sodium: 800mg
- Fat: 35g
- Saturated Fat: 20g
- Trans Fat: 0g
- Carbohydrates: 10g
- Fiber: 1g
- Protein: 40g
- Cholesterol: 150mg
Keywords: Butter Chicken, Indian Cuisine, Easy Recipes
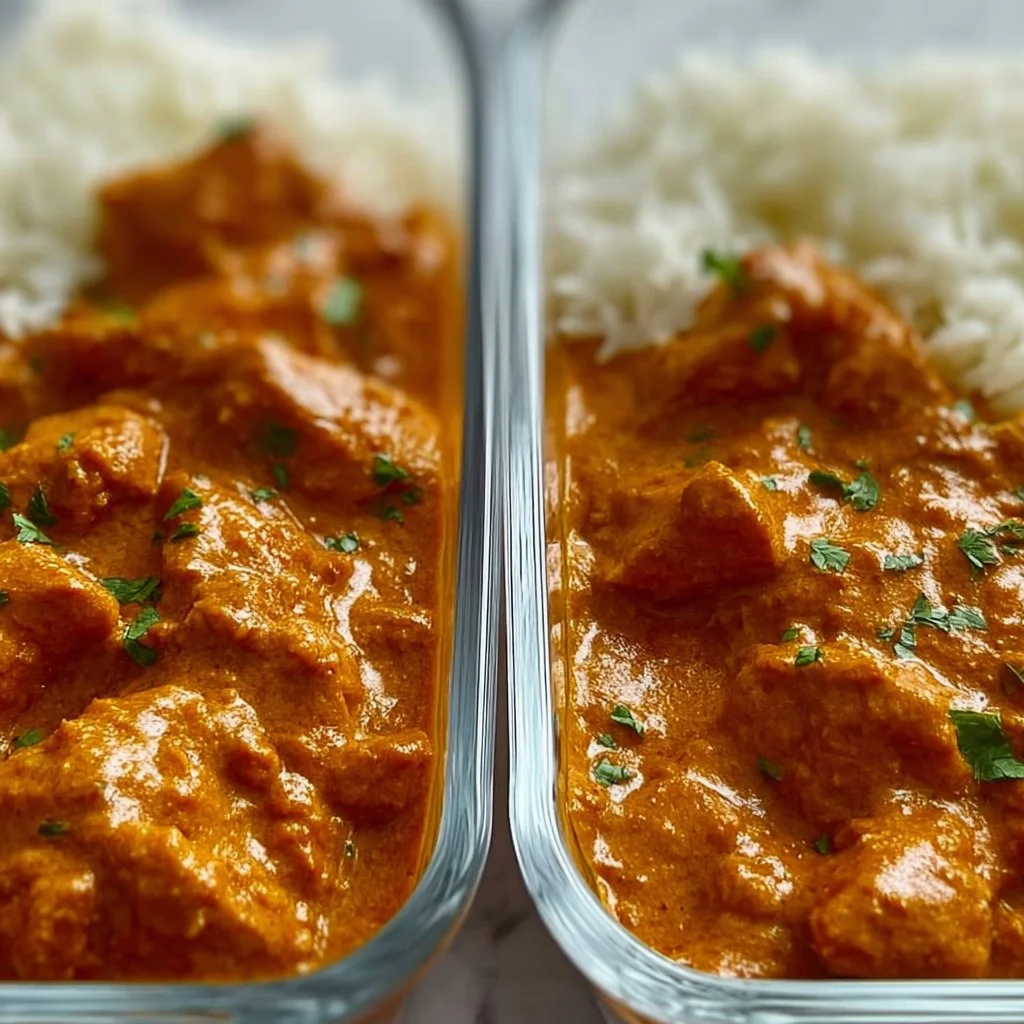
Butter Chicken
Butter Chicken: A Flavorful Journey to Comfort Food Heaven
Hey there, fellow food lovers! I’m Beau Collier, your friendly neighborhood chef, and today we’re diving into something that’s not just a meal but a heartfelt experience—Butter Chicken! If you’re looking for that quintessential recipe that will make your home smell like a cozy Indian kitchen, then you’ve hit the jackpot. Butter Chicken, or Murgh Makhani as the locals call it, is a dish that’s rich, creamy, and downright irresistible. Perfect for any occasion, from bustling weeknights to cozy Sunday dinners, this recipe is a real crowd-pleaser.
Introduction
I remember the first time I tasted Butter Chicken. I was at a friend’s house, and it was one of those chilly evenings where all you wanted to do was curl up under a blanket with a good meal. The aroma wafting through the kitchen was intoxicating—it was those spices that made my stomach rumble. There it was, a big pot of golden, creamy Butter Chicken simmering away, the enticing scent of garlic and ginger filling the air. My friend’s mom served it over fluffy jasmine rice, and honestly, I thought I’d died and gone to culinary heaven.
Fast forward to today—I’ve made it my mission to replicate that feeling, that flavor, right in my own kitchen and share it with you. Butter Chicken isn’t just a recipe; it’s a celebration of life and love, experienced through food. So, grab your spatula, a pinch of curiosity, and let’s create some magic together! You won’t just fill your belly; you’ll fill your heart, too.
Personal Story
Growing up, my family had a tradition of Sunday dinners—think laughter, stories, and, of course, lots of delicious food. One particular Sunday, my mom decided to mix things up with a new recipe: Butter Chicken. I can still picture us gathered around the table, my dad enthusiastically explaining his (questionable) take on Indian spices, while my sister pretended to be the next Gordon Ramsay, critiquing every bite.
As we dug in, my mom’s Butter Chicken turned into a game changer—one that sparked my lifelong love for cooking and trying new things in the kitchen. It was creamy, spicy, and savory, wrapping us up in a warm hug of flavors. That night, the joy of sharing food was palpable, and from then on, Butter Chicken became a staple at our Sunday dinners—an unofficial member of the family, if you will.
Ingredients
Here’s what you’ll need to whip up your own Butter Chicken masterpiece:
-
1 medium yellow onion (diced): Onions are the backbone of this dish, adding sweetness and depth. If you’re looking for a substitute, shallots work in a pinch but won’t quite give you the same robust flavor.
-
2 lbs raw chicken breast (cut into 1/2 inch cubes): Chicken breast is a classic choice, but thighs can add moisture and richness. Feel free to experiment!
-
1 tsp ginger (minced): Ginger adds a zesty dimension to your dish. If you’re fresh out, ground ginger is a great alternative—just use about 1/4 tsp.
-
6 cloves garlic: Garlic brings that savory essence that we all crave. Not a fan? Roasting the garlic can soften its flavor beautifully.
-
2 tbsp olive oil: This helps in browning the chicken. If you want a bit of extra flavor, try using ghee—it’s traditional and delicious!
-
6 oz tomato paste: This gives the dish its rich, velvety base. Tomato sauce or crushed tomatoes can work in a pinch but may yield a thinner texture.
-
1 cup heavy cream: This is where the magic happens! Heavy cream creates that luxurious texture. You can swap it for half and half if you’re looking for a lighter version—but trust me, the heavy cream is where the flavor party is at.
-
1 tbsp garam masala (heaping): This spice blend is the heart of Indian cooking. If you don’t have it, a mix of ground cumin, coriander, and cardamom can be used instead.
-
1 tsp chili powder: A little heat goes a long way! Adjust according to your spice tolerance—cayenne works well here too.
-
1 tsp fenugreek powder (optional but epic): This unique flavor will take your dish to another level. If you can’t find it, just skip it—not a recipe killer, but oh so tasty!
-
1 tsp cumin: This earthy spice round out the flavors. Ground coriander can serve as a substitute if needed.
-
1 tsp salt: Always taste as you go—salt can be adjusted based on preference!
-
1/2 tsp black pepper: Just enough to add a little kick. You can also use freshly cracked black pepper for a bolder taste.
-
1 cup jasmine rice: This is the perfect side to soak up all that fantastic sauce. If you’re after something different, basmati rice is a fantastic alternative!
Step-by-Step Instructions
Now, let’s get cooking! Follow these steps, and trust me, your kitchen will turn into a cozy Indian restaurant in no time.
-
Sauté the onion: In a large skillet, heat 2 tablespoons of olive oil over medium heat. Add the diced yellow onion and sauté until it becomes translucent, about 5 minutes. This is the first layer of flavor, so don’t rush!
-
Add garlic and ginger: Toss in the minced garlic and ginger, stirring constantly for about a minute until fragrant. Pro tip: keeping your heat low during this step prevents the garlic from burning and turning bitter.
-
Brown the chicken: Add in your cubed chicken breast. Cook for about 8-10 minutes, stirring occasionally, until it’s no longer pink. Remember, we’re not cooking it all the way through; it will continue to cook in the sauce later.
-
Introduce the tomato paste: Stir in the tomato paste and let it cook for about 2-3 minutes. This gives the tomatoes a chance to deep dive into the flavors—trust me on this one!
-
Spice it up: Now’s the time to sprinkle in that heaping tablespoon of garam masala, chili powder, fenugreek powder, cumin, salt, and black pepper. Mix it all up and let those spices toast for a minute, releasing all those beautiful aromas.
-
Creamy goodness: Pour in the heavy cream and mix everything until it’s beautifully combined. Bring to a simmer, then reduce the heat and let it cook uncovered for 15-20 minutes. This step is crucial—let it bubble gently, and don’t forget to stir occasionally to avoid any sticking.
-
Fluff that rice: While your Butter Chicken simmers, cook your jasmine rice according to the package instructions. Use a fork to fluff it up once it’s done!
-
Taste test: Give your Butter Chicken a little taste—need more salt? A dash of chili powder? This dish is all about balance, so adjust to your liking!
-
Serve it up: Time to plate! Serve your Butter Chicken over a generous helping of jasmine rice, and make sure to drizzle that luscious sauce generously.
Serving Suggestions
For an authentic dining experience, don’t forget to garnish your Butter Chicken with a sprinkle of fresh cilantro! You can also serve it with hot naan bread on the side for some extra dipping. To add a touch of elegance, serve with a lemon wedge for a zesty kick and perhaps a dollop of yogurt for cooling relief against the spices.
When plating, remember that presentation matters. Serve it in a wide bowl, allowing for a generous portion of sauce to pool around the rice. Your guests will be salivating before they even take the first bite!
Recipe Variations
-
Vegetarian Option: Swap chicken for paneer or tofu for a delightful vegetarian version. Both will absorb those gorgeous flavors and provide a wonderful texture.
-
Spice it Up: If you like it hot, add some diced green chilies or a pinch of cayenne pepper for an extra kick.
-
Coconut Cream Twist: Replace heavy cream with coconut cream for a tropical spin. It’ll give a unique flavor that’s also dairy-free!
-
Mushroom Lovers: For a hearty twist, add in mushrooms along with the chicken. They’ll take on the incredible flavors while adding a nice, meaty texture.
-
Lentil Butter Chicken: Add cooked lentils to the mix for added protein and fiber. It’s a hearty yet healthy option!
Chef’s Notes
This recipe has been a staple in my kitchen for years, and I’ve experimented a lot along the way. I’ve tried adding different spice blends and cooking methods.
One time, my oven went on the fritz right before a dinner party (talk about a nightmare!). I ended up making Butter Chicken entirely on the stovetop, and let me tell you—it turned out just as good, if not better! The key is to let the sauce simmer and develop that deep flavor, regardless of how you cook it.
FAQs and Troubleshooting
1. My sauce isn’t thickening! What should I do?
No worries! Just let it simmer longer. If you want to speed things up, add a cornstarch slurry (1 tbsp cornstarch mixed with 2 tbsp water) to thicken it.
2. Can I freeze Butter Chicken?
Absolutely! It freezes beautifully. Just let it cool completely before transferring to an airtight container. Reheat slowly on the stovetop when you’re ready to enjoy!
3. What do I do if it’s too spicy?
If it’s too spicy for your taste, try stirring in a bit of sugar or honey to balance the heat. Adding more cream can also help mellow it out.
4. I don’t have garam masala! Can I use anything else?
While garam masala is key, you can create a makeshift blend with ground cumin, coriander, and some cinnamon.
Nutritional Info
Now, let’s chat about the nutritional side of things. Butter Chicken, while rich and creamy, can be made to fit a range of dietary needs—just remember that moderation is key! This dish is packed with protein from the chicken and offers a delightful mix of vitamins and minerals from the spices and tomatoes. A serving typically contains:
- Calories: Approximately 490 (without rice)
- Protein: 40g
- Carbohydrates: 12g
- Fat: 30g
If you’re looking for lower-calorie options, consider using Greek yogurt instead of heavy cream, or serve over quinoa instead of rice!
Final Thoughts
So there you have it—my take on Butter Chicken, a dish that’s not just food, but a meal full of memories and love. Whether you’re whipping it up for family or meal prepping for your week, I’m certain this recipe will bring warmth to your home and smiles all around.
Cooking shouldn’t feel like a chore; it should be a joyful exploration—hence why I love sharing these stories and traditions with you. So, what are you waiting for? Grab those ingredients, put some music on, and let’s turn your kitchen into a flavorful paradise. Until next time, happy cooking! 🍽️
Print
Butter Chicken
- Total Time: 45 minutes
- Yield: 4 servings 1x
- Diet: Non-Vegetarian
Description
A rich and creamy Butter Chicken recipe that brings the comforting flavors of Indian cuisine right to your kitchen. Perfect for any occasion!
Ingredients
- 1 medium yellow onion, diced
- 2 lbs raw chicken breast, cut into 1/2 inch cubes
- 1 tsp ginger, minced
- 6 cloves garlic
- 2 tbsp olive oil
- 6 oz tomato paste
- 1 cup heavy cream
- 1 tbsp garam masala, heaping
- 1 tsp chili powder
- 1 tsp fenugreek powder (optional)
- 1 tsp cumin
- 1 tsp salt
- 1/2 tsp black pepper
- 1 cup jasmine rice
Instructions
- Sauté the onion: In a large skillet, heat 2 tablespoons of olive oil over medium heat. Add the diced yellow onion and sauté until it becomes translucent, about 5 minutes.
- Add garlic and ginger: Toss in the minced garlic and ginger, stirring constantly for about a minute until fragrant.
- Brown the chicken: Add in your cubed chicken breast. Cook for about 8-10 minutes, stirring occasionally, until it’s no longer pink.
- Introduce the tomato paste: Stir in the tomato paste and let it cook for about 2-3 minutes.
- Spice it up: Sprinkle in garam masala, chili powder, fenugreek powder, cumin, salt, and black pepper. Mix and let those spices toast for a minute.
- Creamy goodness: Pour in the heavy cream and mix everything until beautifully combined. Bring to a simmer, then reduce the heat and let it cook uncovered for 15-20 minutes.
- Fluff that rice: While simmering, cook your jasmine rice according to package instructions.
- Taste test: Adjust seasoning to your liking.
- Serve it up: Plate your Butter Chicken over jasmine rice, drizzling with the luscious sauce.
Notes
For an authentic dining experience, garnish with fresh cilantro and serve with naan or a lemon wedge.
- Prep Time: 15 minutes
- Cook Time: 30 minutes
- Category: Main Course
- Method: Stovetop
- Cuisine: Indian
Nutrition
- Serving Size: 1 serving
- Calories: 490
- Sugar: 5g
- Sodium: 600mg
- Fat: 30g
- Saturated Fat: 18g
- Unsaturated Fat: 8g
- Trans Fat: 0g
- Carbohydrates: 12g
- Fiber: 1g
- Protein: 40g
- Cholesterol: 120mg
Keywords: Butter Chicken, Indian Cuisine, Comfort Food