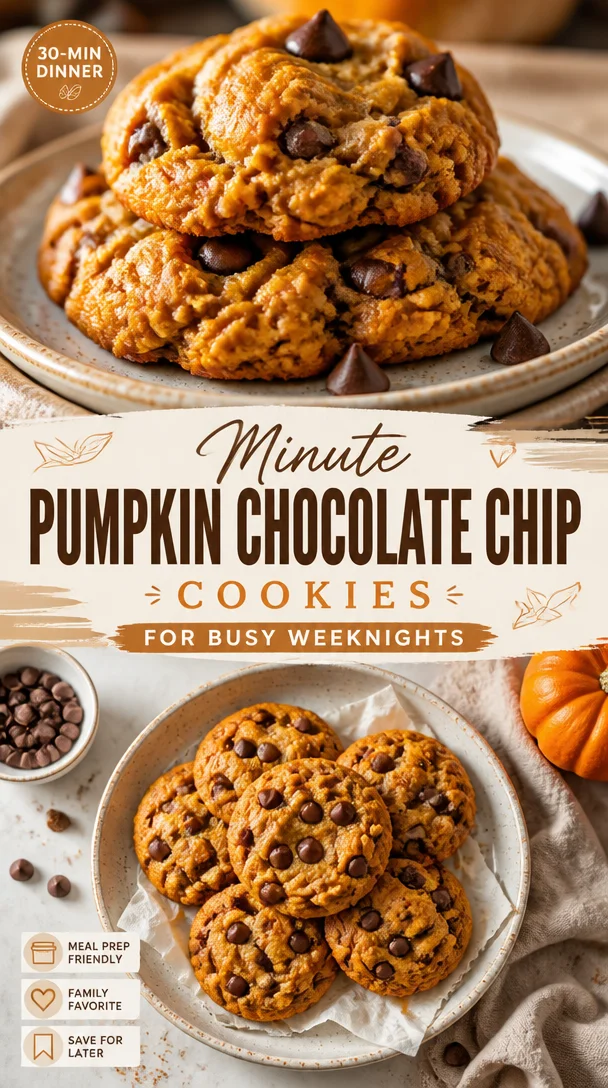
Minute Pumpkin Chocolate Chip Cookies for Busy Weeknights
The Cozy Comfort of Pumpkin Chocolate Chip Cookies
Hey there, fellow foodies! Today, we’re diving headfirst into the cozy world of pumpkin chocolate chip cookies. There’s something magical about the combination of warm spices, velvety pumpkin, and pockets of gooey chocolate that makes these cookies an absolute must-have in your baking arsenal. Whether you’re serving them up at a festive gathering or just indulging in a sweet treat at home, these cookies are sure to bring a smile to your face.
As the leaves change and the air becomes crisp, I can’t help but feel the call of the kitchen. It’s that time of year when the aroma of baking fills the home, and the urge to create something special gnaws at my soul. With each spoonful of pumpkin puree and sprinkle of chocolate chips, I’m taken back to all the cozy moments spent in the kitchen with my loved ones – piecing together a recipe that feels as comforting as a warm hug. So, roll up those sleeves, grab your mixing bowls, and let’s create something wonderful together!
A Sweet Slice of Nostalgia
Growing up, my family had a tradition: every fall, we would head to the local pumpkin patch, pick out the most perfect pumpkins, and bring them home to transform into all sorts of goodies. One particular year, I remember my Aunt Linda introducing me to the concept of pumpkin chocolate chip cookies. At first, I was skeptical – how could pumpkin possibly belong in a cookie? But the moment I took my first bite, all doubt melted away like ice cream on a hot summer day.
I remember sitting cross-legged on the kitchen floor, helping her mix together the ingredients. It was messy, magical, and full of laughter. The best part? When the warm cookies came out of the oven, we would gobble them down while they were still slightly warm, washing them down with cold glasses of milk. Fast forward to today, those memories inspire me to whip up these cookies every fall, and I can’t wait to share my version with you!
Ingredients That Make Magic Happen
Now, let’s gather our ingredients! Here’s what you’ll need to make these delightful pumpkin chocolate chip cookies:
-
1 cup canned pumpkin: This is the star of the show! Canned pumpkin puree is not only convenient but also adds moisture and flavor. If you prefer, you can use homemade pumpkin puree.
-
1 cup sugar: Just the right amount of sweetness! You can swap some of this out for brown sugar for a deeper flavor.
-
1/2 cup butter, softened: This adds richness. If you’re looking for a dairy-free alternative, coconut oil works wonders too!
-
1 teaspoon vanilla extract: A splash of vanilla rounds out the flavors. You can use almond extract for a different twist.
-
2 cups all-purpose flour: The backbone of your cookie dough. For a gluten-free option, try using a 1:1 gluten-free flour blend.
-
1 teaspoon baking soda: This helps the cookies rise. Make sure it’s fresh for best results!
-
1 teaspoon baking powder: Another leavening agent for fluffy cookies.
-
1 teaspoon ground cinnamon: The quintessential fall spice. You can also experiment with pumpkin spice mix!
-
1/2 teaspoon salt: Just a pinch to balance the sweetness.
-
1 cup chocolate chips: Use semi-sweet for classic cookies. Try dark chocolate or even white chocolate for a fun twist!
Step-by-Step Instructions to Cookie Heaven
Alright, now that we’ve gathered our ingredients, let’s dive into the baking magic. Follow these step-by-step instructions for killer pumpkin chocolate chip cookies!
-
Preheat Your Oven: First things first, preheat your oven to 350°F (175°C). This ensures those cookies bake evenly and beautifully.
-
Cream the Butter and Sugar: In a large mixing bowl, beat together the softened butter and sugar until creamy (about 2-3 minutes will do). This step is crucial! The more air you incorporate here, the fluffier your cookies will be.
-
Add Pumpkin and Vanilla: Add the canned pumpkin and vanilla extract to the bowl, mixing until smooth. Don’t rush this part; the pumpkin needs to become one with the mixture!
-
Mix the Dry Ingredients: In another bowl, whisk together the flour, baking soda, baking powder, cinnamon, and salt. This ensures even distribution of the leavening agents and spices.
-
Combine Wet and Dry Mix: Gradually add the dry ingredients to the wet ingredients, mixing gently until just combined. Overmixing can lead to tough cookies, so be gentle, my friend.
-
Stir in the Chocolate Chips: Fold in those yummy chocolate chips! Feel free to taste-test the dough at this point (all in the name of quality control, right?).
-
Scoop and Bake: Drop spoonfuls of dough onto a lined baking sheet, leaving space for the cookies to spread. Bake in your preheated oven for 12-15 minutes, or until the edges are golden brown.
-
Cool and Enjoy: Once out of the oven, let the cookies cool on the baking sheet for about 5 minutes, then transfer them to a wire rack to cool completely (if you can resist the temptation!).
Serving Suggestions: Make It Special
Once those delicious cookies are all baked and cooled, it’s time to serve! Stack them in a rustic basket lined with a cozy kitchen towel for a homey touch. You could also place them on a decorative plate, dusting a bit of powdered sugar on top for flair. Pair these cookies with a warm beverage, like spiced cider or hot chocolate, for the ultimate cozy vibe. Want to make it extra special? Try serving them with a scoop of vanilla ice cream on the side!
Recipe Variations to Keep it Fresh
Now, let’s mix things up a bit! Here are some creative twists and variations to make your pumpkin chocolate chip cookies stand out:
-
Oatmeal Pumpkin Chocolate Chip Cookies: Add 1 cup of rolled oats for a chewy texture and extra fiber.
-
Nutty Crunch: Mix in 1/2 cup of chopped nuts, such as walnuts or pecans, for a delightful crunch.
-
Cranberry Goodness: Throw in 1/2 cup of dried cranberries for a tart contrast to the sweet chocolate.
-
Spicy Kick: Add a pinch of nutmeg or allspice for an extra layer of warmth and spice.
-
Vegan Twist: Replace the butter with coconut oil and use a flax egg (1 tablespoon ground flaxseed mixed with 3 tablespoons water) instead of the egg for a vegan-friendly option!
Chef’s Notes: Memories and Musings
These pumpkin chocolate chip cookies have evolved beautifully over time. Originally, I experimented with different spices and ratios, but I’ve landed on this beloved recipe. It perfectly balances the flavors I adore while keeping things cozy and inviting. A fun fact? The dough is also fantastic as a base for breakfast muffins! Just spoon it into muffin tins, and you’ve got yourself a delicious treat that can be enjoyed any time of day.
FAQs and Troubleshooting
Q: Why are my cookies flat?
A: This could happen if your butter was too warm or if you over-mixed the dough. Make sure your butter is softened but not melted, and mix gently.
Q: Can I freeze the cookie dough?
A: Absolutely! You can freeze the dough for up to three months. Just scoop it onto a baking sheet, freeze, then transfer to a freezer bag. Bake from frozen, adding a couple of extra minutes.
Q: How do I store these cookies?
A: Keep them in an airtight container at room temperature for up to five days. If you want them to last a bit longer, refrigerate them to maintain freshness.
Q: Can I make these cookies gluten-free?
A: You sure can! Swap out the all-purpose flour for a 1:1 gluten-free baking mix, and you’ll be golden.
Nutritional Info
For those of you keeping tabs on your nutritional intake, here’s a rough estimate for one pumpkin chocolate chip cookie (assuming 24 cookies per batch):
- Calories: 150
- Total Fat: 7g
- Saturated Fat: 4g
- Carbohydrates: 22g
- Fiber: 1g
- Sugar: 10g
- Protein: 2g
These cookies are perfect for treating yourself, but always enjoy in moderation!
Final Thoughts: A Cookie Like No Other
In a world full of trends and fleeting food fads, the comforting embrace of a warm pumpkin chocolate chip cookie is timeless. It’s more than just a treat; it’s a vessel for memories, connection, and joy. So as you bake your way through these delicious bites, remember to savor not just the flavor but the moments that come with it. Share them with family and friends, lest you find yourself eating them all in one sitting (no judgment here – I’ve been there!).
Thanks for joining me on this sweet journey today! Now get out there, let the aroma fill your home, and most importantly, share the love baked into every cookie. Happy baking! 🍪
Print
Pumpkin Chocolate Chip Cookies
- Total Time: 30 minutes
- Yield: 24 cookies 1x
- Diet: Vegetarian
Description
Delicious pumpkin chocolate chip cookies filled with warm spices and gooey chocolate, perfect for fall.
Ingredients
- 1 cup canned pumpkin
- 1 cup sugar
- 1/2 cup butter, softened
- 1 teaspoon vanilla extract
- 2 cups all-purpose flour
- 1 teaspoon baking soda
- 1 teaspoon baking powder
- 1 teaspoon ground cinnamon
- 1/2 teaspoon salt
- 1 cup chocolate chips
Instructions
- Preheat your oven to 350°F (175°C).
- Cream the butter and sugar until creamy.
- Add pumpkin and vanilla, mixing until smooth.
- Mix the dry ingredients in another bowl.
- Combine wet and dry ingredients gently.
- Stir in the chocolate chips.
- Scoop dough onto a lined baking sheet.
- Bake for 12-15 minutes until edges are golden.
- Cool on a wire rack before serving.
Notes
Serve with a warm beverage for the ultimate cozy vibe.
- Prep Time: 15 minutes
- Cook Time: 15 minutes
- Category: Dessert
- Method: Baking
- Cuisine: American
Nutrition
- Serving Size: 1 cookie
- Calories: 150
- Sugar: 10g
- Sodium: 100mg
- Fat: 7g
- Saturated Fat: 4g
- Unsaturated Fat: 2g
- Trans Fat: 0g
- Carbohydrates: 22g
- Fiber: 1g
- Protein: 2g
- Cholesterol: 30mg
Keywords: pumpkin cookies, chocolate chip cookies, fall baking, cozy desserts

Minute Peach Cobbler Dumplings: A Quick Comfort Treat
Peach Cobbler Dumplings: A Sweet Slice of Nostalgia
Hey there, fellow food lovers! If you’re looking for a dessert that hits all the right notes—sweet, comforting, and oh-so-easy to make—you’ve landed in the right spot! Today, we’re diving into a delightful dish that’s perfect for those sunny afternoons or cozy evenings at home with loved ones: Peach Cobbler Dumplings.
Imagine sinking your teeth into warm, fluffy dumplings enveloping sweet, juicy peaches, all while that familiar aroma fills your kitchen. That lovely scent brings back countless memories of summer days at my grandmother’s house, where her kitchen was always a haven of delicious desserts and hearty laughter. Each time she made this peach cobbler variation, it didn’t matter if it was raining outside or the sun was shining bright; the world just felt right.
Now, it’s my absolute joy to share this classic recipe with you! I promise you’ll be amazed at how simple it is to bring this slice of nostalgia into your kitchen. So roll up those sleeves, and let’s whip up some peach cobbler dumplings that will have everyone asking for seconds!
A Taste of My Childhood
Let me take you back to my grandmother’s kitchen, a magical place where every corner held a story and every recipe had a sprinkle of love. I remember the vibrant yellow walls plastered with family photos and recipe clippings—all tokens of tasty memories. On balmy summer afternoons, the enticing smell of fresh peaches would waft through the open windows. The fruit was sweet and ripe, practically begging to be transformed into something scrumptious.
One special day, I walked into her kitchen to find her humming merrily while peeling peaches. "Today, we’re making peach cobbler dumplings!" she declared, eyes twinkling with mischief. At that moment, I knew we were in for a treat. As we worked side by side, she taught me not just how to mix a simple dough but also the importance of enjoying the process. Her laughter and expertly guiding hands made small kitchen mishaps into cherished moments.
Now every time I prepare this dish, I feel her spirit—flour in the air, warm butter melting, and that irresistible blend of sugar and cinnamon. I want to share that joy with you, so let’s grab those peaches and start making our own memories, shall we?
Ingredients
Here’s what you’ll need to make these mouthwatering peach cobbler dumplings:
-
2 cups fresh peaches, sliced
Fresh peaches are a must for this recipe! They provide that sweet, juicy flavor that pairs perfectly with the dumplings. If fresh peaches aren’t available, you can use frozen peaches — just be sure to thaw and drain excess moisture before using! -
1 cup granulated sugar
Sugar is the star of the show! It caramelizes beautifully, creating that gooey, sweet sauce that brings everything together. If you prefer a less sweet dish, feel free to reduce the sugar to ¾ of a cup or swap in a natural sweetener like maple syrup. -
1 teaspoon ground cinnamon
Cinnamon adds warmth and depth to our dish. If you’re feeling adventurous, you can even replace it with nutmeg for a different flavor profile, or add a pinch of allspice to the mix! -
1 tablespoon lemon juice
This subtle addition brightens the flavors and balances the sweetness of the peaches. Don’t have fresh lemons? No worries! A splash of bottled lemon juice works just fine. -
1 package refrigerated biscuit dough
These are our dumpling base that gives us those fluffy clouds of goodness. Feel free to use any brand you like; buttermilk biscuits work great for a richer taste. If you’re avoiding gluten, there’s also gluten-free biscuit dough available! -
4 tablespoons butter, melted
Butter helps create that rich, buttery flavor and creates a lovely golden crust. You could swap out butter for a vegan alternative, like coconut oil or a plant-based butter if you’re aiming for dairy-free. -
1 cup water
Water helps create a syrupy sauce as everything cooks together. If you’re feeling fancy, you could elevate it by using a splash of peach juice or even a bit of bourbon for an adult twist!
Step-by-Step Instructions
Alright, it’s time to roll up our sleeves and get cooking! Here’s how you’ll whip up these delightful dumplings:
-
Prep Those Peaches:
Start by washing and peeling your fresh peaches. Slice them into wedges and place them into a bowl. Then, sprinkle the sugar and ground cinnamon over the peaches, and drizzle the lemon juice on top. Mix everything gently to coat the peaches evenly. Set aside for about 10–15 minutes to allow the juices to marinate. This is how you develop that wonderful syrup base. -
Preheat Your Oven:
Preheat your oven to 375°F (190°C). This ensures your dumplings will bake deliciously and evenly! -
Create the Peach Filling:
Pour the peach mixture into a baking dish—think 9×13 inches or something similar. Make sure to include all that heavenly juice at the bottom—trust me, you want that! -
Prepare the Dumplings:
Open your package of biscuit dough and separate the biscuits. For a little twist, you can flatten each biscuit slightly with your hands before placing them on top of the peaches. This gives you a bit more surface area that’ll soak up all those delicious juices. It’s not a must, but hey, why not? -
Drizzle with Butter:
Melt your butter and generously drizzle it over the biscuits. This will give them a beautiful golden brown color and a rich, buttery flavor. -
Add Water:
Carefully pour the cup of water around the edges of the baking dish. Remember—don’t pour it directly over the biscuits; we want them to stay fluffy and not get soggy! -
Bake It Up:
Slide your creation into the oven and bake for about 30–35 minutes, or until the biscuit tops are golden brown and a toothpick inserted into the dumplings comes out clean. You’ll know it’s done when your kitchen starts smelling like heaven—trust me, you won’t be able to resist pulling it out early!
Serving Suggestions
Now that your peach cobbler dumplings are out of the oven and cooled slightly (if you can wait!), it’s time to serve! I love to dish out several fluffy dumplings in shallow bowls alongside a generous scoop of vanilla ice cream. The warm dumplings with the cold ice cream create a delightful contrast that will have your taste buds singing!
To elevate the experience, you can drizzle a little extra peach juice over the top or even serve it with a sprig of mint for a touch of freshness. If you’re feeling fancy, a dusting of powdered sugar can add a lovely flair too!
Recipe Variations
Peach cobbler dumplings are delightfully customizable, and I love exploring different flavor profiles! Here are a few variations to consider:
-
Berry Bliss: Add a cup of fresh or frozen berries—blueberries or raspberries work beautifully mixed in with the peaches. This adds a pop of color and an extra layer of flavor.
-
Spiced Up!: Introduce some fun spices! Try adding a pinch of ground ginger or cardamom to the peaches for a unique twist.
-
Nutty Crunch: Top your dumplings with a sprinkle of chopped pecans or almonds before baking. This gives extra crunch and nutrition!
-
Coconut Cream: Swap half of the butter for coconut oil and add shredded coconut into the biscuit dough for a tropical take!
-
Vegan Delight: Use plant-based biscuit dough, coconut oil instead of butter, and a flax egg to replace any egg in the recipe for a fabulous vegan option.
Chef’s Notes
Creating peach cobbler dumplings has been a comforting ritual for me over the years. One particularly funny memory was when I forgot to add the sugar once—and let’s just say the outcome was… interesting. Thankfully, my friends are good sports and enjoyed toying with the idea of a “sugarless” version! Since then, I always double-check that sugar is added to my bowl!
This recipe has evolved, as I’ve experimented with various fruits and spices over the years, each tweaking it to fit the season or occasion. It never fails to elicit smiles and laughter, reminding me that cooking is all about sharing love and joy!
FAQs and Troubleshooting
Let’s address some common questions or potential hiccups you might encounter:
-
Can I make it ahead of time?
Absolutely! You can prep the peach mixture and biscuit dough separately a day in advance. Just store them in the fridge until you’re ready to bake. -
What if my dumplings are soggy?
If your dumplings turn out soggy, it could be due to too much liquid. Make sure when you’re adding water around the edges, you’re not pouring it directly over the biscuits. If they come out soggy, try letting them rest for a few minutes out of the oven. -
Can I use canned peaches?
Certainly! Just be sure to drain them well and perhaps reduce the sugar slightly since canned peaches are often sweeter. -
How do I store leftovers?
Store any leftovers in an airtight container in the fridge for up to 3–4 days. Reheat in the oven or microwave for a quick treat!
Nutritional Info
While I’m not a nutritionist, here’s a rough breakdown of what you can expect from a serving of peach cobbler dumplings (based on the above recipe).
- Calories: Approximately 350
- Fat: 15g
- Carbohydrates: 55g
- Sugar: 24g
- Protein: 5g
Remember, indulging in a tasty dessert now and then is all part of the joy of cooking!
Final Thoughts
There you have it, my friend—a delightful journey into the world of Peach Cobbler Dumplings! Each bite is a warm hug from your childhood—full of nostalgia, flavor, and love. I hope this recipe inspires you to gather around the kitchen with family or friends for both cooking and savory conversations.
Remember, it’s not just about the end result, it’s truly about enjoying every step of the way! So roll up those sleeves, grab some fresh peaches, and let’s make a batch that will create memories for you and your loved ones for years to come.
Happy cooking, and may your kitchen always be filled with love and laughter!
Ready to dig in? I can’t wait to hear about your peachy adventures in the kitchen!
Print
Peach Cobbler Dumplings
- Total Time: 50 minutes
- Yield: 4 servings 1x
- Diet: Vegetarian
Description
A delightful dessert with warm, fluffy dumplings enveloping sweet, juicy peaches.
Ingredients
- 2 cups fresh peaches, sliced
- 1 cup granulated sugar
- 1 teaspoon ground cinnamon
- 1 tablespoon lemon juice
- 1 package refrigerated biscuit dough
- 4 tablespoons butter, melted
- 1 cup water
Instructions
- Prep those peaches: Start by washing and peeling your fresh peaches. Slice them into wedges and place them into a bowl. Then, sprinkle the sugar and ground cinnamon over the peaches, and drizzle the lemon juice on top. Mix everything gently to coat the peaches evenly. Set aside for about 10–15 minutes to allow the juices to marinate.
- Preheat your oven: Preheat your oven to 375°F (190°C).
- Pour the peach mixture into a baking dish—think 9×13 inches or something similar.
- Open your package of biscuit dough and separate the biscuits. Flatten each biscuit slightly with your hands before placing them on top of the peaches.
- Melt your butter and generously drizzle it over the biscuits.
- Carefully pour the cup of water around the edges of the baking dish.
- Slide your creation into the oven and bake for about 30–35 minutes, or until the biscuit tops are golden brown and a toothpick inserted comes out clean.
Notes
Serve with vanilla ice cream for a delightful contrast in temperature and flavor.
- Prep Time: 15 minutes
- Cook Time: 35 minutes
- Category: Dessert
- Method: Baking
- Cuisine: American
Nutrition
- Serving Size: 1 serving
- Calories: 350
- Sugar: 24g
- Sodium: 300mg
- Fat: 15g
- Saturated Fat: 8g
- Unsaturated Fat: 4g
- Trans Fat: 0g
- Carbohydrates: 55g
- Fiber: 2g
- Protein: 5g
- Cholesterol: 30mg
Keywords: peach cobbler, dessert, dumplings, nostalgic recipe, summer dessert
Ingredient Peach Fritters with Honey Glaze in 25 Minutes
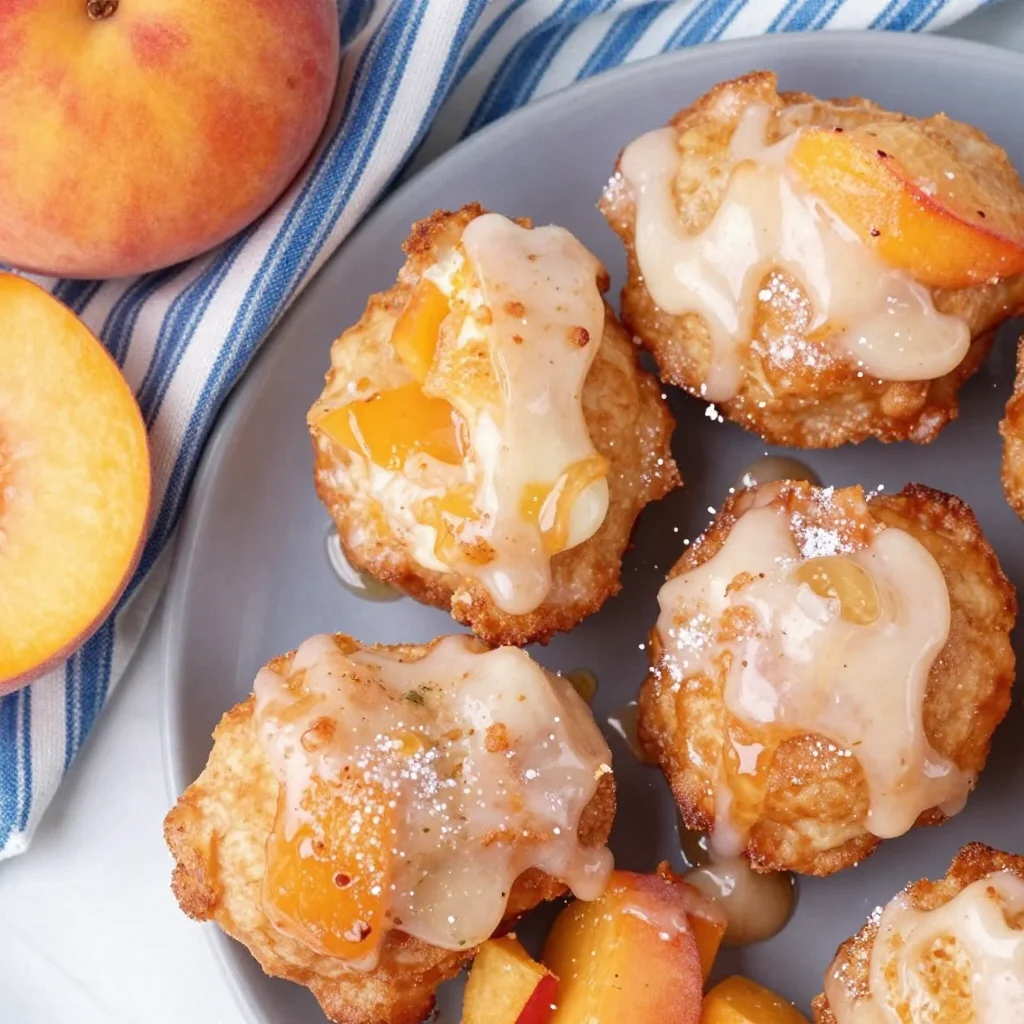
Glazed Peach Fritters: A Sweet Summer Treat
Hey there, food lovers! Are you ready to dive into a world of sweetness and sunshine with me? Today, we’re whipping up something that’s sure to make your taste buds dance—Glazed Peach Fritters! These little gems are like little bites of happiness, capturing the essence of summer in every crispy, golden layer. Whether you’re hosting a brunch or just need a sweet pick-me-up, these fritters have got your back!
The beauty of these fritters lies not only in their taste but in their casual, approachable nature. They’re perfect for both seasoned chefs and those just finding their culinary groove. Plus, think about how wonderful it would be to bring a batch of these to your next gathering! I mean, who can resist the aroma of freshly fried dough mingling with that delightful peachy goodness?
Personal Story: A Peach of a Memory
Let me whisk you back to one sultry summer afternoon during my childhood. My grandma had an old, weathered fry pan that she cherished, and with it, she whipped up the most delightful fritters. We’d spend the summer days at her cozy farmhouse, surrounded by peach trees that seemed to stretch endlessly into the horizon. I can still remember the sweet, fragrant air wafting through the windows as we waited, hands clasped in anticipation.
One magical day, we decided to harvest the ripest peaches from her garden. With my young hands covered in sticky peach juice, we laughed and concocted a plan for Grandma’s famous fritters. Every bite we shared felt like a warm hug, reminding us that food isn’t just about nourishment; it’s about connection and nostalgia. Now, that memory fuels my desire to recreate those feelings through cooking. Each fritter I make is a tribute to those sunny afternoons spent mixing, frying, and laughing in Grandma’s kitchen.
Ingredients: Gather Your Goodies
Let’s dive into the ingredients that will bring these delightful fritters to life! Make sure you have these on hand:
-
2 cups all-purpose flour: This is your fritter base. If you’re looking for gluten-free options, a gluten-free flour blend will work wonders, but you might need to play with the liquid a bit.
-
1 tablespoon baking powder: This is your secret weapon for that fluffy, airy texture. No substitutes needed here; just make sure it’s fresh!
-
1/2 teaspoon salt: A little pinch elevates the sweetness, balancing the flavors wonderfully. You can use sea salt or kosher salt based on your preference.
-
1/4 cup granulated sugar: Sweetness is key! If you want to experiment, brown sugar adds a lovely depth of flavor.
-
1 cup buttermilk: This tangy ingredient makes the batter oh-so-rich and moist. If you don’t have buttermilk, no worries! Just mix a cup of regular milk with a tablespoon of vinegar or lemon juice and let it sit for 5 minutes.
-
2 large eggs: These help bind the mixture and add some fluffiness. You can swap with flaxseed meal mixed with water for a vegan option.
-
2 cups fresh peaches (diced): These beauties are the star of the show! Choose perfectly ripe ones that are fragrant. If peaches aren’t in season, feel free to use frozen ones—just drain the excess moisture.
-
Oil for frying: A neutral oil, like vegetable or canola, is ideal for frying. Avoid olive oil, as its lower smoke point isn’t optimal for frying.
-
1 cup powdered sugar: This will form your lovely glaze. If you want it less sweet, reduce the sugar, or use coconut sugar for a fun twist.
-
2 tablespoons milk (for the glaze): Use whatever milk you fancy—dairy, almond, soy—you name it!
Step-by-Step Instructions: Let’s Get Cooking!
Alright, friends! It’s time to put on that apron and get down to business. Here’s how to create these peach fritters step by step.
-
Prep Your Peaches: Start by washing and dicing your fresh peaches. Aim for about 1/2-inch chunks. Remember, the juicier the peach, the better the flavor! If you’re feeling adventurous, reserve some larger pieces for the garnish!
-
Mix the Dry Ingredients: In a large mixing bowl, whisk together the flour, baking powder, salt, and granulated sugar. Give it a good mix to combine everything evenly; you don’t want any unexpected pockets of salt or sugar in your fritters!
-
Combine the Wet Ingredients: In another bowl, beat the eggs and then add in the buttermilk. Mix until well combined. This creamy mixture is where the magic happens!
-
Bring It All Together: Carefully fold the wet ingredients into the dry mixture. Be gentle; you want to maintain that airiness! It’s totally okay if the batter is a little lumpy—flour pockets are just waiting to puff up beautifully in the fryer.
-
Add the Peaches: Gently fold in those marvelous diced peaches. Don’t be too rough; you want to keep the pieces intact as much as possible. Think of them as little jewels nestled into your batter.
-
Heat the Oil: In a deep pan or heavy-bottomed pot, pour in enough oil for frying. You’ll want it to be about 2 inches deep. Heat it on medium until it reaches around 350°F (175°C). A good way to test if the oil is ready is by dropping a little batter into it; if it sizzles and rises, you’re good to go!
-
Fry Away! Using a tablespoon or ice cream scoop, drop spoonfuls of the batter into the hot oil, being careful not to overcrowd the pan. Fry for about 2-3 minutes on each side or until they’re golden brown and lovely. Flip them gently with a slotted spoon when they’re perfect!
-
Drain and Cool: Once your fritters are golden, carefully transfer them to a plate lined with paper towels to drain excess oil. Let them cool for a moment as you prepare the glaze.
-
Make the Glaze: In a small bowl, whisk together powdered sugar and milk until you achieve a smooth, glossy consistency. If it’s too thick, add a tiny bit more milk!
-
Glaze Those Fritters: Drizzle or dip your cooled fritters in the glaze, letting it drip down the sides in a sweet cascade. Trust me; this step is worth every sticky finger!
Serving Suggestions: The Perfect Plate
When it comes to serving your Glazed Peach Fritters, presentation is key! Arrange them on a beautiful platter, maybe sprinkle a bit of extra powdered sugar on top for that Instagrammable touch. You could even garnish with a few fresh peach slices or mint leaves to make them pop.
For a fun twist, serve them alongside a cup of rich vanilla ice cream or a dollop of whipped cream for that indulgent dessert vibe. Got a brunch party? Place them at the center of the table for a delightful sharing experience. Everyone will want to grab a warm fritter, and trust me, they won’t last long!
Recipe Variations: Get Creative!
Want to mix things up? Here are a few creative variations to make these fritters uniquely yours:
-
Spiced Peach Fritters: Add a dash of cinnamon and nutmeg to the dry ingredients for a warm, cozy flavor twist.
-
Savory Option: How about some savory peach fritters by adding crumbled bacon or fresh herbs like basil or thyme?
-
Berry Fusion: Swap out some peaches for blueberries or raspberries for a delightful berry fritter medley.
-
Peach-Chipotle: For the adventurous, a bit of finely chopped chipotle pepper can add a smoky kick!
-
Gluten-Free Goodness: Use a gluten-free flour blend, and watch as everyone enjoys these fritters without a worry!
Chef’s Notes: A Dash of Nostalgia and Joy
Here’s a little nugget of wisdom from my kitchen: recipes evolve over time, just like our palates do. The first time I tried making these fritters, I was all over the place—I burned a few, had batter flying everywhere, and icing splatters were the least of my worries! But through all the kitchen chaos, I found that each failed attempt taught me something new.
Don’t stress if your fritters aren’t perfect the first time. Use it as an opportunity to learn and embrace that fabulous kitchen mess! Those imperfect moments can lead to the most delightful flavors. After all, the best recipes come with a side of laughter and a pinch of love!
FAQs and Troubleshooting: Your Burning Questions
-
Why did my fritters absorb too much oil?
- If your fritters absorbed oil, the oil may not have been hot enough. Make sure it’s at the right temperature (around 350°F) before frying. If they are frying too slowly, they’ll soak up excess oil.
-
Can I use frozen peaches instead of fresh ones?
- Absolutely! Just be sure to thaw them first and drain excess moisture. They’ll be just as delicious!
-
How can I store leftover fritters?
- Store any leftover fritters in an airtight container in the refrigerator. To reheat, pop them in the oven at 350°F for about 10 minutes, or until warm!
-
My batter is too thick; what do I do?
- If your batter seems overly thick, add a little more buttermilk, one tablespoon at a time, until you reach the desired consistency.
Nutritional Info
While indulging in sweet treats, it’s always nice to be aware of what you’re consuming. One glazed peach fritter will typically contain about:
- Calories: 210-250
- Carbohydrates: 30g
- Protein: 3g
- Fat: 10g
- Sugar: 8g
Adjusting the recipe may alter these nutritional values, but remember, food should be enjoyed in moderation!
Final Thoughts: Come Together Over Fritters
As we wrap up this journey of crafting Glazed Peach Fritters together, I hope you’re inspired to create your own batch in your kitchen. There’s a certain magic that happens when you cook with love—and trust me, every bite will feel like summer’s sweetest memory.
So gather your friends and family, let the aroma of these delectable fritters fill your space, and share stories and laughter around the table. After all, life is better when enjoyed with good company and great food! Don’t forget to share your fritter successes, failings, and variations with me—let’s continue to spread that warmth and creativity in the kitchen. Happy cooking, my friends!
Print
Glazed Peach Fritters
- Total Time: 35 minutes
- Yield: 12 servings 1x
- Diet: Vegetarian
Description
Delicious peach fritters that capture the essence of summer in every crispy, golden layer.
Ingredients
- 2 cups all-purpose flour
- 1 tablespoon baking powder
- 1/2 teaspoon salt
- 1/4 cup granulated sugar
- 1 cup buttermilk
- 2 large eggs
- 2 cups fresh peaches (diced)
- Oil for frying
- 1 cup powdered sugar
- 2 tablespoons milk (for the glaze)
Instructions
- Prep Your Peaches: Start by washing and dicing your fresh peaches into about 1/2-inch chunks.
- Mix the Dry Ingredients: In a large mixing bowl, whisk together the flour, baking powder, salt, and granulated sugar.
- Combine the Wet Ingredients: In another bowl, beat the eggs and then add the buttermilk.
- Bring It All Together: Carefully fold the wet ingredients into the dry mixture.
- Add the Peaches: Gently fold in the diced peaches until just combined.
- Heat the Oil: In a deep pan, heat oil to about 350°F (175°C).
- Fry Away! Drop spoonfuls of the batter into the hot oil and fry until golden brown.
- Drain and Cool: Transfer fritters to paper towels to drain excess oil.
- Make the Glaze: In a small bowl, whisk together powdered sugar and milk until smooth.
- Glaze Those Fritters: Drizzle or dip cooled fritters in the glaze.
Notes
Serve warm and enjoy with ice cream or whipped cream for an extra indulgent treat.
- Prep Time: 15 minutes
- Cook Time: 20 minutes
- Category: Dessert
- Method: Frying
- Cuisine: American
Nutrition
- Serving Size: 1 fritter
- Calories: 230
- Sugar: 8g
- Sodium: 200mg
- Fat: 10g
- Saturated Fat: 1g
- Unsaturated Fat: 7g
- Trans Fat: 0g
- Carbohydrates: 30g
- Fiber: 1g
- Protein: 3g
- Cholesterol: 25mg
Keywords: fritters, peach fritters, dessert, summer treat