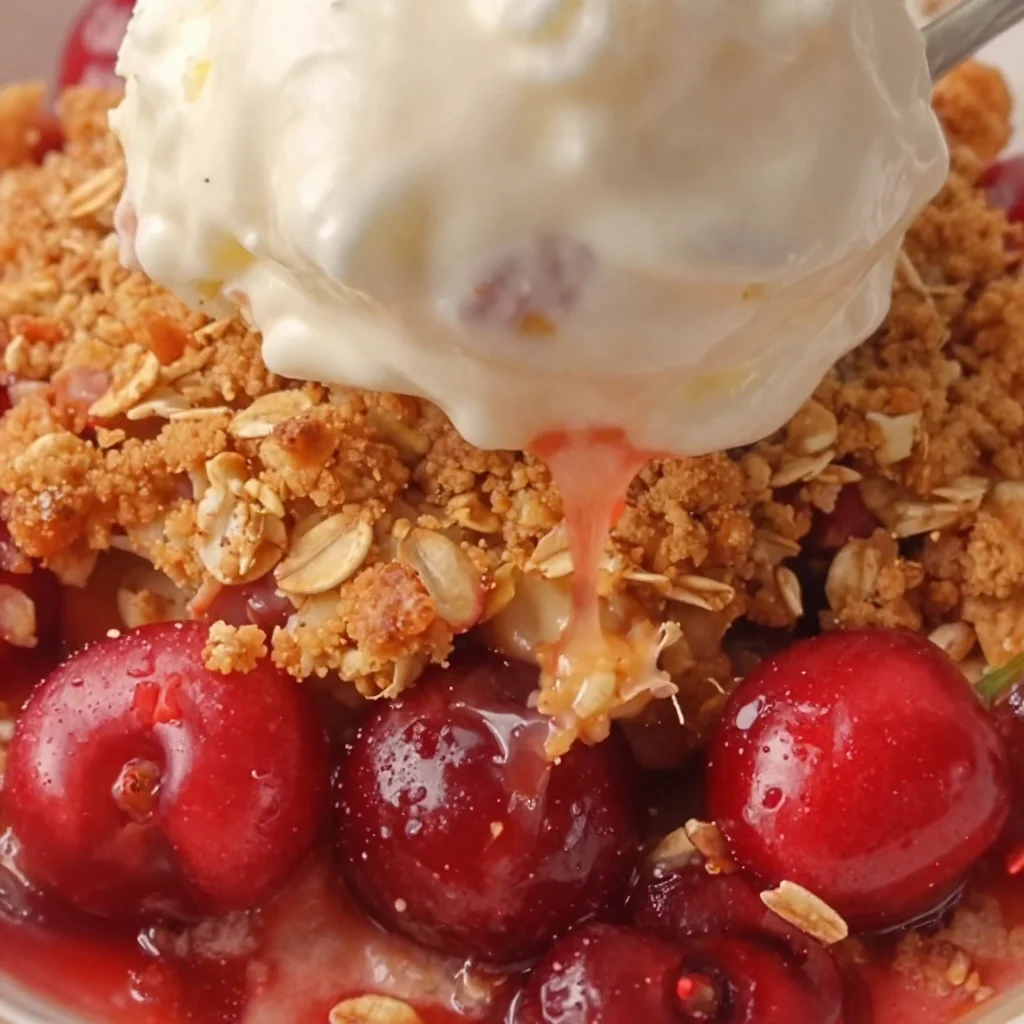
Cherry Crumble
Dive into Deliciousness with Cherry Crumble
Hey there, my fellow food lovers! Today, we’re diving into a dish that has all the charm of summer nostalgia and the cozy warmth of a homey kitchen: Cherry Crumble. Picture this — the sweet, tangy burst of fresh cherries topped with a buttery, golden crumble that’s crisp, crumbly, and totally irresistible. Whether you’re hosting a backyard barbecue or simply treating yourself to a well-deserved dessert, this Cherry Crumble is a delicious way to celebrate every moment.
Cherry season is a fleeting delight. Every year, I eagerly await those luscious cherries to hit the market. There’s just something about standing in the sun, hand-picking those juicy gems with their deep red hues that makes my heart sing. And when it comes time to use them, I have a little ritual: I play my favorite music, pour a glass of something refreshing, and get to work. Trust me, making this dish is as delightful as eating it!
Now, I know what you might be thinking: “Is making a crumble really as easy as you say?” The answer is a resounding yes! With just a few simple steps and some kitchen staples, you’ll have a dessert that impresses friends and family alike. Plus, the aroma wafting through your home while it’s baking? Pure magic! So, grab those cherries, roll up your sleeves, and let’s get cooking!
A Cherry-filled Memory
I can still remember the first time I made Cherry Crumble. It was a sweltering summer afternoon, and my best friend and I were rummaging through my grandmother’s recipe box, searching for something to satisfy our sweet tooth. That box was treasure trove filled with beloved family recipes, and we stumbled upon a handwritten card that read "Cherry Crumble – Grandma’s Favorite."
That day, we picked cherries from the tree in Grandma’s backyard, laughing and joking as we avoided the guide to getting stained (spoiler alert: we weren’t very successful!). As we prepared our ingredients, Grandma wandered in with her apron — the one with little cherries printed all over it — and shared stories of her own summer adventures with cherries. We baked that crumble together and feasted on it warm with scoops of vanilla ice cream melting on top. The taste was heavenly, but it was the laughter and love that made the moment truly unforgettable. Ever since then, Cherry Crumble has held a special place in my heart, and I’m here to help you create your own cherished memories with this fabulous dish!
Ingredients
For this delightful Cherry Crumble, you’ll need:
-
2 cups fresh cherries, pitted and halved
Juicy, sweet cherries are the star of the show! Make sure they’re ripe for optimal flavor. If fresh cherries aren’t available, frozen cherries work well too — just let them thaw and drain excess liquid. -
1 cup rolled oats
These oats add texture and a nutty flavor. If you want a gluten-free version, look for certified gluten-free oats. -
1/2 cup all-purpose flour
Flour is essential for binding your crumble together. For a gluten-free option, use almond flour or a gluten-free all-purpose blend. -
1/2 cup brown sugar
This adds a deep caramel flavor to the topping. You can substitute with coconut sugar for a slightly different but equally tasty sweetness. -
1/3 cup butter, melted
Butter gives your crumble richness and helps create that irresistible crust. For a vegan option, use melted coconut oil or vegan butter. -
1 teaspoon cinnamon
A pinch of spice elevates the flavor profile! Feel free to experiment with nutmeg or pumpkin spice for a different twist. -
1/4 teaspoon salt
A small amount of salt balances the sweetness. It’s an essential ingredient that enhances all the flavors!
Step-by-Step Instructions
Alright, foodie friends, let’s roll up our sleeves and get started on this delightful Cherry Crumble! Follow these steps, and you’ll have a stunning dessert ready in a flash.
-
Preheat Your Oven
Start off by preheating your oven to 350°F (180°C). This is crucial as it ensures even baking, crispy topping, and gooey cherries. -
Prepare the Baking Dish
Grab your favorite baking dish (an 8×8 square or a round dish works great!). Lightly grease it with butter or non-stick spray to prevent sticking. This also adds a little extra buttery flavor! -
Prepare the Cherries
If you’re using fresh cherries, wash them and remove the pits. Halving them allows for better flavor distribution and makes them easier to eat. Toss them with a little sugar (about 1 tablespoon) and set them aside while you prep the crumble. This will create a lovely syrup as the cherries release their juices. -
Make the Crumble Topping
In a medium bowl, combine the rolled oats, flour, brown sugar, cinnamon, and salt. Pour in the melted butter and mix until everything is well combined. You want a crumbly texture, so don’t overmix! There should still be some visible pieces of butter. -
Assemble
Spread the cherries evenly in the prepared baking dish. Sprinkle the crumble mixture generously over the top, ensuring all the cherries are covered. -
Bake to Perfection
Place the dish in the preheated oven and bake for about 30-35 minutes, or until the topping is golden brown and the cherries are bubbling. Your kitchen will soon be filled with the most mouthwatering aroma! -
Serve Warm
Once it’s out of the oven, let it cool for about 10 minutes (if you can wait!). Serve it warm with a generous scoop of vanilla ice cream or a dollop of whipped cream. You can also sprinkle some fresh mint for a pop of color and flavor!
Serving Suggestions
Plating your Cherry Crumble is almost as enjoyable as making it. Here’s how to do it like a pro:
- Option 1: Serve it right from the baking dish! It has that homespun charm and feels extra cozy.
- Option 2: Scoop individual portions into bowls, allowing everyone to customize with their choice of ice cream or toppings.
- Option 3: For a more elegant presentation, use a ring mold to create a pretty layer of cherries topped with the crumble in the center of a dessert plate, garnished with a mint leaf.
No matter how you choose to serve it, I promise your friends and family will be clamoring for seconds!
Recipe Variations
Ready to mix things up a bit? Here are some creative twists on the classic Cherry Crumble:
-
Mixed Berry Crumble: Swap out some of the cherries for blueberries, raspberries, or even strawberries. A mix of berries adds a fun complexity to the flavors!
-
Nutty Crunch: Incorporate chopped nuts like almonds, pecans, or walnuts into your crumble topping for added texture and a health boost.
-
Peachy Cherry Combo: Add sliced peaches for a delightful summer twist. The sweetness of peaches complements the tartness of cherries beautifully!
-
Spiced Up Crumble: For an autumn feel, add a dash of nutmeg or ginger to your crumble topping. It adds warmth and depth of flavor.
-
Coconut Lover: Stir in some shredded coconut to the crumble for a tropical vibe. It beautifully complements the cherries!
Chef’s Notes
Creating the perfect Cherry Crumble has been a journey for me. Over the years, I’ve played with different ratios of sugar, butter, and oats to get just the right texture. The beauty of this recipe is its versatility — you can really make it your own! I’ve had moments of kitchen disasters (yes, I’ve burned a few crumble toppings along the way), but they taught me patience and creativity in the kitchen. Now, each time I make it, I become a little nostalgia machine, recalling sunny summer days with friends and family.
FAQs and Troubleshooting
Let’s tackle some common questions and potential hiccups for making this Cherry Crumble:
-
Why is my topping too dry?
It might be that you didn’t add enough butter! Ensure the mixture is evenly combined; it should be moist but crumbly. You can also add a splash of water or milk if necessary. -
How do I keep my cherries from getting mushy?
Avoid overbaking! Keep a close eye on your crumble near the end of the baking time. The cherries should be softened but still retain some shape. -
Can I use frozen cherries?
Absolutely! Just make sure to thaw and drain the excess liquid before mixing them into the crumble. You may need to adjust cooking time slightly as frozen cherries may take a bit longer to heat up. -
What should I do if I don’t have fresh cherries?
Canned cherries work in a pinch! Just drain them well to avoid excess moisture, and you’re set.
Nutritional Info
For those of you keeping an eye on nutritional content, here’s a rough estimate of what you can expect for one serving (without ice cream):
- Calories: 280
- Total Fat: 12g
- Saturated Fat: 7g
- Carbohydrates: 42g
- Dietary Fiber: 3g
- Sugars: 20g
- Protein: 3g
Remember, these values can vary based on specific brands and ingredients used, so feel free to adjust based on your preferences!
Final Thoughts
And there you have it, my dear food adventurers — a simple, scrumptious Cherry Crumble recipe that is perfect for any occasion. This dessert serves as a beautiful reminder of the joy of cooking and the love that can come from it. Gather your friends, enjoy the smiles it brings, and sprinkle a little more joy into your lives, one crumble at a time.
Thank you for spending this time with me! I hope you create amazing memories in your kitchen while making Cherry Crumble. It’s all about laughter, love, and of course, delicious food! Until next time, happy cooking! 🍒✨
Print
Cherry Crumble
- Total Time: 50 minutes
- Yield: 4 servings 1x
- Diet: Vegetarian
Description
A delightful Cherry Crumble featuring sweet, tangy cherries topped with a buttery, golden crumble. Perfect for summer gatherings or as a comforting dessert.
Ingredients
- 2 cups fresh cherries, pitted and halved
- 1 cup rolled oats
- 1/2 cup all-purpose flour
- 1/2 cup brown sugar
- 1/3 cup butter, melted
- 1 teaspoon cinnamon
- 1/4 teaspoon salt
Instructions
- Preheat your oven to 350°F (180°C).
- Prepare a baking dish by lightly greasing it with butter or non-stick spray.
- Prepare the cherries by washing, pitting, and halving them. Toss with 1 tablespoon of sugar and set aside.
- Make the crumble topping by combining the oats, flour, brown sugar, cinnamon, and salt in a medium bowl. Mix in the melted butter until crumbly.
- Assemble by spreading the cherries in the prepared dish and topping with the crumble mixture.
- Bake in the preheated oven for 30-35 minutes until golden brown and bubbling.
- Serve warm with vanilla ice cream or whipped cream.
Notes
Feel free to customize your crumble with nuts or other fruits, such as peaches or mixed berries.
- Prep Time: 15 minutes
- Cook Time: 35 minutes
- Category: Dessert
- Method: Baking
- Cuisine: American
Nutrition
- Serving Size: 1 serving
- Calories: 280
- Sugar: 20g
- Sodium: 250mg
- Fat: 12g
- Saturated Fat: 7g
- Unsaturated Fat: 4g
- Trans Fat: 0g
- Carbohydrates: 42g
- Fiber: 3g
- Protein: 3g
- Cholesterol: 30mg
Keywords: Cherry Crumble, dessert, summer, baking, fruity dessert

Fresh Cherry Cake: Easy 30-Minute Summer Dessert Recipe
Discovering the Sweetness of Fresh Cherry Cake
Hey there, fellow foodies! It’s Beau Collier, and I’m so excited to share one of my all-time favorite recipes with you today – Fresh Cherry Cake! If you’re looking for a deliciously vibrant dessert that’ll leave your taste buds dancing and your friends begging for the recipe, you’ve hit the jackpot! Imagine biting into a moist, fluffy cake bursting with luscious cherries. It’s like summer on a plate, and your kitchen is the happy hub of this tasty adventure.
Fresh cherry cake isn’t just another dessert; it’s a slice of nostalgia for me. You see, I grew up in a family where baking was akin to art, and our kitchen was always filled with delightful scents and sounds – the whir of the mixer, the laughter of loved ones, and of course, the delightful “oohs” and “aahs” as desserts made their grand entrance.
Every summer, we’d visit a little cherry orchard not too far from our home, and I remember running around with my siblings, eyes wide in wonder as we picked the ripest cherries. The process was so magical: selecting the juiciest ones, filling our buckets (and our mouths), and then bringing our bounty back home to create everything from pies to preserves. One particular year, we decided to bake a cake with our freshly picked cherries, and the sweet aroma that filled our kitchen was unforgettable. That cake became an instant family classic and the star of many summer gatherings.
Now, I want to help recreate that magic in your kitchen with my twist on the original recipe. Everybody should get a taste of this cherry goodness because life is just sweeter with a slice of Fresh Cherry Cake!
Ingredients
Let’s get down to business and gather our ingredients for this delightful treat. Here’s what you need:
-
1 cup All-purpose flour
This is your go-to flour for building a solid cake structure. If you’re gluten-free, try using a gluten-free flour blend instead! -
¼ cup Almond flour
This nutty flour adds moisture and a lovely flavor. If you don’t have it, substituting with the same amount of finely ground oats can work in a pinch. -
½ cup Sugar
Regular granulated sugar works great, but feel free to experiment with raw or cane sugar for a deeper flavor. -
1 tsp Baking powder
This little magic powder helps your cake rise beautifully! -
¼ tsp Baking soda
A sprinkle of baking soda adds an extra boost; together with the baking powder, they ensure a fluffy cake. -
¼ tsp Salt
A pinch of salt enhances all the flavors and balances the sweetness. -
1 Egg
Eggs provide moisture and structure. You can swap it out for 1/4 cup of unsweetened applesauce if you’re looking for an egg-free option. -
½ cup Greek yogurt, plain
This secret ingredient not only keeps the cake moist but adds a lovely tang. Just ensure you use plain yogurt so it doesn’t alter the flavor! -
¼ cup Coconut oil
Coconut oil brings richness and a hint of tropical flair. Substitute with any neutral oil you love, such as canola or sunflower oil. -
1 tsp Vanilla extract
This classic flavor enhancer is a must! There’s nothing quite like the warmth of vanilla in baked goods. -
½ tsp Almond extract
Almond extract works its magic in this recipe, but if you’re not a fan, feel free to leave it out or increase the vanilla. -
1 cup Cherries, pitted and halved
Fresh, juicy cherries take the center stage in this cake. Tossing them in a little flour before adding helps prevent them from sinking to the bottom! -
Cherry halves and almond flakes for topping (Optional)
A decorative touch that looks as good as it tastes!
Step-by-Step Instructions
Now that we’ve gathered all our ingredients, let me guide you through the steps to create this lovely dessert. Get ready because it’s super easy, and I’ll sprinkle in a few chef hacks along the way!
-
Preheat Your Oven
Preheat your oven to 350°F (175°C). This step is crucial to ensure your cake cooks evenly from the get-go. You can pop in a baking sheet lined with parchment paper to catch any drips or excess batter. -
Prepare Your Cake Pan
Grease a 9-inch round cake pan with coconut oil or your favorite non-stick spray, and sprinkle a little flour in to coat. This will help your cake slide out easily once it’s baked. -
Mix Dry Ingredients
In a large bowl, whisk together the all-purpose flour, almond flour, sugar, baking powder, baking soda, and salt until fully combined. This ensures that all the leavening agents are evenly distributed. -
Combine Wet Ingredients
In another bowl, beat the egg until fluffy, then mix in the Greek yogurt, coconut oil, vanilla extract, and almond extract. Ensure everything is blended smoothly before combining it with the dry ingredients. -
Combine Wet and Dry
Gradually fold the wet mixture into the dry ingredients, just until combined. Overmixing can lead to a dense cake, and we want fluffy and cake-y goodness here! -
Prepare the Cherries
Toss your halved cherries in about 2 teaspoons of flour. This step is key to keeping them suspended in the batter. Fold in the floured cherries gently into your cake batter. -
Pour into Pan
Gently pour the batter into the prepared cake pan, smoothing the top with a spatula. If you like, add a few more cherry halves and almond flakes on top for a decorative touch. -
Bake
Place the cake in the oven for about 30-35 minutes. Keep an eye on it; the cake is done when a toothpick inserted in the center comes out clean. -
Cool It Down
Once baked, remove the cake from the oven and let it cool in the pan for about 10 minutes. Then, gently transfer it to a wire rack to cool completely. The smell in your kitchen is going to be irresistible!
Serving Suggestions
Alright, your Fresh Cherry Cake is cool and ready to serve! Here are a few ideas for making it even more fabulous:
-
Dust with Powdered Sugar
A light dusting of powdered sugar adds a lovely elegance and sweetness without being too overwhelming. -
Top with Whipped Cream
Serve generous dollops of fresh whipped cream or even a scoop of vanilla ice cream for an indulgent treat! -
Garnish with Fresh Cherries
You can never have too many cherries! Decorate your plated piece with a few fresh cherries on top for that pop of color and flavor. -
Pair with Coffee or Tea
Nothing complements a slice of cherry cake better than a hot cup of your favorite coffee or a nice chamomile tea.
Recipe Variations
Now that you’ve mastered the classic recipe, let’s spice things up with a few creative twists!
-
Cherry Almond Swirl
Create a marbled effect by swirling in some almond paste or by mixing a tablespoon of almond extract into half of the batter before combining! -
Chocolate Cherry Delight
Add about ½ cup of dark chocolate chips into the batter for an ooey-gooey chocolate surprise in every bite. Chocolate and cherries are a match made in heaven! -
Coconut Cherry Cake
Add shredded coconut into the batter for a tropical twist that complements those sweet cherries beautifully. -
Lemon Zest Punch
Zest a lemon into your batter for a zesty pop that adds brightness to the sweet cherries. It’s floral and fruity in the best way! -
Vegan Cherry Cake
Swap the egg for flaxseed meal mixed with water, use non-dairy yogurt, and coconut oil for a vegan-friendly version!
Chef’s Notes
Over the years, this Fresh Cherry Cake has seen many iterations in my kitchen, often inspired by the seasons. I first started making it during those sweet summer months when cherries are bursting with flavor. You know, the delicious kind that practically begs to be baked into a cake! One year, I was in a rush to celebrate a friend’s birthday and mixed up a batch in under 30 minutes. It became an instant hit, and I decided I had to share it with everyone!
And let me tell you, the joy of seeing my friends take that first bite and their expressions light up—it’s everything. Don’t be surprised if this cake becomes your go-to for gatherings and celebrations, too!
FAQs and Troubleshooting
1. My cake sank in the middle; what went wrong?
This can happen if the batter is overmixed, or there wasn’t enough leavening. Ensure to fold gently and measure your ingredients accurately!
2. Can I use frozen cherries instead of fresh ones?
Absolutely! Just make sure to thaw and drain them well before incorporating them into your batter, as excess moisture can affect the texture.
3. How can I tell when the cake is done?
A toothpick inserted into the center should come out clean or with only a few crumbs stuck to it. If it comes out sticky, it needs a bit longer in the oven.
4. The cake is too dry; how can I avoid this in the future?
Be careful not to overbake! Every oven is different, so check for doneness a few minutes before the recommended baking time.
Nutritional Info
Now that we’ve shared the love with this delicious Fresh Cherry Cake, let’s glance at the nutritional information (per serving, assuming you cut your cake into 8 slices):
- Calories: Approx. 220
- Total Fat: 10g (Saturated Fat: 4g)
- Cholesterol: 30mg
- Sodium: 135mg
- Total Carbohydrates: 30g (Dietary Fiber: 1g, Sugars: 12g)
- Protein: 4g
It’s always nice to indulge a little and enjoy the sweet things in life, isn’t it?
Final Thoughts
There you have it, friends! Your guide to creating a culinary masterpiece with Fresh Cherry Cake that’s equal parts delicious and nostalgic. This recipe is perfect for summer barbecues, birthday parties, or even quiet weekends when you want to treat yourself to something special.
Remember, the kitchen is not just a place to cook—it’s where memories are made, laughter is shared, and flavor takes the spotlight. So, gather those ingredients, roll up your sleeves, and let’s bake something truly memorable today. I can’t wait to hear how your Fresh Cherry Cake turns out and the stories you’ll share around it! Happy baking!
Print
Fresh Cherry Cake
- Total Time: 50 minutes
- Yield: 8 servings 1x
- Diet: Vegetarian
Description
A moist and fluffy cake bursting with fresh cherries, perfect for summer gatherings.
Ingredients
- 1 cup All-purpose flour
- ¼ cup Almond flour
- ½ cup Sugar
- 1 tsp Baking powder
- ¼ tsp Baking soda
- ¼ tsp Salt
- 1 Egg
- ½ cup Greek yogurt, plain
- ¼ cup Coconut oil
- 1 tsp Vanilla extract
- ½ tsp Almond extract
- 1 cup Cherries, pitted and halved
- Cherry halves and almond flakes for topping (optional)
Instructions
- Preheat your oven to 350°F (175°C).
- Grease a 9-inch round cake pan with coconut oil and sprinkle flour to coat.
- Whisk together flour, almond flour, sugar, baking powder, baking soda, and salt in a large bowl.
- Beat the egg in another bowl and mix in Greek yogurt, coconut oil, vanilla extract, and almond extract.
- Fold the wet mixture into the dry ingredients until just combined.
- Toss the halved cherries in about 2 teaspoons of flour and gently fold them into the batter.
- Pour the batter into the prepared cake pan, smoothing the top with a spatula.
- Bake for about 30-35 minutes, or until a toothpick comes out clean.
- Cool the cake in the pan for 10 minutes, then transfer to a wire rack to cool completely.
Notes
Serve with powdered sugar, whipped cream, fresh cherries, or pair with coffee or tea for the perfect accompaniment.
- Prep Time: 15 minutes
- Cook Time: 35 minutes
- Category: Dessert
- Method: Baking
- Cuisine: American
Nutrition
- Serving Size: 1 slice
- Calories: 220
- Sugar: 12g
- Sodium: 135mg
- Fat: 10g
- Saturated Fat: 4g
- Unsaturated Fat: 6g
- Trans Fat: 0g
- Carbohydrates: 30g
- Fiber: 1g
- Protein: 4g
- Cholesterol: 30mg
Keywords: cherry cake, summer dessert, baking recipes
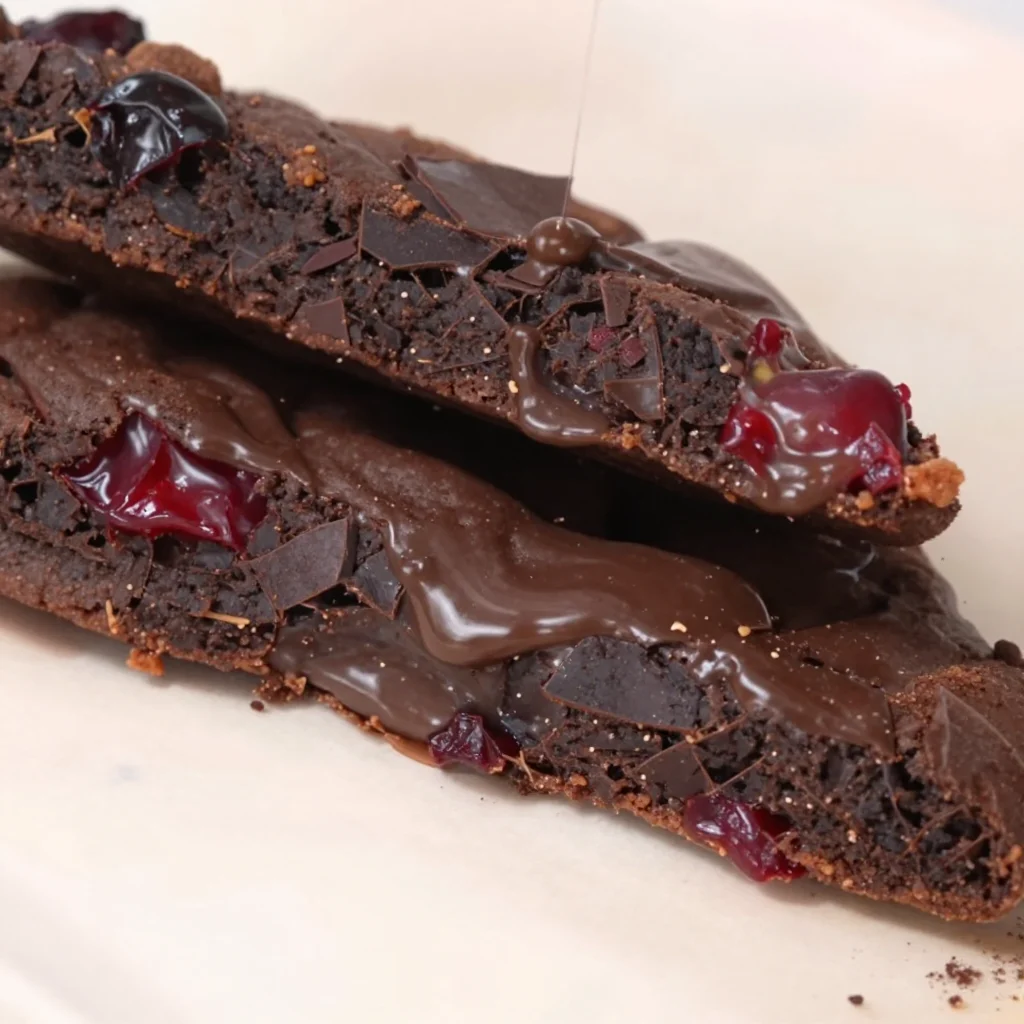
Martha Stewart–Style Chocolate Cookies with Sour Cherries
Chocolate Cookies with Sour Cherries: A Sweet Adventure in Baking
Hey there, fellow food lovers! I’m Beau Collier, and today we’re diving into a delightful world where chocolate and cherries dance together in sweet harmony. If you’re a fan of indulgent cookies that bring a little joy to your day, you’re in the right place! Picture this: a chewy chocolate cookie, rich in flavor, studded with tangy dried sour cherries that add a delightful pop of color and zing. It’s the kind of treat that makes you want to pull up a chair, sip on your favorite beverage, and just take a moment to savor.
This recipe is inspired by a classic Martha Stewart creation. Now, you might be wondering, “What’s so special about these cookies?” Well, they’re not your run-of-the-mill chocolate chip cookies. When you bite into these beauties, you’ll be greeted with that rich, dark chocolate flavor, balanced perfectly by the tartness of sour cherries. Whether you’re at a family gathering, a cozy evening in, or just treating yourself after a long day, these cookies are here to impress.
So, roll up your sleeves, preheat that oven, and let’s embark on this delicious baking adventure together! Trust me; you won’t be able to stop at just one.
A Sweet Memory
Before we get right into the ingredients and instructions, let me take you down memory lane. One of my fondest baking memories is from when I was a teenager, back in the day when I was just starting to experiment in the kitchen. I remember the first time I baked chocolate cookies for my family. I had scoured cookbooks and stumbled upon Martha Stewart’s classic recipes. Naturally, I was both excited and anxious.
Picture this: me, flour dusting my apron, chocolate melting on the stove, and those delectable dried cherries sitting on the counter, waiting to be mixed in. I remember the aroma that filled the house—rich chocolate intermingling with the fruity scent of cherries. It was magical! When those cookies finally came out of the oven, they didn’t just look beautiful; they tasted like happiness in every bite. That day, we turned a simple baking session into a family celebration, sharing stories around the kitchen table, all while devouring cookie after cookie.
So many memories are wrapped in those cookies, and I can’t wait for you to create your own cherished moments with this delightful recipe!
Ingredients
To make these incredible chocolate cookies with sour cherries, you’ll need the following ingredients:
-
1 3/4 cups all-purpose flour
This is the base of your cookies, providing stability and structure. If you want to lighten things up, you can substitute half with whole wheat flour for a nuttier flavor. -
1 1/4 cups unsweetened Dutch process cocoa powder
Richer than regular cocoa, Dutch-processed cocoa adds deep color and an intense chocolate flavor. Don’t have it? Regular cocoa will work in a pinch—just know the flavor may be a tad lighter. -
2 teaspoons baking soda
This is the leavening agent that helps your cookies rise. Make sure it’s fresh; nothing bakes worse than stale baking soda! -
1/4 teaspoon salt
A little salt enhances all the sweet flavors, making them pop! Don’t skip it; your taste buds will thank you. -
1 1/4 cups unsalted butter, softened
Butter adds moisture and flavor. Make sure it’s at room temperature for easy creaming, or you can microwave it for a few seconds if you’re in a hurry (just watch it doesn’t melt). -
1 1/4 cups granulated sugar
For that signature sweetness! You can substitute this with coconut sugar if you’re looking for a less refined option. -
3/4 cup packed brown sugar
Brown sugar adds moisture and a touch of caramel flavor. You can use light or dark brown sugar—dark will give you a more robust flavor! -
2 large eggs
Eggs help bind everything together, giving your cookies their texture. Ensure they’re at room temperature for best results. -
1/4 teaspoon vanilla extract
Vanilla is the magic ingredient that rounds out the flavors. You can try almond extract if you’re feeling adventurous! -
12 ounces bittersweet chocolate, chopped
A must for that decadent chocolate experience! If bittersweet isn’t your jam, semisweet works too. Just keep in mind the sweetness level might change slightly. -
1 1/2 cups dried sour cherries
They add a sweet-tart flavor explosion! If you can’t find dried sour cherries, dried cranberries or blueberries work as tasty substitutes.
Step-by-Step Instructions
Let’s get your baking underway! Follow these steps for cookie perfection:
-
Preheat the Oven:
Start by preheating your oven to 350°F (175°C). This step is crucial as it ensures your cookies bake evenly. -
Prepare Your Baking Sheets:
While the oven preheats, line two baking sheets with parchment paper. This helps prevent sticking and makes for easy cleanup. -
Mix the Dry Ingredients:
In a medium bowl, whisk together your flour, cocoa powder, baking soda, and salt. This ensures that the cocoa powder and baking soda are evenly distributed, leading to consistently baked cookies. -
Cream the Butter and Sugars:
In a large mixing bowl, add your softened butter, granulated sugar, and brown sugar. Using an electric mixer (or a whisk if you’re feeling old school), beat on medium speed until the mixture is light and fluffy, about 2-3 minutes. This step introduces air into the batter, ensuring your cookies are light and tender. -
Add in the Eggs and Vanilla:
Beat in the eggs one at a time, ensuring each is fully incorporated before adding the next. Then mix in the vanilla extract. Give your mixture a little taste—a culinary delight awaits! -
Combine Dry and Wet Ingredients:
Gradually add the dry mixture to the wet ingredients, mixing until just combined. Be careful not to overmix; you want to keep that lovely texture! -
Fold in Chocolate and Cherries:
Gently fold in the chopped bittersweet chocolate and sour cherries. This is where the magic happens—watch how the chocolate and cherries create a beautiful swirl in the dough. -
Scoop the Dough:
Using a cookie scoop or tablespoon, drop rounded scoops of dough onto the prepared baking sheets, spacing them about 2 inches apart. This allows room for the cookies to spread. -
Bake:
Bake in the preheated oven for 10-12 minutes, or until the edges are set and the centers look slightly underbaked. They’ll firm up as they cool, so don’t overbake! -
Cool Down:
Once out of the oven, let the cookies cool on the baking sheets for about 5 minutes before transferring them to wire racks. This step is crucial; it permits them to develop the perfect chewy texture.
Serving Suggestions
When it comes to serving these delectable cookies, presentation matters! Here are a couple of suggestions:
-
Platter Style: Arrange the cookies on a beautiful serving platter with a sprinkle of powdered sugar on top for a picturesque effect. Maybe even pair them with fresh cherries for a pop of color!
-
Cookie Sandwich: Feeling adventurous? Take two cookies, spread a dollop of whipped cream or ice cream in between, and make your very own cookie sandwich. Perfect for those hot summer days!
-
Coffee Pairing: Serve them alongside a mug of hot coffee or a glass of cold milk. The pairing of chocolate and coffee is a match made in heaven!
Recipe Variations
Now, just because this recipe is scrumptiously perfect as it is doesn’t mean we can’t experiment a little! Here are some creative twists you might enjoy:
-
Nutty Delight: Add ½ cup of chopped walnuts or pecans for an extra crunchy texture. The nuttiness beautifully complements the chocolate and cherries.
-
Minty Fresh: Mix in a teaspoon of peppermint extract for a festive twist! Think chocolate-mint girl scout cookies with a sour cherry added zing.
-
Spicy Chocolate: Feeling a little fiery? Add a pinch of cayenne pepper or cinnamon to the batter. You’ll be amazed at how these spices enhance the chocolate flavor!
-
Orange Zest: For a refreshing twist, incorporate the zest of an orange into the cookie dough. The citrus will brighten up the flavors and complement the chocolate and cherries wonderfully.
-
Gluten-Free Version: Swap out the all-purpose flour for a gluten-free flour blend, and make sure your cocoa powder and other ingredients are also gluten-free!
Chef’s Notes
These cookies have a special place in my heart. Over the years, I’ve experimented with countless recipes, but this one has remained a steadfast favorite. I’ve swapped in different additions, tried various chocolate types, and even played around with the dough—every time I make them, they bring back that warm memory of baking with family.
Oh, and here’s a fun story: the very first time I made these cookies for a big gathering, I was so excited that I accidentally mixed up the baking soda and baking powder! Let me tell you, the cookies were more like chocolate frisbees! I rolled with it, though, and we laughed it off. Now, every time I bake these beauties, I can’t help but chuckle at my baking blunder!
FAQs and Troubleshooting
-
Why are my cookies flat?
If your cookies spread too much and end up flat, it could be due to the butter being too warm or melted. Make sure to creak the butter until it’s just softened, not melted. -
Can I use fresh cherries instead of dried?
Yes! However, if you do, make sure to pit and chop them into smaller pieces, and consider reducing the amount of additional liquid in the recipe. -
How do I store leftover cookies?
Keep them in an airtight container at room temperature for up to a week. You can also freeze them! Just make sure they’re fully cooled before freezing, and layer them with parchment to prevent sticking. -
What if I don’t have bittersweet chocolate?
Semisweet chocolate works well as a substitute, just keep in mind it may make your cookies a tad sweeter. Dark chocolate is also an excellent alternative!
Nutritional Info
While we all love to indulge every now and then, here’s a quick breakdown of the nutritional info for one cookie (based on about 24 cookies):
- Calories: 180
- Protein: 2g
- Carbohydrates: 25g
- Fat: 8g
- Saturated Fat: 5g
- Sugar: 10g
- Fiber: 1g
These cookies are best enjoyed in moderation, but hey, who’s counting when you have a treat that brings joy to your day?
Final Thoughts
And there you have it—my beloved recipe for chocolate cookies with sour cherries! Baking these delightful treats isn’t just about feeding your belly; it’s about creating memories, sharing laughter, and indulging in the joy that food brings into our lives. I hope you have as much fun baking them as I do, and I can’t wait to hear about your adventures in the kitchen.
So, grab your ingredients, rally your friends or family, and let’s get baking! Remember, the best part of food is sharing it, so once you whip up a batch (or a double batch, I won’t judge!), share them with someone special or keep them all to yourself. Either way, you’re in for a treat that’s sure to warm your heart with every scrumptious bite.
Happy baking, friends! Let’s keep the love of food alive—one cookie at a time!
Print
Chocolate Cookies with Sour Cherries
- Total Time: 27 minutes
- Yield: 24 cookies 1x
- Diet: Vegetarian
Description
Indulgent chocolate cookies studded with tangy dried sour cherries for a delightful treat.
Ingredients
- 1 3/4 cups all-purpose flour
- 1 1/4 cups unsweetened Dutch process cocoa powder
- 2 teaspoons baking soda
- 1/4 teaspoon salt
- 1 1/4 cups unsalted butter, softened
- 1 1/4 cups granulated sugar
- 3/4 cup packed brown sugar
- 2 large eggs
- 1/4 teaspoon vanilla extract
- 12 ounces bittersweet chocolate, chopped
- 1 1/2 cups dried sour cherries
Instructions
- Preheat the oven to 350°F (175°C).
- Prepare two baking sheets with parchment paper.
- Mix the flour, cocoa powder, baking soda, and salt in a medium bowl.
- Cream together the butter, granulated sugar, and brown sugar until light and fluffy.
- Add the eggs one at a time, then mix in the vanilla extract.
- Combine the dry ingredients with the wet ingredients until just mixed.
- Fold in the chopped chocolate and sour cherries.
- Scoop dough onto the prepared sheets, spacing 2 inches apart.
- Bake for 10-12 minutes until the edges are set.
- Cool on the baking sheets for 5 minutes before transferring to wire racks.
Notes
For variation, consider adding nuts, mint, or spices for a unique flavor.
- Prep Time: 15 minutes
- Cook Time: 12 minutes
- Category: Dessert
- Method: Baking
- Cuisine: American
Nutrition
- Serving Size: 1 cookie
- Calories: 180
- Sugar: 10g
- Sodium: 50mg
- Fat: 8g
- Saturated Fat: 5g
- Unsaturated Fat: 3g
- Trans Fat: 0g
- Carbohydrates: 25g
- Fiber: 1g
- Protein: 2g
- Cholesterol: 30mg
Keywords: chocolate cookies, sour cherries, baking, dessert, treats
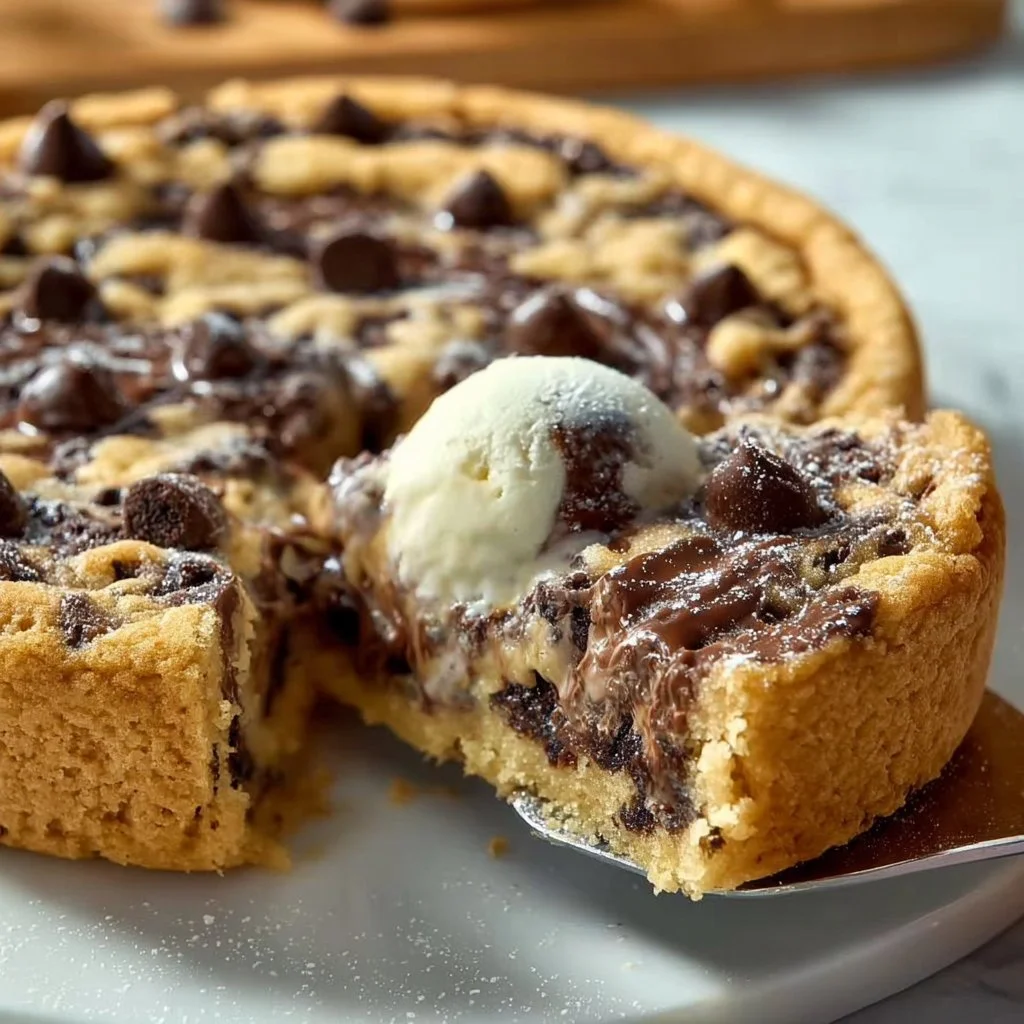
Deep dish Nutella Cookie Pie
Deep Dish Nutella Cookie Pie: A Sweet Slice of Nostalgia
Introduction
Hey there, fellow food lovers! I’m Beau Collier, and today we’re diving into a dessert that’s not just delicious but downright dreamy—the Deep Dish Nutella Cookie Pie! Now, I don’t want to brag, but this dessert has been known to cause spontaneous happy dances in the kitchen. You know what I’m talking about. When that oven timer dings, and you get a whiff of that sweet, gooey goodness—it’s hard not to bust a move!
Picture this: a thick, chewy cookie base that cradles a rich, molten center of Nutella, topped off with a sprinkle of chocolate chips. I mean, can it get any better? This dessert is like a warm hug from your favorite person, and it’s super simple to whip up, making it the perfect treat for any occasion.
Whether you’re gearing up for a fun family gathering, a cozy movie night, or simply need to impress that special someone, this Deep Dish Nutella Cookie Pie is your go-to! Baking it is a straightforward, joyous experience full of the kind of nostalgic warmth that only comes from a kitchen filled with sweet aromas and laughter. So, let’s dust off those mixing bowls and get cracking!
Personal Story
Ah, Nutella! Just saying the word brings back a flood of memories. I remember the first time I tasted Nutella—it was a pivotal moment in my young, curious foodie life. My mom would make these deliciously indulgent snacks after school, and there was always a jar of Nutella on the counter. We would take toasted slices of bread and slather them with the rich hazelnut spread, and while I stuffed my face, I would listen to her stories about how food can create lasting connections.
One rainy afternoon, we decided to switch things up. We mixed Nutella with a basic cookie recipe, and what emerged from our oven was a beautiful, gooey disaster. We didn’t quite follow the measurements (oops!), but we didn’t care; it was glorious! That first bite was a revelation. We had made magic—pure, delicious, chocolaty magic. Fast forward to today, and that spirit of adventure in the kitchen lives on with this Deep Dish Nutella Cookie Pie—each slice brimming with sweet memories and a whole lot of love.
Ingredients
Here’s what you will need to make your very own Deep Dish Nutella Cookie Pie:
-
1 cup all-purpose flour
This is the backbone of your cookie pie. For a gluten-free option, try almond flour or a gluten-free blend. -
1/2 teaspoon baking soda
This little powerhouse helps your cookie rise to perfection. You can substitute it with baking powder if that’s what you have on hand. -
1/4 teaspoon salt
A pinch of salt enhances the sweetness and balances the flavors beautifully. -
1/2 cup unsalted butter, softened
Butter adds richness and flavor. If you prefer a dairy-free option, feel free to use coconut oil or a vegan butter substitute. -
1/2 cup brown sugar
Brown sugar gives your cookie pie that wonderful chewiness and deep, caramel flavor. You can use white sugar if you’re in a pinch, but the flavor will be missing! -
1/4 cup granulated sugar
This helps to sweeten the pie further. You can swap it out with coconut sugar for a healthier alternative. -
1 large egg
This binds all the ingredients together. For a vegan option, try a flax egg (1 tablespoon of ground flaxseed + 2.5 tablespoons of water, mixed and allowed to sit for a few minutes). -
1 teaspoon vanilla extract
Vanilla is the secret sauce that ties everything together, adding warmth and depth of flavor. -
1/2 cup Nutella
The star of the show! If you’re feeling adventurous, try using another spread like cookie butter or peanut butter. -
1/2 cup chocolate chips
Because who doesn’t love more chocolate? You can use dark, milk, or even white chocolate chips depending on your preference.
Step-by-Step Instructions
Let’s get down to business! Here’s how to make your Deep Dish Nutella Cookie Pie—trust me, it’s simpler than it sounds!
-
Preheat your oven
Preheat your oven to 350°F (175°C). This is a crucial step that ensures an even bake from the get-go! -
Mix dry ingredients
In a bowl, whisk together the all-purpose flour, baking soda, and salt. This helps to evenly distribute the baking soda and salt throughout the flour. -
Cream the butter and sugars
In a separate bowl, cream together the softened butter, brown sugar, and granulated sugar using an electric mixer or a sturdy whisk until it’s smooth and fluffy—about 2-3 minutes. This process is vital because it incorporates air into the mixture, giving your cookie pie a light texture. -
Add the egg and vanilla
Beat the egg and vanilla extract into the butter-sugar mixture. Make sure everything is well combined; you want that delicious flavor to infiltrate every bite! -
Combine wet and dry ingredients
Gradually mix the dry ingredients into the wet ingredients—do this slowly to avoid flour clouds! Mix until just combined; be careful not to overmix, or you’ll end up with a tougher cookie. -
Fold in Nutella and chocolate chips
Now comes the fun part! Gently fold in the Nutella—you don’t want to fully mix it in; you’re looking for those delicious swirls of Nutella throughout the batter. Add the chocolate chips, folding them evenly through the mixture. -
Prepare your baking dish
Grease a deep dish pie pan with some butter or cooking spray. You really want to ensure it won’t stick, which makes serving so much easier! -
Scoop and spread
Pour the batter into the pan, and using a spatula, spread it evenly. You want it to look all nice and neat before it hits the oven. There’s something satisfying about that! -
Bake
Slide that beauty into the preheated oven and bake for about 25–30 minutes. The edges will turn golden brown, and the top will look set but still a little gooey in the center. That’s the magic you’re aiming for! -
Cool and serve
Let it cool for at least 10 minutes before slicing into it. This gives the inner Nutella time to thicken up slightly, making for perfect slices. Top with a scoop of vanilla ice cream or whipped cream for an added indulgence!
Serving Suggestions
There are so many fun ways to plate your Deep Dish Nutella Cookie Pie!
-
Classic Style: Simply cut a generous wedge and plate it next to a scoop of vanilla ice cream—what a classic combo!
-
Decadent Drizzle: Consider drizzling some extra melted Nutella over the top and sprinkling with crushed hazelnuts. This not only adds flavor but also a nice crunch!
-
Berry Burst: Serve it alongside fresh berries—strawberries, raspberries, or even a berry coulis—this adds a pop of color and a bit of acidity that complements the rich pie beautifully.
-
Cookie Crumbles: Sprinkle a handful of cookie crumbles atop the pie for added texture and presentation—who doesn’t love a good cookie on a cookie pie?
Recipe Variations
At Feastical, we believe in making recipes your own. Here are a few creative twists on your Deep Dish Nutella Cookie Pie:
-
Nutty Twist: Add 1/2 cup of chopped hazelnuts into the batter for an extra crunch!
-
Peanut Butter Perfection: Substitute half the Nutella with creamy peanut butter, creating a rich, nutty pie with a delightful flavor contrast.
-
Cocoa Lovers Unite: Add 1/4 cup of unsweetened cocoa powder to the dry ingredients for a brownie-like cookie texture and flavor.
-
S’mores Style: Fold in mini marshmallows and crumbled graham crackers for a nostalgic twist reminiscent of campfire s’mores.
-
Salted Caramel Delight: Drizzle some salted caramel over the top before serving for an indulgent finishing touch!
Chef’s Notes
You know, this recipe really evolved over time. The first few times I made it, I tried to make it more complicated, thinking more steps meant more flavor—but honestly, the magic is in its simplicity.
I’ll never forget the time I invited friends over for dinner. I planned an elaborate main course but ended up spending all my time refining this dessert instead. When it was time for dessert, I couldn’t even wait for it to cool before diving in, and the smiles around the table said it all. Food has that remarkable ability to create unforgettable moments, right?
One thing I’ve learned is that confidence is key in the kitchen. If you make a little mistake, own it, laugh, and carry on! That’s what cooking is all about—having fun and making sweet memories!
FAQs and Troubleshooting
1. Why is my cookie pie not rising?
If your cookie pie isn’t rising, it’s possible your baking soda is old and lost its power. Always check the expiry on your leavening agents, and store them properly!
2. Can I use a different spread instead of Nutella?
Absolutely! Feel free to use any chocolate spread, or even almond or cashew butter for a different flavor profile.
3. How do I store leftovers?
Store any leftover pie in an airtight container. It’ll stay fresh for about 3-4 days at room temperature, but I personally love it warm, so try popping it back in the microwave for a few seconds before enjoying!
4. My chocolate chips sank to the bottom! What happened?
This can happen if your batter is too thin. Make sure to not overmix the batter and to fold gently so the chocolate chips remain suspended in the mixture.
Nutritional Info
While I like to keep dessert indulgent and fun, it’s good to have an idea of what you’re munching on! Here’s a rough estimate for a single slice of Deep Dish Nutella Cookie Pie (based on 8 servings):
- Calories: 350
- Total Fat: 20g
- Saturated Fat: 10g
- Carbohydrates: 38g
- Sugars: 20g
- Protein: 4g
Keep in mind that nutritional values can vary based on specific brands and any alterations you make. Enjoy it in moderation—life is all about balance!
Final Thoughts
And there you have it—your guide to creating a delightful Deep Dish Nutella Cookie Pie that’s sure to put a smile on your face and warmth in your heart. Remember, the best recipes come from a place of love and joy not just in the ingredients to assemble but in the stories and people they are shared with.
So, grab your loved ones, roll up your sleeves, and make some magic happen in your kitchen. Whether it’s for a special occasion or just because you’ve had a long week, this deep dish cookie pie is always a winner.
Happy baking, and until next time, keep your spatulas ready and your bellies hungry! 🍽️
Print
Deep Dish Nutella Cookie Pie
- Total Time: 40 minutes
- Yield: 8 servings 1x
- Diet: Vegetarian
Description
A thick, chewy cookie pie filled with rich Nutella and topped with chocolate chips. Perfect for any occasion.
Ingredients
- 1 cup all-purpose flour
- 1/2 teaspoon baking soda
- 1/4 teaspoon salt
- 1/2 cup unsalted butter, softened
- 1/2 cup brown sugar
- 1/4 cup granulated sugar
- 1 large egg
- 1 teaspoon vanilla extract
- 1/2 cup Nutella
- 1/2 cup chocolate chips
Instructions
- Preheat your oven to 350°F (175°C).
- Mix dry ingredients in a bowl: whisk together flour, baking soda, and salt.
- Cream the softened butter, brown sugar, and granulated sugar until smooth and fluffy.
- Add the egg and vanilla extract to the butter-sugar mixture and beat until combined.
- Combine the dry ingredients with the wet ingredients, mixing gradually.
- Fold in the Nutella and chocolate chips gently to maintain swirls.
- Prepare a deep dish pie pan by greasing it.
- Scoop the batter into the pan and spread it evenly.
- Bake for about 25-30 minutes until golden brown.
- Cool for 10 minutes before slicing and serving.
Notes
Top with ice cream, drizzled Nutella, or fresh berries for added indulgence.
- Prep Time: 10 minutes
- Cook Time: 30 minutes
- Category: Dessert
- Method: Baking
- Cuisine: American
Nutrition
- Serving Size: 1 slice
- Calories: 350
- Sugar: 20g
- Sodium: 150mg
- Fat: 20g
- Saturated Fat: 10g
- Unsaturated Fat: 5g
- Trans Fat: 0g
- Carbohydrates: 38g
- Fiber: 1g
- Protein: 4g
- Cholesterol: 30mg
Keywords: Nutella cookie pie, dessert, baking, chocolate
Chocolate Chip Banana Bread
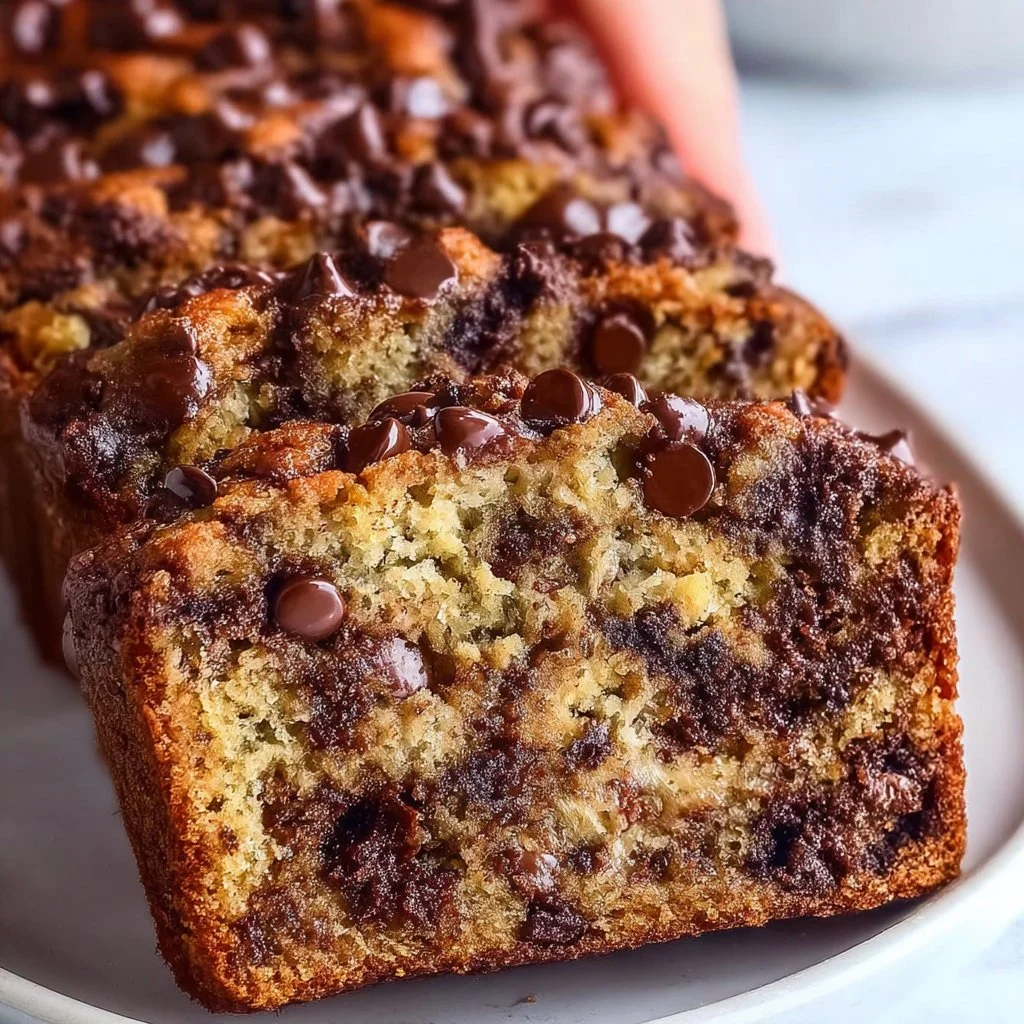
The Ultimate Chocolate Chip Banana Bread: A Feel-Good Recipe
Hey there, food lovers! It’s Beau Collier here, and I’m absolutely thrilled to share one of my all-time favorite recipes with you today: Chocolate Chip Banana Bread! Whether you have a bunch of overripe bananas sitting on your counter, or you simply want to whip up something that smells like heaven and tastes even better, this recipe is your ticket to pure bliss. Seriously, nothing warms the soul quite like a fresh loaf of banana bread.
Banana bread might trigger nostalgic memories for many of you. Perhaps you remember the sweet aroma wafting through your home as a kid, or maybe you have that one friend who makes the best banana bread and has everyone begging for more. This is a dish that brings people together, one delightful slice at a time. Here at Feastical, we believe that food should not only nourish but also create moments and memories. So grab those bananas, crank up your oven, and let’s dive into this indulgent yet simple recipe.
This isn’t just regular banana bread, folks. No! We’re elevating it with rich, melty chocolate chips that will have your taste buds dancing from the first bite. Also, this banana bread is wonderfully versatile, making it perfect for breakfast, an afternoon snack, or even a decadent dessert. Trust me; you’ll be making this over and over!
So, let’s get started on this sweet adventure of baking together. Don’t worry, I’ll guide you every step of the way, and you’ll feel like a pro before you know it. Grab your apron, and let’s embark on this delicious journey!
Personal Story
I remember the first time I made a banana bread that truly blew my mind. I was a young chef in training, excited about the prospect of whipping up something comforting for my family. Our kitchen filled with the fragrant scent of baking bananas and chocolate, and everyone—yes, even my picky little brother—couldn’t resist wandering in for a taste. As the loaf cooled, I could hardly believe my eyes when, just minutes later, half of it disappeared.
It wasn’t just the deliciousness that made that day special; it was witnessing the joy on my family’s faces as they savored each bite. That experience stuck with me, leading me to experiment even more with banana bread recipes over the years. Every time I make it, I feel that same warmth spreading through my home and my heart. You’re not just creating a dish; you’re crafting a sweet moment in time.
Ingredients
Let’s break down the ingredients for this delightful Chocolate Chip Banana Bread. You’ll find that they’re simple, but each one adds a special touch to this masterpiece!
-
4 ripe bananas: The star ingredient! The riper the bananas, the sweeter and more flavorful your bread will be. If you only have green bananas, no worries—just let them ripen a few days, or you can speed up the process by placing them in a brown paper bag.
-
1/2 cup oil: This adds moisture to your banana bread. I like using vegetable or canola oil, but if you want a healthier option, feel free to swap in unsweetened applesauce or melted coconut oil!
-
1 cup sugar: The sugar sweetens the bread, and you can adjust this amount to your liking. Substitute half of it with brown sugar for a deeper flavor or use coconut sugar for a healthier option.
-
2 eggs: They help bind everything together and add richness. You can replace them with a flax egg (1 tablespoon of ground flaxseed mixed with 2.5 tablespoons water) for a vegan option.
-
1 teaspoon vanilla extract: This adds a warm, inviting essence to the bread that pairs beautifully with bananas and chocolate. Feel free to use almond extract if you want a different flair!
-
1 teaspoon baking soda: This is your leavening agent, helping the bread rise and achieve that soft, fluffy texture. Make sure it’s fresh for the best results!
-
1/2 teaspoon salt: A pinch of salt enhances the flavors and balances the sweetness. Don’t skip it!
-
1 1/2 cups all-purpose flour: The base of your bread. If you want, you can swap in whole wheat flour for a heartier bread or gluten-free flour to cater to dietary preferences.
-
1 cup chocolate chips: The cherry on top of this delightful muffin! Dark chocolate chips add a rich flavor, but you can also use milk chocolate for a sweeter bite or even white chocolate chips for something unique.
Step-by-Step Instructions
Now, let’s get down to the nitty-gritty of actually making this incredible Chocolate Chip Banana Bread. Follow these steps, and you’ll have a gorgeous loaf ready to devour!
-
Preheat your oven:
Preheat your oven to 350°F (175°C). This ensures an even bake, so don’t skip this part! It’s always good to start with a warm oven. -
Prepare your baking pan:
Grease a 9×5-inch loaf pan with cooking spray or butter, or line it with parchment paper for easy removal. Trust me, you don’t want your beautiful bread to stick! -
Mash those bananas:
In a large mixing bowl, mash your ripe bananas with a fork or potato masher. Aim for a smooth consistency—some small lumps are okay! This is where the sweetness and flavor will come from, so make it count! -
Mix wet ingredients:
Add in the oil, sugar, eggs, and vanilla extract to the bananas. Mix well until everything is combined and smooth. You want to ensure that the sugar is well incorporated into the banana mixture. -
Combine dry ingredients:
In a separate bowl, whisk together the flour, baking soda, and salt. Mixing the dry ingredients ahead of time will help ensure an even distribution of the leavening agent. -
Combine wet and dry mixtures:
Gradually add the dry ingredients to the wet mixture, stirring until just combined. Be careful not to over-mix—this helps keep your bread tender and soft. You want a few streaks of flour to remain! -
Fold in the chocolate chips:
Gently fold in the chocolate chips with a spatula. Feel free to add a few more on top for that gorgeous presentation! -
Pour the batter into the prepared pan:
Scrape your batter into the prepared loaf pan and smooth out the top with a spatula. -
Bake:
Place it in the preheated oven and bake for 55-65 minutes, or until a toothpick inserted in the center comes out clean. You might want to start checking around the 50-minute mark, just to be sure! -
Cool:
Once baked, remove your banana bread from the oven, and let it cool in the pan for about 10 minutes. Then, carefully transfer it to a wire rack to cool completely. No one likes soggy bread, and cooling helps develop that perfect texture!
Serving Suggestions
Once your masterpiece is cooled, it’s time to serve it up! Slice it into generous pieces, and you can enjoy it warm with a pat of butter for that extra cozy feeling. Want to take it to the next level? Serve it with a dollop of whipped cream or a scoop of ice cream on the side for an indulgent dessert!
Pair it with your favorite hot beverage—think a steaming cup of coffee or a comforting cup of tea. You might even want to drizzle a little melted chocolate on top or sprinkle some chopped nuts for an added texture and flavor boost. The possibilities are endless!
Recipe Variations
Why not mix it up a bit? Here are some fun variations to try with your Chocolate Chip Banana Bread:
-
Nutty Banana Bread: Add a cup of chopped walnuts or pecans for an extra crunch and flavor boost.
-
PB&J Twist: Swirl in a few tablespoons of peanut butter or your favorite jam before baking for a delightful surprise.
-
Cocoa Banana Bread: Mix in 1/4 cup of cocoa powder to turn your banana bread into a chocolate lover’s dream!
-
Dried Fruit Delight: Add a cup of dried cranberries or cherries for a burst of tartness that complements the sweetness of the bananas beautifully.
-
Spiced Banana Bread: Add a teaspoon of cinnamon or pumpkin spice for that warm, inviting aroma and flavor.
Chef’s Notes
This recipe has been a cherished staple in my kitchen for years and has been passed down through various iterations. A few years back, I decided to play around with the base recipe, and voilà! The Chocolate Chip Banana Bread was born, capturing all the joys of nostalgia while adding my personal touch. I love it more with each batch!
Remember, the best part about this recipe is that it can be adjusted to fit your preferences—don’t be afraid to experiment! I’ve had some mishaps in the kitchen along the way—like the time I accidentally swapped salt for sugar—but every mishap led to a masterpiece, and it can for you too!
FAQs and Troubleshooting
1. Why is my banana bread flat?
If your banana bread is flat, it could be due to expired baking soda or overmixing the batter. Ensure your leavening agent is fresh, and mix gently to keep the texture light and fluffy.
2. Can I freeze banana bread?
Absolutely! Wrap it tightly in plastic wrap and aluminum foil before freezing to maintain freshness. It’ll keep for up to three months—perfect for quick snacking!
3. How do I know when my banana bread is done?
Insert a toothpick in the center; if it comes out clean or with a few crumbs, it’s ready! If there’s wet batter, give it a few more minutes in the oven.
4. Can I use frozen bananas?
Definitely! Just ensure they’re thawed and well-drained before mashing them into your batter. This can work wonders in keeping your banana bread moist and flavorful!
Nutritional Information
Here’s a rough nutritional breakdown per slice (based on 12 slices per loaf):
- Calories: 200
- Protein: 2g
- Carbohydrates: 30g
- Fat: 9g
- Sugar: 10g
- Fiber: 1g
Keep in mind, nutritional values may vary based on your exact ingredients and portion sizes. Don’t let those numbers fool you—this is a recipe for the soul, and your happiness is invaluable!
Final Thoughts
And there you have it—a delightful journey through the making of the most scrumptious Chocolate Chip Banana Bread! I hope you’re feeling inspired and ready to create something magical in your kitchen. First and foremost, embrace the process and don’t shy away from adding your unique spin.
Food is meant for sharing, so once you’ve made this banana bread, slice it up, and share it with your loved ones—or keep it all to yourself if you wish (no judgment here!). Just make sure to savor every last bite, and most importantly, enjoy the moments that come with it.
Happy baking, friends! Until next time, keep the kitchen spirit alive and keep spreading the love one delicious dish at a time. Cheers! 🍌🍫
Print
The Ultimate Chocolate Chip Banana Bread
- Total Time: 80 minutes
- Yield: 12 slices 1x
- Diet: Vegetarian
Description
A heartwarming and indulgent recipe for chocolate chip banana bread, perfect for breakfast, snacks, or dessert.
Ingredients
- 4 ripe bananas
- 1/2 cup oil (vegetable or canola, or unsweetened applesauce for a healthier option)
- 1 cup sugar
- 2 eggs (or flax egg for a vegan option)
- 1 teaspoon vanilla extract
- 1 teaspoon baking soda
- 1/2 teaspoon salt
- 1 1/2 cups all-purpose flour (or whole wheat/gluten-free flour)
- 1 cup chocolate chips (dark, milk, or white)
Instructions
- Preheat your oven to 350°F (175°C).
- Prepare a 9 x 5-inch loaf pan with grease or parchment paper.
- Mash the ripe bananas in a large mixing bowl until smooth.
- Add the oil, sugar, eggs, and vanilla extract to the bananas, mixing until combined.
- Whisk together the flour, baking soda, and salt in a separate bowl.
- Combine the dry ingredients with the wet mixture, stirring gently until just combined.
- Fold in the chocolate chips.
- Pour the batter into the prepared loaf pan, smoothing the top.
- Bake for 55-65 minutes, or until a toothpick comes out clean.
- Cool in the pan for 10 minutes, then transfer to a wire rack.
Notes
You can customize the recipe by adding nuts, peanut butter, or cocoa powder for different flavor variations.
- Prep Time: 15 minutes
- Cook Time: 65 minutes
- Category: Dessert
- Method: Baking
- Cuisine: American
Nutrition
- Serving Size: 1 slice
- Calories: 200
- Sugar: 10g
- Sodium: 200mg
- Fat: 9g
- Saturated Fat: 1g
- Unsaturated Fat: 8g
- Trans Fat: 0g
- Carbohydrates: 30g
- Fiber: 1g
- Protein: 2g
- Cholesterol: 30mg
Keywords: banana bread, chocolate chip bread, comfort food

Yogurt Cake
A Delightful Journey into Yogurt Cake: Your New Favorite Dessert
Hey friends! Beau here, and today we’re diving into something incredibly special—Yogurt Cake. If you’re searching for a dessert that’s not just sweet, but also a little tangy, super moist, and quite forgiving for us home cooks, you’ve stumbled into the right recipe! This cake isn’t just another dessert; it’s a nostalgic treasure that carries the essence of laid-back afternoons, laughter, and the warmth of home.
You might be wondering, why yogurt? Well, let me tell you: yogurt is a magical ingredient. Its natural moisture adds a luxurious softness to cakes, while that slight tanginess balances the sweetness perfectly. Plus, it brings a wealth of health benefits to our humble dessert, making it feel like a win-win in the kitchen.
Picture this: a thick slice of golden Yogurt Cake resting on your favorite plate, the fork gently sinking in, revealing a fluffy crumb that’s just begging for a cup of tea or coffee on the side. Trust me; this cake is more than just a snack; it’s a hug on a plate! So, tie on that apron, and let’s embark on this delicious adventure together.
Why is Yogurt Cake becoming a go-to for so many home chefs like us? It’s versatile, easy to customize, and doesn’t demand a lot of special equipment or time. Plus, it’s the perfect canvas for seasonal fruits, spices, or a drizzle of icing. So let’s roll up our sleeves and create something wonderful that’s going to impress not just your taste buds but also anyone you’ll share it with!
Personal Story
Ah, the memories tied to Yogurt Cake are some of my favorites. I remember standing on a stool in my grandmother’s kitchen, eyes wide with excitement, while she measured ingredients for her famous cake. The air was filled with the comforting aroma of vanilla and citrus zest. Every Sunday, like clockwork, we’d whip up a batch together, and I’d sneak spoonfuls of the yogurt mixture when she wasn’t looking (sorry, Grandma!).
One rainy afternoon stands out particularly in my mind. After a long day of exploring the neighborhood puddles, I came home soaked but bursting with energy. My grandmother greeted me with a warm slice of Yogurt Cake and a tall glass of milk. That moment felt like pure magic; with every bite, I felt comforted and content as we chatted about everything and nothing over the soft, fluffy cake.
As I grew up, I began to make this cake for friends and family alike, adding my twist while keeping my grandmother’s fundamental lessons alive. It’s funny how a dish can carry so much love and nostalgia, uniting us across generations. So let’s share that joy! If I can bring a bit of that warmth into your kitchen, my job here is done. Now, let’s get those ingredients ready!
Ingredients
Before we jump into the magical world of mixing and baking, let’s gather our ingredients. Here’s what we’ll need for our Yogurt Cake:
-
1 cup plain yogurt
Yogurt is the star of our show! A thicker yogurt (like Greek) will yield a denser cake, while regular will keep it lighter. If you’re looking for dairy-free options, try using coconut yogurt! -
3 large eggs
Eggs give the cake structure and moisture. For a vegan substitute, you can use flax eggs (1 tablespoon of ground flaxseed + 2.5 tablespoons of water, set aside for 5 minutes). -
1 cup granulated sugar
This sweetens our cake and helps create that beautiful crust as it bakes. If you prefer, you can replace white sugar with coconut sugar for a hint of caramel flavor. -
1/2 cup vegetable oil (or melted butter)
This fat keeps our cake moist. You can substitute with melted coconut oil for a delicious twist or use applesauce for a healthier option. -
1 teaspoon vanilla extract
A splash of vanilla enhances the flavor, but feel free to get creative with almond extract or citrus zest for a unique spin. -
2 cups all-purpose flour
The base of our cake, providing structure. If you want a gluten-free version, try a gluten-free flour blend. -
2 teaspoons baking powder
This is our rising agent, creating those fluffy textures. Always double-check your baking powder for freshness! -
1/2 teaspoon salt
A little salt balances the sweetness and enhances flavors across the board.
Using these ingredients, let’s create something truly comforting and delightful.
Step-by-Step Instructions
Now that we’ve got all of our ingredients ready, let’s get our hands dirty! Here’s how to make the perfect Yogurt Cake.
Step 1: Preheat and Prep
Start by preheating your oven to 350°F (175°C). While that’s warming up, grease a 9-inch round cake pan (or line it with parchment paper) to prevent any sticky situations later.
Chef Tip: I love using cooking spray for the corners of my cake pans—those pesky edges can be tricky!
Step 2: Mix Your Wet Ingredients
In a large bowl, whisk together your yogurt, eggs, sugar, and oil until smooth and creamy. This is the stage to really get that good arm workout in!
Chefs Insight: Whisking not only mixes but also incorporates air, helping our cake rise beautifully.
Step 3: Combine Dry Ingredients
In another bowl, sift together the flour, baking powder, and salt. Sifting helps eliminate lumps and creates a lighter texture.
Chefs Tip: You can whisk the dry ingredients to combine them well; no need for extra bowls if you’re like me and hate the dishes!
Step 4: Bring It Together
Now, gently fold your dry mixture into your wet mixture using a rubber spatula. Be careful not to overmix—this can lead to a dense cake. We want light and fluffy!
Chef Hack: If you see a few flour streaks, that’s okay! They will sort themselves out as you mix.
Step 5: Pour and Bake!
Pour the batter into your prepared cake pan, ensuring it’s evenly distributed. Pop it into that preheated oven and bake for about 30–35 minutes, or until a toothpick inserted in the center comes out clean.
Tip for Success: It’s always a good idea to start checking around the 25-minute mark if your oven runs hot!
Step 6: Cool Down
Once baked, remove the cake from the oven and let it cool in the pan for 10 minutes. Then, transfer it to a wire rack to cool completely.
Chef’s Note: This is the perfect moment to whip up some tea or coffee—trust me, you’re going to need it!
Serving Suggestions
Serving your Yogurt Cake can be as simple or as fancy as you like! Dust the cooled cake with powdered sugar for a classic look, or drizzle a simple glaze made of powdered sugar and lemon juice for a zesty kick.
For an elevated experience, consider topping it with fresh berries, mint leaves, or even a dollop of whipped cream for a touch of elegance. If you’re feeling adventurous, serve warm slices with a scoop of vanilla ice cream for dessert perfection.
Chef Tip: Plate it up on your favorite colorful dishware—it makes a world of difference in presentation!
Recipe Variations
The beauty of Yogurt Cake lies in its versatility. Here are some fun twists you can explore:
-
Lemon Yogurt Cake: Add the zest of one lemon to the batter and replace some of the yogurt with freshly squeezed lemon juice for a refreshing punch.
-
Berry Swirl Yogurt Cake: Gently fold in fresh berries like blueberries or raspberries right before you pour it into the baking pan. Think painterly swirls of fruit color throughout!
-
Chocolate Chip Yogurt Cake: Fold in 1/2 cup of semi-sweet or dark chocolate chips into the batter for a decadent treat.
-
Coconut Yogurt Cake: Add shredded coconut to the batter for a tropical twist. You can also top it with toasted coconut flakes for extra texture.
-
Spiced Yogurt Cake: Incorporate warm spices like cinnamon or nutmeg to elevate the flavor profile. A pinch goes a long way!
Chef’s Notes
It’s wild how one recipe can evolve over time, much like our taste preferences. I’ve made this Yogurt Cake countless times, and every version adds a new memory and twist to the original. I recall one lovely summer afternoon, a dear friend attempted to bake it alongside me, which promptly turned into a flour fight! But at the end of that chaotic day, we had the most delightful, albeit slightly uneven, Yogurt Cake. It turned out perfectly imperfect!
Each time I bake this, I remember those golden moments—laughter echoing through the kitchen, and the aroma wafting through the air feels like a warm hug from my grandmother, reminding me that cooking is about love and connection, not perfection.
FAQs and Troubleshooting
Let’s tackle some common questions that arise when trying to whip up the perfect Yogurt Cake.
Q1: My cake didn’t rise! What went wrong?
A: This could happen if your baking powder is expired or you overmixed the batter. Always check your leavening agents for freshness!
Q2: Can I use flavored yogurt?
Absolutely! However, be cautious with fruity or super sweet flavors as they can alter the overall balance of your cake.
Q3: Why is my cake too dry?
A: Overbaking is usually the culprit or possibly using too much flour. Remember to measure your flour accurately and check on that cake early!
Q4: Can I freeze this cake?
Yes! Just wrap it tightly in plastic wrap and then foil to prevent freezer burn. It will last for up to three months.
Nutritional Info
While it’s tempting to focus on the deliciousness of this recipe, it’s also good to know what we’re putting into our bodies. A typical slice of Yogurt Cake (about 1/12 of the cake) contains approximately:
- Calories: 220
- Total Fat: 8g
- Saturated Fat: 1.5g
- Cholesterol: 35mg
- Sodium: 150mg
- Carbohydrates: 34g
- Fiber: 1g
- Sugars: 14g
- Protein: 4g
This nutritional breakdown can fluctuate based on variations, so feel free to adjust based on your dietary needs. Just remember: moderation is key!
Final Thoughts
And there you have it, my kitchen companions—your very own, scrumptious Yogurt Cake ready to warm hearts and fill bellies! I hope you enjoy every slice as much as I do. Nothing compares to seeing family and friends gather around, smiles on their faces, indulging in something homemade with love.
Take these recipes and make them your own; that’s what cooking is all about! Explore flavors, experiment with toppings, and remember that every cake tells a story. I can’t wait to hear about your adventures in the kitchen and how this Yogurt Cake becomes a staple in your home!
So go on, cut yourself a slice, pour that drink, and relish the feeling of creating something beautiful. Until next time, happy cooking, and may your kitchen be filled with warmth, laughter, and lots of delicious memories! 🍰✨
Print
Yogurt Cake
- Total Time: 50 minutes
- Yield: 12 servings 1x
- Diet: Vegetarian
Description
A moist and tangy Yogurt Cake that is easy to make and perfect for any occasion.
Ingredients
- 1 cup plain yogurt
- 3 large eggs
- 1 cup granulated sugar
- 1/2 cup vegetable oil (or melted butter)
- 1 teaspoon vanilla extract
- 2 cups all-purpose flour
- 2 teaspoons baking powder
- 1/2 teaspoon salt
Instructions
- Preheat your oven to 350°F (175°C). Grease a 9-inch round cake pan.
- Whisk together your yogurt, eggs, sugar, and oil until smooth and creamy.
- Sift together the flour, baking powder, and salt in another bowl.
- Fold your dry mixture into your wet mixture gently with a rubber spatula.
- Pour the batter into the prepared cake pan and bake for about 30–35 minutes.
- Let cool in the pan for 10 minutes, then transfer to a wire rack to cool completely.
Notes
Serve with powdered sugar, fresh berries, or whipped cream for an enjoyable treat.
- Prep Time: 15 minutes
- Cook Time: 35 minutes
- Category: Dessert
- Method: Baking
- Cuisine: American
Nutrition
- Serving Size: 1 slice
- Calories: 220
- Sugar: 14g
- Sodium: 150mg
- Fat: 8g
- Saturated Fat: 1.5g
- Unsaturated Fat: 5.5g
- Trans Fat: 0g
- Carbohydrates: 34g
- Fiber: 1g
- Protein: 4g
- Cholesterol: 35mg
Keywords: cake, yogurt cake, dessert, easy dessert, baking

Creamy Yogurt Cake
The Ultimate Creamy Yogurt Cake Recipe: A Slice of Bliss!
Hey there, fellow food lovers! I’m Beau Collier, and I’m so excited to dive into a dish that’s close to my heart—and my taste buds—today: Creamy Yogurt Cake. This recipe is perfect for those who crave something sweet yet light, super easy to whip up, and unbelievably satisfying. So, pull up a chair, and let’s explore this delightful dessert together!
Introduction: A Slice of Joy
There’s something magical about desserts that bring back fond memories. When I was a kid, summers at my grandmother’s house in the countryside were filled with the smells of fresh-baked cakes and treats that made our hearts sing. One unforgettable sweet was her yogurt cake. It was a simple dish but one that embodied everything I loved about food. As the sun dipped below the horizon, we’d gather around the table, sharing stories and laughter, all while enjoying a slice of her creamy creation.
Fast forward to today, and here I am, crafting my version of that beloved dessert—a creamy yogurt cake that’s sure to be a showstopper at your next gathering or a cozy evening at home. This cake is light, fluffy, and boasts a delicate flavor that marries the creaminess of yogurt with a touch of sweetness. Whether it’s a family celebration, a potluck, or just a day that needs a little cheering up, this yogurt cake has got you covered!
The beauty of this recipe is not just in its taste; it’s also in its simplicity. With just a handful of ingredients and minimal prep time, you’ll be surprised at how easy it is to create a dessert that feels special and indulgent. So, dust off those mixing bowls and let’s make some magic happen in the kitchen!
Personal Story: A Slice of Home
The first time I attempted to recreate my grandmother’s yogurt cake was a bit of an adventure. I was about ten years old and passionate about becoming a chef (little did I know I’d eventually make it a reality!). Armed with her worn-out recipe card—scribbled with little notes in the margins—I strutted into the kitchen, confident I could whip up the same cake that had graced so many family gatherings.
As I mixed the ingredients, I could almost hear my grandmother’s voice, guiding me through each step. I had a mix of concentration and excitement as I poured the batter into the pan and popped it into the oven. The aroma soon flooded the house, and I couldn’t resist peeking inside. To my delight, there it was—a golden cake rising beautifully, just like hers. I couldn’t wait to take a bite!
When it finally cooled and I sliced into it, the texture was a bit different than I remembered—more dense, perhaps. But when I bit into it, a wave of nostalgia washed over me, wrapping me in a warm embrace. It wasn’t the exact cake from my childhood, but it held its own special charm. That day sparked my journey into the world of flavors, and I learned that every kitchen adventure is about not just the food but the memories we create along the way. Now, let’s create some delicious memories together!
Ingredients
Now that you’re ready to create some deliciousness, let’s gather our ingredients! Here’s what you’ll need for your creamy yogurt cake—simple, wholesome, and oh-so-good:
-
2 cups plain yogurt: The star of the show! Any type of plain yogurt will work—Greek, regular, or even a dairy-free version if needed. Greek yogurt will give you a denser cake, while regular yogurt yields a lighter texture.
-
1/2 cup honey or maple syrup: Sweetness is essential, and you can choose between honey for a floral note or maple syrup for a touch of earthiness. You can also reduce the amount of sweetener if you prefer a less sweet cake!
-
1/4 cup cornstarch: This is our secret ingredient to achieve a moist and fluffy texture. Cornstarch helps stabilize the batter; if you don’t have any, you can substitute it with all-purpose flour, though it may alter the final texture slightly.
Step-by-Step Instructions
Ready to get your hands dirty? Here’s how to bring this creamy yogurt cake to life, step by step!
Step 1: Preheat the Oven
Start by preheating your oven to 350°F (175°C). This is crucial; we want our cake to bake evenly and come out just right. While the oven warms up, you’ll have the perfect chance to get your ingredients ready!
Step 2: Prepare the Cake Pan
Take an 8-inch round cake pan (or a similar size) and grease it with a little butter or non-stick spray. To make sure the cake releases beautifully, line the bottom with parchment paper! A little chef’s tip: Sprinkle some flour on the greased pan for added insurance against sticking.
Step 3: Combine the Yogurt and Sweetener
In a large bowl, combine your 2 cups of plain yogurt and 1/2 cup of honey (or maple syrup). Use a whisk to blend them together until smooth. The yogurt will take on a silky texture, and you’ll see those sweet flavors mingling beautifully!
Step 4: Add Cornstarch and Mix
Next, sift in your 1/4 cup of cornstarch. Sifting helps avoid lumps and ensures a nice, fluffy cake. Stir gently until fully incorporated. Here’s a little kitchen hack: You can use a spatula to scrape down the sides of the bowl to make sure everything is mixed beautifully.
Step 5: Pour into the Pan
Once your batter is smooth, pour it into your prepared cake pan. Give the pan a little shake to level the batter evenly. This is the moment to take a step back and admire your handiwork. You’re doing great!
Step 6: Bake the Cake
Place the pan in your preheated oven and bake for about 30-35 minutes. The cake is ready when the edges are lightly golden and a toothpick inserted into the center comes out clean. Bonus tip: Don’t open the oven door too soon—this can cause the cake to sink!
Step 7: Cool and Serve
Once baked, remove the cake from the oven and let it cool in the pan for about 10 minutes. Then, gently flip it out onto a wire rack to cool completely. You’ll be met with a lovely aroma wafting through your kitchen—pure bliss!
Serving Suggestions
Serving this creamy yogurt cake is just as delightful as making it! Once completely cooled, I love to slice it into wedges and serve it with a dollop of whipped cream or a scoop of fresh berries. Drizzle a little extra honey or maple syrup on top for that added touch of sweetness!
For a more rustic vibe, you could even serve it straight from the pan. Place it on the table with a few decorative plates and forks, and let everyone serve themselves! This gets everyone engaged and ready for fun.
Recipe Variations
As a chef, I cherish the beauty of creativity in the kitchen! Here are a few fun variations on our creamy yogurt cake:
-
Citrus Twist: Add the zest of one lemon or orange to the batter for a zesty kick that brightens the flavors beautifully.
-
Berry-licious: Fold in a cup of fresh or frozen berries, like blueberries or raspberries, for bursts of flavor throughout the cake.
-
Choco-Joy: Add in some cocoa powder (1/4 cup should do) to make a chocolatey version—and who could resist that?
-
Nutty Goodness: Fold in some chopped nuts like walnuts or almonds for added crunch. Alternatively, sprinkle chopped nuts on top before baking!
-
Spiced Surprise: Add a pinch of cinnamon or nutmeg to the batter to give it a warm, cozy feel—perfect for cooler months!
Chef’s Notes
One of my favorite parts about cooking is the stories that unfold. I’ve played around with this recipe over the years and had a few kitchen fails, too! I once added way too much cornstarch, resulting in a cake that was more like a brick than a fluffy delight. But hey, that’s how we learn, right?
This cake has evolved over time, mirroring different experiences and flavors I’ve come to love. The key takeaway? Don’t be afraid to experiment! Whether it’s trying a new ingredient or altering flavors, those surprises often lead to delightful results.
FAQs and Troubleshooting
1. Why did my cake sink in the middle?
This could be due to a couple of reasons: either the oven temperature was too low, or the cake was still too wet in the center. Make sure to check the oven temperature with a thermometer and bake longer if necessary!
2. Can I use flavored yogurt?
Absolutely! Flavored yogurt will add an exciting twist to the cake. Just make sure it’s not overly sweet, so adjust the honey/maple syrup accordingly!
3. What should I do if my cake sticks to the pan?
Ensure you grease and line your pan well. If it does stick, run a knife around the edges to help release it—don’t fret, the flavors will be just as delightful!
4. How do I store leftovers?
Keep your cake wrapped in plastic wrap or in an airtight container at room temperature for a day. If you want to store it for longer, pop it in the fridge where it can last for about 3-4 days.
Nutritional Info
(Serving size: 1 slice, approx. 1/8 of cake)
- Calories: 160
- Protein: 4g
- Carbohydrates: 28g
- Fat: 3g
- Fiber: 0g
- Sugar: 11g
Note: Nutritional values may vary based on specific ingredients used and serving sizes.
Final Thoughts
There you have it—a deliciously creamy yogurt cake that’s sure to impress! I hope you’ve enjoyed this journey with me and feel excited to create your own version of this delightful dessert. Remember, cooking is all about connecting with food, flavors, and, most importantly, each other. So gather your loved ones around the table, share a slice, and create beautiful memories together!
Thank you for joining me in the kitchen today. I can’t wait to hear about your yogurt cake adventures. Happy baking, foodies! 🍰
Print
Creamy Yogurt Cake
- Total Time: 45 minutes
- Yield: 8 servings 1x
- Diet: Vegetarian
Description
A light and fluffy yogurt cake that’s easy to make and perfect for any occasion.
Ingredients
- 2 cups plain yogurt
- 1/2 cup honey or maple syrup
- 1/4 cup cornstarch
Instructions
- Preheat the oven to 350°F (175°C).
- Prepare an 8-inch round cake pan by greasing it and lining the bottom with parchment paper.
- Combine the yogurt and honey (or maple syrup) in a large bowl and whisk until smooth.
- Add the cornstarch and mix until fully incorporated.
- Pour the batter into the prepared cake pan and level it.
- Bake for 30-35 minutes until lightly golden and a toothpick comes out clean.
- Cool in the pan for 10 minutes, then flip onto a wire rack to cool completely.
Notes
Serve with whipped cream or fresh berries, and drizzle with extra honey or maple syrup for added sweetness.
- Prep Time: 10 minutes
- Cook Time: 35 minutes
- Category: Dessert
- Method: Baking
- Cuisine: American
Nutrition
- Serving Size: 1 slice
- Calories: 160
- Sugar: 11g
- Sodium: 120mg
- Fat: 3g
- Saturated Fat: 1g
- Unsaturated Fat: 2g
- Trans Fat: 0g
- Carbohydrates: 28g
- Fiber: 0g
- Protein: 4g
- Cholesterol: 5mg
Keywords: yogurt cake, dessert, easy baking, creamy cake, sweet treat