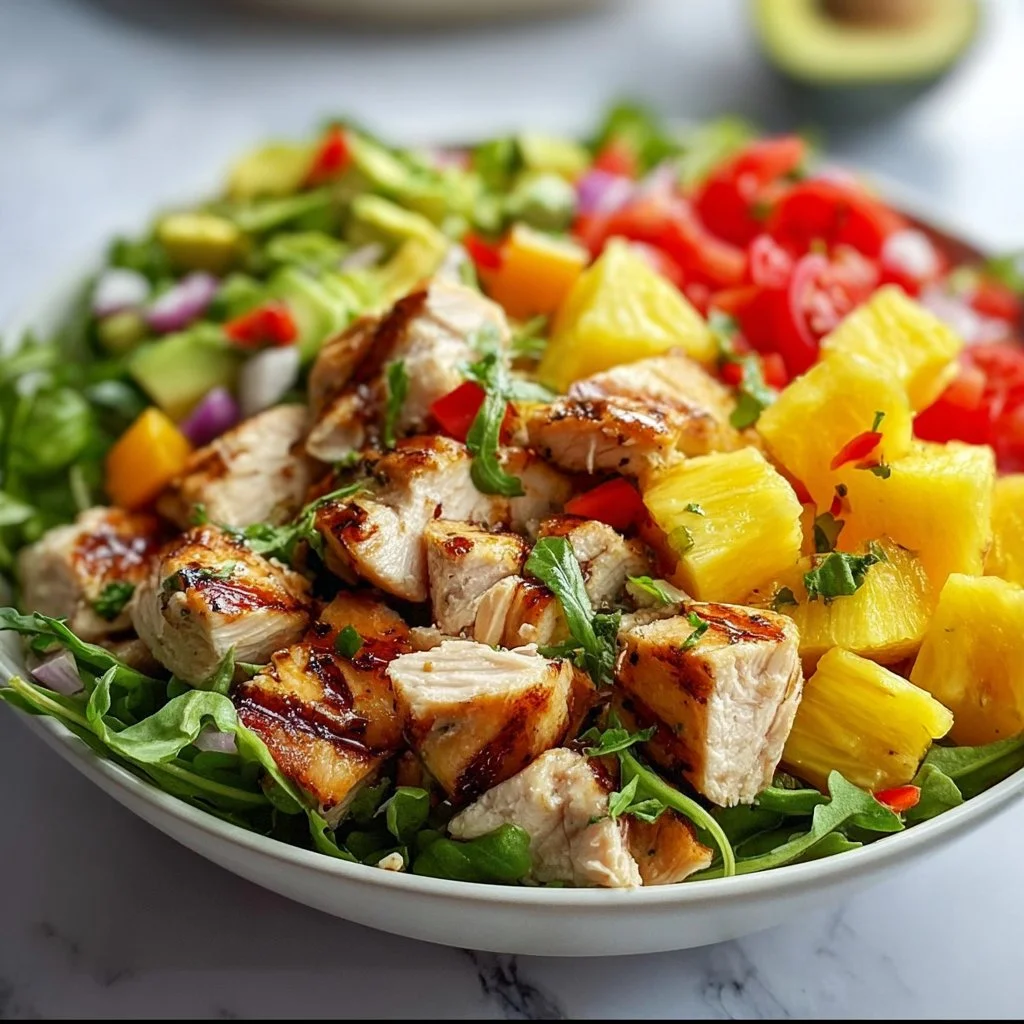
Pineapple Chicken Salad
Pineapple Chicken Salad: A Tropical Twist on a Classic Delight
Hey there, food lovers! It’s Beau Collier here, and today we’re diving into something absolutely delicious that’s sure to bring a taste of the tropics to your kitchen—Pineapple Chicken Salad! This isn’t just any salad; it’s a delightful harmony of tender chicken, juicy pineapple, and creamy dressing that makes for a refreshing meal any time of the year. Whether you’re enjoying it on a sunny picnic or as a light dinner after a long day, this recipe has a bit of magic to lighten up your mood and tantalize those taste buds.
Now, let’s be real—who doesn’t love a good salad? Especially when it’s packed with flavor and texture. This Pineapple Chicken Salad brings together succulent, diced chicken with fresh pineapple to create a dish that’s both savory and sweet. And guess what? It’s super easy to whip up! Let’s face it, we all have those days when we want to eat something wholesome yet simple. This recipe varies between being a main dish and a side, making it a game-changer for your lunch or dinner menus.
But let’s get to the heart of what makes this salad truly special. To me, food isn’t just about sustenance; it’s about connection, nostalgia, and flavors that tell a story. This Pineapple Chicken Salad has become one of my go-to recipes over the years, and I can’t wait to share it with you. Regardless of whether it’s for a family gathering, a lunch with friends, or just a tasty dinner for one, it never fails to impress. So roll up your sleeves, grab your chef hat, and let’s create something beautiful together!
Personal Story
I have a vivid memory that always comes to mind when I think of pineapple chicken salad. It was a hot summer afternoon years ago, and I was at my Aunt Clara’s house—the queen of comfort food. She had a talent for bringing everyone together around the table. That day, she decided to surprise us with her twist on a chicken salad. It was a simple, sunny day, but Aunt Clara’s Pineapple Chicken Salad transformed it into something extraordinarily joyful.
We were out in her garden, filled with laughter and the sweet scent of blooming flowers. I remember the clink of ice-cold lemonade glasses and the sounds of kids running around. When Aunt Clara called us to the table, I was immediately drawn to this vibrant bowl sparkling with pieces of golden pineapple and tender chicken. As soon as I took my first bite, the flavors literally danced in my mouth.
That combination of sweet and savory immediately became a new family favorite. Fast forward to today, and I’ve taken those fond memories and whipped up my own version. Each time I make this salad, it’s like taking a little taste of that summer day with family, bringing joy to each bite. So whether you’re looking to create fresh memories or just find a delicious fix, let’s gather around the table and dig in!
Ingredients
To make our delectable Pineapple Chicken Salad, here’s what you’ll need. Don’t worry if you don’t have everything at home; I’ve included some substitution tips that’ll keep those kitchen wheels turning.
-
2 chicken breasts, cooked and diced:
The star of our show! You can use grilled, roasted, or even leftover chicken. If you want to switch it up, rotisserie chicken works wonders too! -
1 cup fresh pineapple, diced:
For that sweet Tropical flavor! If fresh pineapple isn’t available, you can substitute it with canned pineapple (just be sure to drain it well). Frozen pineapple chunks can also do the trick! -
1/2 cup mayonnaise:
This creamy goodness binds everything together. If you want a healthier option, try using avocado mayo or a vegan alternative. -
1/4 cup Greek yogurt:
This adds tanginess and a creamy texture. You can use regular yogurt or even sour cream if it’s what you have on hand. -
1 tablespoon lime juice:
This zesty addition gives a refreshing kick. Fresh lime juice is best, but lemon juice works beautifully if you have a lemon handy. -
Salt and pepper to taste:
Always essential! Adjust to your liking for that perfect flavor balance. -
2 cups mixed greens (optional):
Perfect for serving as a bed for your salad if you want a fresh crunch. -
Chopped nuts or seeds (optional):
For an added crunch, toss in some walnuts, pecans, or sunflower seeds. They bring texture and a nutty contrast to the dish.
Step-by-Step Instructions
Alright, let’s get cooking! Follow these steps to create your Pineapple Chicken Salad. I’ll sprinkle in some tips and tricks to make the process as smooth as can be!
Step 1: Prepare Your Chicken
Begin by cooking your chicken breasts. You can either grill, bake, or pan-sear them for about 20–25 minutes at 375°F (190°C) until they’re cooked through (an internal temperature of 165°F / 75°C). If you have leftover chicken, stop right there; just dice it into bite-sized pieces. Chef Hack: If you’re using raw chicken, spice it up a bit with your favorite seasonings (salt, pepper, garlic powder) before cooking!
Step 2: Dice the Pineapple
While your chicken is cooking, let’s move on to the pineapple! If you’re using fresh fruit, slice it down the middle, remove the core, and cut it into small cubes. Fresh pineapple is unbelievably juicy and sweet—perfect for balancing flavors! Tip: Store any leftover pineapple in an airtight container in the fridge for your next smoothie or snacking session.
Step 3: Mix the Dressing
In a medium bowl, combine your mayonnaise, Greek yogurt, and lime juice. Whisk it all together until you achieve a creamy, smooth consistency. Season it with salt and pepper to taste. The lime juice not only adds a tang but also lightens up the salad. Insider Tip: Sometimes, I like to add a tiny dash of hot sauce or sriracha for a little kick!
Step 4: Combine the Ingredients
In a large mixing bowl, combine the diced chicken, pineapple, and your creamy dressing. Mix until everyone’s coated in that tasty goodness. The colors just pop here, right? It’s a feast for the eyes before it even hits your taste buds!
Step 5: Add the Greens (Optional)
If you’ve decided to use mixed greens, place them in a large serving bowl. Then gently spoon the chicken and pineapple mixture on top. It not only looks pretty but adds that extra crunch element. Chef’s Secret: If you’re making this salad ahead of time, keep the mixed greens separate until you’re ready to serve for maximum freshness.
Step 6: Final Touches
If you have any nuts or seeds on hand, sprinkle them over the top for some added texture and crunch. You can also garnish with additional lime wedges or chopped cilantro for a fresh finish!
Serving Suggestions
Now that we’ve crafted our Pineapple Chicken Salad, let’s talk about how to serve it! This dish is versatile, so you can present it in several delightful ways:
- On a Bed of Greens: As mentioned earlier, serve the salad over a mix of arugula, spinach, or lettuce for a clean and vibrant presentation.
- In Lettuce Wraps: For a fun, hand-held option, use large romaine or butter lettuce leaves to wrap small servings of the salad. They make for a fresh appetizer or light lunch!
- As a Sandwich Filling: Scoop your salad onto whole grain or sourdough bread for a delightful sandwich that’s bursting with flavor. A little sprinkle of crushed red pepper flakes can elevate it even more!
- Stuffed Avocados: For a more gourmet touch, serve the salad stuffed in halved avocados. The combination of creamy avocado with the salad will take your taste buds on a tropical adventure!
Recipe Variations
Here are a few creative twists to switch up your Pineapple Chicken Salad—a little variation keeps it exciting in the kitchen!
-
Curry Pineapple Chicken Salad: Add a tablespoon of curry powder to the dressing for an exotic flavor. This brings a whole new level to your palate!
-
Spicy Jalapeño Kick: Diced jalapeños added to the salad will spice things up for those who love a little heat.
-
Add Fruits: Experiment with other fruits like mandarin oranges, grapes, or shredded coconut for a twist reminiscent of a tropical getaway.
-
Nutty Addition: Swap in roasted almonds or pecans to add that extra crunch and flavor depth.
-
Make It Vegan: Substitute chicken with chickpeas or tofu to create a plant-based version that’s packed with protein and flavor!
Chef’s Notes
So, here’s a little behind-the-scenes from my kitchen. This Pineapple Chicken Salad recipe has evolved over the years. I remember first trying to make a salad similar to Aunt Clara’s with just a few basic ingredients. But as my culinary love blossomed, so did the variations of this dish. I’ve seen countless friends and family adding their personal touches over BBQs and gatherings. It’s amazing how one recipe can inspire creativity and innovation in so many ways!
FAQs and Troubleshooting
Now, let’s tackle some common questions and hiccups that could pop up while creating your delicious dish!
1. What if my chicken turns out dry?
Dry chicken can happen for a variety of reasons, but don’t fret. This salad is incredibly forgiving! Just shred the chicken and toss it back into the salad with an extra spoonful of dressing to moisten it up.
2. Can I make this salad ahead of time?
Absolutely! Just remember to keep the mixed greens separate. You can prepare the chicken and dressing a day beforehand, and simply combine it all right before serving to keep everything fresh.
3. How long will it last in the fridge?
This salad is good for up to three days if stored in an airtight container. It makes for great meal prep, so keep those leftovers handy!
4. My salad is too runny, what do I do?
If your salad dressing ends up being a little too runny, add more mayonnaise or Greek yogurt to thicken it. Also, draining any excess liquid from the pineapple can help!
Nutritional Info
For those who love to keep track of nutritional values, here’s a rough estimate:
- Calories: Approximately 350 per serving (without added nuts).
- Protein: 30g from chicken.
- Fat: 18g (mainly from mayo and yogurt).
- Carbohydrates: 20g mainly from pineapple.
- Fiber: 2g (without mixed greens).
Keep in mind, these numbers can vary based on portion sizes and specific ingredient brands used.
Final Thoughts
And there you have it, folks—your go-to recipe for Pineapple Chicken Salad, perfectly crafted with love and flavor! This dish is not just a meal; it’s a way to gather those you cherish and enjoy something phenomenal together. Whether you jazz it up with unique ingredients or stick to the classic version, this salad is bound to win hearts at the table.
Remember, it’s not just about the end result; it’s about the joy of cooking and sharing food that brings us closer. So get in that kitchen, get creative, and most importantly, have fun! I can’t wait to hear how your Pineapple Chicken Salad turns out. Until next time, keep cooking up joy and sharing the love! 🍍🥗
Print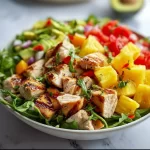
Pineapple Chicken Salad
- Total Time: 40 minutes
- Yield: 4 servings 1x
- Diet: Gluten-Free
Description
A refreshing blend of tender chicken, juicy pineapple, and creamy dressing that adds a tropical twist to your meals.
Ingredients
- 2 chicken breasts, cooked and diced
- 1 cup fresh pineapple, diced
- 1/2 cup mayonnaise
- 1/4 cup Greek yogurt
- 1 tablespoon lime juice
- Salt and pepper to taste
- 2 cups mixed greens (optional)
- Chopped nuts or seeds (optional)
Instructions
- Prepare your chicken by cooking chicken breasts until fully cooked, then dice.
- Dice the pineapple into small cubes.
- Mix the dressing with mayonnaise, Greek yogurt, and lime juice.
- Combine the diced chicken, pineapple, and dressing together.
- Add mixed greens if using, and serve the salad.
- Final touches include adding nuts or seeds for crunch.
Notes
This salad can be served on a bed of greens, in lettuce wraps, or as a sandwich filling. Keep mixed greens separate until ready to serve for maximum freshness.
- Prep Time: 15 minutes
- Cook Time: 25 minutes
- Category: Salad
- Method: Mixing
- Cuisine: American
Nutrition
- Serving Size: 1 serving
- Calories: 350
- Sugar: 10g
- Sodium: 400mg
- Fat: 18g
- Saturated Fat: 3g
- Unsaturated Fat: 10g
- Trans Fat: 0g
- Carbohydrates: 20g
- Fiber: 2g
- Protein: 30g
- Cholesterol: 80mg
Keywords: salad, chicken salad, pineapple salad, tropical salad, easy recipe, healthy meal

Healthy Korean Fried Chicken
The Ultimate Guide to Healthy Korean Fried Chicken
Hey there, food lovers! Welcome back to Feastical, where the heartwarming aroma of culinary delights fills the air. Today, we’re diving into a dish that combines crunch, flavor, and a unique twist on a classic favorite – Healthy Korean Fried Chicken! Picture the scent of golden, crispy chicken infused with the savory notes of soy sauce, garlic, and a touch of spice. If you’re a fan of fried chicken but want a lighter, healthier version, you’re going to fall head over heels in love with this recipe.
Now, you might be wondering—what’s the secret to making fried chicken feel a little less guilty? It’s all about balance and a few smart swaps. I remember when I first tried this recipe; I was skeptical but curious—could I really recreate that crispy texture without dousing it in oil? Through a blend of air frying and a coat of cornstarch, I discovered that yes, I could! Today, I’m excited to share my secrets and help you impress your friends and family with this feel-good dish that’s packed with flavor but without the heavy guilt.
So, gather your ingredients, summon your inner chef, and let’s transform chicken into something truly special. We’re going to create a dish that not only satisfies your cravings but also gives you all the feels without any of the regrets. Ready? Let’s get cooking!
Personal Story
Let me take you back to my first encounter with Korean fried chicken. It was a chilly evening, and I was visiting a bustling city filled with the vibrant sights and sounds of street vendors. The moment I caught a whiff of that crispy, spicy goodness frying up on the street corner, my mouth started watering. I remember standing in line, chatting with my fellow foodies, and sharing laughs as we eagerly awaited the moment when our plate would be filled with those finger-licking pieces.
When I finally took my first bite, it was a revelation—a crunch that gave way to tender, flavorful meat, all drizzled in a sticky, spicy sauce that danced on my palate. It was love at first bite, and I knew I had to recreate that magical experience at home. After many trials (and a few errors), I finally landed on this healthier version, which allows me to indulge in those delicious flavors guilt-free. Now, I’m thrilled to pass this joy on to you!
Ingredients
To make this scrumptious Healthy Korean Fried Chicken, you’ll need the following ingredients:
-
Chicken Pieces
The star of the show! Feel free to use drumsticks, thighs, or boneless breast meat. If you’re looking for a leaner option, chicken breast is your best bet. Just ensure they’re well-trimmed to avoid any excess fat! -
Cornstarch
This magical ingredient is what gives our chicken that crispy texture without all the oil. You can swap it with arrowroot powder if you want a gluten-free option. -
Soy Sauce
A key component for that savory depth of flavor. If you’re watching your sodium intake, feel free to use low-sodium soy sauce or tamari for a gluten-free alternative. -
Garlic Powder
Adds a wonderful aroma and flavor that tackles any chicken dish by bringing it to life. For a fresher touch, you can use minced garlic instead. -
Ginger Powder
This gives the dish that distinctive zing that’s characteristic of Korean food. If you have fresh ginger, feel free to swap out about a teaspoon of fresh grated ginger instead! -
Black Pepper
It adds a subtle kick. You can adjust the amount according to your taste—darker pepper means more heat! -
Hot Sauce (optional)
For those who like it spicy! Feel free to use your favorite brand or even a homemade chili sauce for a personalized touch. -
Cooking Oil Spray (for air frying)
This keeps everything light and crispy while avoiding all that unnecessary oil. If you’re deep frying, then just regular oil will do. -
Green Onions (for garnish)
They add a fresh crunch and pretty colors! If you don’t have any, feel free to leave them out or use sesame seeds for a nutty finish.
Step-by-Step Instructions
Now that we have our ingredients lined up, let’s jump into the cooking!
-
Prep the Chicken
Start by washing and patting the chicken pieces dry with paper towels. This ensures they’re not too moist, which can prevent crispiness later on. For extra flavor, consider marinating them in a mix of soy sauce, garlic powder, ginger, and black pepper for at least 30 minutes (or even overnight if you have the time!). -
Coat the Chicken
In a large bowl, combine the cornstarch, garlic powder, ginger powder, and black pepper. Toss the marinated chicken pieces in the mixture until they are evenly coated. This coating is key for that crispy exterior! Feel free to use your hands or a pair of tongs for an even coat. -
Preheat the Air Fryer
If you’re using an air fryer, preheat it to about 400°F (200°C) for approximately 5 minutes. This step ensures that the chicken will cook evenly and attain that perfect crispiness. -
Place Chicken in Air Fryer
Lightly spray the air fryer basket with a bit of cooking oil to prevent sticking. Arrange the chicken pieces in a single layer (you might need to work in batches if you’re making a lot). Just remember, overcrowding the basket can lead to soggy chicken—nobody wants that! -
Air Fry the Chicken
Cook the chicken in the preheated air fryer for about 15 to 20 minutes, flipping halfway through. You want a beautiful golden-brown color and an internal temperature of 165°F (74°C). Feel free to spritz a little extra cooking spray halfway through cooking to amp up the crunch! -
Prepare the Sauce (optional)
If you want to add a little more flair, you can whip up a simple sauce while the chicken is cooking. Just mix together some soy sauce, honey or maple syrup, and a dash of hot sauce over medium heat until it thickens slightly. Toss your cooked chicken pieces in this sauce for a sticky, sweet finish! -
Serve Up!
Once your chicken is perfectly crispy, it’s time to serve! Transfer it to a plate or serving platter, and feel free to drizzle some of that optional sauce over it before garnishing with chopped green onions.
Serving Suggestions
Now, presentation matters just as much as taste! To plate your Healthy Korean Fried Chicken, you can create a beautiful spread by serving it alongside a vibrant salad or some fragrant jasmine rice. You could also serve the chicken in a lively lettuce wrap—perfect for a fun, interactive meal.
For a delightful touch, add an extra sprinkle of sesame seeds and a few slices of cucumber or radish on the side for garnish. This serves not only to beautify the dish but also to offer a refreshing crunch that balances out the rich flavors of the chicken.
Recipe Variations
-
Spicy Gochujang Glaze
For those who love a little fire, add some gochujang (Korean chili paste) to your sauce for a spicy twist! Mix in a teaspoon of vinegar to give it a tangy kick. -
Crispy Baked Version
If you don’t have an air fryer, you can bake the chicken instead. Preheat your oven to 425°F (220°C), place on a lined baking sheet, and bake for 25-30 minutes until golden brown. -
Honey Garlic Version
Swap the sauce with a honey garlic glaze by mixing honey, soy sauce, minced garlic, and a splash of vinegar. Simmer until thick and toss with cooked chicken! -
Sweet and Tangy Pomegranate Sauce
For a seasonal twist, create a sauce out of pomegranate juice, a splash of soy sauce, and a touch of honey. It adds a vibrant color as well as a sweet and tangy flavor. -
Hot Honey Drizzle
For a trendy flavor, drizzle hot honey over the cooked chicken. It gives a sweet heat that pairs well with the crispy texture!
Chef’s Notes
As we embrace the magic of cooking, remember that recipes are starting points. I’ve evolved this Healthy Korean Fried Chicken over time through trial and error, experimenting with different spices and cooking methods. The joy is in the process, and I always encourage you to add your unique touch. Got herbs sitting lonely in your fridge? Toss them in! Leftover vegetables making their way out? Pair them alongside your chicken!
And let me tell you, there have been moments in my kitchen where things didn’t go as planned—like when I accidentally mistaken baking powder for cornstarch. Oops! But every mistake is a lesson, and every lesson brings us closer to delicious perfection.
FAQs and Troubleshooting
1. Why isn’t my chicken crispy?
Make sure you’re not overcrowding the air fryer or baking sheet. Crispiness comes from adequate airflow around the chicken pieces!
2. Can I use skin-on chicken?
Absolutely! Skin-on chicken can add extra flavor and texture, although it’ll be ready in a bit longer. Just be mindful of the extra fat.
3. How can I store leftovers?
To preserve that crunch, store the chicken in an airtight container in the fridge. Avoid stacking them, and heat them up in the air fryer for a crispy reheat.
4. Can I freeze the coated chicken before cooking?
Yes, you can freeze the coated chicken pieces for later! Just make sure to label and date them for the best results. When you’re ready to cook, there’s no need to thaw—just cook them straight from the freezer.
Nutritional Info
While fried chicken is often viewed as an indulgence, this version packs in lots of positive notes. Here’s a basic rundown to help you feel good about your meal!
- Calories: Approximately 150 per serving (without sauce)
- Protein: 20 grams
- Fat: 6 grams (mostly from cooking oil/butter if used)
- Carbohydrates: 7 grams
- Fiber: 0 grams
- Sodium: Approximately 300 mg (this can vary based on the amount of soy sauce used)
Remember, nutrition counts can change based on the cooking method and specific brands used.
Final Thoughts
Cooking is a beautiful journey where culinary adventures await. With this Healthy Korean Fried Chicken recipe, you’re not just following a set of instructions; you’re creating memories, tastes, and stories at home. Whether you’re making it for a casual family dinner, a party with friends, or simply a cozy night in, this dish is sure to be a hit!
Take pride in serving up that crispy golden goodness, and don’t forget to share your creations with your loved ones—after all, good food is meant to be shared! I can’t wait to hear how you make this recipe your own, so be sure to come back here and share your delicious results! Happy cooking, and let’s dig into that healthy twist on a classic dish!
Print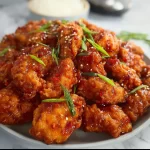
Healthy Korean Fried Chicken
- Total Time: 50 minutes
- Yield: 4 servings
- Diet: Healthy
Description
A lighter take on a classic favorite, this Healthy Korean Fried Chicken features a crispy exterior and savory flavors without the guilt.
Ingredients
- Chicken pieces (drumsticks, thighs, or boneless breast)
- Cornstarch
- Garlic powder
- Ginger powder
- Black pepper
- Hot sauce (optional)
- Cooking oil spray (for air frying)
- Green onions (for garnish)
<li<Soy sauce
Instructions
- Prep the chicken by washing and patting dry.
- Coat the chicken with a mixture of cornstarch, garlic powder, ginger powder, and black pepper.
- Preheat the air fryer to 400°F (200°C).
- Place the chicken in a single layer in the air fryer basket.
- Air fry the chicken for 15 to 20 minutes, flipping halfway through.
- Prepare the sauce, if desired, while the chicken is cooking.
- Serve the chicken garnished with green onions.
Notes
For extra flavor, marinate the chicken in soy sauce, garlic powder, ginger, and black pepper for at least 30 minutes.
- Prep Time: 30 minutes
- Cook Time: 20 minutes
- Category: Main Course
- Method: Air Frying
- Cuisine: Korean
Nutrition
- Serving Size: 1 serving
- Calories: 150
- Sugar: 1g
- Sodium: 300mg
- Fat: 6g
- Saturated Fat: 1g
- Unsaturated Fat: 4g
- Trans Fat: 0g
- Carbohydrates: 7g
- Fiber: 0g
- Protein: 20g
- Cholesterol: 60mg
Keywords: Korean fried chicken, healthy chicken, air fryer recipes

Chicken Crepes Shawarma
Chicken Crepes Shawarma: A Flavorful Journey
Hey there, fellow foodies! If you’re on the hunt for a dish that’s equal parts adventure and comfort, let’s dive into the world of Chicken Crepes Shawarma! Yes, you heard that right—crepes getting cozy with the iconic flavors of shawarma! This spectacular combo is a delightful twist that takes your taste buds on an incredible journey through the bustling streets of the Middle East right into your kitchen.
Picture this: you’re at a vibrant marketplace, the aroma of seasoned chicken grilling wafts through the air as spices mingle with the crisp sound of pita bread sizzling. Sounds dreamy, right? Well, I’ve brought that magic right to your home! I created this recipe to not only satisfy your cravings but also to share a little piece of my culinary adventures. Grab your mixing bowl, and let’s create something that’s ridiculously tasty and perfect for any occasion!
I love recipes that are versatile and shareable, and trust me, this one is undeniably both. Whether you’re hosting a gathering, whipping up a weeknight dinner, or just craving something comforting, these Chicken Crepes Shawarma are bound to make everyone gather around the table with grins galore. So let’s roll up those sleeves and get cooking!
Personal Story
You know, every great recipe comes with a story, and for me, this Chicken Crepes Shawarma holds a special place in my heart. I vividly remember the weekend family gatherings at my cousin Zara’s house. Zara was the unofficial chef of our clan, and her secrets lay sprinkled through intimate conversations as she whipped up her signature dishes. One in particular stood out: her shawarma chicken tended to make our family dinners feel like extravagant feasts!
One day, inspired by her incredible flair, I decided to add a twist of my own to the classic shawarma. My goal was simple: create a dish that would evoke nostalgia but introduce that joyous vibe of crepes—fluffy, foldable, and fun to eat! The first time I served my Chicken Crepes Shawarma, there was laughter, clinking glasses, and stories shared over cuisines that transcended cultures. The moment every mouthful was met with delight confirmed it; I was onto something special. And now, I’m excited to pass this cherished recipe onto you. Let’s make some mouthwatering memories together!
Ingredients
Here’s what you’ll need to create your own delicious Chicken Crepes Shawarma:
-
2 cups all-purpose flour
Perfect for that ideal crepe texture! If you want a gluten-free option, go for a gluten-free flour blend. -
4 large eggs
The key to fluffy crepes! If you’re looking to make this egg-free, try using ground flax seeds and water (1 tablespoon of flax meal + 2.5 tablespoons of water per egg). -
2 cups milk
Whole milk works best for rich crepes. You can use almond or oat milk for a dairy-free alternative. -
1 teaspoon salt
Essential to enhance the flavor. A pinch of coarse sea salt can add a delightful bite! -
2 tablespoons melted butter
Adds richness to the batter. Coconut oil is a great alternative for a dairy-free version. -
1 lb chicken breast
Cooked and shredded. For a quicker option, a store-bought rotisserie chicken makes life easy! -
1/2 cup shawarma sauce
The star of the show! Homemade or store-bought, find one that’s zesty and full of flavor. -
Lettuce, chopped
Adds a fresh crunch! Try arugula or spinach for a peppery twist. -
Tomatoes, diced
Juicy tomatoes add color and nutrition. Cherry tomatoes can work too! -
Cucumbers, diced
Refreshing and crisp, perfect for balancing the spices. Zucchini can be a great substitute if you want something different. -
Pickles
A must for that tangy punch! If you’re not into pickles, try kalamata olives for a Mediterranean vibe. -
Pita bread or crepes
You can use store-bought crepes or whip up your own for an extra-special touch!
Step-by-Step Instructions
Now that you’ve rounded up all those fresh ingredients, let’s get cooking! Follow these steps for Chicken Crepes Shawarma like a pro:
Step 1: Make the Crepe Batter
- In a medium bowl, whisk together the flour, eggs, milk, salt, and melted butter. Whisk until you have a smooth, lump-free batter. It should have a fluid consistency, akin to heavy cream. Chef Hack: Let your batter rest for about 30 minutes! This gives the gluten time to relax, resulting in tender crepes.
Step 2: Cook the Crepes
-
Heat a non-stick skillet over medium heat. Lightly grease with a bit of butter or oil. Pour about 1/4 cup of the batter into the pan, swirling it to cover the base evenly. Tip: If you can toss a crepe like a pancake, you’re golden!
-
Cook for about 1-2 minutes, until the edges start to lift and the surface appears set. Flip using a spatula and cook for another minute, then transfer to a plate. Repeat until all the batter is used, stacking crepes between sheets of parchment paper. Pro Tip: If your first crepe is dodgy, don’t fret! It’s all about practice—and those first few are often just the chef’s snack!
Step 3: Prepare the Chicken
- In a separate bowl, combine the shredded chicken with shawarma sauce until coated. You can adjust the quantity based on your heat preference. Chef Insight: For an extra layer of flavor, consider adding a bit of smoked paprika or cumin to the mix.
Step 4: Assemble Your Crepes
-
Take a warm crepe and layer it with shredded chicken, followed by lettuce, tomatoes, cucumbers, and pickles. Here’s where you can unleash your creativity!
-
Roll or fold the crepe over the filling to encapsulate the flavors. Whether you opt for a burrito-like fold or a classic fold, either way, it’ll be delightful!
-
Repeat for as many servings as you need. Tip: If it gets messy, that’s just part of the fun!
Step 5: Serve and Enjoy
-
Serve with extra shawarma sauce on the side for dipping. A sprinkle of fresh herbs like parsley or cilantro can take it to another level!
-
If you’re feeling fancy, consider briefly grilling the assembled crepes in a panini press for a crispy, golden finish. Trust me, you’ll want to taste that crunch!
Serving Suggestions
Now that you’ve created this scrumptious meal, let’s talk about how to serve it up! For a casual vibe, arrange your crepes on a vibrant platter, garnished with fresh herbs and lemon wedges to squeeze over the top. This adds a refreshing zest that really elevates the dish.
For something a bit more sophisticated, consider presenting the crepes wrapped in parchment with a side of homemade garlic yogurt sauce for an extra flavor boost. Drizzle a bit of olive oil on top for an artistic touch, and make sure arrange everything beautifully. Good food deserves good styling!
Recipe Variations
Want to mix things up? Here are a few delicious twists to the Chicken Crepes Shawarma that you can try:
-
Mediterranean Spin: Swap out the chicken for lamb or beef shawarma for a heartier experience. Add feta cheese to the filling for a tangy kick!
-
Crispy Veggie Option: Keep it vegetarian by using grilled vegetables like zucchini, bell peppers, and eggplant. Add a slice of halloumi cheese for that savory goodness.
-
Spicy Chicken Twist: Marinate the chicken in a spicy harissa sauce before cooking it; your taste buds will thank you!
-
Herbaceous Delight: Mix fresh herbs such as mint or dill into the filling for a refreshing boost. This gives every bite a vibrant twist.
-
Sweet and Savory: Don’t be afraid to add a few roasted sweet potato cubes to the filling! This nice balance of flavors can create a whole new dish.
Chef’s Notes
As a chef who loves to play around with flavors, I have made this recipe countless times in various forms. Each time, it takes me back to those carefree family dinners and laughter-filled nights. It’s a reminder that cooking is not just about the food; it’s about the love and memories we create around it.
Oh, and my biggest kitchen blunder? Dropping an entire plate of prepped crepes on the floor during a dinner party! I learned that day to always have an extra batch on standby—just in case.
FAQs and Troubleshooting
Q: My crepes keep tearing while flipping. What’s wrong?
A: A few things could be at play: Make sure your batter isn’t too thick—add more milk if needed, and ensure the pan is adequately heated without being too hot to burn the crepes.
Q: Can I make the crepes ahead of time?
A: Absolutely! You can prepare the crepes a day in advance, just make sure to store them in an airtight container with parchment paper between each crepe to keep them from sticking.
Q: What’s the best way to reheat leftover crepes?
A: Use a non-stick skillet over low heat to gently warm them up. You can put a lid over the pan to trap some steam, keeping them moist!
Q: Can I freeze the crepes?
A: Yes, you can! Stack them between parchment paper, wrap tight in plastic, and store them in a freezer-safe bag for up to three months. Thaw in the fridge and reheat when you’re ready to dig in!
Nutritional Info
Let’s explore the nutritional side of our delightful Chicken Crepes Shawarma!
Each serving will provide a balanced meal with protein from chicken, healthy fats from the butter, and carbohydrates from the flour and veggies. Expect about:
- Calories: Approximately 400-500 per crepe depending on fillings
- Protein: 30-35g
- Carbohydrates: 50g
- Fat: 15-20g
Of course, the nutritional values can fluctuate based on the variations and the specific ingredients used, but a serving of these crepes can keep you fueled and satisfied! Plus, lots of veggies mean you’re getting beneficial vitamins, fiber, and minerals—what’s not to love?
Final Thoughts
So there you have it—a warm, comforting recipe for Chicken Crepes Shawarma that’ll surely make you the star of your kitchen! I hope you create your own memories with this dish, just as I have with my loved ones. Remember, cooking is a journey, and it’s okay to experiment and make it yours.
The next time you gather friends and family around the table, they’ll be asking for seconds—so be prepared! And as always, thank you for joining me in the kitchen. Until next time, happy cooking! Grab that fork or maybe just that trusty spatula, and let’s make every meal a feast! 🥙✨
Print
Chicken Crepes Shawarma
- Total Time: 50 minutes
- Yield: 4 servings 1x
- Diet: Non-Vegetarian
Description
A delicious twist on traditional shawarma featuring tender chicken wrapped in fluffy crepes, loaded with fresh vegetables and shawarma sauce.
Ingredients
- 2 cups all-purpose flour
- 4 large eggs
- 2 cups whole milk
- 1 teaspoon salt
- 2 tablespoons melted butter
- 1 lb cooked and shredded chicken breast
- 1/2 cup shawarma sauce
- Lettuce, chopped
- Tomatoes, diced
- Cucumbers, diced
- Pickles
- Pita bread or crepes
Instructions
- Make the crepe batter: In a medium bowl, whisk together the flour, eggs, milk, salt, and melted butter until smooth.
- Cook the crepes: Heat a non-stick skillet over medium heat and grease lightly. Pour in 1/4 cup of batter and cook until edges lift.
- Prepare the chicken: Combine the shredded chicken with shawarma sauce, adjusting quantity for heat preference.
- Assemble your crepes: Take a warm crepe, layer with chicken, lettuce, tomatoes, cucumbers, and pickles.
- Serve and enjoy: Add extra shawarma sauce on the side for dipping and garnish with fresh herbs.
Notes
Let the crepe batter rest for 30 minutes for the best texture. You can make crepes ahead of time and store them without sticking.
- Prep Time: 30 minutes
- Cook Time: 20 minutes
- Category: Main Course
- Method: Cooking
- Cuisine: Middle Eastern
Nutrition
- Serving Size: 1 crepe
- Calories: 450
- Sugar: 6g
- Sodium: 850mg
- Fat: 20g
- Saturated Fat: 7g
- Unsaturated Fat: 10g
- Trans Fat: 0g
- Carbohydrates: 50g
- Fiber: 4g
- Protein: 32g
- Cholesterol: 180mg
Keywords: chicken, crepes, shawarma, Middle Eastern, quick meal
Lemon Garlic Chicken Meal Prep
Lemon Garlic Chicken Meal Prep: A Flavorful Journey in Your Kitchen
Hey food lovers, and welcome back to Feastical, where we whip up flavor-packed meals that feed not just your body, but also your soul! Today, I’m thrilled to take you on a culinary adventure with my Lemon Garlic Chicken Meal Prep. This dish is a crowd-pleaser that’s bound to become a staple in your weekly meal rotation, whether you’re fueling up for a busy week ahead or prepping food for your friends and family.
Imagine the bright zesty flavors of lemon mingling with the aromatic warmth of garlic, all perfectly combining with juicy chicken and crisp veggies. This recipe is incredibly simple but bursting with vibrant tastes. Plus, it’s made with ingredients you might already have lying around! You’ll love how easy it is to make, not to mention how delicious it smells while cooking. But this isn’t just about throwing some food together; it’s about creating a nourishing meal that brings the comfort of home straight to your table.
Join me as we dive deep into this recipe that’s not only delicious but also packed with nutrition and love. And let’s be honest, nothing beats feeling good about what you eat. So, grab your apron and let’s embrace our inner chefs together, because it’s time to zest things up with Lemon Garlic Chicken Meal Prep!
Personal Story
This recipe holds a special place in my heart. I remember the first time I made Lemon Garlic Chicken for my family. It was a typical Sunday afternoon, and I was tasked with preparing dinner for a chaotic family gathering. You know how it goes—everyone is bustling about, catching up, and the kitchen becomes a whirlwind of activity. As our old family recipes settled in the air like a comforting hug, I wanted to bring something new to the table.
Feeling a little experimental, I rummaged through my pantry and pulled out some chicken, lemons, and garlic. The moment I squeezed that fresh lemon juice and minced the garlic, the kitchen was filled with a heavenly aroma, and my family’s curious heads started peeking in. I panicked for a minute, questioning if this would be a hit or a miss. But once I plated that vibrant meal and served it up, the smiles said it all.
They went for seconds, and the compliments came pouring in! That was a pivotal moment in my cooking journey—a reminder that food truly creates connections and memories. It transformed into a go-to meal prep option, because not only is it delicious, but it also sets the stage for tender family moments shared over a good meal. Now, I want to share this story and this dish with you so you can savor the same warmth and delight!
Ingredients
Here’s what you’ll need for this zesty and savory Lemon Garlic Chicken Meal Prep:
For the Chicken Marinade:
-
¼ cup fresh lemon juice: The star of the show! Fresh lemon juice brightens the dish and adds acidity. If you’re in a pinch, bottled lemon juice can work, but nothing beats that fresh flavor.
-
2 tablespoons olive oil: This helps keep the chicken moist and adds richness. Feel free to swap it with avocado oil if you prefer a higher smoke point.
-
2 cloves garlic, minced: Garlic adds depth and aroma. Not a fan? You can use garlic powder in its place, but fresh garlic is always best!
-
2 teaspoons dried oregano: A Mediterranean herb that complements the chicken perfectly. You can substitute it with thyme or Italian seasoning for a similar effect.
-
½ teaspoon paprika: This adds a subtle smokiness. If you like a kick, try smoked paprika!
-
½ teaspoon salt: Enhances all the flavors. You can adjust this to your taste or use sea salt for a cleaner taste.
-
½ teaspoon black pepper: For a little heat. White pepper can also be used for a milder flavor.
-
24 ounces boneless, skinless chicken breasts: Chicken breasts are lean and perfect for meal prep. Thighs are an excellent swap if you prefer a richer taste.
For the Vegetables:
-
1.5 pounds yellow potatoes, cut into 1-inch pieces: These yummy spuds soak up all the flavors. You can switch them out with sweet potatoes if you’re feeling adventurous!
-
1 tablespoon olive oil: Drizzled on the potatoes to enhance their natural flavor and crunch.
-
1 teaspoon garlic powder: A great addition to pack in even more garlicky goodness! Again, fresh garlic works, but the powder helps with even cooking.
-
1 teaspoon salt (plus more to taste): Balances the flavors of the potatoes. Adjust as needed!
-
1 teaspoon black pepper (plus more to taste): Feel free to amp up the pepper if you love that extra kick.
-
4 small zucchinis, sliced into 1-inch pieces: These delicate beauties add color and nutrition. You can swap them for bell peppers or asparagus, depending on your season!
Step-by-Step Instructions
Let’s get cooking! Follow these easy steps, and take a scoop of joy with every bite:
1. Prepare the Marinade:
In a bowl, whisk together the fresh lemon juice, olive oil, minced garlic, oregano, paprika, salt, and black pepper. The aroma will hit you—that’s the goodness we’re after!
2. Marinate the Chicken:
Place the chicken breasts in a resealable bag or shallow dish. Pour the marinade over the chicken, ensuring it’s well-coated. Don’t be shy; give it a little massage! Seal the bag or cover the dish and let it marinate in the fridge for at least 30 minutes, or up to 4 hours for maximum flavor. (I usually start prepping my veggies while I let it marinate.)
3. Preheat Your Oven:
While your chicken is soaking up all that love, preheat your oven to 400°F (200°C). This will give us that perfect roast!
4. Prepare the Veggies:
In a large bowl, toss the yellow potatoes with olive oil, garlic powder, salt, and black pepper. Spread them in an even layer on a large baking sheet. Chef hack: Line the baking sheet with parchment paper for easy cleanup!
5. Roast the Potatoes:
Pop the baking sheet into the oven and roast the potatoes for 15 minutes, giving them time to get crispy and golden.
6. Add the Chicken:
After 15 minutes, take the potatoes out and make some space on the baking sheet. Add the marinated chicken breasts to the sheet. There’s no need to overcrowd; if you need more space, use a second sheet!
7. Roast Again:
Return the baking sheet to the oven and roast everything for an additional 20-25 minutes. The internal temperature of the chicken should reach 165°F (75°C). Use a meat thermometer if you have one; it’s a handy tool!
8. Toss in the Zucchini:
About 10 minutes before the chicken is done, toss the zucchini pieces onto the baking sheet. They’ll cook quickly and soak up all the tasty juices from the chicken.
9. Rest and Serve:
Once everything is beautifully roasted, take it out of the oven and let it rest for about 5 minutes before serving. This allows the juices to settle back into the chicken, making every bite more succulent!
10. Meal Prep:
To store for meal prep, divide the chicken, potatoes, and zucchini into airtight containers. You can pop these into the fridge for up to 4 days, or they can be frozen for up to 3 months. Simply reheat when you’re ready to feast!
Serving Suggestions
When it comes to serving, presentation is key! For a beautiful plate, arrange a chicken breast in the center and surround it with a colorful bed of potatoes and zucchini. Drizzle a little extra lemon juice on top for that extra zing.
For an added boost, sprinkle fresh parsley or basil over the top. Serve it with a side of greens—like a spinny salad or sautéed spinach— for a beautiful finish. Your friends and family will appreciate the effort, and it’ll look like you spent hours in the kitchen!
Recipe Variations
One of the best things about this Lemon Garlic Chicken Meal Prep is its versatility. Here are a few creative twists you can try:
-
Herb Variations: Swap out the oregano for rosemary or thyme to give it a completely different flavor profile. Each herb brings its own unique taste!
-
Citrus Twist: For a touch of sweetness, add orange juice to the marinade instead of lemon or blend juices for a delightful citrus medley.
-
Spicy Kick: Want some heat? Add a pinch of red pepper flakes or a drizzle of sriracha to the marinade for a spicy twist.
-
Grains Galore: Serve it over quinoa or brown rice for a heartier meal. The grains will soak up all that yummy lemon-garlic goodness!
-
Keto Friendly: For a low-carb meal prep, skip the potatoes and use broccoli or cauliflower instead. They roast beautifully and pair perfectly with chicken.
Chef’s Notes
I initially stumbled upon this recipe when I was trying to impress my friends during Friendsgiving. They were all raving about how juicy the chicken was, and I just couldn’t stop smiling! Over the years, I’ve refined it to make it simpler while still keeping all those amazing flavors.
One of my favorite kitchen blunders happened the first time I made it—I accidentally used lime juice instead of lemon. While it was a totally different dish, it came out delicious! So don’t hesitate to play around and experiment a little; food is all about creativity!
FAQs and Troubleshooting
-
Can I use chicken thighs instead of breasts?
Absolutely! Chicken thighs are juicier and have more flavor. Just ensure to adjust the cooking time, as thighs may take a little longer to cook. -
What if my chicken isn’t fully cooked?
No worries! If you run into this situation, simply pop it back into the oven for another 5-10 minutes, checking the internal temperature frequently. -
My potatoes are not crispy. What can I do?
If they’re not crispy enough, try giving them a bit more space on the baking sheet. Overcrowding can cause them to steam rather than roast. -
Can I meal prep this if my meal plans change?
Totally! This dish holds up beautifully in the fridge or can be frozen. Just remember to reheat thoroughly!
Nutritional Info
This Lemon Garlic Chicken Meal Prep is not just delicious; it’s nutritious, too! Here’s a quick breakdown per serving (based on 4 servings):
- Calories: Approximately 400
- Protein: 30g
- Fat: 15g
- Carbohydrates: 35g
- Fiber: 5g
- Sugar: 2g
Rich in protein and fiber while packing in vitamins from the veggies, this dish keeps you satisfied without weighing you down. The lemon juice and garlic give a healthy kick of antioxidants, making it a well-rounded meal option!
Final Thoughts
And there you have it—a cheerful, vibrant journey through my Lemon Garlic Chicken Meal Prep! It’s an express ticket to flavor town that guarantees warm, fulfilling meals throughout your busy week.
Don’t forget, cooking should be fun and just a bit messy sometimes! So go ahead and give this recipe a try. Whether you’re cooking for yourself, family, or friends, remember that every meal is an opportunity to create new memories that last a lifetime!
If you make this recipe, I’d love to hear about it! Tag me in your photos, share your kitchen stories, and let’s build a vibrant food community together. Happy cooking, and remember, food is best enjoyed together! Now go out there and feast on life! 🍽️
Print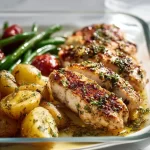
Lemon Garlic Chicken Meal Prep
- Total Time: 70 minutes
- Yield: 4 servings 1x
- Diet: Paleo
Description
A zesty and savory meal prep dish featuring marinated chicken breasts and roasted vegetables, perfect for a busy week.
Ingredients
- ¼ cup fresh lemon juice
- 2 tablespoons olive oil (plus 1 tablespoon for potatoes)
- 2 cloves garlic, minced
- 2 teaspoons dried oregano
- ½ teaspoon paprika
- ½ teaspoon salt
- ½ teaspoon black pepper
- 24 ounces boneless, skinless chicken breasts
- 1.5 pounds yellow potatoes, cut into 1-inch pieces
- 1 teaspoon garlic powder
- 1 teaspoon salt (plus more to taste)
- 1 teaspoon black pepper (plus more to taste)
- 4 small zucchinis, sliced into 1-inch pieces
Instructions
- Prepare the Marinade: In a bowl, whisk together the fresh lemon juice, olive oil, minced garlic, oregano, paprika, salt, and black pepper.
- Marinate the Chicken: Place the chicken breasts in a resealable bag or shallow dish. Pour the marinade over the chicken and let it marinate in the fridge for at least 30 minutes, or up to 4 hours.
- Preheat Your Oven: Preheat the oven to 400°F (200°C).
- Prepare the Veggies: In a bowl, toss the yellow potatoes with olive oil, garlic powder, salt, and black pepper. Spread them on a baking sheet.
- Roast the Potatoes: Bake in the oven for 15 minutes.
- Add the Chicken: Add the marinated chicken breasts to the baking sheet with the potatoes.
- Roast Again: Return to the oven for an additional 20-25 minutes, until the chicken reaches an internal temperature of 165°F (75°C).
- Toss in the Zucchini: About 10 minutes before the chicken is done, add the zucchini to the baking sheet.
- Rest and Serve: Let the dish rest for 5 minutes before serving.
- Meal Prep: Divide into airtight containers for storage. They can be kept in the fridge for up to 4 days or frozen for up to 3 months.
Notes
Feel free to experiment with herbs and vegetables in this meal prep recipe, and adjust seasoning to taste.
- Prep Time: 30 minutes
- Cook Time: 40 minutes
- Category: Main Course
- Method: Roasting
- Cuisine: Mediterranean
Nutrition
- Serving Size: 1 serving
- Calories: 400
- Sugar: 2g
- Sodium: 500mg
- Fat: 15g
- Saturated Fat: 2g
- Unsaturated Fat: 10g
- Trans Fat: 0g
- Carbohydrates: 35g
- Fiber: 5g
- Protein: 30g
- Cholesterol: 65mg
Keywords: chicken meal prep, lemon garlic chicken, healthy meal prep
Irresistible Ruth’s Chris Stuffed Chicken Copycat Recipe Revealed!
Irresistible Ruth’s Chris Stuffed Chicken Copycat Recipe Revealed!
Hey there, fellow foodies! I’m Beau Collier, and I’m thrilled to welcome you to Feastical, where comfort-food dreams come to life. If you’ve ever dined at the iconic Ruth’s Chris Steak House, then you know their stuffed chicken is nothing short of a culinary marvel. But let me tell you—it’s not just a star on their menu; it can shine brightly right in your kitchen too!
Today, I’m here to unveil my very own take on this irresistible stuffed chicken, and trust me, it’s just as delightful, without the hefty price tag. What’s more, you’ll find that cooking this dish isn’t just about the final meal; it’s a journey filled with savory aromas, delightful flavors, and the joy of creating something special. So, whether you’re planning a cozy dinner for two, or you just want to impress your friends at a gathering, this recipe has got you covered!
We’re diving deep into every aspect of this scrumptious dish, from seasoning and stuffing to cooking hacks that’ll leave your guests begging for seconds! You might think that this classic dish is reserved for special occasions, but I’m here to tell you that you can whip it up anytime you want. Let’s have some fun in the kitchen as we roll up our sleeves and fetch those spatulas! Ready? Let’s get cooking!
Personal Story
Ah, stuffed chicken! It takes me back to a warm summer evening when I was just sixteen, helping my mom prepare dinner for a family gathering. We loved hosting our loved ones, and nothing said “celebrate” quite like a delicious homemade meal. I remember the scent of garlic sautéing in olive oil wafting through the kitchen as I stirred in the spinach, cream cheese, and mozzarella—my mom’s secret weapon. That night, we stuffed chicken breasts to bursting, and they were a hit!
We spent hours laughing and reminiscing around the dinner table, the once-quiet house transformed into a lively gathering place filled with love and laughter. Each slice of the stuffed chicken revealed a warm, cheesy center, and I watched everyone’s faces light up with joy—a memory etched in my heart forever. That experience not only sparked my love for cooking but taught me the importance of sharing good food with great company. So, every time I whip up this dish, it’s not just about the flavors; it’s about creating those same warm, joyful moments that bring people together!
Ingredients
Let’s gather our ingredients for this delicious stuffed chicken!
-
2 boneless, skinless chicken breasts
The star of the show! Choose chicken breasts that are plump and fresh. If you’re looking for a healthier option, try using chicken thighs for a juicier bite. -
1 cup spinach, chopped
Fresh spinach adds a lovely color and nutritional boost! If you can’t find fresh spinach, frozen will do just fine—just be sure to thaw and drain any excess water. -
1/2 cup cream cheese, softened
This creamy delight brings richness to the filling. Feel free to substitute with goat cheese or ricotta for a different flavor profile! -
1/2 cup mozzarella cheese, shredded
Mozzarella ties everything together with its irresistible melt! Want a smokier flavor? Try smoked mozzarella or gouda! -
1/4 cup grated Parmesan cheese
This adds a nice salty kick that elevates the dish. Pecorino Romano is a fantastic alternative if you’re seeking a sharper taste. -
2 cloves garlic, minced
Garlic is a must in my kitchen. It adds depth and flavor to the filling. If you’re in a pinch, garlic powder will work as a substitute! -
1 teaspoon Italian seasoning
A blend of herbs that takes this dish to the next level. If you have fresh herbs on hand, feel free to chop some up instead! -
Salt and pepper to taste
Don’t skip these; they’re essential for flavor. Kosher salt is preferable due to its grain size for even seasoning! -
Olive oil for cooking
I love using extra virgin olive oil for its flavor and heart-healthy benefits. You can also use avocado oil if you prefer a higher smoke point!
Step-by-Step Instructions
Step 1: Preheat the Oven
Let’s kick things off! Preheat your oven to 375°F (190°C). Preheating your oven ensures that your chicken will cook evenly and retain its juiciness. No one wants dry chicken, right?
Step 2: Prepare the Filling
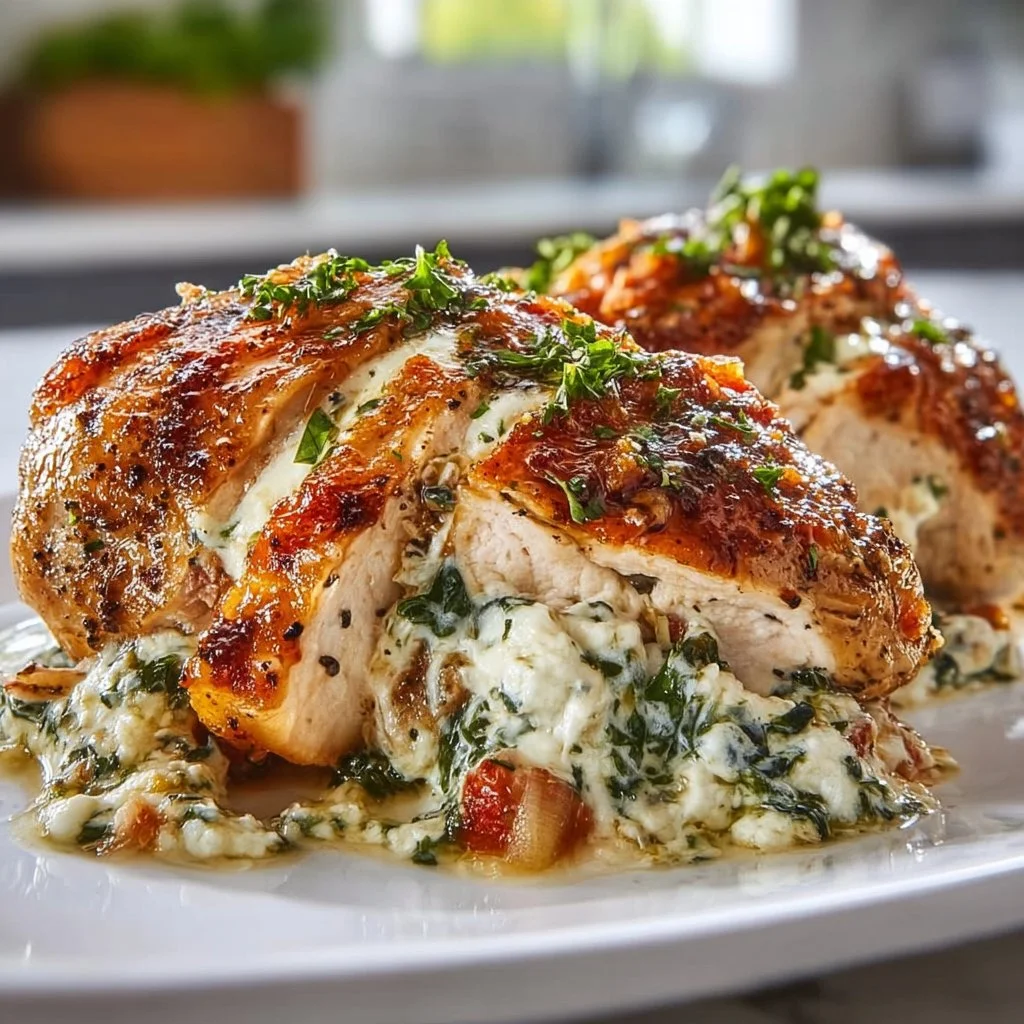
In a medium mixing bowl, combine your chopped spinach, cream cheese, mozzarella, Parmesan, minced garlic, and Italian seasoning. Use a fork or spatula to blend everything together until it’s nicely mixed. You want the cheese to be evenly distributed among the spinach. If it looks a bit lumpy, don’t worry; that’s all part of its charm!
Step 3: Season the Chicken
Next up, let’s season our chicken breasts! Give them a gentle rinse and pat them dry with some paper towels. This step is crucial because you want to avoid any excess moisture on the surface. Season both sides generously with salt and pepper. Got any favorite spice blends? Feel free to sprinkle those on too!
Step 4: Stuff the Chicken
Now comes the fun part! To stuff the chicken, create a pocket by slicing into the side of each breast (don’t cut all the way through!). Grab a generous spoonful of your creamy spinach filling and stuff it right in there. Don’t be shy; you want that filling to be nice and full!
Step 5: Secure the Chicken
Use toothpicks to secure the openings of the stuffed chicken breasts. This will prevent that luscious filling from spilling out while it cooks. A little kitchen hack? Soak the toothpicks in water for about 10 minutes before using them. This prevents them from burning!
Step 6: Cook the Chicken
In an oven-safe skillet, heat about a tablespoon of olive oil over medium-high heat. Once the oil is shimmering, carefully add the stuffed chicken breasts. Sear them for about 4–5 minutes on each side until they turn beautiful golden brown. This step not only locks in all that moisture but also gives it an appetizing color.
Step 7: Bake to Perfection
Once browned, transfer the skillet to your preheated oven. Bake for 25-30 minutes, or until the chicken reaches an internal temperature of 165°F (74°C). Use your meat thermometer to check. Juicy, perfectly cooked chicken is the goal!
Step 8: Rest Before Serving
Remove the skillet from the oven and let the chicken rest for about 5 minutes. This allows the juices to redistribute for that tender bite. You know you’ve got a great dish when the chicken is juicy and oozes that heavenly filling as you slice into it!
Serving Suggestions
Time to plate this beauty! For a stunning presentation, I suggest serving your stuffed chicken over a bed of fluffy risotto or creamy mashed potatoes. Drizzle some extra virgin olive oil over the top for shine, and sprinkle with fresh herbs like parsley or basil for that pop of color. You can even try pairing it with a refreshing side salad or seasonal roasted vegetables to balance the richness!
Recipe Variations
-
Mediterranean Twist: Swap out the cream cheese for feta and add sun-dried tomatoes and Kalamata olives into the spinach filling for a Mediterranean feast!
-
Spicy Kick: Add some crushed red pepper flakes or sliced jalapeños into the filling to give your chicken a kick that will spice up your dinner!
-
Herbaceous Delight: Use fresh herbs like basil and thyme instead of Italian seasoning for a vibrant, fresh taste. Combine with some lemon zest for zesty brightness!
-
Cheesy Broccoli Stuffing: Instead of spinach, use finely chopped steamed broccoli with cheddar cheese for a different veggie-packed version.
-
Wild Mushroom Medley: Sauté some wild mushrooms with garlic and mix them into the filling for an earthy flavor profile that elevates this dish even further!
Chef’s Notes
As this dish has evolved over time, it remains a staple in my kitchen repertoire! I’ve played around with various ingredients and fillings, and each twist brings back delightful memories of that summer evening with my mom. One funny kitchen story? The first time I attempted this recipe, I got too excited and stuffed the chicken until it burst in the skillet! So, remember the golden rule—stuff generously, but not excessively! Everyone makes mistakes in the kitchen. It’s part of the cooking journey!
FAQs and Troubleshooting
-
What can I do if my chicken breasts are uneven in thickness?
- If you have uneven chicken breasts, you can gently pound them to an even thickness using a meat mallet. This will ensure even cooking and tenderness throughout.
-
Why is my cheese oozing out?
- If your filling is too much for the pocket, it may ooze out as it cooks. Just make sure not to overstuff your chicken and secure those openings well!
-
How do I know when the chicken is done?
- The safest way to check is by using a meat thermometer. Chicken should reach an internal temperature of 165°F (74°C) for it to be safe to eat!
-
Can I make this ahead of time?
- Absolutely! You can prepare and stuff the chicken earlier in the day. Just keep it in the fridge, and when you’re ready, pop it in the oven. Cooking time might need a slight adjustment!
Nutritional Info
This copycat Ruth’s Chris stuffed chicken packs a punch with flavor and nutrition! Each serving is approximately 400 calories, rich in protein from the chicken and cheese, and boasts vitamins and minerals from the spinach. Packed with healthy fats from olive oil and cheese, it also delivers comfort without compromise. But remember, portion control is key if you’re watching your calorie intake. Serve it with a side of veggies or a salad for a balanced meal!
Final Thoughts
And there you have it, foodie friends! The deliciousness of a classic Ruth’s Chris stuffed chicken right in your very own home. Cooking is all about bringing people together and enjoying those flavorful moments of joy—all while having fun. I hope you’ll make this dish a part of your kitchen adventures!
Don’t forget, cooking is just as much about experimentation and creativity as it is about following the recipe. So, feel free to customize it to suit your tastes! I’d love to hear about your unique takes on this dish, so drop a comment below or tag me when you share your creations. Remember, as long as you cook with love and laughter, you can never go wrong in the kitchen. Happy cooking, and may your plates always be filled with joy! ✨
Print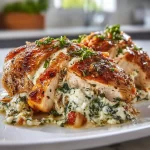
Irresistible Ruth’s Chris Stuffed Chicken Copycat
- Total Time: 45 minutes
- Yield: 2 servings 1x
- Diet: Paleo
Description
Enjoy the flavors of Ruth’s Chris Steak House with this delightful stuffed chicken recipe, featuring a creamy spinach filling.
Ingredients
- 2 boneless, skinless chicken breasts
- 1 cup spinach, chopped
- 1/2 cup cream cheese, softened
- 1/2 cup mozzarella cheese, shredded
- 1/4 cup grated Parmesan cheese
- 2 cloves garlic, minced
- 1 teaspoon Italian seasoning
- Salt and pepper to taste
- Olive oil for cooking
Instructions
- Preheat your oven to 375°F (190°C).
- Combine chopped spinach, cream cheese, mozzarella, Parmesan, minced garlic, and Italian seasoning in a bowl.
- Season both sides of the chicken breasts with salt and pepper.
- Stuff each chicken breast by creating a pocket and filling it with the spinach mixture.
- Secure the openings with toothpicks to keep the filling inside.
- Heat olive oil in an oven-safe skillet and sear the chicken for 4–5 minutes on each side.
- Transfer the skillet to the preheated oven and bake for 25-30 minutes until the chicken is cooked through.
- Rest for 5 minutes before serving.
Notes
This dish can be prepared ahead of time; just refrigerate and bake when ready.
- Prep Time: 15 minutes
- Cook Time: 30 minutes
- Category: Main Course
- Method: Baking
- Cuisine: American
Nutrition
- Serving Size: 1 serving
- Calories: 400
- Sugar: 2g
- Sodium: 500mg
- Fat: 24g
- Saturated Fat: 10g
- Unsaturated Fat: 10g
- Trans Fat: 0g
- Carbohydrates: 8g
- Fiber: 1g
- Protein: 35g
- Cholesterol: 90mg
Keywords: stuffed chicken, creamy spinach, copycat recipe, Ruth's Chris, comfort food