
Peach Lemonade Bliss: Sip Into Summer with the Ultimate Refreshing Experience – mommyplates
# Peach Lemonade Bliss: Sip Into Summer with the Ultimate Refreshing Experience

## Introduction

Hey there, fellow food enthusiasts! If there’s one thing that sets my heart aflame in the kitchen, it’s whipping up a refreshing drink that embodies the essence of summer. Today, I’m beyond excited to share a recipe that’s practically a celebration of sunshine in a glass: **Peach Lemonade Bliss**! Imagine taking your first sip and being instantly transported to a sun-drenched picnic, where the sweet scent of peaches mingles with the zesty vibrance of fresh lemons.

Summer is not just a season; it’s a feeling. The days stretch longer, the heat wraps around you like a comforting blanket, and everything just seems a little bit more vibrant. Nobody wants to slouch through those golden hours feeling sluggish or thirsty! That’s where our star drink, Peach Lemonade Bliss, steps into the spotlight. This tangy, sweet concoction is perfect for entertaining guests or simply enjoying on a lazy afternoon while you lounge in your favorite chair.

Here’s the best part: making this drink is as easy as pie—no culinary degrees required! With just a handful of fresh ingredients, you'll be mixing up a batch in no time. Whether you're hosting a backyard BBQ or just hanging out with friends, this lemonade will have everyone asking, "What’s your secret?” And trust me, we want to keep that element of surprise front and center!

By the end of this post, you'll not only know how to make this heavenly refreshment, but you’ll also be well-equipped with tips, tricks, and stories to impress anyone who takes a sip. So, without further ado, let’s dive into the delightful world of Peach Lemonade Bliss!

## Personal Story

Ah, peaches. Just the thought of them takes me back to summers spent at my grandmother’s house. She had this enchanting little garden that was bursting at the seams with ripe peaches every July. Each time I visited, my mission was clear: to pick the juiciest ones and help her make her legendary peach cobbler. We’d laugh, chat, and bask in the late afternoon sun while our family dog, Max, darted around chasing the occasional butterfly.

One memorable afternoon, as we were lounging on the porch, my grandmother decided we needed something cool to sip on. With her gentle guidance, we concocted a simple peach lemonade that was a game changer! We blended up those sun-kissed peaches with fresh lemon juice, and soon we were giddy with the refreshing taste of summer. It was a moment filled with love, laughter, and deliciousness that I carry with me to this day—so much so that I knew I had to create my own twist on that cherished recipe. And voilà! Peach Lemonade Bliss was born.

## Ingredients

Now, let’s talk ingredients! Here’s what you’re going to need to whip up this delightful drink:

- **2 ripe peaches, peeled and chopped**
  - Choose juicy, fragrant peaches that yield a little when you press them. If you can’t find fresh peaches, frozen ones work in a pinch! Just make sure to thaw them before blending.

- **1 cup freshly squeezed lemon juice (about 4–6 lemons)**
  - Fresh lemons are a must for that vibrant, zesty flavor. If you’re in a hurry, you can use bottled lemon juice, but I promise you’ll notice the difference!

- **1/2 cup sugar (adjust to taste)**
  - White granulated sugar is classic, but feel free to sub in honey or agave nectar for a more natural sweetness. Just adjust to your taste!

- **3 cups cold water**
  - This helps dilute the lemonade to a perfect sipping consistency. For an even more refreshing drink, use chilled sparkling water for a fizzy twist!

- **Ice cubes**
  - Crushed ice is fantastic for summer cocktails, but regular ice cubes will work just fine here.

- **Mint leaves and peach slices for garnish (optional)**
  - Mint adds a refreshing aroma and a pop of color. Plus, who doesn’t love a pretty garnish? I mean, we eat with our eyes first, right?

## Step-by-Step Instructions

Let’s get to the good stuff, shall we? Here’s how to craft your own Peach Lemonade Bliss, step by step!

### Step 1: Prepare Your Ingredients

Start by gathering all your ingredients. You’ll want everything on hand for a seamless kitchen experience. It’s like preparing for an art project; the more organized you are, the more fun you'll have!

### Step 2: Blend The Peaches

Grab a blender and toss in the chopped peaches. Blend them until they’re smooth—this usually takes about 30 seconds. The natural sweetness and juiciness of the peaches will create a delicious puree that acts as the base for your lemonade. If you prefer a chunkier drink, pulse the blender a few times instead.

*Pro Tip*: If you want to intensify that peach flavor, add a bit of lemon zest to the blender. It adds a nice depth and aromatics!

### Step 3: Squeeze the Lemons

Next, let’s get to squeezing! Juice your lemons until you’ve filled that cup with fresh lemon juice. Remember, fresh is key. You'll want to taste as you go; if it seems too tart, you can always adjust with more sugar later.

*Chef Hack*: Want to get more juice from your lemons? Before cutting them, roll them on the countertop with your palm to break down the fibers, making them easier to juice!

### Step 4: Mix It All Together

In a large pitcher, combine the peach puree, freshly squeezed lemon juice, and sugar. Stir it all together until the sugar dissolves. The sugars are going to balance out that tartness of the lemons beautifully!

### Step 5: Add Water

Next, pour in the cold water and mix until everything is combined. Give it a little taste. If it’s too sweet or too tart for your liking, this is your chance to adjust. Don’t be shy—do you!

*Fun Fact*: You can make this a little more adult-friendly with a splash of vodka or gin for a refreshing cocktail version!

### Step 6: Chill It Down

Pop the pitcher into the fridge for at least 30 minutes to let those flavors marry. The longer it sits, the tastier it gets!

### Step 7: Serve It Up!

When you’re ready to serve, fill tall glasses with ice cubes. Pour in your Peach Lemonade Bliss and garnish with fresh mint leaves and peach slices for that Instagram-worthy shot!

*Chef Note*: Chalk this recipe up as a great opportunity to show off your serving skills. Stunning glasses always make drinks more delightful!

## Serving Suggestions

Serving Peach Lemonade Bliss is a breeze because it’s as pretty as it is delicious! Here’s how to present it beautifully:

1. **Glassware**: Use clear glasses to showcase that gorgeous peachy hue. Mason jars or tall, elegant glasses add a rustic or chic vibe depending on your event.

2. **Garnishes**: Simply slapping a mint leaf on top of your drink isn’t enough! Float a few mint leaves on the surface and lean a peach slice against the glass.

3. **Freshness Factor**: A couple of ice cubes, a twist of lemon zest, or even a sprinkle of chia seeds can add texture and elevate the whole experience.

## Recipe Variations

Now that you’ve got the classic Peach Lemonade Bliss down, let’s play! Here are a few delightful variations to keep things interesting:

- **Berry Peach Lemonade**: Toss in a handful of fresh strawberries or raspberries while blending the peaches for a berry-licious twist.

- **Spicy Peach Lemonade**: Feeling adventurous? Add a slice of jalapeño to the blender for a spicy kick that balances beautifully with the sweetness.

- **Herbal Infusion**: Infuse the lemonade with different herbs like basil or thyme for a sophisticated take. Just muddle a few leaves into the pitcher!

- **Peach Iced Tea Lemonade**: Brew some black tea, let it cool, and mix it with your peach lemonade for a refreshing sweet tea alternative.

- **Sparkling Peach Lemonade**: Substitute half of the cold water with sparkling water for a bubbly sensation that makes your taste buds dance.

## Chef’s Notes

This recipe has a sweet spot in my heart, as it not only brings back cherished memories of time spent with my grandmother, but it has also evolved over the years. Remember that summer when I experimented with adding honey instead of sugar? It turned out so well that it became a staple in my kitchen! I’ve also learned that everyone can customize this drink to their taste, so don’t hesitate to make it your own.

And let me tell you a fun kitchen story—a friend once decided to make this drink for a summer gathering. Instead of peaches, they grabbed apricots thinking they’d made the same choice. While it wasn’t what we expected, it turned out to be a delightful surprise—the flavor was incredible! So remember, sometimes kitchen mix-ups lead to the best culinary adventures.

## FAQs and Troubleshooting

Here are some of the questions I often get about Peach Lemonade Bliss, along with some friendly troubleshooting tips!

- **Q:** Why is my lemonade too tart?
  - **A:** Try adding more sugar, honey, or a bit of maple syrup. Adjust until it's just right for your taste buds!

- **Q:** Can I make this ahead of time?
  - **A:** Absolutely! Just keep it refrigerated. However, if you add sparkling water, add it just before serving for that bubbly effect.

- **Q:** Can I make a non-alcoholic version?
  - **A:** All the recipes shared here are naturally non-alcoholic, so no worries! For a more festive feel, consider adding an alcohol-free spirit.

- **Q:** How do I store leftovers?
  - **A:** Store any leftovers in an airtight container in the fridge for up to 3 days. Just give it a good stir before serving, as some settling might occur.

## Nutritional Info

While it’s hard to beat the sheer joy of sipping a drink like Peach Lemonade Bliss, let’s take a quick look at the nutrient breakdown (per serving, makes about 8-10 servings):

- **Calories:** Approximately 80
- **Carbohydrates:** 20g
- **Sugars:** 18g
- **Fiber:** 1g
- **Vitamin C:** 30% of your daily value, thanks to the lemons!

Feel free to adjust the sugar depending on personal tastes or if you're looking to cut down on sweetness. You can always swap sugar for natural sweeteners like stevia or honey to make it work for your dietary needs.

## Final Thoughts

As we wrap up, I hope you’re feeling inspired to mix up a refreshing batch of **Peach Lemonade Bliss** for yourself or your loved ones. Remember, cooking isn’t just about making something delicious; it’s about creating connection, sharing love, and crafting memories. So whether you’re sipping alone on the porch or throwing a bash with friends, this drink has the power to create joy with every sip.

So here’s to summer flavors, sunny vibes, and smashing moments around refreshing lemonade! Cheers, my foodie friends—let’s raise a glass to freshness, friendship, and everything in between! 🍑🍋🥤

Until next time, keep the good food coming and the smiles spreading!

Peach Lemonade Bliss
- Total Time: 45 minutes
- Yield: 8 servings 1x
- Diet: Vegetarian
Description
A refreshing summer drink combining the sweetness of peaches with the tanginess of fresh lemons.
Ingredients
- 2 ripe peaches, peeled and chopped
- 1 cup freshly squeezed lemon juice (about 4–6 lemons)
- 1/2 cup sugar (adjust to taste)
- 3 cups cold water
- Ice cubes
- Mint leaves and peach slices for garnish (optional)
Instructions
- Prepare your ingredients.
- Blend the chopped peaches until smooth.
- Squeeze the lemons to obtain fresh lemon juice.
- Mix peach puree, lemon juice, and sugar in a pitcher until sugar dissolves.
- Add cold water and mix to combine.
- Chill in the fridge for at least 30 minutes.
- Serve with ice cubes and garnish with mint and peach slices.
Notes
You can substitute sugar with honey or agave nectar. For a fizzy twist, use chilled sparkling water instead of still water.
- Prep Time: 15 minutes
- Cook Time: 0 minutes
- Category: Beverage
- Method: Mixing
- Cuisine: American
Nutrition
- Serving Size: 1 serving
- Calories: 80
- Sugar: 18g
- Sodium: 5mg
- Fat: 0g
- Saturated Fat: 0g
- Unsaturated Fat: 0g
- Trans Fat: 0g
- Carbohydrates: 20g
- Fiber: 1g
- Protein: 0g
- Cholesterol: 0mg
Keywords: Peach, Lemonade, Summer Drink, Refreshing Beverage, Non-Alcoholic

Sparkling Cranberry Mocktail
Sparkling Cranberry Mocktail: A Festive Delight!
Hey there, food lovers! Beau Collier here, and I’m thrilled to dive into the vibrant world of holiday drinks with you today! If you’re anything like me, the festive season means putting on your best apron and creating drinks that are not just tasty but also celebrate the warmth of the season. Today, we’re making a Sparkling Cranberry Mocktail that’s sure to dazzle your senses and brighten any gathering. So, let’s mix it up, shall we?
Picture this: you walk into a room filled with laughter, the scent of baked goods wafting through the air, and the playful chime of glasses as friends toast to good times. As the holidays approach, we all want to create memories, and what better way to do that than with a refreshing drink that everyone can enjoy? Enter the Sparkling Cranberry Mocktail – a stunning concoction that’s as joyful as it is delicious!
Crafted from the sweet-tart allure of cranberry juice and the effervescence of sparkling water, this mocktail embraces the spirit of festivity without the need for any alcohol. It’s the kind of drink that brings people together, making it perfect for holiday parties, family dinners, or a cozy night in with your favorite holiday movies.
What I love about this mocktail is its versatility. Whether you’re hosting a big bash or just unwinding after a long day, this drink can be whipped up in no time. Plus, it looks gorgeous with its ruby-red color and chic garnishes – trust me, your guests will be impressed! So, grab your favorite mug or a sparkling glass, and let’s get this party started!
Personal Story
The inspiration for this Sparkling Cranberry Mocktail comes from a holiday gathering I attended years ago at my grandmother’s house. Every year, she’d host a festive family reunion, and the kitchen would be bustling with the sounds of laughter and clinking glassware. I can still remember the way she’d serve her cranberry punch with a flourish, garnishing each glass with a slice of lime and a handful of fresh cranberries.
It was always a hit! As kids, we would sip on that vibrant red drink, feeling like we were part of the “adult” conversations happening around us. Each sip transported me to a world filled with joy, love, and the timeless magic of family traditions. Now, as I share this Sparkling Cranberry Mocktail with all of you, I know I’m passing on that same warmth and festive spirit. Raise a glass to nostalgia, folks!
Ingredients
Here’s what you’ll need to whip up this fabulous Sparkling Cranberry Mocktail:
-
2 cups cranberry juice
Choose 100% cranberry juice for a more tart flavor, or a blend that suits your taste. Look for unsweetened options for a healthier choice, or go for sweetened versions if you want it sweeter. -
1 cup sparkling water or soda
This adds the fizzy element! Use flavored sparkling water like lime or lemon for an extra zing, or opt for a soda for a sweeter drink. If you want a low-cal option, stick with no-calorie sparkling water. -
1 tablespoon lime juice
Fresh is best! If you don’t have lime, lemon juice works too. This adds a nice brightness that balances the sweetness of the cranberry juice. -
Fresh cranberries and lime slices for garnish
These not only look stunning but also enhance the drink’s flavor. If fresh cranberries are out of season, frozen ones work well too! -
Ice cubes
Having the right ice can make a big difference. Try to use larger cubes to avoid watering down your drink too quickly!
Step-by-Step Instructions
Now that we’ve gathered our ingredients, let’s get to the fun part. Making this delicious mocktail is a breeze! Here’s how to do it step by step:
Step 1: Chill Your Ingredients
Start by placing your cranberry juice and sparkling water in the refrigerator for about an hour. This ensures your mocktail is refreshingly cold without having to dilute it with too much ice.
Step 2: Prepare Your Glasses
Choose your favorite glasses for serving. I love using tall, elegant glasses, but any cheerful cup will do! Fill each glass with ice cubes about halfway. Here’s a fun chef hack: if you want your drink to look extra festive, freeze some cranberries in your ice cubes beforehand!
Step 3: Mix the Cranberry Juice and Lime
In a pitcher, combine the 2 cups of cranberry juice with 1 tablespoon of freshly squeezed lime juice. Give it a good stir! This mix is the heart of your mocktail, so make sure it’s well blended. Tip: If you’re a fan of sweetness, taste and adjust with a little bit of sugar or simple syrup, but keep in mind that the sparkling water will add some sweetness too.
Step 4: Add the Sparkling Water
Carefully pour the chilled sparkling water into the cranberry mix. Here’s where the magic happens! The fizz brings a lively vibe to your drink. Pour it slowly to prevent too much froth, and watch the beautiful bubbles rise.
Step 5: Garnish and Serve
Now for the fun part! Pour the mocktail into your prepared glasses over the ice. Drop in a few fresh cranberries and a lime slice for garnish. Not only does it look stunning, but it also hints at the delightful flavors awaiting in that glass. Serve immediately and watch everyone’s eyes light up!
Serving Suggestions
When it comes to serving this stylish Sparkling Cranberry Mocktail, presentation is key! Here are a few serving suggestions to elevate your drink experience:
-
Glassware: Fun and festive glassware can turn a simple drink into something special. Try using mason jars, stemless wine glasses, or even vintage goblets for a unique twist.
-
Garnish Station: Set up a garnish station with additional lime wedges, fresh herbs (like mint), or even flavored sugar rims. Let your guests personalize their drinks!
-
Batch it Up: If you’re having a large gathering, consider making a big batch ahead of time. Just mix the cranberry juice and lime juice and keep the sparkling water separate until you’re ready to serve. This keeps the fizz intact and looking gorgeous!
Recipe Variations
Here are a few creative twists to try with this Sparkling Cranberry Mocktail:
-
Cranberry Mint Fizz: Add a few fresh mint leaves to the bottom of your glass before pouring in the mocktail. The refreshing mint pairs beautifully with the tart cranberry!
-
Spiced Cranberry Cooler: Add a pinch of ground cinnamon or nutmeg to the cranberry juice for a cozy, spiced flavor that’s perfect for chilly evenings.
-
Berry Splash: Mix in a handful of fresh blueberries or raspberries for an added layer of flavor and color!
-
Citrus Delight: Swap the lime juice for lemon or orange juice, or even mix them together for a citrusy affair.
-
Sparkling Punch: If you want to serve a crowd, blend your ingredients with some pineapple juice for a tropical punch, and serve it in a punch bowl for that classic party vibe.
Chef’s Notes
As we wrap up our mocktail journey, I can’t help but reminisce about the importance of sharing food and drink with loved ones. This recipe has evolved over the years – it started as a simple cranberry punch, but I’ve played with flavors, experimented with garnishes, and made it my own. It’s turned into a family tradition, just like my grandmother’s holidays, but now, I’m passing it down to you!
Whether it’s the sparkle of the soda or the tartness of the cranberries, every single ingredient reminds me of joyful moments shared. Cheers to that!
FAQs and Troubleshooting
Q: Can I prepare this drink in advance?
A: Yes, but for the best experience, mix the cranberry juice and lime juice ahead of time, store it in the fridge, and add the sparkling water right before serving to keep it fizzy!
Q: What if I can’t find fresh cranberries?
A: No worries! Frozen cranberries work just fine. They’ll also keep your drink cold and add a lovely pop of color.
Q: Is this mocktail kid-friendly?
A: Absolutely! It’s a fun drink for all ages. Kids love the fizz, and it’s a great way to make them feel included in the celebrations.
Q: How can I make this drink less tart?
A: If you prefer a sweeter mocktail, try using a sweetened cranberry juice or add a splash of simple syrup to balance the tartness.
Nutritional Info
While this Sparkling Cranberry Mocktail is primarily enjoyed for its festive flavor, it’s also relatively low in calories, especially since it can be made with unsweetened cranberry juice and no-sugar-added sparkling water. Here’s a rough breakdown per serving:
- Calories: About 60-80 calories depending on the sweetness of the cranberry juice and soda.
- Sugars: Approximately 12-15 grams.
- Vitamin C: Thanks to the fresh lime and cranberry juice, you’re also getting a nice vitamin C boost!
These numbers make it a refreshing choice compared to many holiday cocktails. Enjoy guilt-free!
Final Thoughts
So there you have it – a delightful Sparkling Cranberry Mocktail that’s not only delicious but also brings a sense of joy and warmth during the festive season. It’s quick to whip up, refreshing to sip on, and utterly pleasing to the eye. Whether you’re hosting a celebration or just want to treat yourself, this mocktail pays homage to those cherished family memories while creating new ones.
Here’s to laughter, friendship, and of course, good food! So grab your ingredients, gather your friends and family, and let’s toast to creating moments that matter. Cheers, foodie friends – let’s make this holiday season sparkly and bright!
Print
Sparkling Cranberry Mocktail
- Total Time: 10 minutes
- Yield: 4 servings 1x
- Diet: Vegetarian
Description
A festive Sparkling Cranberry Mocktail that dazzles with a blend of cranberry juice and sparkling water, perfect for holiday gatherings.
Ingredients
- 2 cups cranberry juice
- 1 cup sparkling water or soda
- 1 tablespoon lime juice
- Fresh cranberries and lime slices for garnish
- Ice cubes
Instructions
- Chill your ingredients by placing your cranberry juice and sparkling water in the refrigerator for about an hour.
- Prepare your glasses by filling them halfway with ice cubes.
- Mix the cranberry juice with lime juice in a pitcher and stir well.
- Add the chilled sparkling water into the cranberry mixture slowly.
- Garnish with fresh cranberries and a lime slice in each glass and serve immediately.
Notes
For a sweeter drink, consider adding some sugar or simple syrup. You can also use flavored sparkling water to enhance the taste.
- Prep Time: 10 minutes
- Cook Time: 0 minutes
- Category: Beverage
- Method: Mixing
- Cuisine: American
Nutrition
- Serving Size: 1 serving
- Calories: 70
- Sugar: 13g
- Sodium: 15mg
- Fat: 0g
- Saturated Fat: 0g
- Unsaturated Fat: 0g
- Trans Fat: 0g
- Carbohydrates: 17g
- Fiber: 0g
- Protein: 0g
- Cholesterol: 0mg
Keywords: mocktail, cranberry drinks, holiday drinks, non-alcoholic beverages

Juicy peach lemonade recipe: A summer delight
Refreshing Summer Delight: Juicy Peach Lemonade Recipe
Hey there, taste adventurers! ☀️ As summertime rolls around, there’s nothing quite like a glass of refreshing lemonade to quench your thirst. But what if we could elevate that classic drink to a whole new level? Enter my Juicy Peach Lemonade—a summer delight that’s bursting with sweet peachy goodness, zesty lemon flavor, and a refreshing hint of mint. Trust me, this beauty will have you feeling like you’re sippin’ on sunshine!
I’ve always found that summer is about more than just hot days and long nights; it’s about the memories we create, the laughter shared over meals, and, of course, the food that brings us all together. Growing up, one of my fondest memories is sitting on the porch with my family, surrounded by the sweet aroma of summer fruits, which inspired me to craft this delightful peach lemonade. There’s something magical about enjoying a cold drink on a hot day, especially one that you made from scratch! 🍑💧
This recipe is not only easy to whip up but also customizable to suit your taste buds. Whether you want it sweeter or with a twist, you can make it your own. So, whether you’re hosting a backyard barbecue, a picnic in the park, or just lounging in your living room, this Juicy Peach Lemonade will be your go-to refreshment. Alright, let’s dive into the sweet, juicy goodness of this recipe!
Personal Story
Ah, I can still picture that sunny afternoon at my grandparents’ house. It was the height of peach season, and we’d gather for a family reunion every summer, filled with laughter and stories. My grandpa would always head to the farmer’s market early that morning, coming back with a basket overflowing with ripe, juicy peaches, their scent wafting through our open windows.
One particular summer, my grandma decided to surprise us with a homemade peach lemonade. She had done it all—the peeling, chopping, and squeezing—while my siblings and I played games outside. When the first pitcher made its debut, we were all gathered at the picnic table, and as soon as I took a sip, I was locked in a blissful summer trance. The sweet peaches blended seamlessly with that zesty lemon punch, and it was pure paradise.
That moment has stuck with me, and every summer since, I’ve tried to recreate that delicious drink—thus, my Juicy Peach Lemonade was born! Now, I get to share this twist on a family favorite with all of you, so you can create your own summer memories, one refreshing sip at a time. 🍹
Ingredients
Here’s what you’ll need to craft your Juicy Peach Lemonade. Make sure to gather these fresh ingredients so we can get started!
-
1.16 lbs Ripe Peaches (about 3 large, peeled and chopped)
Ripe peaches are essential for a sweet lemonade base. Look for peaches that yield slightly to pressure and smell fragrant. If peaches are out of season, you can use frozen sliced peaches—just let them thaw before using. -
0.5 cups Granulated Sugar (can swap for honey, stevia, or erythritol)
This is to sweeten your lemonade. If you’re looking for a healthier alternative, honey adds a nice floral note, while stevia and erythritol keep it low-cal. -
2 cups Water (for syrup)
This will make the base of your syrup. If you’d like a stronger peach flavor, substitute part of the water with peach juice! -
0.33 cups Fresh Lemon Juice (about 2 lemons, zest for more flavor)
Freshly squeezed lemon juice is key! Lemon zest can amplify flavors without being too tart. If you want extra citrusy zing, squeeze one more lemon. -
3 cups Water or Sparkling Water (sparkling water adds fizziness)
Use regular water for a classic lemonade or sparkling water for a fizzy, refreshing twist. Completely your choice, but trust me—those bubbles will make it feel extra festive! -
Ice Cubes (essential for serving)
Don’t even think about skipping these! They’ll keep your lemonade icy cold and refreshing. -
Lemon Slices (adds visual touch and citrus aroma)
These not only look great but also release some zest into your lemonade as you sip. -
Peach Slices (reinforces flavor)
Garnishing your drink with fresh peach slices enhances the peach factor. -
Fresh Mint (adds a fragrant note)
A sprig of mint on top really elevates the sip! Crush the leaves to release their aroma—trust me, it’s magical.
Step-by-Step Instructions
Let’s roll up our sleeves and get to the fun part—making your Juicy Peach Lemonade! Follow these steps, and don’t be afraid to dance around the kitchen while you do it!
Step 1: Make Your Peach Syrup
- Begin by placing your chopped peaches in a medium saucepan. Add in the granulated sugar and pour in 2 cups of water. Stir to combine everything.
- Turn the heat to medium and bring the mixture to a gentle simmer. The key here is to cook it low and slow for about 10 minutes until the peaches soften and the sugar dissolves completely.
- Pro tip: As the peaches break down, mash them lightly with a fork or potato masher to release even more flavor.
Step 2: Strain the Mixture
- After simmering, place a fine-mesh strainer over a large bowl and carefully pour the peach mixture through.
- Use the back of a spoon to press down the peaches, ensuring you extract every last drop of that sweet nectar.
- Don’t toss the peach pulp just yet! You can use it for smoothies or sprinkle it on top of your morning oatmeal!
Step 3: Mix in the Lemon Juice
- Pour your lovely peach syrup back into the saucepan (or a clean mixing bowl). Add in that fresh lemon juice and give it a good stir.
- This is where the flavor really starts to shine! Taste your mixture—you can add more sugar or lemon juice if you like it sweeter or tarter.
Step 4: Combine with Water
- Now it’s time to hydrate our luscious mixture! Stir in the 3 cups of water or sparkling water, depending on your preference.
- If you’re feeling adventurous, sprinkle a pinch of salt to enhance the flavors even more.
Step 5: Chill and Serve
- Pour the lemonade into a pitcher and chill in the refrigerator for at least 1 hour. This also allows the flavors to meld beautifully.
- When you’re ready to serve, fill your glasses with ice cubes, pour the peach lemonade over, and garnish with fresh mint, lemon, and peach slices.
Chef’s Hack: If you want to impress your friends, try freezing small slices of peach into ice cubes beforehand—gorgeous and practical!
Serving Suggestions
Serving your Juicy Peach Lemonade can be as vibrant as the flavors contained within! Here are my suggestions:
- Use tall, clear glasses to showcase those beautiful layers—the peach syrup, the bubbly lemonade, and the colorful garnishes.
- Make it a showstopper by placing a few lemon and peach slices on the rim of each glass. It’s all about presentation, folks!
- Don’t forget to float a sprig of mint on top! Not only does it look inviting, but it also adds a fragrant touch every time you take a sip.
You can easily double or triple the recipe for larger gatherings and serve it in a beautiful pitcher, giving your guests the chance to refill their glasses at their leisure. This lemonade is just begging to be enjoyed with friends and family!
Recipe Variations
Now that you have the base down, let’s get a little creative with some variations you can try:
-
Berry Peach Lemonade: Substitute half of the peaches with fresh raspberries or strawberries. They’ll bring a whole new berry flavor dimension to the drink.
-
Spicy Peach Lemonade: Add a splash of jalapeño juice or some chopped jalapeños into the syrup for a spicy twist! Make sure to taste after adding, as a little goes a long way.
-
Herbal Twist: Swap the mint for basil or thyme for an intriguing herbal essence. Crushing the leaves will release their essential oils—so aromatic!
-
Tropical Peach Lemonade: Combine peaches with fresh pineapple juice for a summery tropical twist that’s perfect for beach days.
-
Lavender Peach Lemonade: Add a bit of culinary lavender into your syrup as it simmers for a delicate floral note. It’s as pretty as it is tasty!
Chef’s Notes
Here’s a little something from my kitchen to yours: This Juicy Peach Lemonade recipe has evolved over time. I originally started out just aiming for a classic lemonade, but as I tinkered with different fruits and flavors, peaches stole my heart. Every time I make it, I remember sunny days filled with laughter, the way my grandmother’s kitchen smelled, and how a simple drink can spark joy.
Also, don’t be afraid to get creative! If something doesn’t go as planned—hey, that’s just another cooking story to add to your kitchen notebook. Trust me, even the best chefs have their mishaps (let’s not talk about the time I mistook salt for sugar… oops!).
FAQs and Troubleshooting
A few common questions I get all the time when it comes to making this lemonade:
-
Can I use canned peaches?
- You can, but fresh peaches are best for flavor! If you use canned, look for fruit packed in juice, not syrup, and don’t forget to drain them well!
-
What should I do if my lemonade is too sweet/tart?
- If it’s too sweet, add a splash more lemon juice to cut the sweetness. For too tart, simply stir in more sugar or a drizzle of honey until it suits your taste.
-
How long can I store this lemonade?
- Your peach lemonade can last for up to a week in the fridge. Just be sure to stir well before serving as the flavors may settle.
-
Can I make this ahead of time?
- Absolutely! Just prepare the syrup in advance and mix everything with water and ice right before serving.
Nutritional Info
Now, let’s break down the numbers for this delicious refreshment—making it easier to fit into your summer treat lineup! Each 1-cup serving (this recipe makes about 8 servings) has roughly:
- Calories: 85
- Total Fat: 0g
- Sodium: 5mg
- Total Carbohydrates: 22g
- Sugars: 19g (less if using honey or sugar substitutes)
- Protein: <1g
This refreshing drink provides a boost of vitamin C from the lemons and peaches, along with hydration that’s perfect for those hot summer days. Always keep in mind that you can adjust sweetness to fit your dietary needs!
Final Thoughts
And there you have it, my fabulous foodies! Your very own Juicy Peach Lemonade recipe is all set to make waves this summer season! 🍋🍑 Remember, this drink is more than just a recipe; it’s a vessel for memories, laughter, and connections filled with flavors.
As you whip this up, I encourage you to share it with loved ones and create your own summer stories. Whether you enjoy a lazy afternoon sipping on the porch, hosting a fun barbecue, or taking a thermos of this peachy delight to the park, know that every glass filled with Juicy Peach Lemonade is a toast to the good times ahead.
So, grab your ingredients and let the blending begin—happy sipping! Cheers to all the delicious, summertime adventures waiting just around the corner! 🥂✨
And that’s a wrap on this peachy love story! I hope you enjoy bringing a piece of summer into your kitchen and sharing it with the people you love. Let’s keep celebrating those feel-good flavors, one recipe at a time—can’t wait to see what culinary adventures you embark on next!
Print
Juicy Peach Lemonade
- Total Time: 25 minutes
- Yield: 8 servings 1x
- Diet: Vegan
Description
A refreshing twist on classic lemonade, this Juicy Peach Lemonade is bursting with sweet peach flavor, zesty lemon, and a hint of mint—perfect for summer gatherings!
Ingredients
- 1.16 lbs Ripe Peaches (about 3 large, peeled and chopped)
- 0.5 cups Granulated Sugar (or honey, stevia, or erythritol)
- 2 cups Water (for syrup)
- 0.33 cups Fresh Lemon Juice (about 2 lemons, zest for more flavor)
- 3 cups Water or Sparkling Water
- Ice Cubes (for serving)
- Lemon Slices (for garnish)
- Peach Slices (for garnish)
- Fresh Mint (for garnish)
Instructions
- Make Your Peach Syrup: Place chopped peaches in a saucepan, add sugar and 2 cups of water. Stir and simmer for 10 minutes until peaches soften.
- Strain the Mixture: Use a fine-mesh strainer over a bowl to pour the peach mixture through, pressing down to extract juice.
- Mix in the Lemon Juice: Return syrup to the saucepan, add lemon juice, and stir to combine.
- Combine with Water: Stir in 3 cups of water or sparkling water. Add a pinch of salt if desired.
- Chill and Serve: Pour into a pitcher, chill for at least 1 hour, and serve over ice garnished with mint, lemon, and peach slices.
Notes
For a fun variation, try adding frozen peach slices to ice cubes before serving for an extra festive touch!
- Prep Time: 15 minutes
- Cook Time: 10 minutes
- Category: Beverage
- Method: Mixing
- Cuisine: American
Nutrition
- Serving Size: 1 cup
- Calories: 85
- Sugar: 19g
- Sodium: 5mg
- Fat: 0g
- Saturated Fat: 0g
- Unsaturated Fat: 0g
- Trans Fat: 0g
- Carbohydrates: 22g
- Fiber: 1g
- Protein: <1g
- Cholesterol: 0mg
Keywords: peach lemonade, summer drink, refreshing beverage, fruity lemonade, homemade lemonade

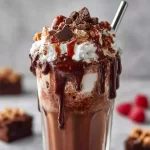
Brownie Milkshake Recipe
# Indulge in Bliss: The Ultimate Brownie Milkshake Recipe

### Introduction

Hey there, fellow food lovers! It’s your pal Beau Collier, and today I'm thrilled to share one of my ultimate guilty pleasures: the Brownie Milkshake! Trust me, this isn't just your ordinary milkshake—it’s a dessert that will make your taste buds do a happy dance. Imagine creamy vanilla ice cream blended with rich brownie chunks, swirls of velvety chocolate syrup, and a cloud of whipped cream on top. Is your mouth watering yet?

Let’s be real; we all have those moments when life throws a curveball, and you just need something sweet and satisfying to pull you back up. Whether it’s a hot summer day, a movie night, or just a cozy moment spent with friends, this brownie milkshake is your go-to. With every sip, you're not just enjoying a drink—you’re reliving a cherished memory, sharing joy, and maybe even creating new ones in the process.

When I think of milkshakes, I remember my childhood friends and I spending countless afternoons at the local soda shop, chatting away while we indulged in thick, creamy shakes. Nothing brought a smile quicker than a giant straw sticking out of a tall glass filled with the good stuff. Today, I’m about to give you a little sneak peek into not just my recipe for the dreamy brownie milkshake, but also the stories and experiences that make this treat so special. Grab your blender, and let’s whip up some nostalgia!

### Personal Story

This recipe takes me straight back to my college years, where late-night study sessions often turned into impromptu hangouts. We all gathered in my tiny kitchen, attempting to make sense of textbooks while honing our culinary skills. One particular evening, my friends and I decided to celebrate surviving finals week (barely!). With a box of brownie mix and a couple of ice cream tubs, we concocted what would become our go-to treat: the Brownie Milkshake.

As the blender whirred to life, laughter bounced off the kitchen walls, each of us taking turns at the blender while the other prepared toppings. After a flurry of brownie crumbles and whipped cream blasts, we toasted to our hard work (and the summer break ahead) with milkshakes so thick you could practically stand a spoon up in them. That night was about more than just dessert; it was about friendships, laughter, and memories made over a simple yet decadent treat. Years later, every sip of this milkshake still brings that joyful chaos back to me.

### Ingredients

Ready to get started? Here’s what you’ll need to whip up your own brownie milkshake:

- **2 cups vanilla ice cream**
  - *Why vanilla?* It’s the perfect base to complement the chocolatey richness of brownies. Feel free to substitute with chocolate ice cream if you’re feeling extra indulgent!

- **1 cup milk (whole or 2% preferred)**
  - *Chef insight:* The creaminess of whole milk makes everything richer. If you're looking for a lighter option, almond or oat milk can also work, but adjust the quantity for the desired thickness.

- **1 large brownie, plus more for garnish**
  - *Substitution tip:* You can use store-bought brownies or even those left over from a previous dessert party, but I highly recommend homemade for maximum flavor!

- **1 teaspoon vanilla extract**
  - *Why add this?* It enhances the overall flavor profile; never skip it! If you're feeling adventurous, a dash of espresso powder can also kick the chocolate flavor up a notch.

- **Whipped cream**
  - *Tip:* Store-bought is fine, but homemade whipped cream really takes it over the top! Just whip heavy cream with a little sugar and vanilla for a dreamy topping.

- **Chocolate syrup**
  - *Little hack:* Drizzle some chocolate syrup inside the glass before pouring in the shake for a professional touch!

### Step-by-Step Instructions

Now, let’s dive into the magic of blending this deliciousness together! Follow these steps, and you’ll be sipping your brownie milkshake in no time.

1. **Gather Your Tools**
   - Make sure you have a blender and a sturdy glass ready. If you want to take it to the next level, grab a large straw.

2. **Blend the Ice Cream and Milk**
   - Add the 2 cups of vanilla ice cream and 1 cup of milk into the blender. Start blending on a low setting just to combine, then increase to high until it’s smooth and creamy. *Tip: You want a thick consistency—if it’s too thick to blend, add a tad more milk.*

3. **Add the Brownie and Vanilla Extract**
   - Crumble that brownie (saving a small piece for garnish), and toss it into the blender along with the teaspoon of vanilla extract. Blend again until the brownie is well mixed but still slightly chunky. *Pro Tip: For more chocolate goodness, throw in some chocolate chips here!*

4. **Taste Test Time!**
   - Here’s where you get to be the chef! Pour a small amount into a glass for a taste test. Adjust sweetness if needed with a little sugar or more syrup.

5. **Drizzle the Glass**
   - Before pouring the whole milkshake, drizzle chocolate syrup along the sides of your glass. Not only does it look great, but it adds extra flavor! *Happy Dance Alert!*

6. **Pour and Top**
   - Pour the milkshake into the glass, filling it almost to the brim. Top generously with whipped cream. *Looks like dessert perfection!*

7. **Garnish and Serve**
   - Crumble the reserved brownie over the whipped cream, and add a final drizzle of chocolate syrup on top. Grab that straw and get ready to dive in!

### Serving Suggestions

While this milkshake is perfectly delightful on its own, there are a few ways to elevate your serving game:

- **Make it a Milkshake Bar:** Set up a fun milkshake station with various toppings like crushed nuts, sprinkles, or even a scoop of peanut butter or caramel drizzle. Let your guests customize their own!

- **Fluffy Pancake Stacks:** Pair your brownie milkshake with some chocolate chip pancakes stacked high for a brunch feast that’s sure to impress.

- **Cozy Evening Treat:** Serve it alongside warm cookies or a slice of pie for a comforting dessert spread.

### Recipe Variations

Now that you’ve got the classic brownie milkshake on lock, here are some fun variations to try out:

1. **Minty Chocolate:** Add a few mint leaves or a drop of peppermint extract for a refreshing twist. Perfect for those who love mint chocolate!

2. **Peanut Butter Bliss:** Swirl in a couple of tablespoons of peanut butter for a nutty flavor explosion. The combination with chocolate is truly divine.

3. **Cookie Crumble:** Swap the brownie for your favorite cookie, like Oreos or chocolate chip, for an equally indulgent treat.

4. **Vegan Delight:** Substitute vanilla ice cream for a dairy-free version, use plant-based milk, and opt for vegan brownies for a totally plant-based milkshake!

5. **Coffee Lover’s Dream:** Blend in a shot of espresso or strong coffee for a mocha brownie milkshake that will get you energized.

### Chef’s Notes

As I’ve perfected this recipe over the years, I’ve learned that there’s no one way to make a milkshake; it’s all about what flavors and textures you love. There was one time when I accidentally used too much milk and ended up with a more liquid dessert—instead of tossing it! I just called it “Milkshake Soup” and served it with tiny spoons. My friends loved it! That’s the beauty of cooking—don’t just follow the rules, have fun with them!

### FAQs and Troubleshooting

1. **What if my milkshake is too thin?**
   - No worries! Just add a bit more ice cream and blend again. If you had too much milk at the start, remember, it’s easy to thicken!

2. **Can I make it ahead of time?**
   - I recommend serving this fresh, but if you must, prepare the milkshake base (minus the whipped cream) and store it in the freezer. Just give it a quick blend before you’re ready to serve!

3. **How do I store leftovers?**
   - While leftover milkshake is rare, if you happen to have some, you can store it in the freezer! Just let it thaw a bit before enjoying again.

4. **Can I add alcohol?**
   - Absolutely! For an adult twist, add a shot of your favorite liqueur—like Baileys or Kahlua—for a boozy brownie treat!

### Nutritional Info

Now, I know we love our delicious treats, but it’s also good to consider what’s in them. Your brownie milkshake will have roughly:

- **Calories:** 600-800 (depends on ice cream and brownies used)
- **Fat:** 30g (saturated fat from ice cream and brownie)
- **Carbohydrates:** 80g (sugar from ice cream and brownies)
- **Protein:** 12g (from milk and ice cream)

This is definitely a treat to enjoy in moderation, but can you really put a price on happiness?

### Final Thoughts

There you have it! A classic Brownie Milkshake that’s ready to take you on a trip down memory lane, and maybe even create some new ones. So crack open your freezer, pull out that ice cream, and let’s blend our way to bliss!

Food is all about the joy it brings us, and this brownie milkshake is sure to deliver just that. Whenever I make it, I’m reminded of those sweet late-night study sessions, surrounded by good friends and laughter. I hope this recipe brings you a taste of that—whether you’re hosting a gathering or enjoying a quiet night in, do it with a brownie milkshake in hand. Cheers to delicious moments!

Now go ahead, whip one up, and let me know how it turns out! Happy blending!
Ultimate Brownie Milkshake
- Total Time: 10 minutes
- Yield: 2 servings 1x
- Diet: Vegetarian
Description
A decadent brownie milkshake blending creamy vanilla ice cream and rich brownie chunks for a delightful treat.
Ingredients
- 2 cups vanilla ice cream
- 1 cup milk (whole or 2% preferred)
- 1 large brownie, plus more for garnish
- 1 teaspoon vanilla extract
- Whipped cream
- Chocolate syrup
Instructions
- Gather Your Tools: Make sure you have a blender and a sturdy glass ready.
- Blend the Ice Cream and Milk: Add the ice cream and milk into the blender and blend until smooth and creamy.
- Add the Brownie and Vanilla Extract: Crumble the brownie into the blender along with vanilla extract and blend until mixed but slightly chunky.
- Taste Test Time: Pour a small amount into a glass for a taste test and adjust sweetness if needed.
- Drizzle the Glass: Drizzle chocolate syrup along the sides of the glass before pouring in the milkshake.
- Pour and Top: Fill the glass with the milkshake and top generously with whipped cream.
- Garnish and Serve: Crumble reserved brownie over the whipped cream and add a drizzle of chocolate syrup on top.
Notes
Customize your milkshake with different toppings and try variations like mint chocolate or peanut butter.
- Prep Time: 10 minutes
- Cook Time: 0 minutes
- Category: Dessert
- Method: Blending
- Cuisine: American
Nutrition
- Serving Size: 1 serving
- Calories: 700
- Sugar: 90g
- Sodium: 300mg
- Fat: 30g
- Saturated Fat: 15g
- Unsaturated Fat: 10g
- Trans Fat: 0g
- Carbohydrates: 80g
- Fiber: 3g
- Protein: 12g
- Cholesterol: 80mg
Keywords: brownie milkshake, dessert, chocolate shake, creamy shake, summer treat

Pink Strawberry Coconut Refresher
Pink Strawberry Coconut Refresher: Your Ultimate Summer Sip
Hey there, fellow foodies! It’s Beau here, and I am so excited to welcome you to my kitchen for a sunny celebration of flavors! Today, we’re whipping up something super special and absolutely refreshing—a Pink Strawberry Coconut Refresher that’s perfect for those warm days when all you want is something cool, sweet, and unearthed from your daydreams.
Picture yourself lounging in a hammock, the sun shining down, and a delightful drink in hand. That’s the vibe I’m aiming for with this easy-peasy recipe! Bursting with the fruity goodness of strawberries and the creamy bliss of coconut milk, this drink isn’t just a treat for your taste buds; it’s a nostalgic trip down memory lane.
Now, I don’t know about you, but summertime always reminds me of lazy afternoons spent with family and friends, sipping fruity drinks and swapping stories under the big shady tree in my backyard. There was this one summer when I tried to impress my cousins by creating my own “lava lamps” using lemonade and colored sugar water. Well, they turned out to be more science experiment than refreshment! But hey, it was the laughs and the sweet moments that made it memorable.
With this Pink Strawberry Coconut Refresher, you’re going to remix those summer vibes and create a new flavor memory that’s easy to prepare and hard to forget. So, grab your favorite blender, and let’s dive into the deliciousness!
Personal Story
Growing up, summer meant being surrounded by coiled garden hoses, open cans of soda, and, of course, the most magical fruit of all—strawberries! My mom would take my siblings and me to the local strawberry patch, where we’d spend hours picking the ripest berries we could find. It was a race, my competitive streak pushing me to fill my basket first, while my little brother would follow behind, munching on more strawberries than he collected!
One summer, we decided to throw a family barbecue, and I remember being tasked with making a refreshing drink for our guests. With the mountain of strawberries we had harvested, I whipped up a blend of strawberries and coconut milk, inspired by the tropical flavors we all craved during the summer heat. The laughter and chatter that filled the air as we enjoyed that sweet drink are forever etched in my memory. That was the moment I discovered that food is not just about taste but also about the moments we create around it.
Now, here we are, a few ripe strawberries later, and I’m thrilled to share my super-simple Pink Strawberry Coconut Refresher with you! Are you ready? Let’s make some magic!
Ingredients
To create this delightful refresher, you will need the following ingredients:
-
1 cup frozen strawberries
Frozen strawberries are perfect for smoothies and drinks because they chill your beverage while adding that delightful fruity essence. You can easily substitute them with fresh strawberries if that’s what you have on hand, just consider adding a bit more ice to keep it cold! -
2 tablespoons sugar
Sugar brings out that lovely sweetness in strawberries, balancing the tartness. If you’re watching your sugar intake, feel free to use honey or a sugar substitute like agave syrup or stevia. -
½ teaspoon vanilla extract
This little addition enhances the flavor of the strawberries and coconut milk, adding depth to the drink. A splash of almond extract could also give it a fun twist! -
4 cups refrigerated coconut milk
Coconut milk not only makes this drink creamy but also adds that refreshing tropical vibe. If you prefer a nutty flavor, go for almond milk instead, but remember, it won’t taste quite as rich!
Step-by-Step Instructions
Now that we have our ingredients ready, it’s time to mix it up! Follow these steps for the ultimate refresher.
-
Gather Your Tools
Grab your blender, a measuring cup, and a spatula. If you want to go fancy, prepare some chilled glasses ahead of time! -
Add Frozen Strawberries
Start by tossing the 1 cup of frozen strawberries into your blender. Don’t be tempted to skip this step—frozen strawberries make your refresher cold and slushy! -
Sprinkle in the Sugar
Measure and add 2 tablespoons of sugar. If you’re opting for honey or a sugar alternative, adjust accordingly. Blend this together until the strawberries are roughly crushed and it looks like a chunky puree. -
Pour in Coconut Milk
Next, add the 4 cups of refrigerated coconut milk. The cold milk will blend beautifully with the strawberries, creating a dreamy texture. Don’t forget to drizzle in that ½ teaspoon of vanilla extract! A perfect blend of flavor awaits. -
Blend Until Smooth
Secure the lid on your blender and buzz it up! Blend everything until you reach a lovely, smooth texture. If you prefer a bit of crunch, just give it a couple of quick pulses instead! -
Taste and Adjust Sweetness
Here’s where your palate comes in! Take a sip. Does it need a smidge more sugar? Go ahead and tweak it to your liking, then blend once more! -
Serve It Up
Pour your Pink Strawberry Coconut Refresher into chilled glasses. For a cute touch, you can decorate the rim with a slice of strawberry or a sprig of mint. Snap a pic before it disappears—trust me, you’ll want to!
Serving Suggestions
Now that your Pink Strawberry Coconut Refresher is ready, let’s talk about how to serve it! This drink is best enjoyed fresh, so serve it immediately in those chilled glasses for that ideal refreshing effect.
You can garnish it with a bright strawberry slice perched on the edge of the glass or throw in a few mint leaves for a pop of color and an extra burst of flavor. If you want to be the star host at your next gathering, whip this refresher up in a big jug or pitcher, and let your guests serve themselves!
Serve it alongside light summer fare like grilled chicken skewers or veggie kabobs for a perfectly balanced feast. And for dessert? How about a slice of coconut cream pie? Trust me, this refresher will complement whatever you pair it with!
Recipe Variations
Feeling adventurous? Here are some creative twists on your Pink Strawberry Coconut Refresher to keep things exciting:
-
Berry Blast: Swap in other frozen berries like blueberries or raspberries or mix them up for a colorful berry combo!
-
Citrus Zing: Add a splash of citrus juice (like lime or orange) to brighten up the flavors.
-
Nutty Bliss: Blend in a couple of tablespoons of almond or cashew butter for a nutty flavor and extra creaminess.
-
Dairy-Free Delight: For those without coconut milk, try oat milk or cashew milk—it will still be spectacularly refreshing!
-
Herbal Infusion: Experiment with fresh herbs like basil or cilantro for an unconventional twist. Just toss in a few leaves while blending!
Chef’s Notes
As a chef, I believe every recipe tells a story, and this one is no different! Back in the day, this refresher was a spontaneous creation born out of a successful berry-picking adventure. Over time, I’ve added my own touches, such as the vanilla extract, which has made it even more irresistible.
A funny tidbit? The first draft of this recipe was more of a “Berry Coconut Soup” than a refresher! But sometimes, in the kitchen, it’s those mistakes that turn into the best creations. Never be afraid to mess around; you never know, you might discover a new favorite!
FAQs and Troubleshooting
-
Why is my refresher too thick?
If you find your refresher is too thick, simply add a touch more coconut milk or water to thin it out until you reach your desired consistency. -
Can I use fresh strawberries instead of frozen?
Absolutely! If using fresh strawberries, you might want to add ice to make it chilled and refreshing. -
How can I store leftovers?
While it’s best enjoyed fresh, if you have leftovers, store it in the fridge for up to two days. Stir it up before serving again, as it may separate. -
Can I make this ahead of time?
For maximum freshness, I recommend making it just before serving. But if you’re pressed for time, blending it a few hours ahead and refrigerating it is a viable option!
Nutritional Info
This Pink Strawberry Coconut Refresher is not only delicious but also with some added health benefits! Here’s a quick nutritional rundown per serving:
- Calories: Approximately 150 kcal
- Fat: 8 g (from coconut milk)
- Carbohydrates: 20 g
- Sugars: 12 g (depends on how much you add)
- Protein: 2 g
- Fiber: 2 g
Great news for you—because you’re getting some vitamins and minerals from the strawberries and coconut milk! Strawberries are rich in Vitamin C and antioxidants, making your refresher both tasty and nutritious.
Final Thoughts
I hope you’ve enjoyed this journey of whipping up your own Pink Strawberry Coconut Refresher as much as I have! It’s amazing how simple ingredients can create such a lively drink and elicit lovely memories. Whether you’re relaxing on the porch or hosting a gathering, this drink is sure to brighten your day!
So, remember to share it with loved ones and create those cozy connections around the table. Food isn’t just about nourishment; it’s about sharing experiences, laughter, and love.
Now, get out there, whip up this refresher, and make some memories! And don’t forget to send me your pics; I love seeing your culinary adventures! Happy sipping!
Print
Pink Strawberry Coconut Refresher
- Total Time: 10 minutes
- Yield: 4 servings 1x
- Diet: Vegetarian
Description
A refreshing drink bursting with the fruity goodness of strawberries and creamy coconut milk, perfect for warm summer days.
Ingredients
- 1 cup frozen strawberries
- 2 tablespoons sugar
- ½ teaspoon vanilla extract
- 4 cups refrigerated coconut milk
Instructions
- Gather your tools: Grab your blender, a measuring cup, and a spatula.
- Add frozen strawberries: Toss the 1 cup of frozen strawberries into your blender.
- Sprinkle in the sugar: Measure and add 2 tablespoons of sugar, blending until the strawberries are roughly crushed.
- Pour in coconut milk: Add the 4 cups of refrigerated coconut milk and ½ teaspoon of vanilla extract.
- Blend until smooth: Secure the lid and blend until you reach a smooth texture.
- Taste and adjust sweetness: Take a sip and add more sugar if needed, blending once more.
- Serve it up: Pour into chilled glasses and garnish as desired.
Notes
For a fun twist, try adding a splash of citrus juice or blending in a couple of tablespoons of nut butter.
- Prep Time: 10 minutes
- Cook Time: 0 minutes
- Category: Beverage
- Method: Blending
- Cuisine: American
Nutrition
- Serving Size: 1 serving
- Calories: 150
- Sugar: 12g
- Sodium: 50mg
- Fat: 8g
- Saturated Fat: 7g
- Unsaturated Fat: 1g
- Trans Fat: 0g
- Carbohydrates: 20g
- Fiber: 2g
- Protein: 2g
- Cholesterol: 0mg
Keywords: summer drink, strawberry refresher, coconut beverage, refreshing drink
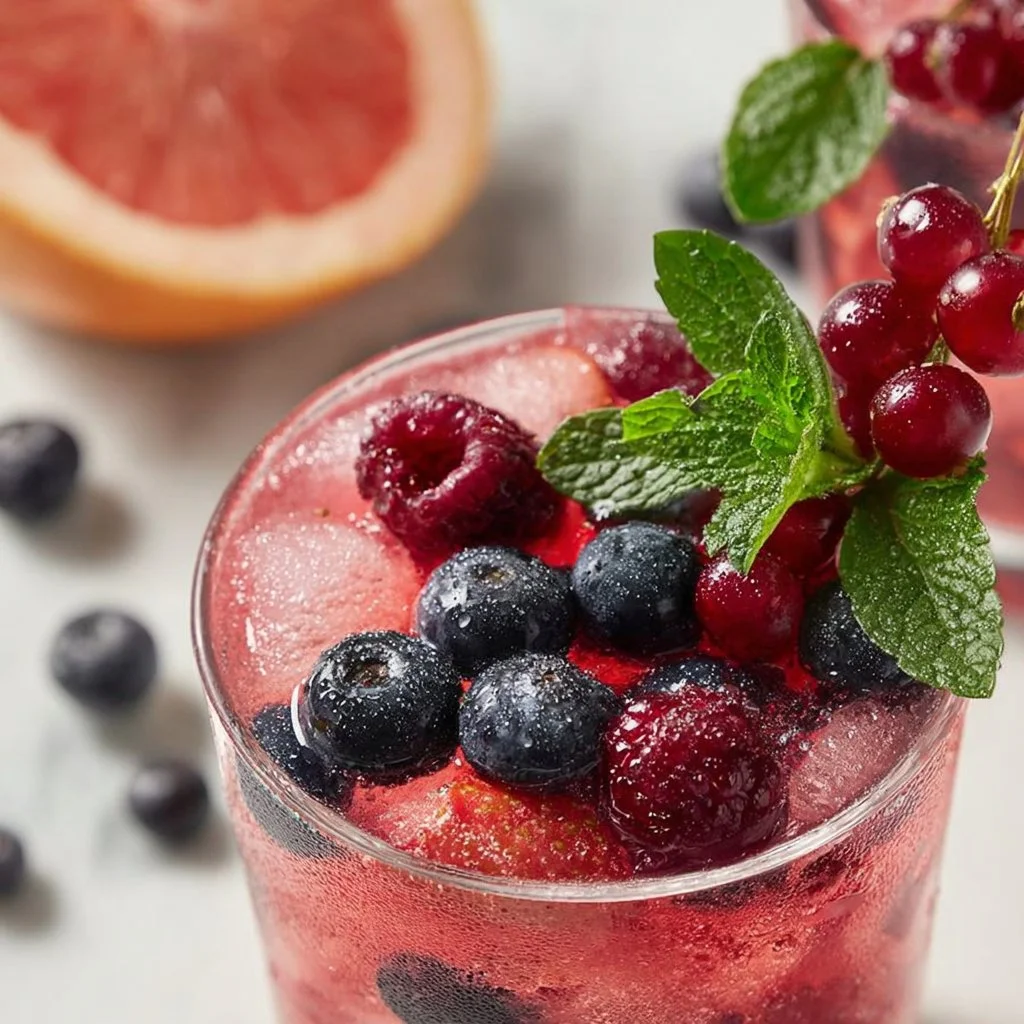
Blushing Berry Mocktail
Blushing Berry Mocktail: Your New Favorite Refreshing Drink
Hey there, fellow foodies! Welcome to Feastical, where the culinary magic happens! If you’re looking to beat the heat or simply want to sip something special while lounging in your favorite chair, you’re in for a treat. Today, we’re whipping up a delightful and refreshing Blushing Berry Mocktail that’s bursting with flavor and colors – just like summer should be!
If you’re anything like me, you appreciate a good mocktail. Whether you’re just winding down after a long day or celebrating a special occasion, there’s something undeniably festive about a drink that’s brimming with fruits and fizz. This Blushing Berry Mocktail is no ordinary drink – it’s a dazzling concoction that not only looks beautiful in your glass but also tastes like a sweet, fruity summer day.
Gather your friends, family, or even your pets if they’re the best companions you have (don’t worry, I won’t judge!), because this recipe is easy to whip up and oh-so-delicious! You’ll find that the combination of fresh berries, refreshing fizz, and a touch of sweetness is simply irresistible. It’s like taking a sip of happiness – perfect for all ages, too. So, let’s roll up our sleeves, grab those berries, and let’s create some kitchen magic!
Personal Story
Ah, the memory of summer barbeques at my grandmother’s house always brings a smile to my face. Every year, the family would gather in her backyard, a beautiful oasis of green, where the scent of barbeque would mingle with the sweet perfume of flowers. My grandmother, with her warm heart and even warmer spirit, was always the life of the party. It was her tradition to serve everyone a special drink during these gatherings, a mocktail she famously called “berry fizz.”
As a kid, I was always enamored with the colors of the drink – shades of deep red, pink, and sometimes even purple, all swirling together in a delightful presentation. I remember her saying, “A little bit of berries, a splash of sparkle, and a drizzle of sweetness, that’s all you need for a celebration.”
Fast forward to today, and I’ve made it my mission to keep her legacy alive with my own take on her mocktail. Hence, the birth of the Blushing Berry Mocktail! It combines nostalgia and flavor in a way that always seems to bring a smile to everyone’s face, whether they’re gathering around the table for a summer feast or just sharing laughs on a warm afternoon. So let’s dive into this beloved recipe!
Ingredients
Here’s what you’ll need to create your refreshing Blushing Berry Mocktail:
-
2 cups mixed berries (fresh or frozen): You can use strawberries, blueberries, raspberries, or blackberries—whatever you have on hand! Don’t shy away from experimenting; each berry contributes its unique flavor. If fresh berries aren’t available, frozen will do beautifully. Just let them thaw before using.
-
1 cup berry juice (cranberry or raspberry): This is the base of our mocktail. You can either buy pre-made juice or make your own! If you’re looking to reduce sugar, opt for juices labeled ‘no added sugar.’
-
2 tablespoons honey or agave syrup: This natural sweetener will enhance the berry flavors. If you’re vegan, agave syrup is a great alternative to honey. Feel free to adjust the sweetness based on your taste!
-
1 cup sparkling water: For that delightful fizzy kick! You can use flavored sparkling water if you want to mix things up a bit. Just ensure it complements the berry flavors.
-
Ice cubes: To keep everything cool and refreshing. I love using clear ice cubes – they just look so much nicer in your drink!
Step-by-Step Instructions
Alright, my kitchen comrades, let’s get to the fun part! Follow these steps for a beautiful Blushing Berry Mocktail:
-
Prep those berries!
Start by washing your chosen berries gently. If you’re using strawberries, don’t forget to hull them (remove the green tops)! Slice them in halves or quarters if they’re large, so their flavor can infuse the drink more easily. If you’re using frozen berries, just let them thaw and gently pat them dry with a paper towel to remove excess moisture. -
Make the berry base!
In a mixing bowl, combine your prepared mixed berries, berry juice, and honey or agave syrup. Use a fork or a muddler to gently mash the berries, releasing their juices while keeping some of the pieces intact for texture. This step adds a lovely burst of flavor to your drink. Let this mixture sit for about 5-10 minutes at room temperature. -
Mix in the fizz!
Once the berries have had time to mingle and get juicy, it’s time to add the sparkling water. Gently pour in the sparkling water and stir to combine. You want to mix it well but be careful not to stir too vigorously or you’ll lose that delightful fizz! -
Prepare your glasses!
Grab your favorite drinkware (the fancier, the better!). Fill each glass with ice cubes to keep everything chilled. I like to use clear glasses so you can see all those beautiful berry colors come to life! -
Pour and garnish!
Ladle the berry mixture over the ice-filled glasses, making sure each glass gets a generous amount of berries. For a lovely finishing touch, garnish with a few whole berries or fresh mint leaves. Not only does this add a pop of color, but it also enhances the aroma when you sip!
And there you have it, your Blushing Berry Mocktail is all dressed up and ready to go. Isn’t that quick and fun? Take a moment to appreciate all those vibrant colors before you dig in!
Serving Suggestions
When it’s time to serve your mocktails, presentation is everything! Here are a few ideas to make your Blushing Berry Mocktail look extra special:
-
Chic Glassware: Serve your drinks in tall, elegant glasses to give that “special occasion” vibe. Think highball glasses or even mason jars for a rustic touch.
-
Colorful Straws: Add a fun paper or reusable straw in a bright color that complements the drink’s hue. It makes sipping even sweeter!
-
Themed Servings: For a birthday party or special gathering, consider placing small party hats on the glasses or using drink stirrers with cute toppers.
-
Food Pairing: Serve it alongside light snacks such as cheese platters, fresh fruit bowls, or savory appetizers like bruschetta that highlight those lovely summer flavors.
Recipe Variations
Now, let’s get creative because this mocktail can easily transform into several variations! Here are a few ideas to put your unique spin on it:
-
Tropical Twist: Add sliced pineapple or mango to give it a tropical vibe. Substitute coconut water for the berry juice for an exotic flavor.
-
Citrus Burst: Squeeze in some fresh lime or lemon juice for acidity. This will brighten up the flavors and bring a refreshing tang to your drink.
-
Herbal Infusion: Experiment by muddling in some basil or lavender leaves with your berries for a herby twist. It’ll definitely elevate your mocktail to a whole new level!
-
Spiked Option: If you’re feeling adventurous and want to kick it up a notch, consider adding a splash of vodka or gin for an adult version of this mocktail.
-
Berry Blush Sangria: Turn your mocktail into a berry-infused sangria by adding diced fruits like peaches or apples and letting them soak with the berry juice before serving!
Chef’s Notes
As with any recipe, this Blushing Berry Mocktail has a special place in my heart. It’s evolved over time—from a simple mixture to a star attraction at many summer gatherings! I remember the first time I took this to a potluck. Everyone was enamored—parents started to ask, “Can you teach me how to make that?”
This drink brings back sweet memories, and I often think of my grandmother’s laughter as we gathered around the backyard table, drinks in hand, enjoying each other’s company. You can use this recipe as a canvas and help create your own cherished kitchen memories.
FAQs and Troubleshooting
Got some questions or running into issues? I’ve got you covered!
1. Can I use different fruits?
Absolutely! Feel free to experiment with other fruits like peaches, kiwi, or even watermelon! Just keep the berry base and berry juice—the key to that lovely “blushing” color!
2. What can I use if I’m out of berry juice?
No worries! You can substitute with pomegranate juice or even a mix of berry-infused teas. It won’t be the same, but it could definitely work!
3. My mocktail isn’t sweet enough. What can I do?
Taste as you go! If you find it lacking sweetness, simply mix in a bit more honey or agave syrup until you reach the desired taste.
4. How can I make this a party batch?
Simple! Just multiply the ingredients by the number of people you’re serving. You can mix everything in a large pitcher, and fill glasses individually as needed.
Nutritional Info
This Blushing Berry Mocktail isn’t just delicious but also quite nutritious! Here’s a rough breakdown per serving:
- Calories: Approximately 120 calories
- Carbohydrates: 30g (mostly from fruits and honey)
- Sugars: 20g (natural sugars from fruits and honey)
- Contains vitamins: Vitamin C, potassium, and antioxidants from the berries!
Remember, because it’s made with whole fruits and natural sweeteners, it’s a much healthier alternative compared to your average sugary beverage.
Final Thoughts
And there you have it, foodies! The Blushing Berry Mocktail isn’t just a drink; it’s an experience, a way to celebrate the little moments in life. Whether you’re gathering with loved ones or simply taking a moment for yourself on a sunny afternoon, this mocktail is sure to bring a smile to your face.
So, grab your favorite ingredients, a shaker, and some eager taste testers, and let’s make every sip a celebration! Remember—good food and drinks are meant to be shared. Cheers to that!
Until next time, keep cooking, keep exploring, and keep enjoying those feel-good foods that warm your heart and soul!
Print
Blushing Berry Mocktail
- Total Time: 10 minutes
- Yield: 4 servings 1x
- Diet: Vegetarian
Description
A refreshing Blushing Berry Mocktail bursting with flavor and colors, perfect for summer gatherings or relaxing afternoons.
Ingredients
- 2 cups mixed berries (fresh or frozen)
- 1 cup berry juice (cranberry or raspberry)
- 2 tablespoons honey or agave syrup
- 1 cup sparkling water
- Ice cubes
Instructions
- Prep those berries! Wash the berries gently, hull strawberries, and slice them if large. If using frozen, thaw and pat dry.
- Make the berry base! Combine mixed berries, berry juice, and honey or agave syrup in a bowl and gently mash.
- Mix in the fizz! Pour in the sparkling water and stir gently.
- Prepare your glasses! Fill glasses with ice cubes to keep everything chilled.
- Pour and garnish! Ladle the berry mixture over the ice and garnish with whole berries or mint leaves.
Notes
Feel free to adjust sweetness and use flavored sparkling water for variety.
- Prep Time: 10 minutes
- Cook Time: 0 minutes
- Category: Beverage
- Method: No Cooking
- Cuisine: American
Nutrition
- Serving Size: 1 serving
- Calories: 120
- Sugar: 20g
- Sodium: 0mg
- Fat: 0g
- Saturated Fat: 0g
- Unsaturated Fat: 0g
- Trans Fat: 0g
- Carbohydrates: 30g
- Fiber: 2g
- Protein: 1g
- Cholesterol: 0mg
Keywords: mocktail, summer drink, berry drink, refreshing beverage, non-alcoholic drink

Healthy Strawberry Mocktail Spritzer
Refreshing Strawberry Mocktail Spritzer: A Sparkling Celebration of Flavor!
Hey there, food lover! I’m so glad you stopped by Feastical today. If you’re ready to whip up a refreshing, feel-good drink that bursts with flavor, then buckle up because we’re diving into the world of a Healthy Strawberry Mocktail Spritzer! This delightful concoction is perfect for any occasion, whether you’re lounging by the pool, hosting a summer celebration, or simply treating yourself after a long day.
Introduction
Let me tell you something: nothing quite compares to that first sip of a spritzy drink on a hot day. It’s like a little party in your mouth! And what better way to celebrate than with the luscious sweetness of strawberries, the zesty kick of lime, and the bubbly effervescence of sparkling water? This berrylicious mocktail is all about joy, health, and savoring the simple pleasures of life. Plus, it’s so easy to make that you’ll be pouring glasses for everyone in a matter of minutes.
You might be wondering, “Why a mocktail?” Well, I’m a firm believer that we can enjoy delicious drinks without the alcohol! Mocktails are like a canvas for creativity; you can transform simple ingredients into something exciting and refreshing. And if you’re like me, you’ll appreciate something that tastes fabulous while keeping things light and healthy.
Now, you might be thinking it’s a tad tricky to impress your friends with a mocktail. But trust me, this Healthy Strawberry Mocktail Spritzer will not just quench your thirst but also delight your taste buds. As you whip it up, I promise this drink will transport you and your friends to sunny afternoons where laughter flows just as freely as the fizzy goodness in your glass.
So, are you ready to unleash the fruity magic? Let’s gather those ingredients and get our mocktail game on!
Personal Story
Every good recipe has a memory and a story behind it. For me, this spritzer brings back fond memories of summer barbecues at my grandparents’ house, where their backyard transformed into a bustling hub of laughter, food, and love. I can still picture my grandmother bustling around, her cheerful spirit filling the atmosphere with joy. One particularly sunny afternoon, she introduced us to a dazzling drink she’d whipped up from her garden’s bounty—strawberries!
She’d patiently slice the freshest strawberries, toss them into a glass, and mix them with lime juice (with a bit of that sparkly mystery ingredient, of course). The best part? Trying to sneak in extra strawberries when she wasn’t looking. That sweet and tangy fizz epitomized summertime for me and, let me tell you, it was always a hit.
Years later, I decided to recreate that lovely memory into a mocktail, marrying it with a touch of healthiness that fits into today’s lifestyles. And here we are, a few family gatherings later with this ever-popular spritzer that never fails to lift spirits and bring smiles. Cheers to the power of strawberries, laughter, and shared stories!
Ingredients
Let’s gather our ingredients! Here’s what you’ll need for your Healthy Strawberry Mocktail Spritzer, and a few quick notes to help you ace this recipe:
-
1 cup sliced fresh strawberries
These little gems are naturally sweet and packed with Vitamin C! Prefer frozen strawberries? They work too, but be aware they may add a slight chill factor to your drink. -
Juice of 1/2 lime
Lime adds a bright and zesty contrast to the sweetness. You can substitute with lemon for a different tangy punch, depending on your taste! -
3–4 tablespoons honey (or more to taste)
Honey is my go-to sweetener for its floral notes, but agave syrup or maple syrup can also do the trick if you’re looking for vegan options! Feel free to adjust the sweetness to suit your palate. -
4 cups unsweetened sparkling water (such as Perrier)
The fizz is essential! Any brand you love will do, just ensure it’s unsweetened to keep this drink refreshing and guilt-free. -
Ice cubes, as needed
Who doesn’t love a chilled drink? Feel free to use crushed ice for a floaty feel in summer—easy peasy! -
1/2 cup additional sliced strawberries, for garnish
Because what’s a spritzer without a little pizzazz? Extra strawberries will elevate the drink and make it look Instagram-worthy. -
1 handful of fresh basil leaves
This is the secret ingredient! It might sound unusual, but fresh basil elevates the drink, adding an aromatic herbal note that plays beautifully with the berries. Feel free to explore mint if basil isn’t your thing!
Step-by-Step Instructions
Now that we’ve gathered our ingredients, let’s put on our chef hats and get started! Here’s how to craft your delightful Healthy Strawberry Mocktail Spritzer, step by step:
-
Prep the Strawberries
Begin by rinsing and slicing the fresh strawberries. Aim for thickness around half an inch to maximize the surface area when muddling them. As you slice, allow yourself to relish the sweet aroma; it’s pure summer joy! -
Muddle It Up
In a large glass or pitcher, combine the sliced strawberries and the juice of half a lime. Using a muddler or the back of a spoon, gently crush the strawberries to release their juices. Aim for a mix that still has some chunky pieces; we want the flavor without turning it into a puree. This technique will explode the flavor in your mocktail! -
Sweeten the Deal
This is where you can get creative! Drizzle in 3–4 tablespoons of honey. Use a spoon to stir it in. Do a taste test here; if you love it a tad sweeter, add a smidge more honey. Perfecting that balance is the chef’s secret! -
Add the Fizz
Now it’s time for the fun part! Pour in the sparkling water. Gently stir again to combine all those flavors. You’ll hear the fizzing—my favorite part! If you like your drink nice and fizzy, feel free to top it off with a splash of sparkling water right before serving! -
Chill It
Now, add the ice cubes! If you’re entertaining, consider presenting your mocktail in a serving pitcher ahead of time, letting it chill. Or you could pour it directly over ice-filled glasses. The presentation will be as vibrant as your sunny day! -
Garnish Like a Pro
Don’t forget about that extra 1/2 cup of sliced strawberries and a handful of fresh basil. Float the strawberry slices on top of each drink with a sprig of basil nestled in, like a mini botanical masterpiece—it’s irresistible! -
Sip & Enjoy
Grab your favorite straw or swizzle stick, and dig in! There’s something magical about watching the ice melt, causing the flavors to mingle further. Take a moment to savor the drink and feel that burst of hydration!
Serving Suggestions
This Healthy Strawberry Mocktail Spritzer is not just a treat for the taste buds; it’s a visual feast! When serving, consider these fun ways to amp up your presentation:
-
Fancy Glassware: Serve the mocktail in stylish stemware or mason jars for a rustic touch—it elevates the experience. Nothing says celebration quite like a beautifully served drink!
-
Colorful Straw: Add a reusable straw for some flair. They come in funky colors and materials, so find one that matches your vibe—or let’s face it, one that matches your outfit!
-
Fresh Garnish: Wedge a thin lime slice over the rim along with the strawberries, and you’ve got a gorgeous garnish. The contrast of colors will make your drink pop!
-
Side Snacks: Pair the spritzer with some light bites like cheese platters or crispy veggie chips. It complements the berry flavor beautifully—who could resist snacking alongside their mocktail?
Recipe Variations
Now that you’ve mastered the classic version, let’s get creative with some variations to keep things exciting:
-
Berry Fusion: Swap out half the strawberries for other berries like raspberries or blueberries for a mixed berry spritzer. It’s a berry bonanza!
-
Coconut Twist: Replace half of the sparkling water with coconut water for a tropical vibe. You’ll get that refreshing twist that screams beach time!
-
Citrus Zinger: Add the juice of an orange or lemon along with your lime juice. This brightens the drink and adds a lovely citrus punch.
-
Herbal Infusion: Experiment with herbs! Try using mint instead of basil for a more common flavor scene. Muddling in mint will provide a refreshing aroma, delighting every sip.
-
Spicy Kick: Feeling adventurous? Add a slice of jalapeño or a pinch of cayenne pepper for a spicy edge that will surprise your taste buds!
Chef’s Notes
Every time I make my Healthy Strawberry Mocktail Spritzer, I bump into spontaneous kitchen fun! One day, I decided to throw in a splash of my favorite fruit-flavored vodka just to see what would happen—and let’s just say it turned into a very fun evening!
I often reflect on how my homemade drinks have evolved. Initially, I just tossed in whatever I had lying around, but over time, I learned the magic of balancing flavors and experimenting. Perfecting this recipe has been a journey itself, turning nostalgic summertime memories into something refreshing. I’ve kept the moments that spark joy and made them more approachable and healthy.
Food, after all, should tell a story—so make this spritzer your very own!
FAQs and Troubleshooting
Here are some common questions I hear from fellow mocktail makers and solutions to the problems that might pop up:
-
Can I make this ahead of time?
Absolutely! You can prep the muddled strawberries and honey mix ahead, but I recommend adding the sparkling water and ice just before serving for optimal fizz. -
What do I do if it’s too sweet?
If your spritzer is on the sweeter side, mix in some extra lime juice to balance it out. Think of it as a quick flavor tune-up! -
Can I use frozen strawberries?
Certainly! You may prefer to blend them into a smoother texture. Just remember to adjust the ice since frozen fruit will make the drink cool quickly! -
My mocktail seems flat; what can I do?
If your drink is lacking fizz, try using a higher-carbonation sparkling water or even adding a splash of tonic water for that extra bubble magic!
Nutritional Info
Let’s chat about the healthy side of this refreshing drink! Here’s a quick breakdown:
- Calories: Approximately 80-100 calories per serving (1 serving is about 1 cup).
- Sugar: Roughly 10-15 grams, depending on how much honey you add.
- Vitamin C: Thanks to our fresh strawberries and lime, you’re getting a solid vitamin boost!
- Hydration: The sparkling water keeps you hydrated, making it a guilt-free refreshment for those warm days.
This mocktail hits all the right marks: light and refreshing with a sweet twist, and you can sip guilt-free while nourishing your body!
Final Thoughts
And there you have it, food-wondering friend—a Healthy Strawberry Mocktail Spritzer that not only quenches your thirst but also tickles your taste buds! Each sip is bursting with flavor, each ingredient thoughtfully crafted to take you back to those good times of summer fun.
I can’t wait for you to make this at home, stirring up your own stories and memories while you share this delightful drink with friends and family. Don’t forget to put your own twist on it—after all, the kitchen is our playground, and every spritzer deserves a personal touch!
So grab those strawberries, gather your crew, and let’s get spritzing! Cheers to health, happiness, and shared moments at the table. Happy cooking, my friends! 🍓🥂
Print
Healthy Strawberry Mocktail Spritzer
- Total Time: 10 minutes
- Yield: 4 servings 1x
- Diet: Vegetarian
Description
A refreshing mocktail bursting with the flavors of strawberries, lime, and sparkling water, perfect for any occasion.
Ingredients
- 1 cup sliced fresh strawberries
- Juice of 1/2 lime
- 3–4 tablespoons honey (or more to taste)
- 4 cups unsweetened sparkling water
- Ice cubes, as needed
- 1/2 cup additional sliced strawberries, for garnish
- 1 handful of fresh basil leaves
Instructions
- Prep the strawberries by rinsing and slicing them into half-inch pieces.
- Muddle the sliced strawberries and lime juice in a large glass or pitcher to release the juices.
- Sweeten with honey, adjusting the amount to taste.
- Add the sparkling water and gently stir to combine.
- Chill the drink by adding ice cubes before serving.
- Garnish with additional strawberry slices and basil leaves.
- Sip & enjoy your refreshing mocktail!
Notes
Serve in fancy glassware for an elevated experience.
- Prep Time: 10 minutes
- Cook Time: 0 minutes
- Category: Beverage
- Method: No Cooking
- Cuisine: American
Nutrition
- Serving Size: 1 cup
- Calories: 90
- Sugar: 12g
- Sodium: 5mg
- Fat: 0g
- Saturated Fat: 0g
- Unsaturated Fat: 0g
- Trans Fat: 0g
- Carbohydrates: 22g
- Fiber: 1g
- Protein: 0g
- Cholesterol: 0mg
Keywords: mocktail, strawberry, refreshing drink, summer beverage, healthy drink
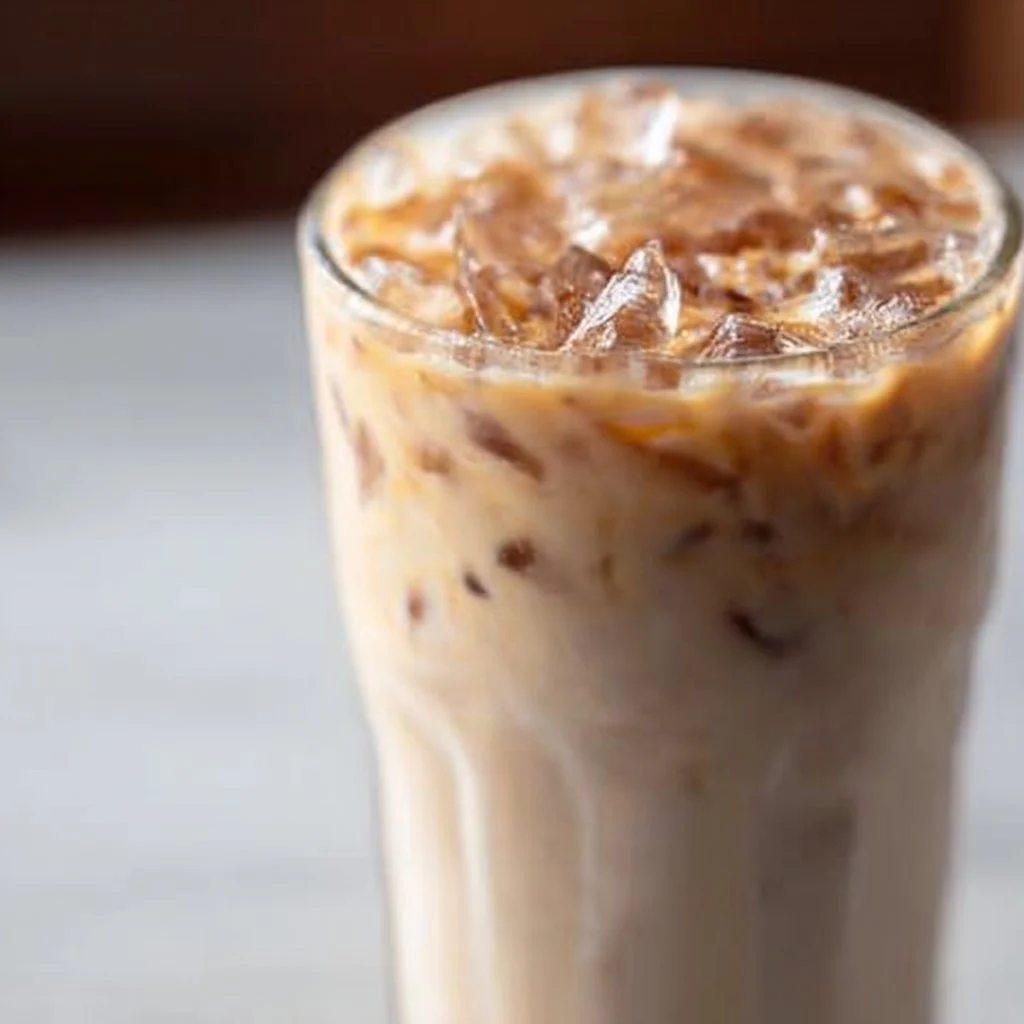
Iced Vanilla Latte (Step-by-Step Recipe)
Iced Vanilla Latte: Your Perfect Summer Sip
Hey, food lovers! It’s Beau Collier here, and I am absolutely thrilled to welcome you to another delicious adventure on Feastical! Today, we’re diving into the world of cool, creamy, and indulgently sweet delights with a refreshing Iced Vanilla Latte. Whether you’re looking to elevate your breakfast game, perk up your afternoon, or just treat yourself to something special, this recipe is your ticket to café-level bliss right at home.
Let’s be real: summer is the season for iced coffee drinks, and nothing captures that vibe quite like a homemade Iced Vanilla Latte. It’s the perfect blend of smooth espresso, sweet vanilla syrup, and creamy milk, all topped over ice. Sound refreshing? It absolutely is! So, kick back, grab your favorite mug (or glass), and let’s create some magic in the kitchen together!
My Coffee-Sipping Story
I can still picture that summer afternoon when coffee transformed my world. I was twelve years old, lounging in my grandmother’s kitchen, surrounded by the warm aroma of freshly brewed coffee. She poured herself a steaming cup of her beloved brew and then—with a twinkle in her eye—added a splash of vanilla. It was as if a whole new flavor dimension exploded! That was my first taste of coffee, and while I didn’t quite appreciate it then, I knew I loved the way it filled the space with warmth.
Fast forward to my early twenties, armed with a newfound love for espresso and a penchant for experimenting in the kitchen, I decided to recreate that moment. I whipped up my first iced vanilla latte, made from the freshest espresso I could find, sweetened with a homemade vanilla syrup that would put store-bought versions to shame. It was bliss in a glass! Each sip took me back to that memory with Grandma, sounds of laughter swirling around us, and a delicious home-cooked meal—the ultimate cozy combination.
So, as we embark on this Iced Vanilla Latte journey together, remember that each drop is more than just a drink; it’s a reminder of the flavors we create and the memories we share.
Ingredients
Here’s what you’ll need to create your own dreamy Iced Vanilla Latte at home:
-
Freshly brewed espresso or very strong coffee
- Why? Espresso brings that robust flavor while magic happens as it cools down over ice. If you don’t have an espresso machine, just brew a robust pot of your favorite coffee to use instead!
-
Vanilla syrup (store-bought or homemade)
- Why? This is the star of our drink. If you’re feeling adventurous, crafting a homemade version with just sugar, water, and vanilla extract can kick the flavor up a notch.
-
Milk of choice (dairy, oat, almond, soy…)
- Why? Your latte, your rules! Almond milk adds nuttiness, oat milk provides creaminess, while whole milk delivers that classic, rich flavor.
-
Ice cubes
- Why? Essential for keeping it chill! Use large ice cubes to slow down melting and avoid a watered-down latte.
-
Optional ingredients: whipped cream, a dash of cinnamon, or a vanilla bean garnish
- Why? Fancy it up! A dollop of whipped cream or a sprinkle of cinnamon adds a touch of indulgence and flavor complexity. A cute vanilla bean makes it look profesh!
Step-by-Step Instructions
Now, let’s get to the good stuff—making our Iced Vanilla Latte! Grab your tools, and let’s do this!
-
Brew Your Espresso:
- Start by brewing 1-2 shots of fresh espresso using your espresso machine.
- Chef Tip: If you’re using coffee instead, aim for a darker roast! The bolder, the better, especially since we’re diluting it with milk and ice.
-
Sweeten It Up:
- While your espresso is still fresh and hot, slowly stir in 1-2 tablespoons of vanilla syrup. This way, it blends beautifully.
- Chef Hack: Adjust the sweetness to your taste. If you like it sweeter, add a little more syrup!
-
Prepare the Ice:
- Fill a tall glass with a generous amount of ice cubes—don’t skimp on this part! Large cubes are great because they melt slower.
- Tip: You can make coffee ice cubes in advance by freezing leftover coffee. No more soggy lattes!
-
Mix It All Together:
- Pour the espresso mixture over the ice, allowing it to chill and serve as the base of your latte.
- Little Pro Tip: For an even cooler drink, chill your glass beforehand!
-
Milk It Up:
- Now, gently pour your choice of milk over the espresso. About 1-½ cups usually works, but you can adjust for your desired creaminess.
- Fun Fact: Layer your milk to create a beautiful ombre effect for an Instagram-worthy shot!
-
Garnish Like a Pro:
- If you’re feeling fancy, top with a swirl of whipped cream, a dash of cinnamon, or a chic vanilla bean.
- Chef’s Choice: A sprinkle of cocoa or chocolate shavings is an irresistible option too!
-
Sip & Enjoy:
- Give it a good stir before diving in to blend the flavors. Then sit back, relax, and revel in your caffeinated creation!
Serving Suggestions
I love serving my Iced Vanilla Latte in a tall, clear glass to showcase that beautiful layered effect! Beyond looks, you can also pair this delight with a variety of treats. If you’re enjoying your latte for breakfast, consider a slice of warm banana bread or some homemade scones. For an afternoon pick-me-up, how about some buttery cookies or a slice of rich chocolate cake? The options are endless, and trust me, the flavor combo will have you dreaming of more!
Recipe Variations
Now that you’ve perfected the classic Iced Vanilla Latte, why not experiment a little? Here are some variations to shake up your routine:
-
Caramel Iced Latte: Swap the vanilla syrup with caramel syrup for a sweet twist that customers rave about at coffee shops!
-
Nutty Iced Latte: Add a tablespoon of hazelnut syrup into the mix for that dreamy nutty flavor—perfect for those coffee connoisseurs!
-
Chai Iced Latte: Replace espresso with strong brewed chai tea for a spiced sensation. Top with steamed milk and a sprinkle of cinnamon!
-
Dairy-Free Bliss: Use coconut milk for a tropical twist that adds both creaminess and a hint of sweetness.
-
Vegan Vanilla Latte: For a dairy-free, vegan option, combine whippable coconut cream with oat milk for a rich finish.
Chef’s Notes
Cooking (and drinking) coffee really goes beyond just following a recipe; it’s a way to connect and indulge. When I first invented this latte recipe, it quickly became a part of my morning routine. I remember inviting friends over during summer weekends, and we’d spend hours sharing stories, laughter, and sipping these beautifully creamy lattes on the porch. It’s amazing how a simple drink can bring people together!
Over time, I’ve learned that experimentation is key, and I’ve tried countless flavor combinations, enjoying every moment in the process. The memories made while sipping on these beverages remind me to appreciate the little moments in life—and let’s face it, they often come accompanied by the best company!
FAQs and Troubleshooting
Q1: My latte tastes weak. What did I do wrong?
A1: If your coffee is weak, it’s likely due to using a light coffee bean or too much milk in proportion to espresso. Opt for a stronger brew and balance the milk.
Q2: Can I make this ahead of time?
A2: Absolutely! You can brew your espresso and mix it with the syrup up to a day ahead, store it in the fridge, and simply add milk and ice before serving.
Q3: How can I make a sugar-free version?
A3: Use sugar-free vanilla syrup or make your own with sugar substitutes! You might want to adjust the ratios to ensure you still capture that sweet flavor.
Q4: Can I froth my milk?
A4: Definitely! Frothing your milk can give your latte a luxurious texture. If you like a frothy latte, consider using a milk frother or heat and froth on the stovetop.
Nutritional Info
Here’s a gentle reminder: your Iced Vanilla Latte can be tailored to fit your nutritional needs. A classic serving (2 shots of espresso, 1 cup of milk, and tbsp of vanilla syrup) contains roughly:
- Calories: 150-250 calories (depending on milk and additions)
- Carbohydrates: 22-32g
- Protein: 7-12g
- Fat: 3-9g (depending on milk choice)
Feel free to adapt the ingredients to make it lighter or richer, as you desire!
Final Thoughts
So, there you have it, my friends! Your very own homemade Iced Vanilla Latte recipe. Whether you’re sipping it solo while enjoying a book or sharing it with loved ones during a summer gathering, this drink is about more than just coffee; it’s about connection, creativity, and making memories.
Remember, the kitchen is where the magic happens. Every sip reflects your unique style, and I can’t wait for you to try this recipe out! So go ahead—get your espresso machine fired up, gather those ingredients, and let’s celebrate together with a delightful Iced Vanilla Latte. Cheers to great flavors and even better moments! Happy sipping!
Print
Iced Vanilla Latte
- Total Time: 10 minutes
- Yield: 1 serving 1x
- Diet: Vegetarian
Description
A refreshing Iced Vanilla Latte combining smooth espresso, sweet vanilla syrup, and creamy milk over ice—perfect for summer.
Ingredients
- 1–2 shots freshly brewed espresso or strong coffee
- 1–2 tablespoons vanilla syrup (store-bought or homemade)
- 1–½ cups milk of choice (dairy, oat, almond, soy, etc.)
- Ice cubes
- Optional: whipped cream, a dash of cinnamon, or a vanilla bean garnish
Instructions
- Brew your espresso by using your espresso machine.
- Sweeten it up by stirring in vanilla syrup while espresso is hot.
- Prepare a tall glass filled with ice cubes.
- Mix it all together by pouring the espresso over ice.
- Milk it up by gently adding your choice of milk.
- Garnish with whipped cream, cinnamon, or a vanilla bean if desired.
- Sip & enjoy your refreshing drink!
Notes
Feel free to experiment with different milk options and syrups for unique variations!
- Prep Time: 5 minutes
- Cook Time: 5 minutes
- Category: Beverage
- Method: Brewing
- Cuisine: American
Nutrition
- Serving Size: 1 serving
- Calories: 200
- Sugar: 20g
- Sodium: 100mg
- Fat: 7g
- Saturated Fat: 4g
- Unsaturated Fat: 2g
- Trans Fat: 0g
- Carbohydrates: 30g
- Fiber: 0g
- Protein: 6g
- Cholesterol: 20mg
Keywords: Iced Vanilla Latte, Coffee, Summer Drink, Refreshing Beverage, Homemade Coffee

Strawberry Milk Tea
The Sweet Symphony of Strawberry Milk Tea: A Flavorful Journey
Hey there, food lovers! Welcome back to Feastical! If you’ve ever found yourself lounging on a lazy afternoon, dreaming of that perfect drink to satisfy your sweet tooth and cool you down, then let me introduce you to the delightful world of Strawberry Milk Tea. Picture this: a refreshing blend of juicy strawberries, rich black tea, and creamy milk, all coming together in a harmonious symphony of flavors that will have your taste buds dancing with joy.
Strawberry Milk Tea isn’t just a drink; it’s an experience. You know those moments in life when everything feels just right? That’s what this tasty beverage encapsulates – warmth, coziness, and the joy of sharing good vibes over a delicious drink. I mean, who doesn’t want to sip on something that tastes as good as it sounds?
So grab your favorite mug (or a cute glass if you’re feeling fancy), and let’s dive into this mouthwatering recipe! Trust me; this isn’t just another drink; it’s a celebration in a cup! Whether you’re whipping it up for a casual brunch with friends or a chill night in, Strawberry Milk Tea is the perfect companion. Let’s get cooking!
Personal Story
Ah, Strawberry Milk Tea brings back such fond memories for me! I still remember the summer of my high school graduation. A group of friends and I took a trip to this quaint little café that served the most heavenly Strawberry Milk Tea I had ever tasted. Their secret was the generous sprinkle of fresh strawberries, and it was love at first sip!
As we sat outside on the patio, soaking up the sun and laughing until our stomachs hurt, I made a promise to myself: I would recreate this magic in my own kitchen one day. And here we are! Since then, I’ve put my own twist on that beloved drink, adding layers of flavor and memories each time I serve it. Now, every time I whip up a batch, I can’t help but smile as I think back to those carefree summer days with friends. Let’s make our own memories while enjoying this cozy drink!
Ingredients
Here’s what you’ll need to make this dreamy Strawberry Milk Tea:
-
1 cup fresh strawberries
Nothing beats the sweetness and flavor of fresh strawberries! If they’re out of season, feel free to use frozen strawberries, but adjust the sugar since frozen berries can be sweeter. -
2 tablespoons sugar
This sweetener is just the ticket for balancing out the tartness of the strawberries. You can swap sugar for honey or maple syrup if you want a natural sweetener. -
1 cup hot water
Hot water is essential for steeping the tea – it extracts all those robust flavors. Make sure to let it cool down for about a minute after boiling to avoid burning the tea bags. -
2 black tea bags
Black tea gives this drink a rich base. If you’re looking for a caffeine-free option, consider using rooibos tea instead, which also has a lovely, mild flavor. -
1 cup whole milk
It creates creaminess and complements the strawberries perfectly. For a lighter flavor, try almond or oat milk, or keep it vegan with coconut milk. -
½ cup ice
Ice is perfect for chilling this drink down. You can adjust this according to your personal taste – more ice means a deliciously slushy drink! -
1 teaspoon vanilla extract
This adds a depth of flavor that ties everything together, evoking memories of homemade treats. You can replace it with almond extract for a nutty twist.
Step-by-Step Instructions
Now, let’s get down to business! Follow these steps and you’ll be swirling up delicious Strawberry Milk Tea in no time:
-
Prepare the Strawberries
Start by washing your fresh strawberries thoroughly. Remove the tops and slice them up. This brings out their natural sweetness and helps release their juices. Note: If you think your strawberries are on the tart side, don’t be afraid to add an extra sprinkle of sugar! -
Make the Strawberry Purée
In a blender, combine your sliced strawberries and tablespoon of sugar. Blend until smooth— it should look like a beautiful, vibrant pink mixture! If you prefer some texture, pulse it a few times instead of blending completely. -
Steep the Black Tea
In a heatproof pitcher (or just a bowl, I won’t judge!), pour 1 cup of hot water and add your two black tea bags. Let it steep for about 5 minutes to really extract that bold flavor. This means you’ll get the strength and richness that make this drink so delightful! -
Combine Strawberry Mixture with Tea
Once your tea has steeped, remove the tea bags and stir in the strawberry purée. This is where the magic starts—watch as those glorious colors swirl together! If it tastes a bit too robust, you can always adjust with more strawberries or a splash more water. -
Add Vanilla and Milk
Stir in the vanilla extract next, followed by the whole milk. If you want the drink cooled down even more, add your half cup of ice at this point and stir until everything is combined. -
Taste and Adjust
It’s always a good idea to taste your creation at this point! Feel free to adjust sweetness or add more milk if you desire creamier or lighter notes. Don’t worry; you’re in control of your Strawberry Milk Tea destiny. -
Serve with a Smile
Grab your favorite mug or glass, and pour that gorgeous drink in! For an extra touch, add some whole strawberries on top for garnish, and don’t forget a couple of ice cubes to keep things chilly!
Serving Suggestions
Presenting your Strawberry Milk Tea can be just as delightful as making it. Here are some fun serving ideas:
-
Mason Jars: For a rustic feel, serve your milk tea in mason jars. It’s trendy and allows you to see all those beautiful colors!
-
Scoopable Treats: Pair it with some fresh whipped cream or a scoop of vanilla ice cream on top for an indulgent treat.
-
Strawberry Garnish: One of my favorite tricks is to slice a whole strawberry and place it on the rim of the glass. It’s a lovely invitation for anyone to dig in!
-
Decorative Straws: Add a fun straw to your glass for that classic café vibe. You can also personalize with some twine or ribbon if it’s for a special occasion.
Remember, the way you serve the drink can elevate the experience, so don’t hold back on the presentation!
Recipe Variations
This Strawberry Milk Tea recipe is versatile – feel free to mix it up a bit! Here are some creative twists you can try:
-
Matcha Strawberry Milk Tea: Swap out black tea for matcha powder for an energizing twist. Just whisk the matcha in hot water before mixing with the strawberry purée.
-
Berry Blast: Add blueberries or raspberries for a fruit medley experience. The more, the merrier, right?
-
Minty Fresh: Infuse some fresh mint leaves while steeping your tea bags for a refreshing taste that brightens the drink!
-
Chai-Infused: Add chai tea bags instead of black tea for a spiced twist. It brings warmth and a little kick to the traditional recipe.
-
Coconut Vibes: For a tropical take, use coconut milk instead of whole milk. It’ll give it that exotic flavor profile that’s perfect for summer!
Chef’s Notes
Sipping on Strawberry Milk Tea has been a nostalgic experience for me, and I love how the recipe has evolved over time. The original café version was delicious, but I started playing around with ingredients until I found the perfect balance. Plus, involving friends in the process made it even more special.
Don’t be afraid to experiment! It seems that every time I make it, I discover something new—maybe a sprinkle of cardamom one day or a dash of cinnamon the next! Each time, it brings back those sunny summer memories, but in new and exciting ways.
FAQs and Troubleshooting
-
Can I make this drink ahead of time?
Absolutely! You can prepare the strawberry purée and tea mixture in advance. Just refrigerate and combine with ice and milk when you’re ready to serve! -
What if it’s too sweet?
No problem! Simply balance it out by adding in more tea or milk. A squeeze of lemon can cut through sweetness as well if you’re feeling adventurous! -
How do I prevent my drink from turning watery?
Use less ice, or consider freezing some of the strawberry purée and using the frozen chunks instead. This adds flavor without diluting the drink. -
Can I use flavored teas?
Definitely! Feel free to experiment with different tea flavors like strawberry or hibiscus, but remember to adjust sugar levels based on the sweetness of the tea.
Nutritional Info
Let’s break it down! Here’s a rough estimate of the nutritional values per serving (based on the ingredients provided):
- Calories: Approximately 250-300 kcal
- Protein: 8g
- Carbohydrates: 37g
- Sugars: 25g
- Fat: 10g
- Fiber: 1g
Keep in mind, these numbers can change based on specific brands and substitutions you choose, but this should give you a ballpark figure!
Final Thoughts
And there you have it, folks! Strawberry Milk Tea is not just a drink you sip; it’s a vessel of memories, flavor, and fun! Whether you’re making it for a cozy night in, a casual brunch, or a day of entertaining friends, this drink pairs beautifully with laughter, heartwarming stories, and delicious snacks.
So, gather your ingredients and channel your inner foodie! Create your own version of this heartwarming drink, and don’t forget to share it with the ones you care about. After all, good food is meant to be shared, and the best moments in life are meant to be celebrated!
Stay tuned for more scrumptious recipes and delicious DIY adventures as we keep exploring flavorful dishes together right here at Feastical! Cheers to happy sipping!
Print
Strawberry Milk Tea
- Total Time: 20 minutes
- Yield: 2 servings 1x
- Diet: Vegetarian
Description
A refreshing blend of juicy strawberries, rich black tea, and creamy milk, perfect for a cozy afternoon.
Ingredients
- 1 cup fresh strawberries
- 2 tablespoons sugar
- 1 cup hot water
- 2 black tea bags
- 1 cup whole milk
- ½ cup ice
- 1 teaspoon vanilla extract
Instructions
- Prepare the strawberries: Wash, remove tops, and slice the strawberries.
- Make the strawberry purée in a blender with sliced strawberries and sugar.
- Steep the black tea in hot water for about 5 minutes.
- Combine the strawberry mixture with the tea after removing the tea bags.
- Add vanilla extract and whole milk, then stir in ice if desired.
- Taste and adjust sweetness or milk as needed.
- Serve in your favorite mug or glass, garnishing with strawberries if desired.
Notes
Serve in mason jars or pair with whipped cream for a delightful treat!
- Prep Time: 15 minutes
- Cook Time: 5 minutes
- Category: Beverage
- Method: Blending and Steeping
- Cuisine: Fusion
Nutrition
- Serving Size: 1 serving
- Calories: 300
- Sugar: 25g
- Sodium: 100mg
- Fat: 10g
- Saturated Fat: 6g
- Unsaturated Fat: 3g
- Trans Fat: 0g
- Carbohydrates: 37g
- Fiber: 1g
- Protein: 8g
- Cholesterol: 30mg
Keywords: strawberry, milk tea, refreshing drink, summer beverage, dessert drink

The Ultimate Chocolate Milkshake
The Ultimate Chocolate Milkshake: A Delicious Dive into Decadence
Hey there, chocolate lovers! Welcome to the sweetest corner of Feastical! Today, we’re diving headfirst into a creamy, dreamy, chocolatey wonderland—the ultimate chocolate milkshake! This recipe isn’t just a drink; it’s an experience, a nostalgic journey back to those sunny days of summer, picnics, and the simpler joys of life. So, buckle up, grab your blender, and get ready to whip up something truly magical.
A Sweet Trip Down Memory Lane
Ah, the chocolate milkshake—my childhood’s liquid gold! I fondly remember hot summer afternoons spent at the local diner with my family. The air would be filled with the sounds of laughter and clinking glasses, and the aroma of fries and burgers would dance around me. I would plop down at the counter, looking forward to that cool, frothy shake that felt like a celebration in a glass.
I remember the thrill of watching the server expertly blend ice cream, milk, and chocolate syrup into a thick, luscious shake. The first sip was always a symphony of chocolatey bliss! The toppings would be a joyous surprise—whipped cream piled high and chocolate sprinkles adding just the right amount of crunch. It’s a memory that still brings a smile to my face every time I sip one of these heavenly creations. It was not just a dessert; it was a moment shared, a sweet memory made.
Now, let’s recreate that magic together! Are you ready to indulge? Let’s go!
Ingredients
Here’s your lineup for the ultimate chocolate milkshake. Trust me; you’re gonna want to grab a pen and jot these down!
-
1 cup Heavy Whipping Cream, cold
A key ingredient for that rich, velvety texture. You can substitute with coconut cream for a dairy-free version. -
5 Tbsp Confectioner’s Sugar
This sweetens the whipping cream for the perfect topper. If you need a healthier option, try using stevia or another sugar substitute! -
3 Tbsp Cocoa Powder, sifted
This bitter-sweet beauty enhances the chocolate flavor. Opt for Dutch-processed cocoa for a deeper taste. -
2 pt Chocolate Ice Cream
The star of the show! Want something different? Try using vanilla ice cream and mixing in chocolate syrup for a twist. -
1/3 cup Chocolate Milk
Extra chocolate? Yes, please! Use almond or soy chocolate milk for a non-dairy option. -
3 Tbsp Chocolate Syrup (plus more for drizzling)
This will make everything sweet and moist. For a gourmet touch, consider homemade syrup! -
Chocolate Sprinkles (to serve)
Because who doesn’t love a little crunch? Use rainbow sprinkles for a fun twist! -
Chocolate Shavings (to serve)
These add an elegant touch. You can shave dark chocolate bar for a richer flavor.
With these ingredients gathered and ready, let’s transform them into something unforgettable!
Step-by-Step Instructions
-
Whip the Cream
- In a large bowl, pour that cold heavy whipping cream. Add the confectioner’s sugar and cocoa powder.
- Using a hand mixer, whip on medium speed until soft peaks form (about 2-3 minutes).
- Chef’s Tip: Don’t overwhip! You want it fluffy, not dry.
-
Blend the Milkshake
- In a blender, combine the chocolate ice cream, chocolate milk, and chocolate syrup. Blend until smooth and creamy.
- Commentary: You can adjust the thickness by adding more milk for a thinner shake or more ice cream for a thicker indulgence.
-
Combine the Goodness
- Once smooth, carefully fold half of the whipped cream into the blender with the milkshake mixture. This step creates a marbled effect of creaminess!
- Chef Hack: Mixing in parts of the whipped cream also helps maintain that airy texture.
-
Prepare Your Glass
- Drizzle chocolate syrup on the insides of your glass. This little touch makes every sip feel like a celebration!
- Showing Off: Make swirls or zigzag patterns for an artistic flair! It’s also Instagram-worthy!
-
Serve It Up
- Pour your smooth chocolate milkshake into the prepared glass, adding a dollop of that delicious whipped cream on top.
- Extra Points: Garnish with chocolate sprinkles and chocolate shavings for that wow factor.
-
Enjoy it
- Grab a big straw, or a spoon if you’re feeling classy, and dig in—because you deserve every delicious sip!
Serving Suggestions
To serve your ultimate chocolate milkshake, consider pairing it with some freshly baked cookies or a slice of warm pie. You can also top it with a maraschino cherry for a traditional diner-style feel. Feeling adventurous? Serve alongside a small plate of salted pretzels for that sweet-salty combo that will have taste buds dancing!
When entertaining friends, create a little milkshake bar with various toppings like crushed Oreos, whipped cream flavors, or fresh fruits. Let them customize their shakes! It’s a fun experience that adds a special touch to any gathering.
Recipe Variations
-
Mint Chocolate Milkshake
- Add a few drops of peppermint extract for a refreshing twist. Top it with crushed peppermint candy for extra crunch!
-
Peanut Butter Chocolate Milkshake
- Mix in 2 tablespoons of creamy peanut butter before blending for a nutty richness. Garnish with crushed peanuts!
-
Spicy Chocolate Milkshake
- Add a pinch of cayenne pepper for a surprising kick. It’s unexpected, but trust me—it’s divine!
-
Mocha Milkshake
- Substitute half of the chocolate milk with brewed coffee. Perfect for coffee lovers!
-
Banana Chocolate Milkshake
- Blend in a ripe banana for added creaminess and natural sweetness. It’s like a delicious breakfast in a cup!
Chef’s Notes
The ultimate chocolate milkshake is not just a recipe; it’s a canvas! Over the years, I’ve tried countless variations based on seasons, holidays, and my mood. One of the funniest mishaps happened when I accidentally blended vanilla ice cream instead of chocolate. I panicked, but added a generous swirl of chocolate syrup, and guess what? It turned out fantastic! Never underestimate the power of improvisation in the kitchen!
FAQs and Troubleshooting
-
Why is my milkshake too thin?
- Simply add more ice cream to thicken it up. Blend again and see if it reaches your desired texture.
-
How can I make a dairy-free milkshake?
- Substitute heavy cream with coconut cream, use non-dairy chocolate ice cream, and chocolate milk made from almond, soy, or oat milk.
-
What if my whipped cream isn’t thickening?
- Ensure your heavy cream is cold, as the cold temperature allows it to whip better. If it still doesn’t thicken, try using a bowl chilled in the freezer beforehand.
-
Can I make this ahead of time?
- It’s best to enjoy it fresh, but you can prepare the whipped cream and blend the shake base separately. Store in the fridge until ready to combine!
Nutritional Info
Per serving (based on the recipe above), you’ll be treating yourself to approximately:
- Calories: 620
- Protein: 10g
- Fat: 36g
- Carbohydrates: 70g
- Sodium: 150mg
- Fiber: 2g
Keep in mind that these values can vary based on ingredient brands and portion sizes. Want a lighter treat? Consider using lower-fat ice cream or reducing the chocolate syrup!
Final Thoughts
In a world filled with complicated recipes and kitchen gadgets, sometimes, you just need to savor something simple yet extravagant. The ultimate chocolate milkshake is a true testament to that. It’s not just a recipe; it’s a celebration of flavors, nostalgia, and the joy of being in the kitchen. I hope you cherish every chocolatey sip and create your own beautiful memories, just like I did.
So, what are you waiting for? Grab your ingredients, make this delightful milkshake, and share it with someone who needs a little sweetness in their life. Remember, food is best when shared, and there’s always room for more joy in our lives. Cheers to tasty adventures! Let’s shake it up! 🍫🥤❤️
Print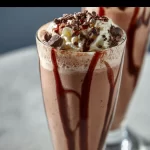
The Ultimate Chocolate Milkshake
- Total Time: 20 minutes
- Yield: 4 servings 1x
- Diet: Vegetarian
Description
A delicious and creamy chocolate milkshake that brings back nostalgic memories of summer days and family outings.
Ingredients
- 1 cup Heavy Whipping Cream, cold
- 5 Tbsp Confectioner’s Sugar
- 3 Tbsp Cocoa Powder, sifted
- 2 pt Chocolate Ice Cream
- 1/3 cup Chocolate Milk
- 3 Tbsp Chocolate Syrup (plus more for drizzling)
- Chocolate Sprinkles (to serve)
- Chocolate Shavings (to serve)
Instructions
- Whip the cream: In a large bowl, pour that cold heavy whipping cream. Add the confectioner’s sugar and cocoa powder. Using a hand mixer, whip on medium speed until soft peaks form (about 2-3 minutes).
- Blend the milkshake: In a blender, combine the chocolate ice cream, chocolate milk, and chocolate syrup. Blend until smooth and creamy.
- Combine the goodness: Once smooth, carefully fold half of the whipped cream into the blender with the milkshake mixture.
- Prepare your glass: Drizzle chocolate syrup on the insides of your glass.
- Serve it up: Pour your smooth chocolate milkshake into the prepared glass, adding a dollop of that delicious whipped cream on top.
- Enjoy it: Grab a big straw, or a spoon if you’re feeling classy, and indulge!
Notes
Pair with freshly baked cookies or a slice of warm pie. Consider creating a milkshake bar for a fun gathering experience.
- Prep Time: 15 minutes
- Cook Time: 5 minutes
- Category: Dessert
- Method: Blending
- Cuisine: American
Nutrition
- Serving Size: 1 serving
- Calories: 620
- Sugar: 70g
- Sodium: 150mg
- Fat: 36g
- Saturated Fat: 21g
- Unsaturated Fat: 10g
- Trans Fat: 0g
- Carbohydrates: 70g
- Fiber: 2g
- Protein: 10g
- Cholesterol: 130mg
Keywords: chocolate milkshake, dessert, creamy drink, nostalgic recipe, summer treat