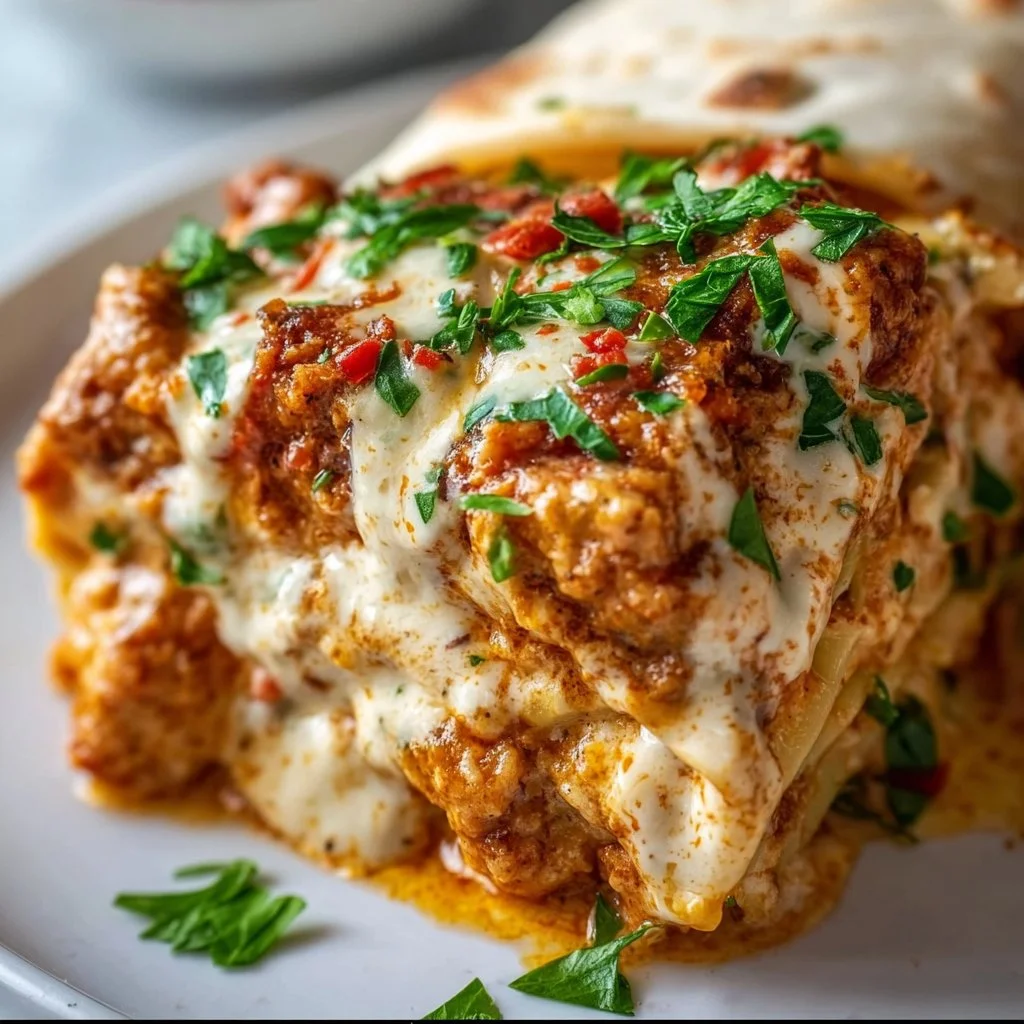
Slow Cooker Lasagna
Slow Cooker Lasagna: A Comfort Food Masterpiece
Introduction
Hey there, food lovers! Welcome back to Feastical, your go-to spot for scrumptious, soul-satisfying recipes that’ll make you feel right at home. Today, we’re diving into the wonderful world of lasagna—specifically, the slow cooker lasagna. Yes, you heard that right! We’re talking about a dish that has the power to turn any ordinary day into a special occasion with its layers of cheesy goodness and rich flavors.
Now, picture this: it’s been a long day at work. You get home, and the last thing you want to do is stand in the kitchen for hours, slaving over a hot stove. What if I told you that you could toss everything into a slow cooker and let it do the hard work for you while you kick back and relax? That’s the magic of slow cooker lasagna!
This dish is perfect for busy weeknights, lazy Sundays, or whenever you’re in the mood for a hearty meal that warms the soul. With its perfect balance of flavors and textures, slow cooker lasagna is great for feeding a crowd or simply satisfying your cravings. The best part? The slow cooker allows all the ingredients to meld beautifully together, creating a dish that’s both comforting and impressive.
So, grab your favorite spatula, and let’s get ready to whip up this crowd-pleaser that’s easier to prepare than you might think. I promise, you’ll want to have seconds (or thirds) once you taste the magic of slow-cooked lasagna! Are you ready to dive in?
Personal Story
Before I delve into the recipe, let me share a little story. Growing up, lasagna was a staple at family gatherings. My grandmother, an Italian culinary wizard, would gather the whole family in her tiny kitchen, her laughter ringing through the air like a sweet melody.
As we mixed the ricotta with fresh herbs and layered the noodles, it was less about just preparing a meal and more about bonding. I can still picture my younger self standing on a stool, trying to reach the high shelves for the marinara sauce while my cousins playfully argued over who made the best garlic bread. By the time grandma’s lasagna was pulled from the oven, the house would smell heavenly—a warm invitation for everyone to sit around the table.
Even after years of experimenting in my kitchen, I find myself returning to that recipe: the one filled with love and laughter. While this slow cooker lasagna is a bit different, it captures the essence of those joyous times, and now, I get to share it with you!
Ingredients
Let’s talk about what you’ll need to whip up this delicious slow cooker lasagna. Here’s the ingredient list, along with some tips:
- Lasagna Noodles: The backbone of your lasagna! You can use traditional or no-boil lasagna noodles. Just be sure to adjust cooking time if using no-boil.
- Ricotta Cheese: This creamy cheese adds richness and texture. If you want a lighter alternative, try cottage cheese or even Greek yogurt mixed with a bit of lemon zest for a tangy kick.
- Mozzarella Cheese: The stretchy, gooey stuff. Use fresh mozzarella if you can; it melts beautifully! For a lower-calorie option, try part-skim mozzarella.
- Parmesan Cheese: The finishing touch! Grated Parmesan adds salty, nutty notes. Pecorino Romano can be substituted for an extra kick.
- Marinara Sauce: Use your favorite jarred version for convenience, or make your own if you’re feeling adventurous! A homemade sauce can elevate this dish even further.
- Ground Beef (or Sausage): This adds protein and flavor. You can swap it out for ground turkey for a leaner option or leave it out entirely for a vegetarian version.
- Italian Seasoning: A blend of herbs that brings everything together—think basil, oregano, and thyme! Feel free to customize with fresh herbs if you have them on hand.
- Garlic: This adds a delightful aroma and flavor. You can use fresh, minced cloves or even garlic powder in a pinch.
- Onion: Adds depth to the sauce. Yellow onions are great, but red onions can also work if you prefer a sweeter flavor.
- Salt and Pepper: Essential for enhancing all the flavors. Adjust to taste.
Step-by-Step Instructions
Alright, my friends! It’s time to roll up your sleeves and get cooking. Don’t worry, I’m here with you every step of the way. Here’s how to create this amazing slow cooker lasagna:
-
Brown the Meat:
- In a skillet over medium heat, add a splash of olive oil and put in your ground beef or sausage.
- Cook it until browned, breaking it apart with a spatula as it cooks. Don’t forget to season with salt and pepper.
- This step not only adds flavor but helps render out the fat, which you can drain or keep for richness.
-
Add Aromatics:
- Toss in chopped onions and minced garlic to the meat.
- Sauté until the onions become translucent and the garlic smells amazing, about 3-5 minutes. Trust me, your kitchen will start to smell heavenly at this point!
-
Mix the Sauce:
- In a large bowl, combine the marinara sauce with Italian seasoning.
- Stir in the cooked meat mixture until it’s well incorporated.
-
Prepare the Cheese Mixture:
- In another bowl, mix the ricotta cheese with an egg (if using), a sprinkle of salt, and some Italian seasoning or herbs.
- This will help keep your ricotta fluffy and creamy and makes it much easier to layer.
-
Layer It Up:
- Now comes the fun part! Start layering in your slow cooker.
- Begin with a scoop of the meat sauce on the bottom.
- Add a layer of lasagna noodles. If you’re using traditional noodles, break them to fit the dish.
- Spread a layer of the ricotta mixture over the noodles, followed by a layer of mozzarella.
- Repeat these steps until your ingredients are used up, finishing with a layer of meat sauce on top (and maybe some extra cheese because who doesn’t love that?).
- Now comes the fun part! Start layering in your slow cooker.
-
Cook Low and Slow:
- Cover your slow cooker, set it on low for 4-6 hours, or high for about 2-3 hours.
- The slow cooking allows the flavors to meld beautifully, and the cheese gets all melty and delicious.
-
Final Touch:
- When it’s done, let the lasagna sit for about 15-20 minutes before digging in. This resting time helps it hold together when slicing.
Serving Suggestions
Alright, once your kitchen smells like an Italian trattoria, it’s time to serve! This lasagna is perfect for family dinners or gatherings. Here’s how to plate it:
-
Slice the lasagna into hearty squares or rectangles. A sharp knife works best—don’t rush this part!
-
Serve a slice on a warm plate, and for added flair, sprinkle some freshly chopped basil or parsley on top. It adds a beautiful pop of color and a fresh aroma.
-
Pair it with a simple green salad drizzled with balsamic vinaigrette to balance out the richness of the lasagna. And don’t forget a hunk of crusty bread on the side for mopping up any leftover sauce.
Recipe Variations
Feeling adventurous? Here are some fun twists and variations on this slow cooker lasagna:
- Vegetarian Lasagna: Swap the meat for layers of your favorite veggies! Spinach, zucchini, mushrooms, and bell peppers are all fantastic options.
- White Lasagna: Use alfredo sauce instead of marinara for a creamy, dreamy version. Layer in sautéed mushrooms and spinach for extra flavor.
- Spicy Kick: Add red pepper flakes to the meat sauce for some heat, or layer in jalapeños for an added spice factor!
- Cheesy Garlic Bread Lasagna: Mix garlic butter into your final mozzarella layer and top with breadcrumbs for a crunchy texture.
- Gluten-Free: Use gluten-free lasagna noodles or replace them with thinly sliced zucchini or eggplant for a low-carb option.
Chef’s Notes
As I’ve played around with this slow cooker lasagna recipe over the years, I’ve learned a few tricks to make it even better. For instance, I’ve discovered that a splash of red wine in the meat sauce can elevate the flavor dramatically. Also, don’t be shy about using different cheese blends—experimenting with a mix of cheeses can create delightful surprises.
And remember: kitchen messes are a badge of honor! One of my best memories was when I accidentally spilled a whole jar of marinara on the floor. Instead of being upset, my family and I started a massive lasagna food fight. It might not have been the most picturesque moment, but it was definitely one of the funniest!
FAQs and Troubleshooting
Here are some common questions and answers to ensure your slow cooker lasagna turns out perfectly:
-
Why is my lasagna watery?
- This could happen if your marinara sauce was too watery or if your vegetables weren’t drained properly. You can also try adding a layer of cheese to absorb some moisture.
-
Can I use fresh pasta?
- Yes! Fresh pasta can be a great alternative. Just keep in mind that it might cook faster, so adjust the time accordingly.
-
What if my noodles are sticking together?
- If using traditional noodles, try adding a touch of oil to the water when boiling or separating them as you layer them.
-
Can I cook this on high?
- Certainly! Just keep an eye on it; while cooking on high can save time, it may require a bit less cooking time than the low setting—aim for around 2-3 hours.
Nutritional Info
When it comes to comfort food like lasagna, it’s easy to let our hearts (and appetites) take the wheel. However, knowing the nutritional content can help us balance indulgence with health! Here’s a rough estimate of the nutritional values per serving (based on a standard recipe):
- Calories: Approximately 400-500 calories per serving, depending on cheese and meat choices.
- Protein: 25-30 grams (thanks to the beef and cheese!)
- Carbohydrates: About 45-50 grams, primarily from the noodles.
- Fat: 20-25 grams, influenced by the ricotta, mozzarella, and meat.
- Fiber: 2-5 grams, depending on added veggies.
Feel free to adjust ingredient amounts or substitute healthier options to lower calorie counts and increase nutritional value.
Final Thoughts
And there you have it, my lovely foodies! A delightful journey into making slow cooker lasagna that is not only satisfying but also brings back beautiful memories and creates new ones. Cooking should always be enjoyable, and this recipe is a perfect way to remind yourself that good food doesn’t have to be complicated or time-consuming.
Now that you have all the knowledge and insider tips to create this slow-cooked masterpiece, it’s time to savor the incredible flavors and share them with your loved ones. Whether you’re having a cozy night in or hosting some friends over, this slow cooker lasagna is sure to impress.
Thanks for hanging out with me in the kitchen today! Don’t forget to share your creation and tag me—I’d love to see your wonderful variations. Until next time, happy cooking, my friends! Let’s keep spreading the love, one delicious bite at a time! 🍽️
Print
Slow Cooker Lasagna
- Total Time: 255 minutes
- Yield: 8 servings
- Diet: Meat and Dairy
Description
A comforting slow cooker lasagna that’s easy to prepare and packed with cheesy goodness and rich flavors.
Ingredients
- Lasagna Noodles
- Ricotta Cheese
- Mozzarella Cheese
- Parmesan Cheese
- Marinara Sauce
- Ground Beef (or Sausage)
- Italian Seasoning
- Garlic
- Onion
- Salt and Pepper
Instructions
- Brown the meat: In a skillet over medium heat, add a splash of olive oil and put in your ground beef or sausage. Cook it until browned, breaking it apart with a spatula as it cooks. Don’t forget to season with salt and pepper.
- Add aromatics: Toss in chopped onions and minced garlic to the meat. Sauté until the onions become translucent and the garlic smells amazing, about 3-5 minutes.
- Mix the sauce: In a large bowl, combine the marinara sauce with Italian seasoning. Stir in the cooked meat mixture until it’s well incorporated.
- Prepare the cheese mixture: In another bowl, mix the ricotta cheese with an egg (if using), a sprinkle of salt, and some Italian seasoning.
- Layer it up: Start layering in your slow cooker with a scoop of the meat sauce, followed by lasagna noodles, ricotta mixture, and mozzarella. Repeat the layers, finishing with a layer of meat sauce on top.
- Cook low and slow: Cover your slow cooker, set it on low for 4-6 hours, or high for about 2-3 hours.
- Let it sit: After cooking, let the lasagna sit for about 15-20 minutes before slicing.
Notes
For different variations, consider adding vegetables for a vegetarian option or using alfredo sauce instead of marinara for a creamy version.
- Prep Time: 15 minutes
- Cook Time: 240 minutes
- Category: Main Course
- Method: Slow Cooking
- Cuisine: Italian
Nutrition
- Serving Size: 1 serving
- Calories: 450
- Sugar: 6g
- Sodium: 600mg
- Fat: 25g
- Saturated Fat: 12g
- Unsaturated Fat: 10g
- Trans Fat: 0g
- Carbohydrates: 50g
- Fiber: 3g
- Protein: 30g
- Cholesterol: 75mg
Keywords: slow cooker, lasagna, comfort food, easy recipe, Italian

Chicken Fajita Casserole
The Ultimate Chicken Fajita Casserole: A Cozy Delight
Hey there, food lovers! I’m Beau Collier, and if you’ve landed here, you’re ready to dive into a delicious journey with my Chicken Fajita Casserole. Now, I don’t know about you, but I believe that every great dish has a story – and this one is no exception!
Picture this: a chilly evening, your kitchen filled with the tantalizing aroma of spices mingling. You know that feeling of comfort that creeps in as you chop fresh veggies, the sizzling sound of chicken browning in the skillet, and the joyful anticipation of gathering around the table with family and friends. That’s the magic of cooking, and today, I’m here to share a recipe that embodies all of that and more.
This Chicken Fajita Casserole is everything you love about traditional fajitas—bold flavors, bright colors, and cheesy goodness—layered into a delightful casserole that makes meal prep a breeze. You’ll love how easy this dish is to whip up, making it ideal for weeknight dinners or casual gatherings. Plus, it’s customizable, so feel free to throw in your favorite ingredients or make it your own!
So, whether you’re a culinary whiz or just figuring out the mystery of your oven, I promise you there’s something for everyone in this dish. Grab your spatula (or a trusty spoon!), roll up your sleeves, and let’s take your taste buds on a fiesta they won’t forget. Ready? Let’s get cooking!
Personal Story
Ah, the memories that come flooding back when I think about fajitas! There’s something nostalgic about sitting around a table with loved ones, each of us crafting our own perfect bite. One of my fondest memories is from my college days, where every Taco Tuesday transformed into a mini fiesta with friends. Our version of a "college fajita night" consisted of sizzling chicken, vibrant veggies, and just enough cheese to make you rethink the meaning of moderation!
One evening, we decided to spice things up and went wild with flavors—adding all sorts of toppings: fresh guacamole, crunchy taco shells, and even a few unconventional choices like pineapple! The laughter and joy shared that night stayed with me, transforming a simple meal into a delightful experience. That’s the spirit of this Chicken Fajita Casserole! It’s designed to inspire those same vibes of togetherness and celebration.
Ingredients
Let’s gather our ingredients, friends! Here’s what you’ll need to create this mouthwatering Chicken Fajita Casserole:
-
1.5 pounds boneless, skinless chicken breasts or thighs (cut into strips)
Perfect for tenderness and flavor! If you prefer a lighter option, you can use turkey breasts instead. -
3 large bell peppers (red, yellow, green, sliced)
These beauties bring color, sweetness, and crunch to the dish. Feel free to substitute with poblano peppers for an extra kick! -
1 large onion (sliced)
Onions add depth of flavor. If you’re not a fan, try using shallots or even leeks for a milder taste. -
2 cups shredded cheese (cheddar, Monterey Jack, or pepper jack)
Cheese is what dreams are made of! I recommend mixing cheese varieties for an irresistible layer of gooey goodness. -
10 oz diced tomatoes with green chilies (drained)
These provide acidity and a touch of spice. For a fresher version, use chopped fresh tomatoes and add jalapeños for heat! -
2 tbsp olive oil
We need this for sautéing our chicken and veggies to perfection! Canola or avocado oil can be great substitutes here. -
1 lime (juiced)
The lime adds brightness! Lemon juice can work in a pinch, but I’d recommend lime for that authentic fajita flavor. -
Fresh cilantro (chopped, for garnish)
Cilantro brings a fresh pop of flavor. If you’re not a fan, parsley or green onions can be a delightful alternative. -
2 tsp chili powder
A staple in Mexican cuisine! If you’re craving more heat, consider adding an extra teaspoon or trying chipotle powder for a smoky flavor. -
1 tsp smoked paprika
This adds a lovely smokiness to the dish. No smoked paprika? Regular paprika works, but the smokiness will be missed. -
1 tsp ground cumin
Cumin heightens the earthy flavors of our fajitas. Substitute with coriander for a different twist. -
1 tsp garlic powder
Garlic flavor without the chopping? Yes, please! If you like it fresh, swap for two cloves of minced garlic. -
1 tsp onion powder
More onion goodness! A must-have for layering flavors, but feel free to skip if you’re using fresh onions. -
0.5 tsp dried oregano
Oregano adds aromatic flavor! Italian seasoning can be a great substitute if you’re looking to mix things up. -
0.25 tsp cayenne pepper (adjust to taste)
This is where the spice level lives! For a milder flavor, skip this entirely or substitute with a dash of paprika. -
Salt and black pepper (to taste)
Don’t forget to season! Start with a pinch and adjust as needed.
Step-by-Step Instructions
Ready to bring this dish to life? Let’s roll up our sleeves and get cooking! Here’s how to make your Chicken Fajita Casserole:
-
Preheat Your Oven:
Preheat your oven to 375°F (190°C). This step is super important because you want that cheesy goodness to melt and meld together perfectly when it’s time to bake. -
Sauté the Chicken:
Heat your olive oil in a large skillet over medium-high heat. Once hot, add the strips of chicken. Cook for about 5–7 minutes, stirring occasionally, until the chicken is browned and cooked through. Here’s a chef hack: Don’t overcrowd the pan! Work in batches if necessary. This ensures even cooking and that crispy texture we all love! -
Add the Veggies:
Toss in your sliced bell peppers and onions into the skillet with the chicken. Stir them around and let those vibrant colors mingle for about 4–5 minutes. You want the veggies to soften up just a bit, but still have a nice crunch. -
Season It Up:
Sprinkle in the chili powder, smoked paprika, cumin, garlic powder, onion powder, oregano, cayenne, salt, and black pepper. Give everything a great toss to coat evenly. As the spices toast, your kitchen will start smelling incredible! -
Layer the Casserole:
Gradually add in the drained diced tomatoes and the lime juice to the chicken and veggie mix. Stir it all together, allowing the flavors to meld. Now, transfer this colorful mixture into a greased 3-quart baking dish. -
Add the Cheese:
Sprinkle one cup of your shredded cheese over the chicken and veggie mixture. Then, layer the remaining cheese on top, giving that casserole the cheesy crown it deserves. -
Bake to Perfection:
Place the baking dish in your preheated oven and bake for 25-30 minutes, or until the cheese is bubbly and golden. I recommend keeping an eye on it toward the end to avoid any over-browning. -
Garnish and Serve:
Once done, remove it from the oven, and let it cool for about 5 minutes (if you can wait that long!). Garnish your casserole with freshly chopped cilantro, serving it up like a fiesta on a plate!
And there you have it—a wonderfully easy Chicken Fajita Casserole that’s bursting with flavor and cozy vibes.
Serving Suggestions
Now that your casserole is baked to perfection, let’s talk about how to serve it! Scoop out generous portions onto plates, using a spatula to keep those lovely layers intact.
You can serve it with warm tortillas on the side for those who want to wrap their portions. A dollop of sour cream or Greek yogurt adds a creamy finish, while fresh guacamole can elevate the flavors even further. Consider offering some salsa or pico de gallo for added freshness and a zesty bite!
It’s also fun to set up a “toppings bar” in case your guests want to add their twist. Include toppings like sliced jalapeños, pickled onions, fresh lime wedges, or even more cheese. Encourage people to dig in and make it their own—after all, that’s the joy of cooking and sharing food!
Recipe Variations
Feeling creative? Here are a few twists you can try with your Chicken Fajita Casserole:
-
Vegetarian Version:
Swap out the chicken for black beans or chickpeas, adding in extra veggies like zucchini or corn for a hearty vegetarian casserole. -
Southwest Chicken Casserole:
Include corn and black beans along with the chicken for a more robust texture. It’ll scream Southwestern flavor! -
Spicy Kick:
Want more heat? Add diced jalapeños into the mix and top with spicy pepper jack cheese for a fiery delight. -
Low-Carb Option:
Instead of layering with tortillas, serve it over a bed of cauliflower rice or zucchini noodles for a delicious low-carb meal. -
Breakfast Casserole:
Switch it up for breakfast by adding scrambled eggs to the mix, creating a fun brunch dish that can be served with hash browns on the side!
Chef’s Notes
This recipe has a special place in my heart, celebrating the joy of simple ingredients coming together to create something truly heartwarming. It has evolved over the years as I’ve experimented—sometimes adding beans, other times daring to use different cheeses.
Funny story—one time, I accidentally used expired cheese (don’t do it, folks) and it turned the entire dish into an unfortunate event! Now, I’m a crazed cheese-checker before any assembly takes place. Lesson learned!
FAQs and Troubleshooting
Q: Can I make this casserole ahead of time?
Absolutely! You can assemble the casserole the night before, cover it tightly with foil, and store it in the fridge. Just add an extra 10 minutes to the baking time when you’re ready to cook.
Q: What if the casserole seems dry?
If your casserole comes out on the drier side, it could be that the chicken was overcooked. Make sure to check the chicken’s internal temperature and try to stick to the recommended cooking times.
Q: How can I substitute for cheese to make it dairy-free?
Use a dairy-free cheese blend or a cashew cream sauce in place of shredded cheese. It won’t melt quite the same, but it’ll add creaminess!
Q: My casserole isn’t browning. What can I do?
If you find that it’s not browning to your liking after baking, try switching on the broiler for a couple of minutes (keeping a close eye!) to get that golden crust on top.
Nutritional Info
Now, let’s get into the health side of the Chicken Fajita Casserole! Here’s an approximate breakdown per serving (based on six servings):
- Calories: 425
- Protein: 38g
- Fat: 22g
- Carbohydrates: 22g
- Fiber: 3g
Remember, this is an estimation depending on the specific ingredients used, including the cheese and chicken cuts. It’s nutritious while still delivering that satisfying feel-good comfort food vibe!
Final Thoughts
I hope this Chicken Fajita Casserole brings as much joy to your kitchen as it has to mine. Whether you’re enjoying it with family around the table or sharing smiles with friends at a gathering, this dish is all about connecting through the love of food.
So, gather your ingredients, unleash your inner chef, and let the flavors lead you to a delightful culinary adventure. I’d love to hear how it turns out for you—share your creations and any twists you made along the way. After all, cooking is all about experimenting, enjoying, and, most importantly, sharing!
Until next time—happy cooking, and may your kitchen always be filled with warmth and laughter! 🥳✨

Chicken Fajita Casserole
- Total Time: 45 minutes
- Yield: 6 servings 1x
- Diet: Gluten-Free
Description
A comforting Chicken Fajita Casserole packed with bold flavors, vibrant colors, and cheesy goodness, perfect for weeknight dinners or gatherings.
Ingredients
- 1.5 pounds boneless, skinless chicken breasts or thighs (cut into strips)
- 3 large bell peppers (red, yellow, green, sliced)
- 1 large onion (sliced)
- 2 cups shredded cheese (cheddar, Monterey Jack, or pepper jack)
- 10 oz diced tomatoes with green chilies (drained)
- 2 tbsp olive oil
- 1 lime (juiced)
- Fresh cilantro (chopped, for garnish)
- 2 tsp chili powder
- 1 tsp smoked paprika
- 1 tsp ground cumin
- 1 tsp garlic powder
- 1 tsp onion powder
- 0.5 tsp dried oregano
- 0.25 tsp cayenne pepper (adjust to taste)
- Salt and black pepper (to taste)
Instructions
- Preheat your oven to 375°F (190°C).
- Heat your olive oil in a large skillet over medium-high heat. Add the chicken strips and cook for 5–7 minutes, until browned and cooked through.
- Toss in the sliced bell peppers and onions and stir for 4–5 minutes until the veggies soften slightly.
- Sprinkle in the chili powder, smoked paprika, cumin, garlic powder, onion powder, oregano, cayenne, salt, and black pepper. Toss to coat evenly.
- Add the drained diced tomatoes and lime juice to the chicken and veggie mix. Stir to combine and transfer to a greased 3-quart baking dish.
- Sprinkle one cup of shredded cheese over the mixture, then layer the remaining cheese on top.
- Bake for 25-30 minutes, or until the cheese is bubbly and golden.
- Garnish with freshly chopped cilantro and serve.
Notes
This casserole can be made ahead of time and stored in the fridge. Add an extra 10 minutes to the baking time if cooking from cold.
- Prep Time: 15 minutes
- Cook Time: 30 minutes
- Category: Main Course
- Method: Baking
- Cuisine: Mexican
Nutrition
- Serving Size: 1 serving
- Calories: 425
- Sugar: 5g
- Sodium: 600mg
- Fat: 22g
- Saturated Fat: 10g
- Unsaturated Fat: 10g
- Trans Fat: 0g
- Carbohydrates: 22g
- Fiber: 3g
- Protein: 38g
- Cholesterol: 80mg
Keywords: Chicken Casserole, Fajita Casserole, Easy Dinner

Chicken Chukka
Discover the Flavorful World of Chicken Chukka: A Soulful Delight
Introduction
Hey food lovers! Welcome back to Feastical! Today, I’m excited to share with you one of those dishes that wraps you in the warm embrace of home-cooked goodness—Chicken Chukka. This dish isn’t just a meal; it’s a celebration of flavors that transports you straight to a bustling kitchen filled with laughter, rich aromas, and cherished memories.
Chicken Chukka is a classic South Indian preparation that’s perfect for those evenings when you want to enjoy something tantalizing yet comforting. The way the spices dance together creates a bold, aromatic experience that makes every bite a delight. Whether you’re stirring up this magic for a family gathering or a cozy night in, there’s something undeniably satisfying about this dish.
As you navigate through the savory spices and succulent chicken pieces, you’ll find that Chicken Chukka is all about simplicity blended with depth of flavor. So, roll up your sleeves and let’s embark on this culinary adventure together. Trust me, by the end of this post, you’ll not only know how to make Chicken Chukka but also have a hefty serving of my kitchen stories to entertain you as you cook! Ready? Let’s dig in!
Personal Story
You know, every dish tells a story, and Chicken Chukka is no exception! I remember the first time I had this flavorful dish at my good friend Priya’s house during a festive celebration. The warm spices wafted through the air, mingling with the sweet sounds of laughter and chatter from the kitchen. Priya’s grandmother was the culinary genius behind it all, and she stood at the stove, artfully blending spices and keeping a watchful eye on the bubbling pot of chicken.
Watching her cook was like witnessing magic. Every toss of the chicken and sprinkle of spices was accompanied by a nostalgic tale from her childhood—how cooking was an expression of love and joy. After she plated up the Chicken Chukka, we gathered around the table, and I got my first taste of this incredible dish. The flavors exploded with warmth, comfort, and a surprising zing from the spices—each bite was better than the last. It became a memory etched in my heart, reminding me of the power of food to bring us together.
Since then, I’ve made my own version of Chicken Chukka countless times, tweaking it just a bit here and there, but always honoring that nostalgic first experience. The deliciousness of Chicken Chukka has turned it into one of my go-to comfort foods—one that I love whipping up for friends and family, just like Priya’s grandmother did.
Ingredients
Here’s a simple list of what you’ll need to create this delightful Chicken Chukka. Remember, great cooking starts with quality ingredients!
-
500 Grams Chicken: Choose bone-in pieces for extra flavor, or go skinless and boneless for a leaner option. Both work wonders!
-
2 Large Onions (Sliced): Sweet and caramelized, onions are the base of the flavor. You can swap with shallots or leeks for a milder taste.
-
2 Tsp Ginger Garlic Paste: A must for that aromatic depth. If you’re in a pinch, freshly minced ginger and garlic will do just fine.
-
2 Tsp Red Chili Powder: Spice it up with your preferred heat level! Adjust according to your taste—smoky paprika is a great milder replacement.
-
¼ Tsp Turmeric Powder: For warmth and a beautiful golden hue. No substitutes here; turmeric is a superstar for flavor and color.
-
½ Tsp Coriander Powder: This adds earthiness—you might also consider using ground cumin for a different flavor profile.
-
Black Pepper: Freshly cracked is best—it elevates the dish! (Feel free to dial back if you prefer less heat.)
-
¼ Tsp Garam Masala Powder: The perfect finishing touch that rounds out the flavors. If you don’t have it, a pinch of cinnamon and cloves will do the trick.
-
2 Tbsp Coconut Oil: Adds a nutty flavor. If you’re not a fan of coconut oil, feel free to swap with vegetable or olive oil.
-
Curry Leaves: These aromatic leaves are essential for that authentic flavor. If you can’t find them, try using bay leaves, though the taste won’t be the same.
-
Coconut Oil for Frying Onions: This gives the onions that delightful crispness. You can substitute with any cooking oil, but coconut oil brings a unique flavor.
-
Salt to taste: Always essential! Use Himalayan salt for added minerals.
Step-by-Step Instructions
Now, let’s roll up those sleeves and get cooking! Follow these instructions closely, and don’t forget to sprinkle in your personality along the way—cooking should be fun!
-
Marinate the Chicken: Start by cleaning and chopping your chicken into bite-sized pieces. In a bowl, combine the chicken with turmeric powder, red chili powder, coriander powder, and salt. Rub the spices into the chicken pieces well. Let this marinate for at least 30 minutes—this step is crucial for flavor!
-
Heat Your Pan: Grab a heavy-bottomed pan or kadhai and pour in the coconut oil (the aroma already takes me back to Priya’s house!). Heat it over medium flame until it shimmers. You want it hot but not smoking.
-
Sauté Your Onions: Add the sliced onions to the hot coconut oil and sauté until golden brown. This step requires patience; caramelizing the onions brings out their natural sweetness and is the foundation for your Chicken Chukka. Once your onions are golden, remove half of them to use as a garnish later.
-
Add Ginger Garlic Paste: Throw in the ginger garlic paste with those sautéed onions, stirring well. Cook this for about 2-3 minutes until the raw smell dissipates—this step pumps up the dish with hearty flavor!
-
In comes the Chicken: Add your marinated chicken to the pan. Stir well to coat it with the onion mixture. Cook for around 5-7 minutes on high flame, then lower it to medium. You want to seal in those juices while the chicken browns nicely.
-
Introduce Spices: Sprinkle in the black pepper and garam masala, mixing well. The smell should be divine right now.
-
Don’t Forget the Curry Leaves: Toss in those lovely curry leaves, stirring them into the pot. They’ll perfume the chicken wonderfully!
-
Simmer It Down: Cover the pan, letting it cook for about 20 minutes on low heat. Stir occasionally. This allows all those rich flavors to mingle. Your kitchen is about to smell like heaven!
-
Adjust Seasoning: Taste and adjust salt if needed. If it feels too thick, you can add a couple of tablespoons of water to loosen it up a bit.
-
Finish with Frying Onions: Finally, before serving, scatter the reserved crispy onions on top—this adds a delightful crunch that takes Chicken Chukka to the next level!
Serving Suggestions
Now that your Chicken Chukka is ready and smelling irresistible, it’s time to plate! For a classic presentation, serve it in a large, shallow bowl, garnished with freshly chopped cilantro and that crispy fried onion on top for texture.
Pair it with steamed rice or fluffy naan to soak up that luscious gravy. A side of cucumber raita or even a simple salad can add a refreshing contrast to the rich flavors of the Chicken Chukka. Trust me, your friends and family will gather around the table like moths to a flame!
Recipe Variations
Feeling adventurous? Here are some creative twists you can add while preparing this dish:
-
Vegetarian Delight: Swap the chicken for paneer or chickpeas, and follow the same method. You’ll have a scrumptious vegetarian version that’s equally fulfilling.
-
Add Some Vegetables: If you love your greens, toss in some bell peppers, carrots, or green peas during the cooking process. They’ll add more color and texture!
-
Coconut Milk Bliss: For a richer sauce, add about ½ cup of coconut milk halfway through cooking. It will provide creaminess and a slightly sweeter touch.
-
Fiery Chukka: Increase the red chili powder or add chopped green chilies if you’re craving extra heat.
-
Ginger Focus: Add a chunk of fresh ginger, julienned, toward the end for a spicier bite that packs a punch.
Chef’s Notes
I’ll let you in on a little kitchen secret: Chicken Chukka is one of those dishes that gets better with time. The flavors deepen and mesh beautifully, so if you can, make it a day ahead and let it sit in the fridge overnight. When you reheat it, the spices will have integrated perfectly, making the dish even more delightful!
I’ve had plenty of kitchen mishaps while trying to recreate this dish too. One time, I accidentally added twice the amount of turmeric—I turned a lovely chicken dish into a bright yellow, ‘slightly off’ experiment. The lesson? Always taste as you go and trust your instincts!
FAQs and Troubleshooting
-
What can I use instead of coconut oil?
- You can substitute with any neutral oil like vegetable or canola oil. However, coconut oil really enhances the dish’s flavor!
-
Why did my chicken become tough?
- Overcooking is usually the culprit! Aim to cook the chicken until just done to keep it juicy and tender.
-
Can I freeze Chicken Chukka?
- Absolutely! It freezes well. Just ensure it’s cooled completely before storing in an airtight container.
-
How do I make it less spicy?
- Reduce the amount of red chili powder and substitute with paprika. Balancing flavors is key!
Nutritional Info
Chicken Chukka is more than just delicious; it’s also packed with nutritional goodness! In one serving of this flavorful dish (assuming a serving size of one cup), you can expect approximately:
- Calories: 380
- Protein: 28g
- Fat: 24g (mostly from coconut oil and chicken)
- Carbohydrates: 14g
- Fiber: 1g
This dish is a great source of protein and, when paired with some veggies, can be part of a balanced meal. Enjoy responsibly!
Final Thoughts
And there you have it—your very own Chicken Chukka, ready to warm your heart and delight your taste buds! Cooking is an adventure, and this dish is just one of countless journeys we can take together in the kitchen. I hope you enjoy this recipe as much as I do, filled with nostalgic moments and flavors that comfort the soul.
Remember, every time you cook, you’re not just preparing food; you’re creating memories. So, gather your loved ones, dig into this savored flavorsome Chicken Chukka, and let the good times roll.
Happy cooking and until next time—keep those spatulas handy and your hearts hungry for joy!
Print
Chicken Chukka
- Total Time: 60 minutes
- Yield: 4 servings 1x
- Diet: Non-Vegetarian
Description
Chicken Chukka is a classic South Indian dish that combines succulent chicken with a medley of spices for a comforting and flavorful experience.
Ingredients
- 500 grams chicken (bone-in or skinless)
- 2 large onions (sliced)
- 2 tsp ginger garlic paste
- 2 tsp red chili powder
- ¼ tsp turmeric powder
- ½ tsp coriander powder
- Black pepper to taste
- ¼ tsp garam masala powder
- 2 tbsp coconut oil
- Curry leaves
- Coconut oil for frying onions
- Salt to taste
Instructions
- Marinate the chicken by cleaning and chopping it into bite-sized pieces. Combine with turmeric powder, red chili powder, coriander powder, and salt. Let marinate for 30 minutes.
- Heat a heavy-bottomed pan and add coconut oil over medium flame.
- Sauté the sliced onions until golden brown; remove half for garnish.
- Add ginger garlic paste and cook for 2-3 minutes until the raw smell disappears.
- Incorporate the marinated chicken and cook for 5-7 minutes on high flame to seal in juices.
- Sprinkle in black pepper and garam masala, mixing well.
- Toss in curry leaves and stir.
- Cover and simmer on low heat for about 20 minutes, stirring occasionally.
- Adjust seasoning and add water if the mixture is too thick.
- Finish by adding crispy onions on top before serving.
Notes
Chicken Chukka improves in flavor when made a day ahead. Reheat before serving.
- Prep Time: 30 minutes
- Cook Time: 30 minutes
- Category: Main Course
- Method: Stovetop
- Cuisine: Indian
Nutrition
- Serving Size: 1 serving
- Calories: 380
- Sugar: 2g
- Sodium: 600mg
- Fat: 24g
- Saturated Fat: 20g
- Unsaturated Fat: 4g
- Trans Fat: 0g
- Carbohydrates: 14g
- Fiber: 1g
- Protein: 28g
- Cholesterol: 70mg
Keywords: Chicken, South Indian, Spicy, Comfort Food, Chicken Chukka

Crispy Honey Sesame Chicken
# Crispy Honey Sesame Chicken: A Delightful Dish That Brings Joy

## Introduction

Hey there, fellow food lovers! I’m Beau Collier, and today I’m thrilled to share one of my all-time favorites: **Crispy Honey Sesame Chicken**. Picture this: succulent chicken, kissed with a sweet and savory glaze, complemented by nutty sesame seeds and a touch of green onion for that perfect crunch and freshness. Nothing says "comfort food" quite like this dish! It’s the kind of meal that can turn an ordinary weeknight into a special occasion, bringing smiles to faces around the table.

Crispy Honey Sesame Chicken is essentially a celebration of flavors and textures. You’ve got crispy bites that make you feel like you’re indulging in take-out, but this homemade version is made with love and packed with fresh ingredients. Whether you’re feeding your family, entertaining friends, or just looking to treat yourself, this dish always hits the spot. And the best part? It’s surprisingly easy to make, even for kitchen novices.

Don’t worry if you’ve never cooked chicken this way before! I’ll guide you through every step, sharing tips and tricks to make it foolproof. Plus, I’ll throw in some personal touches, serving suggestions, and variations to keep things fresh and exciting. So, grab your apron, roll up your sleeves, and let's get cooking!

## Personal Story

Growing up, my family had a tradition where we would gather around the dinner table every Sunday evening. It was a sacred time, where we exchanged stories about our week while savoring a home-cooked meal. One of my favorite dishes that my mom often made was a sweet and sticky chicken dish that we all loved. I remember sitting on the kitchen counter, my little legs swinging as I watched her whip up something magical.

I’ll never forget the first time she entrusted me to help. Dipping the chicken in cornstarch felt like a rite of passage; I was really becoming part of the delicious chaos of cooking. As the chicken sizzled in the pan, a sweet aroma filled the kitchen. Moments like these cemented my love for cooking, and thus, my journey began.

Years later, I tried to recreate my mom’s dish, but I added a twist by introducing sesame seeds and a bit of ginger for extra depth. This crispy honey sesame chicken is a tribute to those nostalgic Sunday dinners, and I’m excited to share this recipe with you—it’s like a warm hug from my culinary roots.

## Ingredients

Here's what you'll need to make this delightful Crispy Honey Sesame Chicken:

- **1 lb chicken breast**, cut into bite-sized pieces
  *I recommend using boneless, skinless chicken for easy cooking. You can swap it with thighs for a juicier texture if you prefer!*

- **1/2 cup cornstarch**
  *This is the secret to that crispy coating! If you're looking for gluten-free options, arrowroot powder can work too!*

- **1/4 cup vegetable oil**
  *Use this for frying until golden brown. Feel free to substitute with canola or peanut oil if you love that nutty flavor!*

- **1/4 cup honey**
  *Sweet, sticky, and oh-so-good! If you’re vegan, you can substitute it with maple syrup or agave nectar for a similar sweetness.*

- **2 tablespoons soy sauce**
  *The salty and savory component. Tamari is a great gluten-free alternative. Keep an eye on the sodium level if you’re cutting back on salt!*

- **1 tablespoon sesame oil**
  *A little goes a long way! It adds a lovely nutty flavor; use less if it’s too strong for your taste.*

- **2 cloves garlic, minced**
  *A must for that aromatic essence. Fresh garlic is best, but you can replace it with garlic powder in a pinch; use about 1/4 teaspoon.*

- **1 teaspoon ginger, minced**
  *Ginger adds a zesty kick! Ground ginger works too if you don’t have fresh on hand—just use about 1/4 teaspoon.*

- **2 tablespoons sesame seeds**
  *These little beauties not only add flavor but also a delightful crunch; toast them slightly for even more nuttiness!*

- **2 green onions, sliced (for garnish)**
  *These add a pop of color and freshness! You can also swap them out for chives if you have those instead.*

## Step-by-Step Instructions

Let’s dive into the cooking process, shall we? Here's how to whip up this crispy goodness in no time!

### Step 1: Prep the Chicken
Start by cutting your chicken breasts into bite-sized pieces. About 1-inch cubes work perfectly! More surface area means more crispy edges when fried. Make sure the pieces are relatively uniform to ensure even cooking. Toss them in a bowl with the cornstarch until well coated. This is where the magic of crispiness begins—don't skip this step!

### Step 2: Heat the Oil
In a large skillet or wok, heat up the vegetable oil over medium-high heat. You want enough oil to cover the bottom of the pan generously but not deep-frying levels. About 1/4 inch should do it! This is the time to test if the oil’s ready. Drop a small piece of chicken in—if it sizzles immediately, you’re good to go!

### Step 3: Fry the Chicken
Carefully add the cornstarch-coated chicken pieces to the hot oil in batches, so you don’t overcrowd the pan. This helps achieve that golden, crispy texture. Fry for about 4-5 minutes on each side until they’re beautifully browned and cooked through. When you see a crispy exterior, you’ll know it’s getting close. Use a pair of tongs to flip them, ensuring all sides get that lovely color.

### Step 4: Make the Sauce
Once the chicken is cooked, remove it from the skillet and let it drain on a paper towel-lined plate. In that same skillet, lower the heat and add the minced garlic and ginger. Sauté for about 30 seconds until fragrant. Then, pour in the honey, soy sauce, and sesame oil. Stir until the sauce is thick and bubbly. This is where the sweet and savory magic happens.

### Step 5: Incorporate the Chicken
Toss the crispy chicken back into the skillet, making sure every piece is coated with the luscious sauce. Sprinkle the sesame seeds and give it another toss for good measure. The aroma should be intoxicating at this point!

### Step 6: Serve It Up
Transfer the chicken to a serving platter or individual bowls. Don’t forget to garnish with sliced green onions! Trust me; it’s all about those finishing touches that elevate the dish.

## Serving Suggestions

Crispy Honey Sesame Chicken is incredibly versatile! I love serving it over a bed of fluffy jasmine rice or brown rice, soaking up all that delicious sauce. You can also pair it with steamed broccoli or snap peas for that extra crunch and color.

If you want to take it up a notch, why not serve it with a side of homemade spring rolls or a fresh salad drizzled with sesame dressing? The contrast of warm, crispy chicken with cold, crisp veggies keeps the meal balanced and exciting. And for a family-style vibe, present it in a large bowl for everyone to dig in together—it’s all about community and connection through food!

## Recipe Variations

Now that you’ve got the basics down, let’s get creative! Here are some fun twists you can try with this recipe:

1. **Baked Version**: If you prefer a healthier option, try baking the chicken instead of frying. Preheat the oven to 400°F (200°C), place the coated chicken pieces on a parchment-lined baking sheet, and spray with cooking oil. Bake for about 20 minutes, flipping halfway through for an even crisp.

2. **Add Spice**: For a spicy kick, add red pepper flakes to the sauce or toss some sliced jalapeños with the chicken before frying.

3. **Vegetable Medley**: To boost nutrition, add stir-fried bell peppers, carrots, or bok choy to the chicken and sauce mixture.

4. **Sweet Citrus Twist**: Mix in some orange or pineapple juice with the honey for a tangy-sweet flavor that’s completely refreshing.

5. **Noodles Instead of Rice**: Try tossing the chicken with cooked rice noodles for a completely different dish. Add some veggies like bean sprouts or bok choy for a phenomenal balance!

## Chef’s Notes

This dish is close to my heart and has evolved over the years. What started as a simple chicken recipe has turned into a family favorite that I whip up for almost every occasion. I still remember those Sunday dinners and how the kitchen filled with laughter, delicious smells, and love, and every now and then, I find myself going off the recipe for a fun culinary experiment.

One time, I forgot to buy honey and ended up using maple syrup—surprisingly good! It just goes to show that cooking is all about creativity and making it your own. Don’t be afraid to play with different ingredients and techniques until you find what resonates with your taste buds. That's the joy of cooking!

## FAQs and Troubleshooting

**Q: Why is my chicken not crispy?**
A: If your chicken isn’t crispy, it might be due to excess moisture. Ensure the pieces are dry before tossing them in cornstarch, and fry in batches so the temperature of the oil doesn’t drop too much.

**Q: Can I make the sauce ahead of time?**
A: Absolutely! You can prepare the sauce ahead of time, store it in the fridge, and warm it up before tossing it with the chicken.

**Q: What should I do if the sauce is too thick?**
A: If you find the sauce thickening too soon, simply add a splash of water or more soy sauce to loosen it up.

**Q: How do I store leftovers?**
A: Store any leftovers in an airtight container in the fridge, and consume within 2–3 days. Reheat in a skillet for the best results.

## Nutritional Info

Here’s a general breakdown for a serving of Crispy Honey Sesame Chicken (note that actual values can vary based on specific ingredients and portion sizes):

- **Calories**: Approximately 350
- **Protein**: 28g
- **Fat**: 15g
- **Carbohydrates**: 30g
- **Sugar**: 12g
- **Sodium**: 450mg

### Tips for Ninja-Approved Meals
While this dish is already pretty wholesome, pairing it up with a rainbow of veggies or serving it alongside a fresh salad will provide a mix of nutrients.

## Final Thoughts

There you have it—your guide to making fabulous Crispy Honey Sesame Chicken right from your kitchen! It’s a dish that not only brings incredible flavor but also warm memories, and I genuinely hope it finds a place in your home just like it did in mine. Enjoy cooking it, sharing it, and most importantly, savoring every delicious bite.

Keep exploring, keep tasting, and keep cooking with love! Remember, the heart of cooking is about bringing joy into your kitchen and the homes of those you love. Until next time, happy cooking, my friends!

Crispy Honey Sesame Chicken
- Total Time: 40 minutes
- Yield: 4 servings 1x
- Diet: None
Description
A delightful dish featuring crispy chicken coated in a sweet and savory honey sesame glaze, perfect for family dinners or entertaining friends.
Ingredients
- 1 lb chicken breast, cut into bite-sized pieces
- 1/2 cup cornstarch
- 1/4 cup vegetable oil
- 1/4 cup honey
- 2 tablespoons soy sauce
- 1 tablespoon sesame oil
- 2 cloves garlic, minced
- 1 teaspoon ginger, minced
- 2 tablespoons sesame seeds
- 2 green onions, sliced (for garnish)
Instructions
- Prep the chicken by cutting it into bite-sized pieces and tossing it in cornstarch for a crispy coating.
- Heat the oil in a skillet over medium-high heat until ready for frying.
- Fry the chicken in batches until golden brown and cooked through, about 4-5 minutes per side.
- Make the sauce by sautéing garlic and ginger, then adding honey, soy sauce, and sesame oil.
- Incorporate the fried chicken back into the sauce, tossing to coat thoroughly.
- Serve the chicken on a platter, garnished with green onions.
Notes
For a healthier option, try baking the chicken instead of frying. Add vegetables for extra nutrition.
- Prep Time: 15 minutes
- Cook Time: 25 minutes
- Category: Main Course
- Method: Frying
- Cuisine: Asian
Nutrition
- Serving Size: 1 serving
- Calories: 350
- Sugar: 12g
- Sodium: 450mg
- Fat: 15g
- Saturated Fat: 2g
- Unsaturated Fat: 9g
- Trans Fat: 0g
- Carbohydrates: 30g
- Fiber: 1g
- Protein: 28g
- Cholesterol: 70mg
Keywords: chicken, honey sesame chicken, Asian recipes, crispy chicken

Chilli Potato Recipe | Honey Chilli Potato Recipe
Honey Chilli Potato Recipe: A Flavorful Adventure You’ll Love!
Hello, food lovers! I’m Beau Collier, and today we’re diving into the world of comfort food with a delicious twist—let’s talk about Honey Chilli Potatoes! If you’re looking for a snack that’s crispy, sweet, spicy, and downright addictive, then grab your apron and join me as we whip up this delight!
Now, let’s paint a picture. Imagine a chilly evening, the aroma of frying potatoes wafting through the air, and the sizzle of ingredients meeting a hot pan. It’s the perfect moment for sharing stories, laughter, and, of course, food. Honey Chilli Potatoes are not just a dish—they’re an experience. This recipe takes humble potatoes and transforms them into crunchy bites of joy, coated with a sweet, spicy sauce that makes them irresistible.
This dish is perfect for serving guests, enjoying as a snack while binge-watching your favorite show, or even jazzing up a weeknight dinner. It’s simple, requires minimal ingredients, yet bursts with flavor! You’ll impress everyone with your culinary skills, and trust me, they’ll be coming back for seconds (and thirds)!
In this blog post, I’ll be guiding you step-by-step through this delightful recipe, sharing a personal story related to Honey Chilli Potatoes, some chef insights, and plenty of tips to help you create a dish that resonates with warmth and love. So let’s get cooking!
Personal Story
Growing up, my family had a tradition of gathering around the dinner table every Friday night. It was our happy place. I fondly remember the days when my mom would put on her apron, grab the biggest pot she could find, and start experimenting with whatever ingredients were left in the pantry. One rainy Friday evening, I walked into the kitchen, and there they were—Honey Chilli Potatoes sizzling in the pan.
The first bite was magic; the sweet honey contrasted perfectly with the heat from the chillies. My friends would raved about how addictive they were, and I half-joked that they could probably eat them all in one go. Now, every time I make this recipe, I think of those family nights and the playful banter that filled our home. Sharing food has this incredible way of bringing people closer, and I hope to share that sense of togetherness with you through this recipe!
Ingredients
Alright, let’s gather our cast of ingredients. Here’s what you’re going to need to create this mouthwatering Honey Chilli Potato dish:
-
4 medium-sized potatoes (small)
- Perfectly starchy and creamy, potatoes are the star of this dish! You could substitute with sweet potatoes for a slight twist.
-
1/4 cup cornflour
- This helps create that crispy coating! If you’re looking for a gluten-free option, use a gluten-free flour blend or arrowroot powder instead.
-
1/4 cup rice flour
- Adds an extra crunch! You could also use all-purpose flour for a similar effect.
-
1/4 teaspoon pepper powder
- A hint of warmth! Adjust this based on your spice tolerance.
-
Salt (to taste)
- Essential for enhancing all those flavors!
-
1 tablespoon oil
- Use any neutral oil for frying; sesame oil can give it a nice flavor!
-
1 tablespoon garlic (finely chopped)
- This adds a delicious aroma and rich flavor; you can substitute with garlic powder if in a pinch.
-
1 teaspoon ginger (finely chopped)
- A lovely zing! If you prefer, you can skip this or use ginger paste.
-
1 long green chili (sliced thin)
- For that spicy kick! Adjust the quantity based on your heat preference.
-
1/2 cup big onion (sliced thin)
- Adds sweetness and texture; red onions can offer a milder flavor.
-
1/2 cup capsicum (sliced thin)
- Colorful and crunchy! Feel free to use other bell peppers; it’s all about what you have on hand.
-
1 tablespoon spring onions (white part)
- For that extra oniony flavor.
-
1 teaspoon soya sauce
- Adds depth. For gluten-free, look for tamari.
-
2 to 3 tablespoon tomato sauce
- A little punch of sweetness; you can swap it with ketchup or salsa.
-
1 teaspoon chilli sauce / schezwan sauce
- For an extra layer of spice!
-
1/2 teaspoon pepper powder
- More heat, if you like it spicy!
-
1 teaspoon cornflour mixed with 2 tablespoons water
- This acts as your thickening agent for the sauce.
-
1 teaspoon vinegar (optional)
- This adds acidity. If you like a zesty bite, don’t skip this!
-
1 tablespoon spring onions (green part)
- For garnish and a pop of color!
-
Salt (to taste)
- Season throughout for maximum flavor!
-
2 tablespoons honey
- The star of the show! It binds everything and adds that sweet touch.
-
2 tablespoons sesame seeds
- Adds crunch and a nutty flavor; you can opt for toasted sesame seeds for an additional flavor boost.
Step-by-Step Instructions
Now that you have everything ready, let’s get to cooking! Follow these steps, and I promise you’ll end up with a plate of heavenly Honey Chilli Potatoes.
Step 1: Prep the Potatoes
Start by peeling your potatoes and cutting them into even matchstick pieces or wedges, depending on your preference. The key here is to make them uniform so they cook evenly. Soaking them in water for about 30 minutes removes excess starch and helps achieve that perfect crispiness—don’t skip this step!
Step 2: Coat the Potatoes
Once soaked, drain and pat the potatoes dry. In a mixing bowl, combine the cornflour, rice flour, pepper powder, and salt. Toss your potatoes in the flour mixture until they are well-coated. The coating makes all the difference! You can also give the potatoes a light spray of oil for an even crunchier texture.
Step 3: Fry ‘Em Up
Heat oil in a pan over medium heat. Make sure it’s hot enough to fry, but not so hot that it burns the coating. Fry the coated potatoes in batches, making sure not to overcrowd the pan. Fry until golden brown and crispy, about 6-8 minutes. Flip them occasionally for an even fry! Drain on paper towels to get rid of excess oil.
Step 4: The Flavor Bomb!
In another pan, heat a tablespoon of oil. Feel free to use the same oil from frying, just consider adding a dash more if needed. Add the finely chopped garlic and ginger, sautéing until fragrant. Toss in the green chili, onions, and capsicum, cooking until just softened but still vibrant. This is where the magic happens!
Step 5: Stir in the Sauces
Add the soy sauce, tomato sauce, Chilli/Schezwan sauce, and the prepared cornflour-water mixture to the pan. Stir vigorously, ensuring everything is well combined. Let it simmer for a couple of minutes until the sauce thickens. You’re going to want to keep this cooking until you achieve a glossy finish!
Step 6: Toss the Potatoes
Now comes the fun part! Gently toss your crispy potatoes into the pan with the sauce, coating them well. Add honey for sweetness and allow everything to simmer together for a couple of more minutes until the flavors are well melded. If you want that extra zing, drizzle in a bit of vinegar. It helps cut through the sweetness beautifully.
Step 7: Garnish and Serve
Turn off the heat and garnish with spring onions and sesame seeds. You’re all set to serve these gorgeous Honey Chilli Potatoes!
Serving Suggestions
Presentation can give your dish that gourmet touch! Serve the Honey Chilli Potatoes in a large bowl, sprinkled with additional spring onions and sesame seeds for that extra pop of color. You can also serve them on a rustic wooden platter, surrounded by some dipping sauces such as sweet chili sauce or a tangy yogurt dip. Pair with drinks like a chilled beer, zesty lemonade, or sparkling water to complete the experience.
Recipe Variations
There’s always room to get creative! Here are some fun variations to put your stamp on this dish:
-
Spicy Honey Garlic Potatoes: Add a teaspoon of red chili flakes or increase the heat with a touch more Sichuan sauce for a fiery bite.
-
Honey Mustard Potatoes: Mix some Dijon mustard with honey for a tangy twist.
-
Herb-infused Potatoes: Add dried herbs like oregano or cumin to your flour mixture for an aromatic touch.
-
Sweet and Savory: Mix in some diced pineapple for a pop of sweetness and texture.
-
Vegan Option: Simply replace honey with agave syrup or maple syrup for a plant-based alternative.
Chef’s Notes
Cooking is all about experimenting! I started making these Honey Chilli Potatoes from a friend’s recipe, adjusting it over the years based on my family’s preferences and the ingredients I have on hand. Sometimes, I throw in some leftover veggies or toss in a handful of nuts for extra crunch. The recipe has evolved, but the love for this dish remains unchanged. It’s a household favorite for a reason!
FAQs and Troubleshooting
Q: Why aren’t my potatoes crispy?
A: The most common culprit is moisture. Make sure to dry the potatoes thoroughly after soaking. Fry in small batches, and ensure the oil is hot enough!
Q: Can I bake these instead of frying?
A: Absolutely! For a healthier version, coat the potatoes and bake at 425°F (220°C) for about 25-30 minutes, flipping halfway through.
Q: What can I do if the sauce is too thick?
A: If the sauce thickens too much, just add a splash of water or stock to loosen it up.
Q: How do I store leftovers?
A: These are best enjoyed fresh, but you can store leftovers in an airtight container in the fridge for 2-3 days. Reheat in the oven for optimal crispiness!
Nutritional Info
Here’s a quick rundown of the nutritional benefits of Honey Chilli Potatoes (per serving):
- Calories: 250 (approximately)
- Fat: 12g
- Carbohydrates: 34g
- Protein: 3g
- Fiber: 3g
Keep in mind that the nutritional info may vary based on specific brands of ingredients used and portion size.
Final Thoughts
There you have it, folks! A tasty and soul-satisfying recipe for Honey Chilli Potatoes, perfect for any occasion. Remember, cooking is about joy, experimentation, and making memories. I hope you recreate this recipe in your kitchen and perhaps even share it with someone special, just as I’ve done with my family.
So don’t wait—get in that kitchen and create your own delectable dish today! Let me know how it goes, or if you have any questions, just reach out. Until next time, fellow foodies—keep it delicious, keep it fun, and keep it real! 🍽️❤️
Print
Honey Chilli Potatoes
- Total Time: 50 minutes
- Yield: 4 servings 1x
- Diet: Vegetarian
Description
Crispy Honey Chilli Potatoes coated in a sweet and spicy sauce, perfect for any occasion.
Ingredients
- 4 medium-sized potatoes (small)
- 1/4 cup cornflour
- 1/4 cup rice flour
- 1/4 teaspoon pepper powder
- Salt (to taste)
- 1 tablespoon oil
- 1 tablespoon garlic (finely chopped)
- 1 teaspoon ginger (finely chopped)
- 1 long green chili (sliced thin)
- 1/2 cup big onion (sliced thin)
- 1/2 cup capsicum (sliced thin)
- 1 tablespoon spring onions (white part)
- 1 teaspoon soya sauce
- 2 to 3 tablespoon tomato sauce
- 1 teaspoon chilli sauce / schezwan sauce
- 1/2 teaspoon pepper powder
- 1 teaspoon cornflour mixed with 2 tablespoons water
- 1 teaspoon vinegar (optional)
- 1 tablespoon spring onions (green part)
- Salt (to taste)
- 2 tablespoons honey
- 2 tablespoons sesame seeds
Instructions
- Prep the Potatoes: Peel and cut the potatoes into even matchstick pieces or wedges. Soak in water for 30 minutes.
- Coat the Potatoes: Drain and pat dry. In a bowl, mix cornflour, rice flour, pepper powder, and salt. Toss the potatoes until well-coated.
- Fry ‘Em Up: Heat oil in a pan. Fry the coated potatoes in batches until golden brown and crispy, about 6-8 minutes.
- The Flavor Bomb!: In another pan, heat a tablespoon of oil. Add garlic and ginger, sauté until fragrant. Add green chili, onions, and capsicum, cooking until softened.
- Stir in the Sauces: Add soy sauce, tomato sauce, Chilli/Schezwan sauce and cornflour-water mixture. Simmer until the sauce thickens.
- Toss the Potatoes: Gently toss the crispy potatoes into the sauce and add honey. Simmer together for a few minutes.
- Garnish and Serve: Turn off the heat and garnish with spring onions and sesame seeds.
Notes
Serve with dipping sauces like sweet chili or tangy yogurt dip. Can be made vegan by substituting honey with agave syrup.
- Prep Time: 30 minutes
- Cook Time: 20 minutes
- Category: Appetizer
- Method: Frying
- Cuisine: Indian
Nutrition
- Serving Size: 1 serving
- Calories: 250
- Sugar: 8g
- Sodium: 300mg
- Fat: 12g
- Saturated Fat: 2g
- Unsaturated Fat: 10g
- Trans Fat: 0g
- Carbohydrates: 34g
- Fiber: 3g
- Protein: 3g
- Cholesterol: 0mg
Keywords: Honey Chilli Potatoes, Vegetarian Snack, Appetizer, Indian Cuisine, Comfort Food

Strawberry Mochi
Strawberry Mochi: A Sweet Treat to Satisfy Your Cravings
Hey there, fellow food lovers! 👋 Today, we’re diving into a delightful dessert that’s both fun to make and oh-so-satisfying to eat: Strawberry Mochi! Imagine biting through a chewy, tender exterior only to be greeted by a refreshing scoop of strawberry ice cream. It’s like a summer day in every bite! Whether you’re gearing up for a fun family night or just looking for a sweet treat to impress your friends, this recipe has got you covered.
As someone who’s always on the lookout for feel-good food that brings people together, I’ve come to appreciate the art of making mochi. It’s a beautiful blend of texture, flavor, and a whole lot of love. It’s perfect for gatherings, celebrations, or even that cozy night in when you just want to treat yourself. Plus, the best part? You can make it right in your kitchen with relatively simple ingredients. So, roll up those sleeves, and let’s get ready to craft some delectably chewy Strawberry Mochi!
Personal Story
Let me take you back to sunny afternoons spent at my grandmother’s quaint kitchen. She had this magical ability to turn the simplest of ingredients into something extraordinary. One unforgettable summer, she decided we were going to make mochi together. With her hands dusted in cornstarch and a big smile on her face, she walked me through every step—infusing the air with the delightful fragrance of strawberries.
I remember her telling me stories about how eating mochi brings good luck in Japanese culture, and as a kid, I loved the idea of munching on a piece of good fortune! We laughed, we flourished cornstarch everywhere, and I may or may not have eaten more than my fair share of strawberry ice cream while we worked. That day was filled with connection, laughter, and, my all-time favorite, lots of delicious mochi. Fast forward to today, and I still carry that memory with me, always finding a way to recreate it in my own kitchen. So let’s create our own sweet memories today with this delightful Strawberry Mochi!
Ingredients
Here’s what you need to whip up some delightful Strawberry Mochi:
-
4 scoops Strawberry Ice Cream: This will be the heart of our mochi. You can substitute with any fruity or creamy ice cream that tickles your taste buds. Vegan or dairy-free options work splendidly too!
-
150g Strawberry Ice Cream (5.3 oz): This serves as the delightful cold core of your mochi. Feel free to experiment with different flavors, like vanilla or mango, for a fun twist.
-
100g Glutinous Rice Flour (¾ cup): This special flour gives mochi its signature chewy texture. Don’t confuse it with regular rice flour! If you’re gluten-free, there are also great options made with sweet rice flour available.
-
Cornstarch for Dusting (approx. ½ cup): This is essential for preventing your mochi from sticking. You can also substitute with potato starch if you prefer. Trust me; it’s a non-negotiable step!
Step-by-Step Instructions
Alright, let’s get down to business! Here’s how to make your own Strawberry Mochi in just a few easy steps.
Step 1: Prepare the Ice Cream
Start by scooping out 4 generous scoops of ice cream and placing them on a plate lined with parchment paper. Pop them into the freezer and let them firm up for about 30 minutes. This is crucial; firm ice cream makes it easier to wrap in mochi later!
Step 2: Mix the Dough
In a mixing bowl, combine 100g of glutinous rice flour with 150g of strawberry ice cream. It’ll give our mochi a lovely hint of flavor. Now, slowly add about 5 tablespoons of water while mixing until you get a batter-like consistency. If it’s too dry, add a little more water, but if it’s too wet, sprinkle in a bit more flour.
Step 3: Steam that Dough
We need our dough nice and soft! Pour the batter into a heatproof dish lined with parchment paper. Steam it for about 20 minutes. You can use a bamboo steamer or a makeshift one with a pot and a colander. Just make sure it’s covered to keep the steam in!
Step 4: Cool and Dust
Once your mochi dough is steamed to perfection, let it cool for about 10 minutes. Dust your countertop with a generous layer of cornstarch so it doesn’t stick when you work with it.
Step 5: Shape the Mochi
Now comes the fun part! Transfer the mochi dough onto the cornstarch-dusted countertop. With your hands dusted in cornstarch, knead it gently to make it more pliable. Pinch off portions of the dough to make small, flattened circles—aim for about 3 inches in diameter.
Step 6: Wrap that Ice Cream
Grab a chilled ice cream scoop from the freezer and place it in the center of your mochi circle. Now, fold the edges of the mochi over the ice cream, pinching and sealing it tightly at the top. Make sure to coat it in cornstarch as you work to keep it from sticking!
Step 7: Final Chill
Once you have all your mochi filled and shaped, pop them back in the freezer to firm up for about 30 minutes. It helps set the shape and keeps the ice cream scooped perfectly inside.
Serving Suggestions
When you’re ready to serve, dust off any excess cornstarch to give your mochi a lovely, clean look. Arrange them on a plate, and feel free to get creative! You can top them with fresh strawberries, a drizzle of chocolate sauce, or even a dusting of powdered sugar for that extra flair. For added fun, why not serve them with a side of whipped cream or a scoop of extra ice cream to really take it over the top?
Recipe Variations
Let’s get creative! Here are a few fun variations to try:
-
Matcha Madness: Swap in matcha ice cream or add a teaspoon of matcha powder to the mochi dough for a delightful green tea twist.
-
Chocolate Bliss: Use chocolate ice cream for a decadent version! You can also add cocoa powder to the dough for an extra chocolaty kick.
-
Fruit Fusion: Experiment with other fruit flavors like mango, raspberry, or even coconut to match the season’s freshest produce.
-
Nutty Addition: Press some finely crushed nuts into the mochi before sealing for a delightful crunch!
-
Vegan Delight: Use a non-dairy ice cream like coconut or almond milk ice cream and check that your glutinous rice flour is certified gluten-free.
Chef’s Notes
Making mochi is not just about the end product; it’s the journey too! I’m always reminded of that one time I made mochi for a party, and instead of sealing them, I accidentally made “open-faced” mochi. Everyone thought it was a new trend! The laughs we shared over it were priceless.
And over the years, this recipe has evolved. I’ve played around with flavors, and you know what? Keep the spirit light and fun! Don’t stress about making them perfect; even the imperfect ones have a special charm!
FAQs and Troubleshooting
Q: Why is my mochi too sticky?
A: More cornstarch, my friend! Make sure you’re starring it up with enough cornstarch while shaping. It keeps it from sticking!
Q: How do I know if my mochi dough is done?
A: The dough will appear slightly translucent when its steamed. If it still looks cloudy or grainy, pop it back for a few more minutes.
Q: Can I make this ahead of time?
A: Absolutely! Just keep your mochi tightly wrapped in plastic wrap in the freezer until you’re ready to serve.
Q: Can I use regular rice flour instead?
A: No, glutinous rice flour is key for that chewy texture. Regular rice flour won’t give you the same results.
Nutritional Info
Here’s a rough nutritional breakdown to keep you happy and informed about your treat! (Based on 1 piece of Strawberry Mochi)
- Calories: ~150-200 calories (may vary based on the specific ice cream used)
- Fat: 7g
- Carbohydrates: 25g
- Protein: 2g
Keep in mind that this is a delightful dessert, so enjoy it in moderation as part of a balanced diet!
Final Thoughts
There you have it! A delicious journey diving into the sweet world of Strawberry Mochi. 🎉 Whether you whip this up on a lazy Sunday or wow your friends at a dinner party, it’s bound to leave everyone smiling and completely satisfied. Remember, cooking is all about exploring flavors, sharing love, and making lasting memories.
I can’t wait for you to try this out in your kitchen! Share your photos, and let’s keep the food chat going. Happy cooking, friends! 🍓✨
Print
Strawberry Mochi
- Total Time: 50 minutes
- Yield: 4 servings 1x
- Diet: Vegetarian
Description
A delightful dessert combining chewy mochi with refreshing strawberry ice cream, perfect for gatherings and sweet treats.
Ingredients
- 4 scoops Strawberry Ice Cream
- 150g Strawberry Ice Cream (5.3 oz)
- 100g Glutinous Rice Flour (¾ cup)
- Cornstarch for Dusting (approx. ½ cup)
Instructions
- Prepare the Ice Cream: Scoop 4 generous scoops of ice cream onto a parchment-lined plate. Freeze for about 30 minutes.
- Mix the Dough: In a bowl, combine 100g of glutinous rice flour and 150g of strawberry ice cream. Slowly add about 5 tablespoons of water while mixing until batter-like consistency.
- Steam that Dough: Pour the batter into a heatproof dish lined with parchment paper and steam for about 20 minutes.
- Cool and Dust: Let the mochi dough cool for about 10 minutes, then dust the countertop with cornstarch.
- Shape the Mochi: Transfer the mochi dough to the cornstarch-dusted countertop. Knead gently and pinch off portions to form small circles.
- Wrap that Ice Cream: Place a chilled scoop of ice cream in the center of each mochi circle and fold edges over, sealing tightly.
- Final Chill: Freeze filled mochi for about 30 minutes to firm up.
Notes
Dust off any excess cornstarch before serving and feel free to top with fresh strawberries or chocolate sauce.
- Prep Time: 30 minutes
- Cook Time: 20 minutes
- Category: Dessert
- Method: Steaming
- Cuisine: Japanese
Nutrition
- Serving Size: 1 piece
- Calories: 175
- Sugar: 12g
- Sodium: 30mg
- Fat: 7g
- Saturated Fat: 4g
- Unsaturated Fat: 2g
- Trans Fat: 0g
- Carbohydrates: 25g
- Fiber: 1g
- Protein: 2g
- Cholesterol: 10mg
Keywords: strawberry mochi, dessert, Japanese sweets

Chicken Crepes Shawarma
Chicken Crepes Shawarma: A Flavorful Journey
Hey there, fellow foodies! If you’re on the hunt for a dish that’s equal parts adventure and comfort, let’s dive into the world of Chicken Crepes Shawarma! Yes, you heard that right—crepes getting cozy with the iconic flavors of shawarma! This spectacular combo is a delightful twist that takes your taste buds on an incredible journey through the bustling streets of the Middle East right into your kitchen.
Picture this: you’re at a vibrant marketplace, the aroma of seasoned chicken grilling wafts through the air as spices mingle with the crisp sound of pita bread sizzling. Sounds dreamy, right? Well, I’ve brought that magic right to your home! I created this recipe to not only satisfy your cravings but also to share a little piece of my culinary adventures. Grab your mixing bowl, and let’s create something that’s ridiculously tasty and perfect for any occasion!
I love recipes that are versatile and shareable, and trust me, this one is undeniably both. Whether you’re hosting a gathering, whipping up a weeknight dinner, or just craving something comforting, these Chicken Crepes Shawarma are bound to make everyone gather around the table with grins galore. So let’s roll up those sleeves and get cooking!
Personal Story
You know, every great recipe comes with a story, and for me, this Chicken Crepes Shawarma holds a special place in my heart. I vividly remember the weekend family gatherings at my cousin Zara’s house. Zara was the unofficial chef of our clan, and her secrets lay sprinkled through intimate conversations as she whipped up her signature dishes. One in particular stood out: her shawarma chicken tended to make our family dinners feel like extravagant feasts!
One day, inspired by her incredible flair, I decided to add a twist of my own to the classic shawarma. My goal was simple: create a dish that would evoke nostalgia but introduce that joyous vibe of crepes—fluffy, foldable, and fun to eat! The first time I served my Chicken Crepes Shawarma, there was laughter, clinking glasses, and stories shared over cuisines that transcended cultures. The moment every mouthful was met with delight confirmed it; I was onto something special. And now, I’m excited to pass this cherished recipe onto you. Let’s make some mouthwatering memories together!
Ingredients
Here’s what you’ll need to create your own delicious Chicken Crepes Shawarma:
-
2 cups all-purpose flour
Perfect for that ideal crepe texture! If you want a gluten-free option, go for a gluten-free flour blend. -
4 large eggs
The key to fluffy crepes! If you’re looking to make this egg-free, try using ground flax seeds and water (1 tablespoon of flax meal + 2.5 tablespoons of water per egg). -
2 cups milk
Whole milk works best for rich crepes. You can use almond or oat milk for a dairy-free alternative. -
1 teaspoon salt
Essential to enhance the flavor. A pinch of coarse sea salt can add a delightful bite! -
2 tablespoons melted butter
Adds richness to the batter. Coconut oil is a great alternative for a dairy-free version. -
1 lb chicken breast
Cooked and shredded. For a quicker option, a store-bought rotisserie chicken makes life easy! -
1/2 cup shawarma sauce
The star of the show! Homemade or store-bought, find one that’s zesty and full of flavor. -
Lettuce, chopped
Adds a fresh crunch! Try arugula or spinach for a peppery twist. -
Tomatoes, diced
Juicy tomatoes add color and nutrition. Cherry tomatoes can work too! -
Cucumbers, diced
Refreshing and crisp, perfect for balancing the spices. Zucchini can be a great substitute if you want something different. -
Pickles
A must for that tangy punch! If you’re not into pickles, try kalamata olives for a Mediterranean vibe. -
Pita bread or crepes
You can use store-bought crepes or whip up your own for an extra-special touch!
Step-by-Step Instructions
Now that you’ve rounded up all those fresh ingredients, let’s get cooking! Follow these steps for Chicken Crepes Shawarma like a pro:
Step 1: Make the Crepe Batter
- In a medium bowl, whisk together the flour, eggs, milk, salt, and melted butter. Whisk until you have a smooth, lump-free batter. It should have a fluid consistency, akin to heavy cream. Chef Hack: Let your batter rest for about 30 minutes! This gives the gluten time to relax, resulting in tender crepes.
Step 2: Cook the Crepes
-
Heat a non-stick skillet over medium heat. Lightly grease with a bit of butter or oil. Pour about 1/4 cup of the batter into the pan, swirling it to cover the base evenly. Tip: If you can toss a crepe like a pancake, you’re golden!
-
Cook for about 1-2 minutes, until the edges start to lift and the surface appears set. Flip using a spatula and cook for another minute, then transfer to a plate. Repeat until all the batter is used, stacking crepes between sheets of parchment paper. Pro Tip: If your first crepe is dodgy, don’t fret! It’s all about practice—and those first few are often just the chef’s snack!
Step 3: Prepare the Chicken
- In a separate bowl, combine the shredded chicken with shawarma sauce until coated. You can adjust the quantity based on your heat preference. Chef Insight: For an extra layer of flavor, consider adding a bit of smoked paprika or cumin to the mix.
Step 4: Assemble Your Crepes
-
Take a warm crepe and layer it with shredded chicken, followed by lettuce, tomatoes, cucumbers, and pickles. Here’s where you can unleash your creativity!
-
Roll or fold the crepe over the filling to encapsulate the flavors. Whether you opt for a burrito-like fold or a classic fold, either way, it’ll be delightful!
-
Repeat for as many servings as you need. Tip: If it gets messy, that’s just part of the fun!
Step 5: Serve and Enjoy
-
Serve with extra shawarma sauce on the side for dipping. A sprinkle of fresh herbs like parsley or cilantro can take it to another level!
-
If you’re feeling fancy, consider briefly grilling the assembled crepes in a panini press for a crispy, golden finish. Trust me, you’ll want to taste that crunch!
Serving Suggestions
Now that you’ve created this scrumptious meal, let’s talk about how to serve it up! For a casual vibe, arrange your crepes on a vibrant platter, garnished with fresh herbs and lemon wedges to squeeze over the top. This adds a refreshing zest that really elevates the dish.
For something a bit more sophisticated, consider presenting the crepes wrapped in parchment with a side of homemade garlic yogurt sauce for an extra flavor boost. Drizzle a bit of olive oil on top for an artistic touch, and make sure arrange everything beautifully. Good food deserves good styling!
Recipe Variations
Want to mix things up? Here are a few delicious twists to the Chicken Crepes Shawarma that you can try:
-
Mediterranean Spin: Swap out the chicken for lamb or beef shawarma for a heartier experience. Add feta cheese to the filling for a tangy kick!
-
Crispy Veggie Option: Keep it vegetarian by using grilled vegetables like zucchini, bell peppers, and eggplant. Add a slice of halloumi cheese for that savory goodness.
-
Spicy Chicken Twist: Marinate the chicken in a spicy harissa sauce before cooking it; your taste buds will thank you!
-
Herbaceous Delight: Mix fresh herbs such as mint or dill into the filling for a refreshing boost. This gives every bite a vibrant twist.
-
Sweet and Savory: Don’t be afraid to add a few roasted sweet potato cubes to the filling! This nice balance of flavors can create a whole new dish.
Chef’s Notes
As a chef who loves to play around with flavors, I have made this recipe countless times in various forms. Each time, it takes me back to those carefree family dinners and laughter-filled nights. It’s a reminder that cooking is not just about the food; it’s about the love and memories we create around it.
Oh, and my biggest kitchen blunder? Dropping an entire plate of prepped crepes on the floor during a dinner party! I learned that day to always have an extra batch on standby—just in case.
FAQs and Troubleshooting
Q: My crepes keep tearing while flipping. What’s wrong?
A: A few things could be at play: Make sure your batter isn’t too thick—add more milk if needed, and ensure the pan is adequately heated without being too hot to burn the crepes.
Q: Can I make the crepes ahead of time?
A: Absolutely! You can prepare the crepes a day in advance, just make sure to store them in an airtight container with parchment paper between each crepe to keep them from sticking.
Q: What’s the best way to reheat leftover crepes?
A: Use a non-stick skillet over low heat to gently warm them up. You can put a lid over the pan to trap some steam, keeping them moist!
Q: Can I freeze the crepes?
A: Yes, you can! Stack them between parchment paper, wrap tight in plastic, and store them in a freezer-safe bag for up to three months. Thaw in the fridge and reheat when you’re ready to dig in!
Nutritional Info
Let’s explore the nutritional side of our delightful Chicken Crepes Shawarma!
Each serving will provide a balanced meal with protein from chicken, healthy fats from the butter, and carbohydrates from the flour and veggies. Expect about:
- Calories: Approximately 400-500 per crepe depending on fillings
- Protein: 30-35g
- Carbohydrates: 50g
- Fat: 15-20g
Of course, the nutritional values can fluctuate based on the variations and the specific ingredients used, but a serving of these crepes can keep you fueled and satisfied! Plus, lots of veggies mean you’re getting beneficial vitamins, fiber, and minerals—what’s not to love?
Final Thoughts
So there you have it—a warm, comforting recipe for Chicken Crepes Shawarma that’ll surely make you the star of your kitchen! I hope you create your own memories with this dish, just as I have with my loved ones. Remember, cooking is a journey, and it’s okay to experiment and make it yours.
The next time you gather friends and family around the table, they’ll be asking for seconds—so be prepared! And as always, thank you for joining me in the kitchen. Until next time, happy cooking! Grab that fork or maybe just that trusty spatula, and let’s make every meal a feast! 🥙✨
Print
Chicken Crepes Shawarma
- Total Time: 50 minutes
- Yield: 4 servings 1x
- Diet: Non-Vegetarian
Description
A delicious twist on traditional shawarma featuring tender chicken wrapped in fluffy crepes, loaded with fresh vegetables and shawarma sauce.
Ingredients
- 2 cups all-purpose flour
- 4 large eggs
- 2 cups whole milk
- 1 teaspoon salt
- 2 tablespoons melted butter
- 1 lb cooked and shredded chicken breast
- 1/2 cup shawarma sauce
- Lettuce, chopped
- Tomatoes, diced
- Cucumbers, diced
- Pickles
- Pita bread or crepes
Instructions
- Make the crepe batter: In a medium bowl, whisk together the flour, eggs, milk, salt, and melted butter until smooth.
- Cook the crepes: Heat a non-stick skillet over medium heat and grease lightly. Pour in 1/4 cup of batter and cook until edges lift.
- Prepare the chicken: Combine the shredded chicken with shawarma sauce, adjusting quantity for heat preference.
- Assemble your crepes: Take a warm crepe, layer with chicken, lettuce, tomatoes, cucumbers, and pickles.
- Serve and enjoy: Add extra shawarma sauce on the side for dipping and garnish with fresh herbs.
Notes
Let the crepe batter rest for 30 minutes for the best texture. You can make crepes ahead of time and store them without sticking.
- Prep Time: 30 minutes
- Cook Time: 20 minutes
- Category: Main Course
- Method: Cooking
- Cuisine: Middle Eastern
Nutrition
- Serving Size: 1 crepe
- Calories: 450
- Sugar: 6g
- Sodium: 850mg
- Fat: 20g
- Saturated Fat: 7g
- Unsaturated Fat: 10g
- Trans Fat: 0g
- Carbohydrates: 50g
- Fiber: 4g
- Protein: 32g
- Cholesterol: 180mg
Keywords: chicken, crepes, shawarma, Middle Eastern, quick meal

Homemade Pepperoni Pizza Pockets
Homemade Pepperoni Pizza Pockets: Your New Favorite Comfort Food
Introduction
Hey there, fellow foodies! I’m Beau Collier, and I’m here to take you on a delightful culinary adventure with one of my all-time favorite comfort foods: Homemade Pepperoni Pizza Pockets! Picture this: a flaky, golden crust filled with gooey, melted cheese, savory pepperoni, and a vibrant splash of zesty pizza sauce. Doesn’t that sound like a warm hug in food form? Trust me, these delicious pockets are as fun to make as they are to eat.
Growing up, weekends and evenings were often filled with the delectable smell of homemade pizza wafting through my family’s kitchen. My mom had this way of making dough dance under her hands, transforming simple ingredients into mouthwatering masterpieces. It was during these fun family moments that I first began to appreciate how food brings people together, from rolling out the dough to getting a little flour on our noses as we crafted our own special pizzas. So, why not take that same magic and put it into easy, portable Pizza Pockets? They’re perfect for sharing at parties, picnics, or just cozy nights at home!
In this post, I’ll walk you through everything you need to know to create your own mouthwatering Pepperoni Pizza Pockets—from ingredients and step-by-step instructions to fun twists that make this dish uniquely yours. Grab your apron, and let’s create some kitchen memories together!
Personal Story
I remember the first time I made pizza pockets with my kids. It was a rainy Saturday afternoon, and we had planned a family movie marathon. Armed with the ingredients laid out on our kitchen counter, the smell of anticipation filled the air, along with a dash of chaos—and I loved every minute of it!
As we stretched the pizza dough, I instructed my little chefs on the proper way to fill and fold them, but let’s be real—there was more stuffing involved than I had anticipated! We ended up with a delightful variety of toppings, from the classic pepperoni to some unconventional treats like pineapple and even a little bit of spinach (you know, trying to sneak in some veggies).
The giggles and laughter that echoed off our walls made those pizza pockets more than just a meal; they turned into cherished family memories. We devoured those scrumptious pockets as we snuggled up on the couch, their cheesy goodness perfectly complimenting the heartwarming films we watched. Now, every time I whip up these tasty bites, I’m transported back to that rainy day, and I hope each of you finds similar joy and connection when you make them!
Ingredients
Here’s what you’ll need to make your scrumptious Homemade Pepperoni Pizza Pockets:
-
1 package of pizza dough: Fresh or store-bought works great! If you’re feeling adventurous, try your hand at homemade dough—trust me, it’s easier than you think. For gluten-free, you can find plenty of pre-made gluten-free dough options.
-
1 cup shredded mozzarella cheese: The classic choice! Mozzarella melts beautifully, but you can substitute with provolone or a dairy-free cheese if you prefer.
-
1 cup sliced pepperoni: Traditional pepperoni brings that nostalgic flavor, but feel free to get creative! Turkey pepperoni or even salami can work wonderfully.
-
1/2 cup pizza sauce: This is where the magic starts! Use your favorite jarred sauce, or whip up a quick homemade version. Don’t have pizza sauce? Try marinara or a mix of tomato sauce and Italian herbs instead.
-
1 tablespoon olive oil: For brushing on the pockets to give them that beautiful golden crust. You can use melted butter if you want an extra rich flavor.
-
1 teaspoon Italian seasoning: A blend of dried herbs like basil, oregano, and thyme. It captures all those Italian flavors in one sprinkle! If you don’t have it handy, don’t hesitate to use your favorite dried herbs, or even a pinch of garlic powder for that extra kick.
-
Flour for dusting: This is essential for keeping the dough from sticking. Just a light dusting will do—it’s not a snowstorm in the kitchen!
Let’s make some magic!
Step-by-Step Instructions
Alright, it’s time to roll up those sleeves and dive into the cooking process! Follow these steps, and I promise you’ll have a batch of delightful Pizza Pockets in no time.
-
Preheat Your Oven: Start by preheating your oven to 425°F (220°C). This will ensure that our Pizza Pockets bake to perfection, with a delectable crispy exterior.
-
Prepare Your Work Surface: Lightly flour your countertop or cutting board. You don’t want the dough to stick, so be generous, but don’t go overboard!
-
Roll Out the Pizza Dough: Unroll or stretch your pizza dough into a rectangle (about 12 inches by 8 inches). If using store-bought dough, let it sit at room temperature for about 20 minutes first—it’s easier to work with!
-
Cut the Dough into Squares: Use a sharp knife or pizza cutter to slice the dough into 4-inch squares—this is where you’ll build your Pizza Pockets. Aim for uniform sizes so they cook evenly!
-
Fill Your Dough Squares: On half of each square, place a couple of slices of pepperoni, followed by a sprinkle of shredded mozzarella cheese, and a spoonful of pizza sauce. Leave a bit of space around the edges so you can fold them over!
-
Season and Fold: Add a pinch of Italian seasoning on top of the filling before folding the dough over to create a pocket. It adds aromatics and flavor to each bite!
-
Seal the Edges: Using your fingers or a fork, press firmly on the edges to seal. Feel free to brush a little olive oil on top at this stage for that extra crunch!
-
Brush with Olive Oil: Once sealed, lightly brush the tops of each pizza pocket with olive oil. This not only adds flavor but helps achieve that lovely golden color when baked.
-
Bake Your Pockets: Place the pockets on a baking sheet lined with parchment paper. Bake for 12-15 minutes or until golden brown. I like to rotate my baking sheet halfway through for even browning!
-
Cool & Serve: Once they come out of the oven, let them cool for a few minutes before serving. You don’t want to burn your mouth on molten cheese!
Chef Hack: Having a bit of trouble sealing those edges? Run your finger along the rim with a touch of water before pressing down; the moisture will help create a stronger seal!
Serving Suggestions
Now that you’ve got your delicious Homemade Pepperoni Pizza Pockets ready, it’s time to serve them up! These pockets are perfect for any occasion, whether it’s game day, a family gathering, or a casual movie night at home.
-
Plating: Arrange the pizza pockets on a large platter for sharing. Add a small bowl of pizza sauce or marinara on the side for dipping. It takes the experience to the next level!
-
Garnish: For a pop of color, finish off with fresh basil leaves or a sprinkle of grated Parmesan cheese right before serving. It’s all about those presentation points!
-
Side Dishes: Complement these tasty treats with some fresh veggie sticks, like cucumber and bell pepper, or a simple mixed green salad for a balanced meal.
Recipe Variations
Feeling adventurous or have dietary restrictions? Don’t sweat it! Here are some fun variations you can try to mix things up:
-
Veggie Lover’s Delight: Swap out the pepperoni for a variety of thinly sliced vegetables like bell peppers, mushrooms, and black olives. Add a sprinkle of feta cheese for a Mediterranean twist!
-
BBQ Chicken Pizza Pockets: Use shredded rotisserie chicken mixed with BBQ sauce in place of pepperoni. It’s fun, flavorful, and a slight deviation from the classic!
-
Spicy Pepperoni: Give it a kick with spicy pepperoni or add crushed red pepper flakes to the filling!
-
Cheese-Only Pockets: For the cheese lovers out there, pile on an assortment of cheeses like mozzarella, cheddar, and gouda to create a multi-cheese masterpiece.
-
Breakfast Edition: For a fun breakfast take, fill with scrambled eggs, cheese, and even a bit of crumbled sausage or bacon. Serve it with your favorite salsa!
Chef’s Notes
A little behind-the-scenes story for you—when I first experimented with these pizza pockets, I accidentally filled them too much, and they burst open in the oven! While the flavors were still delightful, they left quite the mess. But hey, that’s how we learn! Now, I make sure to remind folks to leave some space at the edges.
This recipe has been tweaked and perfected over the years, and I love how each batch brings a new memory with it. It’s such a joy to watch friends and family devour them with big smiles!
FAQs and Troubleshooting
Feeling a bit uncertain? No worries! Here are some common questions and troubleshooting tips to get you on the right track:
-
Why are my pizza pockets leaking?
- Make sure to seal the edges properly! If the filling is too full, they may burst while baking. Less is more!
-
Can I freeze these pizza pockets?
- Absolutely! After assembling, flash freeze them in a single layer. Once frozen, transfer them to a freezer bag. When you’re ready to bake, no need to thaw—just add a few extra minutes to your bake time.
-
What if my dough isn’t stretching?
- If you’re using refrigerated dough, let it come to room temperature for 20-30 minutes. This helps relax the gluten, making it easier to roll out.
-
How can I make them healthier?
- Use whole wheat pizza dough, reduce the cheese, or fill with lots of veggies! You can also try baking them instead of frying for a lighter option.
Nutritional Info
While I’m not a nutritionist, I can certainly break down some rough estimates for you! Each Homemade Pepperoni Pizza Pocket typically contains:
- Calories: Approximately 250-300 (depending on size and filling)
- Protein: Around 12-15g (mostly from cheese and pepperoni)
- Carbohydrates: About 30-35g
- Fat: 12-15g (varying based on the type of cheese and pepperoni)
Of course, precise values will vary based on your ingredients and portion sizes. For those watching their nutritional intake, I recommend using leaner protein and whole grains, as mentioned earlier.
Final Thoughts
Creating these Homemade Pepperoni Pizza Pockets is more than just about the delicious flavors you’ll savor—it’s about the memories you’ll create along the way. Whether it’s decorating them with your loved ones, experimenting with toppings, or savoring that first bite of melted cheese and savory pepperoni, these pockets are sure to hold a special place in your heart—and your kitchen.
I encourage you to not just follow the recipe but to make it your own! Share your creations, variations, and stories with me! I can’t wait to hear how you make these pockets of joy truly special. Now, it’s your turn—get out there, roll up your sleeves, and pour some love into those Pizza Pockets. Happy cooking!
Print
Homemade Pepperoni Pizza Pockets
- Total Time: 35 minutes
- Yield: 4 servings 1x
- Diet: Vegetarian
Description
Delicious and fun to make, Homemade Pepperoni Pizza Pockets are perfect for sharing at parties or cozy nights at home.
Ingredients
- 1 package of pizza dough (fresh or store-bought)
- 1 cup shredded mozzarella cheese
- 1 cup sliced pepperoni
- 1/2 cup pizza sauce
- 1 tablespoon olive oil
- 1 teaspoon Italian seasoning
- Flour for dusting
Instructions
- Preheat your oven to 425°F (220°C).
- Prepare your work surface by lightly flouring the countertop or cutting board.
- Roll out the pizza dough into a rectangle (about 12 inches by 8 inches).
- Cut the dough into 4-inch squares.
- Fill half of each square with pepperoni, mozzarella cheese, and pizza sauce.
- Season with Italian seasoning, then fold the dough over to create a pocket.
- Seal the edges using your fingers or a fork.
- Brush the tops with olive oil for flavor and color.
- Bake for 12-15 minutes or until golden brown.
- Cool for a few minutes before serving.
Notes
For extra flavor, you can experiment with different fillings like vegetables or BBQ chicken.
- Prep Time: 20 minutes
- Cook Time: 15 minutes
- Category: Main Course
- Method: Baking
- Cuisine: Italian
Nutrition
- Serving Size: 1 pocket
- Calories: 300
- Sugar: 6g
- Sodium: 450mg
- Fat: 15g
- Saturated Fat: 5g
- Unsaturated Fat: 8g
- Trans Fat: 0g
- Carbohydrates: 35g
- Fiber: 2g
- Protein: 15g
- Cholesterol: 25mg
Keywords: pizza, pockets, comfort food, homemade, snack
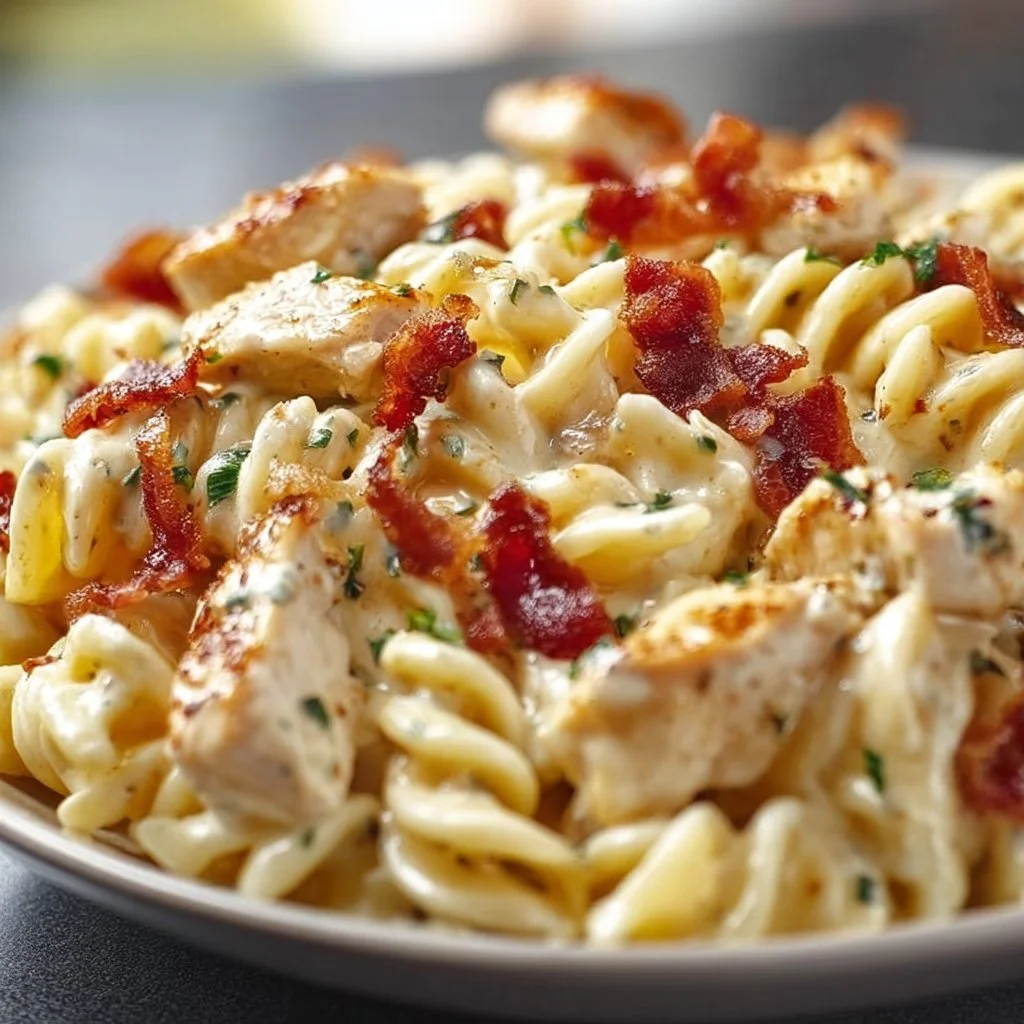
Chicken Bacon Ranch Pasta
Chicken Bacon Ranch Pasta: A Comforting Mix of Flavors
Hey food lovers! I’m thrilled to have you here at Feastical, the place where kitchen stories and delicious recipes come together in a big, warm embrace! Today, we’re diving into one of my all-time favorites: Chicken Bacon Ranch Pasta. This dish has all the cozy vibes you crave, making it perfect for weeknight dinners, potlucks, or just when you want to pamper yourself with something comforting and delicious.
Imagine a creamy sauce hugging each piece of tender pasta, with bits of crispy, flavorful bacon and juicy chicken adding that perfect crunch and richness. I remember the first time I whipped up this recipe; it was a rainy Saturday afternoon, and I had one aim in mind – to create a dish that tasted like a big, warm hug. That’s exactly what this pasta delivers!
Whether you’re juggling work, family, or life’s other commitments, this Chicken Bacon Ranch Pasta keeps it real—quick to make and absolutely satisfying. Plus, it pairs wonderfully with a crisp green salad or a side of garlic bread for the ultimate comfort meal. So grab a fork and your favorite mug (I like to sip my lemonade while cooking!), and let’s get started on this scrumptious journey together!
Personal Story
Let me take you back to a cozy evening a few years ago. I had invited a few friends over for a game night, and I wanted to impress them with something special yet uncomplicated. I rifled through my pantry, excitedly gathering my ingredients as I envisioned hearty laughter echoing around my kitchen. That was when I decided to make Chicken Bacon Ranch Pasta.
The smell of cooking bacon permeated the air, pulling my friends into the kitchen like moths to a flame. I remember the giggles and banter, the playful bickering over who would get the biggest serving, and how every bite was met with nods of approval and delight. That evening, I realized cooking is not just about food; it’s about creating memories and sharing moments. This Chicken Bacon Ranch Pasta has since become a staple in my home, reminding me of the joy of togetherness every time I make it.
Ingredients
Let’s take a closer look at what you’ll need to create this delightful dish. Each ingredient plays a vital role, so let’s ensure we’re all set for a successful cook!
-
8 ounces pasta: Choose your favorite type—penne, fusilli, or rotini work great! If you want to make it gluten-free, opt for gluten-free pasta.
-
1 pound chicken breast, diced: Chicken breast is lean and quick to cook. For a twist, try using turkey or even rotisserie chicken for extra ease!
-
6 strips bacon, cooked and crumbled: Bacon adds a crispy, smoky flavor. If you’re looking for a healthier alternative, turkey bacon or even pancetta can do the trick.
-
1 cup ranch dressing: This creamy dressing is the star of the show! Feel free to use homemade ranch for a personal touch or Greek yogurt for a lighter option.
-
1 cup shredded cheese (cheddar or mozzarella): Cheese adds richness and gooey goodness. Mix and match different cheeses for a more complex flavor profile—think pepper jack for a kick!
-
2 tablespoons olive oil: Olive oil is perfect for sautéing and adds a rich flavor. You can substitute it with avocado oil if you like.
-
Salt and pepper to taste: Season to your preference! Fresh herbs can enhance flavor, too. A little fresh basil or chives, perhaps?
-
Chopped parsley for garnish: A sprinkle of this fresh herb not only adds color but also a fresh taste that brightens the dish. You can use fresh cilantro or green onions as alternatives.
Step-by-Step Instructions
Now that we’ve gathered our ingredients, let’s roll up our sleeves and get cooking! Here’s how to make this Chicken Bacon Ranch Pasta step by step:
-
Cook the Pasta: Start by bringing a large pot of salted water to a boil. Once boiling, add your pasta and cook according to package directions until it’s al dente. Chef’s Hint: Stir the pasta occasionally, and reserve a cup of pasta water before draining. It can help adjust the creaminess later!
-
Cook the Bacon: In a large skillet or frying pan, cook the bacon over medium heat until crispy. Remove the bacon from the pan and place it on a paper towel to absorb excess grease. Tip: Keep some of the bacon grease in the pan—it adds flavor to the chicken!
-
Sauté the Chicken: In the same skillet, add the diced chicken and season with salt and pepper. Sauté for 5-7 minutes until the chicken is cooked through and golden. Little Chef Hack: If you want extra flavor, toss in some minced garlic while the chicken cooks!
-
Combine and Add the Sauce: Once the chicken is cooked, add the cooked pasta directly to the skillet and pour in the ranch dressing. Stir everything together over low heat until well combined. Don’t forget to add that reserved pasta water a bit at a time if it looks too dry.
-
Mix in Bacon and Cheese: Stir in the crumbled bacon and cheese. As the cheese starts to melt, you’ll see everything becoming nice and creamy! Pro Tip: If you love an extra cheesy finish, add more cheese on top of the pasta and pop it under the broiler for a few minutes until bubbly and golden.
-
Finish and Serve: Once everything is beautifully mixed and heated through, remove the skillet from the heat. Serve it up hot and garnish with fresh parsley. Enjoy this hearty dish that’s just bursting with flavor!
Serving Suggestions
Plating is an art! For this Chicken Bacon Ranch Pasta, here’s how to wow your family or friends:
-
On the Plate: Serve the pasta in shallow bowls for a rustic, homey feel, or try a wider platter for family-style dining. Top with a sprinkle of extra cheese and fresh herbs to make it pop!
-
Sides: Pair it with a simple green salad lightly dressed with vinaigrette to balance the rich flavors. Garlic bread or some crusty baguette slices are perfect for soaking up that creamy saucy goodness.
-
Drink Pairing: A nice chilled lemonade or iced tea complements the flavors nicely. If you’re in the mood for something stronger, a light white wine would do wonders.
Recipe Variations
The beauty of Chicken Bacon Ranch Pasta is its versatility! Here are some fun variations to get those creative juices flowing:
-
Vegetarian Twist: Swap out the chicken and bacon for sautéed veggies like bell peppers, zucchini, and mushrooms. Use a plant-based ranch dressing to keep it creamy!
-
Spicy Kick: Add diced jalapeños or a dash of hot sauce to the mix for an extra kick. This gives it a smoky flavor that’ll leave everyone asking for more.
-
Texas Style: Toss in some cooked and drained black beans and corn, or top it off with some sliced avocado for a Tex-Mex angle.
-
Pasta Salad Version: Transform this dish into a pasta salad by using cold ingredients after chilling it in the fridge and swapping the ranch dressing for a lighter yogurt-based sauce.
-
Cheesy Blend: Experiment with different cheeses like gouda or pepper jack, or even throw in some blue cheese for a flavorful twist if you’re feeling adventurous!
Chef’s Notes
This Chicken Bacon Ranch Pasta has evolved over time in my kitchen. Initially, I created it with whatever I had on hand, and it quickly became a favorite! I remember a moment where I had no ranch dressing left, so I experimented with homemade mayo mixed with herbs, and it turned out amazing!
One tip I’ll always share is not to take cooking too seriously. Mistakes are often where the best creations blossom. Just like that one time I accidentally added cinnamon instead of oregano—the taste was unexpected but unforgettable!
FAQs and Troubleshooting
Here are answers to some common questions and potential cooking hiccups:
1. Why did my pasta become mushy?
Make sure to follow the cooking time on the package and occasionally stir. And don’t forget the key—drain it when it’s al dente to maintain that perfect texture!
2. Can I make this dish ahead of time?
Absolutely! Just prepare the dish, but don’t add the cheese until you’re ready to reheat. Store it in an airtight container in the fridge for up to three days.
3. How can I ensure my chicken stays juicy?
Sauté the chicken just until it’s cooked through and golden. If you’re worried, you can marinate the chicken in a bit of ranch dressing for added moisture before cooking!
4. What if it’s too thick?
If your pasta is too thick, gradually add in a tablespoon or two of reserved pasta water until you reach the desired consistency, just like you’re adjusting a cozy sweater!
Nutritional Info
If you’re curious about the nutritional value, let’s break it down a bit. Here’s a rough estimate per serving based on the ingredients listed (serving size is roughly 1 cup):
- Calories: ~550
- Protein: 35g
- Carbohydrates: 40g
- Fat: 30g (depending on the bacon and cheese used)
- Fiber: 2g
Keep in mind these values can vary widely based on ingredient choices, portion sizes, and if you add any fun extras!
Final Thoughts
And there you have it, my dear foodies! This Chicken Bacon Ranch Pasta combines simplicity, flavor, and heart—perfect for sharing with friends and family or enjoying all by yourself. Don’t forget, cooking is all about experimenting and having fun in the kitchen. The more you play with flavors, the more you’ll discover your own unique way to make it.
So, what are you waiting for? Roll up your sleeves, gather those ingredients, and get ready to create delicious memories. If you try this recipe, I’d love to hear your thoughts or see your mouth-watering photos! Share your creations with me on social media or in the comments below! Happy cooking! 🍽️
Print
Chicken Bacon Ranch Pasta
- Total Time: 30 minutes
- Yield: 4 servings 1x
- Diet: Non-Vegetarian
Description
A creamy and comforting pasta dish featuring tender chicken, crispy bacon, and rich ranch dressing.
Ingredients
- 8 ounces pasta (penne, fusilli, or rotini)
- 1 pound chicken breast, diced
- 6 strips bacon, cooked and crumbled
- 1 cup ranch dressing
- 1 cup shredded cheese (cheddar or mozzarella)
- 2 tablespoons olive oil
- Salt and pepper to taste
- Chopped parsley for garnish
Instructions
- Cook the pasta: Bring a large pot of salted water to a boil, add pasta, and cook according to package directions until al dente.
- Cook the bacon: In a large skillet, cook bacon over medium heat until crispy, then place on a paper towel.
- Sauté the chicken: In the same skillet, add diced chicken, season with salt and pepper, and sauté for 5-7 minutes until cooked through.
- Combine and add the sauce: Add cooked pasta and ranch dressing to the skillet and stir over low heat.
- Mix in bacon and cheese: Stir in crumbled bacon and cheese until melted and creamy.
- Finish and serve: Remove from heat, garnish with parsley, and enjoy!
Notes
For a twist, use turkey or rotisserie chicken; for lighter options, consider Greek yogurt instead of ranch dressing.
- Prep Time: 10 minutes
- Cook Time: 20 minutes
- Category: Main Course
- Method: Stovetop
- Cuisine: American
Nutrition
- Serving Size: 1 serving
- Calories: 550
- Sugar: 2g
- Sodium: 800mg
- Fat: 30g
- Saturated Fat: 10g
- Unsaturated Fat: 15g
- Trans Fat: 0g
- Carbohydrates: 40g
- Fiber: 2g
- Protein: 35g
- Cholesterol: 90mg
Keywords: pasta, chicken, bacon, ranch, comfort food
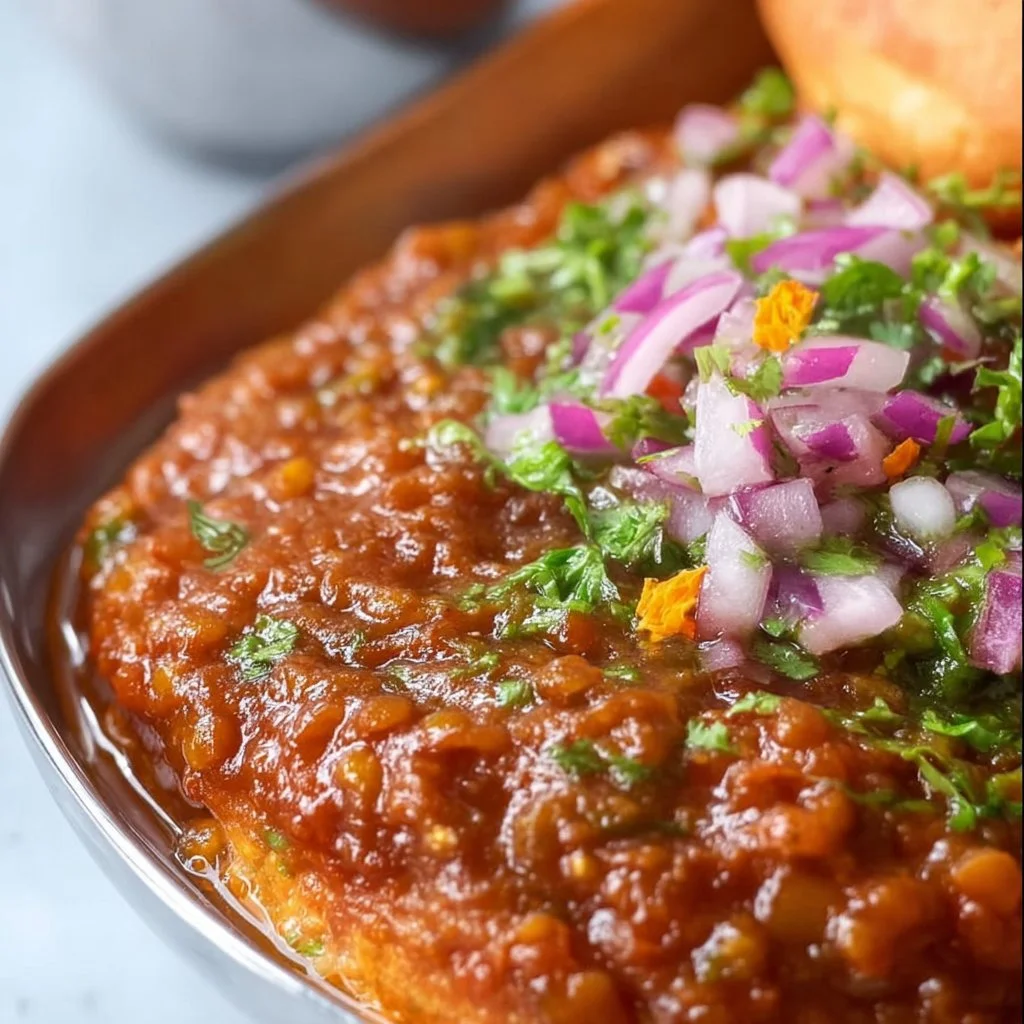
Pav Bhaji Recipe
Pav Bhaji: A Comfort Food Journey
Hey there, foodies! Welcome to a culinary adventure like no other. Today, let’s dive into the wonderful world of Pav Bhaji, a dish that’s as vibrant as it is comforting. Originating from the bustling streets of Mumbai, Pav Bhaji is a savory blend of spiced vegetables served alongside soft, pillowy bread rolls that’ll make your taste buds dance with joy.
Picture this: you’re wandering through the crowded lanes of a local Mumbai market, the air thick with the aroma of sizzling spices and fresh vegetables. The sound of street vendors shouting, “Pav Bhaji! Pav Bhaji!” echoes through the air, drawing you closer to a colorful cart where the magic happens. That’s the beauty of Pav Bhaji – it’s not just food; it’s an experience, a celebration of flavors and a warm hug on a plate. At Feastical, I’m all about bringing the warmth of such homemade delights to your kitchen, so get ready to stir up some happiness!
Whether you’re whipping this up as a weeknight dinner or serving it at a weekend gathering, this recipe has got your back. We’ll explore the intricate process of making Pav Bhaji, but trust me, it’s simpler than it looks. And I promise you’ll enjoy every second of it, from chopping veggies to sifting in spices. So, let’s roll up our sleeves and get cooking. Grab those spatulas, and let’s make some delicious magic happen!
Personal Story
Let me take you back to my childhood—a simpler time when after-school snacks were an exciting ritual. Growing up, my mom was a fantastic cook, but there was something extraordinary about her Pav Bhaji. With friends buzzing around, we gathered around the table, ready to devour bowls of bright, spiced vegetable mash paired with fresh, buttered Pav.
I still remember the sizzle of onions in that beloved frying pan, the fabulous aroma rising from the kitchen, teasing me with promises of something delicious. Watching my mom expertly toss the vibrant vegetables into the pan brought me so much joy. She’d let me sprinkle in the spices and give the bhaji a good mash, laughing as I got more excited with each stir. It wasn’t just about the food; it was about creating memories with loved ones, about that infectious communal spirit where everyone gathered, shared stories, and savored the flavors.
That’s the joy I aspire to recreate with every recipe I share. Pav Bhaji is not just a meal; it’s a tapestry of moments, a love letter to food that connects people. So grab your loved ones, and let’s create some beautiful memories of our own!
Ingredients
Ready to get started? Here’s your grocery list for the ultimate Pav Bhaji! (Note: these ingredients are essential for creating warmth and deliciousness)
-
3 tablespoons butter (Amul butter preferably, divided)
Using quality butter will add richness to the bhaji. Amul is always my go-to for that authentic taste! -
2 tablespoons oil
A neutral oil works best to prevent the butter from burning when sautéing the veggies. You can also use ghee for an extra layer of flavor. -
1 teaspoon cumin seeds
These tiny seeds pack a punch! They add warmth and an earthy depth to the dish. -
1 onion, finely chopped (approximately 1 cup chopped)
Sweet and savory, onions form the base of so many Indian dishes. Make sure to chop them finely for even cooking! -
1 tablespoon ginger, minced
Fresh ginger adds a zesty kick to the masala mix; it lifts the flavors tremendously. -
1.5 tablespoons garlic, minced
Garlic is the aromatic superstar in this dish. Use freshly minced garlic for the best flavor! -
1 teaspoon green chili paste (adjust to taste)
Spice level is totally up to you! Start small and taste as you go along. -
1 green bell pepper, chopped (approximately 1 cup chopped)
Adds a nice crunch and sweet flavor. You can use any colored bell pepper for aesthetics! -
3-4 Roma tomatoes (500gms, about 2.5 cups chopped)
Tomatoes are essential for that rich, tangy base. Roma tomatoes are meatier and cook down nicely! -
1 cup cauliflower florets
A hidden gem in Pav Bhaji, cauliflower adds a wonderful texture and soaks up the spices beautifully! -
3 potatoes (500gms, about 2.5 cups roughly chopped)
Potatoes are the heart of the dish, providing creaminess and body. You can use any waxy potato variety. -
1/2 cup green peas
They add sweetness and a pop of color! Frozen peas work just as well if you’re short on fresh ones. -
1/2 cup beetroot (peeled and grated)
This is optional, but grated beetroot adds a beautiful color and sweetness that makes the bhaji irresistible. -
2 tablespoons tomato paste
For an extra depth of flavor! It thickens the bhaji and enhances the tomato richness. -
2-3 tablespoons Pav Bhaji Masala (adjust to taste)
The magic blend of spices! (More on homemade versions below.) -
¼ teaspoon turmeric powder
Gives a warm yellow hue and subtle flavor that is quintessential in many Indian dishes! -
1 teaspoon Kashmiri red chili powder (optional and to taste)
Use it for a gorgeous red color and mild heat. Always adjust to your spice level. -
1 teaspoon coriander powder
Adds a lovely aromatic background flavor. -
1 teaspoon Kasuri Methi (dry fenugreek leaves)
A secret ingredient that adds a unique herbal aroma and taste—so essential! -
1.5 teaspoons salt (adjust to taste)
Always season as you go! -
2 cups water (plus as required to adjust consistency)
Water helps in mashing and cooking the bhaji down perfectly; add more if you like it saucy! -
12 Pav (dinner rolls)
Soft, fluffy rolls are integral to this dish; the buttery goodness will elevate your bhaji! -
6-8 tablespoons butter (for garnishing the Pav)
Ah, the more, the merrier! Buttering the Pav takes it to the next level. -
1-2 tablespoons Pav Bhaji Masala (optional, to sprinkle before serving)
Personal touch for a flavor boost! -
Some cilantro, for garnishing
Fresh cilantro adds a pop of color and freshness. -
1 medium red onion, finely chopped
This is for serving alongside, giving a crunchy contrast to the creamy bhaji! -
1-2 tablespoons butter (cut into cubes, for serving)
Every bite needs a buttery finish! -
¼ cup cilantro, for garnish
Always a delightful touch! -
1 lemon (cut into wedges or slices)
A squeeze of lemon brightens everything up!
Step-by-Step Instructions
Step 1: Sautéing the Aromatics
Start with a large pan or kadhai over medium heat. Add 2 tablespoons of oil and 1 tablespoon of butter. Once the butter melts, toss in 1 teaspoon cumin seeds. Let them sizzle and infuse the oil for about 30 seconds until they become aromatic. Next, add 1 chopped onion and sauté until it turns golden brown—about 5-7 minutes. This step is crucial; golden onions are the flavor base of your bhaji.
Step 2: Add the Spices
Now it’s time to pump up the flavor. Stir in 1 tablespoon of ginger, 1.5 tablespoons of minced garlic, and 1 teaspoon of green chili paste. The sizzling sound will drive your neighbors crazy with hunger! Cook for about 2 more minutes, stirring continuously to prevent burning.
Step 3: Toss in the Veggies
It’s vegetable time! Add 1 cup of chopped green bell pepper, 3-4 chopped Roma tomatoes, 1 cup cauliflower florets, 2.5 cups of chopped potatoes, and 1/2 cup green peas. Feel free to give them a little stir around to mix with all the goodness in the pan. After a few minutes, add 1/2 cup grated beetroot, 2 tablespoons tomato paste, 2-3 tablespoons Pav Bhaji Masala, and the rest of the spices: ¼ teaspoon turmeric powder, 1 teaspoon Kashmiri red chili powder, 1 teaspoon coriander powder, and 1.5 teaspoons salt.
Step 4: Add Water and Cook
Pour in 2 cups of water and give everything a good mix. Cover the pan and let it simmer on low heat for about 15–20 minutes until all the veggies are cooked through and fork-tender. Feel free to stir occasionally; it enhances the mingling of flavors!
Step 5: Mashing the Vegetables
Once the veggies are tender, it’s time for the fun part. Grab a potato masher and mash everything together in the pan until you reach a smooth, creamy consistency—this step is therapy! If the mixture seems too dry, add a splash of water as needed. Then sprinkle in 1 teaspoon of dried Kasuri Methi and mix it all ! Let it simmer for another 5 minutes uncovered to allow the flavors to meld.
Step 6: Preparing the Pav
While the bhaji is cooking, let’s prepare the Pav. In a separate pan, melt 6-8 tablespoons of butter over medium heat. Cut the Pav rolls in half and toast them on both sides until golden brown. The key is to get that buttery crust—it’s the mini-hug your bhaji deserves!
Step 7: Plating and Serving
Time to serve! Place the hot and creamy bhaji in a bowl, making sure to garnish it with a pat of butter, a sprinkle of chopped cilantro, and maybe some Pav Bhaji Masala for that extra zing. On the side, offer freshly chopped red onion and lemon wedges to squeeze over the top.
Serving Suggestions
For serving, arrange the toasted Pav next to the bhaji in a cozy way that invites everyone to dig in. You could even prepare a small plate with some sliced onion and lemon for each guest to customize their serving. It’s not just about the look; it’s about creating an engaging eating experience. Dip that Pav into the warm bhaji, and you’ll be in culinary heaven!
Recipe Variations
Feeling adventurous? Here are some fun twists on classic Pav Bhaji that you might want to try:
- Cheesy Pav Bhaji: Add shredded cheese on top just before serving and let it melt; everyone loves a cheesy rendition!
- Vegan Version: Swap the butter for coconut oil and skip the Pav or use vegan rolls. It’s still packed with delicious flavor without the dairy!
- Spicy Twist: Add more chilies or a dash of hot sauce to give your bhaji an extra kick!
- Pav Bhaji Taco: Use tortillas instead of Pav, top with bhaji, fresh veggies, and a drizzle of yogurt for a fusion twist!
- Paneer Infusion: Mix in crumbled paneer for added texture and protein, making the dish even heartier.
Chef’s Notes
Ah, dear food friends, Pav Bhaji has been a staple in my kitchen for as long as I can remember. Every time I make it, I think of those joyous days with my mom whipping together this cheerful comfort food. I’ve added little touches over the years, like the grated beetroot, as I stumbled upon it one day and realized how it added flavor and that gorgeous red hue! It’s remarkable how food evolves and how each little change can create a whole new sensation.
And let me share a little tip: never rush this dish! Give it love, time, and attention. Enjoy the process just as much as the scrumptious results.
FAQs and Troubleshooting
1. Why does my Pav Bhaji taste bland?
This could be due to insufficient spices or the missing touch of salt. Taste as you go and don’t hesitate to adjust those seasonings!
2. My bhaji is too watery, what do I do?
If you find yourself with a watery bhaji, you can simmer it uncovered for a few extra minutes, which will help thicken it.
3. Can I make Pav Bhaji ahead of time?
Absolutely! In fact, Pav Bhaji often tastes better the next day after the flavors have had time to meld together. Just reheat with a splash of water.
4. What’s the best way to store leftovers?
Store any leftover bhaji in an airtight container and keep it in the fridge for 2-3 days. Reheat gently before serving!
Nutritional Info
Now, let’s talk about the good stuff! Pav Bhaji is not just delicious but also packs a nutritive punch. Packed with vegetables — potatoes, peas, cauliflower, and beets — it offers a variety of vitamins and minerals. The calories per serving can vary widely depending on ingredients and quantities, but a reasonable estimate is about 350-400 calories per serving when made with traditional butter and rolls. You can easily make it healthier by swapping butter for olive oil or skipping the Pav altogether. The vegetables offer a good amount of dietary fiber, promoting digestive health, while the spices boast anti-inflammatory benefits!
Final Thoughts
There you have it—Pav Bhaji, a dish that embodies warmth, love, and joyful flavors all in one pot. I hope you enjoyed this journey as much as I enjoyed sharing it. Whether you’re cooking alone, with friends, or Family, this recipe is destined to create memories and spark joy.
So what are you waiting for? Gather your ingredients, get those spatulas ready, and let’s make some magic happen in the kitchen! Dive into a plate of Pav Bhaji today, and don’t forget to share your experience with me—tag @Feastical in your culinary creations. Here’s to delicious adventures and endless friendships forged through food. Happy cooking, foodies!
Print
Pav Bhaji
- Total Time: 50 minutes
- Yield: 4 servings 1x
- Diet: Vegetarian
Description
A vibrant and comforting dish of spiced vegetables served with soft, buttery bread rolls, originating from the streets of Mumbai.
Ingredients
- 3 tablespoons butter (Amul butter preferably, divided)
- 2 tablespoons oil
- 1 teaspoon cumin seeds
- 1 onion, finely chopped (approximately 1 cup chopped)
- 1 tablespoon ginger, minced
- 1.5 tablespoons garlic, minced
- 1 teaspoon green chili paste (adjust to taste)
- 1 green bell pepper, chopped (approximately 1 cup chopped)
- 3–4 Roma tomatoes (500gms, about 2.5 cups chopped)
- 1 cup cauliflower florets
- 3 potatoes (500gms, about 2.5 cups roughly chopped)
- 1/2 cup green peas
- 1/2 cup beetroot (peeled and grated, optional)
- 2 tablespoons tomato paste
- 2–3 tablespoons Pav Bhaji Masala (adjust to taste)
- 1/4 teaspoon turmeric powder
- 1 teaspoon Kashmiri red chili powder (optional and to taste)
- 1 teaspoon coriander powder
- 1 teaspoon Kasuri Methi (dry fenugreek leaves)
- 1.5 teaspoons salt (adjust to taste)
- 2 cups water (plus as required to adjust consistency)
- 12 Pav (dinner rolls)
- 6–8 tablespoons butter (for garnishing the Pav)
- 1–2 tablespoons Pav Bhaji Masala (optional, to sprinkle before serving)
- Some cilantro, for garnishing
- 1 medium red onion, finely chopped (for serving)
- 1–2 tablespoons butter (cut into cubes, for serving)
- 1/4 cup cilantro (for garnish)
- 1 lemon (cut into wedges or slices)
Instructions
- Sautéing the Aromatics: Start with a large pan or kadhai over medium heat. Add oil and butter. Once melted, toss in cumin seeds. Let them infuse for about 30 seconds. Add onion and sauté until golden brown—about 5-7 minutes.
- Add the Spices: Stir in ginger, garlic, and green chili paste. Cook for 2 more minutes, stirring continuously.
- Toss in the Veggies: Add bell pepper, tomatoes, cauliflower, potatoes, and peas. Stir to mix. Then add beetroot, tomato paste, Pav Bhaji Masala, turmeric, red chili powder, coriander powder, and salt.
- Add Water and Cook: Pour in water and mix. Cover the pan and let it simmer on low heat for 15-20 minutes.
- Mashing the Vegetables: Once tender, mash everything together in the pan until smooth. Add Kasuri Methi and simmer for another 5 minutes to meld flavors.
- Preparing the Pav: In a separate pan, melt butter over medium heat. Toast halved Pav rolls until golden brown.
- Plating and Serving: Serve the hot bhaji in a bowl, garnished with butter, cilantro, and optional Pav Bhaji Masala. Serve with chopped onion and lemon wedges on the side.
Notes
For a cheesy twist, add shredded cheese before serving. For a vegan version, swap butter for coconut oil.
- Prep Time: 20 minutes
- Cook Time: 30 minutes
- Category: Main Course
- Method: Stovetop
- Cuisine: Indian
Nutrition
- Serving Size: 1 serving
- Calories: 375
- Sugar: 6g
- Sodium: 650mg
- Fat: 18g
- Saturated Fat: 7g
- Unsaturated Fat: 10g
- Trans Fat: 0g
- Carbohydrates: 50g
- Fiber: 4g
- Protein: 11g
- Cholesterol: 35mg
Keywords: Pav Bhaji, Indian Street Food, Vegetarian Comfort Food