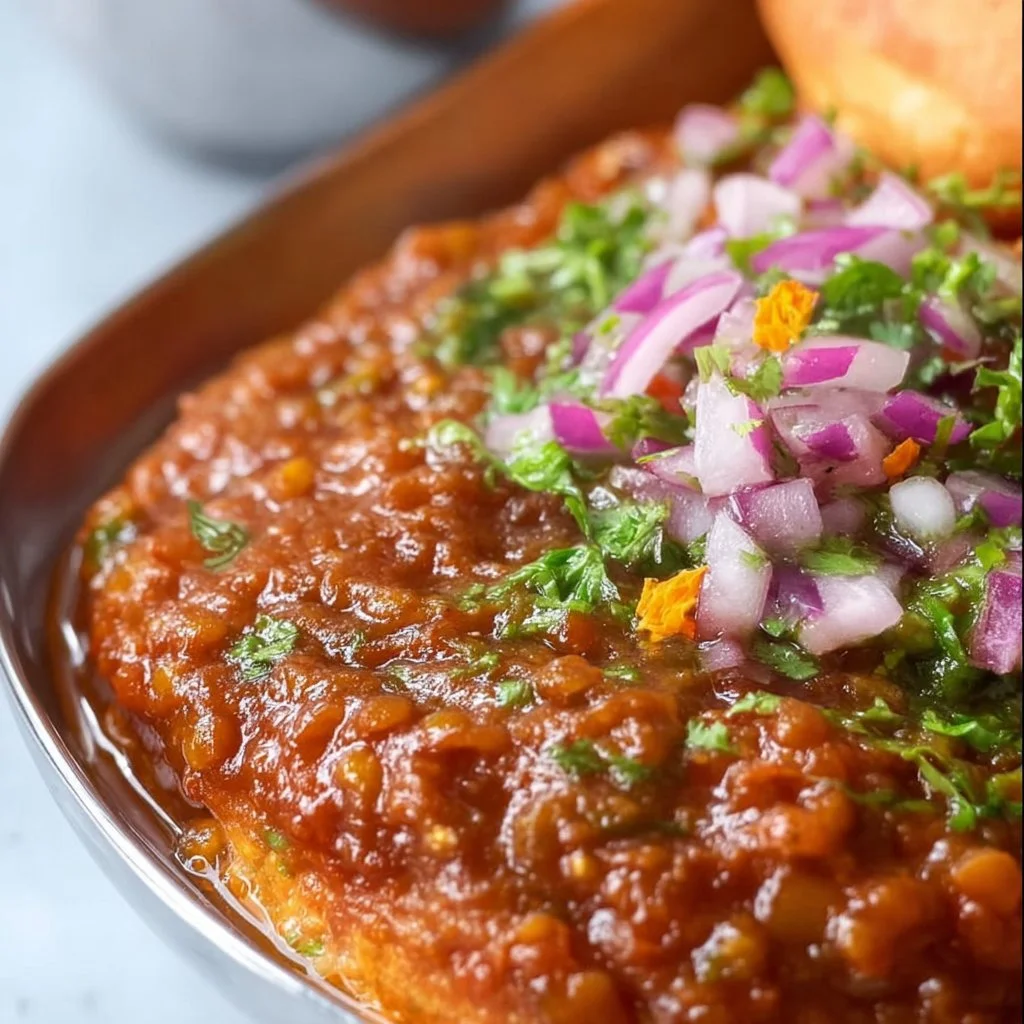
Pav Bhaji Recipe
Pav Bhaji: A Comfort Food Journey
Hey there, foodies! Welcome to a culinary adventure like no other. Today, let’s dive into the wonderful world of Pav Bhaji, a dish that’s as vibrant as it is comforting. Originating from the bustling streets of Mumbai, Pav Bhaji is a savory blend of spiced vegetables served alongside soft, pillowy bread rolls that’ll make your taste buds dance with joy.
Picture this: you’re wandering through the crowded lanes of a local Mumbai market, the air thick with the aroma of sizzling spices and fresh vegetables. The sound of street vendors shouting, “Pav Bhaji! Pav Bhaji!” echoes through the air, drawing you closer to a colorful cart where the magic happens. That’s the beauty of Pav Bhaji – it’s not just food; it’s an experience, a celebration of flavors and a warm hug on a plate. At Feastical, I’m all about bringing the warmth of such homemade delights to your kitchen, so get ready to stir up some happiness!
Whether you’re whipping this up as a weeknight dinner or serving it at a weekend gathering, this recipe has got your back. We’ll explore the intricate process of making Pav Bhaji, but trust me, it’s simpler than it looks. And I promise you’ll enjoy every second of it, from chopping veggies to sifting in spices. So, let’s roll up our sleeves and get cooking. Grab those spatulas, and let’s make some delicious magic happen!
Personal Story
Let me take you back to my childhood—a simpler time when after-school snacks were an exciting ritual. Growing up, my mom was a fantastic cook, but there was something extraordinary about her Pav Bhaji. With friends buzzing around, we gathered around the table, ready to devour bowls of bright, spiced vegetable mash paired with fresh, buttered Pav.
I still remember the sizzle of onions in that beloved frying pan, the fabulous aroma rising from the kitchen, teasing me with promises of something delicious. Watching my mom expertly toss the vibrant vegetables into the pan brought me so much joy. She’d let me sprinkle in the spices and give the bhaji a good mash, laughing as I got more excited with each stir. It wasn’t just about the food; it was about creating memories with loved ones, about that infectious communal spirit where everyone gathered, shared stories, and savored the flavors.
That’s the joy I aspire to recreate with every recipe I share. Pav Bhaji is not just a meal; it’s a tapestry of moments, a love letter to food that connects people. So grab your loved ones, and let’s create some beautiful memories of our own!
Ingredients
Ready to get started? Here’s your grocery list for the ultimate Pav Bhaji! (Note: these ingredients are essential for creating warmth and deliciousness)
-
3 tablespoons butter (Amul butter preferably, divided)
Using quality butter will add richness to the bhaji. Amul is always my go-to for that authentic taste! -
2 tablespoons oil
A neutral oil works best to prevent the butter from burning when sautéing the veggies. You can also use ghee for an extra layer of flavor. -
1 teaspoon cumin seeds
These tiny seeds pack a punch! They add warmth and an earthy depth to the dish. -
1 onion, finely chopped (approximately 1 cup chopped)
Sweet and savory, onions form the base of so many Indian dishes. Make sure to chop them finely for even cooking! -
1 tablespoon ginger, minced
Fresh ginger adds a zesty kick to the masala mix; it lifts the flavors tremendously. -
1.5 tablespoons garlic, minced
Garlic is the aromatic superstar in this dish. Use freshly minced garlic for the best flavor! -
1 teaspoon green chili paste (adjust to taste)
Spice level is totally up to you! Start small and taste as you go along. -
1 green bell pepper, chopped (approximately 1 cup chopped)
Adds a nice crunch and sweet flavor. You can use any colored bell pepper for aesthetics! -
3-4 Roma tomatoes (500gms, about 2.5 cups chopped)
Tomatoes are essential for that rich, tangy base. Roma tomatoes are meatier and cook down nicely! -
1 cup cauliflower florets
A hidden gem in Pav Bhaji, cauliflower adds a wonderful texture and soaks up the spices beautifully! -
3 potatoes (500gms, about 2.5 cups roughly chopped)
Potatoes are the heart of the dish, providing creaminess and body. You can use any waxy potato variety. -
1/2 cup green peas
They add sweetness and a pop of color! Frozen peas work just as well if you’re short on fresh ones. -
1/2 cup beetroot (peeled and grated)
This is optional, but grated beetroot adds a beautiful color and sweetness that makes the bhaji irresistible. -
2 tablespoons tomato paste
For an extra depth of flavor! It thickens the bhaji and enhances the tomato richness. -
2-3 tablespoons Pav Bhaji Masala (adjust to taste)
The magic blend of spices! (More on homemade versions below.) -
¼ teaspoon turmeric powder
Gives a warm yellow hue and subtle flavor that is quintessential in many Indian dishes! -
1 teaspoon Kashmiri red chili powder (optional and to taste)
Use it for a gorgeous red color and mild heat. Always adjust to your spice level. -
1 teaspoon coriander powder
Adds a lovely aromatic background flavor. -
1 teaspoon Kasuri Methi (dry fenugreek leaves)
A secret ingredient that adds a unique herbal aroma and taste—so essential! -
1.5 teaspoons salt (adjust to taste)
Always season as you go! -
2 cups water (plus as required to adjust consistency)
Water helps in mashing and cooking the bhaji down perfectly; add more if you like it saucy! -
12 Pav (dinner rolls)
Soft, fluffy rolls are integral to this dish; the buttery goodness will elevate your bhaji! -
6-8 tablespoons butter (for garnishing the Pav)
Ah, the more, the merrier! Buttering the Pav takes it to the next level. -
1-2 tablespoons Pav Bhaji Masala (optional, to sprinkle before serving)
Personal touch for a flavor boost! -
Some cilantro, for garnishing
Fresh cilantro adds a pop of color and freshness. -
1 medium red onion, finely chopped
This is for serving alongside, giving a crunchy contrast to the creamy bhaji! -
1-2 tablespoons butter (cut into cubes, for serving)
Every bite needs a buttery finish! -
¼ cup cilantro, for garnish
Always a delightful touch! -
1 lemon (cut into wedges or slices)
A squeeze of lemon brightens everything up!
Step-by-Step Instructions
Step 1: Sautéing the Aromatics
Start with a large pan or kadhai over medium heat. Add 2 tablespoons of oil and 1 tablespoon of butter. Once the butter melts, toss in 1 teaspoon cumin seeds. Let them sizzle and infuse the oil for about 30 seconds until they become aromatic. Next, add 1 chopped onion and sauté until it turns golden brown—about 5-7 minutes. This step is crucial; golden onions are the flavor base of your bhaji.
Step 2: Add the Spices
Now it’s time to pump up the flavor. Stir in 1 tablespoon of ginger, 1.5 tablespoons of minced garlic, and 1 teaspoon of green chili paste. The sizzling sound will drive your neighbors crazy with hunger! Cook for about 2 more minutes, stirring continuously to prevent burning.
Step 3: Toss in the Veggies
It’s vegetable time! Add 1 cup of chopped green bell pepper, 3-4 chopped Roma tomatoes, 1 cup cauliflower florets, 2.5 cups of chopped potatoes, and 1/2 cup green peas. Feel free to give them a little stir around to mix with all the goodness in the pan. After a few minutes, add 1/2 cup grated beetroot, 2 tablespoons tomato paste, 2-3 tablespoons Pav Bhaji Masala, and the rest of the spices: ¼ teaspoon turmeric powder, 1 teaspoon Kashmiri red chili powder, 1 teaspoon coriander powder, and 1.5 teaspoons salt.
Step 4: Add Water and Cook
Pour in 2 cups of water and give everything a good mix. Cover the pan and let it simmer on low heat for about 15–20 minutes until all the veggies are cooked through and fork-tender. Feel free to stir occasionally; it enhances the mingling of flavors!
Step 5: Mashing the Vegetables
Once the veggies are tender, it’s time for the fun part. Grab a potato masher and mash everything together in the pan until you reach a smooth, creamy consistency—this step is therapy! If the mixture seems too dry, add a splash of water as needed. Then sprinkle in 1 teaspoon of dried Kasuri Methi and mix it all ! Let it simmer for another 5 minutes uncovered to allow the flavors to meld.
Step 6: Preparing the Pav
While the bhaji is cooking, let’s prepare the Pav. In a separate pan, melt 6-8 tablespoons of butter over medium heat. Cut the Pav rolls in half and toast them on both sides until golden brown. The key is to get that buttery crust—it’s the mini-hug your bhaji deserves!
Step 7: Plating and Serving
Time to serve! Place the hot and creamy bhaji in a bowl, making sure to garnish it with a pat of butter, a sprinkle of chopped cilantro, and maybe some Pav Bhaji Masala for that extra zing. On the side, offer freshly chopped red onion and lemon wedges to squeeze over the top.
Serving Suggestions
For serving, arrange the toasted Pav next to the bhaji in a cozy way that invites everyone to dig in. You could even prepare a small plate with some sliced onion and lemon for each guest to customize their serving. It’s not just about the look; it’s about creating an engaging eating experience. Dip that Pav into the warm bhaji, and you’ll be in culinary heaven!
Recipe Variations
Feeling adventurous? Here are some fun twists on classic Pav Bhaji that you might want to try:
- Cheesy Pav Bhaji: Add shredded cheese on top just before serving and let it melt; everyone loves a cheesy rendition!
- Vegan Version: Swap the butter for coconut oil and skip the Pav or use vegan rolls. It’s still packed with delicious flavor without the dairy!
- Spicy Twist: Add more chilies or a dash of hot sauce to give your bhaji an extra kick!
- Pav Bhaji Taco: Use tortillas instead of Pav, top with bhaji, fresh veggies, and a drizzle of yogurt for a fusion twist!
- Paneer Infusion: Mix in crumbled paneer for added texture and protein, making the dish even heartier.
Chef’s Notes
Ah, dear food friends, Pav Bhaji has been a staple in my kitchen for as long as I can remember. Every time I make it, I think of those joyous days with my mom whipping together this cheerful comfort food. I’ve added little touches over the years, like the grated beetroot, as I stumbled upon it one day and realized how it added flavor and that gorgeous red hue! It’s remarkable how food evolves and how each little change can create a whole new sensation.
And let me share a little tip: never rush this dish! Give it love, time, and attention. Enjoy the process just as much as the scrumptious results.
FAQs and Troubleshooting
1. Why does my Pav Bhaji taste bland?
This could be due to insufficient spices or the missing touch of salt. Taste as you go and don’t hesitate to adjust those seasonings!
2. My bhaji is too watery, what do I do?
If you find yourself with a watery bhaji, you can simmer it uncovered for a few extra minutes, which will help thicken it.
3. Can I make Pav Bhaji ahead of time?
Absolutely! In fact, Pav Bhaji often tastes better the next day after the flavors have had time to meld together. Just reheat with a splash of water.
4. What’s the best way to store leftovers?
Store any leftover bhaji in an airtight container and keep it in the fridge for 2-3 days. Reheat gently before serving!
Nutritional Info
Now, let’s talk about the good stuff! Pav Bhaji is not just delicious but also packs a nutritive punch. Packed with vegetables — potatoes, peas, cauliflower, and beets — it offers a variety of vitamins and minerals. The calories per serving can vary widely depending on ingredients and quantities, but a reasonable estimate is about 350-400 calories per serving when made with traditional butter and rolls. You can easily make it healthier by swapping butter for olive oil or skipping the Pav altogether. The vegetables offer a good amount of dietary fiber, promoting digestive health, while the spices boast anti-inflammatory benefits!
Final Thoughts
There you have it—Pav Bhaji, a dish that embodies warmth, love, and joyful flavors all in one pot. I hope you enjoyed this journey as much as I enjoyed sharing it. Whether you’re cooking alone, with friends, or Family, this recipe is destined to create memories and spark joy.
So what are you waiting for? Gather your ingredients, get those spatulas ready, and let’s make some magic happen in the kitchen! Dive into a plate of Pav Bhaji today, and don’t forget to share your experience with me—tag @Feastical in your culinary creations. Here’s to delicious adventures and endless friendships forged through food. Happy cooking, foodies!
Print
Pav Bhaji
- Total Time: 50 minutes
- Yield: 4 servings 1x
- Diet: Vegetarian
Description
A vibrant and comforting dish of spiced vegetables served with soft, buttery bread rolls, originating from the streets of Mumbai.
Ingredients
- 3 tablespoons butter (Amul butter preferably, divided)
- 2 tablespoons oil
- 1 teaspoon cumin seeds
- 1 onion, finely chopped (approximately 1 cup chopped)
- 1 tablespoon ginger, minced
- 1.5 tablespoons garlic, minced
- 1 teaspoon green chili paste (adjust to taste)
- 1 green bell pepper, chopped (approximately 1 cup chopped)
- 3–4 Roma tomatoes (500gms, about 2.5 cups chopped)
- 1 cup cauliflower florets
- 3 potatoes (500gms, about 2.5 cups roughly chopped)
- 1/2 cup green peas
- 1/2 cup beetroot (peeled and grated, optional)
- 2 tablespoons tomato paste
- 2–3 tablespoons Pav Bhaji Masala (adjust to taste)
- 1/4 teaspoon turmeric powder
- 1 teaspoon Kashmiri red chili powder (optional and to taste)
- 1 teaspoon coriander powder
- 1 teaspoon Kasuri Methi (dry fenugreek leaves)
- 1.5 teaspoons salt (adjust to taste)
- 2 cups water (plus as required to adjust consistency)
- 12 Pav (dinner rolls)
- 6–8 tablespoons butter (for garnishing the Pav)
- 1–2 tablespoons Pav Bhaji Masala (optional, to sprinkle before serving)
- Some cilantro, for garnishing
- 1 medium red onion, finely chopped (for serving)
- 1–2 tablespoons butter (cut into cubes, for serving)
- 1/4 cup cilantro (for garnish)
- 1 lemon (cut into wedges or slices)
Instructions
- Sautéing the Aromatics: Start with a large pan or kadhai over medium heat. Add oil and butter. Once melted, toss in cumin seeds. Let them infuse for about 30 seconds. Add onion and sauté until golden brown—about 5-7 minutes.
- Add the Spices: Stir in ginger, garlic, and green chili paste. Cook for 2 more minutes, stirring continuously.
- Toss in the Veggies: Add bell pepper, tomatoes, cauliflower, potatoes, and peas. Stir to mix. Then add beetroot, tomato paste, Pav Bhaji Masala, turmeric, red chili powder, coriander powder, and salt.
- Add Water and Cook: Pour in water and mix. Cover the pan and let it simmer on low heat for 15-20 minutes.
- Mashing the Vegetables: Once tender, mash everything together in the pan until smooth. Add Kasuri Methi and simmer for another 5 minutes to meld flavors.
- Preparing the Pav: In a separate pan, melt butter over medium heat. Toast halved Pav rolls until golden brown.
- Plating and Serving: Serve the hot bhaji in a bowl, garnished with butter, cilantro, and optional Pav Bhaji Masala. Serve with chopped onion and lemon wedges on the side.
Notes
For a cheesy twist, add shredded cheese before serving. For a vegan version, swap butter for coconut oil.
- Prep Time: 20 minutes
- Cook Time: 30 minutes
- Category: Main Course
- Method: Stovetop
- Cuisine: Indian
Nutrition
- Serving Size: 1 serving
- Calories: 375
- Sugar: 6g
- Sodium: 650mg
- Fat: 18g
- Saturated Fat: 7g
- Unsaturated Fat: 10g
- Trans Fat: 0g
- Carbohydrates: 50g
- Fiber: 4g
- Protein: 11g
- Cholesterol: 35mg
Keywords: Pav Bhaji, Indian Street Food, Vegetarian Comfort Food
Crispy Chicken Ranch Snack Wrap
Crispy Chicken Ranch Snack Wrap: Your New Go-To Treat!
Hey, food lovers! Welcome back to Feastical, your cozy corner for all things scrumptious. Today, I’m thrilled to share a dish that’s not only easy to whip up but also brings that delightful crunch and burst of flavor we all crave. Say hello to the Crispy Chicken Ranch Snack Wrap! Perfect for lunch, game day, or even a midnight snack, these wraps are vibrant, versatile, and always a crowd-pleaser.
Now, I don’t know about you, but there’s something about chicken wraps that takes me right back to my childhood. Picture this: lazy Saturday afternoons spent at home, the smell of something scrumptious wafting through the house, and the sun shining on our backyard BBQ where my family gathered around the grill. There’s excitement in the air as the sizzle of chicken fills the space, and it’s that excitement that fuels my love for food! Throw in a little ranch dressing, some fresh veggies, and just the right crunch, and those memories come flooding back.
These wraps are a fantastic way to get creative in the kitchen and make use of what you have on hand (a little kitchen hack from yours truly!). Whether you’re using crispy chicken tenders from last night’s dinner or whipping up a fresh batch, these wraps are adaptable and oh-so-satisfying. It’s like a hug wrapped in a tortilla!
So, let’s roll up those sleeves, grab your spatula, and kick things off with the ingredients you’ll need for this fab wrap!
Personal Story
Growing up, my family had a tradition—Saturday night was “Wrap Night.” My mom would lay out spreads of ingredients that could transform bland into grand, and we were free to create our own masterpieces! I remember being just a wee lad, standing on a kitchen chair to reach the counter, eyes wide with anticipation. Crunchy, dippable, overflowing with flavor, my little hands would pile high all my favorite toppings on soft tortilla wraps.
One time, I made a ridiculous concoction with a bunch of random ingredients: cold pizza leftovers, ranch dressing, and whatever veggies I could scrounge up. To my surprise, it tasted amazing! It was moments like these—creating something out of “nothing” and sharing it with my family—that instilled the love of food and cooking in me. Now, when I think of making these Crispy Chicken Ranch Snack Wraps, it reminds me of joy, laughter, and everyone coming together around the dinner table (or in our case, the kitchen counter).
Ingredients
Here’s what you’ll need to transform your kitchen into a flavor haven:
-
Crispy Chicken Tenders
Ready-made or homemade, these are the star of the show! If you want to get adventurous, baked or grilled chicken also works! -
Ranch Dressing
The creamy, tangy accent that pairs beautifully with crispy chicken. Have leftovers from another meal? Those work too! -
Tortilla Wraps
Flour, corn, or whole wheat—choose your favorite! These wraps are your canvas of deliciousness! -
Lettuce
Romaine, iceberg, or spinach—whatever fresh greens you have on hand will add that crunchy, refreshing layer! -
Tomatoes
Chopped fresh tomatoes, cherry tomatoes, or even sun-dried—it’s all about what you love and what’s available! -
Cheese
Cheddar, mozzarella, or pepper jack for a spicy kick! If you’re dairy-free, try vegan cheese or omit it altogether! -
Optional Toppings
Avocado for creaminess, crisp bacon bits for saltiness, or sliced jalapeños for a kick—get creative!
Step-by-Step Instructions
Let’s dive into making these bad boys!
-
Prep Your Chicken:
If you’re going the homemade route, start by breading and frying your chicken tenders. Take boneless chicken breast, dip it in flour, then egg, and finally coat it in breadcrumbs (Panko for extra crunch!). Fry until golden brown. If you’re using store-bought, simply heat them according to package instructions! -
Gather Your Wraps:
On a clean surface, lay out your tortilla wraps. Want to warm them up? Toss them on a skillet for a few seconds on each side—it’ll make them pliable and extra tasty! -
Time for Dressing:
Drizzle a generous amount of ranch dressing down the center of each wrap. The ranch really brings everything together—trust me, you don’t want to skip this step! You can even mix in a little hot sauce if you’re feeling adventurous! -
Layer It Up with Chicken:
Place 2-3 crispy chicken tenders in the center of the wrap. Make sure they are warm and crispy! Feel free to break them into smaller pieces to make wrapping easier! -
Freshen It Up:
Sprinkle lettuce and chopped tomatoes over the chicken. This is your chance to include any other veggies or optional toppings you desire (hello, avocado and bacon!). -
Cheese, Please:
Add a handful of shredded cheese on top of your existing layers! The cheese will melt slightly from the chicken’s warmth, adding an oooey-gooey texture. -
Wrap It Up:
Fold the sides of the tortilla in, then roll it tightly from the bottom up. Tuck the filling in as you go to avoid a tasty explosion! -
Slice and Serve:
Halve the wrap diagonally for a beautiful presentation and to make them easier to handle. Whether you serve it with extra dressing for dipping or a side of chips, you’re set!
Serving Suggestions
When it comes to serving those crispy wraps, simplicity is key. Place your wraps on a rustic wooden board or a colorful plate for a pop of vibrancy! You can add a side of crunchy vegetables or a fresh salad for a well-rounded meal. Try drizzling a bit more ranch on the plate for dipping—don’t be shy with that sauce!
Garnish the dish with a few sprigs of fresh parsley or cilantro to elevate the presentation. If you’re entertaining, arrange the wraps in a circle with some dipping sauce in the center—trust me, your friends will be swooning over this spread!
Recipe Variations
Feeling creative? Here are some delicious twists to kick things up:
-
Buffalo Chicken Ranch Wrap:
Toss your chicken tenders in buffalo sauce for a spicy kick! Pair it with a cool ranch dressing to balance the heat. -
Hipster Veggie Wrap:
Swap crispy chicken for grilled veggies (like bell peppers, zucchini, and asparagus) and try a tahini sauce for a unique flavor twist! -
Loaded Baked Potato Wrap:
Dress your chicken with loaded baked potato toppings! Think bacon, cheddar cheese, and chives for an indulgent treat. -
Southwestern Flair:
Add black beans, corn, and avocado for a Southwest-inspired wrap. Chipotle ranch dressing can take it to the next level! -
Healthy Wrap:
Use whole wheat tortillas, grilled chicken, and lots of fresh veggies like cucumbers and spinach, drizzled with vinaigrette for a lighter version!
Chef’s Notes
This recipe has seen some funky iterations over the years, and I’m not ashamed! From experimenting with sweet sauces to adding the strangest toppings found in my fridge, each wrap is a reflection of my inner kitchen adventurer. The key is to have fun and enjoy the process—don’t hesitate to let your imagination run wild! And trust me, these wraps taste even better when made with love!
FAQs and Troubleshooting
Q: Can I make these wraps ahead of time?
A: Absolutely! Just keep them in the fridge wrapped in parchment paper to prevent them from getting soggy. Just be wary: the crispiness can diminish, but they’ll still be tasty!
Q: What if I don’t have ranch dressing?
A: No worries! You can use any creamy dressing you have handy—like blue cheese, Caesar, or even a homemade yogurt-based sauce.
Q: How can I make these wraps kid-friendly?
A: Get your kiddos involved! Let them choose their toppings; this often results in a heightened willingness to try new things.
Q: My wraps fell apart—what went wrong?
A: Make sure to not overstuff them! It’s tempting, but less is more here, and be sure to wrap them tightly!
Nutritional Info
Let’s break down what you’re putting into these delightful wraps! A standard wrap with chicken, ranch dressing, cheese, and lettuce serves about 2-3 people.
- Calories: Approximately 400-500 calories (depending on toppings and serving size).
- Protein: Roughly 25-30g of protein from the chicken and cheese!
- Fat: Around 20g (again, this varies with toppings and dressing choice).
- Carbohydrates: About 35-40g from the tortillas and veggies.
- Fiber: Involvement of fresh veggies can yield about 3-5g of fiber.
Whenever possible, swap out ingredients for healthier versions, like whole grain tortillas or reduce the ranch for a nutrient boost without losing the flavor!
Final Thoughts
There you have it, foodie friends—a delicious, fun, and super versatile recipe for Crispy Chicken Ranch Snack Wraps! There’s no right or wrong when it comes to crafting these wraps—what matters is that you’re in the kitchen, creating something deliciously yours.
So whether it’s a casual lunch or a game-day feast, let these wraps bring your table together. Remember, the best meals often come from shared stories and a little love. So roll up those wraps, gather your favorite people, and dig in!
Until next time, keep cooking, keep creating, and as always—stay hungry for new flavors!
Print
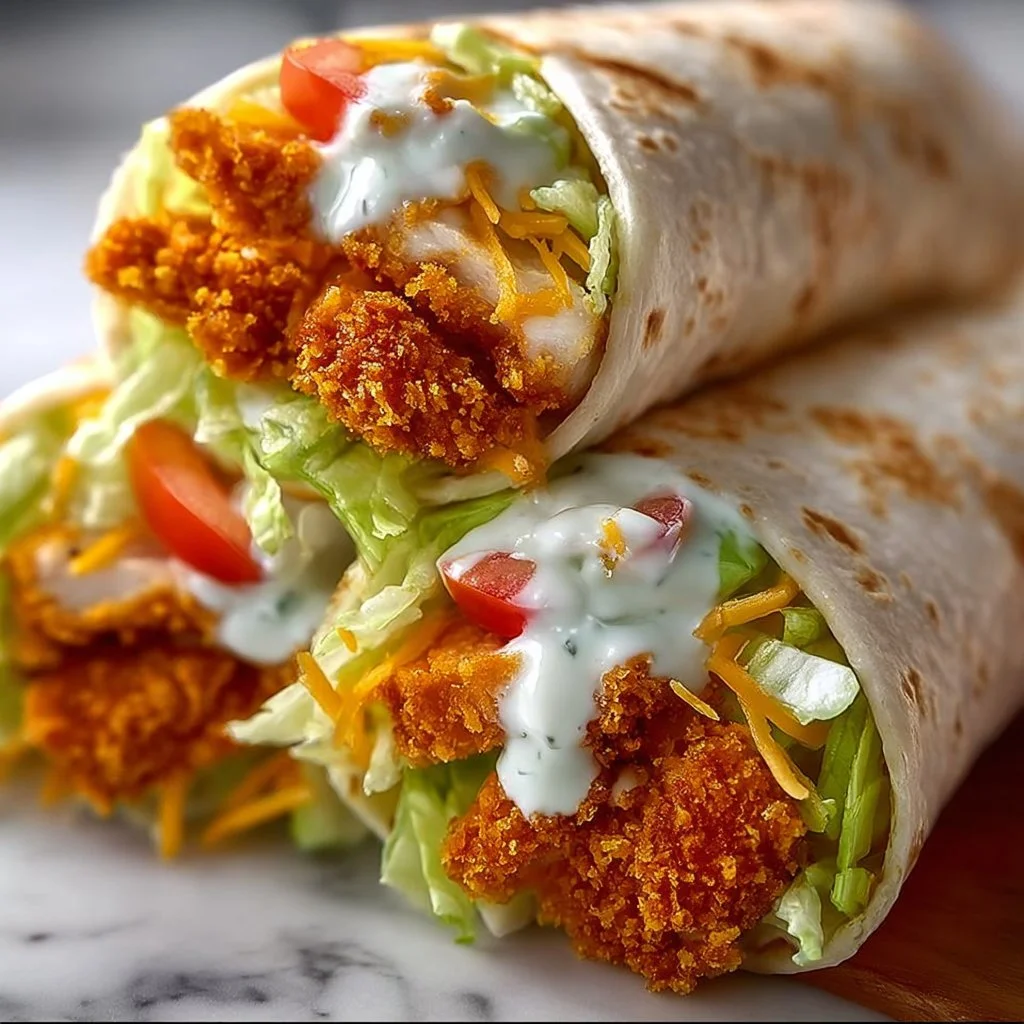
Crispy Chicken Ranch Snack Wrap
- Total Time: 35 minutes
- Yield: 4 servings
- Diet: None
Description
A delightful wrap filled with crispy chicken, fresh veggies, and creamy ranch dressing, perfect for lunch or snacks.
Ingredients
- Crispy Chicken Tenders
- Ranch Dressing
- Tortilla Wraps
- Lettuce
- Tomatoes
- Cheese
- Optional Toppings: Avocado, Bacon bits, Sliced jalapeños
Instructions
- Prep your chicken: If using homemade, bread and fry your chicken tenders. Heat store-bought as per instructions.
- Gather your wraps on a clean surface. Warm them on a skillet for added flavor.
- Drizzle ranch dressing down the center of each wrap.
- Place 2-3 crispy chicken tenders in the center of the wrap.
- Sprinkle lettuce and chopped tomatoes over the chicken.
- Add shredded cheese on top of the layers.
- Wrap the tortilla tightly from bottom to top.
- Slice the wrap diagonally for serving.
Notes
Serve with extra ranch dressing on the side for dipping and garnished with fresh herbs.
- Prep Time: 15 minutes
- Cook Time: 20 minutes
- Category: Lunch
- Method: Wrapping
- Cuisine: American
Nutrition
- Serving Size: 1 wrap
- Calories: 450
- Sugar: 3g
- Sodium: 500mg
- Fat: 20g
- Saturated Fat: 8g
- Unsaturated Fat: 10g
- Trans Fat: 0g
- Carbohydrates: 40g
- Fiber: 4g
- Protein: 28g
- Cholesterol: 60mg
Keywords: chicken wrap, ranch dressing, easy recipe, snack wrap, crispy chicken