
No-Bake Protein Brownie Bites
No-Bake Protein Brownie Bites: Sweet Treats Without the Heat
Hey there, food lovers! Beau Collier here—your friendly kitchen enthusiast, inviting you on a delightful culinary adventure! Today, we’re diving into a sweet treat that’ll leave both your taste buds and your body feeling oh-so-good: No-Bake Protein Brownie Bites. These little wonders are the restorative stash you didn’t know you needed—perfect for an energy boost or a healthy dessert option!
Now, let’s be real for a moment. Who among us hasn’t indulged in a fudgy brownie, feeling all warm and satisfied as we enjoy every bite? But sometimes, you want that scrumptious chocolatey goodness without the guilt or the oven’s fiery embrace. These brownie bites are rich, fudgy, and packed with protein, making them the go-to snack that’ll simplify your life while satisfying your chocolate craving.
What’s even better? These brownies don’t require any baking, making them ideal for hot summer days when the last thing you want to do is turn on the oven. Plus, they’re incredibly easy to whip up, so you can spend more time enjoying food and less time in the kitchen! It’s the best of both worlds, friends.
So grab your favorite mixing bowl and let’s create a no-bake magic that’ll impress everyone from your kids to your friends at your next potluck. Trust me—once you sink your teeth into these bites, you’ll want to make a double batch!
Personal Story
Let me take you back to my childhood kitchen, where the magic of baking first hooked me. My grandmother, a culinary diva in her own right, was a master at turning simple ingredients into delightful treats. I remember standing on a stool, inching my way closer to the countertop, hoping to catch a glimpse of her hands working their magic. One of my fondest memories involves a cocoa-heavy brownie recipe that she created—full of love and just a sprinkle of mischief.
But here’s the twist: she loved to sneak in healthy ingredients unbeknownst to the taste-testing neighborhood kids! We’d all gather in anticipation, and one day, she snuck some cottage cheese into her brownie batter. When I took that first bite, I was convinced I had just tasted pure chocolate heaven. It wasn’t until years later, while experimenting in my own kitchen, that I revisited that idea—combining what I loved about those brownies with a protein-packed twist. And thus, the No-Bake Protein Brownie Bites were born! With every batch, I’m reminded of that spirited kitchen and grandmother’s cheerful laughter—a reminder that cooking is more than just food; it’s about love, connection, and a sprinkle of nostalgia.
Ingredients
Here’s what you’ll need to whip up these tasty treats:
-
1 cup cottage cheese
This creamy base adds protein and moisture without overpowering the brownie flavor. If you’re dairy-free, try using silken tofu for a similar texture! -
1/2 cup almond butter
This nutty goodness provides healthy fats and creaminess. If you’re allergic to nuts, sunflower seed butter works like a charm. -
1/4 cup honey or maple syrup
This natural sweetener gives the brownies a touch of sweetness. Feel free to adjust the amount according to your sweet tooth! -
1/2 cup cocoa powder
The star of the show! Opt for unsweetened cocoa powder for that deep, rich chocolate flavor. You can also experiment with dark cocoa powder for an intense hit. -
1/2 cup rolled oats
These add texture and a bit of chewiness. If you’re gluten-free, just ensure your oats are certified gluten-free! -
1/4 cup chocolate chips (optional)
Because life is always better with chocolate! Use dark or milk chocolate chips, or even go ahead and get wild with white chocolate! -
1 tsp vanilla extract
This aromatic beauty enhances the chocolate flavor. Always opt for pure vanilla extract for the best taste! -
Pinch of salt
A little salt balances out the sweetness and brings out the flavors beautifully.
Step-by-Step Instructions
Ready to roll up your sleeves and create some magic? Here’s how to craft your No-Bake Protein Brownie Bites:
-
Gather Your Ingredients:
The first step in any successful cooking adventure is gathering everything you need. Load up that counter with your ingredients, and let’s get this party started! -
Blend the Base:
In a mixing bowl, combine the cottage cheese and almond butter until smooth. You can use a hand mixer, a blender, or even a food processor. This ensures your brownie base is creamy and lump-free. Trust me, it’ll make a difference in texture! -
Sweeten It Up:
Add in your honey or maple syrup, cocoa powder, and vanilla extract. Mix until everything is well combined. The kitchen should start smelling like a dream right about now. Don’t be afraid to give it a little taste—just a tiny spoonful won’t hurt! -
Incorporate the Dry Ingredients:
Throw in the rolled oats and salt. Stir gently with a spatula or spoon until fully incorporated. The batter should start to come together and give you a sense of chewy, chocolaty goodness. -
Chocolate Chips for Joy:
If you choose to include chocolate chips (and I highly recommend you do!), fold them into the mixture now. This is where the magic truly happens—every bite will reveal a delicious chocolate surprise! -
Shape the Bites:
Now, this is where the fun begins! Using your hands or a small cookie scoop, form the dough into bite-sized balls. You want them to be about 1-inch in diameter; they’re meant to be poppable! -
Chill for the Perfect Texture:
Place the bites on a parchment-lined baking sheet or plate, then pop them in the fridge for at least 30 minutes. This will help firm them up and make them even tastier. (Almost like letting them marinate in their chocolatey goodness!) -
Enjoy the Fruits of Your Labor:
After they’ve chilled, grab a couple (or five) because everyone deserves some healthy chocolatey happiness in their life!
Serving Suggestions
Now that you’ve created your masterpiece, it’s time to serve them up! You can simply present these delicious bites in a beautiful bowl, letting the cocoa-dusted surface shine—a perfect centerpiece for any gathering. For added flair, sprinkle a little extra cocoa powder on top or even drizzle some melted dark chocolate if you’re feeling extra indulgent.
Pair your No-Bake Protein Brownie Bites with a glass of almond milk or a scoop of your favorite yogurt for a complete treat. These pops of chocolate are also fantastic served alongside a fruit platter; the fresh fruit balances out the richness of the brownies.
And if you’re hosting a get-together, consider my favorite way to serve them: on a beautiful cheese board, interspersed with nuts and fruits. This creates a delightful sweet-and-savory experience that’ll have your guests raving!
Recipe Variations
Looking to kick it up a notch or change things up a bit? Here are some fun variations you can try:
-
Nutty Delight: Add in chopped nuts, such as walnuts or pecans, for extra crunch and a lovely texture.
-
Dried Fruit Bliss: Toss in some chopped dried fruit like cranberries, apricots, or cherries for a sweet and tangy burst in the bites.
-
Minty Freshness: Stir in a few drops of peppermint extract for a refreshing mint chocolate flavor that’s perfect for the holiday season!
-
Spicy Chocolate: How about adding a pinch of cayenne or cinnamon to the mix? It might sound odd, but trust me—spicy chocolate is an underrated flavor explosion.
-
Nut-Free Version: Swap out the almond butter for tahini or sunflower seed butter for a nut-free alternative that’s just as flavorful!
Chef’s Notes
Now that you’ve created such a delightful treat, let me share one of my favorite kitchen blunders related to this recipe. One time, I was in a hurry and accidentally grabbed the cayenne pepper instead of cocoa powder! The result? A brownie bite that had some serious kick. Admittedly, it was a hilarious mistake, causing my friends to laugh, sweat, and eat all at the same time. They didn’t waste any time dubbing them “Fiery Brownie Bites.” Who knows—maybe that could start a fun new trend!
As for evolving this recipe, every time I make these brownies, I always find new ways to reinterpret it. Whether it’s changing out the nut butter or trying different add-ins, it’s amazing how versatile they can be!
FAQs and Troubleshooting
As with any recipe, you might have a few questions or run into some hiccups. Let’s tackle a few common issues:
-
Why are my brownie bites crumbly?
If your mixture is too dry and crumbly, it may not have enough moisture. Try adding a little more almond butter or a splash of almond milk until you reach the desired consistency. -
Can I make these without cottage cheese?
Absolutely! You can substitute with silken tofu or a dairy-free yogurt to maintain creaminess without the dairy. -
How long do they last?
If stored in an airtight container, these brownie bites can last in the fridge for about one week. Trust me, they taste good—if they last that long! -
Do they freeze well?
Yes! You can freeze these bites for up to three months. Just make sure to separate layers with parchment paper before freezing to avoid sticking. When you’re ready to indulge, simply allow them to thaw in the fridge.
Nutritional Info
While I’m no nutritionist, I’ve poured my heart into crafting a treat that’s both delicious and nourishing! Each No-Bake Protein Brownie Bite is packed with protein from the cottage cheese and almond butter, making them a satisfying snack. With the inclusion of rolled oats, you’re also receiving essential fiber to keep your digestive system happy.
Here’s a quick breakdown (approximately, depending on how large you make them):
- Calories: ~100 per bite
- Protein: ~3g
- Fat: ~6g (mostly healthy fats!)
- Carbohydrates: ~10g
- Fiber: ~1g
Now, you can bite into goodness, knowing that you’re treating your body right while also indulging your sweet tooth!
Final Thoughts
And there you have it: your No-Bake Protein Brownie Bites are ready to be devoured! I hope you enjoyed this journey as much as I did. These little bites of joy are not just a recipe; they’re an expression of love, warmth, and nostalgia, perfectly suited to brighten up a snack or dessert time.
Whether you’re enjoying them as a pick-me-up during a busy day, serving them at a gathering, or snuggling up with a good book, these brownie bites will keep the smiles coming! I’d love to hear about your experiences with this recipe—feel free to share your thoughts and any creative twists you added along the way!
So until next time, keep spreading joy with food, keep experimenting, and remember: every meal you create is an opportunity to connect with others. Happy cooking, my friends! 🍫❤️
Print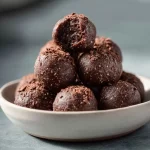
No-Bake Protein Brownie Bites
- Total Time: 45 minutes
- Yield: 12 servings 1x
- Diet: Vegetarian
Description
Rich, fudgy, and packed with protein, these no-bake brownie bites are the perfect guilt-free treat.
Ingredients
- 1 cup cottage cheese
- 1/2 cup almond butter
- 1/4 cup honey or maple syrup
- 1/2 cup cocoa powder
- 1/2 cup rolled oats
- 1/4 cup chocolate chips (optional)
- 1 tsp vanilla extract
- Pinch of salt
Instructions
- Gather Your Ingredients: Gather everything you need.
- Blend the Base: Combine cottage cheese and almond butter until smooth.
- Sweeten It Up: Add honey or maple syrup, cocoa powder, and vanilla extract; mix well.
- Incorporate the Dry Ingredients: Add rolled oats and salt; stir until fully combined.
- Chocolate Chips for Joy: Fold chocolate chips into the mixture if using.
- Shape the Bites: Form the dough into 1-inch balls.
- Chill for the Perfect Texture: Refrigerate for at least 30 minutes.
- Enjoy the Fruits of Your Labor: Serve and indulge!
Notes
Serve with a glass of almond milk or yogurt. Pairs well with fresh fruit.
- Prep Time: 15 minutes
- Cook Time: 0 minutes
- Category: Dessert
- Method: No-Bake
- Cuisine: American
Nutrition
- Serving Size: 1 bite
- Calories: 100
- Sugar: 7g
- Sodium: 40mg
- Fat: 6g
- Saturated Fat: 1g
- Unsaturated Fat: 5g
- Trans Fat: 0g
- Carbohydrates: 10g
- Fiber: 1g
- Protein: 3g
- Cholesterol: 5mg
Keywords: no-bake, protein bites, healthy snacks, brownie bites, dessert

Cottage Cheese Chips – The Ultimate High-Protein Snack
Cottage Cheese Chips – The Ultimate High-Protein Snack
Hey there, fellow food lovers! If you’re on a quest for a high-protein snack that’s as crispy as it is delicious, you’ve just landed in the right spot. Today, we’re diving into the world of Cottage Cheese Chips – a marvelously crunchy snack that packs a nutritional punch without compromising on taste. Whether you’re looking for a guilt-free munch during movie night or a nutritious boost pre- or post-workout, these chips are your new best friend.
Growing up, I always had a love affair with snacks. After school, I’d rummage through the pantry, seeking those satisfying crunches that could only come from chips. But I wanted something that didn’t make me feel guilty afterward. Fast forward to today, and I’ve transformed my nostalgic cravings into something wholesome and equally indulgent—a snack that combines the heartiness of cottage cheese with irresistible crispiness. So grab your apron and let’s make some Cottage Cheese Chips together!
These delightful little bites are unbelievably easy to whip up and adaptable to suit your taste buds. With just a few kitchen staples, your air fryer or oven, and a sprinkle of creativity, you’ll be on your way to a new snack sensation. Not only are they packed with protein, but they’re also gluten-free, and you can customize them to your heart’s content. Let’s get our snack game strong and dig into the world of Cottage Cheese Chips!
Personal Story
The first time I stumbled upon the idea of making chips from cottage cheese was during a late-night cooking session in my tiny apartment kitchen. I was watching one of those cooking shows where the chef takes something ordinary and turns it into something magical. As I snacked on some overly processed chips, feeling a hint of remorse, an idea struck me. Why not try making something just as crunchy but far more nutritious?
With my trusty tub of cottage cheese and an array of seasonings, I started experimenting. The sound of the oven timer buzzing was the moment of truth. As I pulled out the tray, the enticing aroma filled my kitchen, transporting me back to my childhood days filled with laughter and family gatherings. Taking that first bite was transformative—I felt as if I had unlocked a treasure buried within the pantry. The crunch along with the creamy cheese flavor was everything I didn’t know I needed. The best part? I could indulge guilt-free! And that’s how my love affair with Cottage Cheese Chips blossomed, turning late-night cravings into healthy delights.
Ingredients
Here’s what you’ll need to whip up your Cottage Cheese Chips. Trust me—these ingredients are simple, and you probably have most of them in your kitchen already!
-
1 cup (256g) whole milk small curd cottage cheese (4% milkfat, high protein)
This is the star of the show! Whole milk cottage cheese is creamy, rich, and packed with protein—perfect for creating a satisfying snack. If you’re going for a lower-calorie version, you can use low-fat cottage cheese, but keep in mind that the texture might be slightly less creamy. -
Seasonings of your choice (optional)
This is where you can get creative! Whether you crave savory or spicy, the choice is yours. Some favorites include garlic powder, onion powder, smoked paprika, or Italian herb blend. For a spicy kick, add a pinch of cayenne or chili powder. Don’t be afraid to experiment! -
Parmesan cheese (optional)
This adds an extra layer of flavor. Parmesan lends a nice umami character and can enhance that cheesy goodness. If you’re looking for dairy-free options, nutritional yeast can provide a similar cheesy flavor without any dairy.
Step-by-Step Instructions
Ready to get cooking? Let’s turn that cottage cheese into crispy bites of heaven!
-
Preheat Your Oven or Air Fryer
If you’re using the oven, preheat it to 400°F (200°C). If you have an air fryer, set it to 350°F (175°C). Preheating is crucial for achieving that perfect crispiness, so don’t skip this step! -
Prepare the Cottage Cheese
In a bowl, add 1 cup of cottage cheese. If you prefer a smoother texture, you can blend it briefly in a food processor until it reaches your desired consistency. For chunky chips, you can go for the traditional texture. -
Add Seasonings
This is the fun part! Sprinkle your chosen seasonings over the cottage cheese. If you want to add Parmesan, mix it in now. I typically recommend 1 tablespoon of Parmesan for a nice kick! Stir everything well to ensure even flavor distribution. -
Scoop and Shape
Using a spoon or a small ice cream scoop, drop spoonfuls of the mixture onto a lined baking sheet (if using the oven) or the air fryer basket. Aim for small rounds—consider 2-3 inches in diameter. Leave enough space between the chips so they can crisp up nicely. -
Bake or Air Fry
- Oven: Bake for about 15-20 minutes. Keep an eye on them; you want them golden brown and crispy. You may need to flip them halfway through for even cooking.
- Air Fryer: Crisp them up for about 10-12 minutes, checking halfway through to ensure they don’t burn.
-
Cool and Enjoy
Once they’re out of the oven or air fryer, let those little beauties cool for a few minutes. They’ll continue crisping up as they cool. Serve them warm or store them in an airtight container for snacking later.
Serving Suggestions
Now that you have a batch of crispy Cottage Cheese Chips ready to go, here are some fun ways to serve them up:
-
Dip ‘n’ Munch: Pair your chips with some homemade guacamole, salsa, or a zesty Greek yogurt dip. The contrasting flavors and textures will elevate your snacking experience.
-
Party Platter Wow: For gatherings, create a beautiful platter featuring your Cottage Cheese Chips alongside sliced veggies, olives, and a selection of your favorite dips. Friends will be impressed by your culinary creation.
-
Crunchy Salad Toppers: Crumble the chips over a fresh salad for an added crunch factor. They’ll provide that protein boost while making your salad feel like a filling meal.
Recipe Variations
Feeling adventurous? Here are some creative twists to make your Cottage Cheese Chips even more exciting:
-
Cheesy Ranch Flavor: Mix in ranch seasoning and extra cheddar cheese for a zesty ranch chip that’s perfect for parties!
-
Sweet Cinnamon Delight: Add a sprinkle of cinnamon and a few drops of vanilla extract for a sweet version of Cottage Cheese Chips. Perfect for dessert!
-
Spicy Sriracha Twist: Mix in Sriracha or your favorite hot sauce for a fiery kick. These chips pair fabulously with a cooling dip.
-
Italian Herb Infusion: Sprinkle Italian herbs like oregano, basil, and thyme into the cottage cheese for a Mediterranean flair. Served alongside bruschetta, they make a fantastic appetizer.
-
Sweet Potato Spice: If you want to incorporate some veggies, mix mashed, roasted sweet potato into the cottage cheese before dolloping them onto the baking sheet for a sweeter, nutrient-dense chip.
Chef’s Notes
I’ve been experimenting with these Cottage Cheese Chips for quite some time now, and they never cease to amaze me. One day, while hosting a movie night, I decided to try a version with a sprinkle of taco seasoning. They disappeared faster than popcorn! Ever since, I’ve had friends and family clamoring for their “cottage chip fix.”
Another funny kitchen story came from a mishap involving too much garlic powder. Picture this: my friend bit into a chip only to have her eyes widen with delight (or perhaps horror). Let’s just say we all enjoyed the extra kick that night, even if we all had to keep mints handy!
FAQs and Troubleshooting
-
Why aren’t my chips crisping up?
The key here is moisture; if you’re using cottage cheese that’s too watery, they may not crisp. Ensure you’re using a thick variety and consider draining excess liquid before mixing in your spices. -
Can I make these ahead of time?
Absolutely! Just store them in an airtight container, and they’ll stay crunchy for a few days. You can even re-crisp them in the air fryer for a few minutes if needed. -
What can I pair with my cottage chips?
The world is your oyster! Dips like hummus, tzatziki, or even guacamole work beautifully. You can also enjoy them with some fresh veggies for a wholesome platter. -
Can I freeze the cottage cheese chips?
I recommend enjoying them fresh for the best texture; however, you can freeze the uncooked dollops of mixture on a baking sheet, then transfer them to a bag once frozen. Bake straight from the freezer, just add extra time to cook.
Nutritional Info
Cottage Cheese Chips are not only delicious but also packed with nutrition! Here’s a rough breakdown of the nutritional benefits per serving (if following the basic recipe without additional toppings):
- Calories: Approximately 150
- Protein: Around 15g
- Carbohydrates: 5g
- Fat: 6g (depending on the fat percentage of cottage cheese)
- Fiber: Negligible
Keep in mind that adding seasonings, cheese, or dips can alter these values slightly, but the protein punch will still be a fantastic addition to your snack list!
Final Thoughts
So, there you have it—a high-protein, addictive snack that’s incredibly easy to make and super forgiving for those kitchen novices among us. With Cottage Cheese Chips, you get to blend quality ingredients, creativity, and, most importantly, a ton of fun!
So whether you’re plopping down for a binge session on your favorite show or hosting a lively get-together, these chips will shine as the perfect companion. Remember, cooking should never feel like a chore; it’s an adventure waiting to unfold. As you personalize your chips with flavors and seasonings, you’ll discover your own signature twist!
I hope you enjoy making and munching on these Cottage Cheese Chips as much as I do. Let’s embrace the joy of snacking together, one crisp bite at a time! Happy snacking!
Print
Cottage Cheese Chips
- Total Time: 25 minutes
- Yield: 4 servings 1x
- Diet: Gluten-Free
Description
A high-protein, crispy snack made from cottage cheese, perfect for guilt-free munching.
Ingredients
- 1 cup (256g) whole milk small curd cottage cheese (4% milkfat, high protein)
- Seasonings of your choice (optional)
- 1 tablespoon Parmesan cheese (optional)
Instructions
- Preheat your oven or air fryer to 400°F (200°C) or 350°F (175°C) respectively.
- Prepare the cottage cheese in a bowl. Blend for a smoother texture if desired.
- Add the chosen seasonings and Parmesan, mixing well for even flavor distribution.
- Scoop spoonfuls onto a lined baking sheet or air fryer basket, shaping into small rounds.
- Bake for 15-20 minutes in the oven or 10-12 minutes in the air fryer until golden brown.
- Cool for a few minutes before serving or storing in an airtight container.
Notes
Use thick cottage cheese for best results. Experiment with different seasonings for variety.
- Prep Time: 10 minutes
- Cook Time: 15 minutes
- Category: Snack
- Method: Baking
- Cuisine: American
Nutrition
- Serving Size: 1 serving
- Calories: 150
- Sugar: 2g
- Sodium: 200mg
- Fat: 6g
- Saturated Fat: 2g
- Unsaturated Fat: 3g
- Trans Fat: 0g
- Carbohydrates: 5g
- Fiber: 0g
- Protein: 15g
- Cholesterol: 30mg
Keywords: cottage cheese chips, high-protein snack, healthy snacks, gluten-free chips, easy recipes