
Caesar Pasta Salad
Get Ready to Love Life with Caesar Pasta Salad!
Hey there, fellow food lover! I’m Beau Collier, your trusty guide to all things delicious here at Feastical. Today, we’re diving into a dish that screams summer vibes and is a constant crowd-pleaser—Caesar Pasta Salad! This delightful combination marries the creamy, tangy flavors of Caesar dressing with the fun and hearty texture of pasta. It’s a recipe that’s not only quick to whip up but also perfect for potlucks, picnics, or just a cozy dinner at home. So, roll up your sleeves, grab a fork, and let’s get cooking!
Personal Story: A Taste of Nostalgia
I can still recall my first experience with Caesar salad. I was just a kid, sitting in a bustling family restaurant, filled with laughter and the aroma of sizzling garlic. My mom ordered Caesar salad as an appetizer, and from the first bite, I was hooked by the creamy dressing and the crunch of fresh romaine. I felt like a grown-up as I savored my mom’s salad. Fast forward a few years—my family and I were on a road trip and decided to pack a meal, including that unforgettable Caesar salad flavor. In truth, we ended up transforming it into a pasta salad with whatever ingredients we had on hand. Oh, the joy of creativity in cooking! That’s how Caesar Pasta Salad came to be one of my go-to recipes. It’s become a staple in my kitchen and a dish that brings together friends and family.
Ingredients
Here’s what you’ll need to create this vibrant dish:
-
8 oz pasta (penne or rotini)
Choose your favorite type of pasta! Penne or rotini captures the dressing beautifully, but feel free to switch it up with farfalle or even whole wheat options for a healthier twist. -
1 cup romaine lettuce, chopped
Romaine brings that classic Caesar crunch. If you’re looking for a little extra flavor, consider adding kale or baby spinach for a nutrient boost! -
½ cup cherry tomatoes, halved
These little gems add a burst of freshness to each bite. You can swap them out with sun-dried tomatoes if you want a deeper flavor profile. -
1 cup croutons
Store-bought croutons are super convenient, but you can easily make your own by toasting leftover bread tossed in olive oil and seasoning! -
½ cup Caesar dressing
Homemade or store-bought, the dressing is where the magic happens. If you’re feeling adventurous, try a yogurt-based dressing for a tangy twist or a dairy-free version made with cashews or tahini. -
¼ cup grated Parmesan cheese
Parmesan is key for that authentic flavor, but feel free to substitute with nutritional yeast for a vegan option. -
Salt and pepper to taste
Always taste as you go! A pinch of salt can elevate the whole dish, but keep in mind that croutons and cheese can be salty too.
Step-by-Step Instructions
Alright, my friend! Let’s get into the cooking. Follow these steps to whip up your very own Caesar Pasta Salad!
-
Cook the Pasta:
Start by bringing a large pot of salted water to a rolling boil. Add the pasta and cook according to the package instructions until al dente—usually around 8-10 minutes. Remember, nobody likes mushy pasta, so keep an eye on it! Bonus tip: reserve about ½ cup of pasta water before draining; it’s great for adjusting the consistency of your dressing later if needed! -
Prepare the Veggies:
While your pasta is cooking, grab a cutting board! Chop up the romaine lettuce into bite-sized pieces and halve those bright cherry tomatoes. If you’ve got kids helping out, this is a great time to let them lend a hand—kids love cutting tomatoes; it’s like a mini skill session! -
Make It Tangy:
In a large mixing bowl, toss together the romaine, cherry tomatoes, and croutons. This ensures that every ingredient gets noticed! -
Mix the Dressing:
Pour the Caesar dressing over your salad ingredients. Here comes the fun part—use tongs or a spoon to toss everything together until well coated. If you find the salad a bit too dry, that saved pasta water can come to the rescue! A tablespoon or two will help create a creamy, luscious dressing that hugs every bite. -
Add the Pasta:
Once your pasta is cooked, drain it and let it cool slightly (nobody wants to wilt the lettuce, right?). Then, add it to your vibrant veggie mix. Toss gently to combine all those delicious flavors! -
Sprinkle the Cheese:
Finally, sprinkle the grated Parmesan cheese over the top and give it one last gentle toss. Trust me, that cheese adds a whole new level of yum! -
Taste and Adjust:
Take a moment to taste your masterpiece. Add salt and pepper as needed for flavor. This step is crucial! The balance of flavors is where the love goes in. -
Chill if Desired:
You can serve it right away, but I always recommend letting it chill in the fridge for about 30 minutes. This allows all those wonderful flavors to meld together beautifully.
Serving Suggestions
Now that your Caesar Pasta Salad is ready, it’s time to serve! To plate, I like to use a large, shallow bowl to really showcase all those bright colors. You can garnish with a little extra Parmesan cheese on top or even a sprinkle of freshly cracked pepper for that gourmet touch. Serve it alongside grilled chicken or shrimp for a complete meal, or prepare individual portions for a potluck. Don’t forget about those beautiful plates—it’s all about the presentation!
Recipe Variations
Want to switch things up a bit? Here are a few fun variations you can try:
-
Mediterranean Caesar: Swap out the croutons for toasted pine nuts or add some Kalamata olives and some feta cheese for a Mediterranean twist! The briny olives complement the Caesar dressing wonderfully.
-
Spicy Kick: Add some diced jalapeños or a few dashes of hot sauce to your dressing for a spicy twist. It adds a zing that elevates the salad to a whole new level!
-
Protein Power: Toss in some grilled chicken slices, shrimp, or chickpeas to turn your pasta salad into a hearty meal. It’s perfect for meal prep, giving you a satisfying option you can take on the go.
-
Vegan Delight: Use plant-based Caesar dressing and keep it dairy-free with nutritional yeast instead of Parmesan. Load up on extra veggies like bell peppers and cucumbers for extra texture and crunch.
-
Pasta Salad Bites: Make mini versions using bite-sized pasta shapes and serve in little cups as appetizers at parties. Perfect finger food for gatherings!
Chef’s Notes
Over the years, I’ve tweaked this recipe time and again. I’ve experimented with different dressings, from homemade garlic-infused lemon dressing to avocado-based versions. Each variation brought something unique and delicious to the table! Plus, there’s something so comforting about a salad that feels indulgent while being packed with fresh ingredients. Remember, cooking is about exploration—don’t be afraid to make it your own!
FAQs and Troubleshooting
-
What can I do if my salad is too dry?
If your salad feels a bit dry, you can always add a splash of olive oil or your saved pasta water while tossing the salad. This will help moisten the ingredients. -
I don’t have croutons; what can I use instead?
No worries! Crunchy ingredients like toasted nuts or seeds, or even crispy chickpeas will add that necessary texture. -
Can I make this salad ahead of time?
Absolutely! Just keep the dressing separate until you’re ready to serve. This prevents the lettuce from wilting and keeps everything fresh. -
What should I serve this dish with?
Caesar Pasta Salad pairs beautifully with grilled meats or seafood, or it can stand alone as a light, refreshing meal. It’s particularly perfect for summer barbecues and gatherings!
Nutritional Info
This Caesar Pasta Salad is not only delicious but also quite balanced! Here’s a rough breakdown per serving (assuming 4 servings):
- Calories: 350
- Protein: 12g
- Carbohydrates: 45g
- Fiber: 3g
- Fat: 15g
Feel free to tweak the ingredients based on your dietary needs (using whole grain pasta can give you an extra fiber boost!).
Final Thoughts
And there you have it, my friends! Caesar Pasta Salad—a dish that brings back memories and flavors sure to brighten your day. Whether you’re whipping it up for a family BBQ, potluck, or just a simple weeknight dinner, this fresh and tangy salad will always deliver.
Let this recipe inspire you to experiment and explore in your kitchen. Remember, cooking should feel like a celebration, so don’t shy away from making it your own! Now, grab that fork and dig in; you’re going to love this!
Until next time, keep spreading joy through food. Happy cooking! 🥗✨
Print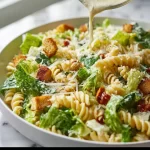
Caesar Pasta Salad
- Total Time: 20 minutes
- Yield: 4 servings 1x
- Diet: Vegetarian
Description
A delightful Caesar Pasta Salad that combines creamy dressing with hearty pasta, perfect for summer gatherings.
Ingredients
- 8 oz pasta (penne or rotini)
- 1 cup romaine lettuce, chopped
- ½ cup cherry tomatoes, halved
- 1 cup croutons
- ½ cup Caesar dressing
- ¼ cup grated Parmesan cheese
- Salt and pepper to taste
Instructions
- Cook the pasta by bringing a large pot of salted water to a boil and cooking according to package instructions until al dente.
- Prepare the veggies by chopping romaine lettuce and halving cherry tomatoes.
- Toss the romaine, cherry tomatoes, and croutons in a large bowl.
- Pour the Caesar dressing over the salad ingredients and toss until well coated.
- Add the cooled pasta to the veggie mix and toss gently.
- Sprinkle the grated Parmesan cheese over the salad and give it a final toss.
- Taste and adjust seasoning with salt and pepper as needed.
- Chill in the fridge for about 30 minutes before serving, if desired.
Notes
For added flavor, let the salad chill before serving to allow the flavors to meld.
- Prep Time: 10 minutes
- Cook Time: 10 minutes
- Category: Salad
- Method: Mixing
- Cuisine: Italian
Nutrition
- Serving Size: 1 serving
- Calories: 350
- Sugar: 3g
- Sodium: 400mg
- Fat: 15g
- Saturated Fat: 4g
- Unsaturated Fat: 8g
- Trans Fat: 0g
- Carbohydrates: 45g
- Fiber: 3g
- Protein: 12g
- Cholesterol: 30mg
Keywords: Caesar pasta salad, summer salad, easy pasta recipes, vegetarian salad, potluck recipes
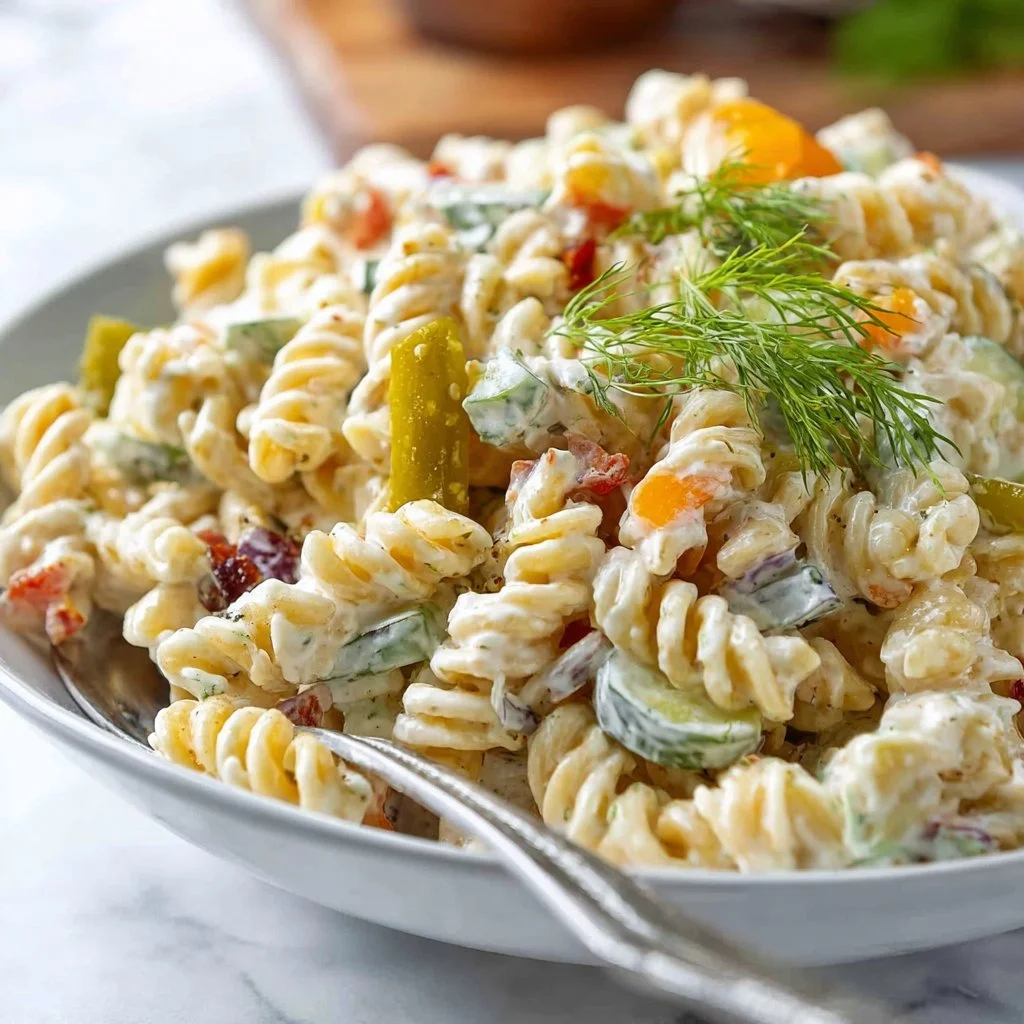
Dill Pickle Pasta Salad
Dill Pickle Pasta Salad: A Bite of Nostalgia and Flavor
Hey there, food lovers! Are you ready to dive into a recipe that’s as refreshing as a summer breeze and as comforting as a Sunday family gathering? Today, we’re whipping up a delightful Dill Pickle Pasta Salad! This isn’t just any pasta salad; it’s creamy, zesty, and just perfect for picnics, potlucks, or simply enjoying on a cozy night. What makes this dish even more special is that it combines the crunch of crunchy veggies with the tanginess of dill pickles, creating a flavor explosion that will have you coming back for seconds (maybe even thirds!).
Picture this: A warm, sunny afternoon, the grill is fired up, and the laughter of friends fills the air as you lay out your spread. There’s the barbecue chicken sizzling away, potato salad on the side, and then, bam! You reveal this vibrant bowl of Dill Pickle Pasta Salad. Instantly, everyone’s intrigued. “What’s in that?” they ask, leaning in for a closer look. And as soon as they take that first forkful, you can see it in their eyes—a mixture of surprise and delight. That’s the magic of this dish!
Not only is this salad packed with flavor, but it’s also super simple to whip up. Even if you’re new to cooking (or can’t remember where you put your spatula), I promise you’ll nail this recipe with ease. So, let’s gather our ingredients and jump headfirst into this tasty adventure together. Trust me—it’s going to be a delicious ride!
Personal Story
You know, food has a funny way of weaving itself into the fabric of our memories, doesn’t it? As a kid, every summer, my family would host a grand picnic at our local park. It was somewhat of a tradition—blankets laid out under the shade of our favorite oak tree, and my mom being the culinary wizard she was, would whip up every dish you could imagine. Among the crowd-pleasers was always a big bowl of her Dill Pickle Pasta Salad.
I remember the anticipation as we all gathered around, sun gleaming just right, plates in hand. The moment that salad hit the table, the air would buzz with excitement. My sister and I would race to be the first to dig in. There was just something about that tangy dressing paired with the coolness of the pickles that made the hot summer day feel even more vibrant. It wasn’t just food; it was laughter, stories, and a sense of belonging. Even now, whenever I make this dish, I’m transported back to those sunny afternoons, sharing bites and laughter with the people I love most. This Dill Pickle Pasta Salad is more than just a recipe; it’s a delightful nod to cherished memories.
Ingredients
Here’s what you’ll need to create this scrumptious Dill Pickle Pasta Salad:
-
8 oz pasta (such as fusilli or rotini)
Choose your favorite pasta shape! Fusilli or rotini hold the dressing beautifully and add a playful twist. You can also use gluten-free pasta if desired—just follow the package instructions! -
1 cup dill pickles, chopped
The stars of the show! Dill pickles add that signature tang. Don’t have dill pickles? Sweet gherkins or half-sours could work too, but be cautious with the sweetness! -
1/2 cup red onion, diced
Red onion offers a nice crunch and a pop of color. If red onion is too pungent for you, consider using green onions or shallots instead for a milder flavor. -
1/2 cup celery, diced
Celery adds refreshing crunch. If you’re not a fan, you can substitute carrots for a bit of sweetness or even bell peppers for more color! -
1 cup mayonnaise
The creamy base of our dressing! You can toggle with Greek yogurt for a lighter version, or even vegan mayo for a plant-based option. -
2 tbsp dill pickle juice
Don’t toss this liquid gold! It amps up the flavor of the dressing. You could swap it with vinegar if you’re in a pinch, but the taste may vary a bit. -
1 tbsp Dijon mustard
This adds a lovely depth to your dressing. To switch it up, try yellow mustard for a more classic taste or even honey mustard for a sweeter twist! -
Salt and pepper to taste
Always finish with a pinch of salt and a dash of pepper to elevate the flavors! You could boost the flavor with a sprinkle of garlic powder or a pinch of cayenne for some heat. -
Fresh dill for garnish
A little fresh dill makes everything better, adding color and freshness. If you don’t have fresh dill, dried dill will suffice, but adjust the amount since dried herbs are more concentrated!
Step-by-Step Instructions
So, you’ve gathered your ingredients—great job! Let’s roll up our sleeves and get cooking. Here’s your step-by-step guide to making a sensational Dill Pickle Pasta Salad:
Step 1: Cook the Pasta
Start by bringing a large pot of salted water to a rolling boil. Once it’s boiling, add in your chosen pasta. Cook it according to the package instructions until al dente—tender but still with a bite. Be sure not to overcook, or you’ll end up with mushy pasta! I always set a timer, as it helps to prevent wandering off into the “what to watch on Netflix” zone.
Step 2: Drain and Cool
Once the pasta is cooked, drain it into a colander and rinse it under cold water. This stops the cooking process and cools the pasta down quickly. Plus, it helps prevent sticking! Give the pasta a little shake to shake off the excess water before setting it aside to cool.
Step 3: Prep the Veggies
While the pasta cools, it’s time to chop up those crunchy veggies! Dice the red onion and celery, and chop up the dill pickles. Don’t stress about making the cuts perfect—rustic is just fine! If you’re feeling adventurous, you can even use a food processor for a quick chop, but watch those fingers!
Step 4: Make the Dressing
In a large mixing bowl, combine the mayonnaise, dill pickle juice, and Dijon mustard. Whisk it all together until it’s nice and smooth. Don’t forget to season with salt and pepper! Taste the dressing; if you want more tang, add a splash of pickle juice or a bit more mustard. This is your salad, so let your tastes lead the way!
Step 5: Combine the Ingredients
Now for the fun part! Add your cooled pasta, chopped pickles, diced red onion, and celery into the bowl with the dressing. Gently fold everything together until the pasta and veggies are well-coated. Use a rubber spatula for this—great for folding and won’t break your pasta!
Step 6: Chill
Once everything is mixed, cover the bowl with plastic wrap or a lid and pop it in the fridge for at least 30 minutes. This step is crucial as it allows all those flavors to meld together beautifully. Who doesn’t love a delicious salad that tastes even better the next day?
Step 7: Serve Up!
Before serving, give the pasta salad a good stir, and adjust the seasoning if needed. You can garnish with fresh dill on top for that extra pop of flavor and color!
Serving Suggestions
When it’s time to serve your Dill Pickle Pasta Salad, you’ve got lots of options! You can transfer it to a large serving bowl for everyone to dig into, or portion it out into individual cups for a fun picnic-style presentation.
For a touch of decor, sprinkle extra dill or even some paprika on top for color. Pair it with grilled meats or serve alongside a fresh side salad for a complete meal. You could also tuck it into a wrap or pita for a fun lunch option! And of course, don’t forget the nice chilled beverage to accompany it—because what’s a summer meal without a refreshing drink?
Recipe Variations
Feeling adventurous? Here are some creative twists you can add to customize your Dill Pickle Pasta Salad:
-
Add Protein: Toss in some cooked chicken, shrimp, or chickpeas to transform this side salad into a satiating main dish.
-
Different Veggies: Go wild with veggies! Add in diced bell peppers, shredded carrots, or even corn for a sweet crunch.
-
Cheesy Goodness: Sprinkle in some shredded cheddar cheese or feta to give your salad an extra layer of flavor.
-
Spicy Kick: Add diced jalapeños or a splash of hot sauce for some heat.
-
Herb Swap: If dill isn’t your jam, try swapping it for chives or parsley for a different herbal note.
Chef’s Notes
One of my favorite things about this Dill Pickle Pasta Salad is its versatility. Over the years, I’ve added different ingredients depending on what I have in the fridge or my mood! There have been times I’ve found some leftover roasted veggies and tossed those in, making it a delightful clean-out-the-fridge recipe. Plus, I once added bacon crumbles—let me tell you, the smoky flavor paired with the tangy dressing was out of this world!
So, don’t be afraid to make this dish your own. Food is all about exploration and creativity, so feel free to experiment!
FAQs and Troubleshooting
1. My pasta salad is too dry. What can I do?
If your pasta salad is feeling a bit dry, don’t be shy! Add a splash more of mayonnaise or dill pickle juice and give it a good stir to mix everything well.
2. Can I make this salad ahead of time?
Absolutely! It’s actually better when made ahead of time, as the flavors meld beautifully. It can be stored in an airtight container in the refrigerator for up to 3 days.
3. How do I prevent my pasta from sticking?
Rinsing your pasta under cold water right after cooking helps to prevent it from sticking together. Additionally, using a non-stick pot can also work well!
4. Can I freeze this pasta salad?
I wouldn’t recommend freezing it due to the creamy nature of the dressing. It’s best enjoyed fresh or well-stored in the fridge.
Nutritional Info
Each serving of this Dill Pickle Pasta Salad is not only packed with flavor but offers a balanced combination of carbohydrates, healthy fats, and vitamins from the fresh veggies. Here’s a quick nutritional breakdown per serving (approximately 1 cup):
- Calories: ~250
- Protein: ~4g
- Carbohydrates: ~30g
- Fat: ~12g
- Fiber: ~1g
Keep in mind that these values can vary based on substitutions, so it’s always good to check if you’re tracking your intake.
Final Thoughts
There you have it—your complete guide to making the most delicious Dill Pickle Pasta Salad! It’s easy to put together, full of flavor, and brings a sense of nostalgia and comfort to the table. Whether you’re serving it at your next gathering or enjoying it with a side of your favorite grilled main, this dish is sure to please.
So grab your forks, gather your loved ones, and elevate your next meal with this delightful recipe. And as always, don’t forget to leave a comment below, sharing your thoughts or any creative twists you’ve tried! Happy cooking friends, and I can’t wait to see how your Dill Pickle Pasta Salad turns out! 🍽️
Print
Dill Pickle Pasta Salad
- Total Time: 45
- Yield: 4 servings 1x
- Diet: Vegetarian
Description
A refreshing and creamy pasta salad, packed with crunchy veggies and tangy dill pickles, perfect for summer gatherings.
Ingredients
- 8 oz pasta (such as fusilli or rotini)
- 1 cup dill pickles, chopped
- 1/2 cup red onion, diced
- 1/2 cup celery, diced
- 1 cup mayonnaise
- 2 tbsp dill pickle juice
- 1 tbsp Dijon mustard
- Salt and pepper to taste
- Fresh dill for garnish
Instructions
- Cook the pasta by bringing a large pot of salted water to a rolling boil, add pasta, and cook according to package instructions until al dente.
- Drain and cool the pasta under cold water to stop the cooking process.
- Prep the veggies by dicing the red onion and celery, and chopping the dill pickles.
- Make the dressing by combining mayonnaise, dill pickle juice, and Dijon mustard in a large mixing bowl and whisk until smooth.
- Combine the cooled pasta, chopped pickles, diced red onion, and celery into the bowl with the dressing and gently fold everything together.
- Chill the salad in the fridge for at least 30 minutes to meld the flavors.
- Serve and garnish with fresh dill before enjoying.
Notes
This salad tastes even better the next day. Customize it by adding protein or different veggies if desired.
- Prep Time: 15
- Cook Time: 10
- Category: Salad
- Method: No Cook
- Cuisine: American
Nutrition
- Serving Size: 1 serving
- Calories: 250
- Sugar: 3g
- Sodium: 600mg
- Fat: 12g
- Saturated Fat: 2g
- Unsaturated Fat: 8g
- Trans Fat: 0g
- Carbohydrates: 30g
- Fiber: 1g
- Protein: 4g
- Cholesterol: 15mg
Keywords: Dill Pickle Pasta Salad, Summer Salad, Pasta Salad Recipes, Refreshing Salad, Picnic Food

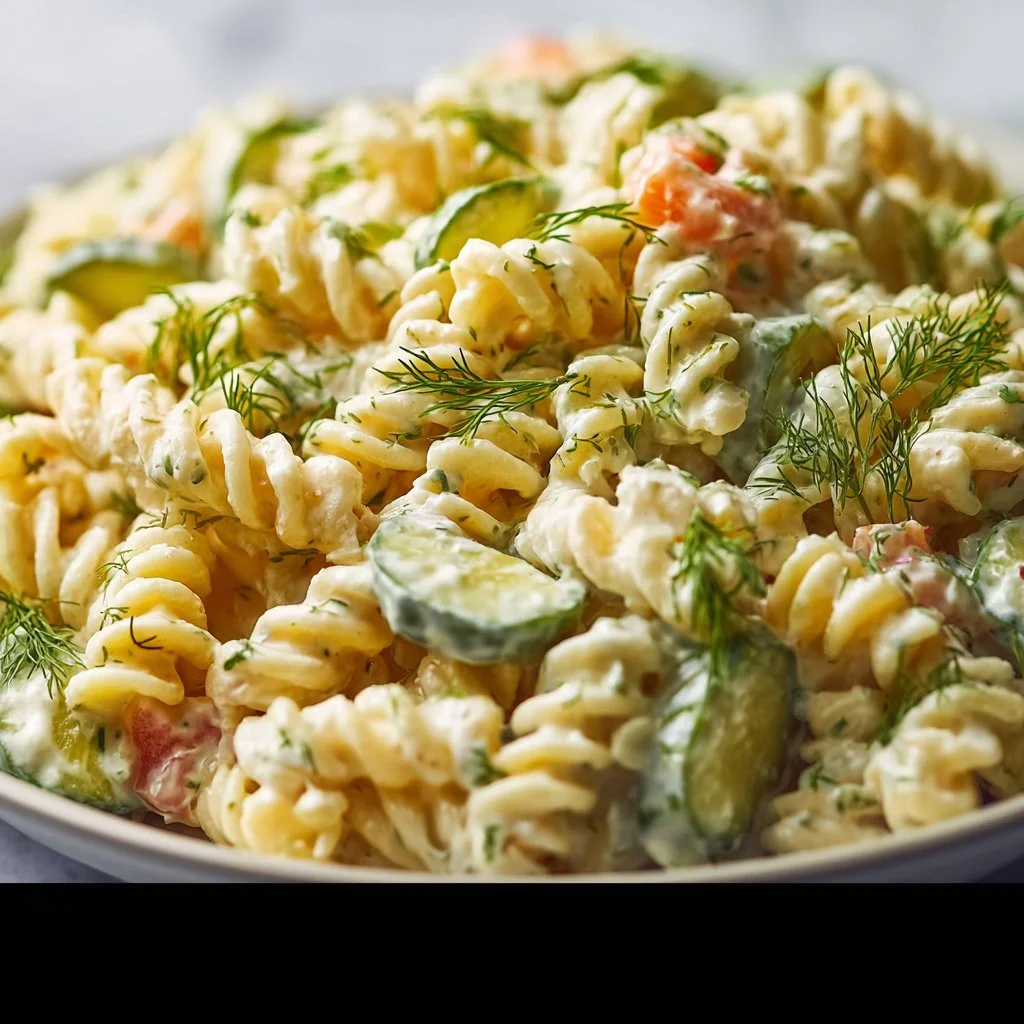
Caesar Pasta Salad
Caesar Pasta Salad: A Delicious Twist on a Classic Favorite
Hey there, food lovers! I’m Beau Collier, and today we’re going on a culinary adventure with a dish that combines the hearty comfort of pasta with the refreshingly crisp flavors of a Caesar salad. Say hello to Caesar Pasta Salad—a delightful blend that’s perfect for any occasion, whether you’re hosting a picnic, a casual BBQ, or simply craving something delicious for a cozy dinner at home.
If you’re anything like me, you’ve had your fair share of classic Caesar salads, but let me tell you, mixing those classic flavors with pasta elevates everything to a new level of yum! You’ve got the crunch of fresh romaine, the salty punch of Parmesan, and the garlicky goodness of Caesar dressing all mingling beautifully with al dente pasta. That’s a flavor explosion right there!
And guess what? This dish is incredibly versatile—you can whip it up in no time and customize it to your heart’s content. Just imagine bringing this vibrant dish to your next potluck or serving it as a light meal with friends. The best part? Cooking it is a breeze! I’ll guide you through each step, ensuring that even if you’re a kitchen novice, you’ll feel like a pro by the time you plate it up.
So, grab your spatula and let’s dive into the world of Caesar Pasta Salad. Let’s make some magic happen in the kitchen together!
Personal Story
I still vividly remember the first time I came across a Caesar pasta salad—it was at a summer family gathering a few years back. My cousin, who is a self-proclaimed food enthusiast (like yours truly), introduced it as her “latest obsession.” I remember the way she described it: a creamy, garlic-infused dressing dancing with the crunch of fresh lettuce and the chew of pasta—pure heaven on a plate!
At the time, it seemed revolutionary. Could it really have all the classic Caesar salad flavors I adored mixed into pasta? Well, I dove right in, and oh boy, was I sold! As I devoured my serving, the harmonious blend of flavors transported me back to simpler days: picnics by the lake, backyard BBQs, and warm, sunshiny afternoons filled with laughter and love.
That one bite ignited a spark in me! I rushed home to replicate her delicious creation, experimenting in my kitchen and making it my own. Since then, my love for Caesar Pasta Salad has only grown, and I can’t wait to share my favorite recipe with all of you. It’s more than just a dish; it’s a connection to good times, cherished memories, and the joy of sharing food with loved ones.
Ingredients
Let’s talk about the magic components of the Caesar Pasta Salad! Here’s what you’ll need:
-
8 ounces of pasta (any short variety)
- Chef Insight: I love using rotini or penne because their shapes hold onto the dressing beautifully. If you’re looking for alternatives, try whole wheat or gluten-free options—both work like a charm!
-
1/2 cup of homemade Caesar dressing
- Substitution Tips: While homemade is best (trust me!), you can also use store-bought if you’re short on time. Consider a vegan Caesar option if you’re catering to dietary restrictions.
-
1/2 cup of grated Parmesan cheese
- Quick Insight: Freshly grated is a game changer! It melts a bit into the warm pasta. If you’re dairy-free, try nutritional yeast for a cheesy-ish experience!
-
1 cup of croutons
- Chef Hack: You can either buy them or make your own from leftover bread—toss cubes with olive oil, garlic powder, and your favorite herbs, then bake until golden!
-
2 cups of romaine lettuce, chopped
- Substitution Tip: Don’t have romaine on hand? Any crunchy green—like iceberg or arugula—could work well, too!
-
Salt and pepper to taste
- Quick Note: Always season to your liking! I often use kosher salt for its texture, and freshly cracked pepper adds a nice zing.
-
Optional: cherry tomatoes, halved
- Flavor Boost: These add a burst of sweetness and color! If you’re feeling adventurous, consider adding other veggies like cucumbers or bell peppers.
Step-by-Step Instructions
Ready to bring this Caesar Pasta Salad to life? Let’s do it step by step!
-
Cook the Pasta
- Start by boiling a pot of salted water. Once it’s bubbling, toss in your chosen short pasta. Cook according to the package instructions until al dente (usually about 8-10 minutes). Al dente is key here—it means “to the tooth” in Italian, embracing that perfect bite.
- Chef Tip: Save a cup of pasta water before draining; it’s liquid gold for adjusting the dressing!
-
Prepare the Dressing (if making homemade)
- If you’re going the homemade route, combine 1/2 cup of mayonnaise, the juice of one lemon, minced garlic (about 2 cloves), a teaspoon of Dijon mustard, and a dash of Worcestershire sauce in a bowl. Whisk everything together and slowly incorporate 1/4 cup of grated Parmesan. Season with salt and pepper to taste.
- Chef Hack: For added richness, you can fold in a bit of Greek yogurt!
-
Chop the Romaine
- While your pasta is cooking, chop the romaine lettuce into bite-sized pieces. You want it crunchy and fresh to balance the creaminess of the dressing!
- Quick Note: Rinsing the lettuce under cold water and patting it dry keeps it crisp!
-
Combine Ingredients
- Once your pasta is cooked and drained, return it to the pot or a large bowl. While it’s warm, toss in the homemade Caesar dressing. The heat from the pasta helps absorb all those delicious flavors!
- Chef Insight: If using the reserved pasta water, add a little to loosen the dressing as needed.
-
Add the Cheese and Croutons
- Fold in the grated Parmesan cheese and croutons gently. This step adds texture and flavor—trust me, you want every bite to be bursting with Caesar goodness!
- Quick Tip: If you want a cheesier flavor, feel free to mix in extra Parmesan or even some shredded mozzarella for creaminess.
-
Toss in the Romaine and Tomatoes
- Now, add the chopped romaine and halved cherry tomatoes (if using). Toss everything together until well combined. The colors should pop, making it as tempting to the eyes as it is to the tummy!
- Chef’s Love: I love topping with a few more croutons at the end to keep that crunch!
-
Let it Chill
- Ideally, let your pasta salad chill for about 30 minutes before serving. This allows all those flavors to meld together beautifully.
- Pro Tip: If you’re making it ahead of time, it can certainly be prepped a few hours (or even a day) in advance—just hold off on the romaine and croutons until serving.
Serving Suggestions
Time to impress your guests (or yourself) with a stunning presentation! Here are a few tips on how to plate your Caesar Pasta Salad:
- Fancy Bowl or Plate: Use a large pasta bowl for a family-style presentation or gather the salad into small, individual plates to serve as a starter.
- Garnish it Up: Sprinkle extra Parmesan and a few croutons on top for an eye-catching finish. You can even add some freshly chopped parsley or basil for a fresh pop of color!
- Pairing Ideas: This salad pairs perfectly with grilled chicken, shrimp, or even a side of garlic bread (because who doesn’t love garlic bread?). It also makes a great lunch option that you can prep ahead of time!
Recipe Variations
Want to mix things up? Here are a few creative twists you can try with your Caesar Pasta Salad:
-
Add Protein: Toss in some grilled chicken, shrimp, or chickpeas for added protein. It makes for a heartier meal!
-
Veggie Boost: Incorporate diced cucumbers or shredded carrots for extra crunch and color. You could also opt for roasted veggies for a smoky flavor.
-
Spicy Twist: Feeling bold? Add diced jalapeños or a splash of hot sauce to the dressing for a spicy kick.
-
Cheesy Wonder: Mix in different types of cheese—like feta or mozzarella—for a unique flavor twist that’ll have your taste buds dancing.
-
Vegan Version: Swap out the dressing for a vegan Caesar, use nutritional yeast instead of cheese, and croutons made without butter for a completely plant-based option!
Chef’s Notes
You know, recipes have a funny way of evolving over time. I started with a traditional Caesar for this dish, and before I knew it, I was throwing in all sorts of goodies! It never fails—there’s always someone who wants to customize, and I love that! Food is about bringing people together and letting their personalities shine through in what they choose to eat.
Plus, I have to confess: I have a habit of taste-testing every dish I create. For science, of course! It’s all in the name of cooking, right? You can never have enough bites to ensure the flavors sing.
FAQs and Troubleshooting
Q1: My pasta salad is too dry. What can I do?
A: If you find your dressing isn’t coating the pasta well enough, simply toss in a bit of reserved pasta water or extra dressing until it reaches your desired creaminess.
Q2: Can I make it vegan?
A: Absolutely! Use a vegan Caesar dressing, nutritional yeast instead of cheese, and make sure your croutons are dairy-free!
Q3: How long will this salad last in the fridge?
A: It’s best eaten within 2-3 days. Just keep in mind that the romaine might wilt if it’s mixed in too early. Like I mentioned earlier, add that just before serving!
Q4: I’m in a rush! What can I do to speed up the process?
A: Use pre-made dressing and croutons, and opt for pre-chopped romaine from your grocery store. It cuts down on prep time significantly!
Nutritional Info
Let’s break down the goodness you’ll find in this lovely Caesar Pasta Salad—keeping in mind that actual values may vary depending on specific ingredients and measurements used:
- Calories: Approximately 450 per serving (assuming 4 servings)
- Protein: 15 grams
- Fat: 20 grams (including healthy fats from the dressing)
- Carbohydrates: 55 grams
- Fiber: 3 grams
This salad offers a delicious balance of fats, proteins, and carbs to satisfy your hunger while still being packed with fresh veggies. So dig in guilt-free!
Final Thoughts
There you have it, foodie friends! A delightful Caesar Pasta Salad that’s not only easy to whip up but also a hit at any gathering. Remember, the true essence of this dish lies in its simplicity and heartiness—it’s about sharing good food and joyful moments with the people we love.
So, whether you’re serving it as a side or making it a meal, I hope this recipe brings as much joy to your kitchen as it has to mine. Get creative, experiment with flavors, and most importantly, enjoy every single bite. After all, cooking is meant to be an experience filled with joy and passion.
Now, go on and share the love—after all, food is about bringing people together! Bon appétit!
Print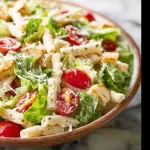
Caesar Pasta Salad
- Total Time: 45 minutes
- Yield: 4 servings 1x
- Diet: Vegetarian
Description
A refreshing twist on the classic Caesar salad that combines pasta with crispy romaine, Parmesan cheese, and creamy Caesar dressing, perfect for any occasion.
Ingredients
- 8 ounces of pasta (any short variety)
- 1/2 cup of homemade Caesar dressing
- 1/2 cup of grated Parmesan cheese
- 1 cup of croutons
- 2 cups of romaine lettuce, chopped
- Salt and pepper to taste
- Optional: cherry tomatoes, halved
Instructions
- Cook the Pasta by boiling a pot of salted water. Add pasta and cook until al dente (8-10 minutes). Save a cup of pasta water before draining.
- Prepare the Dressing by combining 1/2 cup mayonnaise, juice of one lemon, minced garlic, Dijon mustard, and Worcestershire sauce. Whisk and incorporate Parmesan.
- Chop the Romaine into bite-sized pieces.
- Combine the cooked pasta with the Caesar dressing while it’s warm to absorb flavors.
- Add the grated Parmesan cheese and croutons, folding gently.
- Toss in the chopped romaine and cherry tomatoes until combined.
- Let it Chill for about 30 minutes before serving.
Notes
For a vegan version, use a vegan Caesar dressing and nutritional yeast instead of cheese.
- Prep Time: 15 minutes
- Cook Time: 10 minutes
- Category: Salad
- Method: Mixing
- Cuisine: Italian
Nutrition
- Serving Size: 1 serving
- Calories: 450
- Sugar: 2g
- Sodium: 700mg
- Fat: 20g
- Saturated Fat: 5g
- Unsaturated Fat: 12g
- Trans Fat: 0g
- Carbohydrates: 55g
- Fiber: 3g
- Protein: 15g
- Cholesterol: 30mg
Keywords: Caesar Pasta Salad, pasta salad, vegetarian salad, easy salad recipe

Dill Pickle Pasta Salad
Dill Pickle Pasta Salad: A Journey of Flavors
Hey there, food lovers! It’s Beau Collier here, and today we’re diving into the delicious world of Dill Pickle Pasta Salad. This dish is not only bursting with flavor, but it also brings back some awesome memories from my childhood. So, grab your mixing bowl and let’s get cooking!
Pasta salad is one of those magical dishes that embodies a zero-fuss deliciousness and a meal that’s perfect for any occasion. Whether it’s a laid-back barbecue, a potluck gathering, or even just a cozy dinner on a weeknight, pasta salad is your go-to dish. Now, what makes this particular version stand out from the rest? The answer is simple: the zesty, tangy punch of dill pickles!
Growing up, food was a way of connecting with my family and friends. I can still picture my grandmother in her sunny kitchen, with pots boiling over and a big friendly smile plastered on her face. She was famous for her creamy pasta salads, but the one that always made my taste buds dance was her dill pickle creation. I remember thinking, “How can something so simple be so amazing?” Spoiler alert: it’s the dill pickles!
Fast forward to today, and I’m thrilled to pass on that love for dill pickle pasta salad to you! It’s a dish that embodies the warmth of family gatherings and the joy of sharing meals with loved ones. Plus, it’s super easy to make and even easier to customize. Get ready to dig into a bowl of creamy, tangy goodness that will have everyone coming back for more.
Personal Story
One of my fondest memories connected to dill pickle pasta salad happened during the warm summer evenings at my grandparents’ house. The whole family would gather in the backyard, and my grandmother would set out a buffet of colorful dishes—grilled burgers, fresh watermelon slices, and, of course, her famous pasta salad.
I can still hear the laughter and chatter as we gathered around the picnic table, plates in hand, excitement hanging in the air. What I loved the most was watching Grandma drop spoonfuls of her iconic pasta salad into our bowls with a grace that warmed my heart. I was curious about the secret ingredient, and she finally let me in on it—the pickles! She taught me how their tartness brightened up the whole dish and turned it into something truly special.
Those evenings create a special space in my heart, and every time I make this pasta salad, I’m taken back to those cherished moments. It’s not just a recipe; it’s a way to relive those warm, joyful gatherings and create new ones!
Ingredients
Ready to gather the ingredients? Here’s what you’ll need to whip up this delightful Dill Pickle Pasta Salad:
-
8 ounces pasta (e.g., rotini or penne): Use any pasta you love! Rotini adds a fun twist, while penne holds onto the dressing beautifully. Swap with gluten-free pasta if that’s your vibe.
-
1 cup dill pickles, diced: Pickles are the star of the show! For a slightly sweeter flavor, use bread-and-butter pickles, but the classic dill is where it’s at.
-
1/2 cup red onion, chopped: Red onion brings a lovely crunch! If it’s too strong for your palate, use green onions or even shallots for a milder flavor.
-
1/2 cup celery, diced: Celery adds that satisfying crunch. If you’re not a fan, you can replace it with bell peppers for a pop of color and sweetness.
-
1/2 cup mayonnaise: This smooth spread creates the creamy base. For a lighter option, swap it for Greek yogurt.
-
1/4 cup sour cream: The perfect tangy complement! You can also use plain yogurt if you want a healthier twist.
-
1 tablespoon pickle juice: The magic ingredient! It amplifies the pickle flavor. If you’re feeling zesty, add a splash more.
-
1 teaspoon dill weed: It enhances the dill flavor, so sprinkle it in there! If you have fresh dill on hand, use it for an even punchier taste.
-
Salt and pepper to taste: Always season your food! Adjust to your liking for that extra zing.
Step-by-Step Instructions
Ready to unleash your inner chef? Let’s turn those fabulous ingredients into a mouthwatering dill pickle pasta salad!
-
Cook the Pasta:
- Start by boiling a large pot of salted water. Once it’s bubbling like a hot spring, add your pasta. Cook according to package instructions until it’s al dente—this means firm to the bite.
- Chef Tip: Add a splash of olive oil to the water. It helps prevent the pasta from sticking together.
-
Prepare the Veggies:
- While the pasta cooks, grab a cutting board and chop your dill pickles, red onion, and celery.
- Chef Insight: If you rinse the diced onion under cold water, it’ll take away some of the bitterness and mellow it out.
-
Mix the Dressing:
- In a separate bowl, combine the mayonnaise, sour cream, pickle juice, dill weed, and a pinch of salt and pepper. Whisk together until it’s smooth and creamy.
- Little Chef Hack: For a little extra zip, toss in a teaspoon of Dijon mustard. It’ll elevate the flavor and give it a subtle tang!
-
Combine Everything:
- Drain the pasta and let it cool slightly before tossing it in a large mixing bowl. Once it’s warm but not hot, mix in the chopped veggies.
- Pour the dressing over the pasta mixture and stir gently until everything is well coated.
-
Taste and Adjust:
- Now comes the fun part—give it a taste! Adjust the seasoning if needed. If it feels missing something, a little more pickle juice may do the trick.
- Chef’s Pro Tip: Let the pasta salad chill in the fridge for at least 30 minutes before serving. This time allows the flavors to meld beautifully!
Serving Suggestions
When it comes to serving, presentation is key! Here are some fun and fabulous ways to plate your dill pickle pasta salad:
-
In a Beautiful Bowl: Place the pasta salad in a vibrant, colorful bowl and garnish with some fresh dill sprigs on top for that extra touch. It says, “I’m fancy, but I’m still inviting!”
-
In Lettuce Cups: For a fun twist, serve the pasta salad in lettuce cups. This adds a crunch and a refreshing leafiness that complements the flavors!
-
As a Side Dish: Pair it alongside grilled meats, burgers, or hot dogs. The tanginess of the salad cuts through rich flavors, making it a perfect feast companion.
-
On a Picnic Platter: Serving it at a gathering? Bring out a rustic wooden board and plate it with assorted snacks and dips. It’s a guaranteed crowd-pleaser!
Recipe Variations
Now that you’ve mastered the classic dill pickle pasta salad, here are some creative twists to keep things exciting:
-
Bacon Ranch: Add crumbled bacon and a ranch seasoning mix to your dressing. It gives it a smoky flavor that’s oh-so-satisfying!
-
Spicy Kick: Throw in some diced jalapeños or a splash of hot sauce for those who love a little heat. It doesn’t just add spice but also a warm flavor depth.
-
Creamy Avocado: Mix diced avocado into the salad for a creamy texture. It’s a delightful addition that makes this dish more luxurious!
-
Mediterranean Vibes: Swap dill pickles for tangy olives and add crumbled feta cheese instead of sour cream for a Mediterranean-inspired salad.
-
Vegan Delight: Use cashew cream or tofu-based mayonnaise to make this a plant-based dish while keeping it deliciously creamy!
Chef’s Notes
As with any recipe, this dill pickle pasta salad has evolved over time. I’ve tried countless variations, and every time I do, it brings me back to those warm evenings at Grandma’s house. You know how I mentioned that splash of pickle juice? That’s my playful nod to the original recipe, where we used whatever tangy bits we had lying around!
One time, I decided to experiment with adding a bit of goat cheese to the mix, and oh boy, did I fall in love! The creaminess of the cheese gave it a luscious texture. So, don’t be afraid to let your creativity shine through. It’s all about finding the flavors that make your heart sing!
FAQs and Troubleshooting
Let’s tackle some common questions and potential pitfalls. Here are a few FAQs:
-
Why is my pasta salad mushy?
- This can happen if you overcook the pasta. Always cook it al dente, and remember it will continue to cook slightly after draining.
-
Can I make pasta salad ahead of time?
- Absolutely! In fact, it’s better the next day as the flavors meld together. Just store it in an airtight container in the fridge.
-
How do I make it less tangy?
- If you find the salad too tangy, add a little more sour cream or a bit of sugar to balance the flavors out.
-
What if I don’t like pickles?
- No problem! You can omit the pickles and try some of the variants mentioned earlier, like olives or roasted red peppers!
Nutritional Info
Now, let’s talk about nutritional benefits. Each serving of this delightful dill pickle pasta salad packs a punch of flavor without overwhelming you in calories. Depending on the specific ingredients you choose, here’s a general breakdown:
- Calories: Approximately 250-300 calories per serving (about 1 cup)
- Protein: Around 6-8 grams, depending on the dressing and added ingredients
- Fat: About 14-16 grams, primarily from the mayonnaise and sour cream
- Carbohydrates: Around 30-35 grams, mostly from the pasta
- Fiber: About 2-3 grams, thanks to the veggies!
Feel free to adjust the ingredient quantities to fit your dietary needs, whether you’re looking for lighter options or more filling additions!
Final Thoughts
There you have it—a delightful venture into a bowl of creamy, tangy Dill Pickle Pasta Salad that embodies the spirit of togetherness! Whether you’re serving it at a picnic, barbecue, or just enjoying it solo as a comforting meal, this pasta salad is sure to evoke smiles and heartwarming memories.
Remember, cooking is all about having fun and exploring flavors! Let this dish be a canvas for your culinary experiments, and don’t hesitate to make it your own. I’ve shared my memories and tricks with you, now it’s your turn to create your own heartfelt moments in the kitchen. So, dive in, enjoy the process, and most importantly—share it with the ones you love!
Until next time, happy cooking! 🥗
Print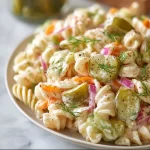
Dill Pickle Pasta Salad
- Total Time: 25 minutes
- Yield: 4 servings 1x
- Diet: Vegetarian
Description
A creamy and tangy pasta salad bursting with flavors of dill pickles, perfect for any occasion.
Ingredients
- 8 ounces pasta (e.g., rotini or penne)
- 1 cup dill pickles, diced
- 1/2 cup red onion, chopped
- 1/2 cup celery, diced
- 1/2 cup mayonnaise
- 1/4 cup sour cream
- 1 tablespoon pickle juice
- 1 teaspoon dill weed
- Salt and pepper to taste
Instructions
- Cook the Pasta: Start by boiling a large pot of salted water. Once it’s bubbling, add your pasta. Cook according to package instructions until it’s al dente.
- Prepare the Veggies: While the pasta cooks, chop your dill pickles, red onion, and celery.
- Mix the Dressing: In a separate bowl, combine the mayonnaise, sour cream, pickle juice, dill weed, and a pinch of salt and pepper. Whisk together until it’s smooth and creamy.
- Combine Everything: Drain the pasta and let it cool slightly. Mix in the chopped veggies, then pour the dressing over the pasta mixture and stir gently until well coated.
- Taste and Adjust: Give it a taste and adjust the seasoning if needed. Chill the pasta salad in the fridge for at least 30 minutes before serving.
Notes
Letting the salad chill enhances the flavors. You can customize the salad with ingredients like bacon, jalapeños, or avocado for added twists!
- Prep Time: 15 minutes
- Cook Time: 10 minutes
- Category: Side Dish
- Method: Mixing
- Cuisine: American
Nutrition
- Serving Size: 1 serving
- Calories: 275
- Sugar: 3g
- Sodium: 450mg
- Fat: 14g
- Saturated Fat: 3g
- Unsaturated Fat: 9g
- Trans Fat: 0g
- Carbohydrates: 34g
- Fiber: 2g
- Protein: 6g
- Cholesterol: 20mg
Keywords: pasta salad, dill pickles, creamy salad, easy recipe, summer dish
Dill Pickle Pasta Salad
Dill Pickle Pasta Salad: A Twist on Comfort Food
Hey there, fellow food lovers! Today, I’m thrilled to share with you a dish that’s not just a recipe but also a heartfelt reminder of summer picnics, family gatherings, and the joy of good food shared with great friends. Yes, you guessed it—it’s Dill Pickle Pasta Salad! This cheery, zesty salad is the epitome of feel-good food that brings a smile to your face, just like a good hug from an old friend.
Now, you might be wondering, what makes pasta salad so special? For starters, they are delightfully versatile, and while traditional pasta salads often take the spotlight, this dill pickle version steals the show! It’s creamy, crunchy, tangy, and so satisfying that you’ll find yourself going back for seconds (or thirds!). Plus, it’s incredibly easy to mix up—it’s the perfect dish for potlucks, barbecues, or even just a quiet dinner at home.
Imagine digging into a bowl of soft pasta shells tossed with crunchy dill pickles and creamy goodness, all underpinned by a hint of just-right spice. Maybe you’ve had a version of this before, or maybe you’re diving into something new. Either way, I promise this is one recipe you won’t want to miss. So grab your favorite kitchen tools and let’s get started making a dish that’s guaranteed to tickle your taste buds and warm your heart!
Personal Story
I’ll never forget the first time I had Dill Pickle Pasta Salad. It was at my Aunt Tilly’s backyard barbecue, and I, being the curious little chef-in-training, decided to sneak into the kitchen to see what deliciousness was going on. As I quietly peered over the countertop, I spotted a massive bowl glistening with a creamy dressing and vibrant green dill. My aunt called it her “secret salad,” but, of course, I was determined to crack the code.
As I scooped a generous helping onto my plate, I was greeted by those bright, tangy flavors that zinged and danced on my palate. The amalgamation of flavors—crunchy pickles, rich cheese, the zing of onion, and the herbaceous freshness of dill—was nothing short of magic. It was the kind of dish that made you feel like summer had splashed itself onto your plate, and I was instantly hooked.
Fast forward to today, and I’ve made my own twists on this classic at countless gatherings, perfecting it year by year. Each time I serve it, it sparks a delightful conversation, a trip down memory lane, and, most importantly, a burst of happiness that comes with sharing good food. So let’s bring that joy into your kitchen!
Ingredients
Here’s what you’ll need to whip up your very own Dill Pickle Pasta Salad. Each ingredient plays a crucial role in this symphony of flavors:
-
½ pound medium shells (about 3 cups)
Perfect pasta shapes are essential! Medium shells hold onto the creamy dressing and pickle juice beautifully. If you want a gluten-free option, swap in gluten-free pasta, or even use chickpea shells for added protein! -
¾ cup sliced pickles
The star of the show! Choose your favorite dill pickles for that ultimate crunch. If you prefer something less tangy, you can substitute sweet pickles for a different flavor profile. -
⅔ cup diced cheddar cheese
Sharp or mild, cheddar adds a creamy richness. Feeling adventurous? Try using pepper jack cheese for a kick or go dairy-free with a cashew cheese alternative! -
3 tablespoons white onion (minced)
Adds a refreshing crunch and mild sweetness. If you’re sensitive to raw onion, soaking them in cold water for 10 minutes can help take away some of their bite. Green onions or shallots are great substitutes if you prefer a milder taste. -
2 tablespoons fresh dill (chopped)
Freshness is key! Dill adds that uplifting herbaceous note. If fresh dill isn’t available, dried dill can work too, but use about a teaspoon since it’s more concentrated. -
½ cup dill pickle juice
This tangy liquid is the secret sauce of your dressing! It enhances the pickle flavor and adds acidity. If you run out of pickle juice, you can substitute it with a splash of vinegar for that zing. -
⅔ cup mayonnaise
Creaminess central! Use full-fat mayonnaise for best flavor, or feel free to opt for Greek yogurt or a vegan mayo to lighten things up. -
⅓ cup sour cream
Adds a lovely tanginess. If you’re allergic to dairy or want a lighter version, a dollop of cashew yogurt can work wonderfully. -
⅛ teaspoon cayenne pepper
A pinch goes a long way! It introduces a subtle heat to the dish without overwhelming the flavors. If you’re not into spicy, feel free to leave it out. -
Salt and black pepper (to taste)
Essential for seasoning. Taste as you go for an optimal flavor balance.
Step-by-Step Instructions
Now that you’ve gathered all your ingredients, let’s jump into making this salad! I promise, it’s as easy as pie (well, easier, since there’s no baking involved).
-
Cook the Pasta
Start by bringing a large pot of salted water to a rolling boil. Add the medium shells and cook according to package instructions until al dente—usually about 9 to 11 minutes. I always like to taste a few shells to ensure they’re just right. While you wait, get your other ingredients prepped! -
Prep the Add-Ins
While the pasta is cooking, chop up your pickles, cheese, onion, and dill. Simple right? The only hack I have for you here is to use a sharp knife for the pickles to avoid squishing them—you want those crunchy pieces intact for the ultimate bite! -
Drain and Cool the Pasta
Once the pasta is cooked, drain it in a colander and rinse it under cool water. This stops the cooking process and helps it cool down so you can mix the salad without the heat wilting your greens. Let it chill while you mix the dressing. -
Make the Dressing
In a large mixing bowl, combine the mayonnaise, sour cream, dill pickle juice, and cayenne pepper. Whisk it all together until it’s smooth and creamy. Pro tip: If you want a lighter dressing, you can substitute half of the mayo with Greek yogurt—same taste with a protein boost! -
Combine the Salad
In the big bowl with the dressing, toss in the cooled pasta, chopped pickles, cheese, onion, and fresh dill. Using a spatula or wooden spoon, gently fold everything together until it’s well coated. This is where the magic happens—each flavor starts mingling! -
Season to Perfection
Taste your salad and add salt and black pepper according to your preferences. Don’t forget to adjust for your specific taste—some like it a bit salty, and others don’t. -
Chill & Serve
Cover the salad and refrigerate for at least an hour before serving. This allows the flavors to meld together beautifully. (But be warned, it’s hard not to steal a spoonful before it fully chills!) Serve in a large bowl and garnish with fresh dill for a pop of color!
Serving Suggestions
When it comes to plating this delectable Dill Pickle Pasta Salad, keep it simple yet inviting! Transfer the salad to a large serving bowl, letting it shine in all its creamy glory. I love to sprinkle a bit of extra chopped dill on top—it not only makes it look gorgeous but also adds that fresh touch!
Consider serving it alongside some grilled chicken or burgers for a well-rounded meal. It also pairs beautifully with BBQ ribs or roasted vegetables. Just a little tip: for outdoor gatherings, pack the salad in a cooler to keep it fresh and cool—no one wants a warm pasta salad at a summer party!
Recipe Variations
Now that you’re ready to make this pasta salad your own, here are some fun variations to consider:
-
Creamy Avocado Dill Pasta Salad
Swap out half the mayo for mashed avocado for a sneakily healthy twist that retains all the creaminess! -
Spicy Pickle Pasta Salad
If you’re a spice lover, toss in some chopped jalapeños or a bit of hot sauce for a spicy kick that’ll set your taste buds on fire. -
Vegan Dill Pickle Pasta Salad
Use a plant-based mayonnaise and dairy-free sour cream for a refreshing vegan option that even meat-lovers will enjoy! -
Crunchy Veggie Dill Pickle Pasta
Incorporate bite-sized pieces of fresh veggies like bell peppers, celery, or even carrots for an extra crunch factor! -
Bacon Lovers’ Delight
Add crumbled crispy bacon for a savory twist that takes this salad to a whole new level of indulgence.
Chef’s Notes
Over the years, I’ve experimented with this recipe many times, and every adaptation brings back wonderful memories. I once added a surprise ingredient—tahini! It added a nutty richness that shocked the flavor profile in the best way. And trust me when I say, kitchens are often filled with delightful accidents; whether an ingredient was misplaced or I ran out of something, those accidental swaps often led to new favorites.
Remember, cooking should be fun, so let your imagination run wild and don’t hesitate to mix things up! Food is meant to be shared, celebrated, and enjoyed, and that’s what this salad exemplifies.
FAQs and Troubleshooting
Q: Can I freeze Dill Pickle Pasta Salad?
A: While you technically can, I don’t recommend it. The creamy dressing won’t hold up well in the freezer and can separate upon thawing. It’s best enjoyed fresh.
Q: My salad turned out too salty. What can I do?
A: If you’ve over-seasoned your salad, try adding a bit more cooked pasta to balance the saltiness. You can also add more mayo or sour cream to dilute the flavors.
Q: How long does this pasta salad last in the fridge?
A: It should stay fresh for about 3 to 4 days in an airtight container. Just give it a stir before serving again for that fresh taste!
Q: Can I use a different type of pickles?
A: Absolutely! Sweet pickles or even bread and butter varieties can offer interesting flavor twists. Experimenting is the key to finding your favorite!
Nutritional Info
Here’s a quick glance at the nutrition for one serving of Dill Pickle Pasta Salad (based on a recipe serving 6):
- Calories: 320
- Total Fat: 22g
- Saturated Fat: 4g
- Cholesterol: 25mg
- Sodium: 600mg
- Total Carbohydrates: 29g
- Dietary Fiber: 1g
- Sugars: 2g
- Protein: 7g
Of course, nutritional content can vary based on your exact ingredient choices, but this should give you a solid idea.
Final Thoughts
And there you have it, friends—my tangy, crunchy, creamy Dill Pickle Pasta Salad that’s bound to be the star at your next gathering! Whether you’re celebrating summer days, family reunions, or simply enjoying a cozy night in, this dish is all about joy, flavor, and connection.
I hope you feel inspired to recreate this at home and add your own flair to make it uniquely yours. Remember, the heart of cooking lies in exploring and having fun, so don’t stress. Most importantly, savor every bite and enjoy sharing this delicious creation with friends and family.
Until next time, keep cooking, keep smiling, and as always—let’s dig in! 🍴✨
Print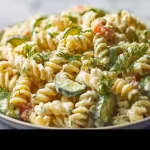
Dill Pickle Pasta Salad
- Total Time: 1 hour 26 minutes
- Yield: 6 servings 1x
- Diet: Vegetarian
Description
A creamy and zesty pasta salad featuring dill pickles, cheddar cheese, and fresh herbs, perfect for summer gatherings.
Ingredients
- ½ pound medium shells (about 3 cups)
- ¾ cup sliced pickles
- ⅔ cup diced cheddar cheese
- 3 tablespoons white onion (minced)
- 2 tablespoons fresh dill (chopped)
- ½ cup dill pickle juice
- ⅔ cup mayonnaise
- ⅓ cup sour cream
- ⅛ teaspoon cayenne pepper
- Salt and black pepper (to taste)
Instructions
- Cook the pasta by boiling salted water and following package instructions until al dente.
- Prep the add-ins by chopping pickles, cheese, onion, and dill.
- Drain and cool the pasta under cold water after cooking.
- Make the dressing by whisking mayonnaise, sour cream, dill pickle juice, and cayenne pepper.
- Combine the salad ingredients with the dressing in a large bowl.
- Season the salad with salt and black pepper to your taste.
- Chill the salad in the refrigerator for at least an hour before serving.
Notes
Serve with grilled chicken or burgers for a complete meal. Pairs well with BBQ ribs or roasted vegetables.
- Prep Time: 15 minutes
- Cook Time: 11 minutes
- Category: Salad
- Method: Mixing
- Cuisine: American
Nutrition
- Serving Size: 1 serving
- Calories: 320
- Sugar: 2g
- Sodium: 600mg
- Fat: 22g
- Saturated Fat: 4g
- Unsaturated Fat: 6g
- Trans Fat: 0g
- Carbohydrates: 29g
- Fiber: 1g
- Protein: 7g
- Cholesterol: 25mg
Keywords: pasta salad, dill pickles, creamy salad, summer recipes, side dish, potluck recipe

Caesar Pasta Salad
The Ultimate Caesar Pasta Salad: A Taste of Nostalgia
Hey there, fellow foodies! If you’re looking for a delightful dish that combines the classic flavors of a Caesar salad with the heartiness of pasta, then you’ve stumbled upon the right recipe! Welcome to Feastical! Today, we’re making a Caesar Pasta Salad that’s as comforting as your favorite weekend binge-watch and as flavorful as your grandma’s secret salad dressing.
Picture this: It’s a sunny afternoon, and you’ve just come home from a long week—tired but ready for something delicious. You open your fridge, and there it is, glistening like a gold medal—your bowl of Caesar Pasta Salad. Crisp layers of romaine lettuce, crunchy croutons, and crispy bacon mingle with perfectly cooked pasta, all enveloped in a creamy dressing that sings like a summer chorus. This bowl of goodness is not just a meal; it’s a memory waiting to happen.
I first created this dish during my college days when my friends and I would gather for potlucks. With everyone’s schedules packed tighter than a can of sardines, we needed something that was quick, easy, and above all, drool-worthy. Fast forward to today, and I’m here sharing this loving tribute to that carefree time with you. So let’s roll up those sleeves and get cooking!
Personal Story
Ah, the memories of college! I can still picture my kitchen filled with laughter and scents, everyone embarking on culinary experiments. One sunny Saturday, we were all eager to impress at our little gathering. There was Josh, attempting to make homemade pizza, and Sarah, who decided that crafting a complicated soufflé could somehow earn her a culinary award. Meanwhile, I was nervously tossing together what would become my famous Caesar Pasta Salad.
I vividly remember the moment when my favorite dish made its debut. It was a scramble—not a single ingredient had escaped my kitchen dance. I was mixing, tasting, and, of course, sampling spoonfuls while the others were neck-deep in their cooking chaos. The laughter and chatter filled the air as I tossed the pasta with the dressing, eyes lit up and spirits high.
When it was finally time to serve, the looks on my friends’ faces as they took that first bite were worth every second I’d spent in the kitchen. The mixture of creamy dressing, crunchy lettuce, and savory bacon was met with a chorus of oohs and ahhs. It wasn’t just a salad; it was an experience, a burst of flavor that tied us together. That day reinforced my belief in the power of good food to create community—and a decent amount of friendly competition.
Ingredients
Now that we’re set in the mood, let’s talk about the stars of our show! Here’s what you’ll need to create this vibrant Caesar Pasta Salad:
-
Crisp Romaine Lettuce: The heart of any Caesar salad! It adds that fresh crunch. Substitution tip: You can mix in some fresh spinach for added flavor and nutrition.
-
Crunchy Croutons: Store-bought or homemade, they add a delightful crunch! Fun fact: You can make croutons from leftover bread—just toss them with olive oil and seasonings and bake!
-
Bacon: A savory addition that gives the salad a smoky flavor. Don’t want bacon? Try crispy chickpeas for a vegetarian option!
-
Parmesan Cheese: Grated or shaved, it adds a tangy note. No Parmesan? Pecorino Romano works wonders too!
-
Pasta (your choice): I love using rotini or fusilli for their ability to hold onto the dressing, but feel free to use any pasta shape you love.
-
Creamy Caesar Dressing: The star! You can use store-bought or making your own is a fun way to impress.
-
Garlic: Freshly minced garlic adds a zing! If you’re sensitive to garlic’s bite, try roasting it for a milder, sweeter flavor.
-
Salt and Pepper: The essential seasoning duo. Adjust to taste!
Each of these ingredients plays a crucial role, and together they create a symphony of flavors. The contrast of textures—from the crunch of the lettuce to the creaminess of the dressing—will have your taste buds dancing!
Step-by-Step Instructions
Alright, let’s get down to the nitty-gritty of bringing this Caesar Pasta Salad to life. Follow these steps, and you’ll have a dish that’ll impress even the pickiest eaters!
Step 1: Cook Your Pasta
Begin by bringing a large pot of salted water to a boil. Add your pasta of choice and cook according to the package directions until al dente. This typically takes about 8-10 minutes. Why salt the water, you ask? It enhances the pasta’s flavor. Just trust me on this one!
Step 2: Prepare the Bacon
While the pasta is doing its thing, heat a skillet over medium heat. Add the bacon and cook until it’s crispy, turning occasionally to avoid burning. This usually takes 5-7 minutes, but keep an eye on it! Once golden brown, transfer the bacon to a paper towel-lined plate to drain the excess fat. Note: Don’t toss that fat just yet—use it to sauté veggies later!
Step 3: Gather the Greens
While your pasta cooks and bacon crisps, wash and chop the romaine lettuce into bite-sized pieces. Don’t be shy—really get in there and make it look inviting!
Step 4: Make It Creamy
In a large bowl, add the cooked and drained pasta, romaine, croutons, crispy bacon, and sprinkle in the Parmesan. Now it’s time for the dressing! Pour in a generous amount of creamy Caesar dressing. You can always add more later; it’s easier to start with less and adjust to taste.
Step 5: Toss it All Together
Using two large spoons, gently fold all the ingredients together until they are evenly mixed. Check for seasoning and add salt and pepper as needed. You want every piece to be coated in that creamy goodness!
Step 6: Chill (Optional)
If you have time, let it chill in the fridge for 20-30 minutes to let the flavors meld together. If you’re super hungry (like I usually am), you can skip this step—it’s still delicious!
Step 7: Serve It Up
Finally, spoon the salad into a large serving bowl or individual plates. Keep a little extra Parmesan on hand for those who want to kick it up a notch!
Voilà, you’ve created a glorious Caesar Pasta Salad that’s ready to be devoured!
Serving Suggestions
Now that your dish is all ready, let’s talk presentation. This dish needs a beautiful serving dish—something that showcases all those layers of color and texture. A big, shallow bowl works wonders, allowing everyone to dig in easily.
Garnish your salad with extra Parmesan cheese and a sprinkle of freshly ground black pepper for that gourmet touch. If you want to take it over the top, add a few sprigs of fresh parsley or even some cherry tomatoes for a pop of color. Not only does this make for a tasty treat, but it’s also an Instagram-ready moment!
Recipe Variations
Want to shake things up a bit? Here are a few fabulous variations to put your spin on this Caesar Pasta Salad:
-
Mediterranean Caesar: Swap the bacon with kalamata olives and add sun-dried tomatoes for a tangy kick.
-
Veggie Lover’s Delight: Toss in some cherry tomatoes, cucumbers, and bell peppers for an extra crunch and burst of freshness.
-
Pesto Twist: Instead of Caesar dressing, use a creamy pesto for a different flavor profile. It adds an herbaceous edge that’s simply divine!
-
Protein Boost: Add grilled chicken or shrimp for some protein—perfect for making this salad a main meal.
-
Gluten-Free/GF Pasta: Use your favorite gluten-free pasta to keep everything inclusive for your gluten-sensitive friends.
Each variation brings a new layer of flavor! Don’t hesitate to get creative and make it your own.
Chef’s Notes
For me, cooking is all about evolution—recognizing what works and what doesn’t! When I first began making this recipe, the dressing was store-bought, and believe me, it was good. But as I grew more confident, I experimented with making my own Caesar dressing from scratch, and let me tell you, it took this salad to another level!
Funny enough, one time I decided to be “on-trend” by adding a dash of lemon zest, and the result was a pleasant surprise! Now I can’t make it without that extra zing. Cooking should always be an adventure, and the kitchen is your playground!
FAQs and Troubleshooting
1. What if my pasta is too mushy?
If you overcooked the pasta, there’s no coming back. But you can make it work by mixing in a little extra dressing or serving it as a warm pasta salad instead!
2. My salad is too dry. What can I do?
Fear not! Just drizzle in a bit more dressing and toss to combine. The right balance of creaminess is key!
3. How long will leftovers keep?
This salad is best enjoyed fresh, but if stored in an airtight container, it should last 2-3 days in the fridge. Just be prepared that the croutons will lose their crunch!
4. Can I prepare this salad ahead of time?
Absolutely! You can prep all the individual components (pasta, dressing, croutons, and lettuce) ahead of time. Just combine right before serving to keep everything fresh and crisp.
Nutritional Info
For those who love to keep tabs on their food intake, here’s a rough estimate of the nutritional breakdown for one generous serving of Caesar Pasta Salad (based on standard ingredients):
- Calories: ~450
- Protein: ~15g
- Carbohydrates: ~48g
- Fat: ~25g
Nutritional values can vary based on precise ingredients and portions, so adjust as needed!
Remember, food is not just fuel—it’s meant to nourish our souls, too!
Final Thoughts
And there you have it, my friends! This Caesar Pasta Salad is more than just a combination of ingredients; it’s a dish filled with stories, laughter, and memories just waiting to manifest in your kitchen!
Whether you’re whipping this up for a party, a family dinner, or just because life is too short not to indulge in deliciousness, I promise you’ll win hearts (and stomachs) with this recipe. So share it, savor it, and most importantly—enjoy every bite!
I can’t wait to hear your stories and see your delicious creations. Tag me on social media, and let’s celebrate the love of cooking together. Bon appétit!
Print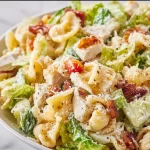
The Ultimate Caesar Pasta Salad
- Total Time: 25 minutes
- Yield: 4 servings
- Diet: Omnivore
Description
A delightful dish combining classic Caesar salad flavors with hearty pasta, perfect for any gathering.
Ingredients
- Crisp Romaine Lettuce
- Crunchy Croutons
- Bacon
- Parmesan Cheese
- Pasta (your choice)
- Creamy Caesar Dressing
- Garlic
- Salt and Pepper
Instructions
- Cook your pasta by bringing salted water to a boil and cooking according to package directions until al dente (8-10 minutes).
- Prepare the bacon in a skillet over medium heat until crispy (5-7 minutes). Drain on paper towels.
- Gather the greens by washing and chopping the romaine lettuce into bite-sized pieces.
- Add the cooked pasta, romaine, croutons, crispy bacon, and Parmesan into a large bowl.
- Pour in the creamy Caesar dressing and mix gently until well combined.
- Chill in the fridge for 20-30 minutes if desired.
- Serve in a large bowl or on individual plates, garnished with extra Parmesan and freshly ground black pepper.
Notes
Feel free to experiment with variations like Mediterranean Caesar or Protein Boost by adding grilled chicken or shrimp.
- Prep Time: 10 minutes
- Cook Time: 15 minutes
- Category: Salad
- Method: Mixing
- Cuisine: American
Nutrition
- Serving Size: 1 serving
- Calories: 450
- Sugar: 3g
- Sodium: 800mg
- Fat: 25g
- Saturated Fat: 8g
- Unsaturated Fat: 15g
- Trans Fat: 0g
- Carbohydrates: 48g
- Fiber: 3g
- Protein: 15g
- Cholesterol: 40mg
Keywords: Caesar salad, pasta salad, comfort food, party food, easy recipe

Hawaiian Chicken Salad
Hawaiian Chicken Salad: A Taste of Aloha!
Aloha and welcome to Feastical, fellow food enthusiasts! Today, we’re diving into a dish that’s as sunny and vibrant as a Hawaiian sunset—Hawaiian Chicken Salad! Seriously, if you’re looking for a recipe that balances delightful flavors, freshness, and a touch of island flair, you’ve found it.
Why am I so excited about this salad? Because it’s a celebration in a bowl! With tender, shredded chicken, juicy pineapple, crunchy macadamia nuts, and a zesty dressing, it brings a little taste of paradise to your kitchen. Plus, you can whip it up in no time, making it perfect for a quick lunch, a potluck, or even a casual dinner on a warm summer evening.
The best part? This Hawaiian Chicken Salad is not just about satisfying your hunger; it’s about evoking nostalgia and creating beautiful memories with those you love. Picture this: gathering with friends and family on a sun-drenched patio, laughter filling the air while you savor each refreshing bite. It’s more than a dish; it’s an experience—a way to connect, share, and savor life together.
So roll up your sleeves, grab your favorite apron, and let’s get started! Whether you’re a kitchen whiz or a total newbie, I promise you can master this Hawaiian Chicken Salad recipe and impress everyone around you. Trust me; I’ll be right there with you, guiding you every step of the way!
Personal Story
Let me take you back to my first encounter with Hawaiian Chicken Salad. It was several years ago during a vibrant summer gathering at a friend’s backyard BBQ. The scents of grilling burgers mingled with the salty ocean breeze, and as the sun dipped low, my plate was filled with colorful dishes.
Then, I spotted it—the Hawaiian Chicken Salad, nestled amid a rainbow of other dishes. My friend, who was known for her cooking prowess, had made it. One bite, and I was instantly transported to a tropical paradise. The sweetness of the pineapple, the crunch of the macadamia nuts, and the creamy dressing danced like a festive luau in my mouth!
The salad sparked not just a tastebud adventure; it ignited a passion in me to recreate and share this wonderful dish. That gathering taught me the power of food to weave stories and create connections. And here I am, sharing this recipe with you to carry on that tradition of bringing joy through delicious culinary adventures!
Ingredients
Here’s what you’ll need to make your Hawaiian Chicken Salad unforgettable:
-
2 cups cooked chicken, shredded
- Use rotisserie chicken for convenience or poach your own. Leftovers work great here too!
-
1 cup pineapple chunks
- Fresh, canned, or even grilled—pineapple always brings that juicy sweetness. If you’re not a fan, try mango as an alternative!
-
1/2 cup macadamia nuts, chopped
- These creamy, buttery nuts add a rich texture. Pine nuts or chopped pecans can serve as suitable substitutes if needed.
-
1/4 cup red onion, diced
- Red onion offers a mild bite. Allow it to soak in cold water for a few minutes to mellow the flavor if you’re sensitive to raw onions.
-
1/4 cup celery, diced
- Celery brings crunch! For a twist, consider cucumber for a refreshing take.
-
1/4 cup fresh cilantro, chopped
- Cilantro adds an aromatic note. If you’re not a fan, fresh parsley or basil can work just as well.
-
1/4 cup plain Greek yogurt or mayo
- I love Greek yogurt for its tanginess and health benefits, but regular mayo will give you that classic creaminess.
-
2 tablespoons lime juice
- Fresh lime juice brightens everything up. Lemon juice is a great alternative if you don’t have limes.
-
Salt and pepper to taste
- Always remember to season your salad! A little sprinkle can make all the difference.
Step-by-Step Instructions
Now that we have our ingredients lined up, let’s get to the fun part—making the Hawaiian Chicken Salad! Follow these step-by-step instructions, and I promise you’ll have a dish you’ll want to make over and over again.
-
Prepare Your Chicken
If you haven’t already, shred your cooked chicken. If you’re using rotisserie, simply pull it apart. Shredding ensures it’s evenly distributed throughout the salad. Pro tip: Use two forks—it’s therapeutic! -
Chop Your Veggies
Take a moment to dice your red onion, celery, and chop that cilantro. The key here is to make sure your pieces are similar in size for even mixing. And remember—don’t be afraid to use those chef’s knives! -
Pineapple Time
If you’re using fresh pineapple, cut it into bite-sized chunks. If you’re using canned pineapple, drain it well. That syrup might look tempting, but we want our salad light and refreshing! -
Prep the Macadamia Nuts
Grab your favorite chopping board and give those macadamia nuts a good chop. Keep some larger pieces for surprise crunchiness in every bite. The nutty aroma will fill your kitchen—divine! -
Making the Dressing
In a large mixing bowl, blend the Greek yogurt (or mayo), lime juice, salt, and pepper. Give it a little taste test—add more lime juice if you like it zesty! -
Combine It All
Now, toss the shredded chicken, pineapple, chopped veggies, and macadamia nuts into that mixing bowl. Fold everything gently, ensuring every piece gets coated in that creamy dressing. -
Chill and Marinate
For an added flavor boost, let the salad chill in the fridge for about 30 minutes. This allows the flavors to meld, akin to how a good marinade works its magic! -
Taste Test!
After chilling, give it a taste! Adjust seasonings if needed—more salt, pepper, or lime until it sings!
Serving Suggestions
Presenting your Hawaiian Chicken Salad is an art in itself. Here are some fun ideas on how to serve it:
-
Chill Out
Serve the salad straight from the fridge in a beautiful, colorful bowl. The bright ingredients speak for themselves, and that cold salad is incredibly refreshing. -
Lettuce Wraps
For a low-carb option, use large lettuce leaves like romaine or butter lettuce to wrap spoonfuls of the Hawaiian Chicken Salad. It’s like a little edible gift—you’ll impress your friends with your creativity! -
In a Pita Pocket
This salad makes a fabulous filling for whole-wheat pitas! Add some extra greens or sprouts for a crunch. -
Pair with Rice or Quinoa
For a heartier meal, serve the salad atop a bed of fluffy rice or quinoa. The grains soak up the juice and dressing, leading to every mouthful being bursting with flavor. -
Garnish with Extra Citrus
A slice of lime or a sprinkle of extra cilantro can take your presentation up a notch. It’s all about those little details!
Recipe Variations
One of the best parts about cooking? You can always make it your own! Here are some fun twists on the classic Hawaiian Chicken Salad:
-
Tropical Fusion
Swap out the pineapple for diced mango or kiwi for an extra tropical twist. -
Spicy Kick
Add some diced jalapeños or a sprinkle of red pepper flakes for a heat level that’ll make your taste buds dance. -
Greek Twist
Incorporate feta cheese for a salty kick and swap cilantro for fresh dill for a Mediterranean twist on this classic! -
Nutty Delight
Try substituting almonds or walnuts instead of macadamia nuts for a different flavor profile. -
Vegan Version
Use chickpeas or seitan instead of chicken while substituting vegan yogurt for an equally delightful, plant-based treat.
Chef’s Notes
Oh, the memories this recipe conjures! I’ll never forget the first time I experimented with adding a splash of coconut milk to my dressing, inspired by the soothing flavors of tropical drinks. It was an instant hit! That’s the wonderful thing about cooking—it evolves with you. This Hawaiian Chicken Salad is never just a one-and-done recipe; it’s a canvas for your culinary creativity.
And feel free to pack it up for lunch the next day! It tastes even better as the flavors continue to mingle and settle. Just make sure to keep the nuts separate until you’re ready to serve, so they stay nice and crunchy.
FAQs and Troubleshooting
Q1: Can I use frozen chicken?
Absolutely! Just thaw it out ahead of time, cook it, and shred it as you normally would. Perfectly convenient!
Q2: What if I don’t have any Greek yogurt or mayo?
No worries! You can use sour cream, or even a splash of coconut milk for a lighter, tropical flavor.
Q3: How long does the salad last in the fridge?
If stored properly in an airtight container, it should last up to 3 days—just remember, the fresher, the better!
Q4: It turned out too dry—what can I do?
Simply add a little more dressing or a splash of lime juice to moisten things up.
Nutritional Info (per serving)
- Calories: Approximately 320
- Protein: 28g
- Fat: 18g
- Carbohydrates: 18g
- Fiber: 2g
- Sugars: 5g
This salad packs a hearty protein punch thanks to the chicken and nuts and incorporates fresh fruits and veggies. A satisfying and nutritious option any day of the week!
Final Thoughts
So there you have it—your ultimate guide to making a delicious Hawaiian Chicken Salad! From the vibrant ingredients to its extraordinary flavors, this dish embodies all the joy of cooking. I hope you found this adventure in flavors as delightful as I did.
Remember, food is not just about filling your belly; it’s about nourishing your soul and bringing people together. Get creative with it, share it with loved ones, and make it your own.
Thanks for joining me today at Feastical. Now, go out there and create your culinary magic in the kitchen. Keep it simple, keep it soulful, and, as always, keep it delicious!
Happy cooking, my friends! 🌺🍍
Print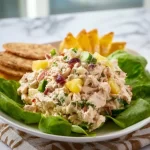
Hawaiian Chicken Salad
- Total Time: 45 minutes
- Yield: 4 servings 1x
- Diet: Gluten-Free
Description
A vibrant Hawaiian Chicken Salad packed with shredded chicken, juicy pineapple, crunchy macadamia nuts, and a zesty dressing, perfect for quick meals or gatherings.
Ingredients
- 2 cups cooked chicken, shredded
- 1 cup pineapple chunks
- 1/2 cup macadamia nuts, chopped
- 1/4 cup red onion, diced
- 1/4 cup celery, diced
- 1/4 cup fresh cilantro, chopped
- 1/4 cup plain Greek yogurt or mayo
- 2 tablespoons lime juice
- Salt and pepper to taste
Instructions
- Prepare your chicken by shredding it if not already done.
- Chop your veggies including red onion, celery, and cilantro.
- Pineapple should be cut into bite-sized chunks or drained if canned.
- Prep the macadamia nuts by chopping them, keeping some pieces larger for crunch.
- Making the dressing by mixing Greek yogurt (or mayo), lime juice, salt, and pepper in a large bowl.
- Combine the shredded chicken, pineapple, chopped veggies, and macadamia nuts into the bowl.
- Chill for about 30 minutes to allow flavors to meld.
- Taste and adjust the seasoning if necessary.
Notes
Best served chilled. Optional: Serve with lettuce wraps, in pita pockets, or over rice/quinoa.
- Prep Time: 15 minutes
- Cook Time: 0 minutes
- Category: Salad
- Method: Mixing
- Cuisine: Hawaiian
Nutrition
- Serving Size: 1 serving
- Calories: 320
- Sugar: 5g
- Sodium: 300mg
- Fat: 18g
- Saturated Fat: 3g
- Unsaturated Fat: 10g
- Trans Fat: 0g
- Carbohydrates: 18g
- Fiber: 2g
- Protein: 28g
- Cholesterol: 75mg
Keywords: Hawaiian chicken salad, summer salad, quick lunch, tropical flavors, healthy salad

Chicken Caesar Pasta Salad
Chicken Caesar Pasta Salad: A Delicious and Easy Recipe to Savor
Hey there, food lovers! It’s your pal Beau Collier here, and I’m excited to share a fantastic recipe that perfectly blends the classic vibes of Caesar salad with the heartiness of pasta. Yes, you guessed it—I’m talking about Chicken Caesar Pasta Salad! If you’re looking to whip up something delightful and satisfying for lunch, dinner, or a potluck, this dish has got your back. It’s light yet filling, zesty, and super easy to make.
This salad stands out because it captures all the yummy flavors of a Caesar salad while transforming it into a comforting pasta dish. Whether you’re sitting down for a relaxed family meal or treating yourself to a lovely solo dinner, this Chicken Caesar Pasta Salad is everything you could want and more.
Let me tell you, there’s something downright heartwarming about salads. Growing up, my grandmother made a killer Caesar salad for our Sunday family dinners. I can still remember the aroma of garlic and anchovies wafting through the kitchen and her little secret twist that always made it pop. We’d pile our plates high, catch up on stories and just enjoy that meal together. Those dinners were the perfect blend of fun, laughter, and fantastic food, exactly what inspired me to dive deeper into the culinary world.
Now, combining that memory with pasta, I thought, “Why not take those flavors I adore and elevate them into a pasta salad?” And voilà! Here we are, ready to create a crowd-pleaser that’s confident in its deliciousness yet easy enough for even the kitchen novices among us. Grab your apron and let’s get cooking!
Personal Story
Every dish we create has a little piece of our heart in it, doesn’t it? For me, the memory of my grandmother making her famous Caesar salad brings an avalanche of nostalgia. I remember the warmth of her kitchen, the clinking of utensils, and the happiness that swirled around like the delicious scents wafting from the stove. One particular summer evening stands out; we had just finished a game of backyard frisbee, and my cousins and I were starving.
Grandma had her apron on, and with a wink, she got us all involved in prepping the meal. I remember mangling the romaine lettuce, while she’d laugh and say, “It’s not about perfection; it’s about enjoying what you make.” We tossed in the croutons and grated cheese, and, of course, everyone was sneaking bites of that creamy dressing. When dinner was finally served, we gathered around the rickety old table outside, with the sun setting, laughter ringing, and our plates overflowing. That dish became the star of every Sunday dinner, reminding me that food has this magical power to unite us.
As I developed the Chicken Caesar Pasta Salad, I channeled the essence of those unforgettable gatherings and went on a quest to recreate that joy. It’s about taking the simple pleasures of life, like a homemade salad, and sharing it with others, just like grandma did. So if you’re ready to put on your chef hat, let’s make something that can generate beautiful memories for you, too!
Ingredients
Before we dive in, here’s what you’ll need to make this scrumptious Chicken Caesar Pasta Salad. Let’s break it down:
-
2 cups cooked pasta (penne or rotini)
Any pasta works, but I adore penne for its shape and texture—it holds onto the dressing beautifully! You can substitute whole grain or gluten-free pasta if preferred. -
1 cup cooked chicken, diced
Use rotisserie chicken for the ultimate convenience—just shred and toss it in. If you want to keep it plant-based, opt for chickpeas or make it a vegetarian delight with seitan. -
2 cups romaine lettuce, chopped
Crisp and fresh, romaine holds up nicely in salads. If you’re feeling adventurous, you can use kale for a twist or even spinach for a softer bite. -
1/2 cup cherry tomatoes, halved
Juicy, sweet, and pop-in-your-mouth goodness! You can swap these with diced bell peppers for a more colorful option or roasted tomatoes for a caramelized flavor. -
1/4 cup grated Parmesan cheese
Cheese? Yes, please! This adds richness to your salad. If you’re lactose intolerant, try nutritional yeast or a dairy-free Parmesan cheese. -
1/4 cup Caesar dressing
Classic dressing brings it all together! You can either use store-bought or whip up a homemade version. For a lighter option, substitute with Greek yogurt-based dressing. -
Salt and pepper to taste
Don’t forget to season! The right balance pulls everything together. Feel free to add other herbs and spices to customize the flavor. -
Croutons (optional)
Crispy crunch is a winner! Make your own by baking bread cubes with olive oil and garlic for a delightful homemade touch.
Step-by-Step Instructions
Now, let’s get into the fun part: cooking! Follow these steps to create your delicious Chicken Caesar Pasta Salad.
Step 1: Cook the Pasta
Begin by bringing a large pot of salted water to a boil. Add your chosen pasta—penne or rotini—and cook according to the package instructions until al dente. This usually takes about 8-10 minutes. Why salted water, you ask? It flavors the pasta as it cooks! Drain and rinse under cold water for a minute to stop the cooking process and cool it down for your salad. Set it aside while you prep the other ingredients.
Step 2: Prepare the Chicken
If you haven’t already, dice your cooked chicken into bite-sized pieces. If you’re using rotisserie chicken, simply shred the meat using two forks or your hands. It makes everything so easy! Pro tip: You can grill up chicken breasts with simple seasoning (salt, pepper, and a squeeze of lemon) to add that smoky charred flavor if you’re in the mood for some extra effort.
Step 3: Chop the Veggies
Next, grab a chopping board and dice up the crisp romaine lettuce, halving the cherry tomatoes. Don’t sweat it if things get a little messy; that’s part of the fun! I love to use a large bowl to mix everything together as I go to save on dishes.
Step 4: Combine in the Bowl
In your large mixing bowl, combine the cooked pasta, diced chicken, chopped romaine, and halved cherry tomatoes. Give everything a gentle toss to combine. You want every piece of pasta to be coated with that Caesar dressing!
Step 5: Add Dressing and Cheese
Drizzle in the Caesar dressing and sprinkle the grated Parmesan cheese over the top. Now the fun begins! Using tongs or a spatula, gently toss until everything is evenly coated in that creamy, dreamy dressing. This is your chance to taste and adjust the seasoning. A splash of lemon juice or a sprinkle of pepper can take it to the next level!
Step 6: Final Touches and Serve
If you’re opting for croutons, sprinkle them on top just before serving, so they maintain that delightful crunch. Serve immediately or refrigerate for about 30 minutes to let the flavors mingle even more. If serving later, toss in a bit more dressing and croutons right before it hits the table.
Serving Suggestions
When it comes to serving, presentation matters! You can plate this Chicken Caesar Pasta Salad in a big bowl for family-style dining or serve individual portions in wide bowls. Add a few extra cherry tomato halves on top and a light sprinkle of more Parmesan for that appealing look.
Consider pairing it with some crusty garlic bread or grilled veggies on the side for an extra colorful touch! If you’re feeling fancy, garnish with fresh parsley or basil to elevate those visuals. Either way, ensure to have forks at the ready because this dish is about to become a new favorite!
Recipe Variations
Want to jazz things up? Here are some creative twists you can try:
-
Mediterranean Delight: Swap out Roman lettuce for spinach, add kalamata olives, diced cucumbers, and feta cheese. Toss in a lemon vinaigrette for a fresh vibe.
-
Spicy Kick: Incorporate some sliced jalapeños or a spicy Caesar dressing for those who enjoy a bit of heat. You can also toss in some roasted red peppers for an additional flavor burst!
-
Vegan-Friendly: Keep the salad plant-based by using chickpeas instead of chicken, vegan Parmesan, and a dairy-free Caesar dressing. It’s just as satisfying!
-
Whole Wheat Wonder: Utilize whole wheat pasta for added fiber and protein. It’s perfect for health-conscious individuals looking for a wholesome meal.
-
Pesto Caesar Twist: Add a swirl of basil pesto along with the dressing for a herby Italian twist and a pop of color!
Chef’s Notes
As much as I love this Chicken Caesar Pasta Salad, every time I make it, I’m reminded of how adaptable it is! I started this recipe to create a quick lunch option, but over time, I’ve turned it into a party favorite by mixing and matching ingredients. There was one memorable summer BBQ where I experimented by adding crispy bacon bits, and let me tell you, that was a hit!
Salads like this one remind us that cooking is all about happiness, love, and creativity. So, don’t be afraid to make it your own! The kitchen is your playground, and food is just a canvas waiting for your masterpiece!
FAQs and Troubleshooting
Let’s dive into some common questions and potential mishaps you might encounter while making this dish:
-
Can I make it ahead of time?
Absolutely! You can prep all the ingredients a day in advance. Just store the dressing separately so the pasta doesn’t get mushy before serving. -
What if my pasta is too soft?
No worries! You can use it as is, as long as it’s not mushy. Tossing the pasta with ice-cold water immediately after cooking locks in what’s left of that al dente texture. -
Is it healthy?
This dish has protein from the chicken and a good amount of veggies, making it relatively healthy! If you’re aiming for fewer calories, light dressings work wonders! -
How do I prevent the pasta salad from getting soggy?
To keep it fresh, use less dressing until you’re ready to serve. Toss in more as needed right before digging in!
Nutritional Info
A typical serving (about 1.5 cups) of your Chicken Caesar Pasta Salad contains approximately:
- Calories: 350
- Protein: 28g
- Carbohydrates: 40g
- Fat: 12g (mostly from the dressing and cheese)
- Fiber: 3g
Of course, these figures can vary based on the specific brands and ingredients you choose, but it’s generally a wholesome option packed with flavor and good-for-you components.
Final Thoughts
There you have it! Your very own Chicken Caesar Pasta Salad recipe, a harmonious blend of flavors and memories that brings joy to the table. Remember, the kitchen is a place for exploration—feel free to tweak this recipe to suit your tastes.
Maybe it’s a dish for your busy weekdays or a go-to at gatherings—you can’t go wrong with this crowd-pleaser! So grab a fork, invite your friends or family, and share those good vibes! Here’s to tasty food and the great moments it creates together. Bon appétit!
Hope you enjoyed this recipe just as much as I love sharing it. Whether it’s the tiny details or a dash of love, the meal you prepare can create unforgettable moments. Until next time, keep cooking, and stay fabulous!
Print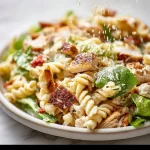
Chicken Caesar Pasta Salad
- Total Time: 25 minutes
- Yield: 4 servings 1x
- Diet: Gluten-Free
Description
A delicious and easy Chicken Caesar Pasta Salad that blends the classic flavors of Caesar salad with hearty pasta.
Ingredients
- 2 cups cooked pasta (penne or rotini)
- 1 cup cooked chicken, diced
- 2 cups romaine lettuce, chopped
- 1/2 cup cherry tomatoes, halved
- 1/4 cup grated Parmesan cheese
- 1/4 cup Caesar dressing
- Salt and pepper to taste
- Croutons (optional)
Instructions
- Cook the Pasta: Bring a large pot of salted water to a boil. Add pasta and cook according to package instructions until al dente. Drain and rinse under cold water.
- Prepare the Chicken: Dice or shred your cooked chicken into bite-sized pieces.
- Chop the Veggies: Dice romaine lettuce and halve the cherry tomatoes.
- Combine in the Bowl: In a large mixing bowl, combine cooked pasta, diced chicken, chopped romaine, and halved tomatoes.
- Add Dressing and Cheese: Drizzle Caesar dressing and sprinkle grated Parmesan cheese over the salad and toss gently.
- Final Touches and Serve: Top with croutons if desired and serve immediately, or refrigerate to let flavors mingle.
Notes
This salad is versatile and can be made ahead of time; just keep the dressing separate to prevent sogginess.
- Prep Time: 15 minutes
- Cook Time: 10 minutes
- Category: Salad
- Method: Mixing
- Cuisine: American
Nutrition
- Serving Size: 1 serving
- Calories: 350
- Sugar: 4g
- Sodium: 400mg
- Fat: 12g
- Saturated Fat: 4g
- Unsaturated Fat: 6g
- Trans Fat: 0g
- Carbohydrates: 45g
- Fiber: 3g
- Protein: 28g
- Cholesterol: 30mg
Keywords: Chicken Caesar Salad, Pasta Salad, Easy Salad Recipe, Quick Dinner

Caesar Pasta Salad
Caesar Pasta Salad: A Fresh Take on a Classic Favorite
Hey there, fellow food lovers! If you’re ready for a delightful twist on an all-time classic, you’re in for a treat with my Caesar Pasta Salad. This dish combines the creamy, zesty flavors of traditional Caesar salad with heartwarming pasta goodness. I’m Beau Collier, and I believe that food should not only bring comfort but also bring us together. Nothing sparks joy like gathering around a table, sharing laughter and delight over a delicious meal.
Picture this: it’s a sun-drenched afternoon, and you find yourself whipping up this salad for friends and family. It’s simple yet elegant, a true crowd-pleaser, perfect for picnics, potlucks, or even a cozy dinner at home. You get to enjoy the crunchy romaine, succulent cherry tomatoes, and delightful croutons, all coated in a luscious Caesar dressing that dances on your palate. Plus, you can spice things up with grilled chicken or shrimp for an extra protein punch.
In this post, I’m diving deep into the world of Caesar Pasta Salad—sharing not only the recipe, but also personal stories, savvy tips, and some extra delicious variations. Whether you’ve been cooking for years or are just starting your culinary adventure, this recipe is designed to be accessible, fun, and, above all, tasty. So grab your apron, and let’s get cooking!
Personal Story
As a child, my culinary journeys often began in my grandmother’s kitchen. She had this authentic way of crafting meals filled with love and warmth—it was where I fell in love with cooking. I remember one sunny afternoon, perched on a stool, watching her prepare a classic Caesar salad. The way she expertly tossed the crisp romaine and creamy dressing brought a twinkle to my young eyes. She would tell stories about her youth as she made her famous homemade dressing, and I was completely captivated.
Years later, inspired by those memories, I wanted to recreate that experience in my kitchen, but with a twist. Enter the Caesar Pasta Salad, which became a staple at family gatherings. Bringing that same love and joy into a modern dish was my goal. It’s more than just food; it’s a heartfelt connection to my past, a way to honor those cherished moments while creating new memories. Now, every time I make this salad, I can hear her voice, guiding me along the way. It’s a dish that reminds us of the joys of cooking with loved ones, making it a perfect addition to any table.
Ingredients
Gather your ingredients, and let’s get started on this delightful Caesar Pasta Salad! Here’s what you’ll need:
-
8 ounces of pasta (e.g., rotini or penne): I love using rotini because the spirals catch the dressing perfectly, but feel free to use any pasta you have on hand! Whole wheat or gluten-free varieties work great, too.
-
2 cups romaine lettuce, chopped: Fresh romaine adds the perfect crunch! If you’re feeling adventurous, you can mix in some kale or spinach for added greens.
-
1/2 cup cherry tomatoes, halved: These little bursts of sweetness are essential. If you can’t find cherry tomatoes, diced regular tomatoes will do just fine.
-
1/2 cup croutons: Store-bought is fine, but if time allows, homemade croutons are a fun and crispy addition! Just toss some bread cubes in olive oil and season them before baking until golden.
-
1/4 cup grated Parmesan cheese: Freshly grated cheese will elevate the dish—don’t skimp on this! You can also substitute with Pecorino Romano for a sharper taste.
-
1/2 cup Caesar dressing: A good, creamy dressing is key! You can go store-bought for convenience or whip up your own if you’re feeling ambitious.
-
Salt and pepper to taste: Basic yet crucial for enhancing all the flavors in the salad.
-
Optional: Grilled chicken or shrimp: If you’re looking to make this a wholesome meal, adding grilled chicken or shrimp will amp up the protein and flavor!
Step-by-Step Instructions
Alright, let’s jump into the cooking process! Follow these steps to whip up your Caesar Pasta Salad:
-
Cook the Pasta:
- Bring a large pot of salted water to a boil. Add the pasta and cook according to package instructions until al dente. This usually takes about 8 to 10 minutes, depending on the type of pasta.
- Tip: Reserve a cup of pasta water before draining! This starchy liquid can help loosen your dressing later if needed.
-
Prep the Veggies:
- While the pasta is cooking, chop your romaine lettuce and halve the cherry tomatoes. Set them aside in a large mixing bowl.
- Chef Hack: To keep lettuce crispier for longer, rinse it in cold water and dry it right before use.
-
Combine Ingredients:
- Once the pasta is cooked, drain it and let it cool for a few minutes in a colander. This prevents wilting the lettuce when you combine everything.
- Add the cooled pasta to the bowl with the lettuce and tomatoes.
-
Dress it Up:
- Pour in the Caesar dressing and toss everything gently to coat the pasta and veggies evenly. If the mixture appears too thick, add a splash of your reserved pasta water to loosen it up.
- Commentary: Mind the dressing—different brands have varying flavors and thickness! Taste as you go and adjust according to your preference.
-
Add the Crunch:
- Toss in the croutons and grated Parmesan cheese. Give it one last gentle mix to combine everything without crushing the croutons.
- Chef Hack: You can save some cheese and croutons for topping later to keep that crunchiness intact!
-
Season and Serve!:
- Season your salad with salt and pepper to taste. Now it’s time to plate!
- Tip: If you’re adding grilled chicken or shrimp, slice them up and place them on top of the salad for that restaurant-style presentation.
Serving Suggestions
Now that your beautiful Caesar Pasta Salad is ready, how can you serve it up like a pro?
-
Plating: Grab a sizable bowl or serving platter and fill it generously with the salad. If you want to impress your guests, layer it—start with the pasta, then add the lettuce and top with a sprinkle of croutons and Parmesan.
-
Garnishes: Consider garnishing with a few additional cherry tomatoes for color or a drizzle of extra Caesar dressing for that restaurant flair. A sprinkle of fresh parsley can elevate the visual appeal as well.
-
Sides: Pair your salad with a warm baguette on the side or a light soup for a complete meal.
Recipe Variations
Let’s get a little adventurous! Here are some ways to give your Caesar Pasta Salad a flavorful twist:
-
Add More Veggies: Incorporate bell peppers for color and crunch, or throw in some sliced cucumbers for extra freshness.
-
Zesty Lemon: For a citrusy kick, squeeze some lemon juice over the salad just before serving. It brightens up the flavors wonderfully!
-
Protein Swaps: Instead of grilled chicken or shrimp, try adding canned tuna, chickpeas, or even roasted tofu for a vegetarian option.
-
Creamy Avocado: Mash up some ripe avocado and mix it in or cut it into slices as a topping for a creamy texture.
-
Herbed Twist: Experiment with adding fresh herbs like basil or dill for a unique flavor punch! A sprinkle of fresh herbs can really elevate the taste.
Chef’s Notes
This Caesar Pasta Salad is a recipe that has evolved since I first started making it. Initially, I strictly followed my grandmother’s Caesar salad recipe, but over the years, I began to incorporate pasta and other ingredients as I got more experimental in the kitchen. The beauty of this dish is its versatility; you can tailor it to fit seasonal ingredients or flavor profiles that tickle your fancy.
One cooking mishap I laugh about happened during a family barbecue. I accidentally threw in too much dressing and turned the salad into something resembling a pasta soup! We laughed it off and labeled it "experimental cuisine." It’s stories like these that keep cooking fun and lead to new favorites!
FAQs and Troubleshooting
-
Q: My pasta is too sticky! What did I do wrong?
- A: If your pasta sticks together, it could be that it wasn’t stirred during cooking or was overcooked. Remember to give it a good stir in the boiling water, and try to drain it immediately after reaching al dente.
-
Q: How can I prevent my lettuce from wilting?
- A: After slicing your lettuce, keep it washed and chilled in the refrigerator until you’re ready to serve. Always add the dressing just before serving to keep it crisp.
-
Q: What if my dressing is too tangy?
- A: If your dressing is overly tangy, try balancing it out with a pinch of sugar or a splash of cream to mellow the flavors. Taste as you go to find the perfect balance!
-
Q: Can I make this salad ahead of time?
- A: You can prep the ingredients, but for the best results, mix everything just before serving to keep the textures fresh and crisp.
Nutritional Info
While the exact nutritional values depend on ingredient choices, here’s a rough estimate for one serving (without chicken or shrimp):
- Calories: 350
- Protein: 12g
- Carbohydrates: 40g
- Fat: 15g
- Fiber: 3g
Additions such as grilled chicken or shrimp will increase the protein content, making this salad more filling!
Final Thoughts
There you have it—my Caesar Pasta Salad recipe, soaked in nostalgia and bursting with flavor! I hope this dish brings you as much comfort and joy as it does for me. Whether you’re having a picnic, attending a potluck, or simply want a satisfying meal at home, this salad checks all the boxes. Don’t forget to share it with your loved ones; food is always better when it’s enjoyed together!
So, what are you waiting for? Grab your fork, toss on your apron, and let the cooking magic begin! If you have any fun stories or variations to share, I would love to hear them. Happy cooking, friends, and may your kitchens always be filled with laughter and delicious aromas!
Print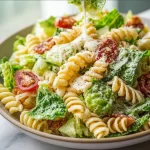
Caesar Pasta Salad
- Total Time: 25 minutes
- Yield: 4 servings 1x
- Diet: Vegetarian
Description
A delightful twist on a classic, this Caesar Pasta Salad combines creamy, zesty flavors with heartwarming pasta goodness.
Ingredients
- 8 ounces of pasta (e.g., rotini or penne)
- 2 cups romaine lettuce, chopped
- 1/2 cup cherry tomatoes, halved
- 1/2 cup croutons
- 1/4 cup grated Parmesan cheese
- 1/2 cup Caesar dressing
- Salt and pepper to taste
- Optional: Grilled chicken or shrimp
Instructions
- Bring a large pot of salted water to a boil. Add the pasta and cook according to package instructions until al dente, about 8 to 10 minutes.
- Chop the romaine lettuce and halve the cherry tomatoes. Set aside.
- Drain the cooked pasta and let it cool for a few minutes in a colander.
- Add the cooled pasta to the bowl with the lettuce and tomatoes.
- Pour in the Caesar dressing and toss everything gently to coat.
- Toss in the croutons and grated Parmesan cheese and mix gently.
- Season your salad with salt and pepper to taste and plate.
Notes
For added flavor, consider garnishing with extra cherry tomatoes or a sprinkle of fresh parsley.
- Prep Time: 15 minutes
- Cook Time: 10 minutes
- Category: Salad
- Method: Mixing
- Cuisine: American
Nutrition
- Serving Size: 1 serving
- Calories: 350
- Sugar: 3g
- Sodium: 400mg
- Fat: 15g
- Saturated Fat: 4g
- Unsaturated Fat: 6g
- Trans Fat: 0g
- Carbohydrates: 40g
- Fiber: 3g
- Protein: 12g
- Cholesterol: 30mg
Keywords: Caesar salad, pasta salad, vegetarian recipes, summer recipes, easy recipes
Cinnamon Sugar French Toast Roll-Ups
Indulgent Cinnamon Sugar French Toast Roll-Ups: A Hug in Every Bite!
Hey there, fellow foodies! I’m Beau Collier, and today we’re diving into a sweet and comforting world of flavors with a fun twist on a breakfast classic: Cinnamon Sugar French Toast Roll-Ups! If you’re like me, you cherish those moments when your kitchen transforms into a canvas of delightful aromas and nostalgic memories. There’s something incredibly satisfying about whipping up a dish that not only fills our bellies but also warms our hearts.
Imagine waking up to the gentle sound of birds chirping outside (or maybe just your neighbor’s dog), and as you stumble into the kitchen, the smell of cinnamon wafts through the air, wrapping you like a cozy blanket. That’s the magic we’re about to create with these roll-ups! Whether you’re making them for a special brunch, indulging in a lazy Saturday morning, or surprising your loved ones with a sweet treat, these little delights won’t disappoint.
This recipe combines the soft and fluffy goodness of bread, rolled up and filled with love, then transformed into a fluffy, golden breakfast delight. It’s simple enough for even the most beginner cooks and delightful enough to impress anyone at your brunch table. So, grab your spatula and let’s get to work – your taste buds are in for a treat!
A Slice of Nostalgia: The Story Behind My Love for French Toast Roll-Ups
Let me take you back to my childhood, where weekend mornings were synonymous with the smell of something delicious wafting through the house. My mom had a knack for making breakfast feel like a holiday. One of her signature dishes was French toast. She would craft these delightful, golden slices of soft bread, gently soaking them in a sweet mixture of eggs and milk before hitting the frying pan, and let me tell you, the busyness in our kitchen was a sight to behold!
But one Saturday, she decided to get a little adventurous and whipped up what she called “French Toast Roll-Ups.” The surprise and excitement in our house were palpable. She started by flattening the bread slices, filling them with cream cheese and berries, and rolling them up like little burritos of joy. The first bite was pure magic! The warm cinnamon sugar crunch combined with the smooth creaminess inside was an explosion of flavors that I still remember vividly.
So here I am, years later, bringing that essence back into my kitchen, but with a twist! These Cinnamon Sugar French Toast Roll-Ups are lighter, simpler, and just as scrumptious. They not only honor those warm memories but also allow me to create new ones with my family and friends. I can’t wait for you to try this recipe and create your own memories around the kitchen table!
Ingredients for Cinnamon Sugar French Toast Roll-Ups
Here’s what you’ll need to bring this sweet breakfast dream to life:
-
6 slices of bread (white or brioche): While any bread can work, I love using brioche for its rich, buttery flavor. White bread works its magic as well. Don’t be afraid to use day-old bread; it’s ideal for absorbing that custardy goodness!
-
2 large eggs: Eggs are the binding agent that transforms bread into French toast. Feel free to use egg substitutes if you’re avoiding eggs!
-
1/4 cup (60ml) milk: Whole milk provides creaminess, but almond milk, oat milk, or any milk alternative works just as well.
-
1/2 teaspoon vanilla extract: A splash of vanilla adds warmth and aroma, elevating your roll-ups to a whole new level. Grab that pure vanilla extract if you can!
-
2 tablespoons (25g) granulated sugar: This adds sweetness to our cinnamon sugar blend. You can substitute it with coconut sugar for a healthier option.
-
1 teaspoon ground cinnamon: The star of the show! Feel free to adjust the quantity depending on your love for cinnamon. You could also try adding a pinch of nutmeg for an additional warm spice.
-
2 tablespoons (28g) unsalted butter, melted: Butter is key to achieving that golden brown exterior. For a dairy-free option, coconut oil or non-dairy butter will shine just as brightly!
Each of these ingredients plays a role in creating the flavor and texture that makes these roll-ups irresistible. A little tip from my kitchen: while opting for fresh ingredients is fantastic, don’t hesitate to experiment with what you have on hand. Cooking is all about flexibility and having fun!
Step-by-Step Instructions for Cooking Cinnamon Sugar French Toast Roll-Ups
Alright, let’s roll up those sleeves and get to cooking! Here’s how you’re going to bring this dish from idea to reality.
Step 1: Prepare Your Workstation
Start by gathering all your ingredients and tools. You’ll need a cutting board, a rolling pin (or a sturdy glass), a large bowl, a skillet, and your favorite spatula. This will make your cooking process smoother and more enjoyable.
Step 2: Flatten the Bread
Take each slice of bread and flatten it using a rolling pin (or a sturdy glass works too). This step creates a canvas for our delicious filling. By flattening the bread, you make it easier to roll up without tearing. It’s all about getting light and fluffy roll-ups!
Tip: If you’re using fresh bread, you can give the slices a quick five-second microwave blast to soften them slightly before flattening.
Step 3: Make the Egg Mixture
In a large mixing bowl, whisk together the eggs, milk, vanilla extract, and half of the granulated sugar until well combined. This mixture is the magic that will soak into the bread and create that rich French toast flavor we crave.
Step 4: Prepare the Cinnamon Sugar Mixture
In a small bowl, combine the remaining granulated sugar with ground cinnamon. This sweet blend is what gives your roll-ups that delightful crunchy exterior. Trust me; it’s a game-changer!
Step 5: Roll ‘Em Up
Now comes the fun part! Take your flattened bread slices and dip them into the egg mixture, allowing them to soak for a few seconds. Make sure they’re coated but not falling apart. Then, place your desired filling (cream cheese, fruit, nut butter, or anything you like) into the center of each slice.
Tightly roll up the bread, tucking in the ends as you go. It’s like wrapping a delicious little gift! Secure it with a toothpick if you feel it may unroll during cooking.
Chef Hack: For extra flavor, sprinkle a tiny bit of the cinnamon sugar mixture inside the filling before rolling up – yum!
Step 6: Cook in the Skillet
Heat a skillet over medium heat and add the melted butter. Carefully place your roll-ups seam side down in the skillet. Cook for about 2-3 minutes, or until they’re golden brown. Then, flip them over and cook the other side until equally delicious.
Be gentle while flipping; you want to maintain that glorious roll-up shape!
Step 7: Dust with Cinnamon Sugar
Once they’re cooked to perfection, remove your roll-ups from the skillet, and immediately roll them in the warm cinnamon sugar mixture until they’re fully coated. This gives them that sweet crunch on the outside that’s oh-so-satisfying!
Step 8: Plate and Enjoy!
Serve your Cinnamon Sugar French Toast Roll-Ups warm, perhaps with a side of fresh fruits or a drizzle of maple syrup. Add a sprinkle of powdered sugar for that Instagram-worthy finish! Trust me, it’s going to be hard to resist devouring these beauties straight off the plate.
Serving Suggestions for Cinnamon Sugar French Toast Roll-Ups
Let’s be real; these roll-ups are divine all on their own, but they can be even more delightful with a few serving suggestions! Here are a couple of my favorite ways to present these delicious treats:
-
Fruit Medley: Serve with a colorful medley of fresh berries, sliced bananas, or caramelized apples to add a refreshing contrast to the richness of the roll-ups.
-
Dipping Sauces: A small bowl of warm maple syrup, chocolate sauce, or whipped cream will take your indulgence to the next level. You can never go wrong with a little extra sweetness on the side!
-
Fine Dining Flair: For those special occasions, a sprinkle of crushed nuts (like pecans or walnuts) and edible flowers will elevate your dish and leave your guests in awe of your culinary skills!
Recipe Variations: Spice It Up!
This recipe is a wonderful base that you can experiment with! Here are a few creative variations that you can try:
-
Chocolate Chip Stuffed Roll-Ups: Add a handful of mini chocolate chips inside each roll-up for those chocolate lovers in your life.
-
Savory Spin: Want to go savory? Swap the cinnamon for garlic powder, fill with a mixture of cream cheese, spinach, and cheese for a delicious savory roll-up that’s perfect for brunch.
-
Nutty Banana Delight: Add mashed bananas or nut butter for a filling that’s packed with flavor! A drizzle of honey on top finishes it off beautifully.
-
Pumpkin Spice Everything: During the fall, why not turn it up a notch? Add pumpkin puree and pumpkin spice to your egg mixture for a seasonal twist that embodies autumn.
-
Gluten-Free Version: Swap out regular bread for your favorite gluten-free bread and enjoy the same deliciousness that caters to your dietary preferences!
Chef’s Notes: A Little Extra Love from My Kitchen
Before we wrap things up, I want to share a couple of thoughts about my wonderful journey with this recipe. French toast roll-ups are one of those dishes that brings out my inner child, igniting those sweet morning memories in the homely kitchen from my youth.
Every time I whip these up, I’m reminded of the laughter shared over breakfast with family and friends. And hey, if a roll-up goes slightly awry, don’t worry! Mistakes can lead to delicious new creations in the kitchen, and sometimes, they become the best stories. So, embrace the messiness of cooking and remember that it’s all part of the fun!
FAQs and Troubleshooting: Sweet Success in the Kitchen
Here are a few common questions or potential mistakes that might come up in the process. Don’t fret; we’ve got you covered!
1. Why are my French toast roll-ups soggy?
If your roll-ups turn out soggy, they may have soaked in the egg mixture too long. Keep the soaking time to 5-10 seconds per slice to maintain the right consistency.
2. Can I make them ahead of time?
Absolutely! You can prepare the roll-ups in advance and store them in the refrigerator. Just reheat in a skillet when you’re ready to serve.
3. What if I don’t have any bread?
Not to worry! Any bread-like alternatives such as wraps or tortillas can work in place of traditional bread. Get creative and embrace what you have!
4. How do I prevent them from unrolling while cooking?
Make sure to roll them tightly and place them seam side down in the skillet. If needed, secure with a toothpick for extra reassurance!
Nutritional Info
While I usually encourage indulgence in the kitchen, it’s also helpful to be mindful of what we’re consuming. Here’s a quick breakdown of the nutritional info per serving:
- Calories: Approximately 220
- Protein: 6g
- Carbohydrates: 35g
- Dietary Fiber: 1g
- Sugars: 8g
- Fat: 8g
Keep in mind that these values will vary based on the exact ingredients you choose. It’s the joy of cooking that counts!
Final Thoughts: A Treat Worth Sharing
There you have it, my friends! Cinnamon Sugar French Toast Roll-Ups are not just a delicious recipe; they encapsulate the warmth of shared moments, nostalgic memories, and the joy of cooking. Whether you’re savoring them with a cup of coffee on a lazy morning or serving them at a gathering, these roll-ups are meant to be enjoyed.
So, put on your apron, turn on some of your favorite tunes, and let’s get cooking! Don’t forget to share your roll-up creations on social media and tag Feastical – I can’t wait to see the magic you create! Until next time, happy cooking and even happier eating! 🥞✨
Print
Cinnamon Sugar French Toast Roll-Ups
- Total Time: 20 minutes
- Yield: 4 servings 1x
- Diet: Vegetarian
Description
Delicious cinnamon sugar roll-ups that capture the essence of French toast, sweetened and rolled for a fun breakfast treat.
Ingredients
- 6 slices of bread (white or brioche)
- 2 large eggs
- 1/4 cup (60ml) milk
- 1/2 teaspoon vanilla extract
- 2 tablespoons (25g) granulated sugar
- 1 teaspoon ground cinnamon
- 2 tablespoons (28g) unsalted butter, melted
Instructions
- Prepare Your Workstation: Gather all ingredients and tools such as a cutting board, rolling pin, large bowl, skillet, and spatula.
- Flatten the Bread: Use a rolling pin to flatten each slice of bread.
- Make the Egg Mixture: Whisk together eggs, milk, vanilla extract, and half of the granulated sugar until well combined.
- Prepare the Cinnamon Sugar Mixture: Combine the remaining sugar with ground cinnamon in a small bowl.
- Roll ‘Em Up: Dip flattened bread slices in egg mixture, fill with desired filling, and tightly roll up.
- Cook in the Skillet: Heat a skillet over medium heat, add melted butter, and cook roll-ups seam side down until golden brown.
- Dust with Cinnamon Sugar: Roll cooked roll-ups in warm cinnamon sugar mixture.
- Plate and Enjoy: Serve warm, optionally with fresh fruits or syrup.
Notes
Experiment with fillings like cream cheese or fruit, and enjoy serving suggestions like fresh berries or dipping sauces.
- Prep Time: 10 minutes
- Cook Time: 10 minutes
- Category: Breakfast
- Method: Skillet Cooking
- Cuisine: American
Nutrition
- Serving Size: 1 roll-up
- Calories: 220
- Sugar: 8g
- Sodium: 200mg
- Fat: 8g
- Saturated Fat: 4g
- Unsaturated Fat: 2g
- Trans Fat: 0g
- Carbohydrates: 35g
- Fiber: 1g
- Protein: 6g
- Cholesterol: 150mg
Keywords: French toast, breakfast, cinnamon sugar, roll-ups, sweet treat