
Healthy Baked Churro Bites
Healthy Baked Churro Bites: An Irresistible Twist on a Classic Treat
Hey there, food lover! Imagine taking a bite of something warm, sweet, and spiced just right—right? I’m Beau Collier, and today we’re diving into a delightful recipe that will awaken your taste buds and add a sprinkle of joy to your day: Healthy Baked Churro Bites. Now, I know churros might sound like a guilty pleasure reserved for fairs and festivals, but I’m here to break that notion with a healthier, oven-baked version that doesn’t skimp on flavor or fun.
Churros, those crispy, sugary coils of happiness, have been a cherished treat in Spanish and Latin American cultures for generations. The scent of cinnamon wafting through the air as they fry up fresh is enough to make anyone do a little happy dance. However, thanks to our chic little recipe, you can embrace this joy in a healthier way—without guilt!
So, whether you’re gearing up for a cozy movie night, planning a festive gathering, or just whipping up a sweet snack because it’s Tuesday, this recipe is perfect for you! I promise, these bites will have you and your loved ones reaching for a second (or third) helping, minus any of that heavy feeling typical of fried treats. Let’s jump into this scrumptious journey of creating healthy baked churro bites!
A Dash of Nostalgia
Growing up, I was that kid who always wanted dessert before dinner—anyone else guilty of that? My family would frequently visit a charming little café where the churros were legendary. They came coated in cinnamon sugar, and one bite would send me straight to cloud nine. I can still hear the sizzle of the churros as they fried, the warm glow of the sun streaming through the café window, and my family laughing and sharing the treat.
One sunny afternoon, I decided to get a little adventurous. I wanted to replicate that joyous experience in my own kitchen, but with a healthier twist. The last thing I wanted was to feel weighed down from indulging in something I loved. That was the spark that ignited my creativity! I wanted to create churro bites that came together simply and without all the guilt. Fast forward to today, and I can confidently say these little bites capture that childhood joy, plus they’ll keep you feeling light and happy. That’s the kind of food magic I live for!
Ingredients
Here’s what you need to whip up these heavenly bites:
-
1 cup almond flour
A fantastic low-carb option that’s packed with fiber and protein. If you’re looking for a nut-free alternative, you can use sunflower seed flour—just be mindful of the taste difference! -
1/4 cup coconut flour
Offers a mild sweetness and is wonderfully absorbent. Swap with another gluten-free flour like oat flour if coconut isn’t your jam! -
1/4 cup sweetener
Use erythritol for a zero-calorie option, or coconut sugar for a more natural approach. Want more flavor? Brown sugar works beautifully too! -
1 tsp baking powder
A key ingredient for creating those fluffy bites—make sure it’s fresh for the best results! -
1/2 tsp cinnamon
The main spice hero of our churros! You can always amp up the cinnamon for that extra warmth and comfort. -
1/4 tsp salt
Enhances all the flavors; don’t skip it! If you’re watching sodium intake, you can reduce to a pinch. -
2 eggs
They bind everything together and make them oh-so-fluffy. If you’re vegan, replace them with flax eggs (2 tbsp ground flaxseed mixed with 6 tbsp water works like magic). -
1/4 cup melted coconut oil
This will add healthy fats and moisture. Unsalted butter or avocado oil can be substituted for a different flavor. -
1 tsp vanilla extract
A must for a well-rounded flavor. You could also try using almond extract for a unique twist. -
Cinnamon and sweetener mixture for coating
This is where the magic happens! Mix equal parts cinnamon and your sweetener choice. It adds that classic churro finish!
Step-by-Step Instructions
Preheat and Prep
-
Preheat your oven to 350°F (175°C). Getting the oven ready means that by the time your dough is ready, your baking surface is ready too!
-
Prepare a baking sheet. Line it with parchment paper for easy cleanup and to prevent sticking. Your future self will thank you for this!
Mix It Up
-
In a mixing bowl, combine the dry ingredients: almond flour, coconut flour, sweetener, baking powder, cinnamon, and salt. Whisk them together until fully mixed. This step helps all those flavors mingle well and ensures even baking.
-
In a separate bowl, whisk the wet ingredients: eggs, melted coconut oil, and vanilla extract until well combined. Incorporate all those liquid lovelies for a smooth texture.
Combine and Shape
-
Merge the wet and dry mixtures together. Stir until you have a thick dough-like consistency. It’ll be sticky, and that’s okay! You want to aim for a dough that holds together when squeezed.
-
Get your hands slightly wet (this will help with the stickiness), then scoop out a tablespoon of dough and roll it into a small ball. Place them about one inch apart on your prepared baking sheet.
Bake to Perfection
- Bake for 15-18 minutes until they’re golden brown on the edges and tender inside. Keep an eye on them after 15 minutes—oven times may vary. A toothpick inserted into the center should come out clean!
Sweet Coating Time
-
While the churro bites are baking, make your cinnamon-sugar coating by mixing equal parts cinnamon and your sweetener choice in a small bowl.
-
Once they’re out of the oven, let them cool for about 5 minutes, then gently roll them in the cinnamon-sugar mixture while they’re still warm. This will create that irresistible shell we all know and love!
Serving Suggestions
Plate those beautiful churro bites in a fun stack or a little basket. You can add a pinch of extra cinnamon sugar on top for good measure! Serve them with a side of creamy Greek yogurt or a luscious dark chocolate sauce for dipping. Imagine having these mini bites paired with a warm mug of chai or hot cocoa. Talk about a cozy combo!
Recipe Variations
Feeling adventurous? Here are a few ways to switch it up:
-
Chocolate Hazelnut Swirls: Add a spoonful of your favorite chocolate hazelnut spread right in the center before rolling into balls.
-
Coconut Churro Bites: Mix in shredded coconut into the dough for a tropical spin.
-
Nutty Crunch: Add chopped nuts (like pecans or walnuts) into the dough for a delightful crunch.
-
Spiced Churro Delight: Experiment with other spices! A bit of nutmeg or cardamom can lend a warm, unique flavor.
-
Sugar-Free Option: Use a sugar-free chocolate sauce or a drizzle of nut butter instead of the cinnamon-sugar for a different take!
Chef’s Notes
As I developed this recipe, I remembered the joy that churros brought to my family and me. It’s amazing how food can elicit such beautiful memories! Each iteration made me realize that there’s always room for improvement or a new technique to learn. I’ve swapped in different flours, played with spices, and each time, I found something delightful. Don’t be afraid to riff on this recipe—that’s where the real magic lies! Food is a celebration, so have fun with it!
FAQs and Troubleshooting
-
Why did my churro bites flatten?
Make sure you’re using freshly opened baking powder, and avoid overmixing. If the dough is too wet, add a bit more almond flour until the consistency is more dough-like. -
Can I freeze these?
Absolutely! Allow them to cool, then store them in a sealed bag in the freezer. Reheat them for a delicious snack anytime! -
What if they are too dry?
Ensure you’re measuring the flour correctly. Spoon the flour into your measuring cup, and level it off—too much flour can dry them out. -
Can I use a different sweetener?
You can use brown sugar, maple syrup, or honey. Just adjust the measurements, as liquid sweeteners may affect the dough’s consistency.
Nutritional Info
These Healthy Baked Churro Bites come in at roughly:
- Calories: 80-90 per bite
- Fat: 6g (mainly heart-healthy fats from coconut oil and almond flour)
- Carbohydrates: 5g net carbs
- Fiber: 2g
- Protein: 2g
They’re a delightful treat that fits into many dietary preferences while satisfying that sweet tooth!
Final Thoughts
And there you have it, friends! Healthy Baked Churro Bites that are easy to whip up, delicious, and full of stories waiting to be created at your dinner table. Food is all about connection—bringing people together, telling stories, and spreading joy through every bite. So, whether you’re indulging for breakfast, dessert, or a delightful snack, remember that good food doesn’t have to be complicated or heavy.
Try these out for your next gathering or, better yet, make them just for yourself! I promise they’ll warm your heart and home. Until next time, grab your spatula and let’s keep creating wholesome kitchen magic together! Happy cooking!
Print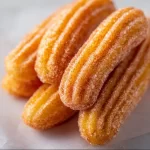
Healthy Baked Churro Bites
- Total Time: 28 minutes
- Yield: 12 servings 1x
- Diet: Gluten-Free
Description
Delicious and guilt-free baked churro bites that capture the joy of a classic treat without the heaviness of frying.
Ingredients
- 1 cup almond flour
- 1/4 cup coconut flour
- 1/4 cup sweetener (erythritol or coconut sugar)
- 1 tsp baking powder
- 1/2 tsp cinnamon
- 1/4 tsp salt
- 2 eggs
- 1/4 cup melted coconut oil
- 1 tsp vanilla extract
- Cinnamon and sweetener mixture for coating
Instructions
- Preheat your oven to 350°F (175°C).
- Prepare a baking sheet lined with parchment paper.
- Combine the dry ingredients in a mixing bowl: almond flour, coconut flour, sweetener, baking powder, cinnamon, and salt.
- Whisk the wet ingredients: eggs, melted coconut oil, and vanilla extract until well combined.
- Merge the wet and dry mixtures together until you have a thick dough-like consistency.
- Wet your hands slightly, then scoop out a tablespoon of dough and roll it into a small ball.
- Place the dough balls about one inch apart on your prepared baking sheet.
- Bake for 15-18 minutes until golden brown on the edges.
- Mix equal parts cinnamon and your sweetener choice in a small bowl for coating.
- Once out of the oven, let cool for 5 minutes, then roll in the cinnamon-sugar mixture.
Notes
These bites are great served with Greek yogurt or dark chocolate sauce for dipping.
- Prep Time: 10 minutes
- Cook Time: 18 minutes
- Category: Dessert
- Method: Baking
- Cuisine: Spanish
Nutrition
- Serving Size: 1 bite
- Calories: 85
- Sugar: 2g
- Sodium: 100mg
- Fat: 6g
- Saturated Fat: 5g
- Unsaturated Fat: 1g
- Trans Fat: 0g
- Carbohydrates: 7g
- Fiber: 2g
- Protein: 2g
- Cholesterol: 30mg
Keywords: baked churros, healthy dessert, gluten-free, snack recipes
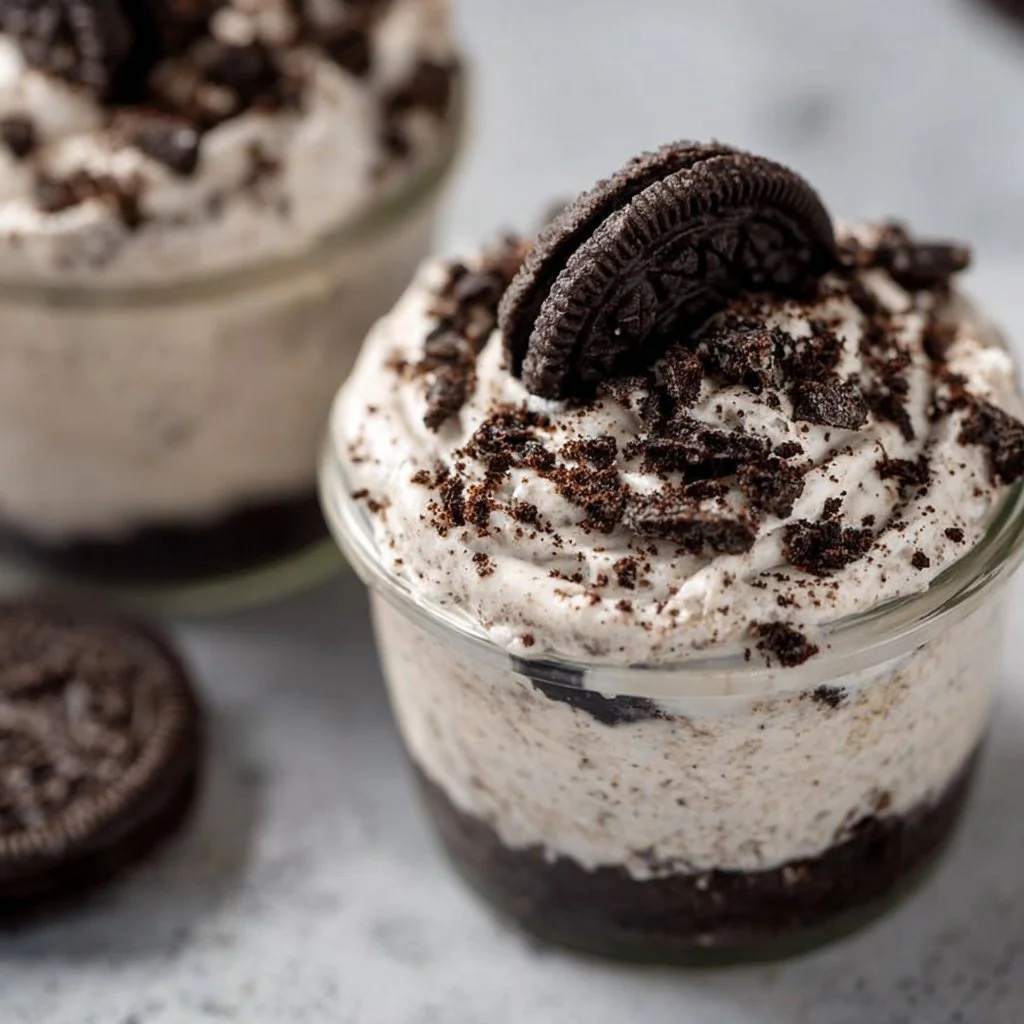
No Bake Oreo Cheesecake Cups
No-Bake Oreo Cheesecake Cups: A Delicious Journey to Sweetness
Hey there, fellow foodies! Are you ready to embark on a culinary adventure that requires zero baking and promises loads of flavor? Let me introduce you to the ultimate dessert: No-Bake Oreo Cheesecake Cups. These little jars of joy are not just about the creamy, dreamy cheesecake filling and the crunchy Oreo crust but also about the memories they create. Trust me, each spoonful is like unwrapping a present filled with sweetness and nostalgia.
As a chef who loves to whip up comforting treats, I can attest that the best recipes don’t always come from the oven. Sometimes, they come from moments shared around a table, laughter echoing in the air, and the sweet aroma of desserts tempting your taste buds. Whether it’s for a backyard barbecue, a movie night with friends, or simply a treat for yourself (hey, you deserve it!), these No-Bake Oreo Cheesecake Cups are the cherry on top of any gathering.
In this blog post, I’ll share how you can make these delightful cups easily at home. With just a handful of ingredients and a bit of love, you’ll be crafting a dessert that’ll leave everyone asking for seconds. So, grab your favorite mixing bowl, and let’s dive into this delicious recipe!
Personal Story
I still remember the summer I discovered my love for cheesecakes. It was a sun-drenched afternoon, and my grandma had decided it was the perfect day to teach me how to make her famous cheesecake. There were no fancy ingredients or complicated methods; just the simple joy of mixing cream cheese, sugar, and love in a bowl. She always had a way of turning ordinary days into memorable ones.
Fast forward a few years, and I found myself experimenting with different variations to keep the flavor alive. That’s when I stumbled upon the right twist: Oreo cookies! Combining my grandma’s classic recipe with these chocolatey delights created something magical. Every time I make these No-Bake Oreo Cheesecake Cups, I’m reminded of my grandma’s warm kitchen and the way she made cooking feel like a celebration. Each cup is a tribute to her legacy, bridging the gap between the past and the present, and reminding me of how food can connect us to our roots.
Ingredients
Here’s what you’ll need to whip up these scrumptious No-Bake Oreo Cheesecake Cups:
-
1 package Oreo cookies (about 15 cookies)
These iconic cookies will serve as the crunchy base. If you’re feeling fancy, you can use any brand of chocolate sandwich cookies or gluten-free versions for a dietary swap. -
8 oz cream cheese, softened
Cream cheese is the star of the show, giving the cheesecake its luscious texture. To lighten it up, try using Neufchâtel cheese, which has less fat but still gives you that creamy goodness. -
1/2 cup powdered sugar
This sweetener gives the filling that nice, smooth sweetness without any graininess. Feel free to use coconut sugar or a sugar substitute if you’re looking for a healthier option. -
1 cup whipped topping
This ingredient is what makes our cheesecake light and fluffy. You can substitute it with freshly whipped cream for a more homemade feel. Just make sure to sweeten it to your liking! -
1/2 cup chocolate chips (optional for garnish)
These are for those who crave an extra layer of chocolaty goodness. If you’re feeling adventurous, you might even use white chocolate or butterscotch chips instead.
Step-by-Step Instructions
Ready to create some magic? Follow my step-by-step guide to make these No-Bake Oreo Cheesecake Cups, and get ready to impress your friends and family!
-
Prepare Your Ingredients
Make sure your cream cheese is softened to room temperature. If time is short, you can microwave it for about 10-15 seconds—just be careful not to melt it! -
Crush the Oreo Cookies
In a zip-top bag, throw in the Oreo cookies, seal it tight, and use a rolling pin or your hands to crush them into fine crumbs. Aim for a texture similar to sand—some larger chunks will add a delightful crunch later! -
Make the Cookie Crust
In a mixing bowl, take about 3/4 of the crushed Oreos and mix them with 2 tablespoons of melted butter until combined. This will create your crust. Spoon a generous amount into the bottom of your serving cups and press it down with the back of a spoon to form an even base. -
Prepare the Cheesecake Filling
In another bowl, beat the softened cream cheese with an electric mixer until it’s nice and smooth. Gradually add in the powdered sugar and beat until well combined. -
Add the Whipped Topping
Gently fold in the whipped topping into the cream cheese mixture. Take your time—this step is crucial for creating that fluffy texture, so be gentle to keep the air in. -
Layer It Up
Spoon the cheesecake filling over the cookie crust in your cups—aim for about an inch-layer. Shake it a little to settle, and don’t worry if it gets a bit messy; that’s part of the fun! -
Top It Off
Sprinkle the remaining crushed Oreos on top of your cheesecake filling for that delicious finishing touch. If you’re using chocolate chips, now’s the time to add those too! -
Chill Out
Place your filled cups in the fridge for at least two hours (or overnight for maximum flavor infusion!). The longer, the better! -
Serve and Enjoy!
When you’re ready to serve, take them out, and if desired, add a dollop of whipped cream on top for that extra flair. Enjoy your creation, and don’t forget to share (or not!).
Serving Suggestions
The beauty of these No-Bake Oreo Cheesecake Cups is their versatility! Here are a few ideas on how to plate or serve them:
-
Individual Cups: Keep them in their cute little cups for a cozy, personal touch. It’s perfect for parties, picnics, or simply enjoying on your own.
-
Garnishing Goodness: Consider adding fresh raspberries or strawberries on top for a pop of color and flavor contrast. They not only look stunning but also add a refreshing zing to each bite.
-
Chocolate Drizzle: A drizzle of chocolate sauce can elevate the look and taste. Just warm some chocolate in the microwave and let it drizzle artistically over the top.
-
Layer Presentation: For a family gathering, consider using a large glass dish to show off layered beauty. Just alternate the layers of crust and cheesecake filling, finishing with crushed Oreos and chocolate chips.
Recipe Variations
Feeling adventurous? Here are a few creative twists and variations you can try:
-
Mint Chocolate Oreo Cheesecake: Use mint-flavored Oreo cookies for a refreshing minty twist!
-
Peanut Butter Delight: Add 1/3 cup of creamy peanut butter to the cheesecake filling for a nutty flavor explosion.
-
Caramel Sauce Swirl: Drizzle caramel sauce into the cheesecake filling before layering it over the crust for a sweeter variation.
-
Fruit-Infused: Mix in some pureed strawberries or blueberry puree into your filling. This will give a fruity essence and a burst of color!
-
Vegan Version: Substitute the cream cheese with a vegan cream cheese alternative and the whipped topping with coconut whipped cream for a delightful dairy-free treat.
Chef’s Notes
Bringing this No-Bake Oreo Cheesecake Cups recipe to life has been a joy! Over the years, I’ve played with various flavors, and the joy of seeing my friends’ faces when they take that first bite is priceless. I remember one time—trying to impress my date—I added a dash of espresso powder for an extra kick. Let’s just say it didn’t go exactly as planned, and I ended up with a rather awake evening! But, hey, each kitchen mishap teaches you something, right?
FAQs and Troubleshooting
1. Why is my cheesecake filling too runny?
If your filling is too runny, your cream cheese might not have been fully softened or beaten enough. Make sure to mix until completely smooth without lumps.
2. Can I make this dessert ahead of time?
Absolutely! These cups are great for prepping a day in advance. Just keep them covered in the fridge until you’re ready to serve.
3. My crust looks too dry/crumbly. What do I do?
If your Oreo crust is too crumbly, try adding a bit more melted butter. A moist crumb will help it stick together.
4. How long will these keep in the fridge?
They’ll stay fresh for about 3–5 days in the fridge. Just make sure they are covered properly!
Nutritional Info
While these delightful No-Bake Oreo Cheesecake Cups are a treat, they’re also a dessert to savor. Let’s break down the nutritional information per cup (this can vary based on exact ingredients and serving sizes):
- Calories: 300
- Total Fat: 16g
- Saturated Fat: 8g
- Cholesterol: 40mg
- Sodium: 190mg
- Total Carbohydrates: 34g
- Dietary Fiber: 1g
- Sugars: 20g
- Protein: 4g
These cups are rich and indulgent, so enjoy them as an occasional treat rather than a daily habit!
Final Thoughts
There you have it! A no-fuss, deliciously satisfying dessert that’s perfect for every occasion. My journey creating these No-Bake Oreo Cheesecake Cups has not only filled my kitchen with delightful aromas but also enriched my soul with love and laughter shared around the table.
Remember, cooking is as much about the process as it is about the outcome. Whether it’s a kitchen disaster or a stunning success, enjoy every moment and don’t forget to make it your own! I can’t wait for you to try this recipe and share your own stories and memories that come along with it.
Until next time, keep cooking, keep exploring, and keep feasting with joy! Bon appétit! 🍰
Print
No-Bake Oreo Cheesecake Cups
- Total Time: 120 minutes
- Yield: 4 servings 1x
- Diet: Vegetarian
Description
Delicious No-Bake Oreo Cheesecake Cups featuring a creamy cheesecake filling and crunchy Oreo crust, perfect for any occasion.
Ingredients
- 1 package Oreo cookies (about 15 cookies)
- 8 oz cream cheese, softened
- 1/2 cup powdered sugar
- 1 cup whipped topping
- 1/2 cup chocolate chips (optional for garnish)
Instructions
- Prepare Your Ingredients: Make sure your cream cheese is softened to room temperature. If time is short, you can microwave it for about 10-15 seconds—just be careful not to melt it!
- Crush the Oreo Cookies: In a zip-top bag, throw in the Oreo cookies, seal it tight, and use a rolling pin or your hands to crush them into fine crumbs.
- Make the Cookie Crust: In a mixing bowl, take about 3/4 of the crushed Oreos and mix them with 2 tablespoons of melted butter until combined. Spoon into the bottom of your cups to form an even base.
- Prepare the Cheesecake Filling: Beat softened cream cheese with an electric mixer until smooth. Gradually add in the powdered sugar and beat until well combined.
- Add the Whipped Topping: Gently fold in the whipped topping into the cream cheese mixture.
- Layer It Up: Spoon the cheesecake filling over the cookie crust in your cups.
- Top It Off: Sprinkle the remaining crushed Oreos on top of your cheesecake filling and optionally add chocolate chips.
- Chill Out: Place your filled cups in the fridge for at least 120 minutes (or overnight for maximum flavor infusion!).
- Serve and Enjoy: Add a dollop of whipped cream on top before serving if desired.
Notes
These cups can be made a day in advance and stored in the fridge. Enjoy them cold!
- Prep Time: 15 minutes
- Cook Time: 0 minutes
- Category: Dessert
- Method: No-Bake
- Cuisine: American
Nutrition
- Serving Size: 1 cup
- Calories: 300
- Sugar: 20g
- Sodium: 190mg
- Fat: 16g
- Saturated Fat: 8g
- Unsaturated Fat: 0g
- Trans Fat: 0g
- Carbohydrates: 34g
- Fiber: 1g
- Protein: 4g
- Cholesterol: 40mg
Keywords: no-bake, cheesecake, Oreo, dessert, easy recipe