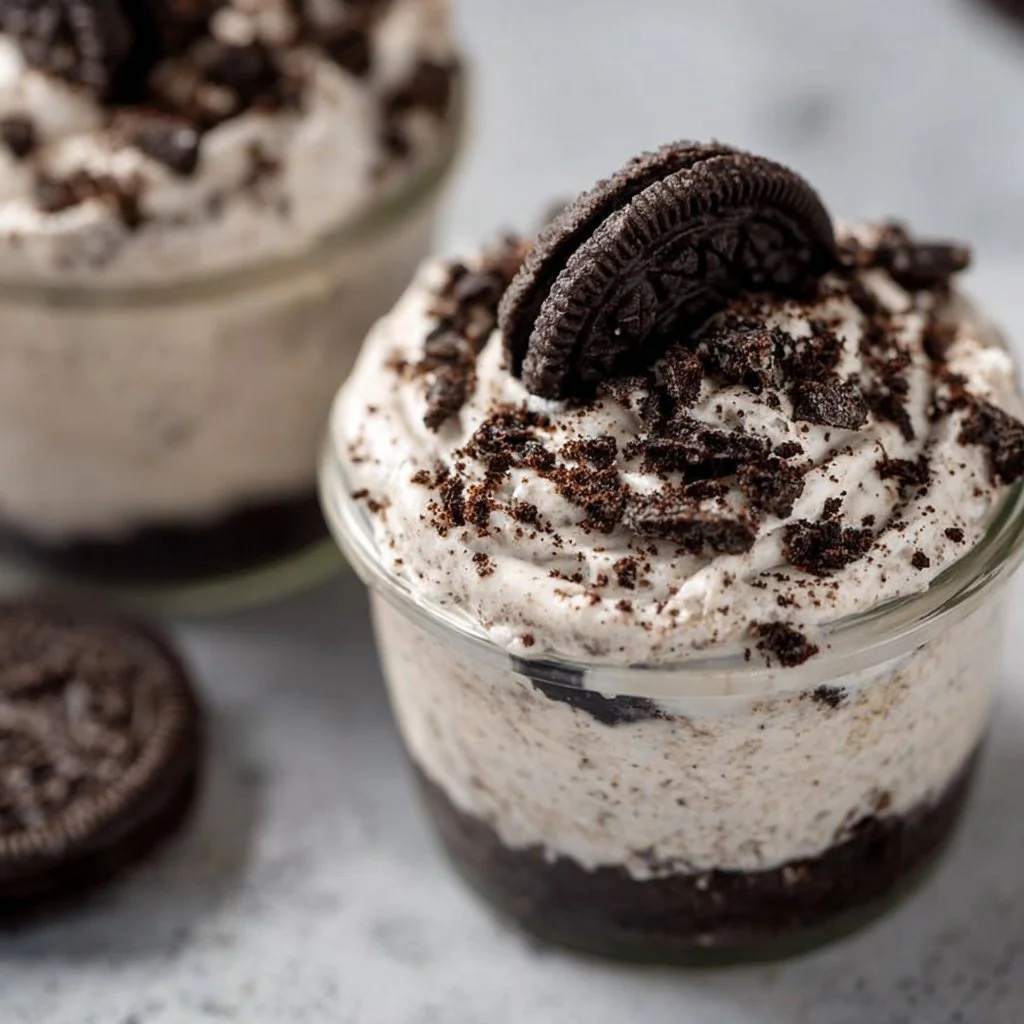
No-Bake Oreo Cheesecake Cups: A Delicious Journey to Sweetness
Hey there, fellow foodies! Are you ready to embark on a culinary adventure that requires zero baking and promises loads of flavor? Let me introduce you to the ultimate dessert: No-Bake Oreo Cheesecake Cups. These little jars of joy are not just about the creamy, dreamy cheesecake filling and the crunchy Oreo crust but also about the memories they create. Trust me, each spoonful is like unwrapping a present filled with sweetness and nostalgia.
As a chef who loves to whip up comforting treats, I can attest that the best recipes don’t always come from the oven. Sometimes, they come from moments shared around a table, laughter echoing in the air, and the sweet aroma of desserts tempting your taste buds. Whether it’s for a backyard barbecue, a movie night with friends, or simply a treat for yourself (hey, you deserve it!), these No-Bake Oreo Cheesecake Cups are the cherry on top of any gathering.
In this blog post, I’ll share how you can make these delightful cups easily at home. With just a handful of ingredients and a bit of love, you’ll be crafting a dessert that’ll leave everyone asking for seconds. So, grab your favorite mixing bowl, and let’s dive into this delicious recipe!
Personal Story
I still remember the summer I discovered my love for cheesecakes. It was a sun-drenched afternoon, and my grandma had decided it was the perfect day to teach me how to make her famous cheesecake. There were no fancy ingredients or complicated methods; just the simple joy of mixing cream cheese, sugar, and love in a bowl. She always had a way of turning ordinary days into memorable ones.
Fast forward a few years, and I found myself experimenting with different variations to keep the flavor alive. That’s when I stumbled upon the right twist: Oreo cookies! Combining my grandma’s classic recipe with these chocolatey delights created something magical. Every time I make these No-Bake Oreo Cheesecake Cups, I’m reminded of my grandma’s warm kitchen and the way she made cooking feel like a celebration. Each cup is a tribute to her legacy, bridging the gap between the past and the present, and reminding me of how food can connect us to our roots.
Ingredients
Here’s what you’ll need to whip up these scrumptious No-Bake Oreo Cheesecake Cups:
-
1 package Oreo cookies (about 15 cookies)
These iconic cookies will serve as the crunchy base. If you’re feeling fancy, you can use any brand of chocolate sandwich cookies or gluten-free versions for a dietary swap. -
8 oz cream cheese, softened
Cream cheese is the star of the show, giving the cheesecake its luscious texture. To lighten it up, try using Neufchâtel cheese, which has less fat but still gives you that creamy goodness. -
1/2 cup powdered sugar
This sweetener gives the filling that nice, smooth sweetness without any graininess. Feel free to use coconut sugar or a sugar substitute if you’re looking for a healthier option. -
1 cup whipped topping
This ingredient is what makes our cheesecake light and fluffy. You can substitute it with freshly whipped cream for a more homemade feel. Just make sure to sweeten it to your liking! -
1/2 cup chocolate chips (optional for garnish)
These are for those who crave an extra layer of chocolaty goodness. If you’re feeling adventurous, you might even use white chocolate or butterscotch chips instead.
Step-by-Step Instructions
Ready to create some magic? Follow my step-by-step guide to make these No-Bake Oreo Cheesecake Cups, and get ready to impress your friends and family!
-
Prepare Your Ingredients
Make sure your cream cheese is softened to room temperature. If time is short, you can microwave it for about 10-15 seconds—just be careful not to melt it! -
Crush the Oreo Cookies
In a zip-top bag, throw in the Oreo cookies, seal it tight, and use a rolling pin or your hands to crush them into fine crumbs. Aim for a texture similar to sand—some larger chunks will add a delightful crunch later! -
Make the Cookie Crust
In a mixing bowl, take about 3/4 of the crushed Oreos and mix them with 2 tablespoons of melted butter until combined. This will create your crust. Spoon a generous amount into the bottom of your serving cups and press it down with the back of a spoon to form an even base. -
Prepare the Cheesecake Filling
In another bowl, beat the softened cream cheese with an electric mixer until it’s nice and smooth. Gradually add in the powdered sugar and beat until well combined. -
Add the Whipped Topping
Gently fold in the whipped topping into the cream cheese mixture. Take your time—this step is crucial for creating that fluffy texture, so be gentle to keep the air in. -
Layer It Up
Spoon the cheesecake filling over the cookie crust in your cups—aim for about an inch-layer. Shake it a little to settle, and don’t worry if it gets a bit messy; that’s part of the fun! -
Top It Off
Sprinkle the remaining crushed Oreos on top of your cheesecake filling for that delicious finishing touch. If you’re using chocolate chips, now’s the time to add those too! -
Chill Out
Place your filled cups in the fridge for at least two hours (or overnight for maximum flavor infusion!). The longer, the better! -
Serve and Enjoy!
When you’re ready to serve, take them out, and if desired, add a dollop of whipped cream on top for that extra flair. Enjoy your creation, and don’t forget to share (or not!).
Serving Suggestions
The beauty of these No-Bake Oreo Cheesecake Cups is their versatility! Here are a few ideas on how to plate or serve them:
-
Individual Cups: Keep them in their cute little cups for a cozy, personal touch. It’s perfect for parties, picnics, or simply enjoying on your own.
-
Garnishing Goodness: Consider adding fresh raspberries or strawberries on top for a pop of color and flavor contrast. They not only look stunning but also add a refreshing zing to each bite.
-
Chocolate Drizzle: A drizzle of chocolate sauce can elevate the look and taste. Just warm some chocolate in the microwave and let it drizzle artistically over the top.
-
Layer Presentation: For a family gathering, consider using a large glass dish to show off layered beauty. Just alternate the layers of crust and cheesecake filling, finishing with crushed Oreos and chocolate chips.
Recipe Variations
Feeling adventurous? Here are a few creative twists and variations you can try:
-
Mint Chocolate Oreo Cheesecake: Use mint-flavored Oreo cookies for a refreshing minty twist!
-
Peanut Butter Delight: Add 1/3 cup of creamy peanut butter to the cheesecake filling for a nutty flavor explosion.
-
Caramel Sauce Swirl: Drizzle caramel sauce into the cheesecake filling before layering it over the crust for a sweeter variation.
-
Fruit-Infused: Mix in some pureed strawberries or blueberry puree into your filling. This will give a fruity essence and a burst of color!
-
Vegan Version: Substitute the cream cheese with a vegan cream cheese alternative and the whipped topping with coconut whipped cream for a delightful dairy-free treat.
Chef’s Notes
Bringing this No-Bake Oreo Cheesecake Cups recipe to life has been a joy! Over the years, I’ve played with various flavors, and the joy of seeing my friends’ faces when they take that first bite is priceless. I remember one time—trying to impress my date—I added a dash of espresso powder for an extra kick. Let’s just say it didn’t go exactly as planned, and I ended up with a rather awake evening! But, hey, each kitchen mishap teaches you something, right?
FAQs and Troubleshooting
1. Why is my cheesecake filling too runny?
If your filling is too runny, your cream cheese might not have been fully softened or beaten enough. Make sure to mix until completely smooth without lumps.
2. Can I make this dessert ahead of time?
Absolutely! These cups are great for prepping a day in advance. Just keep them covered in the fridge until you’re ready to serve.
3. My crust looks too dry/crumbly. What do I do?
If your Oreo crust is too crumbly, try adding a bit more melted butter. A moist crumb will help it stick together.
4. How long will these keep in the fridge?
They’ll stay fresh for about 3–5 days in the fridge. Just make sure they are covered properly!
Nutritional Info
While these delightful No-Bake Oreo Cheesecake Cups are a treat, they’re also a dessert to savor. Let’s break down the nutritional information per cup (this can vary based on exact ingredients and serving sizes):
- Calories: 300
- Total Fat: 16g
- Saturated Fat: 8g
- Cholesterol: 40mg
- Sodium: 190mg
- Total Carbohydrates: 34g
- Dietary Fiber: 1g
- Sugars: 20g
- Protein: 4g
These cups are rich and indulgent, so enjoy them as an occasional treat rather than a daily habit!
Final Thoughts
There you have it! A no-fuss, deliciously satisfying dessert that’s perfect for every occasion. My journey creating these No-Bake Oreo Cheesecake Cups has not only filled my kitchen with delightful aromas but also enriched my soul with love and laughter shared around the table.
Remember, cooking is as much about the process as it is about the outcome. Whether it’s a kitchen disaster or a stunning success, enjoy every moment and don’t forget to make it your own! I can’t wait for you to try this recipe and share your own stories and memories that come along with it.
Until next time, keep cooking, keep exploring, and keep feasting with joy! Bon appétit! 🍰
Print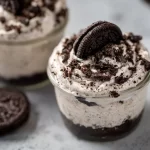
No-Bake Oreo Cheesecake Cups
- Total Time: 120 minutes
- Yield: 4 servings 1x
- Diet: Vegetarian
Description
Delicious No-Bake Oreo Cheesecake Cups featuring a creamy cheesecake filling and crunchy Oreo crust, perfect for any occasion.
Ingredients
- 1 package Oreo cookies (about 15 cookies)
- 8 oz cream cheese, softened
- 1/2 cup powdered sugar
- 1 cup whipped topping
- 1/2 cup chocolate chips (optional for garnish)
Instructions
- Prepare Your Ingredients: Make sure your cream cheese is softened to room temperature. If time is short, you can microwave it for about 10-15 seconds—just be careful not to melt it!
- Crush the Oreo Cookies: In a zip-top bag, throw in the Oreo cookies, seal it tight, and use a rolling pin or your hands to crush them into fine crumbs.
- Make the Cookie Crust: In a mixing bowl, take about 3/4 of the crushed Oreos and mix them with 2 tablespoons of melted butter until combined. Spoon into the bottom of your cups to form an even base.
- Prepare the Cheesecake Filling: Beat softened cream cheese with an electric mixer until smooth. Gradually add in the powdered sugar and beat until well combined.
- Add the Whipped Topping: Gently fold in the whipped topping into the cream cheese mixture.
- Layer It Up: Spoon the cheesecake filling over the cookie crust in your cups.
- Top It Off: Sprinkle the remaining crushed Oreos on top of your cheesecake filling and optionally add chocolate chips.
- Chill Out: Place your filled cups in the fridge for at least 120 minutes (or overnight for maximum flavor infusion!).
- Serve and Enjoy: Add a dollop of whipped cream on top before serving if desired.
Notes
These cups can be made a day in advance and stored in the fridge. Enjoy them cold!
- Prep Time: 15 minutes
- Cook Time: 0 minutes
- Category: Dessert
- Method: No-Bake
- Cuisine: American
Nutrition
- Serving Size: 1 cup
- Calories: 300
- Sugar: 20g
- Sodium: 190mg
- Fat: 16g
- Saturated Fat: 8g
- Unsaturated Fat: 0g
- Trans Fat: 0g
- Carbohydrates: 34g
- Fiber: 1g
- Protein: 4g
- Cholesterol: 40mg
Keywords: no-bake, cheesecake, Oreo, dessert, easy recipe