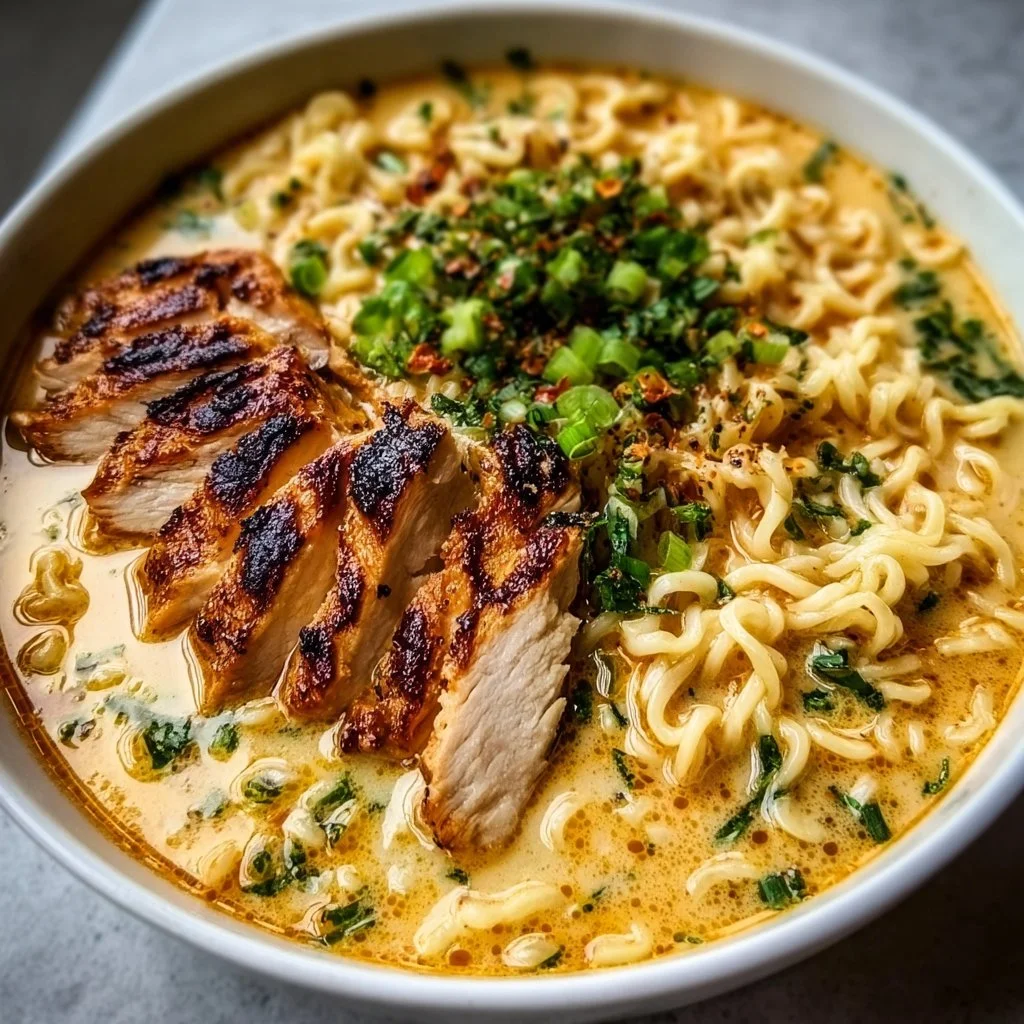
Creamy Garlic Chicken Ramen
Creamy Garlic Chicken Ramen: A Comforting Bowl of Happiness
Hey there, food lovers! It’s Beau Collier here, and today I’m beyond excited to share one of my ultimate comfort food recipes with you: Creamy Garlic Chicken Ramen! If you’re like me, then there’s nothing quite like slurping down a warm bowl of ramen after a long day, right? This dish is not only incredibly savory and satisfying but also super simple to whip up in your own kitchen. With a creamy broth, tender chicken, and a medley of vibrant veggies, it’s practically a hug in a bowl!
You may be wondering what makes this ramen so special. It’s all about those deep, rich flavors and the creamy texture that comforts the soul. Plus, who doesn’t love a sprinkle of bright green onions on top? Whether it’s a rainy day, a cozy movie night, or just a regular Tuesday, this Creamy Garlic Chicken Ramen is the perfect way to warm your heart and fill your belly. So, let’s dive into the delightful world of ramen that I know you’re going to love!
A Culinary Memory to Warm Your Heart
Before we get into the nitty-gritty of the recipe, I want to take you on a little trip down memory lane. I’ll never forget the first time I had ramen in a quaint little noodle shop while traveling through Kyoto. The atmosphere was buzzing with laughter, the aroma of broth wafting through the air was nothing short of intoxicating, and I could hardly contain my excitement. I ordered a bowl of garlic ramen, and with each slurp, I felt all my worries drifting away. It was comfort food at its finest!
After returning home, I kept dreaming about that ramen. I decided to recreate the experience in my cozy kitchen, tweaking the recipe to add my own creamy twist. The result was this show-stopping Creamy Garlic Chicken Ramen! Each time I make it, I’m transported back to that little noodle shop, surrounded by warmth, laughter, and incredible flavors. Now, it’s time for you to create your own ramen memories!
Ingredients You’ll Need
Here’s what you’ll need to make this delicious bowl of Creamy Garlic Chicken Ramen:
-
2 boneless, skinless chicken breasts: Tender and juicy, they soak up all those savory flavors. Swap for tofu or shrimp for a protein change-up.
-
4 cups chicken broth: This serves as the base for your broth. For a lighter option, use low-sodium broth. Vegetable broth works well for a veggie version!
-
200g ramen noodles: Fresh or dried, either works beautifully! You can experiment with udon noodles or even zucchini noodles if you want a low-carb option.
-
2 tablespoons butter: Not just for flavor; it creates a luscious creamy texture! Use olive oil to make it dairy-free.
-
4 cloves garlic, minced: The star of the show! Fresh garlic delivers the best flavor. If you’re in a hurry, garlic powder can be a backup.
-
1 cup heavy cream: This is what gives its creamy goodness! Use coconut milk for a dairy-free spin or half-and-half if you want a lighter version.
-
1 cup mixed vegetables (e.g., broccoli, carrots, bell peppers): Colorful, nutritious, and delicious! You can swap in any veggies you love or have on hand.
-
Salt and pepper to taste: Essential for bringing out all the flavors! Make sure to taste as you go.
-
Chopped green onions for garnish: These add a lovely freshness! You can use cilantro or basil for a different twist.
Step-by-Step Instructions
Now that we’ve got all our ingredients prepped and ready to go, let’s roll up our sleeves and get cooking! Here’s how to make your Creamy Garlic Chicken Ramen:
Step 1: Cook the Chicken
Start by heating a large pot over medium heat, then melt the butter. Once melted, add the two chicken breasts and season both sides with salt and pepper. Cook for about 6-7 minutes on each side until they’re golden brown and cooked through.
Tip: If you have a meat thermometer, you’re looking for an internal temperature of 165°F (74°C) to ensure they’re fully cooked. Once done, remove them from the pot and set aside to rest.
Step 2: Sauté the Garlic
In the same pot, lower the heat slightly and add the minced garlic. Sauté it for about 1-2 minutes until fragrant but be careful not to burn it! Burnt garlic can turn bitter and ruin the awesome flavors we’re building.
Chef Insight: This step is crucial because it infuses the butter with garlic goodness, laying a phenomenal flavor foundation for the broth.
Step 3: Make the Broth
Now, pour in the chicken broth gently, scraping the bottom of the pot to deglaze it and incorporate all those tasty bits stuck from cooking the chicken. Bring it to a gentle simmer.
Tip: If you want extra depth, you can add a splash of soy sauce or a dash of sesame oil here.
Step 4: Cook the Noodles and Vegetables
Add the ramen noodles directly into the broth. They usually take about 4-5 minutes to cook depending on the brand, so keep an eye on them! When there’s about 2 minutes left, toss in your mixed vegetables.
Kitchen Hack: If you like your vegetables tender, add them in at the beginning of the noodle cooking time. For crunchier veggies, like bell peppers, add them in the last minute.
Step 5: Create Creamy Goodness
Once the noodles are tender, stir in the heavy cream until well combined. Let it simmer for another minute to blend all the flavors together.
Tip: If the broth seems too thick, feel free to add a splash of additional chicken broth to reach your desired consistency.
Step 6: Slice and Serve!
While the ramen is simmering, slice the cooked chicken into thin pieces. Ladle the ramen, noodles, vegetables, and creamy broth into bowls, topping each with sliced chicken and a sprinkle of chopped green onions.
Serving Suggestion: For added flair, you can drizzle a bit of chili oil on top for a kick or garnish with sesame seeds!
Recipe Variations
Now that you’ve got the basics down, let me share a few fun twists you can try with this Creamy Garlic Chicken Ramen:
-
Spicy Garlic Chicken Ramen: Add a tablespoon of sriracha or red pepper flakes to the broth for a spicy kick.
-
Creamy Veggie Ramen: Omit the chicken and add more of your favorite vegetables. Try mushrooms, spinach, or snap peas!
-
Coconut Curry Ramen: Swap the chicken broth for coconut milk and add curry paste for an exotic twist.
-
Sesame Ginger Ramen: Incorporate grated ginger with the garlic and sprinkle sesame oil over your bowl for added aroma and flavor.
-
Chicken and Corn Ramen: Toss in a cup of corn (frozen or fresh) for a sweet pop that complements the garlic beautifully.
Chef’s Notes
This Creamy Garlic Chicken Ramen recipe has evolved over time in my kitchen, starting as a basic ramen dish and gradually growing into this ultra-comforting version. I’ve experimented with different broths and proteins, but honestly, there’s just something so nostalgic about the garlic-chicken-cream combo. Every time I serve it up, it draws smiles and happy tummies. Just the magic of food, am I right?
And hey, if you end up tweaking this recipe yourself, I’d love to hear your immersive experiences or the twists you add—because, in the cooking world, there’s always room for creativity!
FAQs and Troubleshooting
1. What if my broth is too thick?
If your broth is too thick after adding the cream, feel free to thin it out with a splash of chicken broth or water until you reach your desired consistency.
2. My chicken is tough. What did I do wrong?
This can happen if the chicken is cooked too long on high heat. Make sure you’re cooking it over medium heat and check for doneness with a thermometer.
3. Can I make this ahead of time?
Absolutely! You can prep the chicken and vegetables ahead and then cook them when you’re ready for dinner. Just be aware that the noodles are best cooked fresh!
4. How do I store leftovers?
Store any leftovers in an airtight container in the fridge. Reheat gently on the stove, adding a bit of water or broth to loosen if it thickens in the fridge.
Nutritional Info
While I don’t dive deep into strict nutritional guidelines, I will say this—this Creamy Garlic Chicken Ramen serves as a hearty meal packed with protein from the chicken and lots of vitamins from those colorful veggies. The heavy cream does add a richness that you’ll want to balance out with a fresh salad or some fruit on the side.
Estimate per serving:
- Calories: 600
- Protein: 40g
- Fat: 30g
- Carbohydrates: 45g
(Adjust based on variations and ingredient choices!)
Final Thoughts
And there you have it, my friends! Your very own bowl of Creamy Garlic Chicken Ramen that’s sure to bring warmth and smiles to your dining experience. The best part about recipes like this is how they serve as a canvas for your creativity and personal touches. Don’t be afraid to experiment with flavors or ingredients based on what you have at home!
As you savor each bite, I hope you feel the love and the joyful spirit that comes from cooking. Gather your loved ones around the table, pour some warm tea, maybe even a quiet movie humming in the background, and dig in!
If you make this recipe, snap a pic and tag me on social media! I can’t wait to see how your version turns out—happy cooking, everyone!
Stay warm and keep the good vibes rolling!
Beau Collier, signing off from Feastical!

Creamy Garlic Chicken Ramen
- Total Time: 30 minutes
- Yield: 4 servings 1x
- Diet: Non-Vegetarian
Description
A comforting bowl of creamy garlic chicken ramen, perfect for warming your heart and filling your belly.
Ingredients
- 2 boneless, skinless chicken breasts
- 4 cups chicken broth
- 200g ramen noodles
- 2 tablespoons butter
- 4 cloves garlic, minced
- 1 cup heavy cream
- 1 cup mixed vegetables (e.g., broccoli, carrots, bell peppers)
- Salt and pepper to taste
- Chopped green onions for garnish
Instructions
- Cook the chicken: Heat a large pot over medium heat, melt the butter, season chicken with salt and pepper, and cook until golden brown.
- Sauté the garlic: In the same pot, add minced garlic and sauté until fragrant.
- Make the broth: Pour in the chicken broth, scraping the bottom of the pot, and bring it to a gentle simmer.
- Cook the noodles and vegetables: Add ramen noodles and cook, adding mixed vegetables for the last 2 minutes.
- Create creamy goodness: Stir in heavy cream and let it simmer.
- Slice and serve: Slice cooked chicken, ladle ramen into bowls, and top with chicken and green onions.
Notes
For a spicy kick, add sriracha to the broth. You can also try coconut milk for a different flavor.
- Prep Time: 10 minutes
- Cook Time: 20 minutes
- Category: Main Course
- Method: Cooking
- Cuisine: Japanese
Nutrition
- Serving Size: 1 serving
- Calories: 600
- Sugar: 4g
- Sodium: 800mg
- Fat: 30g
- Saturated Fat: 16g
- Unsaturated Fat: 9g
- Trans Fat: 0g
- Carbohydrates: 45g
- Fiber: 3g
- Protein: 40g
- Cholesterol: 130mg
Keywords: ramen, creamy garlic chicken, comfort food, easy recipe, homemade ramen
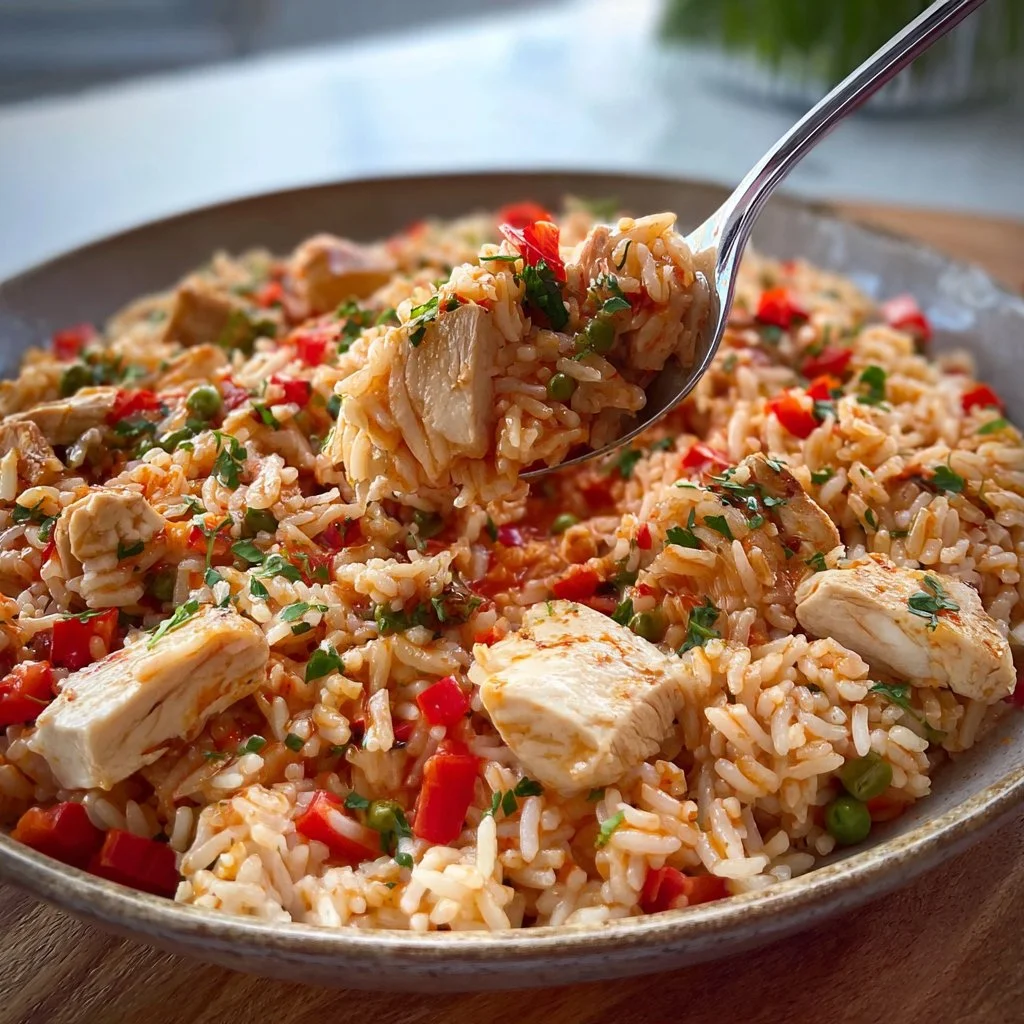
Serbian Rice Dish with Chicken | One Pot Rice | Healthy Cooking | Low-Calorie Recipes
The Ultimate Serbian Rice Dish with Chicken: One-Pot Comfort Food
Hey there, food lovers! Welcome back to Feastical! Today, we’re diving into a dish that is not only mouth-wateringly delicious but also easy to whip up any day of the week: a comforting Serbian Rice Dish with Chicken. This one-pot wonder is a delightful combination of tender chicken, perfectly cooked rice, and a medley of spices that will transport your taste buds straight to the Balkans.
Let me tell you, there’s something special about cooking with love and tradition. As we gather around the kitchen, the aroma wafts through the air, making everyone feel at home. It’s all about sharing moments over food, and that’s what I cherish the most. This recipe is hearty yet healthy, striking the perfect balance for those who want to indulge without breaking the calorie bank. Spoiler alert: you can totally enjoy this dish guilt-free!
I also love how this dish is so versatile. Whether you’re cooking for a family gathering or just whipping up a quick weeknight meal, this recipe has your back! And because it’s all cooked in one pot, the cleanup is a breeze. So, grab your spatula, and let’s get cooking!
Personal Story
I’ll never forget the first time I tasted this savory Serbian Rice Dish. It was at a small family gathering, where my friend’s grandmother whipped up the most incredible spread. The moment I laid eyes on that pot of steaming rice topped with tender chunks of chicken, my stomach started to rumble. The symphony of spices and flavors made my taste buds dance with joy!
In that moment, I was swept into a wave of nostalgia, reminiscent of my own family dinners, where we’d feast on comforting dishes that brought us closer together. I remember how we passed bowls around, sharing not just food but laughter and stories. That first bite was a game-changer for me—not just because of the flavors but also for what it represented: love, tradition, and connection.
And now, I’m thrilled to share this culinary treasure with you. Let’s recreate those warm memories in your kitchen!
Ingredients
Here’s what you’ll need to make this delicious Serbian Rice Dish with Chicken:
-
1.5 cups long-grain rice
The backbone of this dish! Long-grain rice is great here as it cooks up fluffy and doesn’t get mushy. If you’re looking for a healthier swap, you can try brown rice, but keep in mind it may require a little more water and a longer cooking time. -
1 lb chicken thighs (boneless, skinless)
Juicy, tender, and packed with flavor. Chicken thighs are less dry than chicken breasts, making them perfect for this dish. If you prefer a leaner option, boneless chicken breast works too; just be sure to watch the cooking time! -
1 medium onion, diced
The aromatic foundation of your dish! Onions add depth and sweetness. If you’re not an onion fan, shallots or leeks make great substitutes. -
2 cloves garlic, minced
Because what’s a dish without garlic? It infuses everything with a delightful aroma. For a milder taste, feel free to use garlic powder instead. -
1 bell pepper (any color), diced
Bell peppers add color and a slight crunch. You can swap it with any veggies you have on hand—zucchini or carrots are both fantastic options! -
2 cups chicken broth
The flavorful liquid that brings the rice to life. Low-sodium chicken broth is a great choice if you’re watching your salt intake. You can also use vegetable broth for a vegetarian version! -
1 tsp paprika
This adds a beautiful color and a smoky flavor. For a kick, you can use smoked paprika instead! -
Salt and pepper to taste
Essential for bringing out the flavors; adjust to your liking. Remember, you can always add more, but you can’t take it out! -
Fresh parsley for garnish
A little sprinkle of color and freshness goes a long way! If you’re out of parsley, fresh cilantro works too.
Step-by-Step Instructions
Now that we’ve got our ingredients ready, let’s jump into the kitchen! Follow these detailed steps to create your own Serbian Rice Dish with Chicken.
-
Sauté the Chicken
In a large pot or Dutch oven, heat a drizzle of olive oil over medium heat. Season your chicken thighs with salt, pepper, and paprika. Once the oil is hot, add the chicken, searing until golden brown on each side (about 5-7 minutes total). Don’t over-crowd the pot; you want that nice browning! Once browned, remove the chicken and set it aside. -
Sauté the Aromatics
In the same pot, toss in your diced onions, and let them sweat for about 3-4 minutes. You want them to become translucent and aromatic. Then, add in the minced garlic and diced bell pepper, allowing them to mingle with the onions for another minute or so. Talk about a flavor party! -
Add the Rice
Here’s where it gets exciting! Pour in the long-grain rice, and give it a gentle stir, allowing it to coat with the oil and soak up those fragrant juices. Sauté for a couple more minutes; this step enhances the rice’s nutty flavor. -
Pour in the Liquid
Carefully pour the chicken broth into the pot. Give it a good stir, returning the browned chicken to the mixture. Make sure the rice is submerged in the broth. If it seems a bit dry, just add a splash more liquid; we want the rice to be perfectly cooked! -
Simmer
Bring the pot to a gentle boil, then cover and reduce the heat to low. Let it simmer for about 20-25 minutes, or until the rice is fluffy and the chicken is cooked through. Resist the urge to peek too often—trust the process! -
Fluff and Serve
Once cooked, remove the pot from heat, and let it sit, covered, for an extra 5 minutes. This helps the flavors meld together. Before serving, fluff the rice gently with a fork and garnish with freshly chopped parsley. Voilà! Your kitchen is about to smell heavenly.
Serving Suggestions
Presentation can elevate any dish! For this Serbian Rice Dish with Chicken, consider serving it directly from the pot for a cozy, rustic vibe. However, if you want to impress, gently scoop portions into warm bowls, and drizzle with a bit of extra virgin olive oil for a touch of elegance. Pair it with a simple side salad of mixed greens and a zesty vinaigrette for a well-rounded meal.
And don’t forget—you can also serve it with a side of crusty bread to soak up every last bit of that delicious broth!
Recipe Variations
Feeling adventurous? Here are a few creative twists you can try with this base recipe:
-
Veggie-packed Version: Toss in diced carrots and peas for an extra pop of color and nutrition! Just add them during the last 10 minutes of cooking to keep their crunch.
-
Spicy Kick: Add a pinch of red pepper flakes or diced jalapeños alongside the onions for a zesty heat.
-
Herbaceous Delight: Swap the parsley for fresh dill or basil for a unique twist—these herbs bring a fresh, vibrant flavor that complements the chicken beautifully.
-
Coconut Curry Chicken Rice: Add coconut milk instead of half the chicken broth, along with curry powder, for a tropical twist on this dish.
-
Lemon Herb Chicken: Squeeze fresh lemon juice and zest into the broth for a zesty brightness that livens up the dish.
Chef’s Notes
This recipe is one that has evolved over time in my own kitchen. The first time I tried making it, I was frazzled, juggling timing, and hoping for the best. Turns out, it can be quite forgiving! I’ve since learned that you can totally mix and match the vegetables and spices according to what you have on hand. Cooking should be fun, not stressful!
Also, a funny memory comes to mind: my first attempt ended in a minor rice explosion! I closed the lid too tightly, and let’s just say—a bit of steam escaped in the form of a rice volcano! Now, I always make sure to adjust the lid just right, allowing for some room for that bubbling goodness.
FAQs and Troubleshooting
Q1: What do I do if my rice is burning?
A: If you notice the rice sticking to the bottom, lower the heat immediately. Make sure your pot has a heavy bottom to distribute the heat evenly. Adding a splash of water may also help—you want to create steam to finish cooking.
Q2: Can I meal prep this dish?
A: Absolutely! This dish stores well in the fridge. Just keep it in an airtight container for up to 3-4 days. Reheat in the microwave or on the stove with a little added liquid.
Q3: What if I don’t have chicken on hand?
A: You can use pieces of turkey, or for a vegetarian option, substitute with chickpeas or lentils! Just be mindful to adjust the cooking time accordingly.
Nutritional Info
Here’s a quick breakdown of the nutrition for a serving of this delicious dish:
- Calories: Approximately 350 kcal
- Protein: 25g
- Carbohydrates: 40g
- Fat: 10g
- Fiber: 3g
- Sodium: 400mg (can be lower if using low-sodium broth)
This dish is not only packed with flavor but also provides a good balance of protein and carbs, making it a wholesome choice for a healthy meal!
Final Thoughts
So there you have it, my friends! A delightful Serbian Rice Dish with Chicken that’s bound to become a favorite in your household. Whether you’re cooking for family, friends, or simply treating yourself, this dish is an invitation to gather around the table and make memories.
Don’t forget to share your thoughts in the comments below! I’d love to hear how your creation turned out or any delicious twists you made. Until next time, keep those spatulas moving and those smiles wide! Happy cooking! 🥄❤️
Print
The Ultimate Serbian Rice Dish with Chicken
- Total Time: 40 minutes
- Yield: 4 servings 1x
- Diet: Gluten-Free
Description
A comforting one-pot Serbian rice dish featuring tender chicken, perfectly cooked rice, and a medley of spices.
Ingredients
- 1.5 cups long-grain rice
- 1 lb chicken thighs (boneless, skinless)
- 1 medium onion, diced
- 2 cloves garlic, minced
- 1 bell pepper (any color), diced
- 2 cups chicken broth
- 1 tsp paprika
- Salt and pepper to taste
- Fresh parsley for garnish
Instructions
- Sauté the chicken in a large pot with olive oil, seasoning with salt, pepper, and paprika until golden brown (about 5-7 minutes). Remove and set aside.
- Sauté the onions until translucent (3-4 minutes), then add garlic and bell pepper for another minute.
- Add the rice and stir to coat with oil and juices; sauté for a couple of minutes.
- Pour in the chicken broth and return the chicken to the pot, ensuring the rice is submerged.
- Simmer on low heat until the rice is fluffy and the chicken is cooked through (20-25 minutes).
- Fluff the rice with a fork, garnish with parsley, and serve.
Notes
Feel free to customize the vegetables and spices based on your preference. Cooking should be fun and flexible!
- Prep Time: 10 minutes
- Cook Time: 30 minutes
- Category: Main Course
- Method: Stovetop
- Cuisine: Serbian
Nutrition
- Serving Size: 1 serving
- Calories: 350
- Sugar: 2g
- Sodium: 400mg
- Fat: 10g
- Saturated Fat: 2g
- Unsaturated Fat: 8g
- Trans Fat: 0g
- Carbohydrates: 40g
- Fiber: 3g
- Protein: 25g
- Cholesterol: 60mg
Keywords: Serbian rice, chicken recipe, one-pot meals, comfort food, easy dinner

Chicken Caesar Pasta Salad
Chicken Caesar Pasta Salad: A Delightful Fusion of Flavors
Hey there, food lovers! It’s Beau Collier here, and today, we’re whipping up something that’s comfort in a bowl—my Chicken Caesar Pasta Salad! Picture this: tender pasta twirls mingling with juicy pieces of chicken, crisp romaine lettuce, and a creamy Caesar dressing that can make any flavor lover swoon. If that doesn’t get your apron on, I don’t know what will!
Now, I have to tell you why this dish is so special to me. Growing up, my family had a tradition every Sunday where we would gather around the dining table, and my mom would prepare her famous Caesar salad. She always insisted on making her own dressing—it was a sacred process! The smell of garlic and the tanginess of anchovies wafting through the house was intoxicating. Fast-forward a few years later, and I decided to add a delightful twist: pasta! Combining those beloved flavors with the heartiness of pasta gives you the perfect dish for potlucks, picnics, or simply as a comforting dinner at home.
So, whether you’re planning a family gathering, a quick lunch, or just want to indulge in a bowl of deliciousness, this Chicken Caesar Pasta Salad is about to become your new go-to recipe. Grab your favorite bowl, roll up those sleeves, and let’s dive into this culinary adventure!
Personal Story
Every time I make this Chicken Caesar Pasta Salad, I’m transported to those sunny Sunday afternoons spent in the kitchen with my mom. We would crank up some classic tunes and cook together, laughing and sharing stories from the week. I remember being the sous-chef, eagerly waiting for the moment I could help add the ingredients to the bowl. The creamy dressing would always somehow find its way onto my hands, leading to a playful food fight that would leave us both giggling.
One particular Sunday stands out—she let me take the reins as we experimented with adding grilled chicken to her creamy dressing, turning her classic recipe into something fabulous and filling. From that day on, this dish became our family favorite, and making it became our creative way of bonding. This Chicken Caesar Pasta Salad is much more than just a recipe; it’s a celebration of love, laughter, and togetherness around the table.
Ingredients
Here’s what you’ll need to whip up this scrumptious Chicken Caesar Pasta Salad:
-
8 oz pasta (such as rotini or fusilli)
Use your favorite pasta shape! Rotini and fusilli hold the dressing well, but penne or farfalle work too. Gluten-free pasta is also a fantastic option. -
2 cups cooked chicken, diced
Feel free to use leftover rotisserie chicken or grilled chicken. If you’re a vegetarian, swap in chickpeas or tofu for great protein! -
1 cup romaine lettuce, chopped
Crispy romaine adds that classic Caesar salad crunch. If you’d like, you can mix in some baby spinach or kale for extra nutrients. -
1/2 cup cherry tomatoes, halved
These little gems bring a burst of sweetness. Substitution tip: grape tomatoes or even diced cucumbers add wonderful freshness, too! -
1/4 cup grated Parmesan cheese
Parmesan adds a nutty flavor. Pecorino Romano works well too, or you can use nutritional yeast for a vegan option. -
1/2 cup Caesar dressing
You can make your own for a personal touch or save time with a store-bought version. Homemade is usually the way to go for freshness! -
Salt and pepper to taste
Always season to your preference! Freshly cracked black pepper enhances the flavors beautifully. -
Optional: croutons for topping
Who can resist that delightful crunch? You can either buy them or toast some bread at home with a bit of olive oil and seasoning for a homemade treat!
Step-by-Step Instructions
Ready to bring this Chicken Caesar Pasta Salad together? Let’s dive into the steps!
-
Cook the Pasta
Start by boiling a large pot of salted water. Add the pasta and cook according to package instructions until al dente—trust me, you want that perfect bite. Don’t forget to give it a stir occasionally to prevent clumping! Once done, drain the pasta and give it a quick rinse under cold water to stop the cooking process.Chef’s Tip: Adding a splash of olive oil to the cooking water can prevent sticking and add a lovely flavor!
-
Prep the Chicken
While the pasta is cooking, dice your cooked chicken into bite-sized pieces. If you’re using leftover chicken, make sure it’s in nice, even chunks for a balanced bite in each forkful.Chef Insight: If you’re in a time crunch, pulling apart a rotisserie chicken works wonders!
-
Chop the Veggies
Next, it’s time to chop! Slice your romaine lettuce into bite-sized pieces and halve those juicy cherry tomatoes. Toss them together in a big mixing bowl.Fun Tip: If you want more color, consider adding radishes or bell peppers for a vibrant twist!
-
Combine the Pasta and Chicken
Once your pasta is cool, add it to the veggie mixture along with the diced chicken. Toss them together gently. You want everything to be well-combined but be careful not to crush the veggies! -
Dress It Up
Pour that luscious Caesar dressing over your pasta salad, and toss everything together with gusto. Make sure every pasta piece is coated.Little Chef Hack: For extra flavor, add a squeeze of lemon juice right at this stage; it will elevate all the flavors!
-
Season and Serve
Season your salad with salt and pepper to taste. If you want to get fancy, feel free to add in some extra grated Parmesan cheese or some chopped fresh parsley to give it that pop of green!Serving Suggestion: Transfer your pasta salad into a large serving bowl or individual plates. Top with croutons for that satisfying crunch right before serving!
Serving Suggestions
When it comes to serving this delightful Chicken Caesar Pasta Salad, presentation can make all the difference. Spread the salad onto a large platter, and garnish with extra Parmesan cheese and a dusting of black pepper. If you want to impress guests, fresh herbs like chopped basil or parsley can elevate the dish visually and flavor-wise.
For a cozy picnic-style presentation, serve this salad in mason jars! Layer it with pasta at the bottom, followed by chicken, lettuce, and cherry tomatoes. Top it with croutons just before serving to maintain their crunch. Personal servings not only look adorable but are also super convenient!
Recipe Variations
Here are a few creative twists to keep things exciting:
-
Mediterranean Twist: Add kalamata olives, feta cheese, and a dash of lemon juice for that Mediterranean flair!
-
Spicy Kick: Mix in some diced jalapeños or a pinch of red pepper flakes for a spicy Caesar salad!
-
Herbed Chicken: Season your chicken with Italian herbs before cooking for an aromatic boost. Thyme, rosemary, or oregano would work wonders!
-
Vegan Delight: Replace the chicken with chickpeas or tempeh and use a vegan Caesar dressing. Nutritional yeast can be switched for the Parmesan for a cheesy flavor without the dairy.
-
Pasta Swap: Use quinoa or farro instead of pasta for a hearty and wholesome grain option, making it gluten-free and packed with nutrients!
Chef’s Notes
You know, when I first created this Chicken Caesar Pasta Salad, I did it to simplify my meal prep for those weeks when life gets a bit too hectic. Little did I know it would become such a staple in my household—and even in my friends’ homes! Over the years, I’ve played around with various ingredients, and every tweak seems to lead to a new favorite. What’s special about this dish is its flexibility. Honestly, you can’t go wrong with it!
Remember that cooking is all about creativity, and don’t hesitate to experiment! If your pasta salad isn’t quite right, have a laugh about it. I once accidentally used a sweet dressing instead of Caesar—talk about a memorable dinner!
FAQs and Troubleshooting
-
Can I make this salad ahead of time?
Absolutely! Just keep the dressing separate until you’re ready to serve. This keeps the pasta and veggies from getting soggy. -
My pasta turned out mushy. What did I do wrong?
It’s easy to overcook pasta—next time, aim for al dente (it should have a slight bite). Rinse it in cold water right after draining to stop the cooking process. -
How do I store leftovers?
Store in an airtight container in the fridge for up to 3 days. If it starts to lose its crunch, consider tossing in some fresh greens just before serving to revive it! -
Can I freeze Chicken Caesar Pasta Salad?
While it’s not ideal to freeze it, if you have leftovers, separate any non-dressing ingredients before freezing. You can freeze cooked chicken and pasta separately, then mix them fresh when you’re ready to enjoy it again.
Nutritional Info
This Chicken Caesar Pasta Salad brings a hearty balance of proteins, carbs, and veggies. Here’s a quick nutritional overview for a serving size of about 1 cup (not including optional croutons):
- Calories: Approximately 400-450 kcal
- Protein: 25g (depending on chicken or other protein choice)
- Carbohydrates: 45g
- Fat: 15g
- Fiber: 3g
Keep in mind that these values can vary based on your ingredient choices!
Final Thoughts
Cooking is a joyful journey, and with this Chicken Caesar Pasta Salad, you’re not just following a recipe; you’re creating a shared experience that brings friends and family together. Whether it’s for picnics, parties, or just a cozy meal at home, there’s something incredibly comforting about this dish. Trust me, it’s simple yet stunning, and I hope it fills your kitchen with love, laughter, and perhaps a little chaos too.
So, the next time you’re looking for a delightful meal that packs a punch of flavor, remember this recipe! It’s easy to make and even easier to love. Now, roll up your sleeves, get your spatula ready, and enjoy creating something delicious. Happy cooking, my friends!
Print
Chicken Caesar Pasta Salad
- Total Time: 25 minutes
- Yield: 4 servings 1x
- Diet: Balanced
Description
A delightful fusion of flavors with tender pasta, juicy chicken, and crisp romaine tossed in creamy Caesar dressing.
Ingredients
- 8 oz pasta (such as rotini or fusilli)
- 2 cups cooked chicken, diced
- 1 cup romaine lettuce, chopped
- 1/2 cup cherry tomatoes, halved
- 1/4 cup grated Parmesan cheese
- 1/2 cup Caesar dressing
- Salt and pepper to taste
- Optional: croutons for topping
Instructions
- Cook the pasta by boiling a large pot of salted water. Add the pasta and cook according to package instructions until al dente. Drain and rinse under cold water.
- Prep the chicken by dicing it into bite-sized pieces.
- Chop the romaine lettuce and halve the cherry tomatoes. Toss them together in a large mixing bowl.
- Combine the cooled pasta with the veggie mixture and add the diced chicken. Toss gently.
- Dress the salad with Caesar dressing and toss to coat all ingredients.
- Season with salt and pepper to taste. Serve in a large bowl or individual plates, topped with croutons.
Notes
To prevent pasta from sticking, consider adding a splash of olive oil to the boiling water. Keep dressing separate until serving for best texture.
- Prep Time: 15 minutes
- Cook Time: 10 minutes
- Category: Salad
- Method: Mixing
- Cuisine: American
Nutrition
- Serving Size: 1 serving
- Calories: 425
- Sugar: 5g
- Sodium: 590mg
- Fat: 15g
- Saturated Fat: 5g
- Unsaturated Fat: 8g
- Trans Fat: 0g
- Carbohydrates: 45g
- Fiber: 3g
- Protein: 25g
- Cholesterol: 80mg
Keywords: salad, pasta, chicken, Caesar dressing, easy recipe, family meal

Japanese Egg Sandwich (Tamago Sando)
# Discovering the Joy of Tamago Sando: Japanese Egg Sandwich Magic

Hey there, food lovers! Today, we’re diving into a crowd-pleaser that has earned its rightful place in the hearts of many around the world: the Japanese egg sandwich, or **Tamago Sando**. If you’ve never had the pleasure of indulging in this fluffy and creamy delight, you’re in for a treat! Just imagine a perfectly seasoned egg filling nestled between slices of pillowy soft milk bread. Sounds tempting, right? So let’s not waste any time—grab your apron and let’s get cooking!

## A Slice of Nostalgia

Let me take you back to my first encounter with Tamago Sando. Picture this: I was exploring the bustling streets of Tokyo, surrounded by vibrant neon lights, delicious scents wafting from every corner, and the hum of excited chatter. I stumbled upon a tiny corner shop, almost hidden from sight, with a line of locals eagerly waiting outside. Intrigued, I decided to join the queue.

Once I reached the counter, the friendly owner handed me a freshly wrapped Tamago Sando. My first bite was magical—the creaminess of the egg filling complemented by the subtle sweetness of the mayo and the fluffy texture of the milk bread was pure bliss. In that moment, I understood why this humble sandwich has captured the hearts of many. It was like a cozy hug in sandwich form, and I knew then that I wanted to recreate this comforting delight in my own kitchen.

That experience not only sparked my love for Japanese cuisine but also inspired me to share this enchanting dish with you. So, are you ready to bring a little bit of that Tokyo magic into your own kitchen? Let’s go!

## Ingredients

Here’s what you’ll need to make the perfect Tamago Sando:

### For the Filling
- **6 large Pete and Gerry’s Organic Eggs**
  These eggs are not only rich in flavor but also come from birds raised in humane conditions. For a plant-based version, you can substitute with scrambled tofu.

- **1/4 teaspoon sugar**
  This adds a subtle sweetness that balances out the savory aspects of the dish. If you prefer less sweetness, feel free to skip it!

- **1/4 teaspoon salt**
  Essential for bringing out the flavors. Sea salt works wonders, but regular table salt will do just fine.

- **1/4 teaspoon ground black pepper**
  A pinch of this adds depth to your egg filling. You can use white pepper for a milder flavor if preferred.

- **1 to 2 teaspoons milk (or plant milk - Optional)**
  This makes the egg filling creamier. Dairy or plant-based milk like almond or oat milk works well!

- **4 tablespoons Japanese mayonnaise**
  A key ingredient that gives Tamago Sando its signature taste! If you’re in a pinch, regular mayo will suffice, but it might not have that delightful umami kick.

### For Assembly
- **4 slices Japanese milk bread**
  This bread is super soft and slightly sweet, making it the perfect vessel for our egg filling. Don’t worry if you can’t find it; use a soft white bread instead!

- **2 tablespoons unsalted butter (softened)**
  For that perfect toasty exterior! You can swap this for olive oil if you're looking for a dairy-free option.

- **Chives (sliced - for garnish, Optional)**
  A sprinkle of chives adds freshness and a pop of color. Feel free to use scallions or leave them out altogether!

## Step-by-Step Instructions

Now that we’ve gathered our ingredients, let’s put this Tamago Sando together. Ready? Here we go!

### Step 1: Perfectly Boil Your Eggs
Start by placing your eggs in a medium saucepan and covering them with cold water. Bring the water to a rapid boil over medium heat. Once boiling, cover the pot with a lid and turn off the heat. Let the eggs sit for 9-12 minutes depending on how firm you like your yolks.

#### Chef Hack:
If you’re aiming for that perfect, creamy yolk that’s not too dry, shoot for the 10-minute mark. Trust me; it’s magic!

### Step 2: Ice Bath Time!
As soon as your eggs are done sitting, transfer them to a bowl of ice water to cool. This stops the cooking process and makes peeling easier.

### Step 3: Peel and Chop
Once cool, gently tap your eggs on the counter to crack the shell and peel under running water to help remove the shell. After peeling, chop the eggs into small pieces.

### Step 4: Mix the Filling
In a medium bowl, combine the chopped eggs, sugar, salt, pepper, milk, and Japanese mayonnaise. Mix gently until creamy and well-combined. We want the eggs to be fluffy, so don’t overmix!

#### Chef Insight:
Using a fork to mix allows you to maintain a nice texture without turning it into a paste. The goal is to have soft chunks of egg peeking out!

### Step 5: Toast Your Bread
Lightly butter one side of each slice of Japanese milk bread. Heat a pan over medium heat and toast the bread, butter side down, until perfectly golden brown. Remove the bread from the heat and let it cool slightly.

### Step 6: Assemble Your Sandwich
Spread a generous amount of the egg filling on the unbuttered side of one slice of bread, then top it with another slice, butter side up. Gently press down to help everything stick together.

### Step 7: Slice and Serve
Slice your sandwich into quarters or halves—whatever shape makes your heart happy! If desired, garnish with sliced chives for a lovely presentation.

#### Chef Tip:
To keep that pristine sandwich look, use a sharp knife and make clean, swift cuts. You’ll impress your friends with your professional slicing skills!

## Serving Suggestions

What’s a sandwich without a little style, right? Serve your Tamago Sando with a side of lightly pickled cucumbers or a small salad for a refreshing crunch. If you’re feeling fancy, you can even present it with some sweet potato fries or homemade potato chips for extra fun!

### Pro Tip:
Wrap your sandwich tightly in parchment paper or wax paper for a rustic, café-style presentation. It also helps keep everything secure while you indulge!

## Recipe Variations

Here are a few creative twists and flavor options to keep your Tamago Sando exciting:

1. **Avocado Twist**: Mash half an avocado and fold it into your egg filling for a creamy texture with a hint of earthiness.

2. **Spicy Kick**: Add a dash of sriracha or a sprinkle of red pepper flakes to your egg mixture. Perfect for those who love a bit of heat!

3. **Herb Infusion**: Mix in finely chopped fresh herbs like dill or parsley to the egg filling for a refreshing twist.

4. **Sweet-Style**: Swap out the egg for a sweetened banana filling mixed with cream cheese for a dessert-style sandwich.

5. **Protein Boost**: Mix in some finely diced cooked ham or bacon bits for an extra protein punch—delicious and hearty!

## Chef’s Notes

Ah, Tamago Sando has a special place in my heart! Over the years, I’ve modified the recipe to suit my taste and the ingredients readily available at my local market. Often, I reminisce about that quaint little shop in Tokyo—what I wouldn’t give to teleport for a mini lunch date there! Sometimes, I even make a sweetened version for breakfast, adding a hint of cinnamon to the egg mixture; it’s a delightful treat you wouldn’t want to miss.

Remember, cooking is all about experimentation and personalization. Don’t hesitate to put your spin on it!

## FAQs and Troubleshooting

### 1. **What if my eggs are hard to peel?**
This can happen if they’re not fresh. Next time, try using eggs that are a few days old for easier peeling!

### 2. **Can I make this sandwich ahead of time?**
Absolutely! Just store the egg mixture in an airtight container and keep the bread separate until you’re ready to serve to avoid sogginess.

### 3. **Why does my sandwich look flat?**
If your sandwich becomes flat, it may be from too much filling. Try reducing the egg mixture or using thicker bread!

### 4. **Can I use regular mayo instead of Japanese mayo?**
While traditional Japanese mayo adds a unique flavor, regular mayo will work! Just add a few drops of rice vinegar for an extra kick.

## Nutritional Info

While every sandwich can differ in nutrition based on ingredients and portions, here’s a rough estimate of the nutritional value for one Tamago Sando, assuming standard ingredients and serving sizes:

- **Calories**: Approximately 350 calories
- **Protein**: 16 grams
- **Fat**: 24 grams
- **Carbohydrates**: 24 grams
- **Fiber**: 2 grams
- **Sugar**: 2 grams

Tamago Sando is a great option for a satisfying lunch or snack, loaded with protein and deliciousness!

## Final Thoughts

And there you have it, my food-loving friends! A delightful journey into the world of Tamago Sando. Whether you choose to follow my recipe to the letter or put your own unique spin on it, I promise this sandwich will warm your heart just like it did for me on that fateful day in Tokyo. Food is all about sharing experiences and creating memories, and I hope this dish adds a little warmth to your kitchen. So go on, gather your ingredients, and get ready to enjoy this cozy comfort food that’s become a favorite in my home.

Happy cooking, and catch you next time on Feastical!

Tamago Sando: Japanese Egg Sandwich
- Total Time: 30 minutes
- Yield: 2 servings 1x
- Diet: Vegetarian
Description
A fluffy and creamy Japanese egg sandwich featuring perfectly seasoned egg filling nestled between slices of soft milk bread.
Ingredients
- 6 large Pete and Gerry’s Organic Eggs
- 1/4 teaspoon sugar
- 1/4 teaspoon salt
- 1/4 teaspoon ground black pepper
- 1 to 2 teaspoons milk (or plant milk – Optional)
- 4 tablespoons Japanese mayonnaise
- 4 slices Japanese milk bread
- 2 tablespoons unsalted butter (softened)
- Chives (sliced – for garnish, Optional)
Instructions
- Start by placing your eggs in a medium saucepan and covering them with cold water. Bring the water to a rapid boil over medium heat.
- Once boiling, cover the pot with a lid and turn off the heat. Let the eggs sit for 9-12 minutes.
- As soon as your eggs are done sitting, transfer them to a bowl of ice water to cool.
- Once cool, gently tap your eggs on the counter to crack the shell and peel under running water.
- In a medium bowl, combine the chopped eggs, sugar, salt, pepper, milk, and Japanese mayonnaise. Mix gently until creamy.
- Lightly butter one side of each slice of Japanese milk bread.
- Heat a pan over medium heat and toast the bread, butter side down, until perfectly golden brown.
- Spread a generous amount of the egg filling on the unbuttered side of one slice of bread, then top with another slice, butter side up.
- Slice your sandwich into quarters or halves and garnish with sliced chives if desired.
Notes
For a twist, add mashed avocado, sriracha, or fresh herbs to the egg mixture. Can be made ahead of time!
- Prep Time: 15 minutes
- Cook Time: 15 minutes
- Category: Sandwich
- Method: Boiling & Toasting
- Cuisine: Japanese
Nutrition
- Serving Size: 1 sandwich
- Calories: 350
- Sugar: 2g
- Sodium: 500mg
- Fat: 24g
- Saturated Fat: 10g
- Unsaturated Fat: 10g
- Trans Fat: 0g
- Carbohydrates: 24g
- Fiber: 2g
- Protein: 16g
- Cholesterol: 370mg
Keywords: Japanese egg sandwich, Tamago Sando, comfort food, easy lunch, vegetarian sandwich
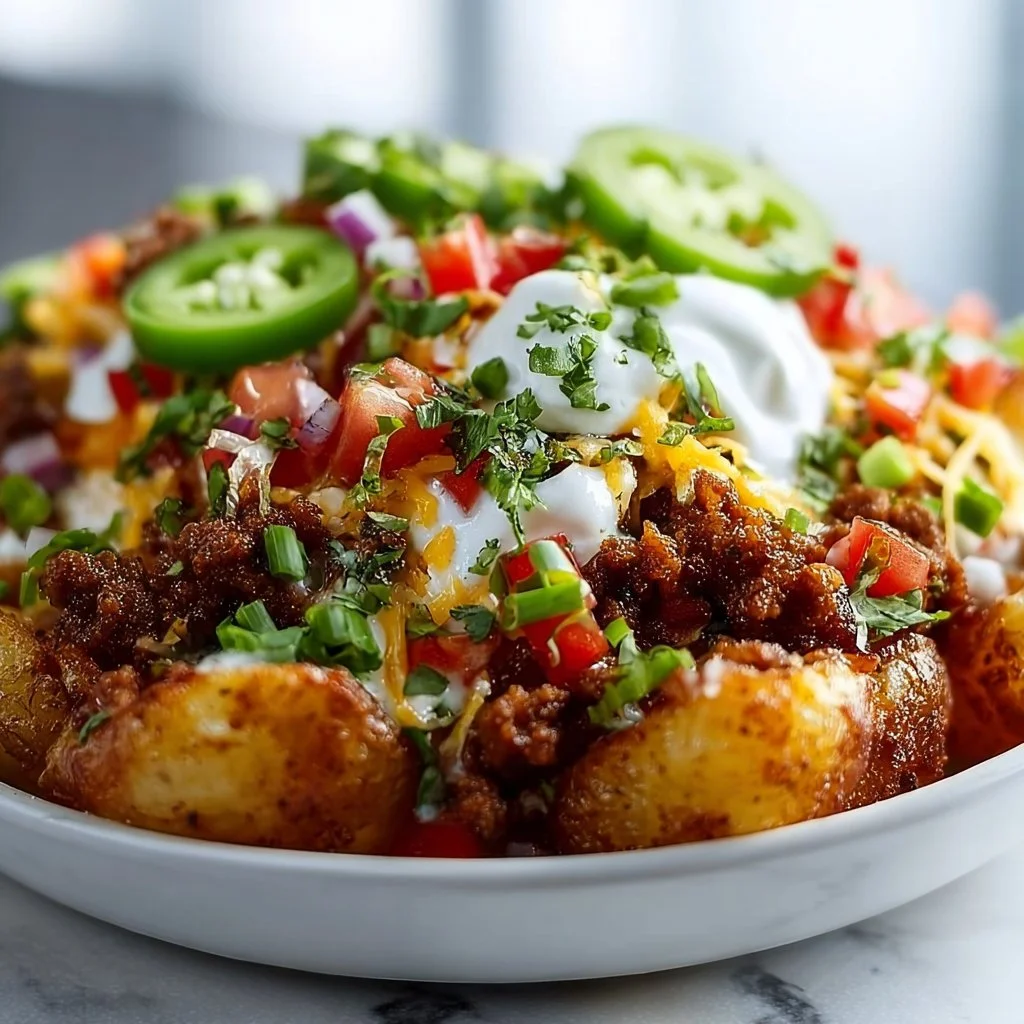
Loaded Potato Taco Bowl
Loaded Potato Taco Bowl: A Feast for Your Taste Buds
Hey there, food lovers! Welcome back to Feastical, where we whip up a delectable storm with ease and panache. Today, I’m super excited to share one of my absolute favorite comfort-food creations: the Loaded Potato Taco Bowl! 🎉 This dish is a vibrant mash-up that combines hearty baked potatoes with the colorful zest of taco flavors, making it a fantastic option for a casual family dinner or a fun meal prep. So, grab your spatula, roll up those sleeves, and let’s get cooking!
A Memory to Savor
Let’s take a little trip down memory lane, shall we? Ever since I was young, I’ve had a special place in my heart for taco night at home. It was that magical time of the week when my family would gather around the dinner table with bowls of fresh ingredients, everyone ready to build their dream taco creations. The air was filled with laughter and the delicious aroma of spices.
One particular taco night stands out in my memory: it was my birthday, and my family had set up a “create your own taco” fiesta, complete with all the toppings you could imagine. My younger sister and I decided to go a little crazy that night and tried to outdo each other with the most outrageous taco concoctions. Picture this: a towering mountain of crispy potato strips, gooey cheese, and enough salsa to cause a flavor explosion!
Fast forward to today, and I’ve channeled that love for tacos and nostalgia into this Loaded Potato Taco Bowl. It’s a dish designed to bring people together, just like those cherished taco nights from my childhood.
Ingredients
Here’s what you’ll need to whip up your Loaded Potato Taco Bowls. Let’s break down each ingredient so you can make informed choices!
-
2 large potatoes, diced
The heart of your bowl! I recommend russet potatoes for their fluffy texture when baked. If you’re looking for a healthier twist, sweet potatoes also work well here. -
1 lb ground beef or turkey
The protein powerhouse! Ground turkey is a leaner option, but it’s all about your preference. For a vegetarian alternative, use crumbled tempeh or lentils. -
1 cup black beans, drained and rinsed
Beans are a fantastic source of fiber and add a lovely creaminess to the bowl. If you’re not a bean fan, you can swap them for kidney beans or chickpeas. -
1 cup corn kernels (fresh or frozen)
Corn brings a pop of sweetness. If corn is out of season, feel free to use canned corn—just be sure to drain it well! -
1 cup diced bell peppers
Any color works! Red, yellow, or green, it’s about what you enjoy. These add flavor and a crisp texture. -
1 avocado, diced
This creamy fruit enriches the dish. If avocados aren’t ripe, try substituting with Greek yogurt for a tangy twist. -
1 cup shredded cheese (cheddar or Mexican blend)
Cheese makes everything better! Grate your own for the best melt. If you want to keep it dairy-free, use a nut-based cheese alternative. -
1 tablespoon olive oil
A dash of good fat for flavor and cooking. You can use avocado oil for a slightly different taste. -
1 teaspoon chili powder
This adds warmth! Adjust to taste based on your spice tolerance; go for smoked paprika if you want a different flavor profile. -
1 teaspoon cumin
Cumin brings an earthy depth. Feel free to experiment with coriander for a fresh twist! -
Salt and pepper to taste
Seasoning is crucial! Always taste as you go to elevate those flavors. -
Fresh cilantro for garnish
A sprinkle of freshness! If cilantro’s not your thing, fresh parsley works too.
Step-by-Step Instructions
Let’s get those potatoes loaded, folks! Here’s how to create your Loaded Potato Taco Bowl, step-by-step:
-
Bake those Potatoes!
Preheat your oven to 400°F (200°C). Dice your potatoes into bite-sized cubes and toss them in a mixing bowl with olive oil, salt, pepper, and half of your chili powder and cumin. Spread them out in a single layer on a baking sheet. Bake for about 25-30 minutes until golden brown and crispy on the edges. Pro Tip: Turn them halfway through for even crispiness! -
Cook the Ground Meat.
While your potatoes are cooking, grab a skillet and heat over medium-high heat. Add your ground beef or turkey, breaking it up with a spoon. Sprinkle in the remaining chili powder and cumin, adding salt and pepper to taste. Cook until the meat is browned and fully cooked—about 5-7 minutes. Drain any excess fat if needed. Chef Hack: Add a splash of broth for moisture and flavor if your meat seems dry. -
Prep the Veggies!
In the same skillet (because who wants to do extra dishes?), toss in your diced bell peppers and the rinsed black beans. Sauté them together for 3-4 minutes until the peppers are tender and vibrant. Feel free to season with a tad more chili powder if you want that extra oomph! -
Add the Corn.
Mix in the corn and stir everything together, letting the heat warm it through. This step should only take about 2 minutes. If you want to swap corn for something different, now’s the time to get creative! -
Assembly Line!
Now it’s your time to shine! Grab your favorite bowls, ladle some crispy baked potatoes to form a base, then add layers of the flavored beef mixture, and top it off with diced avocado and shredded cheese. I love to use a generous handful of cheese, as it melts beautifully with the heat from the potatoes and meat. -
Garnish like a Pro!
Don’t forget those finishing touches! Sprinkle freshly chopped cilantro over the top for vibrancy and flavor. If you’re feeling fancy, drizzle with lime juice or your favorite taco sauce to bring it all home.
Serving Suggestions
When it comes to serving, think about creating a taco bar vibe! Treat your family or friends to their own Loaded Potato Taco Bowls, complete with various toppings. Set out extra garnishes like sour cream, jalapeños, and salsa for people to customize their creations. Serve with a side of tortilla chips for that perfect crunch, and don’t forget some refreshing beverages—maybe a zesty limeade or a chilled beer! Cheers to a meal that not only tastes amazing but looks vibrant and inviting.
Recipe Variations
Now that you have the basics down, let’s get creative! Here are some fun variations to try:
-
Fiesta Loaded Potato Bowl:
Add taco seasoning to your baked potatoes and layer them with spicy chorizo for an extra kick. -
Vegetarian Delight:
Swap the meat for a mix of black beans and sweet potatoes. It’s hearty, delicious, and full of flavor! -
Mexican Street Corn Style:
Stir in some crumbled feta and add lime juice to your corn for that traditional elote flavor. -
Breakfast Taco Bowl:
Instead of ground meat, use scrambled eggs and top it all off with a dollop of salsa and some crispy bacon bits for a hearty breakfast treat. -
Cheesy Spinach Version:
Add fresh spinach to the mix when you sauté the vegetables for a nutritious boost, and don’t skimp on the cheese!
Chef’s Notes
This Loaded Potato Taco Bowl has evolved over time, and every family has a slightly different take on it! I remember the first time I tried adding avocado to the mix—it was a total revelation! Sometimes, the most basic ingredients can be transformed into something extraordinary. Quick funny kitchen mishap: One time, I accidentally muddled the chili powder with cinnamon; no one ever let me forget it! Lesson learned: label your spices, folks!
FAQs and Troubleshooting
Let’s tackle some common questions you might run into:
-
Can I make this ahead of time?
Absolutely! You can prepare the baked potatoes and meat mixture ahead of time. Just keep them stored separately in the fridge and assemble when you’re ready to eat. -
Why are my potatoes not crispy?
If they come out soft, you might have overcrowded the baking sheet. Give them enough space to roast properly. -
How can I make it spicier?
Add diced jalapeños to the meat mixture or sprinkle some cayenne pepper into your seasoning blend. -
What if my avocado isn’t ripe?
If you can’t find a ripe avocado, try using pico de gallo or chunky salsa for that fresh element.
Nutritional Info
A single serving of this Loaded Potato Taco Bowl contains roughly:
- Calories: 600-700 kcal (depending on toppings)
- Protein: 30-35g
- Fat: 25-30g
- Carbohydrates: 70-80g
- Fiber: 10-15g
These values can shift based on the protein choice or if you decide to go heavy on the toppings.
Final Thoughts
There you have it, food enthusiasts—a scrumptious voyage to the Loaded Potato Taco Bowl! I hope this recipe has inspired you to bring your loved ones together, just like my family did on those beloved taco nights. So, dive into your kitchen, throw on your apron, and let the joy of cooking fill your home. Remember, food is not just about sustenance; it’s about creating moments, memories, and happiness. Happy cooking, and don’t forget to share your delicious creations! 🍽️
Until next time, keep it simple, soulful, and satisfying. Bon appétit!
Print
Loaded Potato Taco Bowl
- Total Time: 45 minutes
- Yield: 4 servings 1x
- Diet: Carnivore / Optional Vegetarian
Description
A vibrant mash-up that combines hearty baked potatoes with colorful taco flavors, perfect for a casual family dinner or meal prep.
Ingredients
- 2 large potatoes, diced
- 1 lb ground beef or turkey
- 1 cup black beans, drained and rinsed
- 1 cup corn kernels (fresh or frozen)
- 1 cup diced bell peppers
- 1 avocado, diced
- 1 cup shredded cheese (cheddar or Mexican blend)
- 1 tablespoon olive oil
- 1 teaspoon chili powder
- 1 teaspoon cumin
- Salt and pepper to taste
- Fresh cilantro for garnish
Instructions
- Preheat your oven to 400°F (200°C). Dice your potatoes into bite-sized cubes and toss them in a mixing bowl with olive oil, salt, pepper, and half of your chili powder and cumin. Spread them out in a single layer on a baking sheet. Bake for about 25-30 minutes until golden brown and crispy on the edges. Pro Tip: Turn them halfway through for even crispiness!
- While your potatoes are cooking, grab a skillet and heat over medium-high heat. Add your ground beef or turkey, breaking it up with a spoon. Sprinkle in the remaining chili powder and cumin, adding salt and pepper to taste. Cook until the meat is browned and fully cooked—about 5-7 minutes. Drain any excess fat if needed. Chef Hack: Add a splash of broth for moisture and flavor if your meat seems dry.
- In the same skillet, toss in your diced bell peppers and the rinsed black beans. Sauté them together for 3-4 minutes until the peppers are tender and vibrant. Feel free to season with a tad more chili powder if you want that extra oomph!
- Mix in the corn and stir everything together, letting the heat warm it through. This step should only take about 2 minutes.
- Grab your favorite bowls, ladle some crispy baked potatoes to form a base, then add layers of the flavored beef mixture, and top it off with diced avocado and shredded cheese.
- Sprinkle freshly chopped cilantro over the top for vibrancy and flavor. Drizzle with lime juice or your favorite taco sauce to bring it all home.
Notes
For best results, serve with extra toppings like sour cream, jalapeños, and salsa for a personalized feel. Customize with different proteins or veggies as desired.
- Prep Time: 15 minutes
- Cook Time: 30 minutes
- Category: Main Course
- Method: Baking
- Cuisine: Mexican
Nutrition
- Serving Size: 1 serving
- Calories: 650
- Sugar: 4g
- Sodium: 600mg
- Fat: 28g
- Saturated Fat: 10g
- Unsaturated Fat: 12g
- Trans Fat: 0g
- Carbohydrates: 75g
- Fiber: 12g
- Protein: 32g
- Cholesterol: 70mg
Keywords: taco bowl, loaded potato, family dinner, comfort food, Mexican recipe
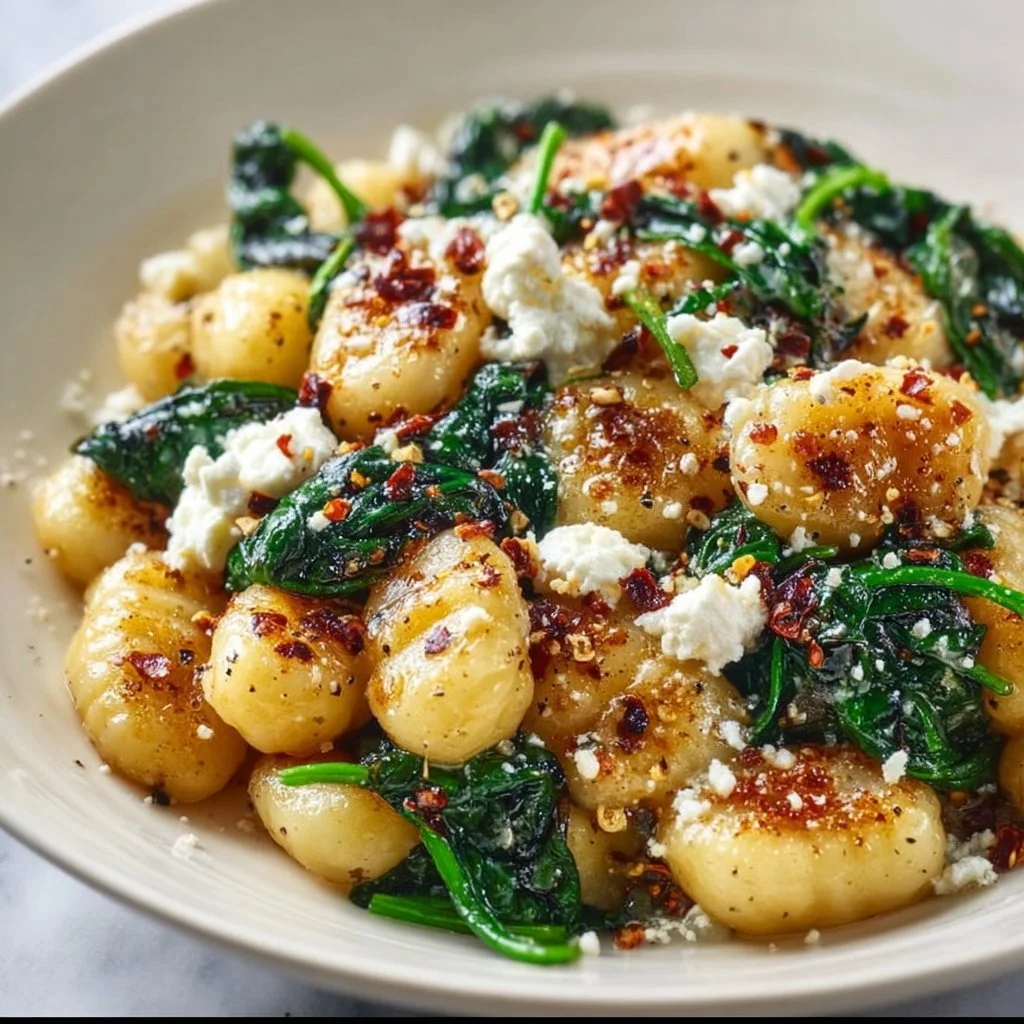
Creamy Gnocchi with Spinach and Feta
# Creamy Gnocchi with Spinach and Feta: A Cozy Comfort Dish

## Introduction

Hey friends! Beau Collier here, and today I'm excited to take you on a culinary journey with one of my all-time favorite comfort dishes: Creamy Gnocchi with Spinach and Feta. You know, something magical happens when the crispy edges of gnocchi meet the lush embrace of cream and the invigorating zest of fresh spinach. It’s like a warm hug from the inside out—perfect for any day that calls for a sprinkle of joy!

Now, you might be wondering: what’s gnocchi, and why should I be excited? Well, these delightful little dumplings are made of potatoes and flour, giving them that wonderfully tender yet slightly chewy texture. They’re not just a skill trick to impress your friends; they’re a canvas for creativity in the kitchen! And when paired with the lusciousness of cream, vibrant greens, and the sharp tang of feta, it becomes a dish that’s not only supper-worthy, but also packed full of flavor and nostalgia.

Speaking of nostalgia, this dish is super special to me—it brings back fond memories of long Sunday dinners at my grandma’s house. After a day filled with laughter and love, we’d gather around the table as she plopped down generous servings of deliciously creamy gnocchi. As a kid, I was convinced her secret ingredient was love, but really it was a handful of simple ingredients crafted into something spectacular. If you’re ready to dive into this creamy world of deliciousness with me, roll up your sleeves, and let's make some magic in the kitchen!

## Personal Story

I still remember the first time I tried making gnocchi for myself. I was a young culinary enthusiast, armed with an apron, a YouTube tutorial, and a dream. I thought, “How hard can it be?” Well, let me tell you—it was a comedy of errors. The dough was either too sticky, or I overworked it and ended up with little gummy dumplings. After a few trials (and a mountain of flour that could rival Mount Everest), I finally got the hang of it.

One evening, I invited a bunch of friends over, and with a (mostly) confident grin, I presented them with my very own version of creamy gnocchi. As the bites melted in our mouths, their faces lit up with delight. I was overjoyed—not just because they loved it, but because I knew that I had created something that would bring folks together. We spent hours laughing, reminiscing about life, and gooey bits of gnocchi made everything feel incredibly special. That night, I knew I had found my groove, and since then, this Creamy Gnocchi with Spinach and Feta has become a staple dish in my kitchen!

## Ingredients

Let’s get into the nitty-gritty of what you'll need for this creamy delight! Here’s my list of ingredients:

- **1 package of gnocchi**: The perfect base for our dish! You can find gnocchi in the pasta aisle or even make your own if you’re feeling adventurous. If you want to keep it gluten-free, look for rice or sweet potato gnocchi!

- **2 cups fresh spinach**: Beautiful, vibrant, and packed with nutrients! You can swap it with kale or arugula if that's what you have on hand, just remember they cook differently!

- **1 cup feta cheese, crumbled**: This cheese brings a delightful salty zing to our dish. If you’re not a fan of feta, you could use goat cheese instead for a creamier texture.

- **1 tablespoon olive oil**: For sautéing those delightful garlic flavors. You can use any neutral oil if you’re out of olive oil—canola or avocado oil works too.

- **2 cloves garlic, minced**: Oh, the aroma of garlic sizzling in the pan—it’s heaven! Feel free to increase the amount if you like a punch of garlic flavor or substitute with shallots for a milder base.

- **1/2 cup heavy cream or half-and-half**: Richness alert! This gives the sauce its creaminess, but if you’re watching calories, you can opt for low-fat milk or a dairy-free cream substitute.

- **Salt and pepper to taste**: The classic seasoning duo! Use sea salt and freshly cracked pepper for the best flavor.

- **Grated Parmesan cheese (optional, for serving)**: Because, let’s be honest, everything’s better with a sprinkle of cheesy goodness on top!

## Step-by-Step Instructions

Alright, kitchen warriors, let’s get cooking! Here’s how to make this creamy gnocchi masterpiece in no time.

1. **Boil the Gnocchi**:
   - Bring a large pot of salted water to a boil. Carefully drop in the gnocchi and cook according to the package instructions until they float to the surface (usually just a few minutes). This is how you know they’re done!
   - **Chef’s Tip**: Keep an eye on them! They can go from perfect to mushy in a flash, so once they float, give them just another minute of cooking time before draining.

2. **Sauté the Garlic and Spinach**:
   - In a large skillet, heat the olive oil over medium heat. Add the minced garlic and sauté it until fragrant (around 30 seconds).
   - Now add in the fresh spinach and cook until it wilts down. This will only take about 2-3 minutes.
   - **Little Chef Hack**: Adding a pinch of salt to the spinach while it cooks helps it break down faster and enhances its flavor!

3. **Mix in the Cream**:
   - Lower the heat and pour in the heavy cream or half-and-half. Stir to combine with the garlic and spinach. Allow it to simmer gently for 1-2 minutes to let the flavors meld beautifully.
   - **Chef Insight**: If you want to amp up the flavor, toss in a pinch of nutmeg—it pairs beautifully with creamy sauces.

4. **Combine Everything**:
   - Once the cream is heated through, gently fold in the cooked gnocchi and the crumbled feta. Toss everything together until the gnocchi is coated in that luscious sauce.
   - **Bonus Tip**: If the sauce becomes too thick, add a splash of pasta cooking water to loosen it up. This will help bind the sauce to the gnocchi perfectly!

5. **Season to Taste**:
   - Give it a taste and season with salt and pepper as needed. Trust your instincts here; everyone’s taste is a little different!
   - **Final Flourish**: If you're feeling fancy, reserve a bit of feta to sprinkle on top right before serving for that extra pop of flavor and presentation!

## Serving Suggestions

Here’s where we get a little creative! Serve your creamy gnocchi warm, right from the skillet to the table. I suggest plating it up in shallow bowls or pasta dishes for that cozy, home-cooked feel.

Garnish with a sprinkle of freshly grated Parmesan cheese and a drizzle of olive oil for a touch of elegance that will impress your friends. If you’re feeling adventurous, toss in a handful of toasted pine nuts, chopped fresh herbs (like dill or basil), or a squeeze of lemon juice for an unexpected zest. Don’t forget to have some crusty bread on the side for sopping up any leftover sauce—you'll want to savor every last bite!

## Recipe Variations

Want to shake things up? Here are some delicious variations you can try:

1. **Mushroom Medley**: Add some sautéed mushrooms to the skillet along with the garlic for an earthy flavor that complements the creaminess beautifully.

2. **Sun-Dried Tomatoes**: For a Mediterranean twist, toss in some chopped sun-dried tomatoes along with the spinach—this will elevate the dish with a burst of tangy goodness.

3. **Protein-Packed**: Mix in grilled chicken, shrimp, or even some chickpeas for extra protein and a heartier meal.

4. **Spicy Kick**: Add a pinch of red pepper flakes when sautéing the garlic to introduce a delightful hint of heat.

5. **Herby Goodness**: Fresh herbs like basil, thyme, or oregano can be added for a fresh, aromatic element that brightens the dish.

## Chef’s Notes

This recipe has come a long way since my chaotic first attempts at gnocchi-making! Over the years, I’ve swapped ingredients, tried new techniques, and even experimented with different toppings. One thing remains true: the key to perfect creamy gnocchi lies in balancing the flavors and staying true to what you enjoy. I've had friends tell me they've added everything from lemon zest to bacon bits, and let me tell you, they were not wrong! Embrace the versatility, adjust to your taste buds, and make it your own.

## FAQs and Troubleshooting

- **Why did my gnocchi turn out mushy?**
  - Watched them too long? It happens! Aim to cook gnocchi until just floating, then drain them immediately.

- **Can I make this dish ahead of time?**
  - While it’s best fresh, you can prepare the sauce in advance and keep it stored in the fridge. Just reheat, and add the gnocchi when you’re ready to serve!

- **What if I want to make it vegetarian?**
  - You’re in luck! This recipe is already vegetarian. Just ensure your dairy ingredients are animal rennet-free if you're looking for a fully veg option.

- **How can I thicken the sauce?**
  - If your sauce is looking too thin, simmer it a bit longer or add in a bit of cream cheese for extra creaminess.

## Nutritional Info

Let’s break down the goodness! This Creamy Gnocchi with Spinach and Feta can be a filling, satisfying dish. Here’s a quick look at what you can expect per serving (approximately, based on common ingredients):

- **Calories**: 450-500
- **Protein**: 15g
- **Carbohydrates**: 44g
- **Fat**: 25g
- **Fiber**: 2g

Keep in mind that adding proteins, more veggies, or other toppings can adjust the nutritional value. It's a comforting dish, but by adding a bit more spinach or swapping out some heavy cream for milk, you can lighten it up!

## Final Thoughts

And there you have it, my friends! A delightful dish of Creamy Gnocchi with Spinach and Feta that’s sure to bring smiles to the table. Cooking isn’t just about the food; it’s about sharing love and laughter with those we cherish. So whether you’re cooking for yourself, a loved one, or a group of friends, remember: every bite is an opportunity to create new memories.

I’d love to hear how your creamy gnocchi turns out! Share your experiences and tweaks in the comments below. Until next time, keep spreading the joy of cooking, and remember, every good meal is a celebration. Happy cooking!
Creamy Gnocchi with Spinach and Feta
- Total Time: 30 minutes
- Yield: 4 servings 1x
- Diet: Vegetarian
Description
A cozy comfort dish featuring tender gnocchi, fresh spinach, and tangy feta in a creamy sauce.
Ingredients
- 1 package of gnocchi
- 2 cups fresh spinach
- 1 cup feta cheese, crumbled
- 1 tablespoon olive oil
- 2 cloves garlic, minced
- 1/2 cup heavy cream or half-and-half
- Salt and pepper to taste
- Grated Parmesan cheese (optional, for serving)
Instructions
- Boil the gnocchi: Bring a large pot of salted water to a boil. Carefully drop in the gnocchi and cook according to the package instructions until they float to the surface (usually just a few minutes). Drain.
- Sauté the garlic and spinach: In a large skillet, heat the olive oil over medium heat. Add the minced garlic and sauté until fragrant (around 30 seconds), then add the fresh spinach and cook until wilted (2-3 minutes).
- Mix in the cream: Lower the heat, pour in the heavy cream or half-and-half, and stir to combine. Allow it to simmer for 1-2 minutes.
- Combine everything: Gently fold in the cooked gnocchi and crumbled feta until coated in the sauce.
- Season to taste: Add salt and pepper as needed, and sprinkle reserved feta on top for serving if desired.
Notes
Feel free to add toasted pine nuts or fresh herbs for extra flavor. Serve with crusty bread for sopping up the sauce.
- Prep Time: 10 minutes
- Cook Time: 20 minutes
- Category: Main Course
- Method: Baking
- Cuisine: Italian
Nutrition
- Serving Size: 1 serving
- Calories: 470
- Sugar: 3g
- Sodium: 600mg
- Fat: 25g
- Saturated Fat: 13g
- Unsaturated Fat: 8g
- Trans Fat: 0g
- Carbohydrates: 44g
- Fiber: 2g
- Protein: 15g
- Cholesterol: 50mg
Keywords: creamy gnocchi, spinach, feta, vegetarian comfort food, Italian recipes, cozy meals

Pizza Eggs
Pizza Eggs: A Game-Changer for Breakfast!
Hey there, food lovers! Beau Collier here, your go-to guy for all things delicious and comforting. Today, we’re diving into a delightful recipe that not only captures the essence of your favorite pizza but also transforms breakfast into an extraordinary feast—Pizza Eggs! 🍳🍕
Now, I know what you’re thinking: “Pizza for breakfast? That sounds naughty!” But let me tell you, these Pizza Eggs are a guilt-free way to enjoy a classic dish without needing to bust out a crust. Whether you’re hosting a brunch for friends or just want to make your morning routine a little more exciting, this recipe is your ticket to flavor town.
Picture it: fluffy scrambled eggs, gooey cheese, and a kick of savory salami, all topped with that lovely touch of tomato sauce and a sprinkle of mixed herbs. It’s like your favorite slice of pizza got a cozy makeover for the breakfast table. Plus, it’s packed with protein, making it a great way to start your day on a high note.
So grab your spatula and let’s whip up something magical! I promise you won’t want this meal to end. Just a heads-up: you might find yourself making this more often than just the occasional Sunday brunch.
Are you ready to make your mornings a little more delicious? Let’s dive in!
Personal Story
Growing up in a big family, breakfast was always a bustling affair. My mom would whip up the most delicious spreads while my siblings and I raced to the table, eager to dig in. One morning, after a particularly late night of play, I woke up to the intoxicating aroma of tomatoes and cheese wafting through the house. To my surprise, Mom had decided to turn our usual scrambled eggs into a pizza-inspired feast.
She called them her "Pizza Eggs," and boy, were they a hit! She’d toss in whatever leftover meats and cheeses we had in the fridge. I remember the excitement of seeing slices of salami bobbing around in a sea of fluffy egg whites and vibrant tomato sauce. There was something magical about it—the delicious fusion of breakfast and pizza that made it hard to sit still at the table.
This dish quickly became a weekend staple in our household, and it holds a special place in my heart. Each bite took me back to those cherished mornings filled with laughter and the comforting flavors of home. Today, I still make Pizza Eggs, and they remind me of those joyful gatherings. Now, I’m excited to share this recipe with you so that you can create your own happy breakfast memories!
Ingredients
For our delightful Pizza Eggs, you’ll need:
-
3 large eggs
Eggs are the star of this dish—creamy, fluffy, and packed with protein. If you’re looking for a lighter option, egg whites work great too! -
60 g reduced-fat cheese
I love using shredded mozzarella for that stringy, gooey texture, but feel free to swap it with something like cheddar or a dairy-free cheese if you’re avoiding dairy! -
1 tbsp passata
This Italian tomato purée brings a rich flavor to your breakfast. If you don’t have passata, crushed tomatoes or even a bit of tomato ketchup will work in a pinch. -
A few slices of salami
Salami gives a deliciously smoky flavor. You can switch it up with pepperoni or even turkey bacon for a lighter option. Veggie lovers? Just skip the meat altogether! -
Mixed herbs
A sprinkle of dried oregano or basil elevates the flavor and adds a lovely aroma. Feel free to get adventurous—add in some Italian seasoning or even chili flakes if you like a little heat!
Step-by-Step Instructions
Alright, let’s get cooking! Here’s how to create your mouth-watering Pizza Eggs step by step:
-
Whisk the Eggs
Start by cracking your eggs into a bowl. Use a fork or a whisk to beat the eggs until they’re well-combined and frothy. This aeration is key to achieving those fluffy eggs you crave in the morning. Pro tip: add a splash of milk or cream before whisking for even creamier eggs! -
Heat the Pan
Place a non-stick skillet over medium heat and add a small drizzle of olive oil or a dab of butter. Once it’s hot (but not smoking!), you’re ready for the eggs! -
Cook the Eggs
Pour the whisked eggs into the pan. Let them set for a moment before gently stirring with a spatula. You want to keep the eggs moving, but don’t rush it—this is where the magic happens! Scramble until they just start to come together—soft and creamy, not overcooked! -
Add Passata and Cheese
When the eggs are about 80% cooked, spread the passata evenly over the mix. Follow it up by sprinkling the shredded cheese on top. Let it cook for a minute, allowing the cheese to melt and meld with those beautiful eggs. Oh, can you smell that already? -
Toss in the Salami
Now, it’s time to add those savory salami slices. Gently fold them in so they are nicely distributed throughout the eggs. The heat will warm them up in no time. -
Season with Herbs
Finally, sprinkle your mixed herbs over the top. This isn’t just for flair—it brings everything together beautifully! Give the eggs one last gentle stir to incorporate those flavors. -
Serve it Up
Once the eggs are fully cooked and the cheese is deliciously melty, carefully transfer them onto a plate. You want them to look fluffy and inviting!
Serving Suggestions
The beauty of Pizza Eggs is in their versatility! You can serve them up simply on their own, or you can dress them up like a brunch superstar. Here are a few ideas:
-
Classic Plate: Serve your Pizza Eggs with a slice of whole-grain toast or a bagel for that classic breakfast feel.
-
Savory Sandwich: Load those Pizza Eggs onto a toasted English muffin or within a wrap. Add some avocado or spinach for an extra layer of flavor and nutrition.
-
Brunch Board: Make it a party! Serve your Pizza Eggs alongside an array of colorful fruits, crunchy veggies, and perhaps a mimosa for the adults. It’s the ultimate brunch experience!
-
Toppings Galore: Don’t hesitate to add additional toppings like red pepper flakes, avocado slices, or even a dollop of sour cream for a creamier finish.
Recipe Variations
Why stop at just one version when you could explore various delicious twists? Here are a few creative ways you can modify your Pizza Eggs:
-
Veggie Delight: Add chopped bell peppers, onions, or mushrooms for a colorful and nutritious upgrade. Sauté the veggies in the skillet first, then add your eggs.
-
Spicy Kick: Add sliced jalapeños or a dash of hot sauce for those who crave a little heat in the morning. Spice levels are totally up to you!
-
Herb Infusion: Instead of mixed herbs, try using fresh basil and parsley for a garden-fresh taste. Add them before serving to keep their bright flavors intact.
-
Cheesy Goodness: Go wild with cheese! Combine different types like feta or gouda in with the mozzarella for a unique flavor fusion.
-
Meat Lovers’ Delight: Craving some extra meat? Try bacon or sausage alongside the salami for an indulgent twist. Just make sure to precook the meat before adding!
Chef’s Notes
Oh, the memories I have in the kitchen! I’ll never forget the time I decided to throw a pizza-themed dinner party and made these Pizza Eggs for breakfast. I was running late, but still determined to impress my guests. With the eggs sizzling away and salami popping from the pan, I managed to serve them into the hands of grinning friends ready to dive into a groundbreaking breakfast!
With each bite, I watched their faces light up with nostalgia reminiscent of late-night pizza runs. In that moment, I knew this recipe was special. Over time, I’ve played around with it, adjusting it to suit whatever I had around in my fridge. That’s the beauty of cooking—freedom to explore and create!
FAQs and Troubleshooting
1. Why are my eggs rubbery?
Overcooking is usually the culprit here! Aim for that soft, custard-like texture, and remember that the eggs continue to cook even after you remove them from the heat.
2. Can I make this ahead of time?
Absolutely! You can whisk the eggs and chop the salami the night before. Just cook everything fresh in the morning for optimum fluffiness!
3. My cheese didn’t melt well. What happened?
Double-check the type of cheese you’re using! Low-fat options can sometimes differ in melting qualities. Go for mozzarella or a higher-fat cheese for that gooey goodness.
4. What if I don’t have passata?
No worries! You can use crushed tomatoes, tomato puree, or even pizza sauce! Just adjust the seasoning accordingly.
Nutritional Info
Curious about the nutritional breakdown of our scrumptious Pizza Eggs? Here’s a quick overview (per serving):
- Calories: 300 kcal
- Protein: 20 g
- Carbohydrates: 5 g
- Fat: 18 g
- Fiber: 1 g
- Sodium: 450 mg
This dish is rich in protein, making it great for a fulfilling breakfast. If you tweak the cheese and salami, those numbers can shift a bit too—so feel free to play around!
Final Thoughts
There you have it, my friends—Pizza Eggs that are sure to elevate your breakfast game and tickle your taste buds! It’s a recipe born from memories, comfort, and a bit of culinary flair. I hope this dish inspires you to experiment, laugh, and create moments in your own kitchen.
So, next time you’re feeling a bit uninspired on those early mornings, remember this little gem. Serve it solo, present it at your brunch gathering, or simply savor it on a quiet Saturday morning. Let me know how your Pizza Eggs turned out—I promise they’ll bring a slice of joy to your day!
Happy cooking, and as always, let’s keep this foodie journey going. Cheers! 🍳🎉
Print
Pizza Eggs
- Total Time: 20 minutes
- Yield: 2 servings 1x
- Diet: Vegetarian
Description
A delicious breakfast that combines fluffy scrambled eggs with cheesy goodness and savory salami, all topped with rich tomato sauce and herbs.
Ingredients
- 3 large eggs
- 60 g reduced-fat cheese (shredded mozzarella recommended)
- 1 tbsp passata (or crushed tomatoes)
- A few slices of salami (or substitute with pepperoni or turkey bacon)
- Mixed herbs (e.g., dried oregano or basil)
Instructions
- Whisk the eggs in a bowl until frothy.
- Heat a non-stick skillet over medium heat with olive oil or butter.
- Cook the whisked eggs, stirring gently until they start to set.
- Add passata and cheese when eggs are 80% cooked.
- Toss in the salami and gently fold it into the eggs.
- Season with mixed herbs and stir gently.
- Serve it up on a plate once fully cooked.
Notes
This dish is versatile; feel free to add veggies or adjust the seasonings to your liking.
- Prep Time: 10 minutes
- Cook Time: 10 minutes
- Category: Breakfast
- Method: Sautéing
- Cuisine: Italian
Nutrition
- Serving Size: 1 serving
- Calories: 300
- Sugar: 3g
- Sodium: 450mg
- Fat: 18g
- Saturated Fat: 6g
- Unsaturated Fat: 10g
- Trans Fat: 0g
- Carbohydrates: 5g
- Fiber: 1g
- Protein: 20g
- Cholesterol: 210mg
Keywords: breakfast, pizza, eggs, cheesy, quick recipe, fluffy eggs
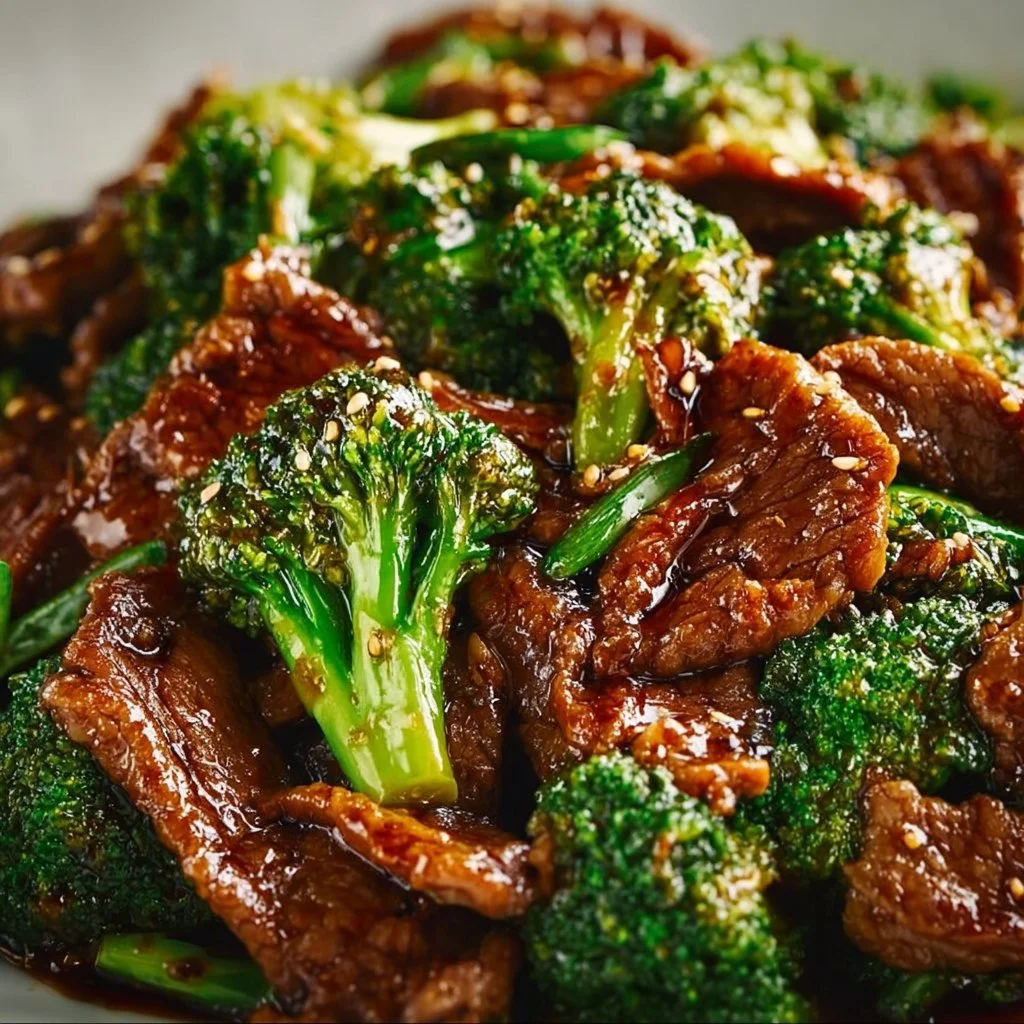
Chinese Beef and Broccoli
Chinese Beef and Broccoli: A Feel-Good Recipe That Brings Us All Together
Hey food lovers! Today, we’re diving into a classic dish that has been a staple both in restaurants and family kitchens alike: Chinese Beef and Broccoli. You know, that vibrant plate of deliciousness, where tender slices of beef are swirled lovingly with crisp broccoli florets and enveloped in a savory sauce that will make your taste buds dance. If you’re like me, this dish isn’t just a meal; it’s an invitation to gather around the table with friends and family, sharing stories and laughter, all while savoring the flavors of life.
Growing up, I had my fair share of meals at local Chinese restaurants, but it was my mom’s home-cooked version of Beef and Broccoli that truly stole the spotlight. Every time she made it, the aroma would waft through our house, drawing us all into the kitchen like moths to a flame. There was something about those fresh ingredients and that glorious sauce that made it feel like a hug from the inside out. Plus, it was one of those recipes that seemed fancy enough for special occasions but was easy enough that I could sneak in and help out in the kitchen, or even whip it up myself once I got the hang of it.
So, if you’re ready to create some kitchen magic, lend me your spatula, and let’s get cooking! You’ll be amazed at how simple and satisfying this Beef and Broccoli dish can be. Just like a warm hug, let’s make this a comforting meal for everyone to enjoy. Ready? Let’s dive right in!
Personal Story
I fondly recall one particular evening—a chilly Sunday night when my mom decided to make her famous Beef and Broccoli. We had recently returned from visiting my grandparents, where discussions about food (and lots of it) filled the air, and I was eager to bring home some of those culinary insights. My mom gave me the reins to chop up those vibrant broccoli florets. As I skillfully (or at least I thought so!) sliced away, we chatted about flavors, textures, and why certain ingredients worked so beautifully together.
We reminisced about our favorite dishes while she expertly stir-fried the beef, standing over the stove like a culinary maestro. The clinking of the wok and sizzling of the meat filled our cozy kitchen. It was more than just cooking; it was bonding over food, laughter, and the joy of creating something we all loved. When dinner was finally served, the three of us took our places at the table. With each bite, I could taste not just the dish, but all the warmth, experiences, and memories woven into it. And in that moment, I realized food truly has the power to connect us in ways we often overlook.
Ingredients
Let’s take a closer look at the ingredients for our mouthwatering Chinese Beef and Broccoli. Here’s what you’ll need:
-
1 lb flank steak (or skirt steak)
A great cut of meat that packs flavor! If you can’t find flank, sirloin is a good substitute, but remember, it cooks quickly—keep an eye on it! -
1 tablespoon soy sauce
This adds a savory depth to the dish. Use low-sodium if you’re watching your salt intake, and feel free to try tamari for a gluten-free option! -
1 tablespoon peanut oil (or vegetable oil)
Peanut oil is fantastic for stir-frying due to its high smoke point. If you have allergies or prefer another option, canola or sunflower oil works well too. -
1 tablespoon cornstarch
A little thickening magic! This helps create a beautifully silky sauce. For a low-carb alternative, you might try arrowroot powder. -
1/2 teaspoon baking soda (optional)
When marinating the beef, this helps tenderize it. A great tip if you’re using a tougher cut! -
1/2 cup chicken stock (or beef stock)
This is where the flavor really starts to build. Homemade stock is always the best, but store-bought works fine in a pinch! -
2 tablespoons Shaoxing wine (or dry sherry)
This rice wine adds depth and complexity. If you can’t find it, a splash of white wine or even cooking sherry can be used! -
2 tablespoons soy sauce
A second addition of soy sauce boosts the umami factor. Again, low-sodium or tamari can work here too. -
1 teaspoon dark soy sauce
This isn’t just about flavor; it delivers a rich color to your sauce. If needed, you can substitute with a bit of molasses for a similar effect. -
2 teaspoons brown sugar (or white sugar)
A touch of sweetness balances the salty components. It helps round out the flavors. -
1 tablespoon cornstarch (for the sauce)
This allows us to achieve a glossy finish to our delicious sauce. -
1 head broccoli (cut into bite-sized florets)
Fresh broccoli is essential for that crunchy bite! You can substitute with snow peas or bok choy for a twist. -
1 tablespoon peanut oil (or vegetable oil)
Remember to keep some oil for sautéing your veggies. -
3 garlic cloves (minced)
Garlic is a flavor powerhouse. If you love it, feel free to add more; there’s no such thing as too much garlic in my book! -
2 teaspoons ginger (minced)
Fresh ginger brightens this dish with a hint of spice. Don’t have fresh? Ground ginger can work in a pinch, but adjust the quantity since it’s more concentrated!
Step-by-Step Instructions
Alright, it’s showtime! Follow these steps to whip up a sensational Beef and Broccoli dish that will have everyone asking for seconds.
Step 1: Prep Your Ingredients
The first thing we want to do is prep all our ingredients. Trust me on this, having everything ready makes cooking so much smoother. Slice the flank steak against the grain into thin strips; about 1/4 inch works best. If your meat is slightly frozen, it will be easier to slice!
Step 2: Marinate That Beef
In a bowl, combine the steak strips with 1 tablespoon of soy sauce, 1 tablespoon of peanut oil, and 1 tablespoon of cornstarch. If you’re using baking soda, sprinkle that in too. Give it a good mix until the beef is well-coated—this marinade will help tenderize your meat and infuse it with flavor. Let it sit for about 20 minutes at room temperature while we prep the rest.
Step 3: Get Your Broccoli Ready
While your beef is soaking up those flavors, let’s turn our focus to the broccoli. Cut up your broccoloce tiniest florets—this way, they’ll cook evenly and quickly. Then, in a separate pot, bring some water to a boil. Blanch the broccoli for about 30 seconds until bright green, and then immediately transfer it to an ice bath to halt the cooking process. This keeps it crisp and vibrant!
Step 4: Stir-Fry Time
In a large skillet or wok, heat 1 tablespoon of peanut oil over medium-high heat. Once hot, add the marinated beef in a single layer (don’t overcrowd the pan) and let it sear. After about 1-2 minutes, stir-fry the beef until it’s just browned but not fully cooked. Remove the beef from the skillet and set aside.
Step 5: Add Aromatics
In the same skillet, throw in your minced garlic and ginger. Let those fragrant ingredients sauté for about 30 seconds until they start to release their lovely aroma. This is where the magic begins!
Step 6: Bring It All Together
Now, in the same skillet, add the blanched broccoli back in along with the beef. Stir to combine.
Meanwhile, we’ll whip up our sauce! In a small bowl, mix together the chicken stock, Shaoxing wine, 2 tablespoons of soy sauce, 1 teaspoon of dark soy sauce, brown sugar, and the remaining 1 tablespoon of cornstarch until smooth. Pour this over the beef and broccoli mixture, and give it a good stir. The sauce will start to thicken and coat everything beautifully. Let it simmer for a couple of minutes until the beef is cooked through and all ingredients are heated.
Step 7: Final Touches
Taste your glorious creation and adjust seasoning. You might want a pinch more sugar or soy sauce; do it according to your palate!
Serving Suggestions
Now that you’ve created this beautiful dish (pat yourself on the back!), it’s time to plate it up. I love serving my Beef and Broccoli over a steaming bowl of fluffy jasmine rice—there’s something about that combination that just feels right.
Scoop a generous portion of beef and broccoli onto your bed of rice, letting that luscious sauce spill over the grains. For an extra touch, garnish with sesame seeds or sliced green onions. And there you have it—a restaurant-quality dish that’s way better than takeout!
Recipe Variations
Feeling adventurous? Here are some creative twists and dietary swaps you can try with this recipe:
-
Add More Veggies: Throw in some sliced bell peppers, carrots, or snap peas for additional colors and nutrients.
-
Spicy Kick: If you like it with a kick, add some red pepper flakes or sriracha to the sauce.
-
Cauliflower Swap: For a low-carb version, substitute the broccoli with cauliflower florets.
-
Protein Alternatives: This recipe isn’t just for beef! Try it with chicken, tofu, or even shrimp. Just make sure to adjust cooking times to accommodate different proteins.
-
Add Noodles: Toss in some cooked regular or rice noodles at the end for a heartier meal.
Chef’s Notes
Food is a wonderful journey; every recipe has a story! My version of Beef and Broccoli has evolved over the years, shaped by family gatherings, travel, and of course, countless taste tests from friends. I remember the first time I decided to add brown sugar—it was a total game-changer!
And let’s talk about the time my friend tried to make it for a date night but accidentally used the entire bottle of dark soy sauce. Let’s just say it was a super salty experience that didn’t go as planned—priceless food memory, if you ask me!
FAQs and Troubleshooting
1. What can I substitute for flank steak?
You can use skirt steak, sirloin, or even chicken for a lighter option. Just remember to adjust cooking times slightly depending on the meat.
2. My sauce turned out too thick; what can I do?
No worries! Just whisk in a little extra broth or water to thin it out until it reaches your desired consistency.
3. The broccoli is mushy; how do I avoid this next time?
Make sure to blanch the broccoli only for about 30 seconds, and immediately transfer it to an ice bath. This keeps it crunchy and vibrant!
4. Can I prep this dish ahead of time?
Absolutely! You can marinate the beef and chop the veggies ahead of time. Just store them in the fridge until you’re ready to cook.
Nutritional Info
(Since every recipe can vary based on serving sizes and ingredient choices, be sure to adjust according to your ratios!)
- Serving Size: 1 cup
- Calories: 340
- Protein: 28g
- Fat: 14g
- Carbohydrates: 22g
- Fiber: 3g
- Sugar: 5g
This dish delivers a great balance of protein and nutrients while being lower in carbs if you choose to serve it on its own or with veggies.
Final Thoughts
And there you have it, my friends! This Chinese Beef and Broccoli recipe is more than just a meal; it’s a pathway to cozy kitchen moments, laughter, and lasting memories. Whether you’re cooking solo, trying to impress a loved one, or simply reviving old traditions, this dish brings everyone together in the best ways possible.
So roll up those sleeves, gather your ingredients, and let’s make some culinary magic happen. At the end of the day, Good food is all about connection, and I can’t wait to hear how your kitchen adventure turns out! Give it a try, and let the flavors and stories unfold. Happy cooking! 🍽️
Print
Chinese Beef and Broccoli
- Total Time: 30 minutes
- Yield: 4 servings 1x
- Diet: None
Description
A classic dish featuring tender beef and crisp broccoli in a savory sauce, perfect for family gatherings.
Ingredients
- 1 lb flank steak
- 1 tablespoon soy sauce
- 1 tablespoon peanut oil
- 1 tablespoon cornstarch
- 1/2 teaspoon baking soda (optional)
- 1/2 cup chicken stock
- 2 tablespoons Shaoxing wine
- 2 tablespoons soy sauce
- 1 teaspoon dark soy sauce
- 2 teaspoons brown sugar
- 1 tablespoon cornstarch (for the sauce)
- 1 head broccoli (cut into bite-sized florets)
- 1 tablespoon peanut oil
- 3 garlic cloves (minced)
- 2 teaspoons ginger (minced)
Instructions
- Prep your ingredients.
- Marinate the beef.
- Get your broccoli ready.
- Stir-Fry the beef.
- Add aromatics.
- Bring it all together.
- Final touches.
Notes
Serve with fluffy jasmine rice and garnish with sesame seeds or green onions.
- Prep Time: 15 minutes
- Cook Time: 15 minutes
- Category: Main Course
- Method: Stir-frying
- Cuisine: Chinese
Nutrition
- Serving Size: 1 cup
- Calories: 340
- Sugar: 5g
- Sodium: 800mg
- Fat: 14g
- Saturated Fat: 2g
- Unsaturated Fat: 7g
- Trans Fat: 0g
- Carbohydrates: 22g
- Fiber: 3g
- Protein: 28g
- Cholesterol: 60mg
Keywords: Beef and Broccoli, Chinese recipe, stir-fry, comfort food
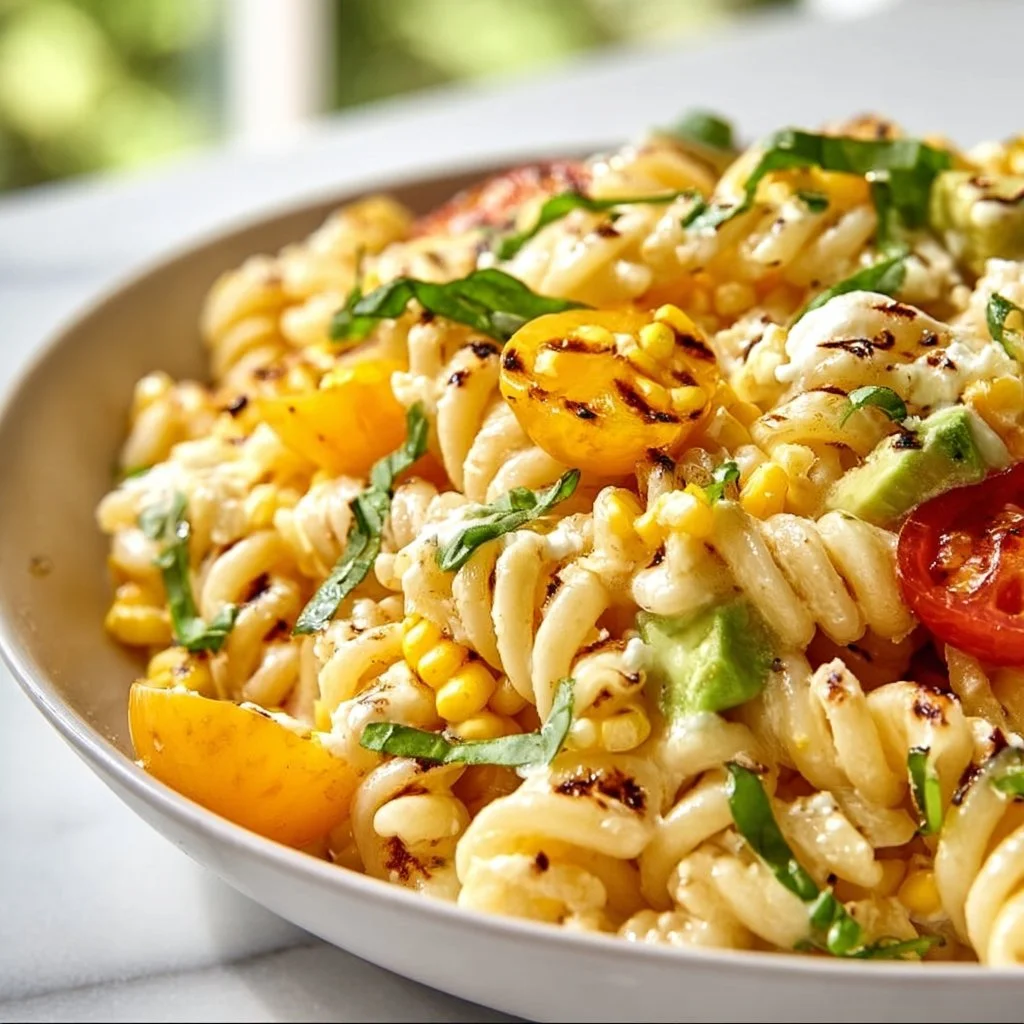
Juicy Street Corn Pasta Salad
Juicy Street Corn Pasta Salad: A Flavorful Fiesta in a Bowl
Hey there, fellow food lovers! Buckle up for a flavor-packed adventure as we whip up something truly special: Juicy Street Corn Pasta Salad. This lively dish takes the classic summer street corn experience and transforms it into a pasta salad that’s perfect for any gathering, picnic, or even a cozy night in. Fresh, zesty, and downright delicious, it’s a burst of sunshine on your plate.
Have you ever had one of those dishes that instantly transports you back to a sun-soaked summer day? Maybe it was a family barbecue in the backyard, or a street fair filled with laughter and the aroma of grilled corn wafting through the air. That’s exactly what this Juicy Street Corn Pasta Salad embodies. It’s an ode to warmth, togetherness, and of course, mouthwatering flavors!
I remember the first time I really fell in love with street corn. I was at a festival, surrounded by friends, music blaring, and the smell of grilled corn in the air. The way they slathered that corn with creamy goodness, sprinkled it with cheese, and topped it off with fresh lime? Pure magic! It just felt like celebration in every bite. I knew I had to capture that essence in a dish that everyone could enjoy, no matter the season.
This pasta salad not only brings the street corn flavor to your table, but it also embraces the versatility of pasta. It’s a fun and refreshing twist that works wonderfully as a side dish or a stand-alone meal. Whether you’re hosting friends, prepping for a family gathering, or just satisfying your own cravings, this recipe has you covered. So let’s get those pots and pans ready because we’re diving into this culinary fiesta!
Personal Story
Ah, the memories of summer! There was a time when my family would gather for our yearly summer cookout. My uncle would take on the grilling duties, and I would squeeze my way through a throng of family members, each one waiting to sink their teeth into juicy, grilled corn fresh off the cob. I can still hear the sizzle and smell the charred sweetness! My grandmother would make her famous chipotle lime mayo, and let me tell you, that stuff was legendary!
One day, inspired by those sunny days filled with laughter and love, I decided to replicate that flavor with a little twist. I thought, “Why not celebrate these bold flavors in a pasta salad, too?” So, I grabbed a box of pasta, some fresh corn from the market, and the rest is history. What came out of that kitchen adventure became an instant hit at our next family gathering, and it’s been a staple ever since. Now, whenever I serve this Juicy Street Corn Pasta Salad, I not only feed my belly but also my soul, bringing back all those cherished memories. Trust me; it’s a dish that carries love, nostalgia, and a whole lot of flavor!
Ingredients
Let’s gather up our ingredients for this colorful creation! Here’s what you’ll need to make your Juicy Street Corn Pasta Salad sing:
-
8 oz Pasta (your choice): Whether you’re a fan of fusilli, penne, or good old elbow macaroni, pasta is the base here. Personalize it! Just remember to cook it al dente for that perfect bite. If you’re gluten-free, opt for chickpea or quinoa pasta!
-
2 cups Fresh Corn (cooked): Grab some sweet corn! You can use frozen corn if fresh isn’t available—just make sure it’s cooked. If you’re feeling adventurous, grill it for extra flavor!
-
1 cup Cherry Tomatoes (halved): These little gems provide sweetness and color. If cherry tomatoes aren’t your jam, go for grape tomatoes or even diced regular tomatoes. Freshness over everything!
-
1/2 cup Red Onion (finely chopped): A little crunch and zing! If raw onion isn’t your thing, soak it in cold water for 10 minutes to mellow out the flavor.
-
1/2 cup Bell Peppers (diced, any color): Bell peppers add crispness and vibrant colors to the dish. You can mix and match colors for a truly festive feel.
-
1/4 cup Cilantro (chopped): It’s fresh, it’s herbaceous! If cilantro isn’t your favorite, parsley can be a nice substitute.
-
1/4 cup Lime Juice: Zesty and bright! Fresh lime juice is best. In a pinch, bottled lime juice will do, but it lacks that fresh punch.
-
3 tbsp Olive Oil: For richness and to marry all the flavors together. Don’t skimp—good quality olive oil makes a difference!
-
Salt and Pepper to taste: Simple but vital! Adjust to your preference. Remember, seasoning as you go is key to a well-balanced dish.
-
1 cup Feta Cheese (crumbled, optional): Crumbled feta adds a creamy, tangy note. Not a fan? You can use goat cheese or omit it entirely.
Now that we’ve got our ingredients lined up, let’s get cooking!
Step-by-Step Instructions
Alright, my kitchen warriors, let’s turn this list of ingredients into a masterpiece! Follow these steps for your Juicy Street Corn Pasta Salad:
-
Cook the Pasta:
Begin by boiling a pot of salted water. Once it reaches a rolling boil, add your pasta. Cook according to package instructions until al dente (usually about 7–10 minutes). Drain and rinse under cold water to stop the cooking process and cool it down. This step is crucial if you want a refreshing salad! -
Prep the Corn:
If using fresh corn, carefully cut the kernels off the cob. If using frozen corn, just pop it into the microwave or sauté it for a couple of minutes until cooked. You want that sweetness to shine! -
Chop Your Veggies:
Dice up the red onion and bell peppers, and halve those cherry tomatoes. The trick to a good salad? The more colorful, the better! -
Combine the Ingredients:
In a large mixing bowl, toss together your cooled pasta, corn, cherry tomatoes, red onion, and bell peppers. Don’t be shy! Use your hands for this—mix until everything is well combined. -
Make the Dressing:
In a separate small bowl, whisk together the lime juice and olive oil. Add a generous pinch of salt and pepper. If you like a little heat, feel free to add a pinch of chili powder or a splash of hot sauce! -
Dress the Salad:
Pour that zesty dressing over your pasta mixture and toss gently. You’d be amazed at how a simple dressing can elevate your dish! -
Fold in the Cilantro and Feta:
Just before serving, gently fold in the chopped cilantro and feta cheese (if using). This keeps the greens fresh and the cheese intact. -
Taste Test:
Here comes the fun part! Take a spoonful and taste. Adjust the seasoning as needed. Do you want more lime? Throw in a squeeze! Want extra salt? Go for it! -
Chill and Enjoy:
For best flavor, let your Juicy Street Corn Pasta Salad chill in the refrigerator for about 30 minutes before serving. This allows all those flavors to really mingle.
Serving Suggestions
Now that our salad is prepped and chilled, how should we serve this colorful dish? Festive, casual, or sophisticated—this pasta salad fits right in!
-
Rustic Plating: Simply scoop a generous portion into a bowl and garnish with extra feta and cilantro on top. Serve it alongside grilled meats or as part of a larger buffet spread.
-
Picnic Perfection: Pack it into mason jars for an adorable picnic treat! Layer the ingredients and dressings separately if you want to keep it fresh until serving.
-
Garnish in Style: If you’re feeling fancy, sprinkle some chili powder on top for an extra burst of color and flavor, or add a sliced lime wedge for that extra zing!
Recipe Variations
Every dish can transform with a few twists! Here are some fun variations to this Juicy Street Corn Pasta Salad that you can try:
-
Spicy Street Corn: Add diced jalapeños or a teaspoon of cayenne pepper to kick things up a notch.
-
Southwestern Style: Incorporate black beans and avocado for extra protein and creaminess, plus a touch of cumin to the dressing.
-
Herb-Infused: Swap out cilantro for fresh basil or dill for a different herby flavor. These herbs will create a whole new vibe!
-
Cheesy Goodness: If feta isn’t your thing, try shredded Monterey Jack or a sprinkle of parmesan for a melted, savory twist.
-
Light & Zesty: For a light version, substitute the pasta with zucchini noodles (zoodles) for a low-carb twist while capturing that fresh taste of summer.
Chef’s Notes
Let me tell you, this recipe has evolved over time! There’s something about mixing it up as seasons change. Sometimes I toss in leftover grilled veggies from a previous BBQ or substitute whatever greens I have on hand. It’s a beautiful way to improvise and let creativity flow! Each batch becomes uniquely yours, which is precisely how cooking should be—an expression of you!
And let’s not forget about the stories that come with each recipe. Over the years, I’ve made this dish for potlucks, birthday parties, and family dinners. Kids have danced around it while adults rave over seconds. When you share food, you share love, and there’s nothing more fulfilling.
FAQs and Troubleshooting
Q: Can I make this salad ahead of time?
A: Absolutely! In fact, letting it chill for a bit allows the flavors to meld beautifully. Just keep it in an airtight container in the fridge for up to 3 days.
Q: The pasta is too sticky; how can I prevent that?
A: Make sure to rinse your pasta after draining to stop the cooking process and prevent it from sticking together.
Q: What if I don’t have any lime?
A: No problem! Lemon juice works perfectly as a substitute and will give you a lovely zesty twist.
Q: Can I add protein to this dish?
A: Definitely! Grilled shrimp, chicken, or even chickpeas would be perfect additions for some heartiness!
Nutritional Info
While specifics can vary by ingredient brands and portion sizes, a serving of this Juicy Street Corn Pasta Salad (approximately 1 cup) generally has:
- Calories: ~300
- Protein: ~8g (with feta)
- Carbohydrates: ~36g
- Dietary Fiber: ~4g
- Total Fat: ~14g
This salad is definitely a wholesome dish, packed with nutrients from fresh veggies, healthy fats from olive oil, and a bit of protein if you choose to add cheese!
Final Thoughts
There you have it, my friends—a delightful, vibrant Juicy Street Corn Pasta Salad that’s just bursting with flavors. This recipe is more than just a salad; it’s an experience, a celebration, and a reminder that food brings people together. So, whether you enjoy this dish on a sunny picnic blanket or at a cozy family dinner, know that you’re indulging in a taste of joy.
Don’t forget to make this recipe your own! Play around with flavors, invite friends to join in the fun of preparing, and savor every bite. After all, the kitchen is not just a space for cooking; it’s where stories are made, laughs are shared, and memories are created.
Until next time, happy cooking, and remember, the best meals come from the heart!
Print
Juicy Street Corn Pasta Salad
- Total Time: 25 minutes
- Yield: 4 servings 1x
- Diet: Vegetarian
Description
A lively pasta salad that captures the flavors of classic summer street corn with fresh ingredients and zesty dressing, perfect for gatherings or picnics.
Ingredients
- 8 oz Pasta (your choice)
- 2 cups Fresh Corn (cooked)
- 1 cup Cherry Tomatoes (halved)
- 1/2 cup Red Onion (finely chopped)
- 1/2 cup Bell Peppers (diced, any color)
- 1/4 cup Cilantro (chopped)
- 1/4 cup Lime Juice
- 3 tbsp Olive Oil
- Salt and Pepper to taste
- 1 cup Feta Cheese (crumbled, optional)
Instructions
- Cook the Pasta: Boil salted water, add pasta, cook until al dente, drain, and rinse with cold water.
- Prep the Corn: Cut kernels off fresh corn or microwave frozen corn until cooked.
- Chop Your Veggies: Dice red onion and bell peppers, halve cherry tomatoes.
- Combine the Ingredients: In a bowl, mix pasta, corn, tomatoes, onion, and peppers.
- Make the Dressing: Whisk lime juice and olive oil with salt and pepper.
- Dress the Salad: Pour dressing over the pasta mixture and toss gently.
- Fold in the Cilantro and Feta: Gently add cilantro and feta just before serving.
- Taste Test: Adjust seasoning to your preference.
- Chill and Enjoy: Refrigerate for about 30 minutes before serving.
Notes
This salad can be made ahead of time and stores well for up to 3 days. Rinse pasta to prevent sticking.
- Prep Time: 15 minutes
- Cook Time: 10 minutes
- Category: Salad
- Method: Mixing
- Cuisine: American
Nutrition
- Serving Size: 1 cup
- Calories: 300
- Sugar: 4g
- Sodium: 350mg
- Fat: 14g
- Saturated Fat: 3g
- Unsaturated Fat: 8g
- Trans Fat: 0g
- Carbohydrates: 36g
- Fiber: 4g
- Protein: 8g
- Cholesterol: 20mg
Keywords: pasta salad, street corn, summer dish, vegetarian, colorful salad
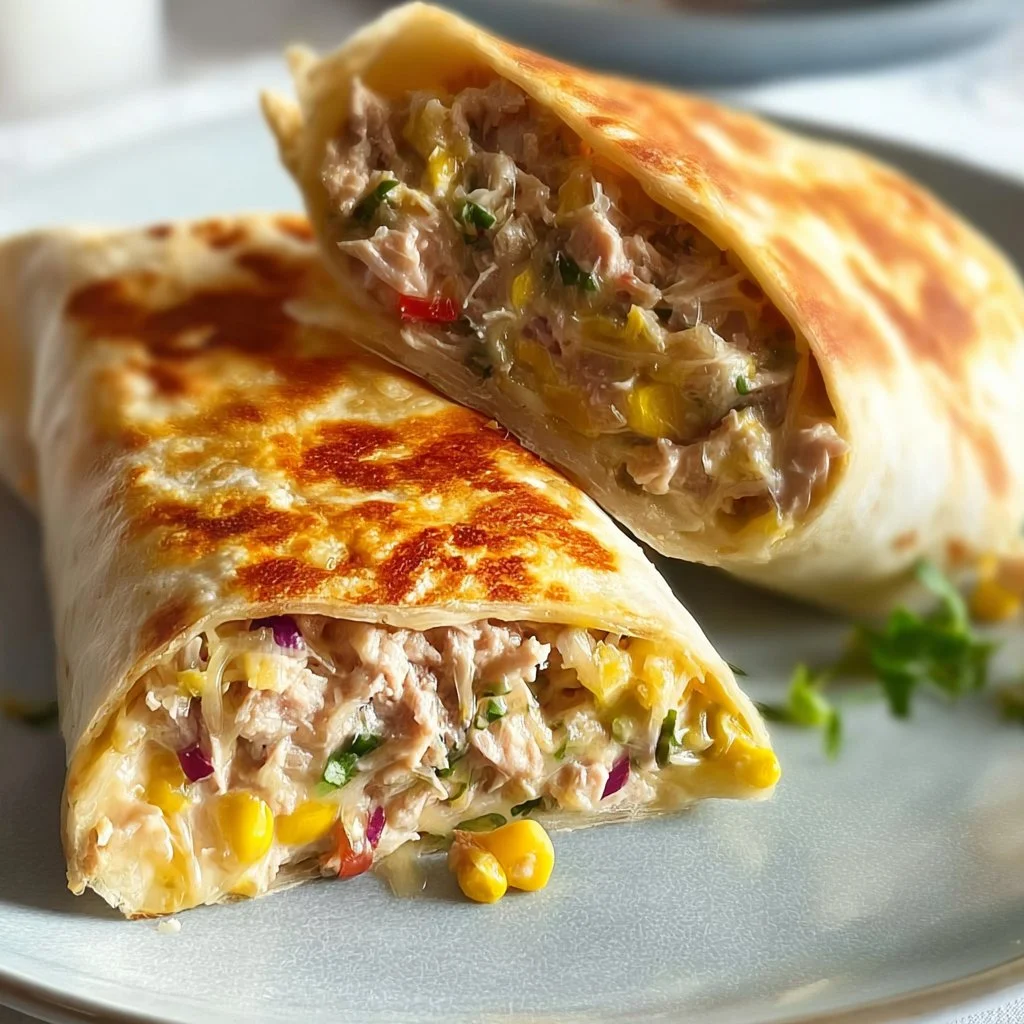
Tuna Melt Wrap
# The Ultimate Tuna Melt Wrap: A Solo Chef’s Favorite

## Introduction

Hey food lovers! I’m Beau Collier, and today we’re diving into one of my favorite comfy classics – the Tuna Melt Wrap. Yes, you heard it right! Imagine your traditional tuna melt but wrapped up nice and cozy, ready to fuel your day with just the right kind of flavor. Whether you’re looking for something simple to whip up on a busy weeknight or a fun dish to impress your friends, this wrap has your back!

Tuna melts have been around forever, and there’s something about that creamy, cheesy goodness stuffed into a warm wrap that just hits the spot. Plus, it’s a fantastic way to use pantry staples. Did someone say convenience? And guess what? You don’t have to slay over the stove for hours to make this happen. With just a few ingredients and about 20 minutes to spare, you’ll have a satisfying meal that tastes like you spent the entire day in the kitchen. Sounds good, right?

But before we roll up our sleeves and get cooking, let me take you on a tasty little journey down memory lane. Cooking has always been about connection for me—whether it’s shared meals with family, rekindling friendships over food, or the simple joy of creating something from scratch. This tuna melt wrap combines all those elements, delivering both nostalgia and deliciousness in every bite. So grab a fork (or your favorite mug), and let’s dig in!

---

## Personal Story: A Culinary Flashback

I vividly remember a Saturday afternoon when I was around twelve years old—my mom and I were in the kitchen, and the sun filtered through the window, bathing us in that warm golden light. My mom was rummaging through the pantry while I was busy daydreaming about the delicious feast we were going to create. Suddenly, she pulled out a can of tuna, and I can still hear her say, “How about tuna melts today?” I thought tuna was only for sandwiches, but boy, was I wrong!

She mixed tuna, mayo, and herbs, but the best part was when she added that layer of melted cheese on top. As it broiled in the oven, I couldn’t help but sneak a taste of the tuna mixture. I’ll never forget how simple ingredients came together to create something truly special. It was in that moment, watching the cheese bubble and golden, that my love for cooking began. While we’ve jazzed it up over the years, this wrap pays homage to those days. With this recipe, you’ll be channeling some serious retro vibes while crafting your own culinary masterpiece!

---

## Ingredients

Now that we’ve set the mood, let’s gather our ingredients. Here’s what you’ll need for making these mouthwatering Tuna Melt Wraps:

- **1 can of tuna, drained**
  *Look for tuna packed in water for a healthier option, or go for oil-packed if you prefer a richer flavor. Canned salmon or chicken can be great substitutes too!*

- **2 tablespoons mayonnaise**
  *Feel free to swap in Greek yogurt for a lighter version or even avocado for a creamy twist!*

- **1 tablespoon Dijon mustard**
  *This adds a tangy kick. If you’re not a fan, regular mustard or even some spicy sriracha can spice things up nicely!*

- **1/4 cup diced celery**
  *Celery gives that perfect crunch. If you don't have any, chopped bell peppers or pickles work well too!*

- **1/4 cup diced pickles**
  *Adding a bit of zesty flavor. Try using sweet or bread-and-butter pickles for extra sweetness, or omit if you prefer!*

- **Salt and pepper to taste**
  *Don’t be shy! A little seasoning will help bring all the flavors together.*

- **Whole wheat wraps**
  *These are my go-to for a healthier option. Feel free to use tortillas—flour or corn—just keep an eye on the size if you’re packing ‘em!*

- **1/2 cup shredded cheese (cheddar or your choice)**
  *Cheddar is classic, but try pepper jack for a little spice or mozzarella for that gooey stretchy goodness!*

- **Lettuce or spinach**
  *A handful of greens adds freshness. You can use any leafy greens, or even arugula for that peppery kick!*

---

## Step-by-Step Instructions

Alright, culinary adventurers! Let’s get cooking. Here’s how we bring this Tuna Melt Wrap to life in just a few simple steps.

### Step 1: Prepare the Tuna Salad Mixture
1. **In a mixing bowl**, combine your drained tuna, mayonnaise, and Dijon mustard.
   - *Tip: Use a fork to break up the tuna nicely—it helps mix everything uniformly!*

2. **Add in your diced celery and pickles**.
   - *Pro tip: You can chop the celery finely for more texture or leave it chunky for a hearty feel!*

3. **Season generously with salt and pepper**.
   - *Remember, taste as you go! A little sprinkle goes a long way... You want that flavor to sing!*

### Step 2: Prepare Your Wrap
1. **Lay your whole wheat wrap flat** on a clean surface or cutting board.
   - *Chef Insight: Warm your wrap slightly in a dry pan for a few seconds on each side before filling. It makes rolling easier and adds a nice touch!*

2. **Spoon a generous portion of the tuna mixture** onto the center of the wrap.
   - *Don’t be stingy—this is the star of the show!*

3. **Sprinkle on that shredded cheese.**
   - *Here’s where it gets cheesy—literally! Lay it on thick for melty goodness!*

### Step 3: Roll It Up
1. **Fold in the sides of the wrap**, then roll it up tightly from the bottom.
   - *A handy technique is to hold the sides while rolling with one hand and tucking in as you go. The key is to keep it snug without overstuffing!*

2. **Place the seam side down** on a preheated skillet (medium heat).
   - *Chef hack: If you have a panini press, use that for an even better crunch outside!*

### Step 4: Toast to Perfection
1. **Cook until golden brown** on one side (about 3-4 minutes), then carefully flip and cook the other side.
   - *Always keep an eye on it, as the cheese can melt quickly!*

2. **Once both sides are crispy and the cheese is melted**, remove it from the skillet and let it rest for a minute.
   - *Don’t skip this step! Cutting too soon can cause oozy cheese spills.*

### Step 5: Slice and Serve
1. **Cut the wrap in half**, and you’ll see that glorious melty cheese and tuna salad peeking out!
   - *For an extra touch, a diagonal cut showcases those layers beautifully!*

---

## Serving Suggestions

Now that you’ve got that irresistible Tuna Melt Wrap, presentation is key! Serve it up with a side of your favorite chips or a fresh salad for a colorful plate. Add a handful of baby greens or a dollop of sour cream for that gourmet vibe.

Feeling adventurous? Try a rainbow of sides: crispy carrot sticks, cucumber slices, or even a small bowl of homemade coleslaw! You can never go wrong with a side of freshness to balance the richness of the wrap.

---

## Recipe Variations

No two foodies are the same, and neither should their recipes be! Here are some delicious variations to try when you want to switch it up:

1. **Spicy Tuna Fling**: Add a tablespoon of sriracha or your favorite hot sauce to the tuna mixture for a spicy kick.
2. **Mediterranean Twist**: Swap mayo for tzatziki sauce and add chopped olives or sun-dried tomatoes for a zesty vibe.
3. **Herb Lovers’ Dream**: Mix in fresh herbs like dill, cilantro, or parsley to lift the tuna flavor to new heights.
4. **Vegan Marvel**: Replace tuna with chickpeas or canned jackfruit, and use vegan mayo for a plant-based alternative.
5. **Green Goddess**: Add mashed avocado for creaminess along with chopped spinach for a burst of nutrients.

---

## Chef’s Notes

As I’ve mastered this Tuna Melt Wrap over the years, I’ve learned one thing: simplicity is key! Elegant flavors often emerge from straightforward ingredients, and using whatever you have on hand can lead to delicious discoveries. This recipe has traveled with me through many culinary seasons, and seeing how the wrap has evolved keeps it fresh and exciting.

Oh, and let me share a little kitchen humor: the first time I made these wraps, I forgot the cheese. You better believe they still tasted good, but when I bit into the warm wrap and found that cheesy goodness on my next try—let’s just say it was the most satisfying ‘aha’ moment ever!

---

## FAQs and Troubleshooting

**Q: What can I do if the wrap falls apart while rolling?**
- *A: Try not to overfill! If it’s too stuffed, your wrap will become rebellious. Also, make sure your wrap is pliable; if it feels stiff, warming it helps!*

**Q: Can I make this ahead of time?**
- *A: Absolutely! Prepare the tuna salad mixture and wrap it tightly in cling film. Assemble on the day you plan to serve for the best freshness!*

**Q: How do I know when the cheese is melted?**
- *A: Just keep an eye on it; about 3–4 minutes per side usually does the trick. A little peek after flipping helps too!*

**Q: What if I'm not a big tuna fan?**
- *A: No worries! Soldier on with shredded chicken, shrimp, or even a hearty vegetable medley instead, the world is your oyster... or wrap!*

---

## Nutritional Info

Let’s talk nutrition! This Tuna Melt Wrap, if made with whole-wheat wraps and loaded with veggies, packs a punch:

- **Calories**: Approximately 400-500 per wrap (depending on cheese and condiments)
- **Protein**: Tuna alone brings about 20 grams!
- **Fiber**: Whole wheat wraps offer about 5 grams.
- **Vitamins and Minerals**: With the addition of greens and pickles, you’ll get a good dose of vitamins A, C, and K, not to mention great hydration!

**Nutritional Tip**: Amping up your greens and substituting whole ingredients can even turn this wrap into a powerhouse meal, full of the nutrients your body craves!

---

## Final Thoughts

And there you have it—the mouthwatering Tuna Melt Wrap, made with love and a sprinkle of creativity! It’s a fun dish that’s not only tasty but also tailors to your personal tastes and dietary needs. Whether you’re grabbing a quick lunch, hosting a casual dinner party, or just craving some comfort food, this wrap has got your back.

I hope you give this recipe a try, and don’t hesitate to share your twists and experiences down in the comments. Happy wrapping, and until next time, keep spreading that culinary joy in your kitchen! 🥙

Grab your loved ones, create those memories, and enjoy the delicious chaos that is cooking! Now, who’s hungry?

The Ultimate Tuna Melt Wrap
- Total Time: 20 minutes
- Yield: 1 serving 1x
- Diet: Pescatarian
Description
A cozy and satisfying twist on the classic tuna melt, wrapped up and ready to enjoy!
Ingredients
- 1 can of tuna, drained
- 2 tablespoons mayonnaise
- 1 tablespoon Dijon mustard
- 1/4 cup diced celery
- 1/4 cup diced pickles
- Salt and pepper to taste
- Whole wheat wraps
- 1/2 cup shredded cheese (cheddar or your choice)
- Lettuce or spinach
Instructions
- In a mixing bowl, combine your drained tuna, mayonnaise, and Dijon mustard.
- Add in your diced celery and pickles.
- Season generously with salt and pepper.
- Lay your whole wheat wrap flat on a clean surface or cutting board.
- Spoon a generous portion of the tuna mixture onto the center of the wrap.
- Sprinkle on that shredded cheese.
- Fold in the sides of the wrap, then roll it up tightly from the bottom.
- Place the seam side down on a preheated skillet (medium heat).
- Cook until golden brown on one side (about 3-4 minutes), then carefully flip and cook the other side.
- Once both sides are crispy and the cheese is melted, remove it from the skillet and let it rest for a minute.
- Cut the wrap in half, and you’ll see that glorious melty cheese and tuna salad peeking out!
Notes
Serve it with your favorite chips or a fresh salad. Feel free to modify the recipe with different ingredients or flavors.
- Prep Time: 10 minutes
- Cook Time: 10 minutes
- Category: Main Course
- Method: Grilling
- Cuisine: American
Nutrition
- Serving Size: 1 wrap
- Calories: 450
- Sugar: 4g
- Sodium: 600mg
- Fat: 25g
- Saturated Fat: 8g
- Unsaturated Fat: 12g
- Trans Fat: 0g
- Carbohydrates: 35g
- Fiber: 5g
- Protein: 25g
- Cholesterol: 40mg
Keywords: tuna melt, wrap, easy lunch, comfort food