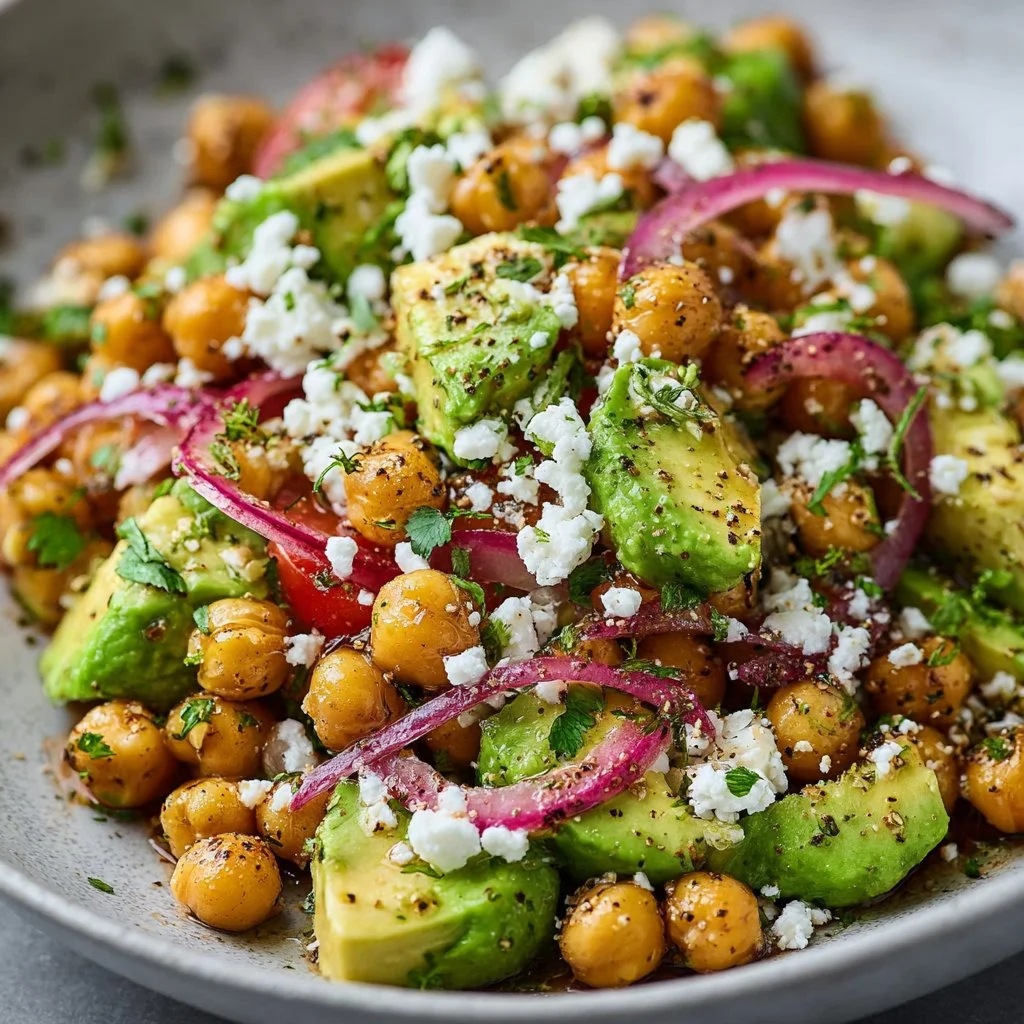
Chickpea Feta Avocado Salad
Chickpea Feta Avocado Salad: A Bright & Flavorful Delight
Hey there, food lovers! It’s Beau Collier from Feastical, and today, we’re diving into a dish that screams sunshine on your plate: the Chickpea Feta Avocado Salad. Seriously, is there anything better than a dish that captures the fresh flavors of summer while being oh-so-simple to whip up? This salad is not just a meal; it’s an experience! Picture this: bright green avocados and creamy feta nestled amongst hearty chickpeas, all drizzled with zesty olive oil and lemon juice. It’s like a Mediterranean getaway, right in your kitchen!
Now, let me tell you, I wasn’t always the culinary wizard I am today (wink). I remember the first time I encountered a chickpea salad. I was just a young foodie, roaming the vibrant farmer’s market, where the colors of the produce practically sing to you. A vendor had a bowl of this enchanting concoction, and I was immediately drawn in. One bite, and I knew I had to recreate it in my own kitchen. If you haven’t tried it yet, get ready to embrace a flurry of flavors that’ll dance on your palate!
This recipe is as flexible as your yoga instructor—perfect for summer picnics, easy weeknight dinners, or meal prep. It’s loaded with nutrients, flavor, and love, making it one of those go-to meals that’ll keep your tummy satisfied without feeling heavy. It’s vegan-friendly if you omit the feta, gluten-free, and packed with protein from the chickpeas. So grab your apron, and let’s get cooking together!
Personal Story
I can still recall that sun-soaked Saturday morning at the local farmer’s market, the air fragrant with herbs and grilled veggies. I must’ve looked like a kid in a candy store, eyes wide, overwhelmed by an abundance of colors. Inspiration struck when I saw a woman tossing together a salad that caught my eye, the glittering feta standing out like a lighthouse amidst waves of fresh greens and chickpeas.
After striking up a friendly conversation, she shared her wisdom about the importance of fresh ingredients—how they elevate any dish from ordinary to extraordinary. That moment planted the seeds of this Chickpea Feta Avocado Salad in my heart! I rushed home, armed with fresh produce, the essence of her words echoing in my ears. Ever since that day, each time I make this salad, I’m transported back to that sunny market day, reigniting my passion for cooking and sharing delicious meals with loved ones.
Ingredients
Let’s gather the goodies! Here’s what you’ll need:
-
1 (15-ounce/425g) can chickpeas, drained and rinsed
Chickpeas are the backbone of this salad, offering a hearty texture and a boost of protein. You could also opt for cooked dried chickpeas if you want to go the extra mile – just make sure they’re tender! -
1 avocado, pitted and diced
Avocados add creaminess and balance the dish. If you’re not an avocado aficionado, feel free to swap in diced cucumbers for a refreshing crunch! -
4 ounces/115g feta cheese, crumbled
Feta lends a salty tanginess. For a vegan twist, replace with a homemade cashew cheese or skip it altogether! -
1/2 cup/75g red onion, thinly sliced
Red onions contribute a zesty bite. If they’re too strong for your taste, soak them in cold water for a few minutes to mellow out the flavor. -
1/2 cup/50g fresh parsley, chopped
Fresh herbs lighten up any dish! You could swap parsley for basil or cilantro if you’re looking for a different flavor profile. -
1/4 cup/25g fresh mint, chopped
Mint imparts a refreshing twist. If mint isn’t your jam, try dill or even fresh oregano for a unique spin! -
3 tablespoons/45ml olive oil
Use a good quality extra virgin olive oil for a lovely richness. Avocado oil could also work if you want a more neutral flavor. -
2 tablespoons/30ml lemon juice, freshly squeezed
Nothing brightens a dish like fresh lemon juice! If you don’t have lemons, lime juice works just as beautifully. -
1 clove garlic, minced
Garlic adds depth – just like my culinary secrets! If you prefer milder flavors, try roasted garlic instead. -
1/2 teaspoon/2.5ml dried oregano
Dried oregano gives off a warm, Mediterranean vibe. You could also use Italian seasoning for a more complex taste. -
Salt and pepper to taste
Always taste before adding these! The seasoning elevates the freshness of the ingredients.
Step-by-Step Instructions
Now, let’s jump into the magic of cooking! Follow these steps, and you’re guaranteed a delightful dish:
-
Prep Your Ingredients: Start by draining and rinsing the chickpeas. This eliminates excess sodium and helps there be no grit in your salad. Grab a good strainer and let those chickpeas sit while you chop everything else!
-
Chop, Chop, Chop:
- Dice the avocado and toss it right into a large mixing bowl.
- Next, slice up your red onion as thinly as you can. Remember, the thinner they are, the less overpowering they’ll taste when combined with the others.
- Now, it’s time for herbs! Chop your parsley and mint, and add them to the bowl for some herby magic.
-
Add the Feta: Crumble your feta directly into the bowl. Don’t be shy—more feta, more flavor! Gently mix all your ingredients with a spatula or wooden spoon, being careful not to mash the avocado too much.
-
Eggiting Olive Oil and Lemon Juice Combo: In a small bowl, whisk together the olive oil, freshly squeezed lemon juice, minced garlic, oregano, salt, and pepper. This dressing is where the magic happens! It brings all your ingredients together like a warm hug.
-
The Grand Finale: Pour your dressing over the salad and fold it gently until everything is beautifully coated! If you notice that the chickpeas are trying to escape, employ a light hand so they don’t get mushy.
-
Taste Test Time!: Here comes the fun part—taste your creation! Adjust the seasoning if necessary. Maybe you want a bit more lemon or an extra sprinkle of oregano? Go for it! You’re the chef here.
-
Chill Out (Optional): This salad is perfect right away, but it also tastes incredible when allowed to chill in the fridge for about 30 minutes. This allows all those flavors to mingle and dance.
Serving Suggestions
Time to plate up! You can serve this Chickpea Feta Avocado Salad in various ways:
-
Bowl-style: Present it in a beautiful bowl and let everyone serve themselves. This family-style approach brings everyone together and makes for a fun meal!
-
In Pita Pockets: Spoon the salad into pita pockets, adding a leaf of lettuce for extra crunch. It’s a portable option that’s perfect for picnics or work lunches!
-
As a Side: Pair it with grilled chicken or fish to elevate your main dish. This salad complements proteins beautifully, giving a refreshing contrast.
-
On a Bed of Greens: Serve the salad over a bed of arugula or mixed greens for a more substantial meal. You can even drape it across whole grain toast for a divine breakfast or lunch option.
Recipe Variations
Feeling adventurous? Here are some flavor-packed variations to jazz up our Chickpea Feta Avocado Salad:
-
Mediterranean Twist: Add diced cucumber and Kalamata olives for an even more authentic Mediterranean vibe.
-
Spicy Kick: Throw in some finely chopped jalapeños or a sprinkle of red pepper flakes for a feisty heat!
-
Protein Boost: Toss in some diced rotisserie chicken or quinoa for extra substance.
-
Tropical Vibes: For a fruity twist, add diced mango or pineapple. The sweetness will create a beautiful balance with the salty feta!
-
Nutty Crunch: Add a handful of toasted sunflower seeds or slivered almonds for some extra crunch and nutrients.
Chef’s Notes
This salad has continuously evolved since I first whipped it up years ago! Initially, it was just a simple mix of chickpeas and feta, but as I explored different ingredients and flavors, it blossomed into the vibrant dish it is today. One of my favorite kitchen stories stems from a friends’ dinner party where I forgot the lemon juice! I scrambled and grabbed a jar of homemade pickle brine to give that tangy kick, and believe it or not, it was a hit! So don’t be afraid to improvise and let your creativity shine through.
FAQs and Troubleshooting
Q: What can I do if my avocado isn’t ripe?
A: Don’t worry! You can microwave your unripe avocado for about 30 seconds in its skin to soften it slightly. However, this trick won’t bring out the same creamy flavor, so always aim for ripe avocados when possible!
Q: How long does this salad last in the fridge?
A: Ideally, it’s best enjoyed fresh, but it’ll keep in the fridge for about 2-3 days. The avocado will darken, but adding a splash more lemon juice can help preserve its bright color!
Q: Can I make this salad in advance?
A: Absolutely! Just keep the avocado separate until you’re ready to serve. This helps prevent browning and keeps the salad fresh.
Q: What if I can’t find fresh herbs?
A: You can use dried herbs! A general rule is to use about one-third the amount of dried herbs as fresh.
Nutritional Info
Here’s the scoop on the nutritional benefits of our Chickpea Feta Avocado Salad:
- Chickpeas are a fantastic source of plant-based protein, fiber, and essential vitamins and minerals, making them a filling addition to any meal.
- Avocado adds healthy fats that are perfect for keeping your heart happy.
- Feta cheese provides calcium and protein; if you’re making a vegan version, using nuts or seeds can still provide those good fats.
- Fresh herbs and veggies are packed with antioxidants and vitamins, giving you a boost of freshness in every bite!
This salad can be a great option for a light lunch or a side dish that complements your main meal. Plus, it’s a vibrant way to sneak in a variety of nutrients while keeping things deliciously simple!
Final Thoughts
So there you have it—the Chickpea Feta Avocado Salad that’s sure to become one of your kitchen staples. Remember, cooking is all about creativity and joy; it’s about creating something to share not just with your palate but also with your loved ones. The memories we create in the kitchen are just as important as the meals we put on the table.
I hope this salad makes its way into your regular rotation and brings as much joy to your kitchen as it brings to mine! Feel free to experiment with flavors, make it your own, and share your variations with us. Happy cooking, and see you next time, foodies! 🍽️
Print
Chickpea Feta Avocado Salad
- Total Time: 15 minutes
- Yield: 4 servings 1x
- Diet: Vegan, Vegetarian, Gluten-Free
Description
A vibrant salad combining chickpeas, creamy avocado, tangy feta, and fresh herbs, perfect for summer days.
Ingredients
- 1 (15-ounce/425g) can chickpeas, drained and rinsed
- 1 avocado, pitted and diced
- 4 ounces/115g feta cheese, crumbled
- 1/2 cup/75g red onion, thinly sliced
- 1/2 cup/50g fresh parsley, chopped
- 1/4 cup/25g fresh mint, chopped
- 3 tablespoons/45ml olive oil
- 2 tablespoons/30ml lemon juice, freshly squeezed
- 1 clove garlic, minced
- 1/2 teaspoon/2.5ml dried oregano
- Salt and pepper to taste
Instructions
- Prep your ingredients: Start by draining and rinsing the chickpeas.
- Dice the avocado and toss it into a large mixing bowl.
- Slice the red onion thinly and add to the bowl.
- Chop your parsley and mint, and add them to the bowl.
- Crumble the feta into the bowl and mix gently.
- Whisk together olive oil, lemon juice, garlic, oregano, salt, and pepper in a small bowl.
- Pour the dressing over the salad and fold gently.
- Taste your creation and adjust seasoning if necessary.
- Chill in the fridge for 30 minutes, if desired.
Notes
For a vegan version, omit the feta or substitute with cashew cheese. This salad is best enjoyed fresh but can be stored in the fridge for up to 2-3 days.
- Prep Time: 15 minutes
- Cook Time: 0 minutes
- Category: Salad
- Method: Mixing
- Cuisine: Mediterranean
Nutrition
- Serving Size: 1 serving
- Calories: 300
- Sugar: 3g
- Sodium: 400mg
- Fat: 18g
- Saturated Fat: 4g
- Unsaturated Fat: 10g
- Trans Fat: 0g
- Carbohydrates: 30g
- Fiber: 9g
- Protein: 10g
- Cholesterol: 10mg
Keywords: chickpea salad, feta, avocado, Mediterranean, healthy salad
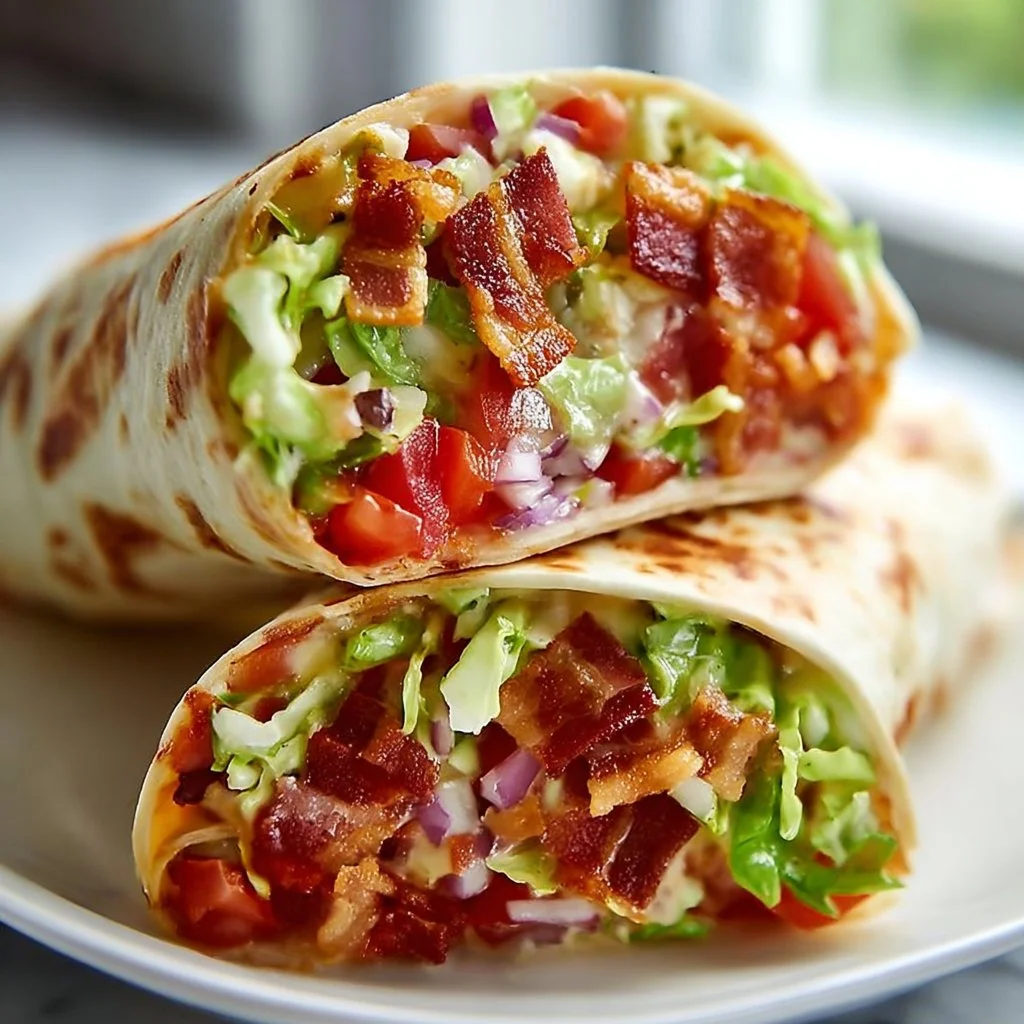
Easy Meal Prep BLT Wraps
Easy Meal Prep BLT Wraps: A Deliciously Simple Solution!
Hey there, fellow food lovers! It’s Beau Collier here, and I’m super excited to share one of my all-time favorite meal prep ideas with you: Easy Meal Prep BLT Wraps! If you’re tired of the same old lunch routine, looking to spice things up, or just want a fun way to enjoy a classic, these wraps are your golden ticket. Whipping up a handful of these delightful wraps can save time during the week and ensure you have a taste of summer in every bite, no matter the season!
A Little Story Behind My BLT Love
Let me take you back to my childhood for a moment. I grew up in a small town where summer meant two things: sunshine and homegrown tomatoes. My family would often pile into my grandparent’s backyard, where my grandfather tended to his beloved vegetable garden. The tomatoes were plump, juicy, and bursting with flavor—a true farm-to-table experience right at home.
One particular day, my grandma decided to make us her famous BLT sandwiches. As the smell of bacon sizzling on the stovetop wafted through the air, I was practically drooling! I will never forget the moment she assembled the sandwich. She layered crispy bacon, bright romaine lettuce, and a thick slice of that garden-fresh tomato between two slices of crusty bread spread generously with mayonnaise. Each bite was pure magic!
These days, I still adore those flavors, but instead of sandwiches, I often transform that classic combo into a wrap! It’s easy to grab and go, making it perfect for lunch prep. With just a few simple ingredients, you can create wraps that remind you of those sunny afternoons spent with family. Now, let’s jump into this deliciousness!
Ingredients for Easy Meal Prep BLT Wraps
Here’s everything you’ll need to make these scrumptious BLT wraps:
-
Tortillas or Wrap Bread: Opt for flour, whole wheat, or even spinach wraps depending on your dietary preferences! If you’re gluten-free, there are fantastic gluten-free tortillas available that fit the bill!
-
Cooked Bacon: You can’t have a BLT without crispy bacon! Roast it in the oven for even cooking or use turkey bacon for a lighter option. You can also try thick-cut bacon for an extra crunch.
-
Lettuce: Romaine is my go-to for that delightful crunch, but feel free to swap it out for baby spinach or butter lettuce if you’re feeling fancy.
-
Tomato: Make sure it’s ripe and juicy—nothing beats the taste of a freshly-picked tomato! You could even consider using cherry tomatoes, halved, for a fun twist!
-
Mayonnaise: The creamy goodness here can’t be skipped. For a lighter alternative, you can use Greek yogurt mixed with a splash of lemon juice. Try flavored mayo for a twist!
-
Salt and Pepper to Taste: These seasonings enhance each layer of flavor, so don’t be shy! A sprinkle of black pepper will bring out the taste of the tomatoes beautifully.
Chef’s Tip: Pre-cooked bacon strips save time!
Step-by-Step Instructions to Assemble Your Wraps
Now, let’s get to the fun part! Here’s how to whip up these Easy Meal Prep BLT Wraps in just a few simple steps.
-
Cook Your Bacon:
- Start by cooking your bacon until it’s crispy. You can fry it in a skillet over medium heat or bake it in the oven at 400°F (200°C) for about 15-20 minutes. The oven option allows you to cook a larger batch without much fuss. Either way, drain the bacon on paper towels to keep it from being greasy!
-
Prepare the Tortillas:
- Take your tortillas or wrap bread, and if you like them warm, you can pop them in the microwave for 10-15 seconds or toast them lightly in a pan. A warm tortilla is always more pliable and enjoyable to eat.
-
Spread the Mayonnaise:
- Generously spread mayonnaise on one side of each tortilla. Don’t be shy—this adds a delightful creaminess to your wrap. If using Greek yogurt, make sure to mix it with a pinch of salt and pepper or any preferred herb beforehand for that extra kick!
-
Layer the Ingredients:
- Begin layering your ingredients. Start with lettuce as the base layer, followed by a few strips of crispy bacon. Add in those perfectly sliced, juicy tomatoes, and sprinkle a little salt and pepper for good measure. This layering not only ensures all those delicious flavors combine but also adds an impressive pop of color!
-
Rolling Time:
- Now, it’s time to roll! Fold in the sides of the tortilla first, then roll it up tightly from the bottom. Keep it snug so everything stays inside and you can enjoy a mess-free bite!
-
Slice and Store:
- You can either slice the wraps in half to create beautiful pinwheels, or keep them whole for later. If you’re prepping for the week, wrap each one in parchment paper or foil to keep them fresh, and store them in an airtight container in the fridge.
Chef’s Tip: Grab some toothpicks if you’re doing a ‘party platter’ style!
Serving Suggestions
Serving our Easy Meal Prep BLT Wraps is all about keeping things light and enjoyable. Here are a few ideas:
-
Plating: Arrange your wraps on a colorful cutting board or a platter. They’d look gorgeous next to a fresh fruit salad or some crunchy carrot sticks for that perfect lunch box.
-
Dipping Sauces: Whip up a quick side of ranch, or how about a zesty chipotle mayo? These dips not only add flavor but also make each bite fun and interactive!
-
Garnishing: Sprinkle some fresh herbs like parsley or even chives on top just before serving. Not only does it look great, but it adds freshness that you’ll love!
Recipe Variations
Let’s jazz it up a little as we talk about some cool twist options for your BLT Wraps:
-
Avocado BLT: Add some slices of creamy avocado for that lush texture! It brings a whole new level of yummy to each bite.
-
Spicy BLT: Spread a layer of sriracha mayo on your wrap for added heat. Or sprinkle some crushed red pepper on your tomatoes!
-
Vegan Version: Use coconut bacon or marinated tofu strips instead of bacon, while keeping your mayo swap to a vegan alternative. Add some sprouts for extra crunch!
-
Salad Wrap: Instead of a tortilla, use large lettuce leaves for a low-carb, gluten-free option.
-
Mediterranean Twist: Incorporate feta cheese and olives along with your traditional ingredients for a refreshing Mediterranean flair.
Chef’s Notes
Over the years, my love for these wraps has evolved, just like my cooking style! From my grandma’s strict cookbook rules to my playful exploration of flavors, I’ve come to appreciate the flexibility of the BLT concept. Sometimes, when I’m feeling particularly adventurous, I create a whole BLT pizza! The ideas are limitless when creativity enters the kitchen, and trust me, there’s no wrong way to enjoy a BLT!
FAQs and Troubleshooting
Did you have questions about your wrap-making adventure? Here are a few answers to common dilemmas you might face:
-
How do I prevent soggy wraps?
- Make sure your ingredients, especially tomatoes, are patted dry before assembling. You can also place the lettuce as a barrier between the tomatoes and the mayo to keep things crisp!
-
Can I freeze my wraps?
- Absolutely! Just make sure to wrap them tightly in cling film or foil, and store them in a freezer-safe bag. They should keep well for up to a month. Thaw in the fridge overnight before enjoying.
-
What if my wraps are falling apart?
- This can happen if you overload your wraps. Ensure you balance your fillings, and leave space at the edges when rolling to avoid spills.
-
How long will the wraps stay fresh in the fridge?
- Typically, they’ll last 3-5 days when stored properly in an airtight container.
Nutritional Info
Knowing what you’re putting in your body is important, so let’s break down the nutrition facts for our Easy Meal Prep BLT Wraps. Keep in mind these numbers will vary based on the ingredients and quantities used:
- Calories: Approximately 300-400 calories per wrap, depending on bacon and mayo choices.
- Protein: About 15-20g from bacon; swap for turkey or plant-protein alternatives for similar stats.
- Carbohydrates: Roughly 30-40g, depending on the type of wrap bread.
- Fat: About 20g, with healthy fats coming from the mayo or any added avocado.
- Fiber: If you choose a whole grain wrap and add in some veggies, you can boost fiber to around 4-5g!
Final Thoughts
There you have it—your go-to guide for whipping up Easy Meal Prep BLT Wraps! Anyone can enjoy this delicious wrap, from the kitchen novice to seasoned chefs looking to try something new. Remember, cooking is about having fun and experimenting!
So let’s get in the kitchen, and I’d love for you to take this recipe and make it your own! Share your creations with me; I can’t wait to see how you personalize your wraps! Until next time, happy cooking, my friends! 🥳🍅🌯
Print
Easy Meal Prep BLT Wraps
- Total Time: 30 minutes
- Yield: 4 servings
- Diet: Omnivore
Description
Delicious and simple BLT wraps perfect for meal prep, combining crispy bacon, fresh lettuce, and ripe tomatoes in a convenient format.
Ingredients
- Tortillas or Wrap Bread
- Cooked Bacon
- Lettuce (Romaine, Baby Spinach, or Butter Lettuce)
- Tomato (Ripe and Juicy)
- Mayonnaise (or Greek Yogurt)
- Salt and Pepper to Taste
Instructions
- Cook your bacon until it’s crispy in a skillet or oven.
- Prepare the tortillas by warming them if desired.
- Spread mayonnaise generously on each tortilla.
- Layer the ingredients starting with lettuce, followed by bacon and tomato.
- Roll the tortilla tightly to keep the ingredients inside.
- Slice the wraps or keep them whole, storing in an airtight container.
Notes
Pre-cooked bacon strips save time. For a party, use toothpicks to secure wraps.
- Prep Time: 10 minutes
- Cook Time: 20 minutes
- Category: Lunch
- Method: Wrapping
- Cuisine: American
Nutrition
- Serving Size: 1 wrap
- Calories: 350
- Sugar: 2g
- Sodium: 600mg
- Fat: 20g
- Saturated Fat: 5g
- Unsaturated Fat: 10g
- Trans Fat: 0g
- Carbohydrates: 30g
- Fiber: 3g
- Protein: 15g
- Cholesterol: 40mg
Keywords: BLT wraps, meal prep, easy recipes, summer food, lunch ideas
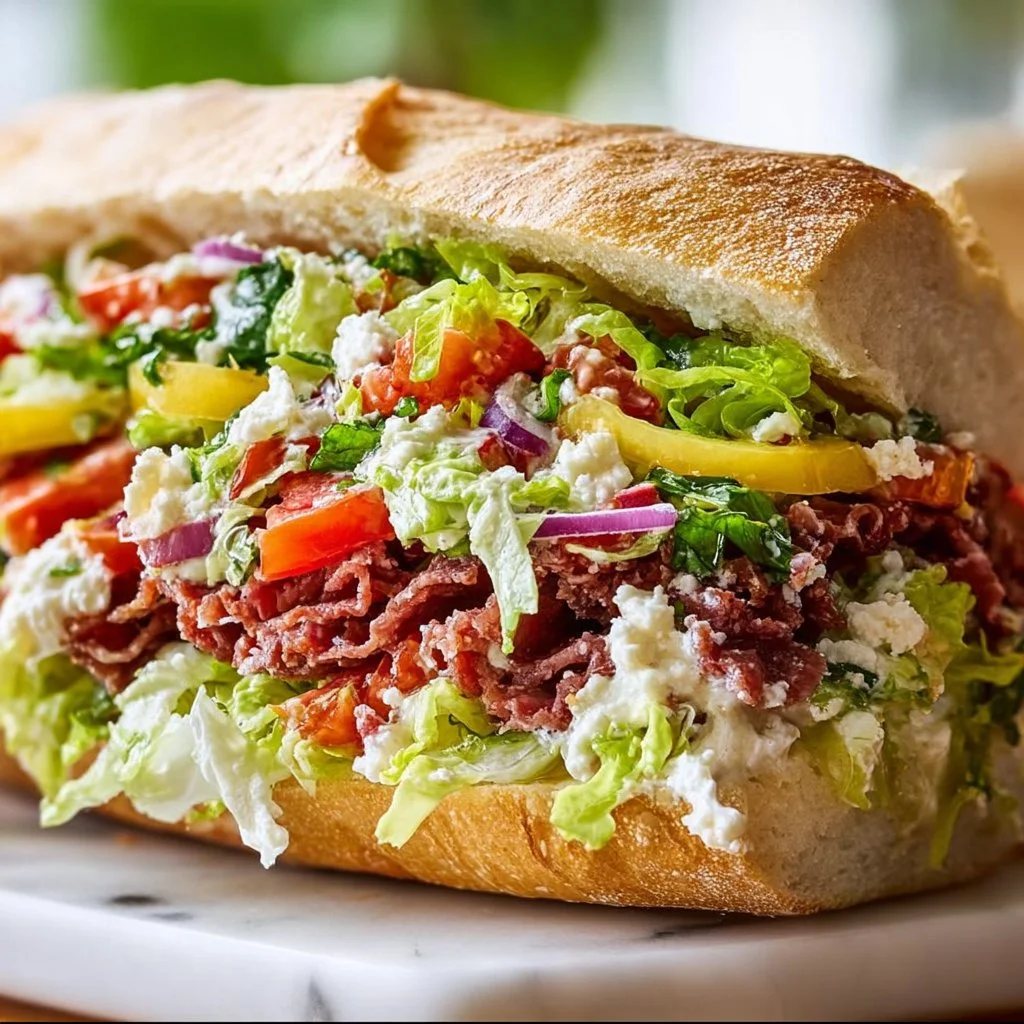
Italian Grinder Salad Sandwich
Italian Grinder Salad Sandwich: A Flavorful Twist on a Classic
Hey there, food lovers! It’s Beau Collier here, and today we’re diving into something a little different: the Italian Grinder Salad Sandwich! If you’re in the mood for a vibrant, hearty, and flavorful dish that brings together all the best elements of an Italian deli, you’ve come to the right place. This sandwich packs in a punch of flavors, a crunch of textures, and a whole lot of comfort, making it the perfect meal for any occasion. So, grab your apron, and let’s get started on this culinary adventure!
There’s something magical about sandwiches, don’t you think? They’re like little edible packages of joy, holding together flavors, textures, and memories. Growing up, I have vivid memories of raiding the local deli with my family, soaking in the lively atmosphere while the salty air filled my lungs. I loved watching the deli workers artfully stack layers of meats, cheeses, and fresh veggies onto crusty rolls, all while my mouth watered with anticipation.
The Italian Grinder Sandwich was a star attraction on those visits, and I’m sure you’ll understand why. It brings together layers of delicious Italian cured meats, a medley of fresh veggies, and an irresistible dressing that ties it all together. Plus, this sandwich is incredibly customizable! Whether you want to enjoy it as a hearty meal or a light snack, there’s a way to make it work for you.
So, are you ready to create your own Italian Grinder Salad Sandwich? Trust me, this dish is more than just a meal; it’s an experience! Let’s explore the flavors that will make your taste buds dance and the memories that truly make food come alive.
Personal Story
One summer, during a family vacation to the picturesque coasts of Italy, I discovered the soul of Italian cuisine at a small, quaint café. After a long day of exploring, we stumbled upon this hidden gem tucked away from the busy tourist streets. The aroma of freshly baked bread wafted through the air as we stepped inside.
I ordered a classic Italian sandwich, unknowingly stepping into my love affair with the Grinder. As I took my first delightful bite, I was transfixed by the contrasting flavors and textures—the spiciness of the salami, the creaminess of the provolone, and the brightness of the fresh veggies enveloped in a crusty roll. I remember smiling at my family as we shared bites and stories, laughing until our faces hurt over the simplest pleasures of food.
That moment ignited my passion for creating and sharing recipes, like the Grinder Sandwich! Each time I make this sandwich, I’m not just cooking; I’m reliving that beautiful summer day filled with flavors and fellowship. So, let’s make our own memories as we whip up this simple yet delicious recipe!
Ingredients
Here’s what you’ll need to whip up your Italian Grinder Salad Sandwich:
-
Ciabatta or Hoagie Rolls
These are the perfect vehicles for our Italian goodies! Ciabatta has a chewy crust and soft inside, while hoagie rolls bring a classic sandwich vibe. If you prefer whole grain or gluten-free options, feel free to swap them in! -
Salami
Rich and flavorful, salami adds the perfect salty kick. You can substitute it with any cured meat like pepperoni or prosciutto for a different spin! -
Capicola
This is a slightly spicy and smoky Italian cured pork that takes your sandwich up a notch. If you can’t find it, try substituting with pastrami or another savory deli meat. -
Provolone Cheese
Creamy and slightly tangy, provolone melts beautifully in this sandwich. If you want a bolder flavor, opt for sharp provolone or mozzarella for a milder, softer finish. -
Lettuce
Crisp lettuce adds a refreshing crunch. Romaine or iceberg works wonderfully, but arugula adds a robust peppery flavor if you’re feeling adventurous! -
Tomatoes
Juicy tomatoes give your sandwich a colorful and tasty twist. Use ripe, in-season tomatoes if you can for the best flavor! -
Red Onions
Thinly sliced, red onions add a pop of sharpness. If you find them too strong, soak them in water for a few minutes before adding them to the sandwich. -
Banana Peppers
These tangy and mildly spicy peppers elevate the flavor profile. You can replace them with pickles or jalapeños if you want a different kick! -
Olive Oil
A drizzle of good-quality olive oil enhances the sandwich’s overall taste. Try flavored oils like garlic or herbs to make it extra special. -
Red Wine Vinegar
This adds a delightful tang that complements the savory elements of the sandwich. Apple cider vinegar works great as a substitute if needed. -
Italian Seasoning
A blend of herbs like oregano, basil, and thyme brings that authentic Italian flavor to your sandwich. You can use fresh herbs too, just adjust the quantity! -
Salt and Pepper
Season to taste! These staples enhance the flavors and bring the whole sandwich together.
Step-by-Step Instructions
Now that we’ve got our ingredients ready, let’s put this beauty together:
Step 1: Slice the Rolls
Start by slicing your ciabatta or hoagie rolls lengthwise. Make sure not to cut all the way through; leave a hinge so you can easily fill them later. This is your canvas!
Chef tip: Toasting these rolls lightly can add a delightful crunch and sturdiness to support all the delicious fillings!
Step 2: Layer the Meats
Spread a thin layer of salami and capicola on the bottom half of each roll. You want a good amount of meat—this is an Italian Grinder after all!
Chef hack: Feel free to mix things up! Use any combination of deli meats you like for a fun twist or use leftover roasted meats if you have them.
Step 3: Add Cheese
Next, layer in the provolone cheese on top of the meat. Make sure to distribute it evenly so every bite has that melty goodness.
Quick note: If you’re planning to heat your sandwiches, you can add the cheese and pop the whole thing in the toaster oven for a few minutes before adding the veggies!
Step 4: Pile on the Veggies
Now comes the fun part! Layer the crisp lettuce, sliced tomatoes, red onions, and banana peppers on top. Don’t be shy here—load it up! All these fresh ingredients provide amazing flavors and textures.
Tip: To prevent sogginess, you can lay the lettuce down first as a barrier.
Step 5: Dress It Up
In a small bowl, whisk together the olive oil, red wine vinegar, Italian seasoning, salt, and pepper. Drizzle this dressing over the sandwich fillings, making sure to coat everything evenly.
Chef secret: If you’re feeling adventurous, add a hint of your favorite mustard to the dressing for an extra zip!
Step 6: Close It Up
Once the sandwich is dressed and ready to go, carefully close it up. You can secure it with toothpicks if you’re worried about everything spilling out!
Step 7: Serve & Enjoy
Your Italian Grinder Salad Sandwich is now ready! You can serve it immediately, or if you prefer, wrap it in foil and let it sit for a bit so the flavors meld together even more.
Serving Suggestions
When it comes to serving your Italian Grinder Salad Sandwich, there are endless options!
You can slice it into halves or quarters to share with friends or family or serve individual sandwiches with a side of crunchy potato chips or a simple green salad.
You could also set up a fun sandwich bar with various condiments and toppings, allowing everyone to build their own perfect grinder. It’s a great way to involve guests at a gathering or simply for a personal touch on family dinner night!
Recipe Variations
Get ready to shake things up with these creative twists on the Italian Grinder Salad Sandwich:
-
Mediterranean Style
Swap the meats for roasted vegetables and feta cheese, then add olives and a drizzle of balsamic glaze. -
Vegan Grinder
Use plant-based deli slices or marinated tofu as the base and load up on all the fresh veggies and some avocado for creaminess. -
Spicy Grinder
Add in spicy giardiniera or crushed red pepper for a kick, and try pepper jack cheese for an extra layer of heat! -
Breakfast Grinder
Layer in scrambled eggs along with breakfast meats, cheese, and avocado for a delicious breakfast take on this classic sandwich. -
Savory Breakfast Bowl
Throw everything in a bowl instead of a sandwich, with a base of grains like quinoa or farro, and top it with a sunny-side-up egg!
Chef’s Notes
I’ve been making this Italian Grinder Salad Sandwich for years, and it never fails to satisfy! Over time, I’ve learned to embrace different ingredient combinations based on what I have in my fridge, and I encourage you to do the same.
One time, I was out of the usual ingredients and substituted some leftover grilled chicken and some homemade pesto. Let’s just say it was a delicious detour! Food is all about creativity and improvisation—there are no hard and fast rules.
And remember, making these sandwiches can be a wonderful bonding experience! Get your family or friends to join in; it makes the process even more enjoyable.
FAQs and Troubleshooting
Q: Can I prepare the sandwich in advance, or will it get soggy?
A: It’s best to assemble the sandwich right before serving for the freshest taste. However, you can prep all ingredients and store them separately until you’re ready to put it all together!
Q: How do I store leftovers?
A: Wrapped tightly in plastic wrap or foil, leftover sandwiches may be stored in the fridge for up to two days. Just note that they should be enjoyed cold or reheated in an oven for best results.
Q: What if I don’t like certain ingredients?
A: Feel free to swap out any ingredient you’re not a fan of! The beauty of this recipe is its adaptability to your taste preferences.
Q: Could I turn this into a grilled sandwich?
A: Absolutely! Butter the outside of the bread and grill it on a skillet until golden brown for a crispy, melty delight!
Nutritional Info
Nutritional info can vary based on the exact ingredients used, but here’s a rough estimate per sandwich:
- Calories: 400-600 (depending on bread and fillings)
- Protein: 25-30g
- Fat: 20-30g
- Carbohydrates: 35-50g
- Fiber: 2-5g
This sandwich is packed with proteins and healthy fats while providing a delightful mix of flavors. Pair it with a side salad, and you’ve got yourself a satisfying meal!
Final Thoughts
There you have it, foodies! Your guide to creating an Italian Grinder Salad Sandwich that’ll capture the essence of vibrant Italian dining right at home.
Like every good meal, this sandwich has the power to bring people together, spark joy, and create memories. Whether you’re flipping through recipe ideas or crafting your own variations, one thing is certain: every bite will remind you of the love and warmth tied to each ingredient.
I hope you’ve enjoyed this culinary journey as much as I have! Now roll up your sleeves, gather your ingredients, and let that lovely kitchen aroma fill your space. Happy cooking, and remember—the best flavors come from the happiest hearts! Buon Appetito!
Print
Italian Grinder Salad Sandwich
- Total Time: 20 minutes
- Yield: 2 servings
- Diet: Vegetarian Option Available
Description
A vibrant and hearty sandwich featuring layers of Italian cured meats, fresh veggies, and a delicious dressing, perfect for any occasion.
Ingredients
- Ciabatta or Hoagie Rolls
- Salami
- Capicola
- Provolone Cheese
- Lettuce
- Tomatoes
- Red Onions
- Banana Peppers
- Olive Oil
- Red Wine Vinegar
- Italian Seasoning
- Salt and Pepper
Instructions
- Slice the rolls lengthwise, making sure not to cut all the way through.
- Layer the salami and capicola on the bottom half of each roll.
- Add the provolone cheese on top of the meat.
- Pile on the crisp lettuce, sliced tomatoes, red onions, and banana peppers.
- Dress the sandwich fillings with olive oil, red wine vinegar, Italian seasoning, salt, and pepper.
- Close the sandwich carefully and secure it with toothpicks if desired.
- Serve immediately, or wrap in foil to let the flavors meld together.
Notes
Customize your sandwich with different meats, cheeses, or veggies. Great for a fun sandwich bar with various toppings.
- Prep Time: 15 minutes
- Cook Time: 5 minutes
- Category: Sandwich
- Method: Assembly
- Cuisine: Italian
Nutrition
- Serving Size: 1 sandwich
- Calories: 500
- Sugar: 6g
- Sodium: 900mg
- Fat: 25g
- Saturated Fat: 10g
- Unsaturated Fat: 12g
- Trans Fat: 0g
- Carbohydrates: 45g
- Fiber: 3g
- Protein: 30g
- Cholesterol: 50mg
Keywords: italian sandwich, grinder salad, deli sandwich
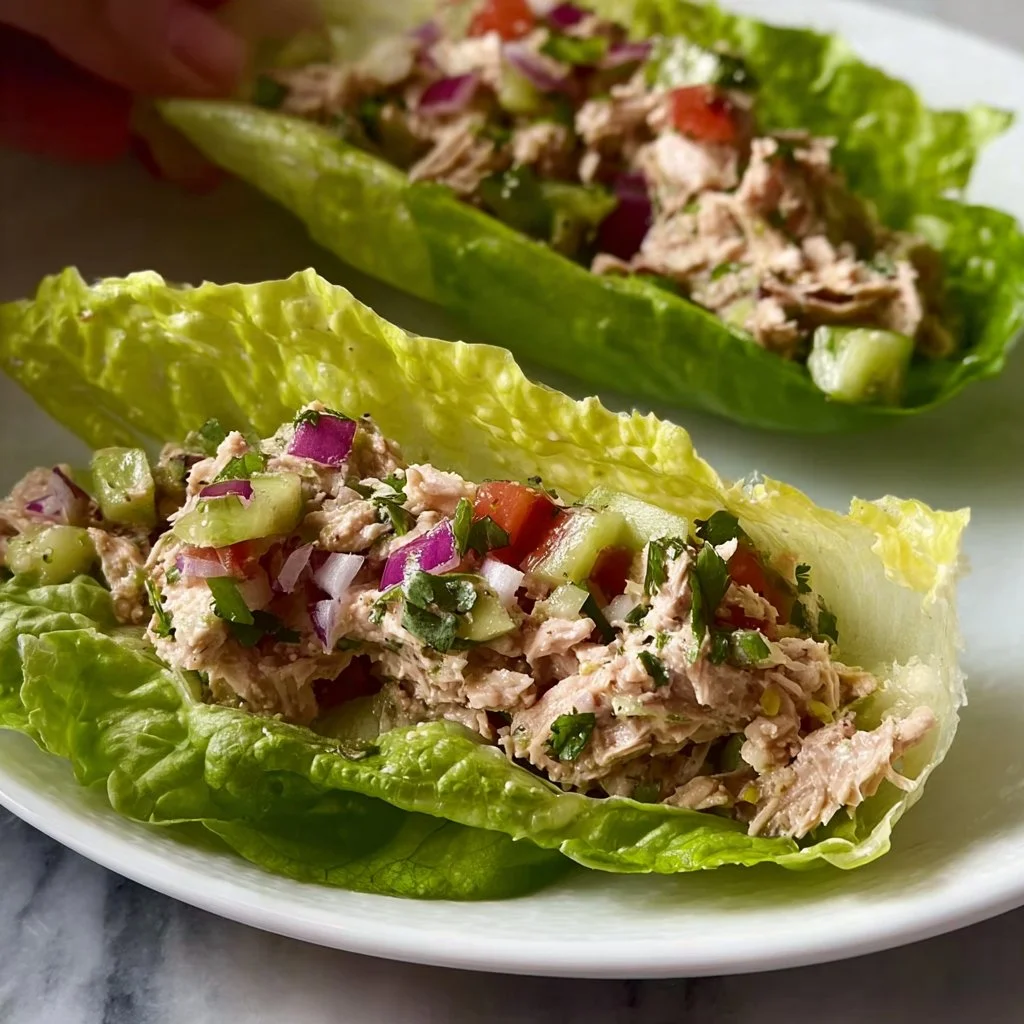
Tuna Lettuce Wraps
Tuna Lettuce Wraps: A Fresh and Flavorful Delight
Introduction:
Hey there, food lovers! It’s your pal Beau Collier from Feastical, and today we’re diving into something that’s not only delicious but also fresh and breezy—Tuna Lettuce Wraps! If you’re anything like me, you love a meal that feels light yet filling, and these wraps are just the ticket.
Imagine sinking your teeth into crisp, refreshing lettuce filled with savory, perfectly seasoned tuna—sounds inviting, right? Whether you need a quick lunch, a fancy appetizer for your next gathering, or a healthy snack, these delightful wraps have got your back. Plus, they’re oh-so-simple to whip up, making them a perfect fit for anyone, from the seasoned chef to those still searching for their spatula. So, grab your butter lettuce or Bibb lettuce, and let’s get cooking!
I remember the first time I stumbled upon the idea of lettuce wraps. I was spending a lazy summer afternoon at my quirky Aunt Louisa’s house. She was the queen of inventive snacks, and that day she had a platter of tuna lettuce wraps, just waiting to spark joy. As I took my first bite, the crunch of the lettuce contrasted beautifully with the creamy tuna filling. It was a match made in heaven!
Since then, I’ve made my own versions of these wonderful wraps, each time adding a personal touch. Trust me, you’ll not only enjoy making them but also sharing them. So, let’s roll up our sleeves and create a dish that’s filled with culinary love, good vibes, and a sprinkle of creativity!
Personal Story:
Ah, memories in the kitchen! One of my fondest moments was when my daughter, little Sophie, decided to help me make these Tuna Lettuce Wraps for her first-ever picnic with friends. She was about seven, armed with a chef’s hat that was three sizes too big and an adventurous spirit that could conquer the world.
We pulled out the ingredients and got to work. I showed her how to open the canned tuna, and she giddily squished the contents into a mixing bowl. Together, we diced the celery and red onion while giggling and sharing stories of adventures from her kindergarten class.
Lettuce wraps became a tradition for our summer picnics, and from that day, Sophie became my little sous-chef. It made my heart swell to see her enthusiasm for cooking and eating healthy. We’d fill those greens with her favorite tuna mixture, decorating each one with bright sprigs of parsley. They became our signature treat!
As time passed and Sophie grew, so did our wrap-making skills. Those cherished moments in the kitchen not only turned out delicious food but also fostered a love for cooking that she carries with her today. It’s funny how something as simple as a tuna salad can become a heartwarming memory, isn’t it?
Ingredients:
Here’s what you’ll need to create your delectable Tuna Lettuce Wraps:
-
Butter Lettuce or Bibb Lettuce: 1 head (or about 8-10 leaves)
- Chef Insight: These leafy greens are sturdy enough to hold your filling, yet soft enough to deliver that refreshing crunch. The leaves are cupped, making them perfect little boats for our delicious tuna mixture!
-
Canned Albacore Tuna: 10 oz (2 5oz cans)
- Substitution Tip: If you’re feeling adventurous, swap from albacore to yellowfin or even canned salmon for a twist on the classic flavor.
-
Mayonnaise: 1/3 cup
- Chef Insight: This adds creaminess to the mixture. For a lighter option, try Greek yogurt or a vegan mayo if you’re keeping it plant-based.
-
Finely Diced Celery: 2 tbsp
- Substitution Tip: This gives a delightful crunch! Feel free to add diced bell peppers or cucumbers for an extra refreshing bite.
-
Finely Diced Red Onion: 2 tbsp (rinsed in cold water)
- Why Rinse?: Rinsing the onions helps tone down their sharpness while keeping that lovely crunch. If raw onion isn’t your jam, try scallions or shallots!
-
Whole Grain Mustard: 1 tsp
- Chef Insight: This adds a nice tangy flavor that rounds out the richness of the tuna. If you prefer a spicier kick, swap it for Dijon mustard.
-
Chopped Fresh Parsley: 1 tsp
- Flavor Boost: This herb acts as a fantastic fresh note. You could also use dill or cilantro depending on your preference.
-
Salt and Pepper: To taste
- Chef Tip: Always season as you go for the best flavor! A sprinkle here and a pinch there can make all the difference.
Step-by-Step Instructions:
Now that we’ve gathered our ingredients, let’s jump into the cooking process! Follow along for some chef hacks that’ll ensure your Tuna Lettuce Wraps turn out perfectly every time.
-
Prep the Lettuce: Start by washing the butter or Bibb lettuce leaves gently under cool running water. Pat them dry with a paper towel or a clean kitchen cloth.
- Chefs Tip: If you’re short on time, wash and dry them ahead of time and store them in an airtight container with a damp paper towel to keep them crisp.
-
Open the Tuna: Grab your cans of albacore tuna and open them. Drain the liquid carefully! Transfer the tuna to a mixing bowl.
- Chef Insight: I like to fluff it with a fork to break up any big chunks. This way, every bite is well-distributed and delicious!
-
Mix it Up: Add the mayonnaise, diced celery, and diced red onion to the tuna. Season with salt and pepper to taste. Drizzle in the whole grain mustard and fold everything gently until well combined.
- Hack Alert: If you want to get a bit creative, add a dash of hot sauce or some chopped pickles for an extra flavor boost!
-
Taste Test: Before proceeding, take a tiny spoonful and taste! Adjust seasoning if necessary.
- Chef Rule: Always remember that delicious food happens in layers of flavor. If it’s not tasting vibrant enough, a little more of this or that can work wonders.
-
Assemble the Wraps: Now comes the fun part! Take your prepared lettuce leaves and spoon a generous amount of the tuna mixture into each leaf. Don’t be shy—fill those cups!
- Serving Tip: If you like it a bit saucy, drizzle a little extra mayo or a squeeze of lemon juice on top.
-
Garnish: Sprinkle a bit of fresh parsley on top for color and added flavor.
- Final Touch: A slice of avocado or some cherry tomato halves on the side can elevate this plate even more!
-
Serve Immediately: Enjoy your tuna lettuce wraps right away while the lettuce is crisp and the flavors lively!
Serving Suggestions:
When it comes to serving these bad boys, presentation is key! Here are some fun ideas to get your Tuna Lettuce Wraps looking as delicious as they taste:
-
Platter Style: Arrange the stuffed lettuce leaves on a beautiful serving platter. You can even add some lemon wedges and herbs for a pop of color.
-
Dipping Sauces: Serve with little bowls of your favorite dipping sauces like soy sauce, sriracha, or a creamy dip to enhance those flavors.
-
Kids’ Picnic: For a fun twist, let the kids add their own toppings—like shredded carrots, sliced cucumbers, or even a dollop of guacamole!
-
Garnished Plate: For a fancy touch, sprinkle some microgreens or edible flowers around the plate to impress your guests.
-
Lunch Boxes: Perfect for meal prep! These wraps pack beautifully into lunch boxes; just keep the tuna filling and lettuce leaves separate until it’s time to eat.
Recipe Variations:
Feeling adventurous? Here are some creative variations to this basic recipe that’ll excite your taste buds!
-
Mediterranean Tuna Wraps: Swap in chopped kalamata olives and feta cheese for a Mediterranean flair. Toss in a few sun-dried tomatoes for extra oomph!
-
Tropical Twist: Add diced pineapple or mango to your mixture. The sweetness will balance beautifully with the savory tuna!
-
Spicy Sriracha Tuna: Mix in some Sriracha for a kick! Perfect for those who crave a bit of heat in their meals.
-
Avocado Tuna Wraps: Mash in some ripe avocado instead of mayonnaise for a creamy, nutrient-rich alternative that adds healthy fats.
-
Vegetarian Version: Replace tuna with chickpeas! Mash them up and season with the same ingredients for a satisfying plant-based option.
Chef’s Notes:
Every recipe tells a story, right? Tuna Lettuce Wraps have evolved over time in my kitchen! Initially, I made them for quick lunches, but over the years, they’ve become staples at parties and gatherings.
I remember one memorable dinner with friends where I doubled the batch, excited to share, only to find out they were devoured before I could even grab one! Let’s say I learned the hard way that these wraps disappear quickly!
I also love experimenting with leftovers—using turkey or chicken instead of tuna works great. It’s all about flexibility and finding joy in cooking!
FAQs and Troubleshooting:
1. My lettuce leaves are tearing when I fill them. What should I do?
- A gentle hand goes a long way! Look for larger, sturdier leaves and make sure they’re dry to avoid tearing. This way, they’ll hold up better against the filling.
2. Why does my tuna salad taste bland?
- Ah, the age-old kitchen conundrum! Don’t forget to taste as you mix. Adding a dash of acid like lemon juice or a splash of hot sauce can brighten the flavor remarkably!
3. Can I prepare these wraps ahead of time?
- Absolutely! Just keep the filling and lettuce separate until you’re ready to serve. Fill them just before eating to maintain that delightful crunch!
4. What if I’m sensitive to onions?
- No problem! Simply skip the onions, or substitute them with diced bell peppers, which provide a nice crunch without the sharpness.
Nutritional Info:
These Tuna Lettuce Wraps not only taste divine but they are also packed with nutrients, making them a guilt-free choice. Here’s a quick breakdown of what you’ll get in one serving (2 wraps):
- Calories: Approximately 230 calories
- Protein: 24 grams (thanks to that mighty tuna!)
- Fat: 14 grams (mostly from healthy sources like mayonnaise or avocado!)
- Carbohydrates: 4 grams (almost negligible, and it’s healthier from the lettuce!)
- Fiber: 1 gram (with all those fresh veggies!)
You’re fueling your body with lean protein, healthy fats, vitamins, and minerals without sacrificing flavor. It’s a win-win!
Final Thoughts:
And there you have it—Proud Tuna Lettuce Wraps that’ll make your taste buds sing! Whether you’re making them for a picnic, a quick dinner, or simply a snack, it’s all about embracing that ease and comfort of good food.
I hope you’ll whip these up and find joy in every bite, just like I do! Cooking doesn’t have to be complicated; it’s about connecting, sharing, and enjoying flavors. So, gather your loved ones around, make some memories, and enjoy these delightful wraps!
Remember, here at Feastical, it’s all about feeling good while eating delicious food. I can’t wait to hear about your adventures in the kitchen. Share your twists on these wraps or tell me your stories—it’s these delicious moments that bring us all together. Happy cooking, friends! 🥗✨
Print
Tuna Lettuce Wraps
- Total Time: 25 minutes
- Yield: 4 servings 1x
- Diet: Low Carb
Description
Fresh and flavorful Tuna Lettuce Wraps perfect for a light meal or a healthy snack.
Ingredients
- 1 head Butter Lettuce or Bibb Lettuce (about 8–10 leaves)
- 10 oz Canned Albacore Tuna (2 5oz cans)
- 1/3 cup Mayonnaise
- 2 tbsp Finely Diced Celery
- 2 tbsp Finely Diced Red Onion (rinsed in cold water)
- 1 tsp Whole Grain Mustard
- 1 tsp Chopped Fresh Parsley
- Salt and Pepper to taste
Instructions
- Prep the Lettuce: Start by washing the butter or Bibb lettuce leaves gently under cool running water. Pat them dry with a paper towel or a clean kitchen cloth.
- Open the Tuna: Grab your cans of albacore tuna and open them. Drain the liquid carefully! Transfer the tuna to a mixing bowl.
- Mix it Up: Add the mayonnaise, diced celery, and diced red onion to the tuna. Season with salt and pepper to taste. Drizzle in the whole grain mustard and fold everything gently until well combined.
- Taste Test: Before proceeding, take a tiny spoonful and taste! Adjust seasoning if necessary.
- Assemble the Wraps: Now comes the fun part! Take your prepared lettuce leaves and spoon a generous amount of the tuna mixture into each leaf.
- Garnish: Sprinkle a bit of fresh parsley on top for color and added flavor.
- Serve Immediately: Enjoy your tuna lettuce wraps right away while the lettuce is crisp and the flavors lively!
Notes
These wraps are perfect for meal prep. Just keep the filling and lettuce leaves separate until you’re ready to eat.
- Prep Time: 15 minutes
- Cook Time: 10 minutes
- Category: Appetizer
- Method: No-Cook
- Cuisine: American
Nutrition
- Serving Size: 2 wraps
- Calories: 230
- Sugar: 1g
- Sodium: 500mg
- Fat: 14g
- Saturated Fat: 2g
- Unsaturated Fat: 10g
- Trans Fat: 0g
- Carbohydrates: 4g
- Fiber: 1g
- Protein: 24g
- Cholesterol: 30mg
Keywords: tuna, lettuce wraps, healthy snacks, meal prep, easy recipes
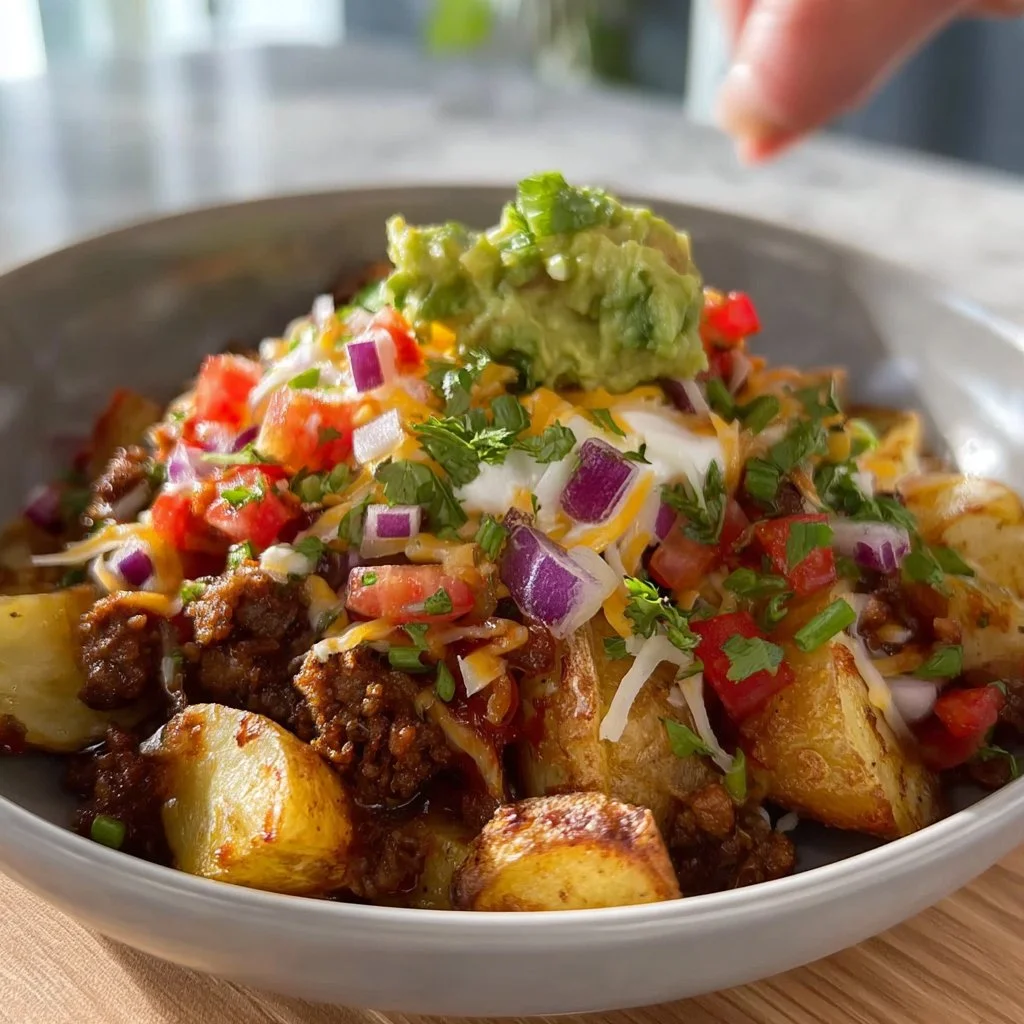
Loaded Potato Taco Bowl
The Loaded Potato Taco Bowl: A Comfort Food Extravaganza
Hey food lovers! Beau Collier here, and today, I’m bringing you one of my all-time favorite comfort food creations— the Loaded Potato Taco Bowl. Imagine this: perfectly baked potatoes nestled in a warm bowl, filled to the brim with seasoned ground beef, savory taco flavors, and all of your favorite toppings. Sounds heavenly, right? Well, it gets better because this dish combines two of our ultimate guilty pleasures: loaded baked potatoes and tacos! It’s like a fiesta in a bowl, which is exactly what life is all about, right?
Now, let’s dive into the inspiration behind this recipe. Back in the day, I used to spend weekends at my grandma’s house. There was always a hearty meal waiting for me whenever I arrived. She had this magical ability to turn simple ingredients into little hugs for the tummy. However, tacos were my absolute favorite! On those lazy Sundays, when we didn’t feel like cooking something too labor-intensive, my grandma would whip up potato skins filled with taco fixings. Fast forward to now, and I’ve turned that delightful memory into my own Loaded Potato Taco Bowl. It’s an easy, versatile dish that’s perfect for family dinners, game nights, or even a solo binge-watching session of your favorite show. So grab your apron, and let’s get cooking!
Personal Story
One of my fondest memories growing up revolves around the delicious meals shared over the family table. I remember one evening in particular when my grandma decided to host a taco night. The air was filled with the aroma of seasoned beef, and I could hear the sound of laughter as we passed around toppings. Each person had their own twist to their tacos, and my creative little mind was bursting with ideas! That was the night I realized that food could be an expression of love and creativity.
After dinner, we had an abundance of baked potatoes left over from a previous meal. Not wanting anything wasted, my grandma said, “Let’s make some taco potato skins!” We scooped out the insides, mixed it with taco fillings, and then piled the loaded goodies back in for a feast. It was a hit! So, that memory stuck with me like melted cheddar on a hot potato. Now, I’ve married that nostalgic experience with a few twists of my own to create this Loaded Potato Taco Bowl, allowing you to bring that same joy to your kitchen!
Ingredients
Here’s what you’ll need:
-
Potatoes: Use russet or Yukon gold for a fluffy interior. If you prefer, you can also use sweet potatoes for a sweeter, nutrient-packed twist.
-
Ground Beef: The classic choice! However, feel free to swap it for ground turkey, chicken, or even black beans for a vegetarian option.
-
Taco Seasoning: A blend of spices to give your beef that authentic taco flavor. You can use store-bought or whip up your own with chili powder, cumin, garlic powder, and onion powder.
-
Guacamole: Because what’s a taco bowl without this creamy delight? You can make your own or buy a fresh batch from the store.
-
Salsa: A spoonful of tangy salsa adds freshness. Opt for homemade or your favorite brand, though fresh pico de gallo is always a great choice!
-
Cheddar Cheese: Sharp cheddar works best for that mouthwatering cheesiness, but feel free to use pepper jack for a kick or even a dairy-free cheese.
-
Olive Oil: A splash of this healthy fat adds flavor while helping the potatoes get that crispy skin when baked.
-
Salt & Pepper: Essential for seasoning! Always taste as you go to get the perfect balance.
A little pro tip: If you’re short on time, you can microwave your potatoes, but baking them yields the best texture!
Step-by-Step Instructions
Now that we have our ingredients ready, let’s get to the fun part—cooking! Follow these simple steps:
Step 1: Bake Your Potatoes
- Preheat your oven to 425°F (220°C).
- Scrub the potatoes thoroughly under running water. Pat them dry with a towel.
- Poke a few holes in each potato with a fork. This allows steam to escape during baking, preventing them from bursting!
- Rub each potato with a bit of olive oil and sprinkle generously with salt. This helps create a crisp skin.
- Place the potatoes directly on the oven rack or on a baking sheet (for easier cleanup) and bake for about 45-60 minutes, until they’re fork-tender.
Chef Hack: To speed things up, you can microwave the potatoes for 5-10 minutes before transferring them to the oven for crispiness.
Step 2: Cook the Ground Beef
- While the potatoes are baking, heat a skillet over medium heat and add a drizzle of olive oil (about 1 tablespoon).
- Once hot, add the ground beef and break it apart with a spatula. Cook for about 5-7 minutes until it browns, stirring occasionally to ensure even cooking.
- Drain any excess fat (unless you’re using lean beef, then you’re all set).
- Add taco seasoning and a splash of water. Stir to combine and simmer for another 5 minutes. This will allow the flavors to meld beautifully.
Extra Tip: If you want a bit more heat, add a pinch of cayenne pepper or some diced jalapeños!
Step 3: Assemble Your Taco Bowl
- Once the potatoes are done, take them out of the oven and let them cool for a few minutes.
- Carefully slice each potato in half lengthwise and scoop out a little bit of the insides, creating the “bowl” for our stuffing.
- Load up the scooped potatoes with the seasoned ground beef generously.
- Top with a heaping spoonful of guacamole and salsa.
- Finally, sprinkle shredded cheddar cheese on top.
Fun Twist: Put the assembled bowls back in the oven for a few minutes, just until the cheese is melted and bubbly.
Step 4: Plate and Serve!
- Transfer the loaded taco bowls to individual servings, or keep them family-style on the table for everyone to help themselves!
- Garnish with fresh cilantro, diced onions, or sliced jalapeños for added flair.
Serving Tip: Pair with crispy tortilla chips and a refreshing drink like homemade lemonade or a fun mocktail to complete the vibe!
Recipe Variations
Let’s get creative! Here are some flavor twists to give your Loaded Potato Taco Bowls a fun makeover:
-
Buffalo Chicken Loaded Potato Bowl: Substitute ground beef with shredded buffalo chicken and top with blue cheese dressing for a zesty twist.
-
BBQ Pulled Pork Potato Bowl: Swap ground beef for pulled pork mixed with your favorite BBQ sauce and top with coleslaw for a Southern spin.
-
Vegetarian Style: Replace beef with black beans or lentils and top with corn salsa, avocado slices, and queso fresco for a hearty meatless option.
-
Taco Verde: Use ground turkey instead of beef, and top with a green salsa (salsa verde) and crumbled feta for a refreshing flavor.
-
Breakfast Taco Bowl: Whip up some scrambled eggs instead of ground beef and top with pico de gallo, avocado, and cheese. Perfect for brunch!
Chef’s Notes
Ah, the memories this recipe brings! I’ve done countless variations over the years. One time, I decided to host a taco bowl party and had guests bring their favorite toppings to share. It was a big ol’ taco buffet that turned into a hilarious competition for the best topping! Another time, my neighbor wanted to impress their partner with a homemade dinner. They made this recipe and it ended up being a hit. The best part? Bonding over delicious food brings people together, and that’s what Feastical is all about!
FAQs and Troubleshooting
1. My potatoes didn’t cook through! What did I do wrong?
Make sure to poke enough holes in the potatoes before baking to allow steam to escape. If you’re still having trouble, you may need to bake them longer or check the size of your potatoes. Larger ones can take more time!
2. How can I keep my guac from turning brown?
The best way to keep guacamole fresh is to press plastic wrap directly onto its surface to limit exposure to air. You can also add a bit of lime juice on top before covering to slow down oxidation.
3. Can I prep the taco filling in advance?
Absolutely! The taco filling can be made ahead and stored in the fridge for up to three days. Just reheat before assembling your bowls!
4. My filling is too dry. What can I do?
If your beef mixture is on the dry side, you can add a splash of beef broth or water while simmering to loosen it up. Also, don’t skip finishing with a sprinkle of fresh toppings for moisture!
Nutritional Info
While this recipe can vary depending on portion sizes and modifications, here’s a rough estimate per bowl using standard ingredients:
- Calories: 620
- Protein: 35g
- Carbohydrates: 53g
- Fat: 30g
- Fiber: 7g
Note: For lower-calorie options, consider swapping in less cheese and/or using leaner meat or beans to boost fiber and decrease fat content!
Final Thoughts
Creating the Loaded Potato Taco Bowl experience is not just about what’s on your plate but the memories you create while cooking. This dish is simple yet full of flavor, perfect for any occasion, from casual family dinners to lively gatherings with friends. So, roll up your sleeves, dive into the kitchen, and make it your own. Let your creativity shine through, and please do come back to share your own variations and stories! Happy cooking and taco-eating, everyone! 🥔🌮✨
Print
Loaded Potato Taco Bowl
- Total Time: 75 minutes
- Yield: 4 servings 1x
- Diet: Non-Vegetarian
Description
A comforting fusion of baked potatoes and taco fixings, perfect for family dinners or solo binge-watching.
Ingredients
- 2 large Russet potatoes
- 1 lb ground beef
- 2 tbsp taco seasoning
- 1/2 cup guacamole
- 1/2 cup salsa
- 1 cup shredded cheddar cheese
- 2 tbsp olive oil
- Salt and pepper to taste
Instructions
- Preheat your oven to 425°F (220°C).
- Scrub the potatoes thoroughly and poke a few holes in each with a fork.
- Rub each potato with olive oil and sprinkle with salt.
- Bake the potatoes directly on the oven rack for about 45-60 minutes until fork-tender.
- Heat a skillet over medium heat and add olive oil.
- Add the ground beef, breaking it apart as it cooks for 5-7 minutes.
- Drain any excess fat, then add taco seasoning and a splash of water.
- Simmer the mixture for an additional 5 minutes to meld flavors.
- Slice each baked potato in half and scoop out some insides.
- Load with seasoned beef, then top with guacamole, salsa, and cheddar cheese.
- Optional: Return to oven to melt the cheese.
- Serve garnished with fresh cilantro, diced onions, or jalapeños.
Notes
For lower-calorie versions, use less cheese or leaner meat. Feel free to customize toppings according to your preferences.
- Prep Time: 15 minutes
- Cook Time: 60 minutes
- Category: Main Course
- Method: Baking
- Cuisine: Mexican
Nutrition
- Serving Size: 1 serving
- Calories: 620
- Sugar: 4g
- Sodium: 600mg
- Fat: 30g
- Saturated Fat: 12g
- Unsaturated Fat: 12g
- Trans Fat: 0g
- Carbohydrates: 53g
- Fiber: 7g
- Protein: 35g
- Cholesterol: 85mg
Keywords: loaded potato taco bowl, comfort food, baked potatoes, taco fixings, family dinner
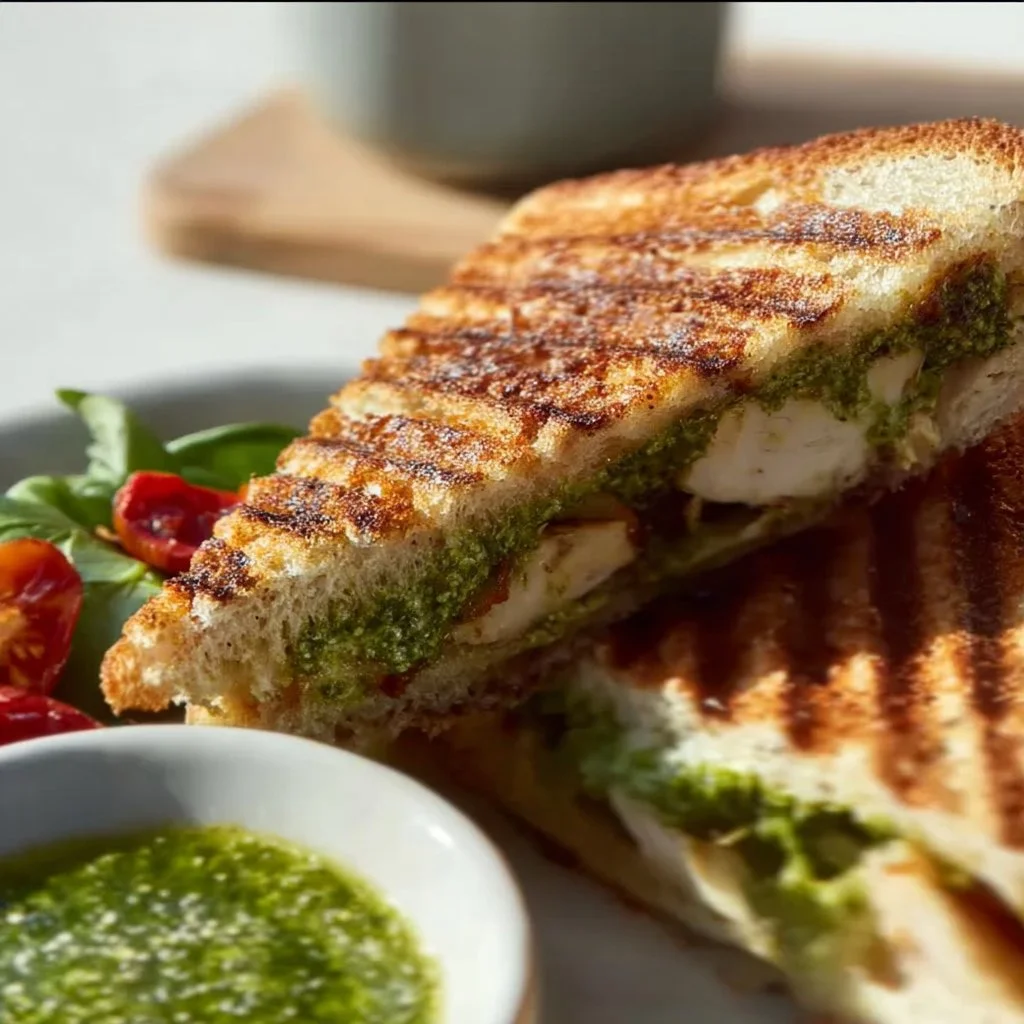
Loaded Chicken Pesto Panini
# Loaded Chicken Pesto Panini: A Slice of Flavor

## Introduction

Hey there, fellow food lovers! It’s Beau Collier, and today we're diving into a delicious recipe that’s sure to tickle your taste buds and warm your heart—my Loaded Chicken Pesto Panini! With just the right amount of crunch, creaminess, and zesty flavor, this panini is perfect for those days when you crave comfort food but still want to feel good about what you're eating.

When you think about a panini, what pops into your mind? For some, it might be a cozy café on a rainy afternoon; for others, maybe a nostalgic memory of family gatherings centered around kitchen creations. For me, it conjures up times spent in my childhood kitchen, where the air was always fragrant with herbs and spices, and anyone who walked through the door was treated to whatever was sizzling on the stove.

As with many of my recipes, this Loaded Chicken Pesto Panini was born out of a desire to share the love of good food that brings people together. It's the kind of dish that wraps you in a comforting embrace and makes you want to gather around the table with loved ones. Plus, it’s super customizable; you can toss in your favorite ingredients or leave out the ones you’re not a fan of. Make it your own! So grab your apron, and let’s get cooking!

---

## Personal Story

Growing up, my mom had this thing about sandwiches—she believed they were the ultimate way to bring a meal together. I remember her making sandwiches for childhood picnics, slapping together layers of whatever we had on hand and calling it 'an adventure in flavor.' One summer, we decided to host a little picnic in our backyard. My mom prepped her famous sandwiches using homemade pesto, which was legendary at our family gatherings.

As I took a bite, the combination of fresh basil, nutty flavors, and juicy fillings brought me back to sunny afternoons spent laughing and sharing stories. Fast-forward to now, and here I am, incorporating that same feeling of warmth and togetherness into this panini. It’s a recipe that honors those memories while still being flexible enough to evolve with the seasons and your own culinary journey.

---

## Ingredients

Now let’s get to the good stuff – here’s what you’ll need to whip up this delightful Loaded Chicken Pesto Panini!

- **1/4 cup extra virgin olive oil**: This liquid gold adds richness and a beautiful depth of flavor. If you're looking to make it a bit lighter, you can swap it out for avocado oil.

- **1/3 cup mixed nuts** (I love walnuts and pine nuts!): Nuts bring an earthy crunch to your pesto. You can replace them with sunflower seeds for a nut-free version!

- **1/2 tsp sea salt**: Essential for balancing flavors. Adjust based on your taste and dietary needs.

- **Juice of 1 lemon**: Brightness in a dish is key, and lemon juice elevates flavors. If you don't have lemon, vinegar can work in a pinch.

- **2 handfuls fresh basil leaves**: The star of the show! Fresh basil brings that aromatic punch. Swap it for spinach or arugula if you're in a pinch.

- **1 tbsp nutritional yeast**: This adds a cheesy flavor without dairy. You can leave it out if you prefer, or use grated Parmesan cheese for a more traditional taste.

- **1/2 tsp minced garlic**: Garlic is a flavor powerhouse. Use roasted garlic for a mellower touch, or omit it if you're not a fan.

- **1/4 tsp ground pepper**: Fresh cracked pepper enhances the dish with warmth. You may use a bit more if you like a spicy kick.

- **2 tbsp water**: This helps smooth out your pesto.

- **2 slices of your favorite bread** (I used Organic Rosemary Sourdough): Bread choice can make or break a panini. Any hearty bread will do, but try ciabatta or whole grain for fun variations!

- **1 tbsp ghee**: This adds a buttery flavor and helps with that glorious golden crust. Butter or olive oil can be used instead.

- **3 tbsp pesto**: You can use store-bought or homemade! Be adventurous—swap in sun-dried tomato pesto for an extra zing.

- **Calabrian peppers**: These are optional but add a delightful heat. Feel free to omit if heat isn’t for you!

- **1/2 avocado, thinly sliced**: Creamy goodness! You can substitute with hummus for a different texture.

- **1 jar marinated roasted sweet red peppers**: These bring a sweet and tangy flavor. If you don’t have them, fresh red bell peppers will work too!

- **2-4 slices cheese** (I went with goat cheese): For creaminess! Feta or provolone are also great here.

- **4 artichokes, quartered**: These provide a nice tangy bite. Canned or jarred works well if fresh isn’t available!

- **6 slices organic deli chicken**: A lean protein to fill you up. You can replace this with turkey or go vegetarian by adding mushrooms!

- **1 cup arugula**: For that peppery kick! Spinach or mixed greens can easily take its place.

- **Fresh cracked pepper**: To taste! It's all about those finishing touches.

- **Sea salt**: Again, adjust to taste.

---

## Step-by-Step Instructions

Alright, folks, now we’re ready to get cooking! Let’s create this panini in a few easy steps. Preheat that trusty panini press or skillet, and let’s do this.

1. **Make the Basil Pesto**: In a food processor, combine your walnuts, pine nuts, salt, lemon juice, basil leaves, nutritional yeast, garlic, and ground pepper. Blend until smooth. Drizzle in that olive oil while blending until it’s creamy. Add water as needed to get the right consistency. Feel free to taste and adjust the salt level. Chef Hack: If your pesto is too thick, a little extra water or oil can work wonders!

2. **Prep the Bread**: Spread the ghee evenly on one side of each slice of bread. This will help toast the bread beautifully and give it that golden-brown crunch we all love.

3. **Layer It Up**: Flip your slices over! Start by spreading 1.5 tablespoons of pesto onto each slice. Layer on the deli chicken, avocado slices, roasted red peppers, artichokes, and cheese. Top it off with a handful of arugula and a sprinkle of sea salt and pepper for that extra oomph.

4. **Press and Toast**: Place the other slice of bread on top (pesto side up!) and gently press down. If you're using a skillet, let it get nice and hot, then add the whole panini to toast both sides. Cook for about 3-4 minutes per side, or until golden and crispy. If using a panini press, follow the manufacturer's instructions for perfect results.

5. **Slice and Serve**: Once your panini is beautifully toasted and the cheese is wonderfully melty, remove it from the heat. Allow it to cool for a minute, then slice it in half. Nothing beats that satisfying crunch when you do!

---

## Serving Suggestions

Now that you’ve got your Loaded Chicken Pesto Panini looking scrumptious, let’s talk presentation. Serve it with a side of crispy sweet potato fries, a fresh salad, or even some crunchy pickles for that delightful contrast.

To elevate the experience, I like to drizzle a bit of balsamic glaze over the top for that added sweetness, or a sprinkle of fresh herbs to make it pop visually! Pair it with your favorite beverage—maybe a crisp white wine or a refreshing iced tea—and you’ve got yourself a meal that’s fantastic for lunch, dinner, or whenever the craving strikes.

---

## Recipe Variations

Feeling adventurous? Here are some ways to put your twist on this Loaded Chicken Pesto Panini:

1. **Mushroom Magic**: Swap out those slices of deli chicken for sautéed mushrooms for a savory vegetarian option. The umami flavor will blow your mind!

2. **Spiced Up**: Add roasted jalapeños along with your other toppings for a spicy kick. Spice lovers, this one's for you!

3. **Caprese Style**: Replace the chicken with mozzarella slices, tomatoes, and fresh basil for a classic Caprese twist.

4. **Mediterranean Flair**: Use feta cheese, olives, and artichokes with a spread of hummus instead of pesto for a unique medley of Mediterranean flavors.

5. **Breakfast Panini**: Add scrambled eggs and spinach for a great breakfast twist! Who says paninis can only be for lunch?

---

## Chef’s Notes

This Loaded Chicken Pesto Panini has evolved quite a bit over time. Initially, it was simple—the classic pesto, grilled chicken, and some cheese. But once I started playing with textures and flavors, it became a canvas for creativity!

I’ve had some kitchen flops too—like the time I didn’t realize my pesto had gone a bit off, and I awakened everyone’s taste buds to a disaster. Lesson learned: fresh ingredients are key! Over the years, I’ve come to appreciate the importance of incorporating seasonal produce, which adds an entirely new layer of flavor.

---

## FAQs and Troubleshooting

**1. My panini isn’t getting crispy enough; what do I do?**
If your panini isn’t crisping up, make sure your cooking surface is hot enough before you place your sandwich down. Additionally, if you’re using a skillet, weight it down with another pan to promote even cooking.

**2. Can I make this ahead of time?**
Absolutely! You can prep the ingredients and assemble it, then wrap it in foil and store it in the fridge. Just pop it onto the heat when you’re ready to enjoy.

**3. What if I don’t like basil? Is there an alternative?**
Not a fan of basil? No problem! Substitute with spinach or kale for a different kind of green flavor in your pesto.

**4. What else can I use instead of ghee?**
Ghee works great for that buttery taste and high smoke point; however, you can easily use butter or olive oil as a substitute based on your preference.

---

## Nutritional Info (if applicable)

A Loaded Chicken Pesto Panini serves as a balanced meal with healthy fats from the avocado and olive oil, lean protein from the chicken, and plenty of nutrients from all the fresh veggies. On average, each panini contains:

- Calories: Approximately 600-700 (depending on bread and cheese choice)
- Protein: Around 35g
- Carbohydrates: About 50g
- Fats: Approximately 30g

Keep in mind that nutritional values may vary based on the specific brands you use and any substitutions made.

---

## Final Thoughts

And there you have it—your very own Loaded Chicken Pesto Panini! This dish wraps up childhood memories, love for fresh ingredients, and a dash of creativity in one delicious sandwich. Whether you're making it for a cozy lunch date, a quick dinner fix, or just because it sounds too good to pass up, this panini won't disappoint.

Don't forget, cooking is about experimenting, so feel free to adjust, swap, and have fun along the way. Remember, every time you step into the kitchen, you’re creating new memories—just like I did back in my mom's kitchen. So grab those ingredients, unleash your inner chef, and let’s create a feast that warms hearts alongside our bellies. Until next time, happy cooking!

Loaded Chicken Pesto Panini
- Total Time: 25 minutes
- Yield: 2 servings 1x
- Diet: Gluten-Free, Dairy-Free (if using appropriate substitutes)
Description
A delightful panini packed with the flavors of homemade basil pesto, tender chicken, and fresh vegetables, perfect for a comforting meal.
Ingredients
- 1/4 cup extra virgin olive oil
- 1/3 cup mixed nuts (walnuts, pine nuts)
- 1/2 tsp sea salt
- Juice of 1 lemon
- 2 handfuls fresh basil leaves
- 1 tbsp nutritional yeast
- 1/2 tsp minced garlic
- 1/4 tsp ground pepper
- 2 tbsp water
- 2 slices of hearty bread (e.g., Organic Rosemary Sourdough)
- 1 tbsp ghee
- 3 tbsp pesto
- Calabrian peppers (optional)
- 1/2 avocado, thinly sliced
- 1 jar marinated roasted sweet red peppers
- 2–4 slices cheese (e.g., goat cheese)
- 4 artichokes, quartered
- 6 slices organic deli chicken
- 1 cup arugula
- Fresh cracked pepper to taste
- Sea salt to taste
Instructions
- Make the Basil Pesto: In a food processor, combine your walnuts, pine nuts, salt, lemon juice, basil leaves, nutritional yeast, garlic, and ground pepper. Blend until smooth. Drizzle in that olive oil while blending until it’s creamy. Add water as needed to get the right consistency. Taste and adjust the salt level.
- Prep the Bread: Spread the ghee evenly on one side of each slice of bread.
- Layer It Up: Flip your slices over and spread 1.5 tablespoons of pesto onto each slice. Layer on the deli chicken, avocado slices, roasted red peppers, artichokes, and cheese. Top with arugula and sprinkle sea salt and pepper.
- Press and Toast: Place the other slice of bread on top and gently press down. Cook in a hot skillet or panini press until golden and crispy, about 3-4 minutes per side.
- Slice and Serve: Once toasted and the cheese is melted, remove from heat, cool slightly, then slice in half.
Notes
Serve with sweet potato fries, salad, or pickles for contrast. Drizzle with balsamic glaze for added sweetness.
- Prep Time: 15 minutes
- Cook Time: 10 minutes
- Category: Sandwich
- Method: Grilling
- Cuisine: Italian
Nutrition
- Serving Size: 1 panini
- Calories: 650
- Sugar: 2g
- Sodium: 600mg
- Fat: 35g
- Saturated Fat: 10g
- Unsaturated Fat: 20g
- Trans Fat: 0g
- Carbohydrates: 50g
- Fiber: 5g
- Protein: 35g
- Cholesterol: 70mg
Keywords: panini, chicken, pesto, sandwich, Italian, quick meal
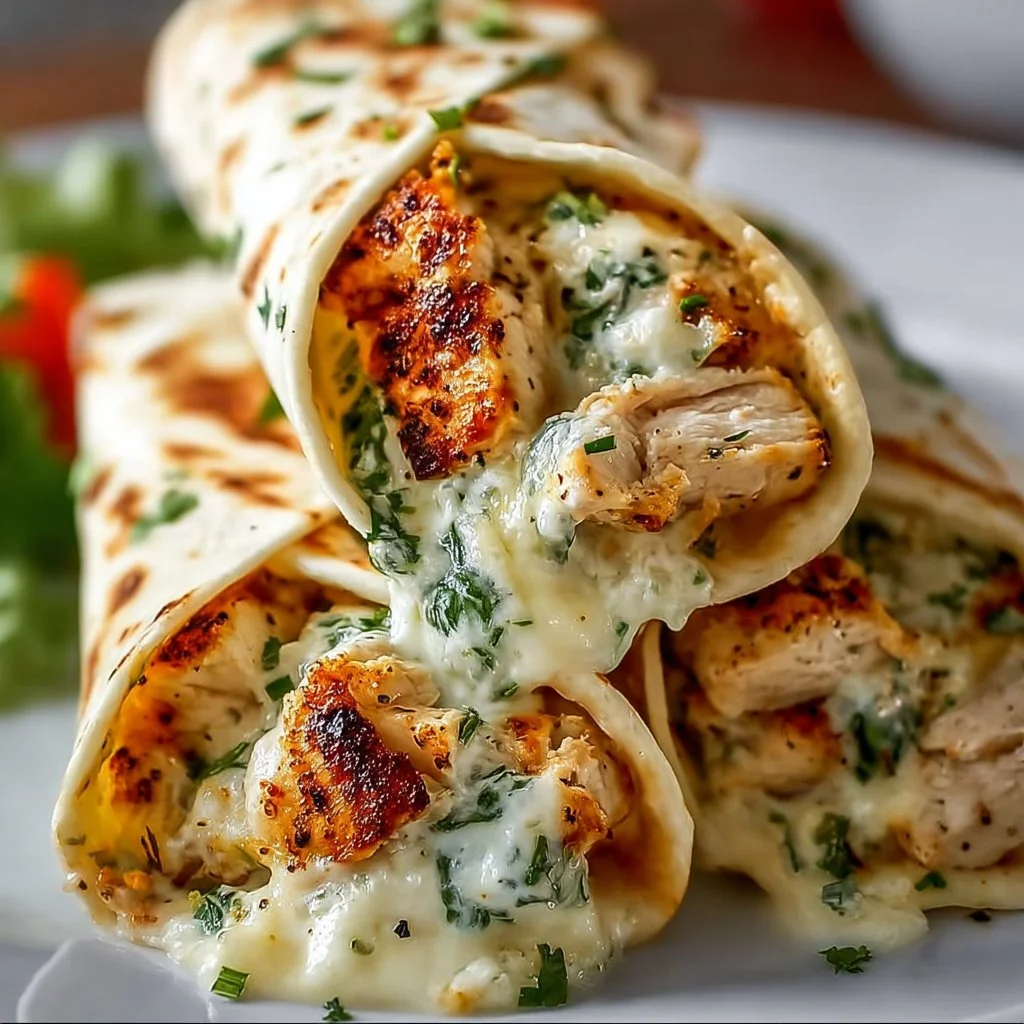
Cheesy Garlic Chicken Wraps
Cheesy Garlic Chicken Wraps: A Wholesome and Flavor-Packed Delight!
Hey there, food lovers! I’m Beau Collier — your friendly neighborhood chef. Today, we’re diving into a delicious creation that’s sure to lick all your culinary worries away: Cheesy Garlic Chicken Wraps! If you’re looking for a meal that’s not only easy to whip up but also bursting with flavor, you’re in for a treat. Grab your apron and let’s get started!
Picture this: It’s a calm weeknight, and the last thing you want to do is hover over the stove for hours. Sound familiar? We’ve all had those days when cooking feels more like a chore than a joy, and that’s why I created Feastical! Life is too short for boring food and endless clean-up. That’s where these Cheesy Garlic Chicken Wraps come in! They’re quick, scrumptious, and a delightful way to enjoy wholesome ingredients without the fuss.
These wraps are like a warm hug after a long day; they combine juicy shredded chicken, gooey melted cheese, and the aromatic allure of garlic — all enveloped in a clever lettuce leaf or wrap of your choice. The beauty of this dish is its flexibility; whether you’re low-carb, gluten-free, or just in the mood to be a bit creative in the kitchen, these wraps can fit the bill.
Let’s unleash your inner chef! I promise you this is a recipe that’s bound to become a family favorite. From meal prep to a spontaneous weeknight dinner, Cheesy Garlic Chicken Wraps are your new go-to. Now, let’s unravel the layers of flavor together!
Personal Story
Growing up, weekends meant family dinners around the table, filled with laughter, stories, and of course, delicious food. One of my fondest childhood memories revolves around my mom’s incredible chicken dishes. No matter how crazy the week had been, her cooking brought us back together. Often, she would whip up a sautéed chicken dish infused with garlic and cheese, which we would wrap in whatever we had – bread, tortillas, or even lettuce!
The smell of garlic sizzling in the pan still evokes warmth and nostalgia for me. Fast-forward to today, I’ve taken that comforting recipe and turned it into these easy, cheesy wraps. Each bite transports me back to those cherished moments — and I want you to feel that same joy when you make them!
Ingredients
-
2 cups cooked chicken, shredded
This is the star of the dish! Use rotisserie chicken for convenience, or roast your own. If you’re vegetarian, you can substitute with shredded jackfruit or tofu for a meaty texture. -
1 cup shredded cheese (cheddar or mozzarella)
Cheese adds that gooey goodness we’re all craving! Cheddar delivers rich flavor, while mozzarella gives you that stretch factor. Feel free to switch it up with pepper jack for a kick! -
4 large lettuce leaves or low carb wraps
Iceberg or romaine works perfectly for a fresh crunch. If you prefer wraps, look for whole grain or gluten-free options. Experiment with your favorite flatbreads, just make sure they’re sturdy enough to hold all that delicious filling. -
2 cloves garlic, minced
Garlic is my secret love. It elevates any dish! You can substitute with garlic powder if that’s all you have on hand—about 1 teaspoon should do the trick. -
1 tablespoon olive oil
This adds a bit of richness. If you’re keen on flavor, try infused oils, like garlic or chili oil. -
Salt and pepper to taste
These basics are essential! Adjust according to your taste — feel free to spice it up with paprika or cayenne for an extra zing! -
Optional: diced tomatoes, avocado, or your choice of veggies
Customize your wrap! Fresh veggies add crunch and color. Avocado gives that creamy texture, while diced tomatoes burst with freshness.
Remember, cooking isn’t a strict science; it’s about experimenting and making it your own!
Step-by-Step Instructions
Now, let’s bring all these glorious ingredients together! Here’s how to create your Cheesy Garlic Chicken Wraps:
Step 1: Prepare Your Chicken
If you’re using leftover cooked chicken or rotisserie chicken, shred it into bite-sized pieces. If you’re cooking from scratch, season chicken breasts with salt and pepper, then grill or bake until cooked through (about 20-30 minutes). Let it cool a bit before shredding—trust me, those fingertips will thank you!
Step 2: Sauté the Garlic
In a skillet, warm the olive oil over medium heat. Once it’s shimmering (but not smoking!), toss in the minced garlic. Cook for 1-2 minutes until it becomes fragrant—be careful not to burn it! This will create a wonderful base for the chicken.
Step 3: Add Chicken and Cheese
Now, add the shredded chicken to the skillet, stirring it to coat with that garlicky goodness. Sprinkle in half (or all!) of the shredded cheese at this point. You want it to melt and mingle well with the chicken. Cook for another 2-3 minutes — that’s right, let it ooze and combine!
Step 4: Prepare the Lettuce or Wraps
While the chicken and cheese are merging into pure bliss, prepare your lettuce or wrap. If using lettuce leaves, rinse and pat them dry. If you’re using low carb wraps, heat them slightly in a dry pan or microwave until they’re pliable.
Step 5: Assemble Your Wraps
Spoon the cheesy chicken mixture onto each lettuce leaf or wrap. Here’s the fun part: add any optional toppings like diced tomatoes, zesty avocado, or extra cheese. You want to create a festive explosion of color and flavor!
Step 6: Roll and Enjoy!
If you’ve opted for wraps, fold them up and secure with a toothpick or simply embrace the mess! If you’ve chosen lettuce leaves, fold them over and dive in. These wraps are best enjoyed fresh and warm!
Serving Suggestions
Now that you have your wraps ready, let’s talk presentation! Serve your Cheesy Garlic Chicken Wraps on a beautiful platter, garnished with fresh herbs like cilantro or parsley to add freshness. A squeeze of lemon or lime juice on top brightens the dish and adds a pop of acidity.
Pair these wraps with a crisp side salad, maybe a tangy vinaigrette dressing to complement the richness of the cheese and chicken. You could even set up a little wrap bar, allowing everyone to customize their own with their favorite toppings — how fun is that?
Recipe Variations
One of the best things about this recipe is its adaptability! Here are a few tasty twists you can try:
-
Buffalo Chicken Wraps: Add buffalo sauce to your chicken mixture for a fiery kick. Top with some crumbled blue cheese and celery sticks.
-
Mediterranean Style: Toss in some diced cucumbers, Kalamata olives, and feta cheese for a Mediterranean spin. You could also switch to pita wraps.
-
Veggie-Packed: Load it with additional veggies like bell peppers, corn, or spinach for a heartier, nutrient-focused wrap.
-
BBQ Twist: Instead of olive oil and garlic, use BBQ sauce with the chicken. Add pickles, too, for that classic BBQ chicken flavor.
-
Breakfast Wrap: Feel free to scramble some eggs and mix it into the chicken. It makes a versatile breakfast or brunch option!
Whatever your taste buds crave, these wraps are here for it!
Chef’s Notes
I’ve played around with this recipe over the years, and it’s developed into something I adore. It originally started as just a quick meal, but every time I make these wraps, I discover new ways to enjoy them. One time, I added caramelized onions, and boy, did that create a flavor explosion!
And hey, don’t sweat the small stuff in the kitchen! I once dropped an entire plate of wraps right before serving; instead of panicking, I grabbed a round casserole dish, piled everything in there, and called it a “deconstructed wrap.” It got rave reviews! Cooking is as much about creativity as it is about following a recipe.
FAQs and Troubleshooting
-
Q: What if my chicken is dry?
A: Moisture is key! If your chicken is a bit dry, try adding a splash of chicken broth or extra cheese when mixing to bring it back to life. -
Q: Can I make these ahead of time?
A: Absolutely! Just store each element in separate airtight containers in the fridge. Assemble just before serving to keep everything fresh. -
Q: What can I use instead of cheese?
A: If you’re looking to skip dairy, Daiya or other vegan cheeses work wonders. You can also opt for a creamy avocado spread. -
Q: How do I ensure my wraps don’t fall apart?
A: Here’s the chef’s secret: don’t overfill! Make sure to leave enough space to fold or roll without bursting at the seams.
Nutritional Info
Let’s break down the nutrition of these delightful wraps per serving (assuming basic ingredients):
- Calories: Approximately 320
- Protein: 30g
- Fat: 15g
- Carbohydrates: 20g (depending on the wrap used)
- Fiber: 4g
Of course, variations will change this, but you get a good pantry of protein and healthy fats. Pairing it with veggies also adds essential vitamins and minerals to the dish!
Final Thoughts
There you have it, my friends — a scrumptious, soul-satisfying recipe for Cheesy Garlic Chicken Wraps! Whether you opt for these as a solo meal or something to share with the fam, they are sure to leave you all wanting more.
Cooking doesn’t have to be complicated or time-consuming; it’s all about embracing fresh ingredients, experimenting, and ultimately enjoying the process. So, roll up your sleeves and dive into your own kitchen adventure.
I can’t wait to hear your thoughts and stories about these wraps. Remember, at Feastical, every bite should feel like a celebration! Until next time, keep cooking with love and laughter — let the culinary magic flow!
Happy cooking, and let’s keep this kitchen love rolling! 🍽️💖
Print
Cheesy Garlic Chicken Wraps
- Total Time: 25 minutes
- Yield: 4 servings 1x
- Diet: Gluten-Free
Description
Delicious and easy-to-make cheesy garlic chicken wraps, perfect for a quick weeknight meal.
Ingredients
- 2 cups cooked chicken, shredded
- 1 cup shredded cheese (cheddar or mozzarella)
- 4 large lettuce leaves or low carb wraps
- 2 cloves garlic, minced
- 1 tablespoon olive oil
- Salt and pepper to taste
- Optional: diced tomatoes, avocado, or your choice of veggies
Instructions
- Prepare your chicken by shredding it into bite-sized pieces.
- Sauté the garlic in olive oil over medium heat until fragrant.
- Add the shredded chicken and cheese to the skillet and cook until melted.
- Prepare the lettuce or wraps for assembling.
- Assemble your wraps by spooning the cheesy chicken mixture onto each leaf or wrap.
- Roll the wraps and enjoy fresh and warm!
Notes
Feel free to customize the wraps with your choice of additional toppings or variations.
- Prep Time: 10 minutes
- Cook Time: 15 minutes
- Category: Main Course
- Method: Sautéing
- Cuisine: American
Nutrition
- Serving Size: 1 wrap
- Calories: 320
- Sugar: 2g
- Sodium: 500mg
- Fat: 15g
- Saturated Fat: 6g
- Unsaturated Fat: 7g
- Trans Fat: 0g
- Carbohydrates: 20g
- Fiber: 4g
- Protein: 30g
- Cholesterol: 60mg
Keywords: cheesy wraps, garlic chicken, quick meal, easy dinner, family favorite
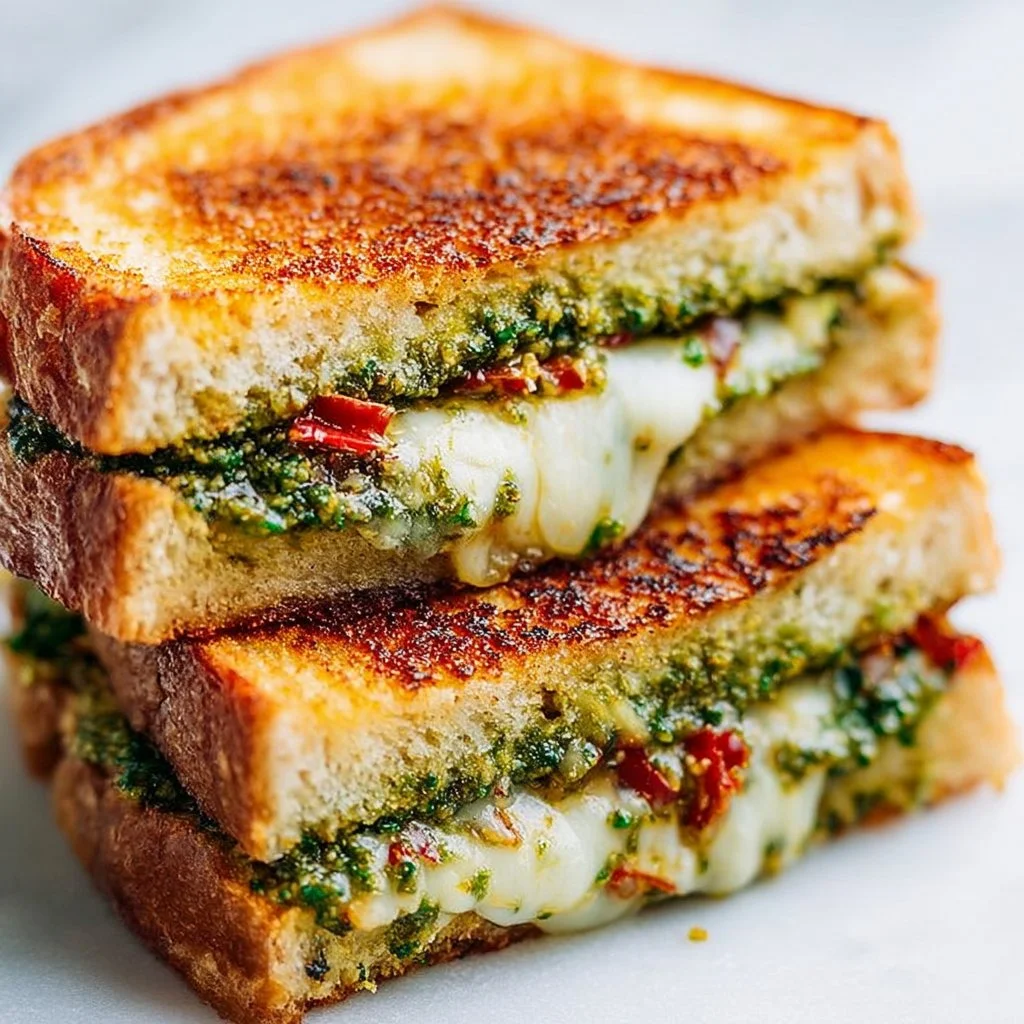
Pesto Grilled Cheese
Pesto Grilled Cheese: A Delectable Delight
Hey there, food lovers! If there’s one thing we can all agree on, it’s that comfort food comes in all shapes, sizes, and flavors. Today, we’re leveling up a classic favorite: grilled cheese. But wait—this isn’t just any grilled cheese. Say hello to Pesto Grilled Cheese, where the classic simplicity of melted cheese and crispy bread meets the delightful, herbaceous punch of homemade (or store-bought) pesto.
Imagine biting into that crispy golden-brown exterior, only to unveil the melty, cheesy goodness inside, infused with the rich flavors of basil, garlic, and parmesan. This dish is like a hug from an old friend and, trust me, it’s the perfect way to satisfy your cravings without fussing over complicated steps or ingredients. Whether you’re making it for a fancy brunch, an easy lunch, or a quick dinner, Pesto Grilled Cheese never fails to impress.
Now, why did I choose to share this particular recipe today? Well, my love for grilled cheese runs deep— it’s the ultimate nostalgic comfort food that never goes out of style. I remember those rainy afternoons spent huddled in front of the TV, dipping my cheesy creation into a warm bowl of tomato soup. I knew I had to capture that same magic but with a twist. So, grab your favorite mug, because we’re about to embark on a culinary adventure that will make your taste buds dance.
So, let’s roll up our sleeves and dive into the delicious world of Pesto Grilled Cheese!
Personal Story
Back in college, my go-to “fancy” dish was grilled cheese. In those wonderfully chaotic days, I didn’t always have the budget for lavish dinners, but somehow, I still craved flavor and comfort. One rainy afternoon, I found myself daydreaming about my mom’s homemade basil pesto, which was the highlight of every summer meal. I rummaged through my fridge and stumbled upon a jar of store-bought pesto, some cheese, and bread that was about to go stale. The gears in my head started turning: "What if I spread some pesto on the bread instead of just butter?"
I toasted that sandwich to perfection, and the moment I took that first blissful bite, I was transported to my mom’s kitchen, surrounded by the scents of summer and sunshine. It was magic in the making, and from that day on, Pesto Grilled Cheese became my version of fast food. I introduced it to friends, added it to brunch menus, and turned it into a beloved crowd-pleaser at potlucks.
That simple culinary experiment showed me that you don’t need a lot to make something delicious—you just need some creativity and the willingness to experiment. And what better way to honor my culinary journey than by sharing this delightful Pesto Grilled Cheese recipe with you?
Ingredients
Here’s a straightforward list of what you’ll need to craft this splendid Pesto Grilled Cheese, along with some chef insights to help you along the way:
-
2 slices of bread
You can use practically any type of bread—sourdough, whole grain, or even gluten-free! Just make sure it’s sturdy enough to hold all that goodness. For a crunchy exterior, try a thick cut! -
2 tablespoons pesto
This can be homemade or store-bought. If you’re feeling adventurous, why not whip up a quick homemade version? Just blend fresh basil, garlic, pine nuts, parmesan, and olive oil until smooth! Feeling nut-free? Use sunflower seeds or omit them altogether. -
2 slices of cheese (mozzarella or cheddar work beautifully)
Cheddar adds a nice sharpness, while mozzarella gives that gooey, stretchy effect. You can also mix and match cheeses—throw in some pepper jack for heat or gouda for richness! -
1 tablespoon butter
Use unsalted butter for better control over saltiness, or swap it with olive oil or vegan butter for a plant-based twist. Just remember to brown it slightly for extra flavor.
Now that you’ve gathered all your ingredients, let’s get cooking!
Step-by-Step Instructions
-
Prep Your Ingredients
Gather all your delicious goodies beforehand. This ensures everything’s within reach and makes assembling your sandwich a breeze! Lay out your bread slices, butter, and pesto so you’re all set to go. -
Butter Those Slices
Generously spread the butter on one side of each slice of bread. This will give your grilled cheese that beautiful golden crust we all know and love. If you’re feeling fancy, consider adding a sprinkle of garlic powder or Italian seasoning to the butter for extra flavor. -
Spread the Pesto
Flip the bread slices over (buttered side down) and spread about 2 tablespoons of pesto on one of the slices. Don’t skimp on it; this is where the magic happens! If you’ve made a homemade pesto, you might want to taste it to see if it needs a pinch of salt or a squeeze of lemon. -
Add the Cheese
Layer your cheese slices right on top of the pesto. Remember, the more cheese, the merrier! If you’re mixing cheeses, now is the time to get creative. I usually go for mozzarella for its meltiness and a slice of sharp cheddar for that extra oomph! -
Top It Off
Place the second slice of bread on top, making sure the buttered side is facing out. Gently press down to help the sandwich stick together. -
Heat the Pan
Get a skillet or griddle on medium heat. If you want to make sure it’s the perfect temperature, you can sprinkle a drop of water onto the pan; if it sizzles, you’re good to go! -
Grill to Perfection
Carefully place your sandwich in the skillet. Cook for about 3-4 minutes, or until the bottom is perfectly golden brown. Flip it over and let the other side grill for another 3-4 minutes. If you notice it’s browning too quickly, simply reduce the heat a little. Be patient, and let that cheese melt! -
Check the Cheese
After about 7-8 minutes total cooking time, your sandwich should be gloriously golden brown, and the cheese should be beautifully melted. Use a spatula to gently press down on the sandwich to encourage more melting if needed. -
Slice and Serve
Once out of the skillet, let the sandwich rest for a minute before slicing it in half. This helps prevent the cheese from oozing out all over the place. If you can resist, let it cool for just a moment—it’s worth it!
Serving Suggestions
When it comes to serving your Pesto Grilled Cheese, the world is your oyster! You could pair it with a bowl of classic tomato soup for that nostalgic touch. Simply bite, dip, and enjoy as the flavors mingle beautifully. To elevate your presentation, try cutting the sandwich diagonally and serve it on a rustic wooden board with a side of soup in a cute little cup.
You might also consider topping it with some fresh arugula or a sprinkle of grated parmesan for a gourmet touch. A drizzle of balsamic glaze can add a delightful tang that complements the pesto’s herbaceousness nicely. And let’s not forget about some crunchy pickle spears on the side for that classic deli vibe!
Recipe Variations
The beauty of Pesto Grilled Cheese is that it’s incredibly versatile! Here are a few creative twists to keep your taste buds excited:
-
Caprese Style: Add fresh slices of tomato and basil leaves between the cheese layers for a fresh Caprese-inspired twist.
-
Spicy Kick: Mix in jalapeño slices or a smear of sriracha into the pesto for a fiery hit. Perfect for those who crave heat!
-
Mediterranean Delight: Swap the pesto for a sun-dried tomato spread, and include some feta cheese and olives for a Mediterranean vibe.
-
Vegan Version: Use vegan cheese and butter, or even cashew cheese, along with a homemade vegan pesto for a plant-based option that’s just as satisfying.
-
Breakfast Brunch: Add a fried egg on top of the sandwich during cooking for a breakfast twist that makes this dish not just for lunch anymore!
Chef’s Notes
Now, let me tell you a little secret: this recipe has evolved over time. Initially, I wasn’t a huge pesto fan (don’t judge me!). I never used to think much of it until I created my version tailored to my taste—less oil, more freshness. I started experimenting with various nuts and herbs and even used arugula instead of basil on a whim! It amazed me how a simple cheese sandwich could spark so much creativity in my kitchen.
Funny story—one time I was prepping pesto and got a little too enthusiastic with the garlic. Let me tell you, my friends loved the grilled cheese, but I might have single-handedly scared off the vampires that night! Always be mindful of just how powerful garlic can be; a little goes a long way!
FAQs and Troubleshooting
Q1: Why is my sandwich not browning evenly?
This often happens if the heat is too high. Make sure to keep it on medium heat and give it enough time to develop that golden crust.
Q2: My cheese isn’t melting properly. What should I do?
Using a combination of cheeses can help with melting. If you’re using low-fat cheese, they often take longer to melt. Just give it a bit more time on the heat, and make sure to press down gently while cooking!
Q3: Can I freeze Pesto Grilled Cheese?
Yes, you can! Just assemble the sandwiches, wrap them tightly in plastic wrap, and freeze. When ready to enjoy, thaw and then grill to your heart’s content. Just keep in mind that the bread might get a little soggier upon reheating.
Q4: Can I use other spreads instead of pesto?
Absolutely! Try olive tapenade, roasted red pepper spread, or even hummus for a totally different flavor profile that can add diversity to your grilled cheese game.
Nutritional Info
If you’re keeping track, here’s a general nutritional breakdown for one serving of Pesto Grilled Cheese using mozzarella cheese, white bread, and butter:
- Calories: Approximately 400-450 calories
- Protein: 18-20 grams
- Fat: 25-30 grams
- Carb: 35-40 grams
- Fiber: 2-3 grams
Keep in mind, variations in ingredients will affect these values, so feel free to make adjustments based on your dietary needs!
Final Thoughts
There you have it, folks! A step-by-step guide to crafting the ultimate Pesto Grilled Cheese. I hope this recipe helps you rediscover the joy of cooking in your own kitchen and brings a sprinkle of happiness to your day. Whether you whip it up for lunch, dinner, or a decadent snack, this sandwich serves up comfort and nostalgia.
Remember, cooking should be as much about the fun and stories shared as it is about the food itself. Don’t be afraid to experiment, and most importantly, share it with someone you love. So grab your spatula, put on your favorite tunes, and get ready to dig into a sandwich that’s not just a meal but a celebration of flavor.
Until next time, keep cooking with love and passion! 🍽️
Print
Pesto Grilled Cheese
- Total Time: 18 minutes
- Yield: 1 serving 1x
- Diet: Vegetarian
Description
A delightful twist on the classic grilled cheese, infused with the rich flavors of basil pesto and melty cheese.
Ingredients
- 2 slices of bread (sourdough, whole grain, or gluten-free)
- 2 tablespoons pesto
- 2 slices of cheese (mozzarella or cheddar)
- 1 tablespoon butter
Instructions
- Prep your ingredients by gathering all the items.
- Butter one side of each slice of bread.
- Spread the pesto on the unbuttered side of one slice.
- Add the cheese slices on top of the pesto.
- Top with the second slice of bread, buttered side out.
- Heat a skillet on medium heat.
- Grill the sandwich for 3-4 minutes until golden brown.
- Check the cheese after 7-8 minutes, ensuring it’s melted.
- Slice and serve the sandwich with your favorite sides.
Notes
Pair with tomato soup for a nostalgic touch, or enjoy with arugula and balsamic glaze for a gourmet touch.
- Prep Time: 10 minutes
- Cook Time: 8 minutes
- Category: Snack
- Method: Grilling
- Cuisine: American
Nutrition
- Serving Size: 1 sandwich
- Calories: 400
- Sugar: 3g
- Sodium: 700mg
- Fat: 25g
- Saturated Fat: 12g
- Unsaturated Fat: 10g
- Trans Fat: 0g
- Carbohydrates: 35g
- Fiber: 2g
- Protein: 20g
- Cholesterol: 30mg
Keywords: grilled cheese, pesto, comfort food, sandwich, easy recipe
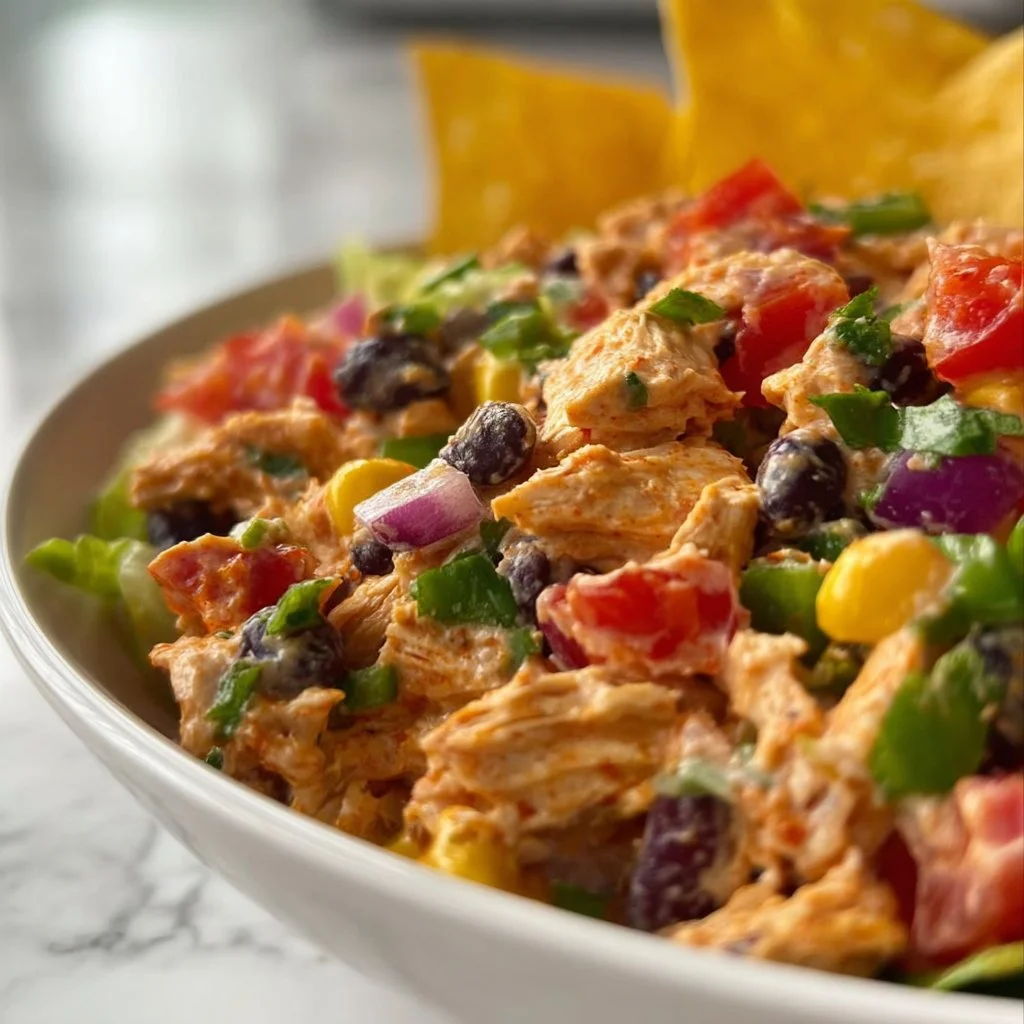
Southwestern Chicken Salad
Southwestern Chicken Salad: A Burst of Flavors to Brighten Your Day
Hey there, food lovers! Welcome to另一场Feastical! If you’re ready to embark on a taste adventure that’s as vibrant as a Southwest sunset, you’re in the right place. Today, I’m sharing one of my all-time favorite recipes: Southwestern Chicken Salad. This dish is like a fiesta in a bowl—fresh, zesty, and packed with ingredients that sing with flavor! Let’s dive in!
So, what makes this Southwestern Chicken Salad shine? For starters, it’s more than just a salad; it’s a celebration of colors, textures, and tastes that perfectly represent the spirit of the Southwest. Think of tender, shredded chicken mingling with creamy Greek yogurt, hearty black beans, sweet fire-roasted corn, and crunchy bell peppers, all dressed in a zesty lime juice and spice blend. It’s wholesome, nutritious, and oh-so-delicious!
You might wonder, “Why should I care about chicken salad?” Well, imagine a hot summer day where you want something light yet filling, or perhaps you’ve just had a long week and need an easy recipe that won’t take forever to whip up. This salad is the answer. Plus, it’s effortlessly customizable—swap or add your favorite ingredients without much thought.
But before we get into the nitty-gritty of ingredients and cooking steps, let me share a personal story that brings me back to the heart of this dish. Cooking is about connection, and the memories we share around the table often mean more than the meals themselves.
Personal Story
Years ago, I found myself in a tiny kitchen in Santa Fe, New Mexico, where the air was thick with the rich aroma of spices and the warmth of family. I remember it was a rainy afternoon, and my aunt was making her rendition of Southwestern Chicken Salad. She offered me a seat while she cooked and shared stories that made the ingredients come alive—like how her love for cooking spurred from her grandmother.
While she chopped bell peppers and stirred the bowl, she touched on how food brought the family together—celebrating birthdays, holidays, or simply the end of a long week with good conversation and lots of laughter. That’s when I realized: this salad isn’t just a meal. It’s a vessel for memories, connection, and love—just like a cozy hug. So let’s recreate that moment and instill it into your kitchen, shall we?
Ingredients
Now that I’ve hopefully sparked some hungry inspiration, here’s what you’ll need to make this Southwestern Chicken Salad.
-
2 cups cooked chicken, shredded
Using rotisserie chicken is my go-to hack for saving time! If you’re in the mood for a healthy twist, feel free to use grilled chicken or turkey. -
1 cup Greek yogurt
This creamy hero adds a tangy flavor and keeps the salad light. You can substitute it with sour cream or a dairy-free yogurt if you prefer. -
1 can black beans, rinsed and drained
These beans are a powerhouse of protein and fiber! Canned beans are super convenient, but if you want, you can cook dried beans—just plan ahead for soaking and cooking time. -
1 cup fire-roasted corn
Nothing elevates your dish like a bit of smoky sweetness! If fresh corn is in season, grill or roast it for a delightful touch. Frozen corn works fine too! -
1 bell pepper, diced (any color of your choice)
Bell peppers add crunch and vibrant color! Swap with jalapeños for a spicy kick or add multiple bell peppers for a rainbow effect. -
1 teaspoon chili powder
This spice will add depth and warmth to your salad; if you’re feeling adventurous, try chipotle powder for a smoky flavor! -
1 teaspoon cumin
Cumin brings an earthy, robust flavor. If you’re low on cumin, a dash of taco seasoning works great too! -
Salt and pepper to taste
Don’t skip seasoning—taste as you go; it’s the secret to making the flavors pop! -
Lime juice to taste
Fresh lime juice brightens the dish and brings all the flavors together. If you have lemons, they work too but will give a slightly different taste.
Step-by-Step Instructions
Ready to put your culinary skills to work? Let’s get into the nitty-gritty of making this Southwestern Chicken Salad!
Step 1: Shred the Chicken
If you’re using rotisserie chicken, skip ahead! If you’re cooking the chicken yourself, season your chicken breasts with salt and pepper, then grill or roast until fully cooked (about 165°F internal temperature). After resting, shred the chicken using two forks—don’t be shy! This is part of the fun!
Step 2: Combine the Base Ingredients
In a large mixing bowl, toss in your shredded chicken, rinsed black beans, and fire-roasted corn. This combination is already starting to look vibrant and inviting!
Chef Tip: Use a large bowl to give yourself enough room for mixing, which will help avoid spills!
Step 3: Prep the Vegetables
Dice your bell pepper into bite-sized pieces. Feel free to get creative and add more colors! Toss the diced bell peppers into the mixing bowl to add crunch and freshness.
Step 4: Mix the Dressing
In a smaller bowl, combine the Greek yogurt, lime juice, chili powder, and cumin. Fold it until it’s smooth and well-blended.
Chef Hack: Use a whisk for easier mixing! If you prefer a thinner dressing, add a splash of water or additional lime juice until it reaches your desired consistency.
Step 5: Combine Everything
Pour the yogurt dressing over the chicken mixture and gently fold it all together. Make sure everything is evenly coated—every bite should burst with flavor!
Taste Test: This is the moment to taste! Adjust the seasonings and lime juice according to your preference.
Step 6: Chill and Serve
Cover the salad and let it chill in the fridge for about 30 minutes—this allows all those wonderful flavors to meld together brilliantly!
Serving Cheat: You can serve this salad right away, but the flavors really deepen with a little chill time!
Serving Suggestions
Once your Southwestern Chicken Salad has chilled, it’s time to plate it up! Serve it family-style in a big bowl or portion it out in individual bowls for a more personal touch. Add a sprinkle of fresh cilantro on top for garnish—everyone loves that vibrant pop of green!
You can pair it with whole wheat tortillas, tortilla chips, or even over a bed of greens. Want an extra kick? Drizzle some hot sauce or pico de gallo on top for a delightful zing!
Recipe Variations
Who says you can’t have fun with recipes? Here are a few variations to keep your taste buds dancing:
-
Southwestern Chicken Salad Wrap: Take your salad and wrap it up in a whole wheat tortilla for a portable meal.
-
Quinoa & Chicken Salad: Replace half of the shredded chicken with cooked quinoa for a protein boost.
-
Mediterranean Twist: Swap black beans for chickpeas, Greek yogurt for a tahini dressing, and throw in some diced cucumbers and kalamata olives.
-
Add Some Heat: If you like it spicy, toss in diced jalapeños or a dash of hot sauce to the dressing.
-
Vegetarian Option: Omit the chicken and substitute with grilled vegetables or extra beans for a filling vegetarian dish.
Chef’s Notes
This Southwestern Chicken Salad has been a staple in my kitchen for years! It’s incredible how much joy a bowl of salad can bring. I often change it up based on what I have in the fridge or what’s fresh from the farmer’s market. It’s versatile, forgiving, and—let’s be honest—ridiculously easy to make!
Once, I was in a hurry preparing this salad for friends and accidentally grabbed cinnamon instead of cumin. (Who knew those jars could look so similar?) Well, my friends ended up loving it, and it turned into a hilarious kitchen story, but I wouldn’t recommend it!
FAQs and Troubleshooting
1. Can I make this salad ahead of time?
Absolutely! Just keep it in the fridge for up to 2 days. The flavors actually develop nicely, but avoid adding crunchy toppings until serving to keep everything fresh!
2. Why is my salad too dry?
There’s a simple fix! Just adjust by adding more Greek yogurt or lime juice until you reach your preferred creaminess.
3. How can I make this salad spicier?
You can add diced jalapeños, hot sauce, or extra chili powder to the mix. Your taste buds will thank you!
4. What can I do if I don’t have shredded chicken?
No problem! You can use any cooked protein like turkey or even a can of tuna if you’re in a pinch.
Nutritional Info
Now, let’s break down why this Southwestern Chicken Salad is not just delicious but also nutritious! It’s a protein powerhouse thanks to the chicken and black beans, providing essential amino acids and fiber. The Greek yogurt base is rich in probiotics supporting your gut health. Plus, the medley of colorful veggies delivers various vitamins and minerals, promoting overall well-being.
Approximate Nutrition per Serving (1 cup):
- Calories: 280
- Protein: 30g
- Fat: 9g (depends on the yogurt used)
- Carbohydrates: 30g
- Fiber: 10g
- Sugar: 4g
All good fuel to keep you feeling fabulous!
Final Thoughts
I hope you feel inspired to whip up this Southwestern Chicken Salad soon! Bring your family or friends into the kitchen—cooking is always better when shared. Remember, it’s not just about following the recipe; it’s about making it your own and enjoying every single bite.
As you enjoy this dish and perhaps share stories of your own, know that every meal is a chance to create cherished memories. So grab a fork or a sturdy tortilla and dig into this bowl of sunshine. Happy cooking, and until next time, keep cultivating those culinary vibes! 🌶️🥗
Print
Southwestern Chicken Salad
- Total Time: 45 minutes
- Yield: 4 servings 1x
- Diet: Gluten-Free
Description
A vibrant and zesty salad packed with tender chicken, black beans, corn, and a creamy Greek yogurt dressing.
Ingredients
- 2 cups cooked chicken, shredded
- 1 cup Greek yogurt
- 1 can black beans, rinsed and drained
- 1 cup fire-roasted corn
- 1 bell pepper, diced (any color of your choice)
- 1 teaspoon chili powder
- 1 teaspoon cumin
- Salt and pepper to taste
- Lime juice to taste
Instructions
- Shred the chicken if not using rotisserie by seasoning and cooking until fully cooked, then shred.
- Combine the shredded chicken, rinsed black beans, and fire-roasted corn in a large mixing bowl.
- Prep your bell pepper by dicing it into bite-sized pieces and add to the bowl.
- Mix the dressing by combining Greek yogurt, lime juice, chili powder, and cumin in a smaller bowl until smooth.
- Combine everything by pouring the yogurt dressing over the chicken mixture and gently fold it all together.
- Chill the salad in the fridge for about 30 minutes before serving.
Notes
You can customize this salad with other vegetables or proteins according to your preference.
- Prep Time: 15 minutes
- Cook Time: 30 minutes
- Category: Salad
- Method: Mixing
- Cuisine: Southwestern
Nutrition
- Serving Size: 1 serving
- Calories: 280
- Sugar: 4g
- Sodium: 400mg
- Fat: 9g
- Saturated Fat: 2g
- Unsaturated Fat: 7g
- Trans Fat: 0g
- Carbohydrates: 30g
- Fiber: 10g
- Protein: 30g
- Cholesterol: 60mg
Keywords: chicken salad, southwestern salad, healthy salad, easy recipes, summer meals
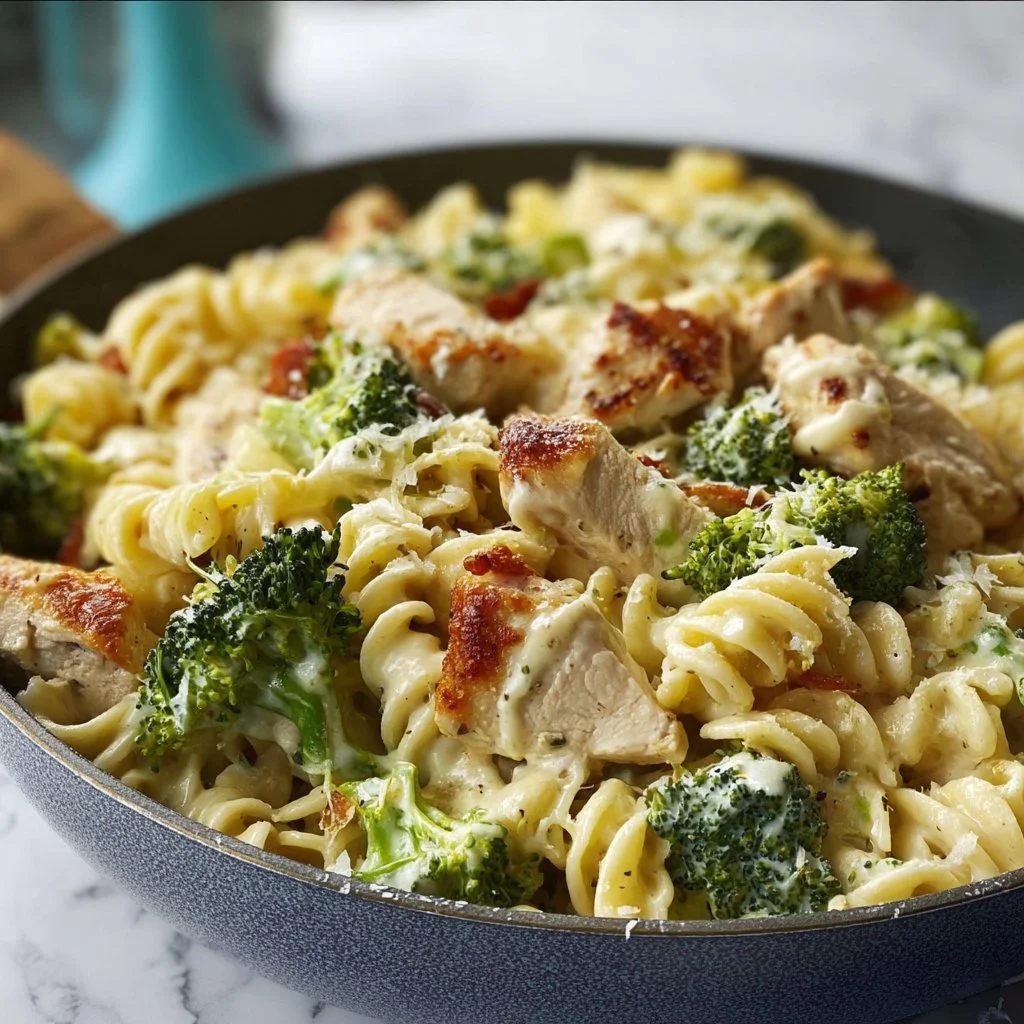
Chicken Broccoli Pasta in Lemon Cream Sauce
# A Joyous Journey with Chicken Broccoli Pasta in Lemon Cream Sauce

## Introduction

Hey there, food enthusiasts! It’s time to gather around because I’ve whipped up one of my all-time favorite dishes: Chicken Broccoli Pasta in Lemon Cream Sauce. Imagine a delightful medley of tender chicken, vibrant broccoli, and perfectly cooked pasta, all snuggled in a luscious, tangy lemon cream sauce. Doesn’t that just make your taste buds dance?

We all have that one recipe that we rely on to uplift our spirits and bring a smile to our faces. This one is mine! It’s not just a dish; it’s a celebration of cozy kitchen vibes, sunshine flavors, and family moments that linger in the heart long after the last bite. Whenever I make this meal, I'm transported back to my childhood home, where my mom created a symphony of aromas in the kitchen, each whiff more inviting than the last.

If you're a newbie, don’t sweat it! This recipe is super approachable, leaving plenty of room for improvisation. And if you’re a seasoned pro, I bet you’ll still find a little nugget of wisdom or two tucked away within these words. So grab your favorite apron, channel your inner culinary wizard, and let’s get cooking. Trust me, your taste buds will thank you!

## Personal Story

I remember the first time I concocted Chicken Broccoli Pasta in Lemon Cream Sauce. I was a young chef on a mission to impress my family for Sunday dinner. Armed with a handful of ingredients and a whole lot of enthusiasm, I dove into the kitchen. It was one of those magical evenings where the stars aligned. The creaminess of the sauce wrapped around the chicken and broccoli as if they were meant to be together, creating a memorable dish that left everyone asking for seconds. The laughter around the dinner table, along with the satisfied sighs, is a memory I cherish.

Fast forward to today, this dish has welcomed several variations, spins, and tweaks, all influenced by the people I’ve shared it with. Cooking, for me, is not just about feeding the body; it's about nourishing the soul. Every time I prepare this Chicken Broccoli Pasta, it’s like inviting those cherished memories back into my kitchen.

## Ingredients

Alright, let’s gather our heroes for this fantastic dish! Here’s what you’ll need:

- **8 oz pasta (fettuccine or penne)**
  - Pasta is the backbone of this dish. Fettuccine lends a lovely ribbon-like texture, while penne grabs the creamy sauce for every delightful bite. Not a fan of these? Any pasta works—just play around with shapes like rotini or farfalle!

- **2 cups broccoli florets**
  - Not only does broccoli add a pop of color, but it also packs a nutritional punch. You can substitute with cauliflower or asparagus if you’re feeling adventurous!

- **1 lb chicken breast, diced**
  - Chicken breast keeps things straightforward and light, and it absorbs flavors beautifully. If you're looking for a twist, feel free to use shrimp or grilled tofu for a veggie option.

- **2 tablespoons olive oil**
  - This crucial fat helps in cooking the chicken and bringing richness to the dish. Extra virgin olive oil is a wonderful choice, but avocado oil or butter can work too!

- **2 cloves garlic, minced**
  - Garlic adds an aromatic depth that's irreplaceable. If you're pressed for time, pre-minced garlic works just fine in a pinch.

- **1 cup heavy cream**
  - This is where our sauce gets its lusciousness. For a lighter version, half-and-half or coconut cream can do the trick.

- **1 cup chicken broth**
  - This liquid helps to create a soothing base for the sauce. Homemade broth is fantastic, but store-bought works perfectly too. Vegetable broth is a great substitute, especially for a vegetarian version.

- **1 lemon, juiced and zested**
  - This bright, citrusy note brings everything to life! You can use lime in a pinch, though lemon's unique zing really captures the essence of this dish.

- **Salt and pepper to taste**
  - Essential seasoning is key for balancing flavors. I always recommend starting light and adding more toward the end.

- **Grated Parmesan cheese for serving**
  - Parmesan is the cherry on top of our Italian-inspired creation. No Parm? Try Pecorino Romano or nutritional yeast for a vegan option!

## Step-by-Step Instructions

Now that we have our ingredients ready, let’s jump into the cooking! Here are the steps to create this dish that will surely win hearts and tummies.

1. **Cook the Pasta:**
   - Begin by bringing a large pot of salted water to a rolling boil. Once it’s boiling, add your pasta and cook it according to the package instructions until al dente. Remember, it will keep cooking when added to the sauce, so you want it just shy of perfect. Since I love multitasking, I often set a timer for a minute less than the recommended cook time.

2. **Prepare the Broccoli:**
   - While the pasta is cooking, grab a separate pot and bring some water to a boil. Add the broccoli florets and blanch them for about 2–3 minutes until they turn vibrant green and slightly tender but still crisp. Drain and set aside. This step not only enhances their color but also helps retain some nutrients!

3. **Sauté the Chicken:**
   - In a large skillet, heat the olive oil over medium heat. Once it shimmers (trust me, you’ll know), toss in the diced chicken. Allow the chicken to sear and cook through for about 5–7 minutes, stirring occasionally. Make sure the chicken is golden and cooked all the way through—season with salt and pepper while cooking.

4. **Add Garlic:**
   - As the chicken nears completion, add the minced garlic, cooking for about 30 seconds just until fragrant. Garlic burns quickly, so keep an eye on it; no one likes burned garlic!

5. **Bring on the Cream:**
   - It’s time for the heavy cream! Pour it into the skillet, stirring gently to combine it with the chicken and garlic. Let this simmer for 3–4 minutes as it thickens slightly.

6. **Incorporate the Broth and Lemon:**
   - Pour in the chicken broth along with the lemon juice and zest, stirring to amalgamate. The acidity from the lemon balances the richness of the cream beautifully. Let this simmer for another 5 minutes, allowing the flavors to meld.

7. **Combine with Pasta:**
   - Now, add the cooked pasta and blanched broccoli to the skillet. Toss everything together gently to coat the pasta and broccoli with that gorgeous lemon cream sauce. This step is crucial as it melds all the flavors and textures together.

8. **Adjust Seasoning:**
   - Take a moment to taste and adjust your seasonings. Add more salt, pepper, or even a squeeze of fresh lemon juice to brighten things up. You’re the chef here; make it yours!

## Serving Suggestions

Ready to dig in? This Chicken Broccoli Pasta in Lemon Cream Sauce looks fabulous served family-style right from the skillet, or you can plate it up for an elegant touch. To plate, twirl the pasta onto a plate or bowl, allowing the chicken and broccoli to perch atop the pasta, showing off the beautiful colors. A generous sprinkle of grated Parmesan cheese finishes it off nicely, offering a fantastic creamy texture with every bite.

Pair this dish with a light salad, perhaps a crisp green side, and some crusty garlic bread to complete the experience. It’s comfort food with a sophisticated flair!

## Recipe Variations

Now, let's have some fun with this! Here are a few twists you can try with this dish to make it uniquely yours:

1. **Add Spices:**
   - For a kick, try adding red pepper flakes or blackened seasoning to the chicken. Spice can elevate the flavor profile beautifully!

2. **Veggie Mix-In:**
   - Enhance the nutritional value by mixing in other veggies like bell peppers, peas, or spinach. The more, the merrier!

3. **Make it Cheesy:**
   - For a truly indulgent version, mix in some cream cheese or mozzarella cheese while the cream simmers for an extra cheesy delight.

4. **Swap the Protein:**
   - Try swapping the chicken for sautéed shrimp or even grilled portobello mushrooms for a plant-based delight.

5. **Herbal Lift:**
   - Fresh herbs make all the difference! Consider stirring in fresh basil, thyme, or parsley just before serving to add an aromatic touch.

## Chef’s Notes

This recipe has evolved over the years as I’ve shared it with family and friends. I once added a handful of fresh spinach on a whim, and it was a game-changer! Sometimes, I pick up locally sourced ingredients that inspire new flavors and twists. The beauty of cooking is that it's always evolving. Never shy away from making it your own; consider it a canvas waiting for your artistic touch!

## FAQs and Troubleshooting

Here are some common questions folks often ask about this recipe, along with troubleshooting tips if you find yourself in a culinary pickle:

1. **Can I use frozen broccoli?**
   - Absolutely! Just make sure to thaw and drain excess moisture before adding it to the dish. The cooking times may vary slightly, so keep an eye on the texture.

2. **What if my sauce is too thick?**
   - If the sauce seems too thick, you can easily thin it out with a splash of chicken broth or even a bit of reserved pasta water. It’s all about creating that perfect creamy texture.

3. **How can I store leftovers?**
   - Store any leftovers in an airtight container in the fridge for up to 3 days. Reheat gently on the stovetop or in the microwave, adding a splash of broth or cream if needed.

4. **Can I make this dish vegetarian?**
   - Of course! Simply swap the chicken for your favorite protein like chickpeas or tofu, and use vegetable broth in place of chicken broth. The creamy sauce can be made with non-dairy alternatives too!

## Nutritional Info

Each serving of Chicken Broccoli Pasta in Lemon Cream Sauce is a comforting bite packed with flavor and nutrients. Here’s a quick breakdown:

- **Calories:** Approximately 550–600 calories per serving (depending on pasta type and cream)
- **Protein:** About 30g (from chicken and cheese)
- **Fat:** Approximately 25g (from cream and olive oil)
- **Carbohydrates:** Around 60g (from pasta)
- **Fiber:** Roughly 5g (thanks to broccoli!)

Of course, these numbers can change based on ingredient substitutions. But remember, food is not just about numbers—it’s about joy… and love!

## Final Thoughts

I hope you feel inspired to give this Chicken Broccoli Pasta in Lemon Cream Sauce a whirl in your own kitchen! This recipe isn’t just about feeding our bodies; it’s about creating vibrant memories around the table with family and friends. Whether you’re enjoying it on a cozy weeknight or celebrating a special occasion, bring your unique flavor to the dish!

Cooking is a journey, and I’m thrilled to be part of yours. Remember to take the time to savor every bite and smile, whether you're indulging solo or sharing with loved ones. Happy cooking, and until next time, may your kitchen always be filled with love and laughter!

Chicken Broccoli Pasta in Lemon Cream Sauce
- Total Time: 45 minutes
- Yield: 4 servings 1x
- Diet: Gluten-Free option available
Description
A delightful medley of tender chicken, vibrant broccoli, and perfectly cooked pasta in a luscious lemon cream sauce.
Ingredients
- 8 oz pasta (fettuccine or penne)
- 2 cups broccoli florets
- 1 lb chicken breast, diced
- 2 tablespoons olive oil
- 2 cloves garlic, minced
- 1 cup heavy cream
- 1 cup chicken broth
- 1 lemon, juiced and zested
- Salt and pepper to taste
- Grated Parmesan cheese for serving
Instructions
- Cook the Pasta: Begin by bringing a large pot of salted water to a rolling boil. Once it’s boiling, add your pasta and cook it according to the package instructions until al dente.
- Prepare the Broccoli: While the pasta is cooking, grab a separate pot and bring some water to a boil. Add the broccoli florets and blanch them for about 2–3 minutes. Drain and set aside.
- Sauté the Chicken: In a large skillet, heat the olive oil over medium heat. Toss in the diced chicken and cook for about 5–7 minutes until golden and cooked through.
- Add Garlic: Once the chicken is nearly done, add the minced garlic and cook for about 30 seconds until fragrant.
- Bring on the Cream: Pour in the heavy cream, stirring gently to combine. Let this simmer for 3–4 minutes.
- Incorporate the Broth and Lemon: Stir in the chicken broth along with the lemon juice and zest. Let this simmer for another 5 minutes.
- Combine with Pasta: Add the cooked pasta and blanched broccoli to the skillet, tossing everything together to coat with the sauce.
- Adjust Seasoning: Taste and adjust seasonings with salt, pepper, or extra lemon juice if desired.
Notes
Feel free to experiment with different pasta shapes or protein options like shrimp or tofu, and add other vegetables like bell peppers or spinach for added nutrients.
- Prep Time: 15 minutes
- Cook Time: 30 minutes
- Category: Main Course
- Method: Stovetop
- Cuisine: Italian
Nutrition
- Serving Size: 1 serving
- Calories: 600
- Sugar: 2g
- Sodium: 450mg
- Fat: 26g
- Saturated Fat: 12g
- Unsaturated Fat: 10g
- Trans Fat: 0g
- Carbohydrates: 60g
- Fiber: 5g
- Protein: 30g
- Cholesterol: 80mg
Keywords: chicken pasta, broccoli, lemon cream sauce, Italian recipes, comfort food