
Nutella Toast Pies
Discovering Delight with Nutella Toast Pies: A Step-by-Step Recipe Guide
Hey there, my culinary companions! If you’re ready to whip up something that will not only warm your heart but also tickle your taste buds, you’ve come to the right spot! Today, we’re diving into the comforting world of Nutella Toast Pies. Imagine a delightful combination of crispy, buttery bread encasing a luscious filling of rich Nutella, dusted with just a hint of sweetness. Sound dreamy? I promise, it’s even better than it sounds!
Nutella has a special place in my heart (and my pantry!). It’s not just chocolate spread; it’s an experience that brings back waves of nostalgia. You know those lazy Sunday mornings when you crave something indulgent but don’t want to spend hours in the kitchen? This is where Nutella comes to the rescue! Grab that jar of joy, some bread, and let’s create a masterpiece that will impress anyone hanging out at your kitchen table.
As we venture through each step, I’ll share some valuable kitchen hacks, fun stories, and ways to make this recipe uniquely yours. So, roll up your sleeves, turn on your favorite playlist, and let’s make some delightful Nutella Toast Pies that will have your taste buds doing a happy dance!
Personal Story
Ah, the first time I ever tried Nutella—I can still vividly recall that moment! I was about 10 years old, eagerly waiting for my family to gather around the kitchen table for our traditional weekend breakfast. My mom, the queen of comfort food, decided to treat us to some homemade toast with that irresistible chocolate spread. As she slathered generous amounts of Nutella onto warm, crispy bread, the aroma enveloped the kitchen in a sweet embrace.
With just one bite, I was hooked. The creamy chocolate-hazelnut blend just melted in my mouth and paired perfectly with the crunch of the bread. It was pure joy! Fast forward a couple of decades, and I find myself recreating that same magic in my kitchen, but with a fun twist. Instead of just plain toast, I decided to elevate it to Nutella Toast Pies—a crispy, golden delight that feels like a warm hug.
Now, every time I make these pies, I’m transported back to that sunlit kitchen filled with laughter, smiles, and the best food memories. It’s a reminder of how simple ingredients can create lasting happiness, and I can’t wait for you to experience that same joy!
Ingredients
Before we roll up to our sleeves and dive into cooking, here’s what you’ll need to create these delightful Nutella Toast Pies:
-
Bread Slices:
- Use your favorite bread! White, whole grain, or even brioche works wonders. Want a gluten-free option? Go for gluten-free bread, and you won’t miss a beat.
-
Nutella:
- Of course! This creamy chocolate spread is the star of the show. If you fancy a different flavor, almond butter or peanut butter can make a delicious substitute.
-
Butter:
- We need butter for that golden, crispy exterior. Unsalted is best for controlling the flavor, but feel free to use margarine or coconut oil for a dairy-free option.
-
Powdered Sugar:
- This is sprinkled on top for sweetness. If you’re in a pinch, regular granulated sugar can work too! But powdered sugar gives that lovely café-style finish.
-
Cinnamon (optional):
- A pinch of cinnamon adds warmth and depth. If you’re not a cinnamon fan, feel free to skip it or replace it with cardamom for a different twist!
Step-by-Step Instructions
Alright, my foodie friend! Let’s roll up our sleeves and cook up some Nutella Toast Pies. Follow these easy steps, and let me sprinkle in a few tips along the way!
Step 1: Prepare Your Ingredients
Gather your ingredients. It’s always a good idea to have everything within arm’s reach. Trust me; it makes cooking so much smoother!
Step 2: Spread the Nutella
Take two slices of bread. Generously spread about one to two tablespoons of Nutella on one side of each slice. Feel free to add more if you’re feeling indulgent (I won’t judge!). Every bite should be filled with that rich, creamy goodness!
Step 3: Assemble Your Pies
Now, place the Nutella-coated sides together to form a sandwich. Press down gently; we want them to stick together nicely, so that delicious filling stays put!
Step 4: Trim the Edges (Optional)
For that polished, pie-like appearance, trim off the crusts of the sandwich. This step is optional but adds a cute touch. Plus, it helps the filling stay inside while cooking!
Step 5: Butter the Bread
Melt a tablespoon of butter in your skillet over medium heat. Once melted, gently brush the outside of each sandwich with the melted butter, ensuring a lovely golden crust.
Step 6: Cook the Pies
Carefully place the sandwiches in the skillet. Cook for about 2-3 minutes on each side or until they turn golden brown and crispy. If they’re cooking too quickly, turn down the heat a notch! (We don’t want burnt toast pies—yikes!).
Step 7: Dust with Sugar and Cinnamon
Once your pies are perfectly golden, remove them from the skillet and sprinkle with powdered sugar and a touch of cinnamon, if desired. This adds that café-style flair and makes them look oh-so-delicious!
Step 8: Slice and Serve
Slice the pies diagonally, arrange them on a plate, and get ready to dig in! Trust me; these Nutella Toast Pies are best enjoyed warm while the filling is oozing beautifully!
Serving Suggestions
Now that your Nutella Toast Pies are looking gorgeous, let’s talk serving ideas! You can plate them up in various ways:
-
Classic Plate: Arrange the sliced pies on a plate, dust with more powdered sugar, and add fresh berries on the side. Strawberries or raspberries bring a bright, fresh twist that complements the richness of the Nutella nicely.
-
Elevated Brunch: Serve your toast pies with a dollop of whipped cream and a drizzle of chocolate sauce for the ultimate brunch treat! Don’t forget a fresh cup of coffee to wash it down—bliss!
-
Kid-Friendly Plate: For the little foodies, serve with a side of sliced apples or bananas for a fun, colorful meal. It’s a great way to encourage them to enjoy some fruits along with their indulgent treat.
Recipe Variations
The beauty of Nutella Toast Pies is how easily they adapt to your taste! Here are a few creative twists to try:
-
Banana Nutella Toast Pies: Slice up some bananas and layer them in with the Nutella. It adds natural sweetness and a lovely texture!
-
Peanut Butter & Chocolate Delight: Swap out half the Nutella for peanut butter. It’s a classic combo that never goes out of style!
-
Nutella & Berry Surprise: Add fresh strawberries or raspberries directly inside the pie before cooking for a fruity burst with every bite.
-
Marshmallow Fluff Version: For an ultra-sweet treat, add a layer of marshmallow fluff to the Nutella. It’s like a s’more, but in pie form!
-
Spicy Chocolate Pies: Feeling adventurous? Sprinkle some cayenne pepper or chili powder in the Nutella before spreading. It adds a surprising kick that works beautifully with chocolate!
Chef’s Notes
Every recipe in my kitchen has a story, and Nutella Toast Pies are no different! When I first created this recipe, I was trying to make a quick snack for my last-minute guests. I wanted something indulgent but that didn’t require a trip to the grocery store—Nutella was the easy winner. Turns out, my impromptu creation has become a fan favorite among family and friends. I still chuckle every time someone asks for the recipe—they wouldn’t believe how simple it is!
One funny kitchen memory involves an overzealous friend attempting to add salt instead of sugar to the topping. Let’s just say, we all had a good laugh once they bravely took a bite! Always read your labels, folks!
FAQs and Troubleshooting
1. What if my Nutella is too thick to spread?
If you find it difficult to spread the Nutella, try warming it slightly in the microwave for just a few seconds—be careful not to overdo it! This softens the spread and makes it easier to work with.
2. Can I make these ahead of time?
Sure! You can prepare the sandwiches, wrap them tightly in plastic, and store them in the fridge for up to a day. When ready to eat, just pop them in a skillet or toaster to reheat!
3. Why are my pies not crispy?
Make sure your skillet is heated properly before adding the sandwiches, and ensure you’re using enough butter to help create that delicious crust! If they still turn out soggy, consider lowering the heat slightly to allow them to cook thoroughly without burning.
4. What can I do if the filling spills out?
Give the pies a gentle press when assembling them—this helps seal the edges. If any Nutella does spill out while cooking, don’t fret; just scoop it up with a spatula and enjoy the extra treat!
Nutritional Info (If Applicable)
Let’s talk numbers! While these Nutella Toast Pies are definitely a treat, moderation is key. Here’s a rough estimate of the nutritional info per serving (one pie):
- Calories: Approximately 250-300 calories
- Protein: 5g
- Fat: 15g
- Carbohydrates: 30g
- Sugar: 10g
To lighten them up, consider using whole grain bread or reducing the amount of Nutella. Each delicious bite is worth it, but always listen to your tummy!
Final Thoughts
There you have it, my friends—a cozy, delicious recipe for Nutella Toast Pies that’s sure to delight the taste buds of everyone around your table. It’s all about keeping things simple, fun, and most importantly, enjoyable!
Whether you’re sharing with family, indulging on a quiet evening, or impressing a friend on a casual brunch date, these pies are bound to become a hit! I hope you create warm memories just like I did in my childhood, all while savoring each lovely bite.
So go ahead, grab that Nutella, and let’s make some toast pies! Remember, food is meant to be shared, so don’t hesitate to spread the love (and Nutella) around!
Happy cooking, and until next time, keep those pots clanging and those love-filled recipes coming!
Print
Nutella Toast Pies
- Total Time: 20 minutes
- Yield: 2 servings 1x
- Diet: Vegetarian
Description
Delightful Nutella Toast Pies with a crispy exterior and a rich chocolate-hazelnut filling, perfect for a cozy breakfast or indulgent snack.
Ingredients
- 4 slices of Bread (white, whole grain, or brioche)
- 1/2 cup Nutella
- 2 tablespoons Butter (unsalted)
- 1 tablespoon Powdered Sugar
- 1/2 teaspoon Cinnamon (optional)
Instructions
- Prepare your ingredients by gathering everything you’ll need.
- Spread about one to two tablespoons of Nutella on one side of each slice of bread.
- Assemble the slices into a sandwich with the Nutella sides together.
- Trim the edges if desired for a neat appearance.
- Butter the outside of each sandwich with melted butter.
- Cook the sandwiches in a skillet over medium heat for 2-3 minutes on each side until golden brown.
- Dust with powdered sugar and cinnamon before serving.
- Slice diagonally and serve warm.
Notes
For a gourmet touch, serve with fresh berries or whipped cream. Experiment with fillings like bananas or berries for extra flavor!
- Prep Time: 10 minutes
- Cook Time: 10 minutes
- Category: Dessert
- Method: Pan-frying
- Cuisine: American
Nutrition
- Serving Size: 1 serving
- Calories: 300
- Sugar: 10g
- Sodium: 200mg
- Fat: 15g
- Saturated Fat: 9g
- Unsaturated Fat: 5g
- Trans Fat: 0g
- Carbohydrates: 30g
- Fiber: 2g
- Protein: 5g
- Cholesterol: 30mg
Keywords: Nutella, Toast, Dessert, Easy Snack, Kid-Friendly, Breakfast
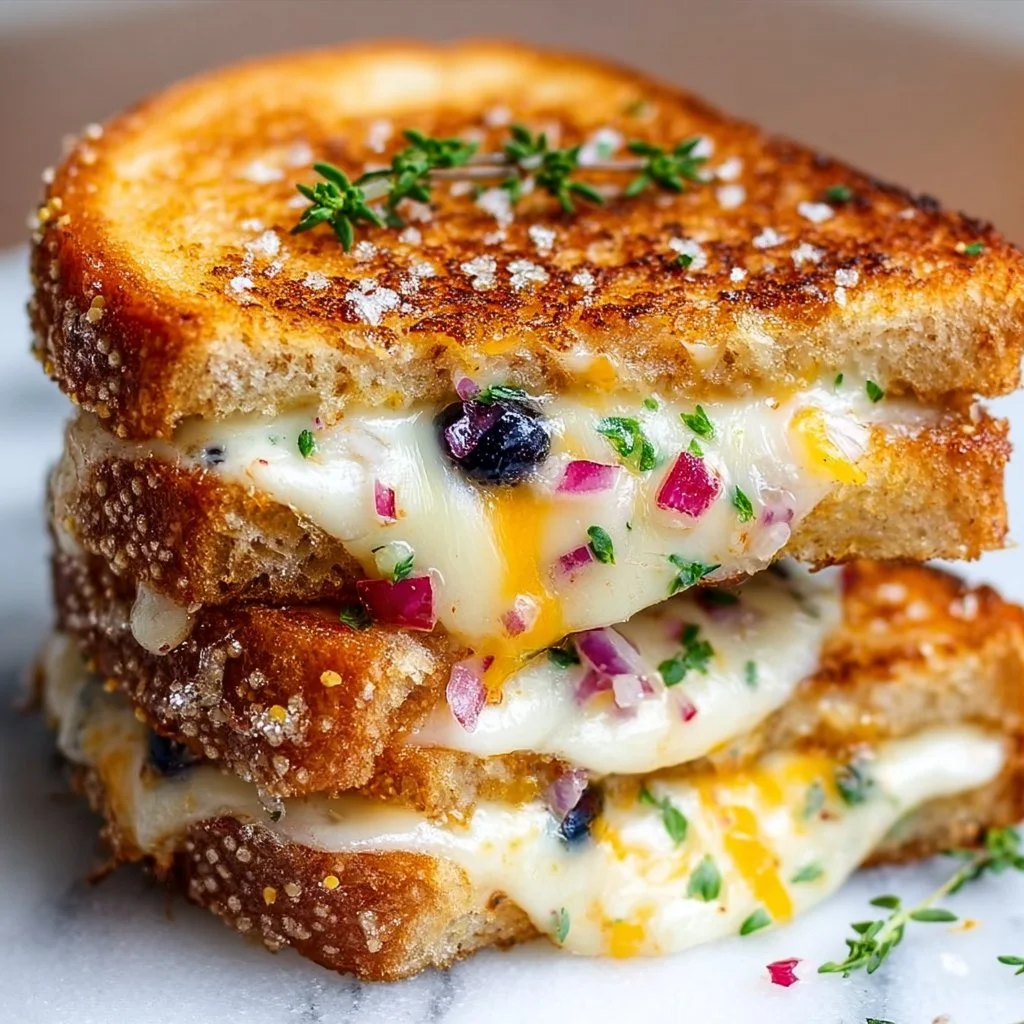
Grilled Cheese
The Ultimate Grilled Cheese: Everyone’s Favorite Comfort Food
Introduction
Hey there, food lovers! If there’s one dish that can spark nostalgia and comfort in the hearts of many, it’s the humble grilled cheese sandwich. Perfectly golden brown and oozing with melty cheese, this is the kind of food that warms not just your belly but your very soul.
When I think of grilled cheese, I can’t help but reminisce about those rainy afternoons spent huddled up with my mom in the kitchen. She’d pull out the cast-iron skillet and butter up slices of bread like it was a piece of art. The sizzling sound as the bread hit the hot pan? Pure magic! Those formative moments shaped my love for good food, and now I’m on a mission to spread that flavor-filled joy with all of you.
In today’s post, we’re diving deep into how to make the ultimate grilled cheese. I’m talking about more than plain old bread and cheese; we’re going to explore fun twists, serving suggestions, and kitchen hacks—all while keeping it light, casual, and downright delicious! So grab your spatula, and let’s get cheesy!
Personal Story
As a kid, I had a ritual: every Saturday morning, after I had completed my Saturday chores—which often involved dragging a vacuum across my room—I would sit down for a luxurious bowl of tomato soup, paired with a perfect grilled cheese. My mom would make it, of course, and she always said the secret was using lots of butter and a mix of cheeses. Who could argue with that?
One Saturday, as I waited impatiently for lunch, I decided to help her by mixing up some spices. Little did I know, I grabbed the cayenne pepper instead of the garlic powder! Just as she was about to take the first bite, that fiery aroma hit us both like a freight train. Let’s just say that day I learned two valuable lessons: always read your spice labels, and a little bit of adventure never hurt anyone—even if it burnt a few taste buds along the way!
To this day, I embrace those spirited moments in the kitchen—whether they come with a pinch of cayenne or a sprinkle of nostalgia. Remember, food is not just about the flavors; it’s about the memories and connection it creates. Now, let’s get on to whipping up your first (or thousandth) grilled cheese masterpiece!
Ingredients
Let’s gather our ingredients for this grilled cheese extravaganza! Here’s your shopping list, along with my little chef insights and substitutions.
-
Bread (your choice): White, whole grain, sourdough, you name it! Each type adds a unique texture and flavor. For a twist, try brioche or a crusty baguette for an elegant touch.
-
Cheese: Cheddar, American, mozzarella—oh my! The world is your cheesy oyster. I recommend a sharp cheddar for the classic vibe, or mix a couple of cheeses for an exciting blend. If you’re dairy-free, you can find delicious plant-based cheeses that melt just as well!
-
Butter: The golden elixir of the grilled cheese! Unsalted butter is preferred for control over seasoning, but salted butter lends a bit of extra flavor if that’s all you have.
-
Optional Ingredients:
- Tomato: Fresh slices add a burst of freshness, especially when layered inside the sandwich.
- Bacon: Who doesn’t love crispy bacon? It adds a savory crunch that’ll take your grilled cheese to the next level.
- Herbs: Fresh basil or parsley sprinkled on top not only looks pretty but adds layers of flavor!
Chef Insight: Always use room-temperature ingredients! It helps everything blend together nicely and cook evenly.
Step-by-Step Instructions
Now that we have everything ready, let’s get to the sizzling part! Here’s how to whip up the ultimate grilled cheese sandwich:
-
Prepare the Ingredients: Start by laying out your bread slices on a clean cutting board. If you’re adding tomatoes or bacon, slice them up now so you’re ready to go.
-
Butter the Bread: Take a generous amount of butter and spread it evenly on one side of each slice of bread. This is where the magic begins! Make sure to cover the entire surface so you get that golden crust. A little secret: if you’re feeling extra fancy, you can mix a sprinkle of garlic powder or herbs into the butter for a flavor boost.
-
Layer the Cheese: On the unbuttered sides of the bread, pile on your shredded cheese. Remember to keep some cheese aside to be used during the final stages of grilling for that gooey stretch that we all love!
-
Heat the Pan: Preheat a skillet over medium heat. You want the heat to be just right—not too hot, or you’ll burn the bread before the cheese melts. Ideally, aim for a sizzling sound when you add the sandwich.
-
Assemble the Sandwich: Place one slice of bread, buttered side down, onto the hot skillet. If you’re adding tomatoes or bacon, now is the time—layer them on before topping with the second slice of bread, buttered side facing up.
-
Grill it Up: Cook the sandwich for about 2-4 minutes. Keep an eye on it! You want to flip only when the bottom is golden brown. Here’s a little chef trick: if the bread is browning too quickly, lower the heat. You want that cheese to melt without burning the outside.
-
The Flip: Once the first side is golden and crispy, gently flip the sandwich using a spatula. If you hear the satisfying crunch, you’re doing it right! Now cook the other side for an additional 2-4 minutes. If it’s browning too fast, don’t hesitate to use a small lid to trap heat and encourage the cheese to melt.
-
Add Extra Cheese: If you’re a cheese lover (and who isn’t?), sprinkle a little reserved shredded cheese on the top during the last minute and cover again to get that dreamy melt.
-
Serve Hot: The moment you see that perfect golden-brown crust and hear that crunch, it’s time to take your masterpiece off the heat! Let it cool for a few moments before cutting it in half.
Serving Suggestions
Nothing says comfort food like a perfectly plated grilled cheese! Here are a few fun ways you can serve it up:
-
On a Plate with Tomato Soup: Serve that warm, grilled goodness alongside a bowl of tomato soup for dunking. It’s the classic combo that never goes out of style!
-
Garnished with Fresh Herbs: After plating, sprinkle some fresh basil or parsley on top of your sandwich for a vibrant flair.
-
Quirky Platter: For a brunch vibe, pair your grilled cheese with a fruit assortment—think strawberries, grapes, and maybe even some avocado slices on the side.
-
Cut Into Triangles: After letting it cool for a bit, cut your sandwich into triangles—you know, the classic “fancy” cut that adds a touch of elegance.
Recipe Variations
Feeling adventurous? Let’s mix it up! Here are some tasty twists on the classic grilled cheese:
-
Caprese Grilled Cheese: Add sliced tomatoes and fresh basil with your mozzarella for a refreshing combo.
-
Bacon & Jalapeño: Spice things up by adding crispy bacon and sliced jalapeños for a smoky and spicy bite.
-
Apple and Brie: Slice up some apples and layer them with brie cheese for a sweet and savory delight.
-
Pesto Delight: Spread some store-bought or homemade pesto on one slice of bread before layering the cheese for an aromatic twist.
-
Buffalo Chicken: For the meat lovers, add shredded buffalo chicken to your grilled cheese for an extra kick!
Chef’s Notes
Ah, grilled cheese: the canvas of our culinary creativity! Over the years, this simple dish has seen countless versions. I love to experiment with whatever’s in the fridge, and it never fails to surprise me how a little twist can create something entirely new.
One particularly memorable kitchen adventure involved trying to recreate a childhood favorite I had at a little roadside diner. They had a “Monte Cristo” style grilled cheese, so naturally, I took the challenge. After a few attempts, I found out that powdered sugar on top and a side of jam transformed my grilled cheese into a gourmet delight!
Remember, cooking is all about exploration and having fun. So throw caution to the wind and let your ingredients inspire your next creation!
FAQs and Troubleshooting
1. My grilled cheese is burning before the cheese melts! What’s wrong?
- This usually means your heat is too high. Lowering the temperature allows the bread to cook slowly while giving the cheese time to melt.
2. How can I keep my grilled cheese from falling apart?
- Press down gently on the sandwich once assembled. Using shredded cheese can also help it stick better.
3. Can I make grilled cheese in advance?
- While grilled cheese is best enjoyed fresh, you can assemble it beforehand and store it in the fridge. Just remember to grill it right before serving!
4. What if I don’t have butter?
- No worries! You can use mayonnaise instead—it creates a golden crust and imparts a nice flavor. Trust me; it’s a game changer!
Nutritional Info (if applicable)
While grilled cheese may be comfort food, it can hold its own nutritionally with tailored tweaks. Here’s a quick breakdown:
- Calories: Typically around 300-500 calories per sandwich (depending on the type and amount of cheese and bread).
- Protein: Cheese provides quality protein, generally around 20g per serving.
- Carbohydrates: Bread contributes most caloric content; trying whole grain can up fiber content!
- Fats: Expect anywhere from 15g to 30g of fat based on your butter and cheese choice.
Want to make it healthier? Use whole grain bread or reduce the amount of cheese, swapping in some avocado or a side salad for balance!
Final Thoughts
In the end, grilled cheese is not just a sandwich; it’s a celebration of simple ingredients and the memories they evoke. Whether enjoyed with soup, on a picnic, or as a midnight snack, it’s the edible embodiment of comfort.
With just a few tips and tricks, you can whip up a gourmet-style grilled cheese from the comfort of your kitchen. So don your apron, grab that spatula, and let’s start crafting delicious moments! Thank you for joining me on this cheesy adventure; I can’t wait to hear about your own kitchen experiments at Feastical! Now, dig in and feel the love in every bite! 🍽️❤️
Print
The Ultimate Grilled Cheese
- Total Time: 18 minutes
- Yield: 2 servings
- Diet: Vegetarian
Description
A nostalgic and comforting grilled cheese sandwich, oozing with melty cheese and perfect for any occasion.
Ingredients
- Bread (your choice): White, whole grain, sourdough, brioche, or baguette
- Cheese: Cheddar, American, mozzarella, or a mix of cheeses
- Butter: Unsalted or salted
- Optional Ingredients: Tomato slices, crispy bacon, fresh herbs (basil or parsley)
Instructions
- Prepare the Ingredients: Lay out your bread slices on a clean cutting board and slice any optional ingredients.
- Butter the Bread: Spread a generous amount of butter evenly on one side of each slice of bread.
- Layer the Cheese: On the unbuttered sides of the bread, pile on the shredded cheese, keeping some aside for later.
- Heat the Pan: Preheat a skillet over medium heat until it’s just right for grilling.
- Assemble the Sandwich: Place one slice of bread, buttered side down, on the skillet, and layer on any optional ingredients before adding the second slice of bread, buttered side up.
- Grill it Up: Cook the sandwich for about 2-4 minutes until the bottom is golden brown.
- The Flip: Once the first side is golden and crispy, gently flip the sandwich and cook the other side for an additional 2-4 minutes.
- Add Extra Cheese: Sprinkle reserved shredded cheese on top during the last minute and cover to melt.
- Serve Hot: Remove the sandwich from the skillet, let it cool for a moment, then cut it in half and enjoy!
Notes
For a gourmet twist, try adding cinnamon sugar on top or serve with jam!
- Prep Time: 10 minutes
- Cook Time: 8 minutes
- Category: Snack
- Method: Grilling
- Cuisine: American
Nutrition
- Serving Size: 1 sandwich
- Calories: 350
- Sugar: 3g
- Sodium: 600mg
- Fat: 25g
- Saturated Fat: 12g
- Unsaturated Fat: 10g
- Trans Fat: 0g
- Carbohydrates: 30g
- Fiber: 2g
- Protein: 15g
- Cholesterol: 55mg
Keywords: grilled cheese, comfort food, easy recipe, quick meal, vegetarian

EASY TACO CUPS
Easy Taco Cups: A Comforting Culinary Adventure
Hey there, food lovers! I’m Beau Collier, and I’m so excited to bring you one of my all-time favorite recipes right here at Feastical! If you’re looking for a dish that’s not only lip-smacking good but also easy to whip up, you’ve landed in the right spot. Today, we’re diving into the world of Easy Taco Cups, a fun and versatile recipe that’s perfect for any occasion—be it a cozy dinner with family, a fun party with friends, or just a little self-care night with your favorite show.
These delightful little cups are not only a feast for your taste buds but also a blast to make! Picture this: savory ground beef mingling with zesty taco seasoning, nestled inside crispy tortillas and topped with gooey melted cheese. Can you say yum? But that’s not all—they’re super customizable, so everyone can create their masterpiece. Trust me, once you dig into these taco cups, they’re bound to become a staple in your recipe rotation.
Now, let’s kick things off with a tasty memory I have related to this dish that shaped my love for Mexican cuisine.
A Taco Memory
Growing up, our family had a tradition of Taco Tuesdays. Every Tuesday, my mom would pull out her colorful array of ingredients and set up a DIY taco bar on the kitchen table. The aroma of simmering spices would fill the house, and all the kids would gather around, excitement bubbling over. As we built our tacos, laughter and chatter echoed through the room. It wasn’t just about filling up our bellies; it was about connection and creativity.
One Tuesday, my mom decided to surprise us with something new—she made mini taco cups using muffin tins. We were all intrigued! She handed us the spoons and let us build our own taco cups with the toppings of our choice. That night, each cup turned out unique, and the table was a colorful masterpiece of flavors and textures. It was a winning combination of fun and flavor! To this day, those taco cups are a delicious reminder of that cozy kitchen filled with love, laughter, and plenty of seasoning.
So, let’s heat up those ovens and gather our ingredients; it’s time to create your own taco memories!
Ingredients
Here’s what you’ll need to whip up these scrumptious Easy Taco Cups:
-
Ground Beef (450 g): This is the backbone of the dish. You can swap it out for ground turkey, chicken, or even a meat substitute if you’re looking for a vegetarian option. It’s your taco, so feel free to experiment!
-
Small Flour Tortillas (8 tortillas, cut into rounds): Look for soft tortillas that are easy to shape. If you want a crunchy texture, you could opt for corn tortillas instead or even use wonton wrappers for a fun twist!
-
Onion (1 medium, finely chopped): A great flavor booster! If you’re not a huge fan of onions, you can leave them out or use green onions for a milder taste.
-
Garlic (2 cloves, minced): Because every great dish starts with garlic! You can use garlic powder in a pinch, but fresh garlic brings that vibrant zing.
-
Taco Seasoning (2 tablespoons): This is where the magic happens! You can use store-bought or mix your own with chili powder, cumin, oregano, and paprika. Adjust the spice level according to your taste!
-
Tomato Sauce (120 ml): It adds moisture and a nice acidity to balance the richness of the beef. You could substitute with salsa for a chunkier texture.
-
Shredded Cheddar Cheese (150 g): This melty goodness is what dreams are made of! Feel free to mix it up with Monterey Jack or pepper jack for a little kick.
-
Canned Corn (120 g, drained): Sweet corn adds a pop of color and sweetness. You can substitute it with fresh corn or even black olives for a different flavor profile.
-
Canned Black Beans (120 g, rinsed and drained): Beans add protein and fiber to your taco cups. If you’re not a fan, you could swap them for lentils or another bean variety.
-
Olive Oil (1 tablespoon): A little olive oil keeps everything from sticking and adds a subtle richness. You can also use avocado oil or melted butter.
Step-by-Step Instructions
Ready to assemble your taco cups? Let’s do this! Follow these easy steps to create your mouthwatering masterpiece:
Step 1: Preheat and Prep
First things first, preheat your oven to 190°C (375°F). While that’s heating up, chop your onion and mince your garlic. I love using a garlic press—it saves time and ensures the perfect mince!
Step 2: Sizzle the Beef
In a large skillet, heat the olive oil over medium heat. Add the chopped onion and sauté for about 3-5 minutes until soft and translucent. Now, toss in the minced garlic and stir it around for about 30 seconds until fragrant—there’s nothing quite like the smell of garlic sautéing!
Next, add the ground beef to the skillet. Cook it until it’s browned, stirring regularly. Don’t forget to break up the meat with your spatula for even cooking. This should take about 5-7 minutes. Once the beef is browned, drain the excess fat if necessary. Your house should smell incredible by now!
Step 3: Add Flavor
Now that your beef is perfectly cooked, it’s time to introduce the seasonings! Sprinkle in the taco seasoning and the tomato sauce—mix everything together until well combined. Continue to cook for another 2-3 minutes until everything is heated through. This is the moment when all those flavors start to meld together!
Step 4: Topping It Off
Now it’s time for the star of the show! Remove the skillet from heat and gently fold in the drained corn and black beans. This adds extra layers of texture and flavor. Take a taste and adjust the seasoning if necessary—maybe add a pinch of salt or a dash of hot sauce if you’re feeling spicy!
Step 5: Shape Those Tortillas
Now comes the fun part—shaping those tortillas! Cut circles from your tortillas using a cookie cutter or the rim of a glass. Gently press each round into a greased muffin tin. They should fit snugly, creating little cups for our delicious filling.
Step 6: Load ‘Em Up
Spoon the meat mixture into each tortilla cup, filling them generously but not overflowing. Top each cup with a sprinkle of shredded cheddar cheese; this is where the magic happens! The cheese will melt and create a gooey layer on top—you can’t go wrong!
Step 7: Bake to Perfection
Place the muffin tin in the preheated oven and bake for about 15-20 minutes, or until the tortillas are crispy and the cheese is bubbly and golden. Keep an eye on them; you want that perfect golden hue!
Step 8: Cool and Serve
Once they’re done, let them cool for a few minutes. This allows the cups to set and makes them easier to remove from the muffin tin. Carefully lift them out and place them on a serving platter. It’s time to dig in!
Serving Suggestions
When it comes to serving, I like to set up a garnish bar! Serve your taco cups with an array of toppings like sour cream, fresh cilantro, diced tomatoes, sliced jalapeños, and avocado. Let your guests get creative! You can even provide some crispy tortilla chips on the side for an added crunch.
To plate them, arrange the taco cups on a vibrant platter or a rustic wooden board for a charming presentation. Don’t forget to sprinkle a bit of lime juice on top for that fresh zing!
Recipe Variations
Feeling adventurous? Here are some creative twists you can try with your Easy Taco Cups:
-
Spicy Taco Cups: Add diced jalapeños or a sprinkle of cayenne pepper to your beef mixture for an extra kick.
-
Vegetarian Taco Cups: Substitute the ground beef with sautéed mushrooms, lentils, or a mix of your favorite roasted veggies for a plant-based version packed with flavor.
-
Cheesy Fiesta Taco Cups: Mix different cheeses like pepper jack, mozzarella, or even crumbled feta for a fun flavor twist.
-
Southwestern Taco Cups: Add black olives and some diced bell peppers to the filling for a south-of-the-border flair.
-
Breakfast Taco Cups: Scramble some eggs and mix them with cooked sausage or bacon, then top with cheese for a breakfast take on taco cups.
Chef’s Notes
Over the years, this taco cups recipe has evolved, and it’s become a family favorite! I love how adaptable it is, allowing me to explore different flavor profiles. Plus, every time I make them, it takes me back to those joyful moments in my childhood kitchen.
One time, I had some leftover taco filling and decided to stuff it in bell peppers. Let me tell you—it was a hit! So, don’t be afraid to get creative with your leftovers! Cooking should be fun and experimental; embrace it.
FAQs and Troubleshooting
-
Can I make these ahead of time?
Absolutely! You can prepare the filling in advance and store it in the fridge. When you’re ready to serve, just assemble the cups and bake them. A great timesaver! -
What if my tortilla cups are sticking?
Make sure to grease your muffin tin well. You could also lightly flour the cups before pressing the tortillas in. If you’re using non-stick or silicone pans, that helps too! -
How can I tell when the taco cups are done?
Look for golden-brown edges on the tortillas and bubbly cheese. If you notice the tortillas are browning too quickly, cover them with aluminum foil to avoid burning. -
Can I freeze these taco cups?
Yes! Assemble the uncooked taco cups, cover them tightly, and stash them in the freezer. Just bake from frozen when you’re ready to enjoy. Baking time may be slightly longer.
Nutritional Info
As we enjoy these delicious Easy Taco Cups, here’s a rough idea of the nutritional breakdown per serving:
- Calories: Approximately 250 kcal per cup
- Protein: 15g
- Carbohydrates: 25g
- Fat: 12g
- Fiber: 4g
These numbers will vary based on ingredient choices and portion sizes, so always adjust according to your own dietary needs.
Final Thoughts
So there you have it—your new go-to recipe for Easy Taco Cups! I hope you feel inspired to gather your loved ones and make some wonderful memories in the kitchen. Whether you enjoy them as an appetizer, a party dish, or just a comforting meal, these taco cups are sure to bring smiles and satisfaction.
Remember, cooking should be fun, so don’t hesitate to tweak the ingredients and make them your own. Life is too short for boring food! Keep exploring, keep tasting, and always keep that kitchen love alive. Happy cooking, friends! 🥳
Print
Easy Taco Cups
- Total Time: 45 minutes
- Yield: 8 servings 1x
- Diet: None
Description
Delicious and customizable taco cups filled with savory ground beef, zesty seasonings, and topped with melted cheese, perfect for any occasion.
Ingredients
- 450 g Ground Beef
- 8 Small Flour Tortillas, cut into rounds
- 1 medium Onion, finely chopped
- 2 cloves Garlic, minced
- 2 tablespoons Taco Seasoning
- 120 ml Tomato Sauce
- 150 g Shredded Cheddar Cheese
- 120 g Canned Corn, drained
- 120 g Canned Black Beans, rinsed and drained
- 1 tablespoon Olive Oil
Instructions
- Preheat your oven to 190°C (375°F). Chop your onion and mince your garlic.
- Heat olive oil in a skillet over medium heat, add onion and sauté for 3-5 minutes until soft.
- Add minced garlic and stir for 30 seconds until fragrant.
- Add ground beef, cook until browned (5-7 minutes); drain excess fat if necessary.
- Sprinkle in taco seasoning and tomato sauce; mix well and cook for an additional 2-3 minutes.
- Fold in drained corn and black beans, adjust seasoning to taste.
- Cut circles from tortillas and press them into a greased muffin tin.
- Spoon the beef mixture into each tortilla cup and top with shredded cheese.
- Bake for 15-20 minutes until tortillas are crispy and cheese is bubbly.
- Cool for a few minutes before serving.
Notes
You can customize the filling with different meats or make it vegetarian. Serve with toppings like sour cream, fresh cilantro, and diced tomatoes.
- Prep Time: 15 minutes
- Cook Time: 30 minutes
- Category: Appetizer
- Method: Baking
- Cuisine: Mexican
Nutrition
- Serving Size: 1 cup
- Calories: 250
- Sugar: 3g
- Sodium: 600mg
- Fat: 12g
- Saturated Fat: 6g
- Unsaturated Fat: 4g
- Trans Fat: 0g
- Carbohydrates: 25g
- Fiber: 4g
- Protein: 15g
- Cholesterol: 40mg
Keywords: taco cups, easy recipe, Mexican cuisine, party food, comfort food
Healthy Savory Snacks
Savory Zucchini Chickpea Bites: A Healthy Snack to Savor!
Hey there, my fellow food lovers! Today, we’re diving into a delicious and healthy recipe that’s sure to tickle your taste buds and nourish your body. We’re talking about Savory Zucchini Chickpea Bites—the perfect party snack, midday pick-me-up, or a fun addition to any meal. You know how sometimes you just crave something crispy yet wholesome, something that packs a punch of flavor without overloading on guilt? Well, you’re in for a treat!
I can still remember the first time I made these savory bites. It was a sunny afternoon, and I wanted to whip up a snack that wouldn’t just fuel my body, but also remind me of the comforting flavors of my childhood. I was rummaging through the fridge and pantry, and there they were—zucchini and chickpeas calling my name! I decided to experiment, tossing in some spices and a sprinkling of parmesan for that cheesy goodness. The result? Pure magic! My kitchen smelled incredible, and one bite took me straight back to those cozy family dinners.
Food has that unique power, doesn’t it? Bringing us together, wrapping us in memories, and evoking feelings of happiness and nostalgia! That’s exactly why I started Feastical—to share my journey through the kitchen and inspire you to create your own delicious memories. So, whether you’re looking to impress friends, satisfy your snack cravings, or maintain a healthy diet, these bites are for you! Ready to let’s get cooking?
Personal Story
Let me take you back to a warm summer evening when I was a young culinary explorer, eager to learn from my mom while she whipped up her signature veggie dish in our cozy kitchen. With our small herb garden just steps away, those evenings felt like a treasure hunt! I loved how she made getting into the kitchen feel like an adventure. Together, we’d snip fresh basil, pluck ripe tomatoes, and rummage into our coolers for the freshest produce. It was during one of those adventures that I first stumbled upon zucchini and chickpea combinations. My mom was all about healthy snacking, using whatever was ripe and in-season.
One day, we decided to experiment with what we had. We turned those chunky zucchinis into little veggie balls that baked up beautifully, crisp on the outside and utterly comforting on the inside. The delight in my mom’s eyes when we pulled them out of the oven was priceless! We devoured them within minutes, and I’ve cherished that memory ever since. Today, I’m thrilled to share my revised version of those beloved bites, packed with wholesome ingredients and an extra kick of flavor!
Ingredients
Here’s everything you’ll need to create your savory zucchini chickpea bites:
-
2 medium zucchinis
These beauties give your bites moisture, making them tender and delicious! Feel free to swap with yellow squash if you want a different color. -
1 can (15 oz) chickpeas, drained and rinsed
A fantastic source of protein and fiber! If chickpeas aren’t your thing, cans of white beans work just as well! -
1 cup almond flour
This gluten-free alternative to traditional flours adds a lovely nuttiness and binds everything together perfectly. If you’re looking for a lower-calorie option, ground oats can work in a pinch! -
1 cup mixed vegetables, diced (bell peppers, onions, carrots, etc.)
Feel free to use whatever you’ve got on hand! The more colorful, the better. Plus, it adds extra nutrients and crunch. -
1 tsp smoked paprika
This spice adds a delightful smoky flavor! If you prefer less smokiness, regular paprika or even chili powder can be a fun twist! -
½ cup grated Parmesan cheese
Beautifully cheesy and addictive! To make this recipe vegan, use nutritional yeast for that cheesy flavor sans dairy! -
Salt and pepper to taste
To season those flavors perfectly! Keep it simple, or add a dash of cayenne pepper for a little heat!
With these ingredients, you’ll be on your way to crafting a pokeable pleasure of a snack!
Step-by-Step Instructions
Alright, let’s get our hands in the mix! Here’s how to make these Savory Zucchini Chickpea Bites:
Step 1: Prepare the Zucchini
Start by preheating your oven to 400°F (200°C). While that’s warming up, grab those zucchinis and give them a good wash. Grate them using a box grater or a food processor. Make sure to squeeze out excess moisture using a clean kitchen towel or cheesecloth. This step is crucial—too much water will make your bites mushy instead of delightfully crispy!
Step 2: Mash the Chickpeas
In a large mixing bowl, toss in your drained chickpeas. Use a fork or a potato masher to mash them up a bit. You’re looking for a chunky blend—some whole chickpeas add lovely texture! It’s okay to smash them a bit, but don’t go crazy; we want some bites to be a little crunchy.
Step 3: Combine the Ingredients
Add the sautéed vegetables (cooked until just soft to retain texture), grated zucchini, almond flour, grated parmesan, smoked paprika, salt, and pepper into the bowl with the chickpeas. Mix everything together with a spatula or your hands until well combined. You want a sticky blend, so it holds together when forming the patties.
Step 4: Shape the Bites
Now for the fun part! Take handfuls of the mixture and form them into small balls or patties, about the size of a golf ball or slightly bigger. You can shape them into whatever size you like—use mini sizes for party snacks, or larger shapes for a main dish!
Step 5: Bake to Crispy Perfection
Line a baking tray with parchment paper (easy cleanup is the name of the game!). Lay out the bites with a little space in between to allow for even baking. Pop them into your preheated oven and bake for 25-30 minutes, flipping halfway through. You want them golden brown, crispy on the outside, and tender on the inside. Feel free to rotate the tray halfway for an even cook!
Step 6: Enjoy the Aromatic Goodness
Once they’re out of the oven, resist the urge to dive in immediately! Allow them to rest for a few minutes; they’ll firm up as they cool. Just imagine those glorious smells wafting through your kitchen—it’s the best part! Present them with a side of your favorite dipping sauce, like tzatziki or spicy hummus, and you’re ready to serve!
Serving Suggestions
These savory bites are super versatile! Serve them warm with a sprinkle of fresh herbs like parsley or chives for a colorful touch. For a fun twist, create a platter with a variety of dips. Think garlic aioli, spicy ketchup, or classic marinara sauce!
If you want to jazz it up, try throwing a mini aperitivo party! Serve these bites alongside your favorite wine, fresh olives, and a handful of crackers. Trust me; you’ll have everyone raving about your impressive appetizer spread.
Recipe Variations
Looking to shake things up? Here are a few creative variations to try:
-
Mediterranean Twist: Fold in some chopped kalamata olives, sun-dried tomatoes, or feta cheese for a flavor boost that transports you straight to the Mediterranean.
-
Herby Delight: Add in finely chopped fresh herbs like cilantro, parsley, or basil for a burst of freshness. Choose herbs based on seasonal availability for the best flavor!
-
Spicy Kick: Toss in some diced jalapeños or a pinch of red pepper flakes for a spicy little surprise. Adjust the heat to suit your taste!
-
Cheesy Goodness: Swap the parmesan for crumbled goat cheese or cheddar for something extra cheesy and delicious.
-
Fancy Add-ins: Mix in a tablespoon of tahini or a tablespoon of nutritional yeast for that extra depth of flavor and a nutrient boost!
No matter how you switch things up, the main concept remains the same—joyful snacking at its finest!
Chef’s Notes
I’ve been tinkering with this recipe for quite some time now. What started as a simple family meal has evolved into a fun-filled party snack, and I often hear from friends and family about how much they enjoy these bites. They’ve become a staple at gatherings since everyone can enjoy them—trust me when I say the last time I made a double batch, they disappeared faster than I could serve!
More than just a recipe, I think of these Savory Zucchini Chickpea Bites as a reminder of how fun cooking can be. Experimentation is my favorite part of the journey; every new ingredient adds a twist of creativity!
FAQs and Troubleshooting
Q1: My bites fell apart while baking! What did I do wrong?
A: No worries! This can happen if there’s too much moisture in the mixture. Make sure to squeeze out excess water from your zucchini and allow your mixture to sit for a few minutes before shaping it into bites. If they still seem too loose, stir in some extra almond flour to help bind them!
Q2: Can I freeze these bites for later?
A: Absolutely! Once cooled, simply place them in a freezer-safe bag or container. They’re good for up to three months. Reheat them in the oven at 350°F (175°C) for a few minutes when you’re ready to enjoy again!
Q3: How can I make these bites spicier?
A: You can either add more smoked paprika, toss in some cayenne pepper before cooking, or serve them with a spicy dipping sauce!
Q4: Can I use other flours besides almond flour?
A: Yes! You can try oat flour, all-purpose flour, or even chickpea flour for more chickpea goodness. Just remember that the texture might slightly differ.
Nutritional Info
Each bite packs a flavorful punch while being loaded with nutrients! Here’s a rough breakdown:
- Calories: Approximately 80 cal per bite (varies with added ingredients)
- Protein: Around 3-4 grams from chickpeas and parmesan
- Fiber: 2 grams, thanks to the zucchini and chickpeas
- Fat: About 3-4 grams, depending on the type of cheese and oil used
- Vitamins & Minerals: Great sources of Vitamin C (from zucchini), iron, and potassium!
These bites are not just tasty; they’re a wholesome way to fuel your day without guilt!
Final Thoughts
And there you have it, my friends—Savory Zucchini Chickpea Bites that bring joy, flavor, and nostalgia all in one bite! Whether you’re snacking on them while binge-watching your favorite show or serving them at your next gathering, you’ll be sharing meals and memories that create smiles and warmth, much like a cozy hug.
I hope you enjoy making these as much as I do! Remember, cooking is all about creating, experimenting, and most importantly, HAVING FUN! So don your aprons, ignite those ovens, and let’s keep making food stories worth sharing. Until next time, happy cooking!
Print
Savory Zucchini Chickpea Bites
- Total Time: 45 minutes
- Yield: 4 servings 1x
- Diet: Vegetarian
Description
A delicious and healthy snack that combines zucchini and chickpeas for a crispy yet wholesome treat.
Ingredients
- 2 medium zucchinis
- 1 can (15 oz) chickpeas, drained and rinsed
- 1 cup almond flour
- 1 cup mixed vegetables, diced (bell peppers, onions, carrots, etc.)
- 1 tsp smoked paprika
- ½ cup grated Parmesan cheese
- Salt and pepper to taste
Instructions
- Preheat your oven to 400°F (200°C).
- Wash and grate the zucchinis, then squeeze out excess moisture.
- Mash the chickpeas in a large bowl until chunky.
- Combine the vegetables, grated zucchini, almond flour, Parmesan, smoked paprika, salt, and pepper with the chickpeas.
- Form small balls or patties with the mixture.
- Bake for 25-30 minutes, flipping halfway until golden brown.
- Allow to cool slightly before serving with a dipping sauce.
Notes
For a vegan version, replace Parmesan with nutritional yeast.
- Prep Time: 15 minutes
- Cook Time: 30 minutes
- Category: Snack
- Method: Baking
- Cuisine: Mediterranean
Nutrition
- Serving Size: 1 serving
- Calories: 80
- Sugar: 2g
- Sodium: 250mg
- Fat: 4g
- Saturated Fat: 1g
- Unsaturated Fat: 3g
- Trans Fat: 0g
- Carbohydrates: 9g
- Fiber: 2g
- Protein: 3g
- Cholesterol: 5mg
Keywords: snack, vegetarian, zucchini, chickpeas, healthy bites, party snack
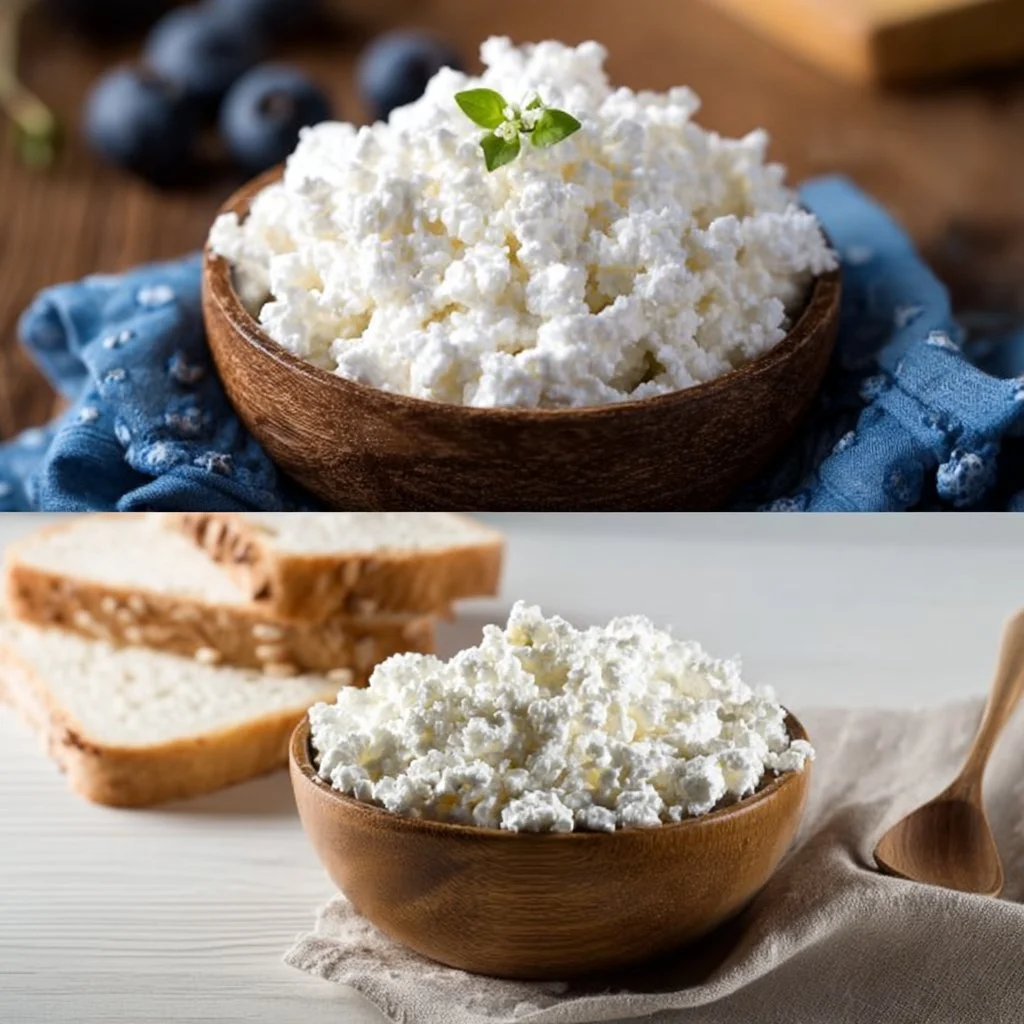
Creative Ways To Eat Cottage Cheese
Creative Ways to Eat Cottage Cheese
Hey there, fellow food lovers! It’s Beau Collier here, and today we’re diving into a delightful ingredient that’s often overlooked but is absolutely packed with flavor and nutritional goodness—cottage cheese! You might be thinking, “Cottage cheese? Really?” But hold onto your spoons because I’m about to show you that this humble dairy delight is more versatile than you ever imagined.
Whether you’re trying to up your protein game, enjoy a creamy treat without the guilt, or simply indulge in some comforting flavors, cottage cheese deserves a spotlight on your plate. From breakfast to dinner and everything in between, this little curd is the secret ingredient that can elevate your meals.
You may remember as a kid, scraping the bottom of a cottage cheese container—maybe you loved it, or maybe you thought it was just for wise old folks on diets! Either way, I’m here to change your mind and show you how cottage cheese can be your best friend in the kitchen. So, let’s roll up our sleeves and explore this creamy canvas together!
Personal Story
Growing up, my grandma was the queen of making simple ingredients shine. One of my favorite memories is her legendary “Cottage Cheese Fruit Delight.” Every summer, she’d whip up a big bowl of this sunny treat, layered with colorful fruits, a drizzle of honey, and a sprinkle of nuts. I can still hear her cheerful voice as she’d say, “Cooking is like a dance, Beau! Just follow the rhythm of the flavors!”
Those summer afternoons spent enjoying her Cottage Cheese Fruit Delight served not just as a tasty treat but as a bridge to family bonding. We’d gather around the kitchen table, armed with our forks, competing over who could make the most beautiful bowl. It wasn’t just about food; it was about love, laughter, and a shared passion for good eats. Now, as a grown-up chef, I cherish those memories, and my mission is to help you create your own delicious and heartwarming moments with simple, feel-good ingredients like cottage cheese.
Ingredients
Here’s what you’ll need for some creative cottage cheese delights:
-
Cottage Cheese: The star of the show! Creamy, protein-packed, and low in fat, cottage cheese can be enjoyed on its own or as a base for countless combinations. If you’re looking for a lower-fat option, go for the 1% or fat-free varieties.
-
Fruit (e.g., Pineapple, Peaches, Berries): Fresh, frozen, or canned; fruits add natural sweetness and vibrant color. Pineapple and peaches create a tropical vibe, while berries bring antioxidants and tartness. Feel free to swap with whatever fruits you have on hand!
-
Honey or Maple Syrup: A touch of sweetness elevates the dish. Honey is great for drizzling, while maple syrup adds a unique flavor. For a sugar-free option, consider using agave syrup or a sugar substitute of your choice.
-
Nuts (e.g., Almonds, Walnuts): Nuts add a crunchy texture and healthy fats. Almonds lend a delicate flavor, while walnuts provide a robust nutty profile. Use your favorites or even blend different types for a mixed-nut crunch!
-
Seeds (e.g., Chia Seeds, Flaxseeds): Nutritional powerhouses packed with omega-3s and fiber, seeds take your cottage cheese game to the next level. Mix them in for an extra health boost or sprinkle on top for a beautiful finish.
-
Granola: A crunchy topping that offers sweetness and texture. Choose a low-sugar variety or make your own! It’s great for adding crunchiness in breakfasts or snacks.
-
Vegetables (e.g., Cucumber, Bell Pepper): Who says cottage cheese is just for sweet dishes? Adding finely chopped veggies creates a savory base. Cucumber brings a refreshing crunch while bell pepper adds color and sweetness.
-
Herbs (e.g., Chives, Parsley): Fresh herbs enhance the flavor profile without adding calories. Chives work wonders in savory creations while parsley can brighten up both sweet and savory dishes.
-
Spices (e.g., Paprika, Black Pepper): Spice it up! A dash of paprika adds warmth, and black pepper gives a little kick. Experiment with your favorite spices to create unique flavors.
-
Olive Oil: A drizzle of high-quality olive oil balances flavors and enriches the dish. It’s essential for those savory options that meld cottage cheese with heartier ingredients.
-
Salt: Just a pinch gives depth to your dish, enhancing all the flavors. Remember, moderation is key!
Don’t worry if you don’t have all these ingredients at home. This recipe is incredibly adaptable, so swap things out based on your pantry’s contents and your personal preferences!
Step-by-Step Instructions
Ready to bring cottage cheese out of the shadows? Let’s dive into some creative ways to enjoy it!
1. Cottage Cheese Fruit Bowl
-
Step 1: Start with a generous scoop of cottage cheese in a bowl.
- Tip: For an even creamier texture, give it a quick whisk before serving!
-
Step 2: Chop your favorite fruits into bite-sized pieces.
- Note: If using canned fruits, make sure to drain them well to avoid excess liquid.
-
Step 3: Arrange the fruit artfully over the cottage cheese. Take your time! Presentation matters, and this is your chance to get creative!
-
Step 4: Drizzle honey or maple syrup over the top.
- Chef Hack: If your honey is thick, warm it slightly in the microwave to make drizzling easier.
-
Step 5: Sprinkle crunchy nuts and seeds on top for added texture.
-
Step 6: For the finishing touch, add a sprinkle of cinnamon or nutmeg for extra warmth.
2. Savory Cottage Cheese Snack
-
Step 1: Grab a bowl and add a serving of cottage cheese.
- Tip: Opt for the 2% or whole-fat versions for a more decadent flavor.
-
Step 2: Finely chop your choice of vegetables (cucumber and bell pepper are excellent options).
- Time-Saving Hint: You can use a food processor to make this step ultra-fast!
-
Step 3: Mix the veggies into the cottage cheese, ensuring everything is evenly distributed.
-
Step 4: Drizzle with olive oil and season with salt, black pepper, and paprika.
-
Step 5: Garnish with chopped fresh herbs for a pop of color and flavor.
3. Breakfast Cottage Cheese Parfait
-
Step 1: Start with a glass (or your favorite mug!) and layer cottage cheese at the bottom.
- Chef Insight: Using a clear container makes it visually stunning!
-
Step 2: Next, layer in granola for crunch.
-
Step 3: Follow it up with a layer of fruit, then repeat until you reach the top—cottage cheese, granola, fruit, repeat!
-
Step 4: Top it all off with a drizzle of honey and some extra berries for a showstopper breakfast!
4. Cottage Cheese Dip
-
Step 1: Use a bowl to combine cottage cheese with spices and herbs to create a smooth dip.
- Tip: Blend it in a food processor for a silky-smooth consistency.
-
Step 2: Adjust flavor with olive oil, salt, and pepper to taste.
-
Step 3: Serve this dip with fresh veggies, crackers, or pita bread for a light snack or appetizer!
Now that you’ve prepared these simple yet delightful recipes, let’s find out how to plate and serve them!
Serving Suggestions
When it comes to serving these cottage cheese creations, presentation is key! Here are some ideas:
-
For Fruit Bowls: Use colorful bowls that contrast with the creamy white of the cottage cheese. Garnish with a sprig of mint or edible flowers for that extra oomph.
-
Savory Snacks: Serve in a rustic wooden bowl or on a cheeseboard with assorted crackers, fresh vegetable sticks, and olives. This invites sharing and makes for an eye-catching display!
-
Breakfast Parfaits: The clear layering of your parfaits deserves the spotlight. Place them in tall glasses or mason jars, and don’t forget to top them with a sprinkle of additional granola and a fruit slice for a pop of color.
-
Dips: Present your dip in a small bowl in the center of a platter filled with colorful veggie sticks and sturdy crackers.
Recipe Variations
Feeling adventurous? Here are some creative twists you can put on your cottage cheese dishes:
-
Tropical Twist: Mix cottage cheese with diced mango, shredded coconut, and a squeeze of lime for a beachy vibe.
-
Spicy Cottage Cheese Dip: Stir in jalapeños, cumin, and lime juice for a zesty kick.
-
Herbed Cottage Cheese Spread: Add fresh herbs, garlic powder, and a sprinkle of lemon zest to create a delicious spread for sandwiches.
-
Dessert Delight: Blend cottage cheese with cocoa powder and sweetener for a healthy chocolate pudding that satisfies your sweet tooth.
-
Protein-Packed Smoothie: Blend cottage cheese with a banana, a handful of spinach, and almond milk for a smoothie that keeps you full and energized!
Chef’s Notes
The beauty of cottage cheese lies in its adaptability. When I was starting as a chef, I’d whip up a quick snack using whatever was in my fridge. From leftover veggies to that ripe avocado begging to be used, it’s a canvas that welcomes improvisation.
Remember when I told you about my grandma’s Cottage Cheese Fruit Delight? I’m now inspired to add an endless variety of twists to that classic recipe! Whether you’re enjoying it with a morning cup of coffee or a light lunch, cottage cheese is versatile enough to keep surprising you. With each meal, don’t hesitate to personalize it and make it your own.
FAQs and Troubleshooting
Q1: Can I use flavored cottage cheese?
A: Absolutely! Flavored varieties can add an unexpected twist. Just watch out for added sugars!
Q2: My cottage cheese is too watery! What can I do?
A: If your cottage cheese is watery, try draining it in a fine sieve or cheesecloth to remove excess liquid. It’ll create a creamier texture for your dishes.
Q3: How long does cottage cheese last in the fridge?
A: Typically, unopened cottage cheese can last up to a couple of weeks, while opened cheese is best consumed within five to seven days. Always check the expiration date!
Q4: What’s the best way to store leftover cottage cheese?
A: Seal it tightly in its original container or transfer it to an airtight container. Keep it stored in the fridge to maintain freshness.
Nutritional Info
Cottage cheese is a nutritional powerhouse! Here’s a quick rundown of what makes it so fantastic:
- Protein: Full of high-quality protein, it can help keep you full longer, perfect for muscle maintenance and weight management.
- Calcium: Rich in calcium, it’s excellent for bone health.
- Low in Calories: Compared to other dairy products, cottage cheese has fewer calories and fat, making it a healthy choice for snacking or meal prep.
- Versatile: Its mild flavor makes it an excellent canvas for both savory and sweet dishes—creating endless possibilities for nutrition!
Final Thoughts
Cottage cheese doesn’t have to be just a sidekick; it can be the star of your kitchen adventures! Whether it’s mixed with fruits for breakfast brimming with sweetness, doused with herbs and veggies for a savory snack, or even standing in as the base for your next favorite dip—cottage cheese brings creativity and health right to your bowl.
So next time you see that lonely tub of cottage cheese lurking in the fridge, remember this post and the endless possibilities it holds. Dive in, get creative, and let your taste buds lead the way. Here at Feastical, we believe food should offer comfort, joy, and a sense of togetherness—even when it’s just a dish of cottage cheese.
Until next time, happy cooking! ✨
Print
Creative Ways to Eat Cottage Cheese
- Total Time: 15 minutes
- Yield: 2 servings
- Diet: Vegetarian
Description
Explore versatile and delicious ways to enjoy cottage cheese, from sweet fruit bowls to savory snacks and dips.
Ingredients
- Cottage Cheese
- Fruit (e.g., Pineapple, Peaches, Berries)
- Honey or Maple Syrup
- Nuts (e.g., Almonds, Walnuts)
- Seeds (e.g., Chia Seeds, Flaxseeds)
- Granola
- Vegetables (e.g., Cucumber, Bell Pepper)
- Herbs (e.g., Chives, Parsley)
- Spices (e.g., Paprika, Black Pepper)
- Olive Oil
- Salt
Instructions
- Start with a generous scoop of cottage cheese in a bowl.
- Chop your favorite fruits into bite-sized pieces.
- Arrange the fruit artfully over the cottage cheese.
- Drizzle honey or maple syrup over the top.
- Sprinkle crunchy nuts and seeds on top for added texture.
- Add a sprinkle of cinnamon or nutmeg for extra warmth.
Notes
This recipe is highly adaptable; feel free to swap ingredients based on what you have on hand.
- Prep Time: 10 minutes
- Cook Time: 5 minutes
- Category: Snack
- Method: No Cooking
- Cuisine: American
Nutrition
- Serving Size: 1 serving
- Calories: 250
- Sugar: 15g
- Sodium: 360mg
- Fat: 10g
- Saturated Fat: 2g
- Unsaturated Fat: 8g
- Trans Fat: 0g
- Carbohydrates: 23g
- Fiber: 3g
- Protein: 20g
- Cholesterol: 10mg
Keywords: cottage cheese, healthy recipes, snacks, fruit bowl, savory snacks