Crispy Mozzarella Sticks in 15 Minutes: Quick Snack Recipe
Irresistible Mozzarella Cheese Sticks: A Must-Try Recipe!
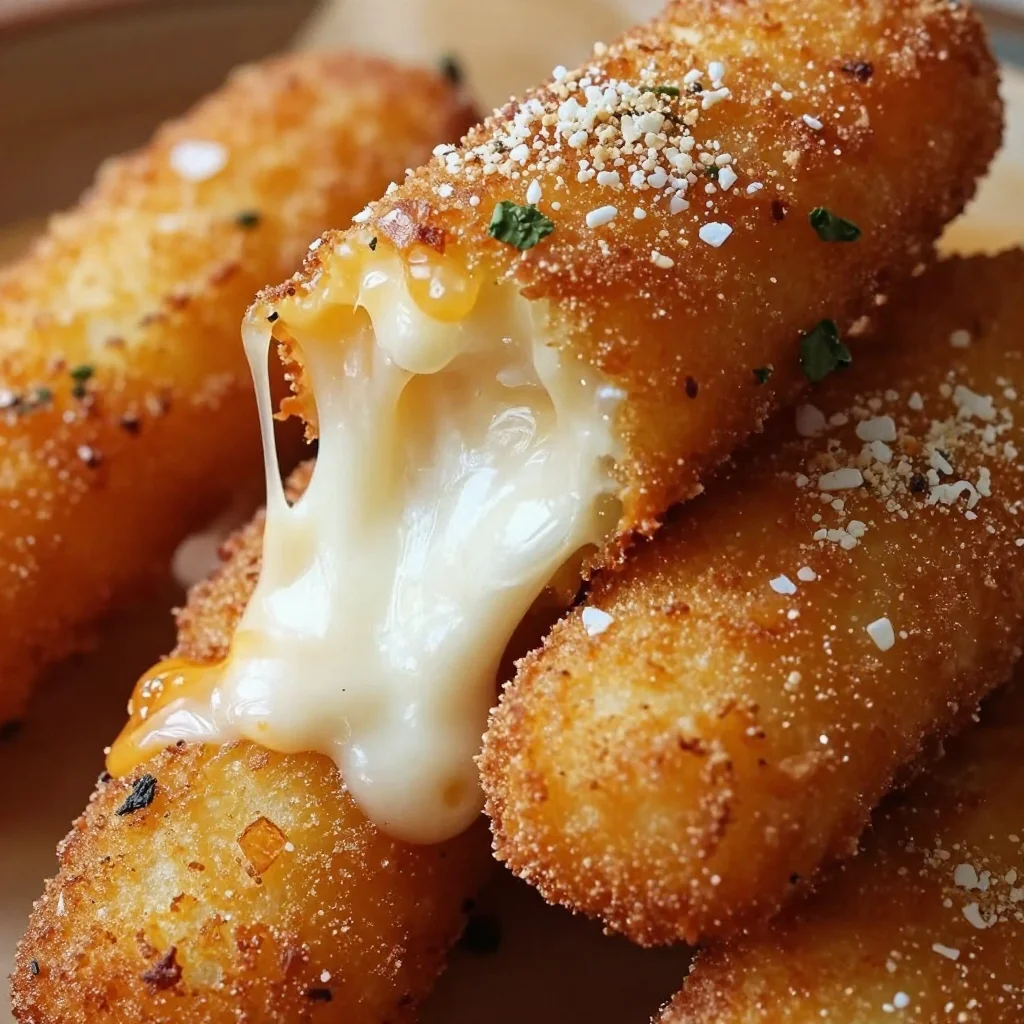
Hey, food lovers! It’s Beau Collier here, and today, we’re diving into one of the most delightful, gooey, and golden snacks you could ever make—Mozzarella Cheese Sticks! Trust me; these little bites of heaven will transport you back to your favorite pizza joint, or perhaps that beloved fair where you first discovered the magic of deep-fried cheese. With every stretchy, savory bite, you’ll feel like a kid again!
Making homemade mozzarella cheese sticks is not only super fun, but it’s also a great way to impress guests or spoil the family on movie night. Plus, there’s nothing quite like the satisfaction of pulling that cheese apart and watching it stretch like taffy. Ready your frying pan, folks, because we’re about to get cheesy!
A Trip Down Memory Lane
Let me share a little kitchen story with you. The first time I made mozzarella cheese sticks was at a family gathering, and boy, was that an adventure! I had gathered up some cousins and decided we should impress the adults with our snack-making prowess. Armed with a block of mozzarella and a smattering of ingredients I’d gathered, we set off on our cheesy quest.
Well, let’s just say it didn’t go entirely as planned. We were a bit too ambitious; flour ended up on the floor, breadcrumbs flew through the air like glitter at a party, and let’s not even talk about the oil splatters! But once we finally managed to fry our first batch of cheese sticks, the joy on everyone’s faces made all the chaos worth it. Those gooey, cheesy sticks disappeared faster than we could make them, and from that day on, I’ve cherished the delightful simplicity of this recipe and the laughter that comes with it.
Ingredients
Alright, let’s gather our ingredients, shall we? Here’s everything you need to whip up these mozzarella delights:
- 12 ounces mozzarella cheese: You can use string cheese or a block cut into sticks. If you want a fun twist, try flavored mozzarella for a kick!
- 1 cup all-purpose flour: This is your base for coating. Use gluten-free flour for a gluten-free option.
- 2 large eggs, beaten: This helps the breadcrumbs stick. For a vegan option, use a flax egg (1 tablespoon ground flaxseed combined with 3 tablespoons water).
- 1 cup seasoned breadcrumbs: Store-bought is great, but if you’re feeling adventurous, make your own by blending stale bread with your favorite spices!
- ½ teaspoon garlic powder (optional): Adds a lovely kick! Feel free to skip it if you’re not into garlic.
- ½ teaspoon Italian seasoning (optional): This will elevate the flavor profile. Experiment with your favorite herbs!
- Vegetable oil (for frying): Canola or peanut oil work great. You can air-fry for a healthier version!
Step-by-Step Instructions
Ready to get cheesy? Let’s go! Here’s how to make those irresistible mozzarella sticks step by step:
-
Prep Your Stations: First, set up an assembly line for easy coating. Place the flour in one bowl, the beaten eggs in another, and the breadcrumbs mixed with garlic powder and Italian seasoning in a third bowl. Trust me, this prep will save you time and sticky fingers later!
-
Cut the Cheese: If you’re using a block of mozzarella, cut it into sticks about 3 to 4 inches long. If you’re using string cheese, just unwrap those bad boys!
-
Coat the Sticks: Now for the fun part—dipping! Start by coating each mozzarella stick in flour, shaking off any excess. Then, dip it into the beaten eggs, ensuring it’s fully coated. Finally, roll it in the breadcrumb mixture. I like to press the breadcrumbs onto the cheese to ensure they stick well.
-
Double-Dip (Optional): For an extra crispy result, you can repeat the egg and breadcrumb steps. This double coating will give your cheese sticks that extra crunch you crave!
-
Chill for a Bit: Before frying, lay the coated cheese sticks on a plate and pop them into the freezer for about 15-20 minutes. This step helps to firm up the cheese and prevents it from melting too quickly during frying.
-
Heat the Oil: In a large skillet, pour enough vegetable oil to cover the bottom, about ½ inch deep. Heat the oil over medium-high until hot, but not smoking. You can test if it’s ready by dropping a breadcrumb in—if it sizzles, you’re good to go!
-
Fry ‘Em Up: Carefully place a few cheese sticks in the hot oil, making sure not to overcrowd the pan. Fry them for 1-2 minutes on each side or until golden brown. Use tongs or a slotted spoon to turn them and drain the excess oil on paper towels once they’re done.
-
Repeat: Continue frying the rest of the cheese sticks, adjusting the heat as necessary to keep the oil at the right temperature.
-
Serve: While they’re still hot, serve your gooey mozzarella sticks immediately with marinara sauce or your favorite dipping sauce. You’ll want to savor every cheesy bite!
Serving Suggestions
Presentation matters, folks! To make your mozzarella cheese sticks even more appetizing, consider serving them on a beautiful wooden platter or a colorful plate with a small bowl of warm marinara sauce on the side. You could sprinkle some fresh parsley or basil on top for a pop of color and freshness.
For a fun game day snack, pair these cheesy wonders with a side of spicy ranch or even sriracha for those who like a bit of heat. They’re also fabulous served alongside a crisp salad for balance. Just grab a toothpick and let your guests dip away!
Recipe Variations
Feeling adventurous? Here are a few creative twists you can try with your mozzarella cheese sticks:
-
Bacon-Wrapped: Wrap each cheese stick with a slice of bacon before frying for a smoky, meaty flavor. Just be aware that they’re even more indulgent—perfect for a party!
-
Spicy Jalapeño: Add finely chopped jalapeños to your breadcrumb mixture for an extra kick. You can also serve with chipotle or spicy marinara for an added heat boost!
-
Herb Crust: Instead of traditional breadcrumbs, try using crushed herbs or even a mixture of crushed tortilla chips for a unique flavor.
-
Cheese Mix: For a fun twist, use different types of cheese like pepper jack, cheddar, or Gouda along with mozzarella to create a gooey, flavorful combination.
-
Air Frying: For a healthier alternative, you can air fry your cheese sticks. Just spray the sticks lightly with olive oil and cook according to your air fryer’s instructions.
Chef’s Notes
Oh, where do I begin? This recipe has been a staple in my kitchen for years. Fun fact: the first time I attempted cheese sticks in my adult life, I was wearing a white shirt. Spoiler alert: it didn’t end well! Ever since that day, I’ve learned to wear an apron and embrace the culinary chaos.
The great thing is that this recipe has evolved over time. When I started, I strictly followed a standard breadcrumb coating; now, I experiment with flavors and ingredients. It’s all about what feels good to you. Remember, the best kitchen stories come from trying new things, whether they result in success or, let’s say, “character-building” experiences!
FAQs and Troubleshooting
-
Why did my cheese sticks burst open while frying?
- This can happen if the oil is too hot or if they weren’t chilled long enough. Try chilling them longer and adjusting the heat!
-
Can I bake these instead of frying?
- Absolutely! Preheat your oven to 400°F (200°C) and place the cheese sticks on a baking sheet lined with parchment. Spray with cooking oil and bake for about 15 minutes or until golden. They might not be as gooey but still delicious!
-
How can I make sure they stay crispy?
- Serve immediately after frying. If you have leftovers, pop them into the oven to crisp them up again instead of the microwave.
-
Can I freeze the cheese sticks?
- Yes! Before frying, freeze them. Once they’re firm, you can store them in a zip-top bag. When you’re ready to enjoy, fry them straight from the freezer—just add a minute or two to the fry time.
Nutritional Info
While comfort food isn’t always synonymous with health food, I believe in balance. Each cheese stick contains about 150 calories, with 10g of fat and 8g of protein. Rich in cheesy goodness and always a crowd-pleaser, these treats fit into an occasional indulgence. For a lighter version, opt to bake or air-fry, and serve with plenty of veggies for balance!
Final Thoughts
Mozzarella cheese sticks are more than just a snack—they’re a piece of nostalgia, a source of joy, and the ultimate party pleaser. With this recipe, you’ll never again have to settle for mediocre frozen varieties when you can whip up a homemade batch in no time. So, roll up those sleeves, channel your inner kid in the kitchen, and let your taste buds revel in the gooey magic of mozzarella.
I can’t wait to see how you put your spin on this recipe! Tag your photos and share your cheesy adventures with me. Happy cooking, and remember: there are no mistakes in the kitchen, just opportunities for deliciousness! 🍽️🧀
Print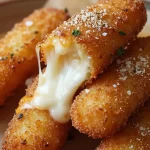
Irresistible Mozzarella Cheese Sticks
- Total Time: 25 minutes
- Yield: 4 servings 1x
- Diet: Vegetarian
Description
Delightful, gooey, and golden mozzarella cheese sticks, perfect for parties or movie nights.
Ingredients
- 12 ounces mozzarella cheese, cut into sticks
- 1 cup all-purpose flour
- 2 large eggs, beaten
- 1 cup seasoned breadcrumbs
- ½ teaspoon garlic powder (optional)
- ½ teaspoon Italian seasoning (optional)
- Vegetable oil (for frying)
Instructions
- Prep your stations by setting up bowls of flour, beaten eggs, and breadcrumb mixture.
- Cut the mozzarella into sticks if using a block.
- Coat each stick in flour, dip in eggs, and roll in breadcrumbs.
- Double-Dip for a crispier result (optional).
- Chill the coated sticks in the freezer for 15-20 minutes.
- Heat vegetable oil in a skillet over medium-high heat.
- Fry the sticks for 1-2 minutes on each side until golden brown.
- Repeat with the remaining sticks.
- Serve immediately with marinara sauce.
Notes
For a healthier option, consider air-frying the cheese sticks.
- Prep Time: 15 minutes
- Cook Time: 10 minutes
- Category: Snack
- Method: Frying
- Cuisine: Italian
Nutrition
- Serving Size: 1 serving
- Calories: 150
- Sugar: 1g
- Sodium: 300mg
- Fat: 10g
- Saturated Fat: 4g
- Unsaturated Fat: 5g
- Trans Fat: 0g
- Carbohydrates: 10g
- Fiber: 1g
- Protein: 8g
- Cholesterol: 70mg
Keywords: mozzarella, cheese sticks, snack, party food, baking
Crispy Garlic Cheese Ritz Bits: 15-Minute Weeknight Snack Hack
Cheesy Garlic Ritz Bits Snacks: A Culinary Hug for Your Taste Buds
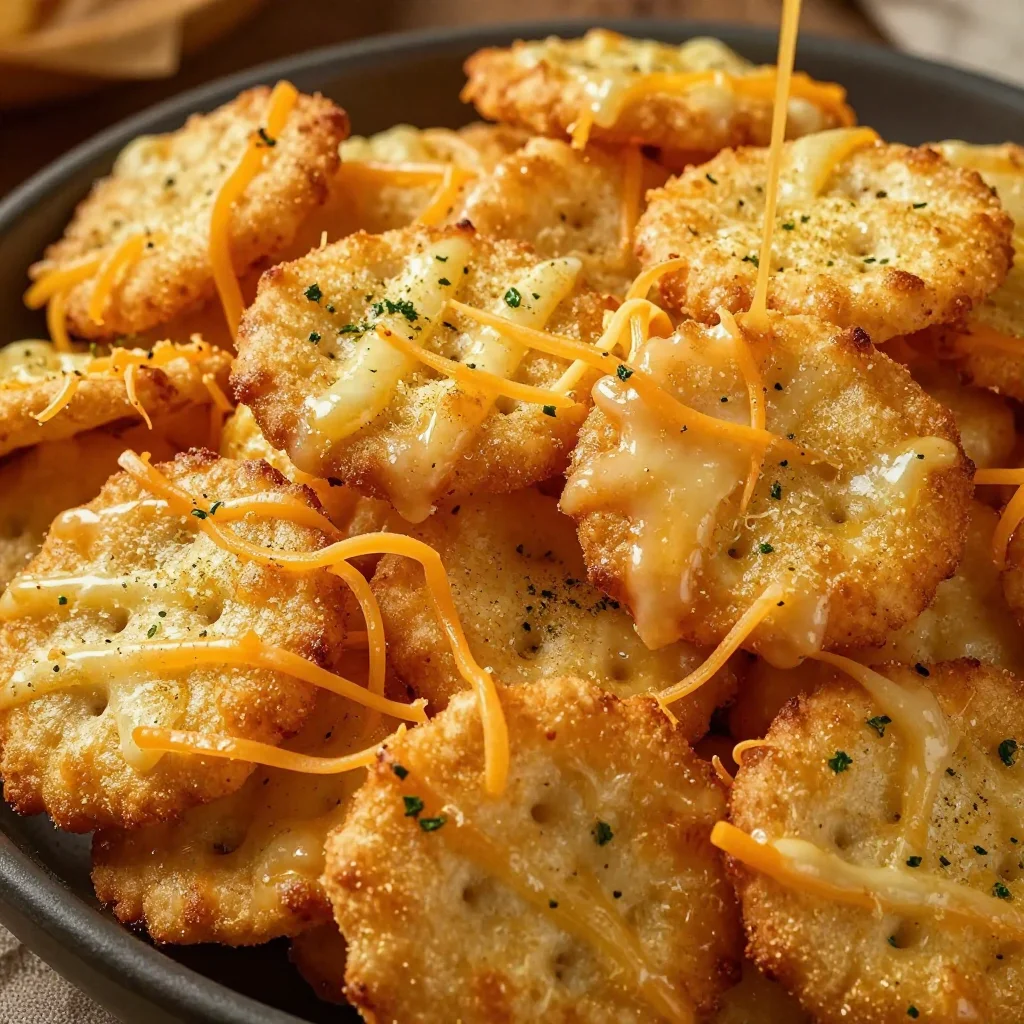
Hey food lovers! It’s Beau Collier here, and today, I want to share with you a recipe that’s near and dear to my heart—Cheesy Garlic Ritz Bits Snacks. If you’re anything like me, there’s just something about tiny, crunchy snacks that come together effortlessly and pack a flavor punch. These cheesy, garlicky little bites not only make perfect party pleasers but also are fantastic for those cozy movie nights at home.
You might wonder why Ritz Bits? Let me tell you, they’re like little edible treasures. These bite-sized crackers are light, buttery, and, quite frankly, irresistible. The moment you pop that golden cracker in your mouth, it’s a mini explosion of comfort that brings back fond memories. Then, when you amp them up with cheese and garlic—oh boy—it’s a whole new level of deliciousness.
My First Kitchen Adventure with Ritz Bits
Let’s rewind to my childhood for a sec. I remember weekends at my grandmother’s house, and that meant something special was always cooking. She had these secret snacks—her “kitchen surprises”—that she would whip up like magic. One day, she decided to experiment with those classic Ritz Crackers, and let me tell you, it was a game-changer. As a kid, I was mesmerized watching her melt butter, sprinkle garlic powder, and introduce the cheesy goodness.
We would sit cross-legged on the floor, munching on these tasty bites while watching our favorite cartoons. The shared moments, full of laughter and crumbs, created an eternal bond between food and family for me. This recipe is my ode to those days—combining nostalgia with a touch of culinary creativity. Let’s dive into making these crunchy delights!
Ingredients
Here’s what you’ll need to create these Cheesy Garlic Ritz Bits Snacks:
-
1 box (12.5 oz) Ritz Bits Crackers, Original
- Perfectly bite-sized and buttery, these crackers are the foundation of our snack!
-
1/2 cup (1 stick) Unsalted Butter, melted
- Adds a rich flavor and helps everything stick together. You can swap this out for olive oil or a vegan butter alternative if you want to make it dairy-free.
-
2 tbsp Garlic Powder
- Because who doesn’t love garlic? If you’re feeling adventurous, feel free to use fresh minced garlic—1 clove gives you that vibrant flavor kick.
-
1 tbsp Onion Powder
- This adds depth to your snack. If you have fresh onions on hand, finely diced shallots can be an awesome substitute for a zestier version.
-
1 tsp Dried Parsley Flakes
- A pop of color and mild flavor. If you have fresh parsley lying around, use it! About a tablespoon of chopped fresh parsley will do the trick.
-
1/2 tsp Fine Sea Salt
- Enhances all the flavors. If you’re watching your salt intake, feel free to reduce this amount a tad.
-
1/4 tsp Freshly Ground Black Pepper
- Just a pinch gives a warm, peppery finish. Adjust according to your spice tolerance!
-
1/2 cup Finely Grated Parmesan Cheese
- Adds that irresistible cheesy flavor we all love. For a twist, try using Pecorino Romano for a more robust taste.
-
1/2 cup Finely Shredded Sharp Cheddar Cheese
- The sharpness of this cheese complements the richness perfectly. Feel free to use your favorite cheese or a blend of cheeses—it’s all good!
-
1/4 tsp Smoked Paprika (optional)
- For some added depth and smokiness. If you don’t have it, no worries—it’s fantastic either way.
-
Pinch Cayenne Pepper (optional)
- For those who like a little heat! A pinch adds excitement without overwhelming the flavor.
Step-by-Step Instructions
Alright, let’s get cooking! Here’s how to make your Cheesy Garlic Ritz Bits Snacks step by step:
-
Preheat Your Oven
Preheat your oven to 350°F (175°C). This will ensure that your snacks bake evenly and get to that perfect crispy state. -
Melt the Butter
In a small saucepan, melt the stick of unsalted butter over low heat. It’s not just about melting; stir it gently to prevent it from browning. As it melts, your kitchen will smell heavenly, and you’ll want to gobble it all up! -
Mix in the Spices
Once your butter is melted, take it off the heat. In a large bowl, combine the melted butter, garlic powder, onion powder, dried parsley, sea salt, black pepper, smoked paprika, and cayenne pepper if you’re using it. Just whisk it for about 30 seconds until it’s all combined, creating a luscious, fragrant marinade for our crackers. -
Add the Cheeses
Next, fold in the grated Parmesan and shredded cheddar cheese. The mixture will start to clump together, and that’s exactly what we want! This cheesy goodness is going to coat our Ritz Bits to perfection. -
Coat the Ritz Crackers
Now comes the fun part—gently add the Ritz Bits Crackers to the bowl. With a spatula or your hands, carefully toss the crackers in the buttery, cheesy mixture until every piece is beautifully coated. (And yes, it’s totally okay to sneak a taste; I won’t tell anyone!) -
Spread on a Baking Sheet
Line a baking sheet with parchment paper to prevent sticking. Spread the coated crackers out in a single layer. Make sure they aren’t overlapping too much; we want even baking! -
Bake to Golden Perfection
Pop them in the preheated oven and bake for 10-12 minutes, or until they turn a lovely golden brown. The smell in your kitchen will be absolutely irresistible, and you might find it hard to wait! -
Cool and Serve
Remove from the oven and let them cool on the baking sheet for a few minutes before serving. This helps them crisp up even more!
Now that you’ve made your Cheesy Garlic Ritz Bits Snacks, it’s time to enjoy the fruits of your labor!
Serving Suggestions
When it comes to serving your Cheesy Garlic Ritz Bits, the world is your oyster—or should I say, your cracker! Here’s how I love to plate them:
-
Classic Snack Bowl
Serve them warm in a beautiful bowl or dish. Let your guests dive in, either with their hands or with toothpicks, adding a touch of playful elegance. -
Pair with Dips
These snacks are fabulous on their own, but they shine even brighter alongside dips. Try a tangy ranch dressing or a warm, cheesy dip for that extra wow factor. -
Garnish with Fresh Herbs
Add a sprinkle of fresh parsley or chives on top right before serving for a pop of color and flavor. It adds a touch of gourmet flair that will impress your friends and family!
Recipe Variations
Now, let’s get creative! Here are some fun twists you can try with these Cheesy Garlic Ritz Bits Snacks:
-
Spicy Jalapeño: Mix in some finely chopped jalapeños for a spicy kick. You can also use pepper jack cheese for an extra cheesy heat.
-
Herb-Infused: Experiment with different herbs! Use fresh thyme or rosemary for a fragrant twist.
-
Italian Style: Add some Italian seasoning blend to the mix and swap out Parmesan for mozzarella for a pizza-flavored snack.
-
Sweet and Savory: Drizzle with honey after baking for a unique sweet-and-savory combo. You won’t regret it!
-
Buffalo Flavor: Toss in some buffalo sauce for a tangy, spicy zing, and pair with ranch for dipping.
Chef’s Notes
This recipe has seen a bit of evolution over time. Originally, I stumbled upon it during a potluck, where a friend brought a simple garlic cracker mix. I knew I could jazz it up with cheese and spices, turning it into something special. It’s become a go-to for me; be it a casual game night or a fancy gathering, it never disappoints!
And let me share a quick kitchen story—once, while trying to impress friends, I accidentally overbaked them. Instead of turning sad and mushy, they turned into the crispiest, cheesiest bites ever! Let’s just say, sometimes mistakes lead to delightful surprises, so keep experimenting!
FAQs and Troubleshooting
Here are some common questions I get about making these cheesy snacks:
-
Can I make these ahead of time?
Absolutely! You can prepare and coat the crackers, then store them in an airtight container in the fridge. To serve, just bake before the gathering! -
What do I do if they burn?
Baking speed varies by oven. If you see them browning quickly, turn your oven down to 325°F and check them frequently. Remember, they’ll continue to cook a little after coming out. -
Can I use other crackers?
Of course! Feel free to experiment with other types of crackers—just keep in mind the flavors might change slightly. -
How do I store leftovers?
Keep any leftovers in an airtight container at room temperature for a few days. They won’t last long—we can’t resist them too much, right?
Nutritional Info
For those keeping an eye on nutritional content, here’s a rough estimate per serving (based on 24 servings):
- Calories: 130
- Total Fat: 8g (Saturated Fat: 4g)
- Cholesterol: 20mg
- Sodium: 180mg
- Total Carbohydrates: 10g (Dietary Fiber: 0g, Sugars: 1g)
- Protein: 2g
Feel free to adjust the ingredients based on your dietary needs!
Final Thoughts
There you have it, my fabulous foodie friends—Cheesy Garlic Ritz Bits Snacks that are sure to become a staple in your kitchen. From family gatherings to cozy nights in, these bites bring joy and flavor to any occasion.
Remember, cooking is all about joy, exploration, and comfort—just like these snacks. So grab your ingredients, channel your inner chef, and get ready for your kitchen to smell like a warming hug of garlic and cheese.
Until next time, keep experimenting, keep enjoying, and most importantly—keep sharing good food with the people you love. Cheers to happy cooking!
Print
Cheesy Garlic Ritz Bits Snacks
- Total Time: 22 minutes
- Yield: 24 servings 1x
- Diet: Vegetarian
Description
Delicious, bite-sized cheesy and garlicky Ritz Bits that are perfect for parties or cozy movie nights.
Ingredients
- 1 box (12.5 oz) Ritz Bits Crackers, Original
- 1/2 cup (1 stick) Unsalted Butter, melted
- 2 tbsp Garlic Powder
- 1 tbsp Onion Powder
- 1 tsp Dried Parsley Flakes
- 1/2 tsp Fine Sea Salt
- 1/4 tsp Freshly Ground Black Pepper
- 1/2 cup Finely Grated Parmesan Cheese
- 1/2 cup Finely Shredded Sharp Cheddar Cheese
- 1/4 tsp Smoked Paprika (optional)
- Pinch Cayenne Pepper (optional)
Instructions
- Preheat your oven to 350°F (175°C).
- Melt the stick of unsalted butter over low heat in a small saucepan.
- Mix butter with garlic powder, onion powder, dried parsley, sea salt, black pepper, smoked paprika, and cayenne in a large bowl.
- Add the grated Parmesan and shredded cheddar cheese to the bowl and fold gently.
- Coat the Ritz Bits Crackers in the cheesy mixture with a spatula or your hands.
- Spread the coated crackers on a parchment-lined baking sheet in a single layer.
- Bake for 10-12 minutes, until golden brown.
- Cool on the baking sheet before serving.
Notes
You can substitute the butter with olive oil or vegan butter for a dairy-free version. To add heat, mix in chopped jalapeños or use pepper jack cheese.
- Prep Time: 10 minutes
- Cook Time: 12 minutes
- Category: Snack
- Method: Baking
- Cuisine: American
Nutrition
- Serving Size: 1 serving
- Calories: 130
- Sugar: 1g
- Sodium: 180mg
- Fat: 8g
- Saturated Fat: 4g
- Unsaturated Fat: 4g
- Trans Fat: 0g
- Carbohydrates: 10g
- Fiber: 0g
- Protein: 2g
- Cholesterol: 20mg
Keywords: Ritz snacks, cheesy snacks, garlic bites, party appetizers