
Hawaiian Chicken Salad
Hawaiian Chicken Salad: A Taste of Aloha!
Aloha and welcome to Feastical, fellow food enthusiasts! Today, we’re diving into a dish that’s as sunny and vibrant as a Hawaiian sunset—Hawaiian Chicken Salad! Seriously, if you’re looking for a recipe that balances delightful flavors, freshness, and a touch of island flair, you’ve found it.
Why am I so excited about this salad? Because it’s a celebration in a bowl! With tender, shredded chicken, juicy pineapple, crunchy macadamia nuts, and a zesty dressing, it brings a little taste of paradise to your kitchen. Plus, you can whip it up in no time, making it perfect for a quick lunch, a potluck, or even a casual dinner on a warm summer evening.
The best part? This Hawaiian Chicken Salad is not just about satisfying your hunger; it’s about evoking nostalgia and creating beautiful memories with those you love. Picture this: gathering with friends and family on a sun-drenched patio, laughter filling the air while you savor each refreshing bite. It’s more than a dish; it’s an experience—a way to connect, share, and savor life together.
So roll up your sleeves, grab your favorite apron, and let’s get started! Whether you’re a kitchen whiz or a total newbie, I promise you can master this Hawaiian Chicken Salad recipe and impress everyone around you. Trust me; I’ll be right there with you, guiding you every step of the way!
Personal Story
Let me take you back to my first encounter with Hawaiian Chicken Salad. It was several years ago during a vibrant summer gathering at a friend’s backyard BBQ. The scents of grilling burgers mingled with the salty ocean breeze, and as the sun dipped low, my plate was filled with colorful dishes.
Then, I spotted it—the Hawaiian Chicken Salad, nestled amid a rainbow of other dishes. My friend, who was known for her cooking prowess, had made it. One bite, and I was instantly transported to a tropical paradise. The sweetness of the pineapple, the crunch of the macadamia nuts, and the creamy dressing danced like a festive luau in my mouth!
The salad sparked not just a tastebud adventure; it ignited a passion in me to recreate and share this wonderful dish. That gathering taught me the power of food to weave stories and create connections. And here I am, sharing this recipe with you to carry on that tradition of bringing joy through delicious culinary adventures!
Ingredients
Here’s what you’ll need to make your Hawaiian Chicken Salad unforgettable:
-
2 cups cooked chicken, shredded
- Use rotisserie chicken for convenience or poach your own. Leftovers work great here too!
-
1 cup pineapple chunks
- Fresh, canned, or even grilled—pineapple always brings that juicy sweetness. If you’re not a fan, try mango as an alternative!
-
1/2 cup macadamia nuts, chopped
- These creamy, buttery nuts add a rich texture. Pine nuts or chopped pecans can serve as suitable substitutes if needed.
-
1/4 cup red onion, diced
- Red onion offers a mild bite. Allow it to soak in cold water for a few minutes to mellow the flavor if you’re sensitive to raw onions.
-
1/4 cup celery, diced
- Celery brings crunch! For a twist, consider cucumber for a refreshing take.
-
1/4 cup fresh cilantro, chopped
- Cilantro adds an aromatic note. If you’re not a fan, fresh parsley or basil can work just as well.
-
1/4 cup plain Greek yogurt or mayo
- I love Greek yogurt for its tanginess and health benefits, but regular mayo will give you that classic creaminess.
-
2 tablespoons lime juice
- Fresh lime juice brightens everything up. Lemon juice is a great alternative if you don’t have limes.
-
Salt and pepper to taste
- Always remember to season your salad! A little sprinkle can make all the difference.
Step-by-Step Instructions
Now that we have our ingredients lined up, let’s get to the fun part—making the Hawaiian Chicken Salad! Follow these step-by-step instructions, and I promise you’ll have a dish you’ll want to make over and over again.
-
Prepare Your Chicken
If you haven’t already, shred your cooked chicken. If you’re using rotisserie, simply pull it apart. Shredding ensures it’s evenly distributed throughout the salad. Pro tip: Use two forks—it’s therapeutic! -
Chop Your Veggies
Take a moment to dice your red onion, celery, and chop that cilantro. The key here is to make sure your pieces are similar in size for even mixing. And remember—don’t be afraid to use those chef’s knives! -
Pineapple Time
If you’re using fresh pineapple, cut it into bite-sized chunks. If you’re using canned pineapple, drain it well. That syrup might look tempting, but we want our salad light and refreshing! -
Prep the Macadamia Nuts
Grab your favorite chopping board and give those macadamia nuts a good chop. Keep some larger pieces for surprise crunchiness in every bite. The nutty aroma will fill your kitchen—divine! -
Making the Dressing
In a large mixing bowl, blend the Greek yogurt (or mayo), lime juice, salt, and pepper. Give it a little taste test—add more lime juice if you like it zesty! -
Combine It All
Now, toss the shredded chicken, pineapple, chopped veggies, and macadamia nuts into that mixing bowl. Fold everything gently, ensuring every piece gets coated in that creamy dressing. -
Chill and Marinate
For an added flavor boost, let the salad chill in the fridge for about 30 minutes. This allows the flavors to meld, akin to how a good marinade works its magic! -
Taste Test!
After chilling, give it a taste! Adjust seasonings if needed—more salt, pepper, or lime until it sings!
Serving Suggestions
Presenting your Hawaiian Chicken Salad is an art in itself. Here are some fun ideas on how to serve it:
-
Chill Out
Serve the salad straight from the fridge in a beautiful, colorful bowl. The bright ingredients speak for themselves, and that cold salad is incredibly refreshing. -
Lettuce Wraps
For a low-carb option, use large lettuce leaves like romaine or butter lettuce to wrap spoonfuls of the Hawaiian Chicken Salad. It’s like a little edible gift—you’ll impress your friends with your creativity! -
In a Pita Pocket
This salad makes a fabulous filling for whole-wheat pitas! Add some extra greens or sprouts for a crunch. -
Pair with Rice or Quinoa
For a heartier meal, serve the salad atop a bed of fluffy rice or quinoa. The grains soak up the juice and dressing, leading to every mouthful being bursting with flavor. -
Garnish with Extra Citrus
A slice of lime or a sprinkle of extra cilantro can take your presentation up a notch. It’s all about those little details!
Recipe Variations
One of the best parts about cooking? You can always make it your own! Here are some fun twists on the classic Hawaiian Chicken Salad:
-
Tropical Fusion
Swap out the pineapple for diced mango or kiwi for an extra tropical twist. -
Spicy Kick
Add some diced jalapeños or a sprinkle of red pepper flakes for a heat level that’ll make your taste buds dance. -
Greek Twist
Incorporate feta cheese for a salty kick and swap cilantro for fresh dill for a Mediterranean twist on this classic! -
Nutty Delight
Try substituting almonds or walnuts instead of macadamia nuts for a different flavor profile. -
Vegan Version
Use chickpeas or seitan instead of chicken while substituting vegan yogurt for an equally delightful, plant-based treat.
Chef’s Notes
Oh, the memories this recipe conjures! I’ll never forget the first time I experimented with adding a splash of coconut milk to my dressing, inspired by the soothing flavors of tropical drinks. It was an instant hit! That’s the wonderful thing about cooking—it evolves with you. This Hawaiian Chicken Salad is never just a one-and-done recipe; it’s a canvas for your culinary creativity.
And feel free to pack it up for lunch the next day! It tastes even better as the flavors continue to mingle and settle. Just make sure to keep the nuts separate until you’re ready to serve, so they stay nice and crunchy.
FAQs and Troubleshooting
Q1: Can I use frozen chicken?
Absolutely! Just thaw it out ahead of time, cook it, and shred it as you normally would. Perfectly convenient!
Q2: What if I don’t have any Greek yogurt or mayo?
No worries! You can use sour cream, or even a splash of coconut milk for a lighter, tropical flavor.
Q3: How long does the salad last in the fridge?
If stored properly in an airtight container, it should last up to 3 days—just remember, the fresher, the better!
Q4: It turned out too dry—what can I do?
Simply add a little more dressing or a splash of lime juice to moisten things up.
Nutritional Info (per serving)
- Calories: Approximately 320
- Protein: 28g
- Fat: 18g
- Carbohydrates: 18g
- Fiber: 2g
- Sugars: 5g
This salad packs a hearty protein punch thanks to the chicken and nuts and incorporates fresh fruits and veggies. A satisfying and nutritious option any day of the week!
Final Thoughts
So there you have it—your ultimate guide to making a delicious Hawaiian Chicken Salad! From the vibrant ingredients to its extraordinary flavors, this dish embodies all the joy of cooking. I hope you found this adventure in flavors as delightful as I did.
Remember, food is not just about filling your belly; it’s about nourishing your soul and bringing people together. Get creative with it, share it with loved ones, and make it your own.
Thanks for joining me today at Feastical. Now, go out there and create your culinary magic in the kitchen. Keep it simple, keep it soulful, and, as always, keep it delicious!
Happy cooking, my friends! 🌺🍍
Print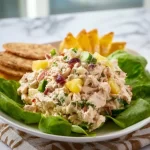
Hawaiian Chicken Salad
- Total Time: 45 minutes
- Yield: 4 servings 1x
- Diet: Gluten-Free
Description
A vibrant Hawaiian Chicken Salad packed with shredded chicken, juicy pineapple, crunchy macadamia nuts, and a zesty dressing, perfect for quick meals or gatherings.
Ingredients
- 2 cups cooked chicken, shredded
- 1 cup pineapple chunks
- 1/2 cup macadamia nuts, chopped
- 1/4 cup red onion, diced
- 1/4 cup celery, diced
- 1/4 cup fresh cilantro, chopped
- 1/4 cup plain Greek yogurt or mayo
- 2 tablespoons lime juice
- Salt and pepper to taste
Instructions
- Prepare your chicken by shredding it if not already done.
- Chop your veggies including red onion, celery, and cilantro.
- Pineapple should be cut into bite-sized chunks or drained if canned.
- Prep the macadamia nuts by chopping them, keeping some pieces larger for crunch.
- Making the dressing by mixing Greek yogurt (or mayo), lime juice, salt, and pepper in a large bowl.
- Combine the shredded chicken, pineapple, chopped veggies, and macadamia nuts into the bowl.
- Chill for about 30 minutes to allow flavors to meld.
- Taste and adjust the seasoning if necessary.
Notes
Best served chilled. Optional: Serve with lettuce wraps, in pita pockets, or over rice/quinoa.
- Prep Time: 15 minutes
- Cook Time: 0 minutes
- Category: Salad
- Method: Mixing
- Cuisine: Hawaiian
Nutrition
- Serving Size: 1 serving
- Calories: 320
- Sugar: 5g
- Sodium: 300mg
- Fat: 18g
- Saturated Fat: 3g
- Unsaturated Fat: 10g
- Trans Fat: 0g
- Carbohydrates: 18g
- Fiber: 2g
- Protein: 28g
- Cholesterol: 75mg
Keywords: Hawaiian chicken salad, summer salad, quick lunch, tropical flavors, healthy salad

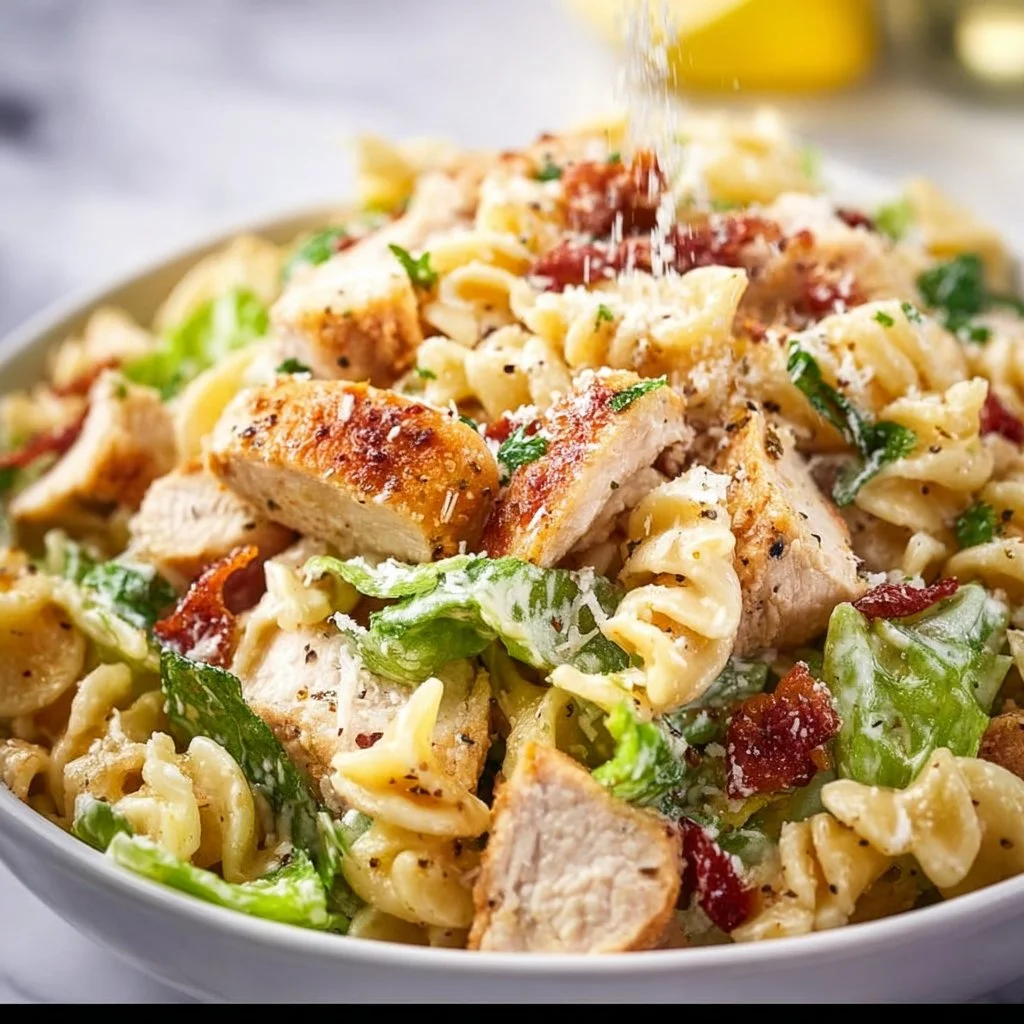
Chicken Caesar Pasta Salad
Chicken Caesar Pasta Salad: A Delicious and Easy Recipe to Savor
Hey there, food lovers! It’s your pal Beau Collier here, and I’m excited to share a fantastic recipe that perfectly blends the classic vibes of Caesar salad with the heartiness of pasta. Yes, you guessed it—I’m talking about Chicken Caesar Pasta Salad! If you’re looking to whip up something delightful and satisfying for lunch, dinner, or a potluck, this dish has got your back. It’s light yet filling, zesty, and super easy to make.
This salad stands out because it captures all the yummy flavors of a Caesar salad while transforming it into a comforting pasta dish. Whether you’re sitting down for a relaxed family meal or treating yourself to a lovely solo dinner, this Chicken Caesar Pasta Salad is everything you could want and more.
Let me tell you, there’s something downright heartwarming about salads. Growing up, my grandmother made a killer Caesar salad for our Sunday family dinners. I can still remember the aroma of garlic and anchovies wafting through the kitchen and her little secret twist that always made it pop. We’d pile our plates high, catch up on stories and just enjoy that meal together. Those dinners were the perfect blend of fun, laughter, and fantastic food, exactly what inspired me to dive deeper into the culinary world.
Now, combining that memory with pasta, I thought, “Why not take those flavors I adore and elevate them into a pasta salad?” And voilà! Here we are, ready to create a crowd-pleaser that’s confident in its deliciousness yet easy enough for even the kitchen novices among us. Grab your apron and let’s get cooking!
Personal Story
Every dish we create has a little piece of our heart in it, doesn’t it? For me, the memory of my grandmother making her famous Caesar salad brings an avalanche of nostalgia. I remember the warmth of her kitchen, the clinking of utensils, and the happiness that swirled around like the delicious scents wafting from the stove. One particular summer evening stands out; we had just finished a game of backyard frisbee, and my cousins and I were starving.
Grandma had her apron on, and with a wink, she got us all involved in prepping the meal. I remember mangling the romaine lettuce, while she’d laugh and say, “It’s not about perfection; it’s about enjoying what you make.” We tossed in the croutons and grated cheese, and, of course, everyone was sneaking bites of that creamy dressing. When dinner was finally served, we gathered around the rickety old table outside, with the sun setting, laughter ringing, and our plates overflowing. That dish became the star of every Sunday dinner, reminding me that food has this magical power to unite us.
As I developed the Chicken Caesar Pasta Salad, I channeled the essence of those unforgettable gatherings and went on a quest to recreate that joy. It’s about taking the simple pleasures of life, like a homemade salad, and sharing it with others, just like grandma did. So if you’re ready to put on your chef hat, let’s make something that can generate beautiful memories for you, too!
Ingredients
Before we dive in, here’s what you’ll need to make this scrumptious Chicken Caesar Pasta Salad. Let’s break it down:
-
2 cups cooked pasta (penne or rotini)
Any pasta works, but I adore penne for its shape and texture—it holds onto the dressing beautifully! You can substitute whole grain or gluten-free pasta if preferred. -
1 cup cooked chicken, diced
Use rotisserie chicken for the ultimate convenience—just shred and toss it in. If you want to keep it plant-based, opt for chickpeas or make it a vegetarian delight with seitan. -
2 cups romaine lettuce, chopped
Crisp and fresh, romaine holds up nicely in salads. If you’re feeling adventurous, you can use kale for a twist or even spinach for a softer bite. -
1/2 cup cherry tomatoes, halved
Juicy, sweet, and pop-in-your-mouth goodness! You can swap these with diced bell peppers for a more colorful option or roasted tomatoes for a caramelized flavor. -
1/4 cup grated Parmesan cheese
Cheese? Yes, please! This adds richness to your salad. If you’re lactose intolerant, try nutritional yeast or a dairy-free Parmesan cheese. -
1/4 cup Caesar dressing
Classic dressing brings it all together! You can either use store-bought or whip up a homemade version. For a lighter option, substitute with Greek yogurt-based dressing. -
Salt and pepper to taste
Don’t forget to season! The right balance pulls everything together. Feel free to add other herbs and spices to customize the flavor. -
Croutons (optional)
Crispy crunch is a winner! Make your own by baking bread cubes with olive oil and garlic for a delightful homemade touch.
Step-by-Step Instructions
Now, let’s get into the fun part: cooking! Follow these steps to create your delicious Chicken Caesar Pasta Salad.
Step 1: Cook the Pasta
Begin by bringing a large pot of salted water to a boil. Add your chosen pasta—penne or rotini—and cook according to the package instructions until al dente. This usually takes about 8-10 minutes. Why salted water, you ask? It flavors the pasta as it cooks! Drain and rinse under cold water for a minute to stop the cooking process and cool it down for your salad. Set it aside while you prep the other ingredients.
Step 2: Prepare the Chicken
If you haven’t already, dice your cooked chicken into bite-sized pieces. If you’re using rotisserie chicken, simply shred the meat using two forks or your hands. It makes everything so easy! Pro tip: You can grill up chicken breasts with simple seasoning (salt, pepper, and a squeeze of lemon) to add that smoky charred flavor if you’re in the mood for some extra effort.
Step 3: Chop the Veggies
Next, grab a chopping board and dice up the crisp romaine lettuce, halving the cherry tomatoes. Don’t sweat it if things get a little messy; that’s part of the fun! I love to use a large bowl to mix everything together as I go to save on dishes.
Step 4: Combine in the Bowl
In your large mixing bowl, combine the cooked pasta, diced chicken, chopped romaine, and halved cherry tomatoes. Give everything a gentle toss to combine. You want every piece of pasta to be coated with that Caesar dressing!
Step 5: Add Dressing and Cheese
Drizzle in the Caesar dressing and sprinkle the grated Parmesan cheese over the top. Now the fun begins! Using tongs or a spatula, gently toss until everything is evenly coated in that creamy, dreamy dressing. This is your chance to taste and adjust the seasoning. A splash of lemon juice or a sprinkle of pepper can take it to the next level!
Step 6: Final Touches and Serve
If you’re opting for croutons, sprinkle them on top just before serving, so they maintain that delightful crunch. Serve immediately or refrigerate for about 30 minutes to let the flavors mingle even more. If serving later, toss in a bit more dressing and croutons right before it hits the table.
Serving Suggestions
When it comes to serving, presentation matters! You can plate this Chicken Caesar Pasta Salad in a big bowl for family-style dining or serve individual portions in wide bowls. Add a few extra cherry tomato halves on top and a light sprinkle of more Parmesan for that appealing look.
Consider pairing it with some crusty garlic bread or grilled veggies on the side for an extra colorful touch! If you’re feeling fancy, garnish with fresh parsley or basil to elevate those visuals. Either way, ensure to have forks at the ready because this dish is about to become a new favorite!
Recipe Variations
Want to jazz things up? Here are some creative twists you can try:
-
Mediterranean Delight: Swap out Roman lettuce for spinach, add kalamata olives, diced cucumbers, and feta cheese. Toss in a lemon vinaigrette for a fresh vibe.
-
Spicy Kick: Incorporate some sliced jalapeños or a spicy Caesar dressing for those who enjoy a bit of heat. You can also toss in some roasted red peppers for an additional flavor burst!
-
Vegan-Friendly: Keep the salad plant-based by using chickpeas instead of chicken, vegan Parmesan, and a dairy-free Caesar dressing. It’s just as satisfying!
-
Whole Wheat Wonder: Utilize whole wheat pasta for added fiber and protein. It’s perfect for health-conscious individuals looking for a wholesome meal.
-
Pesto Caesar Twist: Add a swirl of basil pesto along with the dressing for a herby Italian twist and a pop of color!
Chef’s Notes
As much as I love this Chicken Caesar Pasta Salad, every time I make it, I’m reminded of how adaptable it is! I started this recipe to create a quick lunch option, but over time, I’ve turned it into a party favorite by mixing and matching ingredients. There was one memorable summer BBQ where I experimented by adding crispy bacon bits, and let me tell you, that was a hit!
Salads like this one remind us that cooking is all about happiness, love, and creativity. So, don’t be afraid to make it your own! The kitchen is your playground, and food is just a canvas waiting for your masterpiece!
FAQs and Troubleshooting
Let’s dive into some common questions and potential mishaps you might encounter while making this dish:
-
Can I make it ahead of time?
Absolutely! You can prep all the ingredients a day in advance. Just store the dressing separately so the pasta doesn’t get mushy before serving. -
What if my pasta is too soft?
No worries! You can use it as is, as long as it’s not mushy. Tossing the pasta with ice-cold water immediately after cooking locks in what’s left of that al dente texture. -
Is it healthy?
This dish has protein from the chicken and a good amount of veggies, making it relatively healthy! If you’re aiming for fewer calories, light dressings work wonders! -
How do I prevent the pasta salad from getting soggy?
To keep it fresh, use less dressing until you’re ready to serve. Toss in more as needed right before digging in!
Nutritional Info
A typical serving (about 1.5 cups) of your Chicken Caesar Pasta Salad contains approximately:
- Calories: 350
- Protein: 28g
- Carbohydrates: 40g
- Fat: 12g (mostly from the dressing and cheese)
- Fiber: 3g
Of course, these figures can vary based on the specific brands and ingredients you choose, but it’s generally a wholesome option packed with flavor and good-for-you components.
Final Thoughts
There you have it! Your very own Chicken Caesar Pasta Salad recipe, a harmonious blend of flavors and memories that brings joy to the table. Remember, the kitchen is a place for exploration—feel free to tweak this recipe to suit your tastes.
Maybe it’s a dish for your busy weekdays or a go-to at gatherings—you can’t go wrong with this crowd-pleaser! So grab a fork, invite your friends or family, and share those good vibes! Here’s to tasty food and the great moments it creates together. Bon appétit!
Hope you enjoyed this recipe just as much as I love sharing it. Whether it’s the tiny details or a dash of love, the meal you prepare can create unforgettable moments. Until next time, keep cooking, and stay fabulous!
Print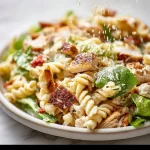
Chicken Caesar Pasta Salad
- Total Time: 25 minutes
- Yield: 4 servings 1x
- Diet: Gluten-Free
Description
A delicious and easy Chicken Caesar Pasta Salad that blends the classic flavors of Caesar salad with hearty pasta.
Ingredients
- 2 cups cooked pasta (penne or rotini)
- 1 cup cooked chicken, diced
- 2 cups romaine lettuce, chopped
- 1/2 cup cherry tomatoes, halved
- 1/4 cup grated Parmesan cheese
- 1/4 cup Caesar dressing
- Salt and pepper to taste
- Croutons (optional)
Instructions
- Cook the Pasta: Bring a large pot of salted water to a boil. Add pasta and cook according to package instructions until al dente. Drain and rinse under cold water.
- Prepare the Chicken: Dice or shred your cooked chicken into bite-sized pieces.
- Chop the Veggies: Dice romaine lettuce and halve the cherry tomatoes.
- Combine in the Bowl: In a large mixing bowl, combine cooked pasta, diced chicken, chopped romaine, and halved tomatoes.
- Add Dressing and Cheese: Drizzle Caesar dressing and sprinkle grated Parmesan cheese over the salad and toss gently.
- Final Touches and Serve: Top with croutons if desired and serve immediately, or refrigerate to let flavors mingle.
Notes
This salad is versatile and can be made ahead of time; just keep the dressing separate to prevent sogginess.
- Prep Time: 15 minutes
- Cook Time: 10 minutes
- Category: Salad
- Method: Mixing
- Cuisine: American
Nutrition
- Serving Size: 1 serving
- Calories: 350
- Sugar: 4g
- Sodium: 400mg
- Fat: 12g
- Saturated Fat: 4g
- Unsaturated Fat: 6g
- Trans Fat: 0g
- Carbohydrates: 45g
- Fiber: 3g
- Protein: 28g
- Cholesterol: 30mg
Keywords: Chicken Caesar Salad, Pasta Salad, Easy Salad Recipe, Quick Dinner

Chicken Bacon Ranch Pasta Salad
Chicken Bacon Ranch Pasta Salad: A Delightful Mix of Comfort and Flavor
Hey there, food friend! If you’re on a quest for a dish that’s as comforting as your favorite blanket and packed with flavor, you’ve come to the right place. Welcome to the world of Chicken Bacon Ranch Pasta Salad! This delightful dish tussles with the cozy vibes of pasta salad while embracing the heartiness of chicken and the irresistible crunch of bacon. It’s a dish that has become a go-to in my kitchen, perfect for lazy Sundays or gatherings with friends. So, grab your apron, and let’s get cooking!
Let’s be real—nothing bridges the gap between casual dining and gourmet flair quite like a hearty pasta salad. Whether it’s a summer barbecue, a family picnic, or the perfect potluck dish, Chicken Bacon Ranch Pasta Salad has got you covered. Packed with succulent pieces of chicken, crispy bacon, and vibrant veggies, this dish dazzles the palate. But it’s not just about the flavors; it’s a celebration of togetherness.
I often remember my Aunt Linda’s backyard cookouts where laughter and delicious food filled the air. She was famous for her pasta salad with a twist—always coming up with new combinations to keep the family guessing. It was there, among the smiles and sunshine, that I learned the true magic of a great recipe: it’s not just about following steps; it’s about the stories and memories you create while sharing a meal.
Today, I’m excited to share with you a recipe that leans into the nostalgia of those lovely gatherings with a modern flair. This Chicken Bacon Ranch Pasta Salad not only packs big flavors but also welcomes twists and variations that can cater to any palate or dietary preference.
So, let’s dive in, shall we? Grab your favorite knife and cutting board; we have some cooking to do!
Personal Story
Ah, Chicken Bacon Ranch Pasta Salad! A dish that takes me back to summers filled with laughter, family, and an endless array of food. I vividly remember my first attempt at making this salad for a summer birthday bash. It was a sunny Saturday afternoon, and the air was alive with the voices of friends and family. I wanted to impress everyone with something deliciously different. After scouring through recipes, I found the perfect inspiration—my beloved Chicken Bacon Ranch Pasta Salad.
I remember cooking up a storm in the kitchen, getting a little too excited and forgetting that I had bacon sizzling in the pan. Imagine my panic as I ran to the stove, only to find a glorious crispy mess—and let’s just say, I had a bit more than I needed. But hey, the more bacon, the better, right? Fast forward to the party, and everyone raved about my creation. It was a hit, and I swear I felt like a culinary rockstar that day!
Now, every time I whip up this pasta salad, I’m not just cooking; I’m reminiscing about that memorable birthday bash. It’s filled with vibrant colors, amazing textures, and the warmth of shared memories. So, keep reading—let’s craft your pasta salad that’s bound to steal the show, just like mine did.
Ingredients
Now that we’re feeling all warm and fuzzy inside, let’s gather our ingredients. Here’s what you’ll need for the ultimate Chicken Bacon Ranch Pasta Salad:
- 8 oz fusilli or rotini pasta: These shapes hold onto dressing and mix-ins beautifully. If gluten-free is your jam, feel free to swap in a gluten-free pasta.
- 1 cup cooked chicken, diced: Any cooked chicken works—rotisserie chicken is a convenient choice! If you want a vegetarian take, try substituting with hearty chickpeas or white beans.
- 6 slices bacon, cooked and crumbled: Can’t go wrong with crispy bacon! Turkey bacon is a lighter alternative if you want to keep it healthier.
- 1 cup cherry tomatoes, halved: Their sweetness adds a nice pop of color. If they’re out of season, canned diced tomatoes will do in a pinch—just drain well!
- 1/2 cup cheddar cheese, shredded: Sharp or mild—whatever tickles your taste buds. Vegan cheese or a sprinkle of nutritional yeast works great for dairy-free options.
- 1/4 cup red onion, diced: A touch of sharpness that elevates the dish. If you’re sensitive to raw onions, consider substituting with green onions for a milder flavor.
- 1 cup ranch dressing: It’s the creamy star of the show! Make your own or use store-bought to save time. For a healthier spin, Greek yogurt mixed with herbs makes a delicious alternative.
- Salt and pepper to taste: Essential for flavor balancing—don’t skip it!
- Fresh parsley for garnish: It adds not only a hint of flavor but also a nice pop of color for presentation.
Step-by-Step Instructions
Ready to create some kitchen magic? Follow these simple steps, and your Chicken Bacon Ranch Pasta Salad will be a masterpiece in no time.
-
Cook the Pasta:
- Bring a large pot of salted water to a rolling boil. Add the fusilli or rotini pasta and cook according to package directions until al dente (usually around 8–10 minutes).
- Chef Tip: Don’t forget to stir occasionally to prevent sticking! When done, reserve a cup of pasta water (it’s a chef secret for adjusting sauce later) and drain the rest. Rinse the pasta under cold water to cool it down—this will keep it from getting mushy.
-
Prepare the Chicken:
- If you’re using leftover chicken or a rotisserie bird, dice it into bite-sized pieces. If you’re cooking fresh chicken, you can boil, grill, or bake it until fully cooked (about 15–20 minutes).
- Chef Tip: Season your chicken with salt, pepper, and maybe a sprinkle of garlic powder to amp up the flavor.
-
Crisp the Bacon:
- Cook the bacon until crispy in a skillet over medium heat. Once done, transfer it to a paper towel-lined plate to drain. Let it cool a bit before crumbling it into smaller pieces.
- Chef Tip: For an extra crispy situation, you can bake the bacon in the oven at 400°F for about 15-20 minutes—mess-free and perfectly crispy!
-
Mix It Up:
- In a large mixing bowl, combine the cooled pasta, diced chicken, crumbled bacon, halved cherry tomatoes, cheddar cheese, and red onion.
- Chef Tip: Toss everything briefly to combine. The key is to ensure even distribution of all those tasty ingredients!
-
Dress It Right:
- Pour in the ranch dressing and season with salt and pepper to taste. Mix gently until everything is well-coated.
- Chef Tip: If the salad seems dry, use some of the reserved pasta water to loosen up the dressing—just a tablespoon at a time.
-
Garnish and Chill:
- Transfer to a serving platter or bowl and sprinkle fresh parsley on top. For the best flavor, give it at least 30 minutes in the fridge to meld the flavors together.
- Chef Tip: If you’re preparing ahead, this salad is perfect for a couple of days in the fridge. Just give it a gentle stir and add a touch more dressing if needed.
Serving Suggestions
Plating your Chicken Bacon Ranch Pasta Salad doesn’t have to be boring! Here’s how to serve it up like a pro:
-
Big, Bold Bowl: Serve it in a large, colorful bowl for a casual look. Place it in the center of your table and let everyone dig in!
-
Individual Servings: For a more refined touch, spoon the salad into mason jars or smaller bowls. This is perfect for picnics or potlucks, allowing everyone to grab their own serving.
-
Garnish Game Strong: Finish with a sprinkle of fresh parsley or even some chopped chives for a pop of color and flavor. You can also sprinkle some extra cheese or even crumbled bacon on top for visual appeal.
-
Pair It Right: This pasta salad goes wonderfully with grilled chicken, garlic bread, or crispy green salads. Pair it with a nice white wine for a delightful touch or iced tea for a refreshing complement.
Recipe Variations
Feeling adventurous in the kitchen? Here are some delicious twists on the classic Chicken Bacon Ranch Pasta Salad:
-
Spicy Kick: Add sliced jalapeños or a dash of hot sauce to spice things up. You can also use buffalo ranch dressing for that real kick!
-
Vegetable Power: Toss in some diced bell peppers, cucumbers, or even shredded carrots for an extra crunch and color.
-
Sneaky Greens: Mix in some baby spinach or kale for a nutrient boost. The dressing will help soften the greens, and you’ll hardly notice they’re there!
-
Pasta Swap: Swap out the pasta for quinoa or rice for a gluten-free, whole grain options. It changes the texture and makes it even more hearty.
-
Herbie Twist: Add fresh herbs like dill, basil, or cilantro for a flavor explosion that brightens up the dish.
Chef’s Notes
As someone who loves to cook, I have to share that I’ve learned plenty through my pasta salad journey. I started making this dish years ago and never looked back. At first, I followed recipes to the letter, but over time, I found joy in experimenting with flavors and ingredients.
You might laugh when I tell you that there was a time I tried adding raisins because someone raved about it, but let’s just say it wasn’t my best culinary move! Now, I prefer sticking with what works to create a classic that can be adapted to anyone’s taste.
Also, this recipe has evolved from being a casual side to becoming featured on my dinner table. It’s easy to throw together, flexible, and truly satisfies even the pickiest eaters.
FAQs and Troubleshooting
Got any questions? Let’s tackle a few common ones!
-
What if my pasta salad is too dry?
- Not a problem! Add a splash of the reserved pasta water or more ranch dressing.
-
Can I make this pasta salad ahead of time?
- Absolutely! Prepare it a day in advance, but add the bacon right before serving to keep it crispy.
-
How can I store leftovers?
- Keep it in an airtight container in the fridge for up to 3 days. Just remember to stir before serving.
-
What can I use instead of ranch dressing?
- You can whip up a creamy dressing using Greek yogurt, vinegar, and herbs or try a vinaigrette for a lighter option.
Nutritional Info
Now, while I’m no nutritionist, a rough estimate of this mouthwatering Chicken Bacon Ranch Pasta Salad is as follows (this can vary based on specific ingredients and portion sizes):
- Calories: Approximately 350-400 per serving (1 cup)
- Protein: ~25 grams
- Carbohydrates: ~35 grams
- Fat: ~15-20 grams
- Fiber: ~2-3 grams
Feel free to adjust ingredients to cater to dietary restrictions—like replacing pasta with zucchini noodles—because who doesn’t love a good twist on health?
Final Thoughts
There you have it, folks! Your journey into the delightful realm of Chicken Bacon Ranch Pasta Salad is officially complete. Whether you choose to make it for a cozy night in or to impress at a gathering, your affection for good food will shine through.
Remember, cooking is all about enjoying the process and making memories. So don’t be afraid to put your own spin on this classic recipe—take risks, laugh off mishaps, and share your culinary tales with those you love.
Now, grab yourself a fork (or maybe a spoon) and dig into your very own pasta salad masterpiece. Here’s to delicious meals and happy memories ahead—let’s feast!
Happy cooking, and until next time, may your kitchen be filled with warmth, love, and a whole lot of good food! 🍴❤️
Print
Chicken Bacon Ranch Pasta Salad
- Total Time: 45 minutes
- Yield: 4 servings 1x
- Diet: Pescatarian
Description
A delightful mix of pasta, chicken, bacon, and ranch dressing, this Chicken Bacon Ranch Pasta Salad is perfect for gatherings and packed with flavor.
Ingredients
- 8 oz fusilli or rotini pasta
- 1 cup cooked chicken, diced
- 6 slices bacon, cooked and crumbled
- 1 cup cherry tomatoes, halved
- 1/2 cup cheddar cheese, shredded
- 1/4 cup red onion, diced
- 1 cup ranch dressing
- Salt and pepper to taste
- Fresh parsley for garnish
Instructions
- Cook the pasta: Bring a large pot of salted water to a rolling boil. Add the fusilli or rotini pasta and cook according to package directions until al dente (usually around 8–10 minutes).
- Prepare the chicken: Dice cooked chicken into bite-sized pieces or cook fresh chicken until fully cooked (about 15–20 minutes).
- Crisp the bacon: Cook the bacon until crispy in a skillet over medium heat and crumble it into smaller pieces.
- Mix it up: In a large mixing bowl, combine the cooled pasta, diced chicken, crumbled bacon, cherry tomatoes, cheddar cheese, and red onion.
- Dress it right: Pour in the ranch dressing and season with salt and pepper to taste. Mix gently until well-coated.
- Garnish and chill: Transfer to a serving platter and sprinkle parsley on top. Chill for at least 30 minutes before serving.
Notes
This salad can be made ahead of time and stored in the fridge for a couple of days. Add bacon right before serving to keep it crispy.
- Prep Time: 15 minutes
- Cook Time: 30 minutes
- Category: Side Dish
- Method: Chilling
- Cuisine: American
Nutrition
- Serving Size: 1 cup
- Calories: 375
- Sugar: 3g
- Sodium: 600mg
- Fat: 18g
- Saturated Fat: 6g
- Unsaturated Fat: 10g
- Trans Fat: 0g
- Carbohydrates: 35g
- Fiber: 3g
- Protein: 25g
- Cholesterol: 45mg
Keywords: pasta salad, chicken salad, bacon salad, ranch salad, summer salad
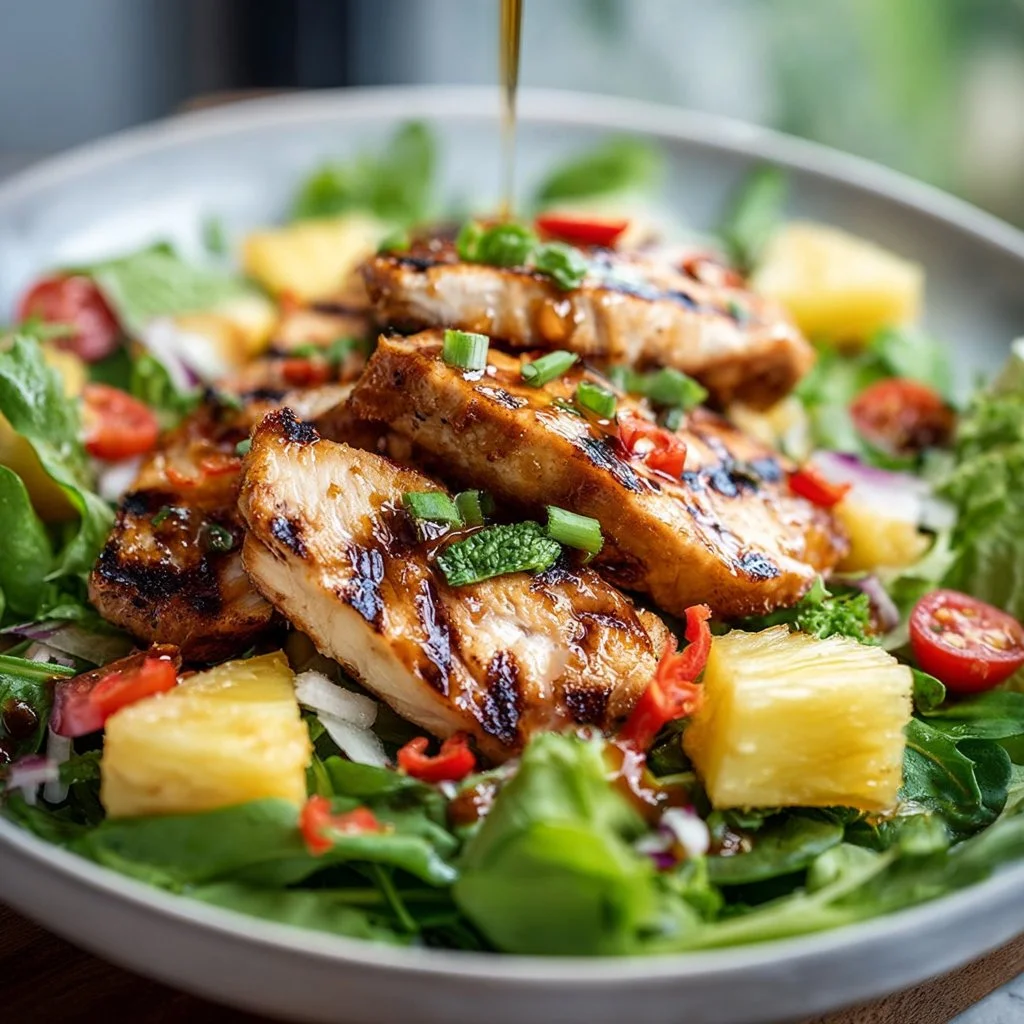
Grilled Pineapple Chicken Salad
Grilled Pineapple Chicken Salad: A Summer Staple for Food Lovers
Hey there, food lovers! Today, I’m bringing you one of my absolute summer favorites: Grilled Pineapple Chicken Salad. This recipe is not just a dish; it’s an experience that captures the essence of sunny days spent outdoors, surrounded by laughter and good company. Imagine this: it’s a sunny afternoon, the grill is sizzling, and that sweet aroma of grilled pineapple wafts through the air, mixing perfectly with the savory scent of marinated chicken. Doesn’t that sound divine?
The best thing about this salad is that it’s not only delicious but also comes together in no time. Whether you’re hosting a backyard BBQ or just seeking a fresh and vibrant meal, this Grilled Pineapple Chicken Salad is your go-to option. It’s super versatile, allowing you to toss in whatever veggies or toppings you have on hand. Plus, it’s packed with flavor and health benefits! So grab your apron, fire up that grill, and let’s get cooking!
Personal Story
Let me take you back to one of my most cherished summer memories. It was a warm July afternoon, and my family decided to have our annual backyard barbecue. The grill was sizzling, and everyone was bustling about, catching up and sharing stories. It was during these gatherings that our family traditions unfolded, each recipe carrying with it a story and a sprinkle of love.
That year, I excitedly volunteered to whip up a new creation: grilled chicken with a pineapple twist. Armed with a handful of fresh ingredients and my trusty grill tongs, I infused the chicken with zesty lime and olive oil – the sun’s heat reflecting off the grates. The moment the first slice of pineapple met the grill, the sweet, caramelized goodness permeated the air, and I knew I had a winner.
Everyone loved it, and the salad became a staple in our family gatherings moving forward. Since then, I’ve fine-tuned the recipe, making it deeper and more vibrant. Whenever I prepare this salad, it’s not just about the food; it’s about reliving those joy-filled moments around the grill, surrounded by my loved ones.
Ingredients
Here’s what you’ll need to bring this beautiful salad to life:
-
2 Chicken Breasts: The star of the show! Choose boneless, skinless chicken breasts for easy grilling. If you’re looking for a lean protein alternative, turkey breast works just as well.
-
1 Fresh Pineapple: The sweet and tangy kicker! Fresh is always best, but if you’re short on time, canned pineapple will do in a pinch. Just make sure it’s packed in juice, not syrup.
-
4 Cups Mixed Greens: For that fresh crunch! Use your choice of greens like spinach, arugula, or romaine. Want more heartiness? Try incorporating kale or even quinoa.
-
2 Tablespoons Olive Oil: This helps marinate the chicken and adds richness to the salad. Need a substitute? Avocado oil or even coconut oil will add a beautiful flavor.
-
Juice of 2 Limes: The zesty pop! Lime juice amplifies the flavors while providing a refreshing zing. If you prefer a different citrus note, try lemon or grapefruit instead.
-
Salt and Pepper to Taste: Simple, yet essential! Seasoning is key – don’t skip out on this! For a twist, consider smoked salt for added depth.
-
Optional Toppings (Avocado, Cilantro, etc.): Get creative! Avocados provide creaminess, while fresh cilantro adds a burst of flavor. You can also drizzle honey or sprinkle feta for a tangy punch.
Step-by-Step Instructions
Now that we have our ingredients ready, let’s dive into the cooking process! Trust me; you’re going to love how easy this is.
-
Marinate the Chicken: In a bowl, combine olive oil, lime juice, salt, and pepper. Whisk until well blended. Place the chicken breasts in the marinade, ensuring they are coated evenly. Let it sit for about 30 minutes – this is where the flavors really start to meld!
Chef’s Tip: If you’re pressed for time, marinating for even 15 minutes will still give you great results. For extra flavor, try adding minced garlic or chili flakes to the marinade.
-
Prepare the Pineapple: While the chicken is marinating, slice your pineapple into rings about 1-inch thick. You want those grill marks to make an appearance!
Chef Insight: Grilling enhances the natural sweetness of pineapple, so don’t skip this step! It also caramelizes those sugars, creating a beautiful contrast with the savory chicken.
-
Preheat the Grill: Get your grill nice and hot – around 400°F (200°C) should do the trick. You want that perfect sear!
Hack Alert: If you’re using a grill pan on the stove, heat it on high, and add a touch of oil to create a non-stick surface.
-
Time to Grill!: Place the marinated chicken on the grill, letting it cook for about 6-7 minutes on each side, or until it reaches an internal temperature of 165°F (75°C). Toss those pineapple rings on the grill during the last 3-4 minutes, flipping them halfway through until you see beautiful grill marks.
Tip: Avoid pressing down on the chicken while it cooks, as this releases juices. Let it sizzle peacefully!
-
Rest and Slice: Once the chicken is done, remove it from the grill and allow it to rest for about 5 minutes. This step allows the juices to redistribute, ensuring each bite is moist. Slice the chicken into strips, and chop the grilled pineapple into bite-sized pieces.
-
Assemble Your Salad: In a large bowl, toss the mixed greens, grilled chicken, and pineapple together. Drizzle with any remaining marinade or a little extra olive oil and lime juice for dressing.
-
Garnish and Serve: Top with those optional ingredients you picked out earlier – creamy avocado slices, fresh cilantro, or even crumbled feta cheese.
Serving Tip: For a beautiful presentation, serve the salad on a large platter, allowing the vibrant colors to pop!
Serving Suggestions
When it comes to serving this Grilled Pineapple Chicken Salad, the options are endless! You can plate it nicely in individual bowls or serve it family-style on a larger dish, inviting everyone to dig in.
Add a splash of color by placing edible flowers or a sprinkle of sesame seeds on top. If you want to elevate the experience, pair it with a zesty lime vinaigrette or simply a dollop of tangy yogurt dressing on the side. Fresh fruit skewers can also make a delightful accompaniment, adding both visual appeal and extra flavor.
For those looking to enjoy this salad as a heartier meal, serve it within a warm tortilla as a wrap, or pair it with grilled corn on the cob for a complete summer feast!
Recipe Variations
Feeling adventurous? Here are some creative twists and variations you can try with this salad:
-
Tropical Twist: Swap the grilled pineapple for mango or peaches for a refreshing, fruity alternative.
-
Spicy Kick: Add sliced jalapeños for a spicy punch or drizzle with your favorite hot sauce for an unexpected twist.
-
Protein Swap: Use shrimp or tofu instead of chicken for a delicious seafood or plant-based treat.
-
Crunch Factor: Throw in some nuts or seeds like sliced almonds or pumpkin seeds for an extra crunch.
-
Dressing Diversions: Swap out the olive oil dressing for a peanut sauce or a creamy ranch dressing for a rich flavor profile.
Chef’s Notes
Over the years, I’ve played around with this recipe, adjusting it to suit different seasons and occasions. I remember the first time I tried adding a scoop of cool, creamy avocado—what a game changer! It balanced the acidic lime perfectly and added an unexpected silkiness to every bite.
Another fun kitchen story: during a summer cookout a couple of years ago, I accidentally had a grilling mishap where the chicken got a bit too charred. In an attempt to salvage dinner, I masked it with some spicy mango salsa. The crowd couldn’t get enough of it! Now, I always keep a salsa handy when grilling, just in case.
FAQs and Troubleshooting
1. Why is my chicken dry?
Dry chicken often results from overcooking. Use a meat thermometer to ensure it reaches 165°F (75°C). Remember to let it rest before slicing!
2. Can I use canned pineapple?
Absolutely! Just ensure it’s packed in juice instead of syrup for the best flavor. Drain and pat it dry before grilling to prevent excess moisture.
3. What if I don’t have a grill?
No worries! You can use a grill pan on your stovetop or even bake the chicken and pineapple in the oven at 375°F (190°C) for about 25 minutes.
4. How long can I store leftovers?
You can keep the salad in an airtight container in the fridge for up to 3 days. Just add the dressing right before eating!
Nutritional Info
For those keeping an eye on nutritional information, here’s a general breakdown per serving of this delightful Grilled Pineapple Chicken Salad:
- Calories: Approximately 320
- Protein: 30g
- Carbohydrates: 20g
- Fat: 15g
- Fiber: 4g
- Sugar: 5g
This salad is a great source of lean protein, healthy fats, and lots of incredible vitamins and fiber from the mixed greens and pineapple. It’s light but satisfying, making it perfect for a summer meal.
Final Thoughts
So there you have it—a scrumptious Grilled Pineapple Chicken Salad that captures the essence of summer in every bite. I truly believe that food has the incredible ability to bring people together, and this dish is no exception. Whether you’re grilling up a storm for your friends or simply treating yourself to a refreshing meal, I hope this recipe becomes a staple in your kitchen as it has in mine.
Thank you for joining me on this culinary adventure! Here’s to unforgettable summer gatherings, delicious food, and, most importantly, the love for cooking that unites us all. Go ahead, grab your fork (or that fancy plate), and let’s make some memories together with this vibrant salad! Bon appétit!
Print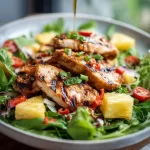
Grilled Pineapple Chicken Salad
- Total Time: 45 minutes
- Yield: 4 servings 1x
- Diet: Gluten-Free
Description
A vibrant and refreshing salad featuring marinated grilled chicken and sweet pineapple, perfect for summer gatherings.
Ingredients
- 2 Chicken Breasts, boneless and skinless
- 1 Fresh Pineapple, sliced into rings
- 4 Cups Mixed Greens (spinach, arugula, romaine, or kale)
- 2 Tablespoons Olive Oil
- Juice of 2 Limes
- Salt and Pepper to Taste
- Optional Toppings (Avocado, Cilantro, etc.)
Instructions
- Marinate the chicken: In a bowl, combine olive oil, lime juice, salt, and pepper. Whisk until well blended. Place the chicken breasts in the marinade, coating evenly, and let sit for about 30 minutes.
- Prepare the pineapple: Slice the pineapple into rings about 1-inch thick.
- Preheat the grill: Heat the grill to around 400°F (200°C).
- Grill the chicken: Place the marinated chicken on the grill for about 6-7 minutes on each side, until it reaches an internal temperature of 165°F (75°C). Add the pineapple rings during the last 3-4 minutes.
- Rest and slice the chicken: Remove from the grill and let rest for 5 minutes before slicing.
- Assemble your salad: In a large bowl, toss together the mixed greens, grilled chicken, and pineapple. Drizzle with remaining marinade or extra olive oil and lime juice.
- Garnish and serve: Top with optional ingredients like avocado slices and cilantro.
Notes
This salad is versatile; use any vegetables or toppings you prefer. It also works well in wraps or paired with grilled corn.
- Prep Time: 30 minutes
- Cook Time: 15 minutes
- Category: Salad
- Method: Grilling
- Cuisine: American
Nutrition
- Serving Size: 1 serving
- Calories: 320
- Sugar: 5g
- Sodium: 200mg
- Fat: 15g
- Saturated Fat: 2g
- Unsaturated Fat: 10g
- Trans Fat: 0g
- Carbohydrates: 20g
- Fiber: 4g
- Protein: 30g
- Cholesterol: 80mg
Keywords: grilled chicken salad, pineapple salad, summer recipes, healthy salad, BBQ recipes
Chicken Caesar Pasta Salad
Chicken Caesar Pasta Salad: The Comfort Food You Didn’t Know You Needed
Hey there, fellow food lovers! It’s Beau Collier, your trusty guide through the whimsical world of comfort food, and today, we’re diving into something absolutely delightful: Chicken Caesar Pasta Salad! Picture this: a warm, sunny afternoon, you’re surrounded by friends, laughter fills the air, and all you need is a dish that brings those good vibes to the table. Enter the Chicken Caesar Pasta Salad—a perfect blend of juicy chicken, crispy bacon, fresh greens, and a tangy Caesar dressing that will have your taste buds doing a little happy dance!
I can still remember the first time I whipped up this fantastic dish in my cozy kitchen. It was a typical Saturday, and I was hosting a little get-together for my friends. I wanted something light yet filling—something that would keep the spirit high and the bellies satisfied. As I rummaged through my fridge, I found some leftover chicken from a previous dinner, and an idea sparked! From there, the Chicken Caesar Pasta Salad was born. It wasn’t just a meal; it became a memory, filled with laughter and compliments, and that’s what cooking is all about, isn’t it?
So, grab your apron and let’s unleash the magic of this Chicken Caesar Pasta Salad together! Whether you’re cooking for two or making a potluck dish that’ll steal the show, I promise this recipe will earn you high-fives all around.
Personal Story
Ah, the memories that food can evoke! There’s one specific night that pops into my mind whenever I think about Chicken Caesar Pasta Salad. It was one summer evening, and my friends and I decided to host an impromptu backyard barbecue. The sun was setting, and everything had that golden glow—perfect for a casual meal under the twinkling stars.
I had just returned from my weekly farmers’ market run, and the fresh ingredients practically begged to be turned into something special. Armed with my newfound bounty, I set out to create the Chicken Caesar Pasta Salad. Everyone was skeptical at first; after all, how does one combine a classic salad with pasta? But as soon as the aroma filled the air, and I served it in my grandmother’s old ceramic bowl—a treasured family heirloom—there was no turning back!
We ended up devouring the entire bowl, laughter echoing through the night, and before we knew it, everyone was standing around the table, fighting over the last few bites. That’s the magic of food—it connects us, sparks joy, and creates endless memories. Who knew a simple chicken salad could have such a powerful impact?
Ingredients
Now that we’ve stirred up some culinary nostalgia, let’s dive into the star players of our Chicken Caesar Pasta Salad. Here’s what you’ll need:
-
2 cups bowtie pasta: The fun, flirty shape holds sauce beautifully! You can swap it out with rotini or fusilli if you want something different, but bowties add a nice visual appeal.
-
1 cup cooked chicken, diced: Use leftover rotisserie chicken for a time-saver, or grill up some chicken breasts. For a vegetarian option, chickpeas work great!
-
1/2 cup crispy bacon, chopped: Crunchy bacon adds a savory kick! If you’re looking for a healthier twist, try turkey bacon or skip the bacon altogether for a vegetarian version.
-
1 cup Romaine lettuce, chopped: Fresh greens are essential! If you want to switch things up, consider using kale or spinach for a different flavor profile.
-
1/2 cup cherry tomatoes, halved: These sweet, juicy bites add a burst of flavor. You can also substitute with sun-dried tomatoes if you’re feeling adventurous!
-
1/2 cup Parmesan cheese, grated: The salty, nutty flavor is perfect for this dish. If you’re dairy-free, nutritional yeast is a fantastic substitute to add a cheesy flavor without the cheese!
-
1 cup Caesar dressing: A creamy dressing is what ties everything together; store-bought is fine, but homemade is oh-so-worth it! For a healthier option, try Greek yogurt as a base.
-
Salt and pepper to taste: Seasoning is key! Freshly cracked black pepper elevates the dish, while a pinch of salt enhances all the flavors.
Step-by-Step Instructions
Let’s get cooking! Follow these easy steps for a mouthwatering Chicken Caesar Pasta Salad that your friends and family won’t stop raving about.
-
Cook the Pasta:
- Start by bringing a large pot of salted water to a boil. Toss in the bowtie pasta and cook according to the package instructions, usually around 8-10 minutes.
- Chef’s Tip: About two minutes before the pasta is done, reserve a cup of the pasta cooking water. If your salad needs a little looseness later, this starchy water is a lifesaver!
-
Prep the Chicken:
- While the pasta is cooking, take your cooked chicken and dice it into bite-sized pieces. If you’re starting with raw chicken, grill or sauté them in a little olive oil and season with salt and pepper.
- Quick Hack: Season your chicken with garlic powder and Italian herbs for an extra burst of flavor.
-
Cook the Bacon:
- In a large skillet, cook your bacon over medium heat until crispy. Once done, remove and let it drain on a paper towel.
- Chef’s Insight: Save a teaspoon of bacon drippings to drizzle over the salad later—trust me, it’s worth it for the flavor!
-
Combine Tomatoes & Lettuce:
- In a large mixing bowl, add the chopped Romaine lettuce and halved cherry tomatoes. These fresh elements add crunch and color to your pasta salad!
-
Drain the Pasta:
- Once the pasta is ready, drain and rinse it under cold water to cool it down. You don’t want your lettuce wilting before you serve the salad!
- Secret Hack: Toss the pasta with a splash of olive oil to prevent it from sticking.
-
Mix It All Together:
- Add the cooled pasta, cooked chicken, crispy bacon, and Parmesan cheese to the bowl with the lettuce and tomatoes.
- Drizzle the Caesar dressing over the top. Go a little lighter at first; you can always add more!
-
Toss & Serve:
- Gently toss everything together until the pasta and salad ingredients are coated in that creamy dressing. If it appears a bit dry, just add a splash of reserved pasta water!
- Taste and adjust seasoning with salt and pepper as desired.
Serving Suggestions
You have your beautiful Chicken Caesar Pasta Salad all prepped and ready to go, now how to serve it? Here’s a little flourish to elevate your presentation:
-
Bowl It Up: Serve it family-style in a large serving bowl for a cozy, communal vibe. Make sure to have some extra dressing on the side for everyone to customize their salad!
-
Individual Servings: For a fancy touch, serve the salad in individual mason jars or clear cups. Layer the ingredients starting with the dressing at the bottom, followed by pasta, chicken, bacon, and a garnish of lettuce and tomatoes on top. This not only looks Instagram-worthy but makes for easy transport!
-
Garnish: Sprinkle a little more grated Parmesan and fresh cracked black pepper on top just before serving for that final touch.
Recipe Variations
Here are a few delightful twists you can add to your Chicken Caesar Pasta Salad to keep things fresh and exciting:
-
Mediterranean Vibe: Swap out the Caesar dressing for tzatziki sauce and add kalamata olives and feta cheese for a Mediterranean flair!
-
Spicy Kick: Add sliced jalapeños or a sprinkle of red pepper flakes for a spicy version. A drizzle of sriracha on top takes it to another level!
-
Fruit-Fusion: Toss in some diced avocado or seasonal fruits like diced peaches or strawberries for a sweet balance against the savory elements.
-
Vegan Version: Use chickpeas for protein, nutritional yeast for a cheese flavor, and a homemade dairy-free Caesar dressing to make it vegan-friendly.
-
Grilled Veggies: Add some grilled zucchini, bell peppers, or asparagus for an added crunch and robust flavor—perfect for making the salad seasonal and colorful!
Chef’s Notes
Ah, cooking truly is a journey, isn’t it? I’ve made this Chicken Caesar Pasta Salad countless times, and each version has been slightly different, depending on what ingredients I had on hand or who I was serving. Over the years, the salad has evolved into a versatile dish, and I love experimenting with it!
One funny memory I have is when I decided to go rogue and add a whole block of feta cheese instead of Parmesan—let’s just say, that salad turned into a creamy, tangy explosion that left everyone trying to guess the mystery ingredient! But that’s the beauty of cooking; it’s all about learning, laughing, and tweaking recipes to suit your taste.
FAQs and Troubleshooting
Let’s tackle some common questions and issues you may encounter while making this Chicken Caesar Pasta Salad:
Q1: Can I make this salad ahead of time?
Absolutely! You can prep the pasta and chop the veggies ahead of time. Just keep everything separate and mix together right before serving, or it can become mushy.
Q2: What if my dressing is too thick?
No worries! Just add a little bit of the reserved pasta water to loosen it up, or even some olive oil will help drench your salad beautifully.
Q3: How can I keep the salad fresh for leftovers?
Store any leftover salad in an airtight container in the refrigerator, but keep the dressing separate. Mix it in only when you’re ready to eat!
Q4: Is there a gluten-free option for this salad?
Sure! Use gluten-free pasta instead of traditional bowties, and you’re good to go!
Nutritional Info
While this Chicken Caesar Pasta Salad is undeniably delicious, it’s always good to know what’s going into your dish. Here’s a rough breakdown of the nutritional info for one serving (based on 6 servings total):
- Calories: 450
- Protein: 25g
- Carbohydrates: 45g
- Fat: 20g
- Fiber: 3g
- Sodium: 800mg
Keep in mind that these numbers may vary based on the ingredients you select, but you can access vital info that fits your dietary needs!
Final Thoughts
And there you have it—your very own Chicken Caesar Pasta Salad! It’s a dish that not only satisfies your cravings but creates lasting memories and brings people together. As you gather around the table, whether with family or friends, remember that food is more than just ingredients; it’s a love language, a storytelling medium, and a way to nourish the soul.
So, dive in, experiment with flavors, and make this recipe your own. I can’t wait for you to experience all the joy and warmth this dish brings to your kitchen! Until next time, happy cooking, and here’s to many more delicious meals together!
Stay flavorful,
Beau Collier

Chicken Caesar Pasta Salad
- Total Time: 30 minutes
- Yield: 6 servings 1x
- Diet: Non-Vegetarian
Description
A delightful blend of juicy chicken, crispy bacon, fresh greens, and tangy Caesar dressing, perfect for gatherings or a cozy meal.
Ingredients
- 2 cups bowtie pasta
- 1 cup cooked chicken, diced
- 1/2 cup crispy bacon, chopped
- 1 cup Romaine lettuce, chopped
- 1/2 cup cherry tomatoes, halved
- 1/2 cup Parmesan cheese, grated
- 1 cup Caesar dressing
- Salt and pepper to taste
Instructions
- Cook the pasta by bringing a large pot of salted water to a boil. Toss in the bowtie pasta and cook according to the package instructions, usually around 8-10 minutes.
- Prep the chicken by dicing it into bite-sized pieces.
- Cook the bacon in a large skillet over medium heat until crispy.
- Combine the chopped Romaine lettuce and halved cherry tomatoes in a large mixing bowl.
- Drain the pasta and rinse it under cold water to cool it down.
- Mix everything together by adding the cooled pasta, chicken, bacon, and Parmesan cheese to the bowl with the lettuce and tomatoes.
- Toss everything together until coated with Caesar dressing.
Notes
For a lighter version, substitute Greek yogurt for the dressing. Store any leftover salad in an airtight container in the refrigerator, keeping dressing separate.
- Prep Time: 15 minutes
- Cook Time: 15 minutes
- Category: Salad
- Method: Mixing
- Cuisine: American
Nutrition
- Serving Size: 1 serving
- Calories: 450
- Sugar: 3g
- Sodium: 800mg
- Fat: 20g
- Saturated Fat: 7g
- Unsaturated Fat: 13g
- Trans Fat: 0g
- Carbohydrates: 45g
- Fiber: 3g
- Protein: 25g
- Cholesterol: 70mg
Keywords: Chicken, Caesar, Pasta Salad, Comfort Food, Easy Recipes

Simple Greek Yogurt Caesar Pasta Salad
Simple Greek Yogurt Caesar Pasta Salad: A Fresh Twist on a Classic Favorite
Hey there, food lovers! It’s Beau Collier here, and I’m so excited to welcome you to my kitchen today! If you’re on the hunt for a refreshing dish to bring to those summer potlucks or a quick dinner that’s good for the soul, you’ve landed in the right spot. Today, we’re whipping up a Simple Greek Yogurt Caesar Pasta Salad that’s not just flavorful—it’s also a healthier spin on the traditional version.
Picture this: twirling your fork around creamy, tangy goodness, combined with the delightful crunch of fresh vegetables. Doesn’t that sound perfect? The best part of this dish is how versatile it is. You can serve it warm or cold, making it a fantastic option for all seasons. Plus, it’s loaded with protein from the Greek yogurt, making it a hearty dish that can stand on its own or work as a side.
But this dish isn’t just about the food; it’s about the memories that come with it. When I think of pasta salads, I’m instantly transported to sun-drenched backyard barbecues with friends and family, where laughter mingles with the aroma of grilled goodies wafting through the air. So grab your pots and pans because we’re about to create something delicious that will add a sprinkle of joy to your table!
Personal Story
I’ll never forget the first time I made a pasta salad. I was just a kid, helping out in my grandma’s kitchen. The sun was shining, and we had a family gathering planned. She put me to work, gathering fresh tomatoes from the garden—all while telling me about her secret ingredient that made her pasta salad the talk of the town.
She swore by using a mix of creamy dressings, but I remember her saying, “Beau, darling, you need to know that the secret is all in the love you sprinkle into the dish.” Fast forward a few years, and my love for that pasta salad grew stronger! But as I learned more about healthy eating, I made tweaks to her classic recipes, including a lighter version of that beloved salad.
This Simple Greek Yogurt Caesar Pasta Salad is one of those creations that carries my grandma’s spirit. The use of Greek yogurt keeps it creamy without the extra calories, reminding me of Sunday family dinners while giving it a fresh, modern edge. So, let’s create some new memories together, shall we?
Ingredients
Here’s what you’ll need to make this delicious dish:
-
8 ounces pasta (such as rotini or penne)
Choose your favorite type—whole wheat or gluten-free works beautifully too! A fun chef hack? The shape of your pasta can affect the overall texture. Twisted pasta like rotini holds onto the dressing better than straight shapes. -
1 cup Greek yogurt
Opt for plain, low-fat Greek yogurt for that creamy consistency. Don’t worry about the tang; it’ll elevate the dish. Feel free to replace it with sour cream for a different flavor, or if you’re dairy-free, try coconut yogurt. -
2 tablespoons Caesar dressing
This is where the magic begins! You can use store-bought for convenience, or make your own. If you’re looking for a homemade version, blend anchovy paste, garlic, lemon juice, and olive oil with your yogurt! -
1/4 cup grated Parmesan cheese
Freshly grated adds a nice flavor kick! If you’re vegan, try nutritional yeast for that cheesy taste without the dairy. -
1/2 cup cherry tomatoes, halved
The popping flavor of fresh tomatoes adds sweetness. Substitute with sun-dried tomatoes for a different profile or use your favorite seasonal veggies. -
1/4 cup diced cucumber
Crisp and cool, cucumbers help balance out the creaminess. For a twist, consider bell peppers or radishes for added crunch! -
Salt and pepper to taste
Adjust according to your preferences; a little pinch enhances all those bright flavors. -
Chopped parsley for garnish (optional)
A sprinkle adds color and freshness! Basil or arugula can also work beautifully, giving a slightly different flavor palette.
Step-by-Step Instructions
Ready to get cooking? Let’s break it down step by step!
-
Cook the Pasta
Start by boiling a large pot of salted water. Toss in your pasta and cook until al dente according to the package instructions (usually around 8-10 minutes). Remember: undercooking just a tad is key, as the pasta will soften further when mixed with the dressing. Drain and rinse under cold water to stop the cooking process and keep that bounce. -
Prepare Your Veggies
While the pasta is cooking, let’s tackle those cherry tomatoes and cucumbers. Halving the tomatoes makes them burst with flavor, while dicing cucumbers adds that satisfying crunch. Getting messy in the process is often part of the fun! -
Make the Dressing
In a large bowl, combine Greek yogurt and Caesar dressing. Mix well until you have a smooth, creamy base. If you’re feeling adventurous, add a splash of lemon juice for a zesty kick. This step is so much easier than tackling a traditional egg-based Caesar dressing! -
Combine Ingredients
Once the pasta has cooled, toss it into the bowl with the dressing. Stir gently until the pasta is fully coated. It’s really satisfying to see all that creamy goodness enveloping every piece of pasta! -
Add Veggies and Cheese
Next, fold in the halved cherry tomatoes, diced cucumbers, and grated Parmesan cheese. Again, gently mix, being careful not to squish those vibrant veggies. Feel free to taste at this stage and adjust salt and pepper as needed! -
Serve it Right
Give your salad a final look over—how vibrant and fresh it looks! If you’re serving it immediately, plate directly onto bowls, or transfer it to a serving dish. Top it off with some chopped parsley for that added touch of color.
Chef Hack:
Remember, this salad can be made ahead of time. Just keep it chilled in the fridge for 1-2 hours before serving to allow the flavors to meld!
Serving Suggestions
This Simple Greek Yogurt Caesar Pasta Salad is incredibly versatile in terms of serving. You can plate it in individual bowls, garnished with parsley, or serve it family-style in a large platter, drawing everyone in with its vibrant colors. For a little flair, consider serving it alongside some grilled chicken or shrimp for protein.
If you want to elevate your presentation effort, use a ring mold to stack the salad into beautiful rounds topped with more cheese and a sprig of parsley. Don’t forget to set out some extra dressing on the side for those who like a little extra!
Recipe Variations
Here are some fun twists you can try to shake things up:
-
Mediterranean Style: Add kalamata olives, artichokes, and roasted red peppers for a delightful Mediterranean flair.
-
Bacon Bliss: Prosciutto or bacon bits can infuse a smoky flavor. Just be sure to cook them up nice and crispy!
-
Protein-Packed: Toss in grilled chicken or chickpeas to turn this side dish into a complete meal.
-
Herb-Infused: Consider adding fresh herbs like dill or chives for a burst of freshness that enhances the overall flavor.
-
Spicy Kick: If you enjoy heat, add a pinch of red pepper flakes or some diced jalapeños for a zingy surprise!
Chef’s Notes
Ah, what a ride it’s been creating this dish! Over time, each time I made variations to my pasta salad, I realized how much room there is to play with flavors and ingredients. From creamy to bursting with fresh tastes, food is truly the best medium for creativity.
One of my funniest moments in the kitchen? I once mistook cinnamon for my pasta salad dressing mix. Let’s just say, it’s a memory I won’t forget anytime soon—and it certainly taught me to keep my labels tidy!
FAQs and Troubleshooting
Here are a few common questions I get about this dish, along with some troubleshooting tips:
-
Can I make this salad ahead of time?
Absolutely! It’s perfect for meal prep. Just store it in an airtight container in the fridge for up to 3 days. The flavors will develop even more! -
What can I do if the salad is too thick?
If you find your dressing too thick, simply thin it out with a splash of olive oil or a little bit of water until you reach your desired consistency. -
What if I don’t have Greek yogurt?
Not a problem! Regular plain yogurt or even a nut-based yogurt can be excellent alternatives. Just check for a good consistency. -
How do I store leftovers?
Store any leftovers in an airtight container in the fridge. It’s typically best consumed within 3 days to retain its fresh taste.
Nutritional Info
While exact nutritional information can vary based on the exact ingredients you use, here’s an estimate per serving:
- Calories: Approx. 275
- Protein: 12g (thanks to the Greek yogurt!)
- Carbohydrates: 36g
- Fat: 8g
- Fiber: 2g
- Sugar: 2g
This pasta salad is not only delicious but balanced too!
Final Thoughts
There you have it, folks! A Simple Greek Yogurt Caesar Pasta Salad that’s as easy to make as it is to enjoy. Bringing together creamy yogurt, fresh veggies, and the nostalgic comfort of pasta, this dish is bound to inspire hearts and appetites alike.
Whether you’re hosting a summer barbecue, prepping for an easy weeknight dinner, or simply craving something delicious and wholesome, this dish delivers. So give it a try and let your kitchen be filled with love, laughter, and delightful flavors.
Join me again for another tasty culinary adventure, because there’s always something new to discover in the world of food! Happy cooking, friends!
Print
Simple Greek Yogurt Caesar Pasta Salad
- Total Time: 25 minutes
- Yield: 4 servings 1x
- Diet: Vegetarian
Description
A refreshing twist on a classic Caesar salad, featuring creamy Greek yogurt for a healthier alternative. Perfect for potlucks or a quick dinner!
Ingredients
- 8 ounces pasta (such as rotini or penne)
- 1 cup Greek yogurt
- 2 tablespoons Caesar dressing
- 1/4 cup grated Parmesan cheese
- 1/2 cup cherry tomatoes, halved
- 1/4 cup diced cucumber
- Salt and pepper to taste
- Chopped parsley for garnish (optional)
Instructions
- Cook the pasta in a large pot of salted water until al dente, about 8-10 minutes. Drain and cool under cold water.
- Prepare the cherry tomatoes and cucumbers by halving and dicing them, respectively.
- Make the dressing by mixing Greek yogurt and Caesar dressing in a large bowl until smooth.
- Combine the cooled pasta with the dressing until coated.
- Add the cherry tomatoes, cucumbers, and Parmesan cheese, and mix gently.
- Serve immediately or chill in the fridge for 1-2 hours before serving.
Notes
This salad can be made ahead of time and stored in the fridge for up to 3 days. Adjust salt and pepper according to taste.
- Prep Time: 15 minutes
- Cook Time: 10 minutes
- Category: Side Dish
- Method: Mixing
- Cuisine: Mediterranean
Nutrition
- Serving Size: 1 serving
- Calories: 275
- Sugar: 2g
- Sodium: 400mg
- Fat: 8g
- Saturated Fat: 3g
- Unsaturated Fat: 4g
- Trans Fat: 0g
- Carbohydrates: 36g
- Fiber: 2g
- Protein: 12g
- Cholesterol: 10mg
Keywords: pasta salad, healthy recipe, Greek yogurt, Caesar salad, summer dish

Creamy Dill Pickle Bacon Ranch Pasta Salad
Creamy Dill Pickle Bacon Ranch Pasta Salad: The Ultimate Crowd-Pleaser
Hey folks! Beau Collier here, and I’m thrilled to share a dish that perfectly balances comfort, tang, and crunch: Creamy Dill Pickle Bacon Ranch Pasta Salad! Nothing says “let’s dig in” quite like a big bowl of this deliciousness, especially when you whip it up for a sunny picnic or a casual backyard barbecue. This pasta salad is not only a fan-favorite but also an absolute delight to make and eat. So grab your spatula, and let’s dive into the kitchen for some flavorful fun!
Ah, pasta salad—one of those magical dishes that can be a sidekick or the main event! Whether you’re balancing a plate at a summer potluck or just treating yourself to an easy dinner at home, a good pasta salad always shines. Lately, my taste buds have been craving something creamy, crunchy, and packed with flavor, and that’s when this Creamy Dill Pickle Bacon Ranch Pasta Salad came to mind.
Picture this: you’re at a picnic, laughing with friends, with sunshine enveloping you like your favorite cozy blanket. Someone makes a beeline for the food table, and there it is—your beautiful bowl of creamy pasta salad, sprinkled with crispy bacon and tangy dill pickles. As they heap a scoop onto their plate, you can’t help but feel a surge of pride and excitement. It’s one of those dishes that garners a chorus of “Oohs” and “Aahs,” leaving everyone asking for the recipe.
This pasta salad combines two flavors many of us love but might not expect together: dill pickles and ranch dressing, all harmonized with crispy, smoky bacon. It’s a symphony of tastes and textures, with chewy pasta, crunchy pickles, and the richness of bacon, all wrapped up in a creamy dressing. And guess what? You can easily customize it to fit your needs and preferences!
So, follow me as we whip up this tantalizing pasta salad that’ll have everyone begging for more, whether they’re foodies or just looking for something simple and satisfying.
Personal Story
Growing up, summer gatherings in my family were always a feast for the senses. One of my favorite memories is of my grandmother’s backyard barbecues, where the scent of grilled burgers danced through the warm air, mingling with the enticing aroma of her famous pasta salad. It was always a hit, but what really captured my heart was the addition of dill pickles.
I remember the first time I suggested bacon—to my surprise, the idea was met with gleeful approval. We cooked up some bacon until it was perfectly crispy and added it into her signature pasta mix with no regrets! The salty crunch paired with the tangy pickles seemed like a brilliant culinary revelation at the time. Fast forward to today, when I think of family gatherings, I think of laughter, delicious food, and this Creamy Dill Pickle Bacon Ranch Pasta Salad as a culinary bridge across generations. Now I’m excited to share this recipe with you, so you can create your own delicious memories around the dinner table!
Ingredients
Let’s gather our ingredients! Here’s what you’ll need to make this fabulous pasta salad:
-
8 oz pasta (e.g., rotini or penne)
Choose any pasta shape you like! Rotini’s spiral shape does a great job at catching the creamy dressing. -
1 cup crispy bacon, chopped
Use thick-cut bacon for that extra crunch. If you’d prefer a healthier option, turkey bacon works surprisingly well! -
1 cup sharp cheddar cheese, cubed
This adds a kick of flavor; feel free to swap it for pepper jack or a vegan cheese if you’re looking to change it up. -
1 cup dill pickles, chopped
Dill pickles are the star of this dish! For a milder flavor, go with bread-and-butter pickles, or you can add spicy pickles if you want some kick. -
1 cup ranch dressing
You can use store-bought, but homemade ranch dressing takes it to the next level! Just mix buttermilk, mayonnaise, fresh herbs, and spices. -
Salt and Pepper to taste
Don’t skip this! Seasoning is key to elevating the overall flavor of the salad. -
Fresh dill (optional, for garnish)
A sprinkle of fresh dill adds brightness and freshness. If you don’t have it, you can skip it, but I highly recommend it if you can!
Step-by-Step Instructions
Now, let’s get cooking! Here’s how to whip up this scrumptious pasta salad step-by-step.
Step 1: Cook the Pasta
Boil a pot of salted water and add the pasta. Cook it according to package instructions until al dente—this usually takes about 8–10 minutes. Remember, we want it firm enough to hold up against all those chunky ingredients!
Tip: Keep an eye on it. Once it’s done, drain the pasta and immediately rinse it under cold water to stop the cooking process. This helps it to cool off quickly and keeps the pasta from clumping.
Step 2: Fry the Bacon
In a skillet over medium heat, cook your bacon until it’s crispy—we’re talking golden-brown perfection!
Note: Keep a watchful eye, as bacon can go from crispy to burnt in the blink of an eye. Once it’s done, remove it from the pan and set it on a plate lined with paper towels to absorb the excess grease. Once it’s cooled, chop it into bite-sized pieces.
Step 3: Prepare the Veggies
While your pasta is cooking and your bacon is sizzling, grab your pickles! Chop the dill pickles into small pieces; you want them to distribute evenly throughout the salad. This simple step makes a world of difference in every forkful!
Step 4: Combine Ingredients
In a large mixing bowl, combine the cooked pasta, crispy bacon, sharp cheddar cheese, and chopped dill pickles.
Chef Hack: Make this easier by tossing them gently with your hands. It’s fun, and you can feel the textures come together!
Step 5: Add the Dressing
Pour the ranch dressing over the pasta mixture and season with salt and pepper to taste.
Tip: Start with a little bit of seasoning, taste, and add more as needed. This ensures that you don’t accidentally over-season!
Step 6: Mix it Up
Using a spatula or wooden spoon, gently fold all the ingredients together until everything is evenly coated with the creamy dressing.
Friendly Reminder: Be gentle with the pasta; we want to keep those delightful little shapes intact.
Step 7: Chill and Serve
Cover the bowl with plastic wrap and refrigerate for at least 30 minutes before serving. This chilling time allows the flavors to meld beautifully!
Pro Tip: If you serve it right away, the flavors will still be good, but giving it that chill time transforms it into a full-on flavor fiesta!
Serving Suggestions
When it comes to serving your Creamy Dill Pickle Bacon Ranch Pasta Salad, presentation is key! Here’s how you can plate it up:
- Platter Style: Transfer the salad to a large, beautiful serving bowl or platter. Sprinkle fresh dill on top for that gorgeous finishing touch.
- Individual Cups: For a fun twist, serve the salad in individual cups or jars. Not only does it look cute, but it also makes for easy serving!
- Add Some Greens: Lay fresh greens like arugula or spinach beneath the salad for a pop of color and added nutrients.
- Topping Options: A sprinkle of toasted sunflower seeds or chopped nuts can add an unexpected crunch.
After all, you eat with your eyes first, so let’s make it look as good as it tastes!
Recipe Variations
I love how flexible this salad can be! Here are some fun variations to consider:
- Spicy Kick: Add a chopped jalapeño or a dash of hot sauce for a spicy twist!
- Crispy Veggie Additions: Toss in some chopped sundried tomatoes, bell peppers, or even shredded carrots for a crunchy flare.
- Switch Up the Cheese: Instead of cheddar, try feta or goat cheese for a creamier finish.
- Herb Swap: Fresh basil or parsley can be delicious substitutes for dill if you’re not a fan.
- Dairy-Free Delight: Use dairy-free cheese and plant-based ranch dressing for a vegan twist!
Chef’s Notes
This recipe has come a long way since I first played around with those simple backyard ingredients! Over the years, I’ve experimented with various dressings and add-ins. Some days I find myself throwing in a handful of greens, other days, a sprinkle of chili flakes for heat. Each modification brings a delightful new angle to the dish, and that’s what keeps cooking exciting.
One of my funniest kitchen stories revolves around this recipe—once, I completely forgot to add the bacon! It was a last-minute blunder that had everyone licking their forks and asking, “Where’s the bacon?” What a lesson in how essential those crispy treasures can be!
FAQs and Troubleshooting
1. Can I make this salad ahead of time?
Absolutely! In fact, it’s even better the next day as the flavors have time to meld. Just store it in an airtight container in the fridge.
2. What if I don’t like pickles?
No worries! You could swap them out with chopped olives or simply leave them out. The salad will still be delicious!
3. Can I use a different type of dressing?
Yes! While ranch works beautifully here, feel free to use any creamy dressing you love—Caesar, blue cheese, or even a homemade yogurt dressing!
4. Why is my pasta salty?
If your pasta water was too salty, it can carry that salinity into the salad. Always remember to taste your pasta before combining it to avoid over-salting!
Nutritional Info
For those of you who love to watch your nutritional intake, here’s a rough breakdown of a serving of Creamy Dill Pickle Bacon Ranch Pasta Salad:
- Calories: About 350–400 calories (heavy on bacon and cheese)
- Protein: 15g (thanks to bacon and cheese)
- Carbohydrates: 35g (mostly from pasta)
- Fat: 20g (from bacon and dressing)
- Fiber: 2g
Keep in mind that nutritional values can vary based on substitutions and serving sizes.
Final Thoughts
There you have it—a delightful, creamy dill pickle bacon ranch pasta salad that brings back memories and creates new ones! The next time you’re looking for a sure-to-please dish, whether for a summer picnic, potluck, or just a cozy night in, remember this recipe.
Don’t hesitate to play around with it; this is your kitchen, and creativity is encouraged! So let’s grab those ingredients, bring some friends together, and enjoy a delicious bowl of love. Happy cooking, and until next time—keep it deliciously real!
Print
Creamy Dill Pickle Bacon Ranch Pasta Salad
- Total Time: 45 minutes
- Yield: 4 servings 1x
- Diet: None
Description
A creamy, crunchy pasta salad featuring dill pickles, crispy bacon, and tangy ranch dressing—perfect for picnics and BBQs.
Ingredients
- 8 oz pasta (e.g., rotini or penne)
- 1 cup crispy bacon, chopped
- 1 cup sharp cheddar cheese, cubed
- 1 cup dill pickles, chopped
- 1 cup ranch dressing
- Salt and Pepper to taste
- Fresh dill (optional, for garnish)
Instructions
- Boil a pot of salted water and add the pasta. Cook until al dente, about 8-10 minutes.
- Remove the pasta from heat, drain, and rinse under cold water.
- Cook the bacon in a skillet until crispy, then chop it into bite-sized pieces.
- Chop the dill pickles into small pieces.
- Combine the cooked pasta, crispy bacon, cheddar cheese, and dill pickles in a large bowl.
- Pour ranch dressing over the mixture and season with salt and pepper.
- Fold until everything is well coated.
- Refrigerate for at least 30 minutes before serving.
Notes
This salad is even better the next day as the flavors meld together.
- Prep Time: 15 minutes
- Cook Time: 30 minutes
- Category: Side Dish
- Method: Mixing
- Cuisine: American
Nutrition
- Serving Size: 1 serving
- Calories: 375
- Sugar: 2g
- Sodium: 600mg
- Fat: 25g
- Saturated Fat: 10g
- Unsaturated Fat: 10g
- Trans Fat: 0g
- Carbohydrates: 35g
- Fiber: 2g
- Protein: 15g
- Cholesterol: 50mg
Keywords: pasta salad, creamy salad, bacon ranch salad, picnic food, summer recipe

Caesar Pasta Salad
Caesar Pasta Salad: A Fresh Take on a Classic Favorite
Hey there, fellow food lovers! If you’re ready for a delightful twist on an all-time classic, you’re in for a treat with my Caesar Pasta Salad. This dish combines the creamy, zesty flavors of traditional Caesar salad with heartwarming pasta goodness. I’m Beau Collier, and I believe that food should not only bring comfort but also bring us together. Nothing sparks joy like gathering around a table, sharing laughter and delight over a delicious meal.
Picture this: it’s a sun-drenched afternoon, and you find yourself whipping up this salad for friends and family. It’s simple yet elegant, a true crowd-pleaser, perfect for picnics, potlucks, or even a cozy dinner at home. You get to enjoy the crunchy romaine, succulent cherry tomatoes, and delightful croutons, all coated in a luscious Caesar dressing that dances on your palate. Plus, you can spice things up with grilled chicken or shrimp for an extra protein punch.
In this post, I’m diving deep into the world of Caesar Pasta Salad—sharing not only the recipe, but also personal stories, savvy tips, and some extra delicious variations. Whether you’ve been cooking for years or are just starting your culinary adventure, this recipe is designed to be accessible, fun, and, above all, tasty. So grab your apron, and let’s get cooking!
Personal Story
As a child, my culinary journeys often began in my grandmother’s kitchen. She had this authentic way of crafting meals filled with love and warmth—it was where I fell in love with cooking. I remember one sunny afternoon, perched on a stool, watching her prepare a classic Caesar salad. The way she expertly tossed the crisp romaine and creamy dressing brought a twinkle to my young eyes. She would tell stories about her youth as she made her famous homemade dressing, and I was completely captivated.
Years later, inspired by those memories, I wanted to recreate that experience in my kitchen, but with a twist. Enter the Caesar Pasta Salad, which became a staple at family gatherings. Bringing that same love and joy into a modern dish was my goal. It’s more than just food; it’s a heartfelt connection to my past, a way to honor those cherished moments while creating new memories. Now, every time I make this salad, I can hear her voice, guiding me along the way. It’s a dish that reminds us of the joys of cooking with loved ones, making it a perfect addition to any table.
Ingredients
Gather your ingredients, and let’s get started on this delightful Caesar Pasta Salad! Here’s what you’ll need:
-
8 ounces of pasta (e.g., rotini or penne): I love using rotini because the spirals catch the dressing perfectly, but feel free to use any pasta you have on hand! Whole wheat or gluten-free varieties work great, too.
-
2 cups romaine lettuce, chopped: Fresh romaine adds the perfect crunch! If you’re feeling adventurous, you can mix in some kale or spinach for added greens.
-
1/2 cup cherry tomatoes, halved: These little bursts of sweetness are essential. If you can’t find cherry tomatoes, diced regular tomatoes will do just fine.
-
1/2 cup croutons: Store-bought is fine, but if time allows, homemade croutons are a fun and crispy addition! Just toss some bread cubes in olive oil and season them before baking until golden.
-
1/4 cup grated Parmesan cheese: Freshly grated cheese will elevate the dish—don’t skimp on this! You can also substitute with Pecorino Romano for a sharper taste.
-
1/2 cup Caesar dressing: A good, creamy dressing is key! You can go store-bought for convenience or whip up your own if you’re feeling ambitious.
-
Salt and pepper to taste: Basic yet crucial for enhancing all the flavors in the salad.
-
Optional: Grilled chicken or shrimp: If you’re looking to make this a wholesome meal, adding grilled chicken or shrimp will amp up the protein and flavor!
Step-by-Step Instructions
Alright, let’s jump into the cooking process! Follow these steps to whip up your Caesar Pasta Salad:
-
Cook the Pasta:
- Bring a large pot of salted water to a boil. Add the pasta and cook according to package instructions until al dente. This usually takes about 8 to 10 minutes, depending on the type of pasta.
- Tip: Reserve a cup of pasta water before draining! This starchy liquid can help loosen your dressing later if needed.
-
Prep the Veggies:
- While the pasta is cooking, chop your romaine lettuce and halve the cherry tomatoes. Set them aside in a large mixing bowl.
- Chef Hack: To keep lettuce crispier for longer, rinse it in cold water and dry it right before use.
-
Combine Ingredients:
- Once the pasta is cooked, drain it and let it cool for a few minutes in a colander. This prevents wilting the lettuce when you combine everything.
- Add the cooled pasta to the bowl with the lettuce and tomatoes.
-
Dress it Up:
- Pour in the Caesar dressing and toss everything gently to coat the pasta and veggies evenly. If the mixture appears too thick, add a splash of your reserved pasta water to loosen it up.
- Commentary: Mind the dressing—different brands have varying flavors and thickness! Taste as you go and adjust according to your preference.
-
Add the Crunch:
- Toss in the croutons and grated Parmesan cheese. Give it one last gentle mix to combine everything without crushing the croutons.
- Chef Hack: You can save some cheese and croutons for topping later to keep that crunchiness intact!
-
Season and Serve!:
- Season your salad with salt and pepper to taste. Now it’s time to plate!
- Tip: If you’re adding grilled chicken or shrimp, slice them up and place them on top of the salad for that restaurant-style presentation.
Serving Suggestions
Now that your beautiful Caesar Pasta Salad is ready, how can you serve it up like a pro?
-
Plating: Grab a sizable bowl or serving platter and fill it generously with the salad. If you want to impress your guests, layer it—start with the pasta, then add the lettuce and top with a sprinkle of croutons and Parmesan.
-
Garnishes: Consider garnishing with a few additional cherry tomatoes for color or a drizzle of extra Caesar dressing for that restaurant flair. A sprinkle of fresh parsley can elevate the visual appeal as well.
-
Sides: Pair your salad with a warm baguette on the side or a light soup for a complete meal.
Recipe Variations
Let’s get a little adventurous! Here are some ways to give your Caesar Pasta Salad a flavorful twist:
-
Add More Veggies: Incorporate bell peppers for color and crunch, or throw in some sliced cucumbers for extra freshness.
-
Zesty Lemon: For a citrusy kick, squeeze some lemon juice over the salad just before serving. It brightens up the flavors wonderfully!
-
Protein Swaps: Instead of grilled chicken or shrimp, try adding canned tuna, chickpeas, or even roasted tofu for a vegetarian option.
-
Creamy Avocado: Mash up some ripe avocado and mix it in or cut it into slices as a topping for a creamy texture.
-
Herbed Twist: Experiment with adding fresh herbs like basil or dill for a unique flavor punch! A sprinkle of fresh herbs can really elevate the taste.
Chef’s Notes
This Caesar Pasta Salad is a recipe that has evolved since I first started making it. Initially, I strictly followed my grandmother’s Caesar salad recipe, but over the years, I began to incorporate pasta and other ingredients as I got more experimental in the kitchen. The beauty of this dish is its versatility; you can tailor it to fit seasonal ingredients or flavor profiles that tickle your fancy.
One cooking mishap I laugh about happened during a family barbecue. I accidentally threw in too much dressing and turned the salad into something resembling a pasta soup! We laughed it off and labeled it "experimental cuisine." It’s stories like these that keep cooking fun and lead to new favorites!
FAQs and Troubleshooting
-
Q: My pasta is too sticky! What did I do wrong?
- A: If your pasta sticks together, it could be that it wasn’t stirred during cooking or was overcooked. Remember to give it a good stir in the boiling water, and try to drain it immediately after reaching al dente.
-
Q: How can I prevent my lettuce from wilting?
- A: After slicing your lettuce, keep it washed and chilled in the refrigerator until you’re ready to serve. Always add the dressing just before serving to keep it crisp.
-
Q: What if my dressing is too tangy?
- A: If your dressing is overly tangy, try balancing it out with a pinch of sugar or a splash of cream to mellow the flavors. Taste as you go to find the perfect balance!
-
Q: Can I make this salad ahead of time?
- A: You can prep the ingredients, but for the best results, mix everything just before serving to keep the textures fresh and crisp.
Nutritional Info
While the exact nutritional values depend on ingredient choices, here’s a rough estimate for one serving (without chicken or shrimp):
- Calories: 350
- Protein: 12g
- Carbohydrates: 40g
- Fat: 15g
- Fiber: 3g
Additions such as grilled chicken or shrimp will increase the protein content, making this salad more filling!
Final Thoughts
There you have it—my Caesar Pasta Salad recipe, soaked in nostalgia and bursting with flavor! I hope this dish brings you as much comfort and joy as it does for me. Whether you’re having a picnic, attending a potluck, or simply want a satisfying meal at home, this salad checks all the boxes. Don’t forget to share it with your loved ones; food is always better when it’s enjoyed together!
So, what are you waiting for? Grab your fork, toss on your apron, and let the cooking magic begin! If you have any fun stories or variations to share, I would love to hear them. Happy cooking, friends, and may your kitchens always be filled with laughter and delicious aromas!
Print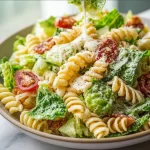
Caesar Pasta Salad
- Total Time: 25 minutes
- Yield: 4 servings 1x
- Diet: Vegetarian
Description
A delightful twist on a classic, this Caesar Pasta Salad combines creamy, zesty flavors with heartwarming pasta goodness.
Ingredients
- 8 ounces of pasta (e.g., rotini or penne)
- 2 cups romaine lettuce, chopped
- 1/2 cup cherry tomatoes, halved
- 1/2 cup croutons
- 1/4 cup grated Parmesan cheese
- 1/2 cup Caesar dressing
- Salt and pepper to taste
- Optional: Grilled chicken or shrimp
Instructions
- Bring a large pot of salted water to a boil. Add the pasta and cook according to package instructions until al dente, about 8 to 10 minutes.
- Chop the romaine lettuce and halve the cherry tomatoes. Set aside.
- Drain the cooked pasta and let it cool for a few minutes in a colander.
- Add the cooled pasta to the bowl with the lettuce and tomatoes.
- Pour in the Caesar dressing and toss everything gently to coat.
- Toss in the croutons and grated Parmesan cheese and mix gently.
- Season your salad with salt and pepper to taste and plate.
Notes
For added flavor, consider garnishing with extra cherry tomatoes or a sprinkle of fresh parsley.
- Prep Time: 15 minutes
- Cook Time: 10 minutes
- Category: Salad
- Method: Mixing
- Cuisine: American
Nutrition
- Serving Size: 1 serving
- Calories: 350
- Sugar: 3g
- Sodium: 400mg
- Fat: 15g
- Saturated Fat: 4g
- Unsaturated Fat: 6g
- Trans Fat: 0g
- Carbohydrates: 40g
- Fiber: 3g
- Protein: 12g
- Cholesterol: 30mg
Keywords: Caesar salad, pasta salad, vegetarian recipes, summer recipes, easy recipes

Sweet & Savory Grilled Chicken Salad
Sweet & Savory Grilled Chicken Salad: A Celebration of Flavor and Nostalgia
Hey there, food lovers! If you’ve been searching for a dish that’s a delightful explosion of flavors, look no further than my Sweet & Savory Grilled Chicken Salad. This dish isn’t just your average salad; it’s a celebration of grilled chicken’s smoky goodness, fresh vibrant greens, and the sweet and tangy notes of pineapple. It’s perfect for lunch, dinner, or even a sunny picnic in the park!
Now, let me take you on a little journey. Picture this: It’s a lazy summer Sunday afternoon, and I could smell the tantalizing aroma of grilling chicken wafting through our backyard. My mom would be outside, barbecue tongs in hand, flipping those sizzling pieces of chicken, while my sister and I would dart around, playing tag and getting into the summertime spirit. As the chicken cooked, our dad would chop up fresh vegetables and fruits, and that’s when the magic would happen.
My brother and I would help mix things up, adding whatever fresh ingredients made their way to the table. At that moment, I realized that cooking could be more than just a chore; it could be a family gathering, a place where laughter filled the air, and every bite packed a memory. Fast forward a couple of decades, and here I am, ready to recreate those sun-soaked afternoons with my own spin on a classic dish – lean, juicy grilled chicken on a bed of greens with a sweet-tangy kick from fresh pineapple.
So grab your apron, and let’s dive into this culinary adventure together!
Personal Story
Growing up, meals weren’t just about feeding our bellies; they were about creating moments that we cherished. I vividly remember the first time I tried grilled chicken salad with pineapple. It was at a potluck hosted by our neighbors. I was drawn to a colorful platter with grilled chicken nestled amidst vibrant greens and chunks of pineapple catching the sun like little gems. I had never thought of combining those flavors!
I took a bite, and it was like a burst of sunshine in my mouth—the smokiness of the chicken danced with the sweetness of the pineapple, all tied together by the fresh crunch of the greens. I didn’t realize how a simple dish could become so ingrained in my memory. From that day on, I vowed to recreate that salad at home. Each time I whip it up, I’m reminded of those sunny days spent with friends and family, sharing stories over laughter, and, of course, delicious food. So let’s honor those memories and create new ones with my take on Sweet & Savory Grilled Chicken Salad!
Ingredients
To make this delightful salad, gather the following:
-
2 Chicken Breasts
Lean and protein-packed, chicken breasts are a staple in many kitchens. If you’re short on time, boneless, skinless thighs work nicely or opt for leftover grilled chicken to save time. -
1 Cup Fresh Pineapple, Diced
Pineapple adds sweetness and juiciness! If fresh pineapple isn’t available, canned pineapple chunks (in juice, not syrup) will do the trick. -
1 Avocado, Sliced
Creamy avocado brings richness and healthy fats. Feel free to swap for diced mango if you prefer a different flavor profile. -
4 Cups Mixed Greens
A mix of spinach, arugula, or even kale gives a lively crunch. Choose what you love best; each green brings a unique taste! -
1/4 Cup Red Onion, Thinly Sliced
For a punch of flavor! If red onions are too strong for you, shallots make a sweeter substitute. -
1/4 Cup Cilantro, Chopped
This herb brings freshness to your salad. Not a fan? Try basil or even parsley for an alternative. -
1/4 Cup Olive Oil
A healthy fat that helps bind the salad together. For a lighter version, you could use avocado oil or even mango oil for a fruity twist. -
2 Tablespoons Lime Juice
Bright and zesty! If you have lemon on hand, that works beautifully too. -
1 Tablespoon Honey
This adds a touch of sweetness to the dressing! For a vegan swap, use maple syrup or agave nectar. -
Salt and Pepper to Taste
Essential seasonings to enhance all those glorious flavors.
The combination of these ingredients creates a delightful mix of flavors and textures that will have your taste buds dancing!
Step-by-Step Instructions
Let’s bring all those ingredients together into a delicious Sweet & Savory Grilled Chicken Salad! Follow these easy steps:
-
Preheat Your Grill:
Fire up your grill to medium-high heat. If you’re using a grill pan, let it heat up on the stove. The key is to have it hot enough to get a nice sear. -
Prep the Chicken:
Pat your chicken breasts dry with a paper towel. This helps them get a nice color when grilling. Season both sides with salt, pepper, and a drizzle of olive oil. If you have extra time, let them marinate with lime juice for about 30 minutes—flavor is everything! -
Grill the Chicken:
Place the chicken on the grill and close the lid. Grill for about 6-7 minutes on one side, then flip it over to grill for another 5-7 minutes or until the internal temperature reaches 165°F (75°C). The grill marks and slight char are your friends. Once done, remove from the grill and let it rest; this keeps the juices locked in. -
Prepare the Pineapple:
While the chicken is resting, toss your pineapple onto the grill. Just about 2-3 minutes on each side will give it those beautiful grill marks and caramelize the sugars. This step enhances the pineapple’s sweetness. -
Prepare the Salad Base:
In a large mixing bowl, combine your mixed greens, sliced avocado, red onion, and chopped cilantro. The contrast in colors is stunning and makes it even more appetizing! -
Make Your Dressing:
In a small bowl, whisk together olive oil, lime juice, honey, salt, and pepper. This dressing is the secret star of the show, bringing all the elements together. -
Slice Up the Chicken:
After the chicken has rested, slice it into strips. This not only makes it easier to eat but shows off those beautiful grill marks. -
Assemble the Salad:
On a large plate or serving bowl, create a bed of mixed greens. Sprinkle the grilled pineapple on top, then add the sliced chicken and avocado. Drizzle the dressing over the top, and voilà! -
Garnish and Serve:
For an extra pop, sprinkle more cilantro or even some chopped nuts for crunch. Enjoy!
Serving Suggestions
When it comes to serving my Sweet & Savory Grilled Chicken Salad, presentation is everything! Serve it in a large, colorful bowl to showcase those vibrant greens, golden grilled chicken, and bright pineapple. Alternatively, divide it among individual plates for smaller portions.
Pair it with crusty bread or whole grain rolls for a heartier meal, or enjoy it solo for a lighter option. And don’t forget to offer extra lime wedges on the side for those who crave an extra zing!
Recipe Variations
One of the best things about this grilled chicken salad is its versatility. Here are a few creative twists you can try:
-
Tropical Twist: Add diced mango and swap red onion for finely chopped jalapeño to give it a tropical kick!
-
Mediterranean Flair: Use feta cheese instead of avocado and substitute olives for the cilantro, creating a delicious Mediterranean-inspired dish.
-
Spicy Kick: Mix in some sliced jalapeños for a heat boost or drizzle with your favorite spicy sauce to turn up the heat!
-
Asian Flair: Replace the dressing with a sesame soy dressing and add crunchy chow mein noodles for a different twist.
-
Vegan Delight: Swap out chicken for marinated grilled tofu and replace honey with agave to make a plant-based version.
Chef’s Notes
Whenever I whip up this Sweet & Savory Grilled Chicken Salad, I’m reminded of the beautiful simplicity of food and how it can stir up memories and laughter. Through the years, I’ve learned to adapt this recipe to whatever is in season, whether that’s peaches in the summer or leftover roasted veggies in the winter.
One of my favorite things to do is make a big batch and invite friends over for a casual dinner party. We all pitch in, share stories, and before you know it, the salad is gone before the main course even gets served! There’s something special about sharing food that makes it all the more memorable, and I hope this recipe brings just as much joy to your table!
FAQs and Troubleshooting
1. What if my chicken is dry?
If you overcook your chicken, it can turn out dry. Use a meat thermometer to check the internal temperature. Grill until just done, and let it rest before slicing to retain juices!
2. How can I make this salad ahead of time?
You can make the grilled chicken and veggies ahead of time. Assemble everything, but keep the dressing separate until you’re ready to serve to avoid sogginess!
3. Can I store leftovers?
Yes, but keep everything in separate containers to maintain freshness! The salad can last for about 1-2 days in the fridge. Just be aware that the greens might wilt a little.
4. What are alternative greens I can use?
Don’t limit yourself to just mixed greens! Try kale for a hearty base or cabbage for an extra crunch. Feel free to mix and match for your desired flavor and texture!
Nutritional Info
Enjoying a bowl of Sweet & Savory Grilled Chicken Salad not only satisfies cravings but also supports a healthy lifestyle. A generous serving (about 2 cups) offers:
- Calories: ~350
- Protein: ~30g
- Carbohydrates: ~25g
- Fats: ~20g (healthy fats from olive oil and avocado!)
- Fiber: ~8g from veggies and fruits
This salad is balanced and packed with nutrients to leave you feeling full and energized. Plus, it’s fresh, colorful, and looks as good on your plate as it tastes!
Final Thoughts
There you have it, my sweet and savory grilled chicken salad that’s bursting with flavor and stories to tell! This recipe is more than just food; it’s about creating connections—whether it’s with family, friends, or even just inviting your inner chef to come out and play in the kitchen.
I hope you enjoy making and tweaking it as much as I have. Remember that the best meals come from the heart and the kitchen is the perfect place to let your creativity shine. So what are you waiting for? Gather your ingredients, invite a friend, and let’s create some delicious memories together. Happy cooking, and don’t forget to grab your fork—it’s time to dig in!
Print
Sweet & Savory Grilled Chicken Salad
- Total Time: 35 minutes
- Yield: 4 servings 1x
- Diet: Healthy
Description
A delightful explosion of flavors, featuring juicy grilled chicken, fresh greens, and sweet-tangy pineapple, perfect for any meal.
Ingredients
- 2 Chicken Breasts
- 1 Cup Fresh Pineapple, Diced
- 1 Avocado, Sliced
- 4 Cups Mixed Greens
- 1/4 Cup Red Onion, Thinly Sliced
- 1/4 Cup Cilantro, Chopped
- 1/4 Cup Olive Oil
- 2 Tablespoons Lime Juice
- 1 Tablespoon Honey
- Salt and Pepper to Taste
Instructions
- Preheat your grill to medium-high heat.
- Pat your chicken breasts dry and season with salt, pepper, and olive oil.
- Grill the chicken for 6-7 minutes on one side, then flip and grill for another 5-7 minutes until done.
- Prepare the pineapple by grilling for 2-3 minutes on each side.
- Combine mixed greens, avocado, red onion, and cilantro in a bowl.
- Whisk together olive oil, lime juice, honey, salt, and pepper for the dressing.
- Slice the grilled chicken into strips.
- Assemble the salad with the greens, grilled pineapple, chicken, and dressing.
- Garnish with more cilantro or nuts if desired.
Notes
Feel free to swap ingredients based on your preference and availability.
- Prep Time: 15 minutes
- Cook Time: 20 minutes
- Category: Salad
- Method: Grilling
- Cuisine: American
Nutrition
- Serving Size: 1 serving
- Calories: 350
- Sugar: 8g
- Sodium: 200mg
- Fat: 20g
- Saturated Fat: 3g
- Unsaturated Fat: 15g
- Trans Fat: 0g
- Carbohydrates: 25g
- Fiber: 8g
- Protein: 30g
- Cholesterol: 70mg
Keywords: grilled chicken salad, healthy salad, summer salad, pineapple salad, easy recipe

Fruit Salad
The Ultimate Fruit Salad: A Delight for the Senses
Hey there, fellow food lovers! I’m so thrilled you’re here at Feastical, your go-to spot for all things delicious and heartwarming. Today, we’re diving into a recipe that’s as easy as pie (okay, maybe even easier) and as vibrant as a summer day—Fruit Salad! Now, I know what you might think: “Fruit salad? Isn’t that just throwing some fruits together?” Ah, my friend, it’s so much more than that!
This dish is a canvas for your culinary creativity, bursting with color and flavor, and perfect for any occasion. Whether you’re serving it as a tantalizing appetizer at a backyard barbecue, a refreshing side for your brunch, or even a guilt-free dessert, this colorful medley of fruits will always leave your guests wanting more. And the best part? You can customize it to your heart’s content, making it a no-fail option for any fruit lover out there.
You see, growing up, fruit salad was a staple at family gatherings—especially during those balmy summer months. My Aunt Lily would whip up the most delicious concoctions. She taught me that the magic was in the details: using the ripest fruits, a drizzle of honey for sweetness, and a sprinkle of freshly torn mint leaves to elevate everything to a whole new level of deliciousness. Every spoonful was like biting into sunshine—and that’s something I carry in my heart and my kitchen to this day.
So grab your cutting board and let’s get chopping! I promise you this colorful creation will be a feast for both your eyes and your taste buds. Let’s jump right in!
Personal Story
I remember the first time I had a fruit salad that really changed my perspective on this classic dish. I was visiting my Aunt Lily during a hot August afternoon, and she had just come back from the farmer’s market with a bounty of fresh, ripe fruits. The smell of sweetness wafted through her kitchen as she began slicing through piles of juicy strawberries, pineapples, and bananas.
As she tossed everything into a big, vibrant bowl, she added a secret ingredient—her special honey-lime dressing. I watched in awe as she drizzled the honey and lime over the cut fruits, mesmerizing me with her kitchen dance. When I finally got to dig in, it was like a party for my taste buds! Each bite was a burst of flavors so bright and fresh that I could practically hear my taste buds singing. From that day forward, I realized that fruit salad could be so much more than just a bowl of cut-up fruits; it could be a delightful experience! Now, every time I make this dish, I think of Aunt Lily and that magical summer afternoon, transforming simple ingredients into something extraordinary.
Ingredients
Let’s gather our star players for today’s fruit salad! Here’s the list of ingredients you’ll need:
-
Mixed Fresh Fruits (Pineapple, Blueberries, Strawberries, Bananas):
- Pineapple: The tropical zing of pineapple adds a refreshing touch! Go for a fresh one; its juicy sweetness is unmatched! If you can’t find one, canned pineapple (in juice, not syrup) works as a great substitute.
- Blueberries: Tiny but mighty! These little beauties are packed with antioxidants. You can swap them for blackberries or raspberries if you want something different.
- Strawberries: Sweet and juicy, strawberries are a crowd favorite! If they’re out of season, feel free to use sliced peaches or nectarines.
- Bananas: Bananas are perfect for adding a creamy texture. If you need a substitute, try using mango or some diced kiwi for a tropical twist.
-
Honey or Agave Syrup (optional):
- Honey enhances the sweetness and adds a lovely glaze to our fruity mix. If you’re vegan or need a milder flavor, agave syrup is a fantastic substitute.
-
Mint Leaves (for garnish):
- Fresh mint lifts the flavor profile and adds a pop of color! If you don’t have mint, lemongrass or basil could introduce an interesting flavor twist.
So grab the freshest fruits you can find, and let’s get this sweet show on the road!
Step-by-Step Instructions
Alright, my fellow chefs, it’s time to get our hands a little fruity! Here’s how to whip up the ultimate fruit salad, step by step:
Step 1: Prepare Your Fruits
Start by washing all your fruits thoroughly under running water to freshen them up. For strawberries, remove the leafy green tops. For pineapples, cut the skin off, taking care to remove the ‘eyes’ (the little brown spots).
Chef Tip: If you’re unsure how to dice a pineapple, try cutting it in half lengthwise, slicing it into rings, and then cubing the rings.
Step 2: Chop and Dice!
Begin chopping your fruits into bite-sized pieces. Aim for uniform sizes so they mix together nicely and are easy to eat.
Chef Hack: To keep bananas from browning, you can sprinkle a little lemon juice on them once chopped. This not only preserves their color but adds a nice zing!
Step 3: Mix It Up
In a large mixing bowl, combine all your chopped fruits: pineapple, blueberries, strawberries, and bananas. Gently toss them together with a wooden spoon or spatula.
Tip: If you want to keep them from mushing together, take care when stirring—gentle is key!
Step 4: The Sweetener
If your fruit isn’t as sweet as you’d like, go ahead and drizzle in the honey or agave syrup. Start with one tablespoon, mix well, and taste. You can always add more if you need it sweeter!
Chef Insight: For an added zing, consider mixing in a splash of lime or orange juice with the honey/agave—it complements the fruits beautifully!
Step 5: Garnish to Impress
Tear fresh mint leaves and gently fold them into your fruit salad. It’ll add freshness and elevate the dish visually!
Chef’s Note: If you want to show off, save some mint leaves to sprinkle on top as an eye-catching garnish.
Step 6: Chill and Serve
Cover the mixing bowl with plastic wrap and refrigerate for about 30 minutes. This allows the flavors to meld together and results in an even tastier salad!
Chef Tip: Serve this beauty in a clear glass bowl to showcase all those vibrant colors—it’s all about the presentation!
Serving Suggestions
Now that you have this stunning fruit salad ready to go, let’s talk about how to serve it. The presentation can elevate this already delightful dish into something truly spectacular!
Consider using a large, clear glass bowl to really show off all those bright colors and textures. After chilling it, give it one last gentle toss before ladling it into individual servings. You could also use mason jars for an adorable picnic-style serving.
If you’re feeling a little extra fancy, sprinkle some chopped nuts—like toasted almonds or walnuts—on top for a bit of crunch. Another fantastic idea is to serve it alongside a scoop of vanilla yogurt or whipped cream for a divine dessert!
Trust me, your guests will be impressed, and you’ll be left with an empty bowl—nothing but sweet memories.
Recipe Variations
This fruit salad is wonderfully customizable! Here are a few creative variations you can try:
-
Tropical Twist: Add diced mango, papaya, or kiwi for an exotic flair. A splash of coconut milk can also lend a creamy tropical taste!
-
Berry Medley: Swap out the blueberries and strawberries for raspberries, blackberries, or go full berry bonanza by mixing all of them together!
-
Citrus Celebration: Include orange and grapefruit segments for a zesty burst of flavor. Pair it with a dressing made of citrus juice and zest to amp it up!
-
Nutty & Cheesy: Toss in some crumbled feta or cottage cheese for a savory touch, along with some toasted pecans or walnuts for crunch.
-
Spicy Kick: For the adventurous, sprinkle a touch of chili powder or jalapeño slices to introduce a surprising heat element that plays off the sweetness of the fruits!
Feel free to blend and match these ideas based on your preferences and what’s in season in your area!
Chef’s Notes
You know, there was a time when I thought fruit salad was just a boring mix of whatever fruits were left in the fridge. But as I’ve spent more time in the kitchen, I’ve realized that it doesn’t take much to elevate this dish! I love reimagining this classic with seasonal fruits or fun dressing combinations, keeping it fresh each time I make it.
One of my funniest kitchen moments was when I tried to impress a friend by making an elaborate fruit salad—namely, I slipped on a banana peel and sent fruit flying everywhere! The silver lining? We got to eat a floor fruit salad! Just remember to have fun in the kitchen, whether the results are picture-perfect or a little messy.
FAQs and Troubleshooting
Let’s tackle some common questions and troubleshooting tips that might pop up as you’re creating your fruit salad masterpiece:
-
Q: Why did my banana turn brown too quickly?
- A: Bananas are notorious for browning due to their exposure to air. Adding a bit of lemon juice can help! Always slice them last, just before serving, to maintain that bright yellow color.
-
Q: Can I make this salad ahead of time?
- A: Yes, but for best results, make it a few hours ahead of serving. This will allow the flavors to meld. However, it’s best to leave bananas and any delicate fruits until just before serving—nobody likes mushy fruit!
-
Q: How do I know if the fruit is ripe enough?
- A: Look for vibrant colors and a sweet aroma. For bananas, gently press—if they give slightly, they’re ripe. Pineapples should smell sweet and have a small amount of give when pressed.
-
Q: Can I use frozen fruits?
- A: Absolutely! However, thaw and drain them before mixing them in the salad to avoid excess moisture.
Nutritional Info
One serving of this fruit salad is not just a feast for the eyes but also for your health! Here’s a quick glance at the nutritional benefits:
- Calories: Approximately 120 calories per serving (depending on the fruits used).
- Vitamin C: The abundance of fruits provides a hefty dose of vitamin C, boosting your immune system.
- Fiber: The fresh fruits offer dietary fiber, which aids in digestion and keeps you feeling satisfied.
- Antioxidants: Berries, in particular, are packed with antioxidants that are great for overall health.
Feel good about indulging in this fresh, colorful salad!
Final Thoughts
And there you have it! An easy, vibrant fruit salad that is sure to add a splash of joy to any meal. As you embrace the world of fresh fruits and flavors, always remember that cooking is about creativity and enjoyment.
Don’t hesitate to experiment with different fruits, dressings, and serving styles! Food is meant to be shared and celebrated, and a fruit salad is the perfect, refreshing way to do that. Whether you’re enjoying it at a picnic, a family gathering, or just as a healthy snack, know that each bite is a step toward making beautiful memories.
So, what are you waiting for? Head to your kitchen, gather that fresh fruit, and let’s whip up a delicious fruit salad that’s bursting with flavor! Happy eating, foodies! 🍓🍍🍌🥝
Print
The Ultimate Fruit Salad
- Total Time: 15 minutes
- Yield: 4 servings
- Diet: Vegan
Description
A vibrant and customizable fruit salad that’s perfect for any occasion, bursting with flavor and freshness.
Ingredients
- Mixed Fresh Fruits (Pineapple, Blueberries, Strawberries, Bananas)
- Honey or Agave Syrup (optional)
- Mint Leaves (for garnish)
Instructions
- Prepare your fruits by washing them thoroughly. For strawberries, remove the leafy green tops. For pineapples, cut the skin off and remove the ‘eyes’.
- Chop your fruits into bite-sized pieces for easy mixing.
- Mix all the chopped fruits together in a large bowl.
- The sweetener: drizzle honey or agave syrup into the mix and stir well.
- Garnish with fresh mint leaves.
- Chill the salad in the refrigerator for about 30 minutes before serving.
Notes
Serve in a clear glass bowl for maximum visual appeal. You can also add chopped nuts or serve with yogurt for an extra treat.
- Prep Time: 15 minutes
- Cook Time: 0 minutes
- Category: Side Dish
- Method: No-Cook
- Cuisine: American
Nutrition
- Serving Size: 1 serving
- Calories: 120
- Sugar: 17g
- Sodium: 5mg
- Fat: 0g
- Saturated Fat: 0g
- Unsaturated Fat: 0g
- Trans Fat: 0g
- Carbohydrates: 31g
- Fiber: 3g
- Protein: 1g
- Cholesterol: 0mg
Keywords: fruit salad, summer salad, healthy dessert, colorful fruit, fresh fruit