
Pizza Eggs
Pizza Eggs: A Game-Changer for Breakfast!
Hey there, food lovers! Beau Collier here, your go-to guy for all things delicious and comforting. Today, we’re diving into a delightful recipe that not only captures the essence of your favorite pizza but also transforms breakfast into an extraordinary feast—Pizza Eggs! 🍳🍕
Now, I know what you’re thinking: “Pizza for breakfast? That sounds naughty!” But let me tell you, these Pizza Eggs are a guilt-free way to enjoy a classic dish without needing to bust out a crust. Whether you’re hosting a brunch for friends or just want to make your morning routine a little more exciting, this recipe is your ticket to flavor town.
Picture it: fluffy scrambled eggs, gooey cheese, and a kick of savory salami, all topped with that lovely touch of tomato sauce and a sprinkle of mixed herbs. It’s like your favorite slice of pizza got a cozy makeover for the breakfast table. Plus, it’s packed with protein, making it a great way to start your day on a high note.
So grab your spatula and let’s whip up something magical! I promise you won’t want this meal to end. Just a heads-up: you might find yourself making this more often than just the occasional Sunday brunch.
Are you ready to make your mornings a little more delicious? Let’s dive in!
Personal Story
Growing up in a big family, breakfast was always a bustling affair. My mom would whip up the most delicious spreads while my siblings and I raced to the table, eager to dig in. One morning, after a particularly late night of play, I woke up to the intoxicating aroma of tomatoes and cheese wafting through the house. To my surprise, Mom had decided to turn our usual scrambled eggs into a pizza-inspired feast.
She called them her "Pizza Eggs," and boy, were they a hit! She’d toss in whatever leftover meats and cheeses we had in the fridge. I remember the excitement of seeing slices of salami bobbing around in a sea of fluffy egg whites and vibrant tomato sauce. There was something magical about it—the delicious fusion of breakfast and pizza that made it hard to sit still at the table.
This dish quickly became a weekend staple in our household, and it holds a special place in my heart. Each bite took me back to those cherished mornings filled with laughter and the comforting flavors of home. Today, I still make Pizza Eggs, and they remind me of those joyful gatherings. Now, I’m excited to share this recipe with you so that you can create your own happy breakfast memories!
Ingredients
For our delightful Pizza Eggs, you’ll need:
-
3 large eggs
Eggs are the star of this dish—creamy, fluffy, and packed with protein. If you’re looking for a lighter option, egg whites work great too! -
60 g reduced-fat cheese
I love using shredded mozzarella for that stringy, gooey texture, but feel free to swap it with something like cheddar or a dairy-free cheese if you’re avoiding dairy! -
1 tbsp passata
This Italian tomato purée brings a rich flavor to your breakfast. If you don’t have passata, crushed tomatoes or even a bit of tomato ketchup will work in a pinch. -
A few slices of salami
Salami gives a deliciously smoky flavor. You can switch it up with pepperoni or even turkey bacon for a lighter option. Veggie lovers? Just skip the meat altogether! -
Mixed herbs
A sprinkle of dried oregano or basil elevates the flavor and adds a lovely aroma. Feel free to get adventurous—add in some Italian seasoning or even chili flakes if you like a little heat!
Step-by-Step Instructions
Alright, let’s get cooking! Here’s how to create your mouth-watering Pizza Eggs step by step:
-
Whisk the Eggs
Start by cracking your eggs into a bowl. Use a fork or a whisk to beat the eggs until they’re well-combined and frothy. This aeration is key to achieving those fluffy eggs you crave in the morning. Pro tip: add a splash of milk or cream before whisking for even creamier eggs! -
Heat the Pan
Place a non-stick skillet over medium heat and add a small drizzle of olive oil or a dab of butter. Once it’s hot (but not smoking!), you’re ready for the eggs! -
Cook the Eggs
Pour the whisked eggs into the pan. Let them set for a moment before gently stirring with a spatula. You want to keep the eggs moving, but don’t rush it—this is where the magic happens! Scramble until they just start to come together—soft and creamy, not overcooked! -
Add Passata and Cheese
When the eggs are about 80% cooked, spread the passata evenly over the mix. Follow it up by sprinkling the shredded cheese on top. Let it cook for a minute, allowing the cheese to melt and meld with those beautiful eggs. Oh, can you smell that already? -
Toss in the Salami
Now, it’s time to add those savory salami slices. Gently fold them in so they are nicely distributed throughout the eggs. The heat will warm them up in no time. -
Season with Herbs
Finally, sprinkle your mixed herbs over the top. This isn’t just for flair—it brings everything together beautifully! Give the eggs one last gentle stir to incorporate those flavors. -
Serve it Up
Once the eggs are fully cooked and the cheese is deliciously melty, carefully transfer them onto a plate. You want them to look fluffy and inviting!
Serving Suggestions
The beauty of Pizza Eggs is in their versatility! You can serve them up simply on their own, or you can dress them up like a brunch superstar. Here are a few ideas:
-
Classic Plate: Serve your Pizza Eggs with a slice of whole-grain toast or a bagel for that classic breakfast feel.
-
Savory Sandwich: Load those Pizza Eggs onto a toasted English muffin or within a wrap. Add some avocado or spinach for an extra layer of flavor and nutrition.
-
Brunch Board: Make it a party! Serve your Pizza Eggs alongside an array of colorful fruits, crunchy veggies, and perhaps a mimosa for the adults. It’s the ultimate brunch experience!
-
Toppings Galore: Don’t hesitate to add additional toppings like red pepper flakes, avocado slices, or even a dollop of sour cream for a creamier finish.
Recipe Variations
Why stop at just one version when you could explore various delicious twists? Here are a few creative ways you can modify your Pizza Eggs:
-
Veggie Delight: Add chopped bell peppers, onions, or mushrooms for a colorful and nutritious upgrade. Sauté the veggies in the skillet first, then add your eggs.
-
Spicy Kick: Add sliced jalapeños or a dash of hot sauce for those who crave a little heat in the morning. Spice levels are totally up to you!
-
Herb Infusion: Instead of mixed herbs, try using fresh basil and parsley for a garden-fresh taste. Add them before serving to keep their bright flavors intact.
-
Cheesy Goodness: Go wild with cheese! Combine different types like feta or gouda in with the mozzarella for a unique flavor fusion.
-
Meat Lovers’ Delight: Craving some extra meat? Try bacon or sausage alongside the salami for an indulgent twist. Just make sure to precook the meat before adding!
Chef’s Notes
Oh, the memories I have in the kitchen! I’ll never forget the time I decided to throw a pizza-themed dinner party and made these Pizza Eggs for breakfast. I was running late, but still determined to impress my guests. With the eggs sizzling away and salami popping from the pan, I managed to serve them into the hands of grinning friends ready to dive into a groundbreaking breakfast!
With each bite, I watched their faces light up with nostalgia reminiscent of late-night pizza runs. In that moment, I knew this recipe was special. Over time, I’ve played around with it, adjusting it to suit whatever I had around in my fridge. That’s the beauty of cooking—freedom to explore and create!
FAQs and Troubleshooting
1. Why are my eggs rubbery?
Overcooking is usually the culprit here! Aim for that soft, custard-like texture, and remember that the eggs continue to cook even after you remove them from the heat.
2. Can I make this ahead of time?
Absolutely! You can whisk the eggs and chop the salami the night before. Just cook everything fresh in the morning for optimum fluffiness!
3. My cheese didn’t melt well. What happened?
Double-check the type of cheese you’re using! Low-fat options can sometimes differ in melting qualities. Go for mozzarella or a higher-fat cheese for that gooey goodness.
4. What if I don’t have passata?
No worries! You can use crushed tomatoes, tomato puree, or even pizza sauce! Just adjust the seasoning accordingly.
Nutritional Info
Curious about the nutritional breakdown of our scrumptious Pizza Eggs? Here’s a quick overview (per serving):
- Calories: 300 kcal
- Protein: 20 g
- Carbohydrates: 5 g
- Fat: 18 g
- Fiber: 1 g
- Sodium: 450 mg
This dish is rich in protein, making it great for a fulfilling breakfast. If you tweak the cheese and salami, those numbers can shift a bit too—so feel free to play around!
Final Thoughts
There you have it, my friends—Pizza Eggs that are sure to elevate your breakfast game and tickle your taste buds! It’s a recipe born from memories, comfort, and a bit of culinary flair. I hope this dish inspires you to experiment, laugh, and create moments in your own kitchen.
So, next time you’re feeling a bit uninspired on those early mornings, remember this little gem. Serve it solo, present it at your brunch gathering, or simply savor it on a quiet Saturday morning. Let me know how your Pizza Eggs turned out—I promise they’ll bring a slice of joy to your day!
Happy cooking, and as always, let’s keep this foodie journey going. Cheers! 🍳🎉
Print
Pizza Eggs
- Total Time: 20 minutes
- Yield: 2 servings 1x
- Diet: Vegetarian
Description
A delicious breakfast that combines fluffy scrambled eggs with cheesy goodness and savory salami, all topped with rich tomato sauce and herbs.
Ingredients
- 3 large eggs
- 60 g reduced-fat cheese (shredded mozzarella recommended)
- 1 tbsp passata (or crushed tomatoes)
- A few slices of salami (or substitute with pepperoni or turkey bacon)
- Mixed herbs (e.g., dried oregano or basil)
Instructions
- Whisk the eggs in a bowl until frothy.
- Heat a non-stick skillet over medium heat with olive oil or butter.
- Cook the whisked eggs, stirring gently until they start to set.
- Add passata and cheese when eggs are 80% cooked.
- Toss in the salami and gently fold it into the eggs.
- Season with mixed herbs and stir gently.
- Serve it up on a plate once fully cooked.
Notes
This dish is versatile; feel free to add veggies or adjust the seasonings to your liking.
- Prep Time: 10 minutes
- Cook Time: 10 minutes
- Category: Breakfast
- Method: Sautéing
- Cuisine: Italian
Nutrition
- Serving Size: 1 serving
- Calories: 300
- Sugar: 3g
- Sodium: 450mg
- Fat: 18g
- Saturated Fat: 6g
- Unsaturated Fat: 10g
- Trans Fat: 0g
- Carbohydrates: 5g
- Fiber: 1g
- Protein: 20g
- Cholesterol: 210mg
Keywords: breakfast, pizza, eggs, cheesy, quick recipe, fluffy eggs
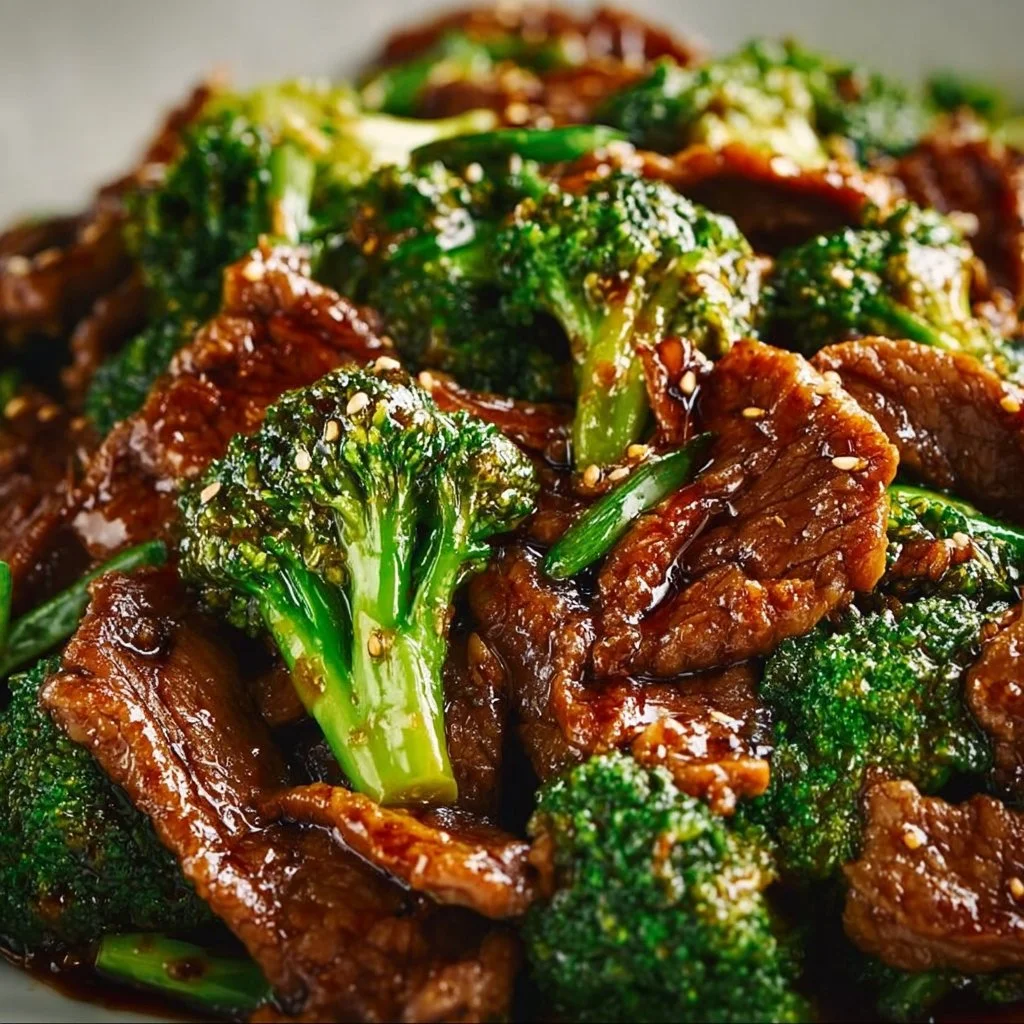
Chinese Beef and Broccoli
Chinese Beef and Broccoli: A Feel-Good Recipe That Brings Us All Together
Hey food lovers! Today, we’re diving into a classic dish that has been a staple both in restaurants and family kitchens alike: Chinese Beef and Broccoli. You know, that vibrant plate of deliciousness, where tender slices of beef are swirled lovingly with crisp broccoli florets and enveloped in a savory sauce that will make your taste buds dance. If you’re like me, this dish isn’t just a meal; it’s an invitation to gather around the table with friends and family, sharing stories and laughter, all while savoring the flavors of life.
Growing up, I had my fair share of meals at local Chinese restaurants, but it was my mom’s home-cooked version of Beef and Broccoli that truly stole the spotlight. Every time she made it, the aroma would waft through our house, drawing us all into the kitchen like moths to a flame. There was something about those fresh ingredients and that glorious sauce that made it feel like a hug from the inside out. Plus, it was one of those recipes that seemed fancy enough for special occasions but was easy enough that I could sneak in and help out in the kitchen, or even whip it up myself once I got the hang of it.
So, if you’re ready to create some kitchen magic, lend me your spatula, and let’s get cooking! You’ll be amazed at how simple and satisfying this Beef and Broccoli dish can be. Just like a warm hug, let’s make this a comforting meal for everyone to enjoy. Ready? Let’s dive right in!
Personal Story
I fondly recall one particular evening—a chilly Sunday night when my mom decided to make her famous Beef and Broccoli. We had recently returned from visiting my grandparents, where discussions about food (and lots of it) filled the air, and I was eager to bring home some of those culinary insights. My mom gave me the reins to chop up those vibrant broccoli florets. As I skillfully (or at least I thought so!) sliced away, we chatted about flavors, textures, and why certain ingredients worked so beautifully together.
We reminisced about our favorite dishes while she expertly stir-fried the beef, standing over the stove like a culinary maestro. The clinking of the wok and sizzling of the meat filled our cozy kitchen. It was more than just cooking; it was bonding over food, laughter, and the joy of creating something we all loved. When dinner was finally served, the three of us took our places at the table. With each bite, I could taste not just the dish, but all the warmth, experiences, and memories woven into it. And in that moment, I realized food truly has the power to connect us in ways we often overlook.
Ingredients
Let’s take a closer look at the ingredients for our mouthwatering Chinese Beef and Broccoli. Here’s what you’ll need:
-
1 lb flank steak (or skirt steak)
A great cut of meat that packs flavor! If you can’t find flank, sirloin is a good substitute, but remember, it cooks quickly—keep an eye on it! -
1 tablespoon soy sauce
This adds a savory depth to the dish. Use low-sodium if you’re watching your salt intake, and feel free to try tamari for a gluten-free option! -
1 tablespoon peanut oil (or vegetable oil)
Peanut oil is fantastic for stir-frying due to its high smoke point. If you have allergies or prefer another option, canola or sunflower oil works well too. -
1 tablespoon cornstarch
A little thickening magic! This helps create a beautifully silky sauce. For a low-carb alternative, you might try arrowroot powder. -
1/2 teaspoon baking soda (optional)
When marinating the beef, this helps tenderize it. A great tip if you’re using a tougher cut! -
1/2 cup chicken stock (or beef stock)
This is where the flavor really starts to build. Homemade stock is always the best, but store-bought works fine in a pinch! -
2 tablespoons Shaoxing wine (or dry sherry)
This rice wine adds depth and complexity. If you can’t find it, a splash of white wine or even cooking sherry can be used! -
2 tablespoons soy sauce
A second addition of soy sauce boosts the umami factor. Again, low-sodium or tamari can work here too. -
1 teaspoon dark soy sauce
This isn’t just about flavor; it delivers a rich color to your sauce. If needed, you can substitute with a bit of molasses for a similar effect. -
2 teaspoons brown sugar (or white sugar)
A touch of sweetness balances the salty components. It helps round out the flavors. -
1 tablespoon cornstarch (for the sauce)
This allows us to achieve a glossy finish to our delicious sauce. -
1 head broccoli (cut into bite-sized florets)
Fresh broccoli is essential for that crunchy bite! You can substitute with snow peas or bok choy for a twist. -
1 tablespoon peanut oil (or vegetable oil)
Remember to keep some oil for sautéing your veggies. -
3 garlic cloves (minced)
Garlic is a flavor powerhouse. If you love it, feel free to add more; there’s no such thing as too much garlic in my book! -
2 teaspoons ginger (minced)
Fresh ginger brightens this dish with a hint of spice. Don’t have fresh? Ground ginger can work in a pinch, but adjust the quantity since it’s more concentrated!
Step-by-Step Instructions
Alright, it’s showtime! Follow these steps to whip up a sensational Beef and Broccoli dish that will have everyone asking for seconds.
Step 1: Prep Your Ingredients
The first thing we want to do is prep all our ingredients. Trust me on this, having everything ready makes cooking so much smoother. Slice the flank steak against the grain into thin strips; about 1/4 inch works best. If your meat is slightly frozen, it will be easier to slice!
Step 2: Marinate That Beef
In a bowl, combine the steak strips with 1 tablespoon of soy sauce, 1 tablespoon of peanut oil, and 1 tablespoon of cornstarch. If you’re using baking soda, sprinkle that in too. Give it a good mix until the beef is well-coated—this marinade will help tenderize your meat and infuse it with flavor. Let it sit for about 20 minutes at room temperature while we prep the rest.
Step 3: Get Your Broccoli Ready
While your beef is soaking up those flavors, let’s turn our focus to the broccoli. Cut up your broccoloce tiniest florets—this way, they’ll cook evenly and quickly. Then, in a separate pot, bring some water to a boil. Blanch the broccoli for about 30 seconds until bright green, and then immediately transfer it to an ice bath to halt the cooking process. This keeps it crisp and vibrant!
Step 4: Stir-Fry Time
In a large skillet or wok, heat 1 tablespoon of peanut oil over medium-high heat. Once hot, add the marinated beef in a single layer (don’t overcrowd the pan) and let it sear. After about 1-2 minutes, stir-fry the beef until it’s just browned but not fully cooked. Remove the beef from the skillet and set aside.
Step 5: Add Aromatics
In the same skillet, throw in your minced garlic and ginger. Let those fragrant ingredients sauté for about 30 seconds until they start to release their lovely aroma. This is where the magic begins!
Step 6: Bring It All Together
Now, in the same skillet, add the blanched broccoli back in along with the beef. Stir to combine.
Meanwhile, we’ll whip up our sauce! In a small bowl, mix together the chicken stock, Shaoxing wine, 2 tablespoons of soy sauce, 1 teaspoon of dark soy sauce, brown sugar, and the remaining 1 tablespoon of cornstarch until smooth. Pour this over the beef and broccoli mixture, and give it a good stir. The sauce will start to thicken and coat everything beautifully. Let it simmer for a couple of minutes until the beef is cooked through and all ingredients are heated.
Step 7: Final Touches
Taste your glorious creation and adjust seasoning. You might want a pinch more sugar or soy sauce; do it according to your palate!
Serving Suggestions
Now that you’ve created this beautiful dish (pat yourself on the back!), it’s time to plate it up. I love serving my Beef and Broccoli over a steaming bowl of fluffy jasmine rice—there’s something about that combination that just feels right.
Scoop a generous portion of beef and broccoli onto your bed of rice, letting that luscious sauce spill over the grains. For an extra touch, garnish with sesame seeds or sliced green onions. And there you have it—a restaurant-quality dish that’s way better than takeout!
Recipe Variations
Feeling adventurous? Here are some creative twists and dietary swaps you can try with this recipe:
-
Add More Veggies: Throw in some sliced bell peppers, carrots, or snap peas for additional colors and nutrients.
-
Spicy Kick: If you like it with a kick, add some red pepper flakes or sriracha to the sauce.
-
Cauliflower Swap: For a low-carb version, substitute the broccoli with cauliflower florets.
-
Protein Alternatives: This recipe isn’t just for beef! Try it with chicken, tofu, or even shrimp. Just make sure to adjust cooking times to accommodate different proteins.
-
Add Noodles: Toss in some cooked regular or rice noodles at the end for a heartier meal.
Chef’s Notes
Food is a wonderful journey; every recipe has a story! My version of Beef and Broccoli has evolved over the years, shaped by family gatherings, travel, and of course, countless taste tests from friends. I remember the first time I decided to add brown sugar—it was a total game-changer!
And let’s talk about the time my friend tried to make it for a date night but accidentally used the entire bottle of dark soy sauce. Let’s just say it was a super salty experience that didn’t go as planned—priceless food memory, if you ask me!
FAQs and Troubleshooting
1. What can I substitute for flank steak?
You can use skirt steak, sirloin, or even chicken for a lighter option. Just remember to adjust cooking times slightly depending on the meat.
2. My sauce turned out too thick; what can I do?
No worries! Just whisk in a little extra broth or water to thin it out until it reaches your desired consistency.
3. The broccoli is mushy; how do I avoid this next time?
Make sure to blanch the broccoli only for about 30 seconds, and immediately transfer it to an ice bath. This keeps it crunchy and vibrant!
4. Can I prep this dish ahead of time?
Absolutely! You can marinate the beef and chop the veggies ahead of time. Just store them in the fridge until you’re ready to cook.
Nutritional Info
(Since every recipe can vary based on serving sizes and ingredient choices, be sure to adjust according to your ratios!)
- Serving Size: 1 cup
- Calories: 340
- Protein: 28g
- Fat: 14g
- Carbohydrates: 22g
- Fiber: 3g
- Sugar: 5g
This dish delivers a great balance of protein and nutrients while being lower in carbs if you choose to serve it on its own or with veggies.
Final Thoughts
And there you have it, my friends! This Chinese Beef and Broccoli recipe is more than just a meal; it’s a pathway to cozy kitchen moments, laughter, and lasting memories. Whether you’re cooking solo, trying to impress a loved one, or simply reviving old traditions, this dish brings everyone together in the best ways possible.
So roll up those sleeves, gather your ingredients, and let’s make some culinary magic happen. At the end of the day, Good food is all about connection, and I can’t wait to hear how your kitchen adventure turns out! Give it a try, and let the flavors and stories unfold. Happy cooking! 🍽️
Print
Chinese Beef and Broccoli
- Total Time: 30 minutes
- Yield: 4 servings 1x
- Diet: None
Description
A classic dish featuring tender beef and crisp broccoli in a savory sauce, perfect for family gatherings.
Ingredients
- 1 lb flank steak
- 1 tablespoon soy sauce
- 1 tablespoon peanut oil
- 1 tablespoon cornstarch
- 1/2 teaspoon baking soda (optional)
- 1/2 cup chicken stock
- 2 tablespoons Shaoxing wine
- 2 tablespoons soy sauce
- 1 teaspoon dark soy sauce
- 2 teaspoons brown sugar
- 1 tablespoon cornstarch (for the sauce)
- 1 head broccoli (cut into bite-sized florets)
- 1 tablespoon peanut oil
- 3 garlic cloves (minced)
- 2 teaspoons ginger (minced)
Instructions
- Prep your ingredients.
- Marinate the beef.
- Get your broccoli ready.
- Stir-Fry the beef.
- Add aromatics.
- Bring it all together.
- Final touches.
Notes
Serve with fluffy jasmine rice and garnish with sesame seeds or green onions.
- Prep Time: 15 minutes
- Cook Time: 15 minutes
- Category: Main Course
- Method: Stir-frying
- Cuisine: Chinese
Nutrition
- Serving Size: 1 cup
- Calories: 340
- Sugar: 5g
- Sodium: 800mg
- Fat: 14g
- Saturated Fat: 2g
- Unsaturated Fat: 7g
- Trans Fat: 0g
- Carbohydrates: 22g
- Fiber: 3g
- Protein: 28g
- Cholesterol: 60mg
Keywords: Beef and Broccoli, Chinese recipe, stir-fry, comfort food

Juicy Street Corn Pasta Salad
Juicy Street Corn Pasta Salad: A Flavorful Fiesta in a Bowl
Hey there, fellow food lovers! Buckle up for a flavor-packed adventure as we whip up something truly special: Juicy Street Corn Pasta Salad. This lively dish takes the classic summer street corn experience and transforms it into a pasta salad that’s perfect for any gathering, picnic, or even a cozy night in. Fresh, zesty, and downright delicious, it’s a burst of sunshine on your plate.
Have you ever had one of those dishes that instantly transports you back to a sun-soaked summer day? Maybe it was a family barbecue in the backyard, or a street fair filled with laughter and the aroma of grilled corn wafting through the air. That’s exactly what this Juicy Street Corn Pasta Salad embodies. It’s an ode to warmth, togetherness, and of course, mouthwatering flavors!
I remember the first time I really fell in love with street corn. I was at a festival, surrounded by friends, music blaring, and the smell of grilled corn in the air. The way they slathered that corn with creamy goodness, sprinkled it with cheese, and topped it off with fresh lime? Pure magic! It just felt like celebration in every bite. I knew I had to capture that essence in a dish that everyone could enjoy, no matter the season.
This pasta salad not only brings the street corn flavor to your table, but it also embraces the versatility of pasta. It’s a fun and refreshing twist that works wonderfully as a side dish or a stand-alone meal. Whether you’re hosting friends, prepping for a family gathering, or just satisfying your own cravings, this recipe has you covered. So let’s get those pots and pans ready because we’re diving into this culinary fiesta!
Personal Story
Ah, the memories of summer! There was a time when my family would gather for our yearly summer cookout. My uncle would take on the grilling duties, and I would squeeze my way through a throng of family members, each one waiting to sink their teeth into juicy, grilled corn fresh off the cob. I can still hear the sizzle and smell the charred sweetness! My grandmother would make her famous chipotle lime mayo, and let me tell you, that stuff was legendary!
One day, inspired by those sunny days filled with laughter and love, I decided to replicate that flavor with a little twist. I thought, “Why not celebrate these bold flavors in a pasta salad, too?” So, I grabbed a box of pasta, some fresh corn from the market, and the rest is history. What came out of that kitchen adventure became an instant hit at our next family gathering, and it’s been a staple ever since. Now, whenever I serve this Juicy Street Corn Pasta Salad, I not only feed my belly but also my soul, bringing back all those cherished memories. Trust me; it’s a dish that carries love, nostalgia, and a whole lot of flavor!
Ingredients
Let’s gather up our ingredients for this colorful creation! Here’s what you’ll need to make your Juicy Street Corn Pasta Salad sing:
-
8 oz Pasta (your choice): Whether you’re a fan of fusilli, penne, or good old elbow macaroni, pasta is the base here. Personalize it! Just remember to cook it al dente for that perfect bite. If you’re gluten-free, opt for chickpea or quinoa pasta!
-
2 cups Fresh Corn (cooked): Grab some sweet corn! You can use frozen corn if fresh isn’t available—just make sure it’s cooked. If you’re feeling adventurous, grill it for extra flavor!
-
1 cup Cherry Tomatoes (halved): These little gems provide sweetness and color. If cherry tomatoes aren’t your jam, go for grape tomatoes or even diced regular tomatoes. Freshness over everything!
-
1/2 cup Red Onion (finely chopped): A little crunch and zing! If raw onion isn’t your thing, soak it in cold water for 10 minutes to mellow out the flavor.
-
1/2 cup Bell Peppers (diced, any color): Bell peppers add crispness and vibrant colors to the dish. You can mix and match colors for a truly festive feel.
-
1/4 cup Cilantro (chopped): It’s fresh, it’s herbaceous! If cilantro isn’t your favorite, parsley can be a nice substitute.
-
1/4 cup Lime Juice: Zesty and bright! Fresh lime juice is best. In a pinch, bottled lime juice will do, but it lacks that fresh punch.
-
3 tbsp Olive Oil: For richness and to marry all the flavors together. Don’t skimp—good quality olive oil makes a difference!
-
Salt and Pepper to taste: Simple but vital! Adjust to your preference. Remember, seasoning as you go is key to a well-balanced dish.
-
1 cup Feta Cheese (crumbled, optional): Crumbled feta adds a creamy, tangy note. Not a fan? You can use goat cheese or omit it entirely.
Now that we’ve got our ingredients lined up, let’s get cooking!
Step-by-Step Instructions
Alright, my kitchen warriors, let’s turn this list of ingredients into a masterpiece! Follow these steps for your Juicy Street Corn Pasta Salad:
-
Cook the Pasta:
Begin by boiling a pot of salted water. Once it reaches a rolling boil, add your pasta. Cook according to package instructions until al dente (usually about 7–10 minutes). Drain and rinse under cold water to stop the cooking process and cool it down. This step is crucial if you want a refreshing salad! -
Prep the Corn:
If using fresh corn, carefully cut the kernels off the cob. If using frozen corn, just pop it into the microwave or sauté it for a couple of minutes until cooked. You want that sweetness to shine! -
Chop Your Veggies:
Dice up the red onion and bell peppers, and halve those cherry tomatoes. The trick to a good salad? The more colorful, the better! -
Combine the Ingredients:
In a large mixing bowl, toss together your cooled pasta, corn, cherry tomatoes, red onion, and bell peppers. Don’t be shy! Use your hands for this—mix until everything is well combined. -
Make the Dressing:
In a separate small bowl, whisk together the lime juice and olive oil. Add a generous pinch of salt and pepper. If you like a little heat, feel free to add a pinch of chili powder or a splash of hot sauce! -
Dress the Salad:
Pour that zesty dressing over your pasta mixture and toss gently. You’d be amazed at how a simple dressing can elevate your dish! -
Fold in the Cilantro and Feta:
Just before serving, gently fold in the chopped cilantro and feta cheese (if using). This keeps the greens fresh and the cheese intact. -
Taste Test:
Here comes the fun part! Take a spoonful and taste. Adjust the seasoning as needed. Do you want more lime? Throw in a squeeze! Want extra salt? Go for it! -
Chill and Enjoy:
For best flavor, let your Juicy Street Corn Pasta Salad chill in the refrigerator for about 30 minutes before serving. This allows all those flavors to really mingle.
Serving Suggestions
Now that our salad is prepped and chilled, how should we serve this colorful dish? Festive, casual, or sophisticated—this pasta salad fits right in!
-
Rustic Plating: Simply scoop a generous portion into a bowl and garnish with extra feta and cilantro on top. Serve it alongside grilled meats or as part of a larger buffet spread.
-
Picnic Perfection: Pack it into mason jars for an adorable picnic treat! Layer the ingredients and dressings separately if you want to keep it fresh until serving.
-
Garnish in Style: If you’re feeling fancy, sprinkle some chili powder on top for an extra burst of color and flavor, or add a sliced lime wedge for that extra zing!
Recipe Variations
Every dish can transform with a few twists! Here are some fun variations to this Juicy Street Corn Pasta Salad that you can try:
-
Spicy Street Corn: Add diced jalapeños or a teaspoon of cayenne pepper to kick things up a notch.
-
Southwestern Style: Incorporate black beans and avocado for extra protein and creaminess, plus a touch of cumin to the dressing.
-
Herb-Infused: Swap out cilantro for fresh basil or dill for a different herby flavor. These herbs will create a whole new vibe!
-
Cheesy Goodness: If feta isn’t your thing, try shredded Monterey Jack or a sprinkle of parmesan for a melted, savory twist.
-
Light & Zesty: For a light version, substitute the pasta with zucchini noodles (zoodles) for a low-carb twist while capturing that fresh taste of summer.
Chef’s Notes
Let me tell you, this recipe has evolved over time! There’s something about mixing it up as seasons change. Sometimes I toss in leftover grilled veggies from a previous BBQ or substitute whatever greens I have on hand. It’s a beautiful way to improvise and let creativity flow! Each batch becomes uniquely yours, which is precisely how cooking should be—an expression of you!
And let’s not forget about the stories that come with each recipe. Over the years, I’ve made this dish for potlucks, birthday parties, and family dinners. Kids have danced around it while adults rave over seconds. When you share food, you share love, and there’s nothing more fulfilling.
FAQs and Troubleshooting
Q: Can I make this salad ahead of time?
A: Absolutely! In fact, letting it chill for a bit allows the flavors to meld beautifully. Just keep it in an airtight container in the fridge for up to 3 days.
Q: The pasta is too sticky; how can I prevent that?
A: Make sure to rinse your pasta after draining to stop the cooking process and prevent it from sticking together.
Q: What if I don’t have any lime?
A: No problem! Lemon juice works perfectly as a substitute and will give you a lovely zesty twist.
Q: Can I add protein to this dish?
A: Definitely! Grilled shrimp, chicken, or even chickpeas would be perfect additions for some heartiness!
Nutritional Info
While specifics can vary by ingredient brands and portion sizes, a serving of this Juicy Street Corn Pasta Salad (approximately 1 cup) generally has:
- Calories: ~300
- Protein: ~8g (with feta)
- Carbohydrates: ~36g
- Dietary Fiber: ~4g
- Total Fat: ~14g
This salad is definitely a wholesome dish, packed with nutrients from fresh veggies, healthy fats from olive oil, and a bit of protein if you choose to add cheese!
Final Thoughts
There you have it, my friends—a delightful, vibrant Juicy Street Corn Pasta Salad that’s just bursting with flavors. This recipe is more than just a salad; it’s an experience, a celebration, and a reminder that food brings people together. So, whether you enjoy this dish on a sunny picnic blanket or at a cozy family dinner, know that you’re indulging in a taste of joy.
Don’t forget to make this recipe your own! Play around with flavors, invite friends to join in the fun of preparing, and savor every bite. After all, the kitchen is not just a space for cooking; it’s where stories are made, laughs are shared, and memories are created.
Until next time, happy cooking, and remember, the best meals come from the heart!
Print
Juicy Street Corn Pasta Salad
- Total Time: 25 minutes
- Yield: 4 servings 1x
- Diet: Vegetarian
Description
A lively pasta salad that captures the flavors of classic summer street corn with fresh ingredients and zesty dressing, perfect for gatherings or picnics.
Ingredients
- 8 oz Pasta (your choice)
- 2 cups Fresh Corn (cooked)
- 1 cup Cherry Tomatoes (halved)
- 1/2 cup Red Onion (finely chopped)
- 1/2 cup Bell Peppers (diced, any color)
- 1/4 cup Cilantro (chopped)
- 1/4 cup Lime Juice
- 3 tbsp Olive Oil
- Salt and Pepper to taste
- 1 cup Feta Cheese (crumbled, optional)
Instructions
- Cook the Pasta: Boil salted water, add pasta, cook until al dente, drain, and rinse with cold water.
- Prep the Corn: Cut kernels off fresh corn or microwave frozen corn until cooked.
- Chop Your Veggies: Dice red onion and bell peppers, halve cherry tomatoes.
- Combine the Ingredients: In a bowl, mix pasta, corn, tomatoes, onion, and peppers.
- Make the Dressing: Whisk lime juice and olive oil with salt and pepper.
- Dress the Salad: Pour dressing over the pasta mixture and toss gently.
- Fold in the Cilantro and Feta: Gently add cilantro and feta just before serving.
- Taste Test: Adjust seasoning to your preference.
- Chill and Enjoy: Refrigerate for about 30 minutes before serving.
Notes
This salad can be made ahead of time and stores well for up to 3 days. Rinse pasta to prevent sticking.
- Prep Time: 15 minutes
- Cook Time: 10 minutes
- Category: Salad
- Method: Mixing
- Cuisine: American
Nutrition
- Serving Size: 1 cup
- Calories: 300
- Sugar: 4g
- Sodium: 350mg
- Fat: 14g
- Saturated Fat: 3g
- Unsaturated Fat: 8g
- Trans Fat: 0g
- Carbohydrates: 36g
- Fiber: 4g
- Protein: 8g
- Cholesterol: 20mg
Keywords: pasta salad, street corn, summer dish, vegetarian, colorful salad
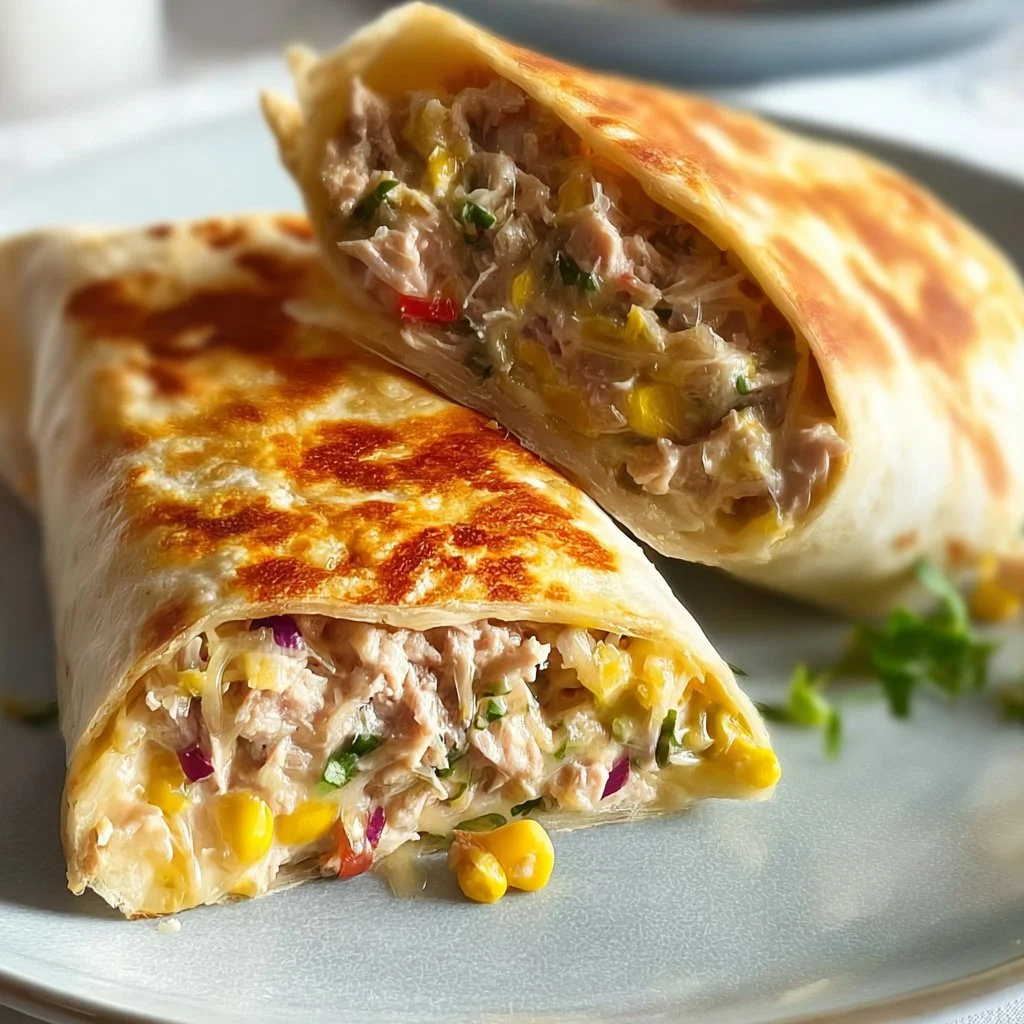
Tuna Melt Wrap
# The Ultimate Tuna Melt Wrap: A Solo Chef’s Favorite

## Introduction

Hey food lovers! I’m Beau Collier, and today we’re diving into one of my favorite comfy classics – the Tuna Melt Wrap. Yes, you heard it right! Imagine your traditional tuna melt but wrapped up nice and cozy, ready to fuel your day with just the right kind of flavor. Whether you’re looking for something simple to whip up on a busy weeknight or a fun dish to impress your friends, this wrap has your back!

Tuna melts have been around forever, and there’s something about that creamy, cheesy goodness stuffed into a warm wrap that just hits the spot. Plus, it’s a fantastic way to use pantry staples. Did someone say convenience? And guess what? You don’t have to slay over the stove for hours to make this happen. With just a few ingredients and about 20 minutes to spare, you’ll have a satisfying meal that tastes like you spent the entire day in the kitchen. Sounds good, right?

But before we roll up our sleeves and get cooking, let me take you on a tasty little journey down memory lane. Cooking has always been about connection for me—whether it’s shared meals with family, rekindling friendships over food, or the simple joy of creating something from scratch. This tuna melt wrap combines all those elements, delivering both nostalgia and deliciousness in every bite. So grab a fork (or your favorite mug), and let’s dig in!

---

## Personal Story: A Culinary Flashback

I vividly remember a Saturday afternoon when I was around twelve years old—my mom and I were in the kitchen, and the sun filtered through the window, bathing us in that warm golden light. My mom was rummaging through the pantry while I was busy daydreaming about the delicious feast we were going to create. Suddenly, she pulled out a can of tuna, and I can still hear her say, “How about tuna melts today?” I thought tuna was only for sandwiches, but boy, was I wrong!

She mixed tuna, mayo, and herbs, but the best part was when she added that layer of melted cheese on top. As it broiled in the oven, I couldn’t help but sneak a taste of the tuna mixture. I’ll never forget how simple ingredients came together to create something truly special. It was in that moment, watching the cheese bubble and golden, that my love for cooking began. While we’ve jazzed it up over the years, this wrap pays homage to those days. With this recipe, you’ll be channeling some serious retro vibes while crafting your own culinary masterpiece!

---

## Ingredients

Now that we’ve set the mood, let’s gather our ingredients. Here’s what you’ll need for making these mouthwatering Tuna Melt Wraps:

- **1 can of tuna, drained**
  *Look for tuna packed in water for a healthier option, or go for oil-packed if you prefer a richer flavor. Canned salmon or chicken can be great substitutes too!*

- **2 tablespoons mayonnaise**
  *Feel free to swap in Greek yogurt for a lighter version or even avocado for a creamy twist!*

- **1 tablespoon Dijon mustard**
  *This adds a tangy kick. If you’re not a fan, regular mustard or even some spicy sriracha can spice things up nicely!*

- **1/4 cup diced celery**
  *Celery gives that perfect crunch. If you don't have any, chopped bell peppers or pickles work well too!*

- **1/4 cup diced pickles**
  *Adding a bit of zesty flavor. Try using sweet or bread-and-butter pickles for extra sweetness, or omit if you prefer!*

- **Salt and pepper to taste**
  *Don’t be shy! A little seasoning will help bring all the flavors together.*

- **Whole wheat wraps**
  *These are my go-to for a healthier option. Feel free to use tortillas—flour or corn—just keep an eye on the size if you’re packing ‘em!*

- **1/2 cup shredded cheese (cheddar or your choice)**
  *Cheddar is classic, but try pepper jack for a little spice or mozzarella for that gooey stretchy goodness!*

- **Lettuce or spinach**
  *A handful of greens adds freshness. You can use any leafy greens, or even arugula for that peppery kick!*

---

## Step-by-Step Instructions

Alright, culinary adventurers! Let’s get cooking. Here’s how we bring this Tuna Melt Wrap to life in just a few simple steps.

### Step 1: Prepare the Tuna Salad Mixture
1. **In a mixing bowl**, combine your drained tuna, mayonnaise, and Dijon mustard.
   - *Tip: Use a fork to break up the tuna nicely—it helps mix everything uniformly!*

2. **Add in your diced celery and pickles**.
   - *Pro tip: You can chop the celery finely for more texture or leave it chunky for a hearty feel!*

3. **Season generously with salt and pepper**.
   - *Remember, taste as you go! A little sprinkle goes a long way... You want that flavor to sing!*

### Step 2: Prepare Your Wrap
1. **Lay your whole wheat wrap flat** on a clean surface or cutting board.
   - *Chef Insight: Warm your wrap slightly in a dry pan for a few seconds on each side before filling. It makes rolling easier and adds a nice touch!*

2. **Spoon a generous portion of the tuna mixture** onto the center of the wrap.
   - *Don’t be stingy—this is the star of the show!*

3. **Sprinkle on that shredded cheese.**
   - *Here’s where it gets cheesy—literally! Lay it on thick for melty goodness!*

### Step 3: Roll It Up
1. **Fold in the sides of the wrap**, then roll it up tightly from the bottom.
   - *A handy technique is to hold the sides while rolling with one hand and tucking in as you go. The key is to keep it snug without overstuffing!*

2. **Place the seam side down** on a preheated skillet (medium heat).
   - *Chef hack: If you have a panini press, use that for an even better crunch outside!*

### Step 4: Toast to Perfection
1. **Cook until golden brown** on one side (about 3-4 minutes), then carefully flip and cook the other side.
   - *Always keep an eye on it, as the cheese can melt quickly!*

2. **Once both sides are crispy and the cheese is melted**, remove it from the skillet and let it rest for a minute.
   - *Don’t skip this step! Cutting too soon can cause oozy cheese spills.*

### Step 5: Slice and Serve
1. **Cut the wrap in half**, and you’ll see that glorious melty cheese and tuna salad peeking out!
   - *For an extra touch, a diagonal cut showcases those layers beautifully!*

---

## Serving Suggestions

Now that you’ve got that irresistible Tuna Melt Wrap, presentation is key! Serve it up with a side of your favorite chips or a fresh salad for a colorful plate. Add a handful of baby greens or a dollop of sour cream for that gourmet vibe.

Feeling adventurous? Try a rainbow of sides: crispy carrot sticks, cucumber slices, or even a small bowl of homemade coleslaw! You can never go wrong with a side of freshness to balance the richness of the wrap.

---

## Recipe Variations

No two foodies are the same, and neither should their recipes be! Here are some delicious variations to try when you want to switch it up:

1. **Spicy Tuna Fling**: Add a tablespoon of sriracha or your favorite hot sauce to the tuna mixture for a spicy kick.
2. **Mediterranean Twist**: Swap mayo for tzatziki sauce and add chopped olives or sun-dried tomatoes for a zesty vibe.
3. **Herb Lovers’ Dream**: Mix in fresh herbs like dill, cilantro, or parsley to lift the tuna flavor to new heights.
4. **Vegan Marvel**: Replace tuna with chickpeas or canned jackfruit, and use vegan mayo for a plant-based alternative.
5. **Green Goddess**: Add mashed avocado for creaminess along with chopped spinach for a burst of nutrients.

---

## Chef’s Notes

As I’ve mastered this Tuna Melt Wrap over the years, I’ve learned one thing: simplicity is key! Elegant flavors often emerge from straightforward ingredients, and using whatever you have on hand can lead to delicious discoveries. This recipe has traveled with me through many culinary seasons, and seeing how the wrap has evolved keeps it fresh and exciting.

Oh, and let me share a little kitchen humor: the first time I made these wraps, I forgot the cheese. You better believe they still tasted good, but when I bit into the warm wrap and found that cheesy goodness on my next try—let’s just say it was the most satisfying ‘aha’ moment ever!

---

## FAQs and Troubleshooting

**Q: What can I do if the wrap falls apart while rolling?**
- *A: Try not to overfill! If it’s too stuffed, your wrap will become rebellious. Also, make sure your wrap is pliable; if it feels stiff, warming it helps!*

**Q: Can I make this ahead of time?**
- *A: Absolutely! Prepare the tuna salad mixture and wrap it tightly in cling film. Assemble on the day you plan to serve for the best freshness!*

**Q: How do I know when the cheese is melted?**
- *A: Just keep an eye on it; about 3–4 minutes per side usually does the trick. A little peek after flipping helps too!*

**Q: What if I'm not a big tuna fan?**
- *A: No worries! Soldier on with shredded chicken, shrimp, or even a hearty vegetable medley instead, the world is your oyster... or wrap!*

---

## Nutritional Info

Let’s talk nutrition! This Tuna Melt Wrap, if made with whole-wheat wraps and loaded with veggies, packs a punch:

- **Calories**: Approximately 400-500 per wrap (depending on cheese and condiments)
- **Protein**: Tuna alone brings about 20 grams!
- **Fiber**: Whole wheat wraps offer about 5 grams.
- **Vitamins and Minerals**: With the addition of greens and pickles, you’ll get a good dose of vitamins A, C, and K, not to mention great hydration!

**Nutritional Tip**: Amping up your greens and substituting whole ingredients can even turn this wrap into a powerhouse meal, full of the nutrients your body craves!

---

## Final Thoughts

And there you have it—the mouthwatering Tuna Melt Wrap, made with love and a sprinkle of creativity! It’s a fun dish that’s not only tasty but also tailors to your personal tastes and dietary needs. Whether you’re grabbing a quick lunch, hosting a casual dinner party, or just craving some comfort food, this wrap has got your back.

I hope you give this recipe a try, and don’t hesitate to share your twists and experiences down in the comments. Happy wrapping, and until next time, keep spreading that culinary joy in your kitchen! 🥙

Grab your loved ones, create those memories, and enjoy the delicious chaos that is cooking! Now, who’s hungry?

The Ultimate Tuna Melt Wrap
- Total Time: 20 minutes
- Yield: 1 serving 1x
- Diet: Pescatarian
Description
A cozy and satisfying twist on the classic tuna melt, wrapped up and ready to enjoy!
Ingredients
- 1 can of tuna, drained
- 2 tablespoons mayonnaise
- 1 tablespoon Dijon mustard
- 1/4 cup diced celery
- 1/4 cup diced pickles
- Salt and pepper to taste
- Whole wheat wraps
- 1/2 cup shredded cheese (cheddar or your choice)
- Lettuce or spinach
Instructions
- In a mixing bowl, combine your drained tuna, mayonnaise, and Dijon mustard.
- Add in your diced celery and pickles.
- Season generously with salt and pepper.
- Lay your whole wheat wrap flat on a clean surface or cutting board.
- Spoon a generous portion of the tuna mixture onto the center of the wrap.
- Sprinkle on that shredded cheese.
- Fold in the sides of the wrap, then roll it up tightly from the bottom.
- Place the seam side down on a preheated skillet (medium heat).
- Cook until golden brown on one side (about 3-4 minutes), then carefully flip and cook the other side.
- Once both sides are crispy and the cheese is melted, remove it from the skillet and let it rest for a minute.
- Cut the wrap in half, and you’ll see that glorious melty cheese and tuna salad peeking out!
Notes
Serve it with your favorite chips or a fresh salad. Feel free to modify the recipe with different ingredients or flavors.
- Prep Time: 10 minutes
- Cook Time: 10 minutes
- Category: Main Course
- Method: Grilling
- Cuisine: American
Nutrition
- Serving Size: 1 wrap
- Calories: 450
- Sugar: 4g
- Sodium: 600mg
- Fat: 25g
- Saturated Fat: 8g
- Unsaturated Fat: 12g
- Trans Fat: 0g
- Carbohydrates: 35g
- Fiber: 5g
- Protein: 25g
- Cholesterol: 40mg
Keywords: tuna melt, wrap, easy lunch, comfort food
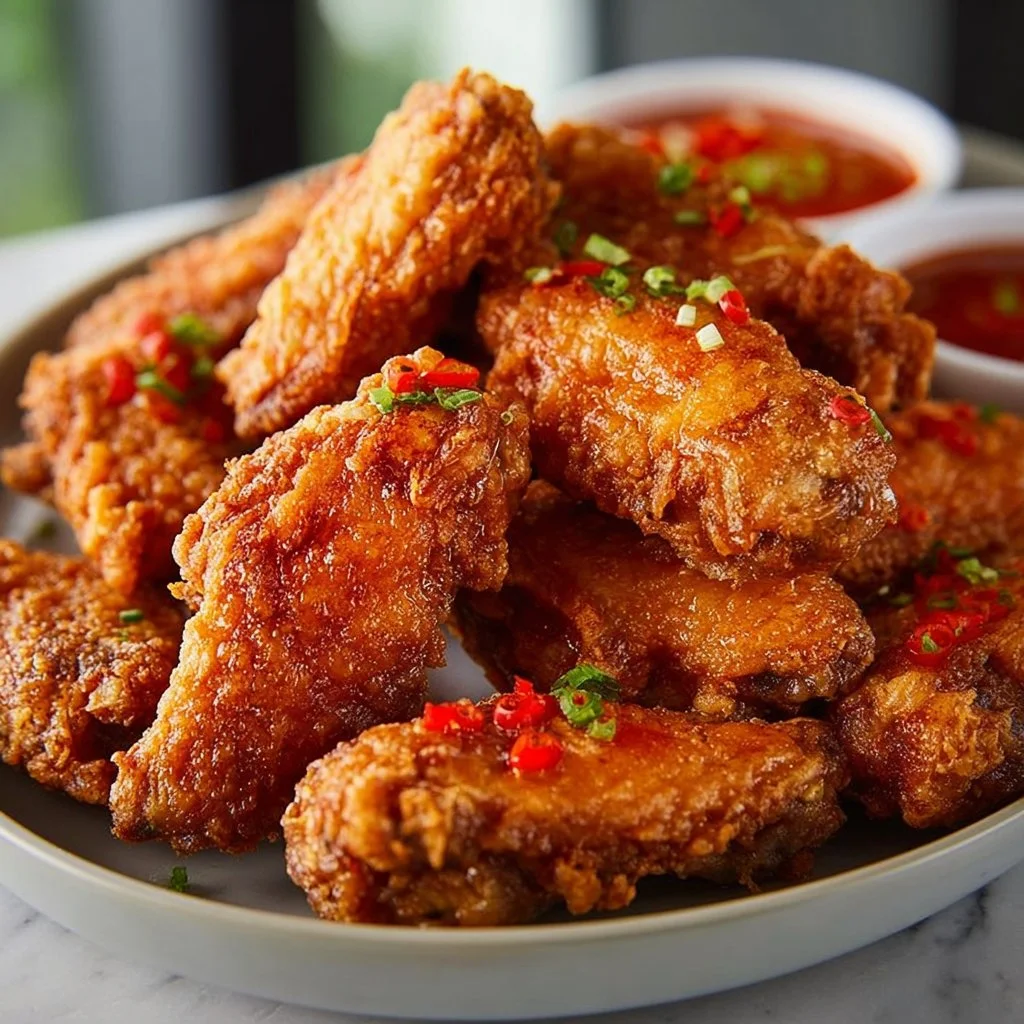
Crispy Fried Chicken Wings Recipe: A Simple, Flavorful Treat for Any Occasion
# Crispy Fried Chicken Wings Recipe: A Simple, Flavorful Treat for Any Occasion

## Introduction

Hey there, fellow food lover! Welcome back to Feastical, your happy place for feel-good food. Today, we’re diving into a classic comfort dish that’s sure to bring smiles around the table: Crispy Fried Chicken Wings! These golden, crunchy bites are a staple for game nights, family gatherings, or when you just want to treat yourself to something utterly delicious.

Now, who doesn’t love a good wing? They’re perfect for digging into while catching your favorite sports game or simply enjoying a cozy evening at home. But here’s the kicker — they don't have to be complicated to make! Trust me, with just a few simple ingredients and some love, we’ll have your kitchen smelling like a restaurant in no time. And between you and me, the best part about making wings at home is that you can customize the flavors however you like!

In this recipe, we’ll cover everything you need, from gathering our ingredients to serving your delicious wings. Whether you’re seasoned in the kitchen or just figuring out where your spatula is stashed, I’m here to show you how to make these wings crispy, flavorful, and utterly irresistible. So, let’s roll up our sleeves and get those wings frying!

## Personal Story

Ah, chicken wings! They always remind me of a special summer BBQ I had with my family years back. I was just a kid, barely tall enough to see over the grill, but the smell of frying chicken filled the air — a scent that seemed to go hand-in-hand with laughter and fun. My uncle was the self-proclaimed "Wing King," and he had perfected his recipe over the years. Everyone was clamoring around the grill, hoping to get the first taste of those crispy treats.

I remember the anticipation, the golden wings flying off the platter as soon as they hit the table. I swear, I couldn’t eat just one! The joy of gathering with loved ones, sharing stories, and, of course, devouring those wings brought me so much happiness. That day inspired me to create my own version of crispy fried chicken wings, one that brings the same feeling of warmth and connection. With this recipe, I hope to evoke the same joy for you! Ready to make your own batch of crispy memories? Let's get started!

## Ingredients

To whip up a batch of these scrumptious wings, here’s what you’ll need:

- **2 lbs chicken wings**
  - Look for fresh or frozen wings, depending on what’s available. If using frozen, make sure to fully thaw them before cooking. For a healthier option, you can also use boneless chicken thighs.

- **17 fl oz vegetable or canola oil**
  - We use these oils because they have a high smoke point, perfect for frying. They also won’t overwhelm the flavor of your wings. If desired, you can try peanut oil for a nuttier taste, but ensure no one has allergies.

- **1/2 cup all-purpose flour**
  - This helps create that glorious crispiness we're after! If you're looking for gluten-free options, you can swap it out for almond flour or a gluten-free flour blend.

- **1 tsp salt**
  - Essential for seasoning the wings to perfection. Remember, you can always adjust this to suit your taste.

- **1/2 tsp black pepper**
  - A little heat will elevate your wings. Feel free to use freshly ground pepper for a stronger flavor.

- **1/4 tsp garlic powder**
  - This adds a kick of flavor without being overpowering. If you love garlic, try adding fresh minced garlic instead!

- **1/4 tsp paprika**
  - To give those wings a lovely color and a subtle sweetness. Smoked paprika can add a deeper flavor profile if you're feeling adventurous.

- **1/4 tsp cayenne pepper**
  - For those who like it spicy! You can adjust this based on your tolerance; it’s totally optional.

- **1 whole egg**
  - This allows our flour coating to stick beautifully to the wings. For a vegan alternative, you could use aquafaba or a flax egg.

## Step-by-Step Instructions

### 1. Prepping the Wings
Start by rinsing your chicken wings under cold water. Pat them dry with paper towels – this is key! The drier the wings, the crispier they will get.

### 2. Marinating
In a large mixing bowl, toss the wings with salt, black pepper, garlic powder, paprika, and cayenne pepper for about 10-15 minutes. You want all those flavors to seep into the meat. Let them sit while you prepare your batter.

### 3. Preparing the Batter
In a separate bowl, whisk the egg until it’s frothy. Then, taking the seasoned wings, dip them in the egg mixture, allowing any excess to drip off. The egg acts as glue to the flour, which we’ll get to next!

### 4. Coating the Wings
Now, toss the egg-coated wings into the flour. Use your hands to ensure they’re completely covered. Give them a gentle shake to remove any excess flour — we want them lightly coated, not caked!

### 5. Heating the Oil
In a heavy-bottomed pot or deep fryer, heat your oil over medium-high heat. Use a thermometer to get the oil to around 350°F (175°C). If you don’t have a thermometer, drop a small piece of bread in; if it sizzles and browns in about 60 seconds, you're good to go!

### 6. Frying the Wings
Carefully lower the coated wings into the hot oil, being careful not to overcrowd the pan. Fry them in batches for about 8-10 minutes or until they’re golden brown and crispy. Make sure to flip them halfway through for even cooking.

### 7. Draining the Wings
Once fried, carefully use a slotted spoon to remove the wings and let them drain on a paper towel-lined plate. This helps eliminate excess oil and keeps them crispy.

### 8. Serving
Serve your crispy fried chicken wings hot! They’re perfect as-is, but feel free to toss them in your favorite sauce or serve with dipping sauces on the side.

## Serving Suggestions

When it comes to plating, presentation is key! Arrange your wings on a large platter, perhaps sprinkle a bit of fresh parsley or chives for color – it's all about that wow factor! You can serve them with a side of celery and carrot sticks for a classic touch.

Outfit your table with an array of dipping sauces like ranch, buffalo sauce, or BBQ sauce, encouraging everyone to dive right in. The best part? Get ready for that satisfying crunch when they take their first bite!

## Recipe Variations

1. **Buffalo Style**: Toss the fried wings in melted butter and your favorite hot sauce for that classic Buffalo flavor.

2. **Honey Garlic**: After frying, drizzle with a mixture of honey, soy sauce, and minced garlic for a sweet Asian-inspired twist.

3. **Spicy Cajun**: Incorporate Cajun seasoning into your flour mix for a zesty kick!

4. **Lemon Pepper**: After frying, toss wings with fresh lemon juice and lemon pepper seasoning for a refreshing flavor.

5. **Sweet Chili**: Coat with sweet chili sauce afterward for a delicious sweet and spicy combo!

## Chef’s Notes

This crispy fried chicken wing recipe has been a staple in my kitchen for years, evolving from a basic breading technique to the perfected recipe it is today. I once tried to make a batch while multitasking and nearly set the smoke alarm off! But hey, that's part of the kitchen adventure, right?

The beauty of cooking is that you can tweak and refine recipes over time. Don’t hesitate to play around with flavors! Whether it’s adding your favorite spices or experimenting with sauces, the kitchen is yours to explore.

## FAQs and Troubleshooting

1. **Why aren’t my wings crispy?**
   - The key to crispy wings is drying them completely before frying and ensuring your oil is hot enough.

2. **Can I bake these instead?**
   - Absolutely! For a healthier version, bake at 425°F (220°C) for about 40-45 minutes, flipping halfway through until they’re crispy.

3. **What dipping sauces pair well?**
   - Classic ranch, buffalo sauce, blue cheese dip, or a tangy BBQ sauce are all excellent choices.

4. **How do I store leftovers?**
   - Store any leftovers in an airtight container in the fridge for up to 2 days. Reheat in an oven to retain crispiness.

## Nutritional Info

(Yield: 4 servings)

- **Calories per serving**: ~350
- **Protein**: ~28g
- **Fat**: ~23g
- **Carbohydrates**: ~10g
- **Fiber**: 0g
- **Sodium**: ~600mg

Please note, calorie counts can vary depending on portion sizes and cooking methods.

## Final Thoughts

There you have it, my friend! A delicious, crispy fried chicken wings recipe that’s sure to impress your friends and family — or keep all to yourself for a cozy night in. Due to the versatility of chicken wings, you can dress them up or down according to occasion or mood.

So, what are you waiting for? Grab your ingredients and let’s get cooking! I can’t wait for you to enjoy these tasty bites just as much as I do. Don’t forget to share your thoughts or any unique twists you try with me! Until next time, keep your spatula handy and your heart full of love for food. Happy cooking, and see you soon at Feastical!

Crispy Fried Chicken Wings
- Total Time: 45 minutes
- Yield: 4 servings 1x
- Diet: Paleo
Description
Delicious and crispy fried chicken wings, perfect for game nights or family gatherings.
Ingredients
- 2 lbs chicken wings
- 17 fl oz vegetable or canola oil
- 1/2 cup all-purpose flour
- 1 tsp salt
- 1/2 tsp black pepper
- 1/4 tsp garlic powder
- 1/4 tsp paprika
- 1/4 tsp cayenne pepper
- 1 whole egg
Instructions
- Start by rinsing your chicken wings under cold water. Pat them dry with paper towels.
- In a large mixing bowl, toss the wings with salt, black pepper, garlic powder, paprika, and cayenne pepper for 10-15 minutes.
- In a separate bowl, whisk the egg until frothy. Dip the seasoned wings in the egg mixture.
- Now, toss the egg-coated wings into the flour, ensuring they’re completely covered.
- In a heavy-bottomed pot or deep fryer, heat your oil over medium-high heat to around 350°F (175°C).
- Carefully lower the coated wings into the hot oil, frying them in batches for about 8-10 minutes until golden brown.
- Once fried, use a slotted spoon to remove the wings and let them drain on a paper towel-lined plate.
- Serve your crispy fried chicken wings hot, with your favorite dipping sauces on the side.
Notes
For a healthier version, you can bake the wings at 425°F (220°C) for about 40-45 minutes.
- Prep Time: 15 minutes
- Cook Time: 30 minutes
- Category: Main Course
- Method: Frying
- Cuisine: American
Nutrition
- Serving Size: 1 serving
- Calories: 350
- Sugar: 0g
- Sodium: 600mg
- Fat: 23g
- Saturated Fat: 6g
- Unsaturated Fat: 15g
- Trans Fat: 0g
- Carbohydrates: 10g
- Fiber: 0g
- Protein: 28g
- Cholesterol: 85mg
Keywords: crispy chicken wings, fried wings, party food, game night recipes, comfort food

Crispy Battered Fish and Chips Recipe
Crispy Battered Fish and Chips Recipe
Hey there, fellow food enthusiasts! Beau Collier here, and today we’re diving into a classic dish that has a special place in my heart, and on my dinner table—Crispy Battered Fish and Chips! This crispy, golden delight is more than just a meal; it’s a celebration of comfort food that brings families and friends together. Perfect for cozy dinners, gatherings, or just an indulgent night in, this dish is a symphony of crunch, flavor, and nostalgia.
I’ve been making fish and chips since I was a kid; it was a staple in my family’s weekend culinary adventures. We would huddle in the kitchen, flour dusting the countertops and the delicious scent of sizzling fish wafting through the air. The anticipation as we waited for the first piece to hit the plate was almost palpable! This dish isn’t just about the taste—it’s about the memories, the laughter, and the love that goes into every bite.
So, roll up your sleeves, grab your spatula, and let’s create this culinary masterpiece together! We will go through some fun stories, easy step-by-step instructions, and kitchen hacks that will have you feeling like a culinary rockstar in no time!
Personal Story
Ah, fish and chips—each bite brings me back to my childhood days spent at the local fish fry every Friday night. My family would pile into the car, and the anticipation would build with every turn, as the aroma of fried fish wafted through the air even before we arrived. There’s something inherently magical about food that carries memories, isn’t there?
One particular Friday stands out in my mind. I was around eleven years old, my father and I were on our usual fish and chip adventure, and after devouring an absurd amount of crispy goodness, my dad claimed I had a real knack for cooking. We decided on a whim to recreate that experience at home—and boy, did we make a mess! Flour on the floor, spilled oil everywhere, and I remember the sound of laughter washing over the kitchen chaos. It was one of those days that turned into a cherished family tradition, preparing our version of fish and chips in our little kitchen.
Fast forward to today, I still find joy and solace in making this dish. Whether I’m sizzling fish for friends or whipping up a batch for a cozy night at home, it’s a recipe that combines my love for cooking with cherished memories, proving that food truly tastes better when shared. The joy of preparing and sharing fish and chips is what brought me here today, and I can’t wait for you to experience the same!
Ingredients
Gathering the right ingredients is essential for creating the perfect fish and chips. Let’s break down what you’ll need:
-
4 large Russet potatoes (about 2½ pounds, scrubbed and peeled)
Russet potatoes are ideal for frying because they have a high starch content, which gives that fluffy interior and crisp exterior you crave. Feel free to substitute with Yukon Gold potatoes for a slightly creamier texture. -
¼ cup white vinegar
This will soak the potatoes before frying, helping them achieve the perfect golden exterior while keeping them tender inside. If you don’t have white vinegar, apple cider vinegar works too! -
Vegetable oil (as needed, for frying)
You’ll want neutral-flavored oil with a high smoke point, like canola or peanut oil. Avoid olive oil—it’s not suited for deep frying. -
Kosher salt (as needed)
Kosher salt is less intense than table salt, making it perfect for seasoning without overwhelming the flavor. Use it generously in your cooking for that deep flavor. -
1½ pounds cod or other flaky white fish
Cod is my go-to, with its mild flavor and flakiness. You can easily swap it with haddock or even tilapia for a different taste experience! -
Freshly ground black pepper (as needed)
Freshly ground elevates flavors; if you’re in a pinch, pre-ground works too, just keep it light. -
1 cup all-purpose flour
This provides the backbone for your batter. It contributes to the crunchy texture but feel free to swap with gluten-free flour if you’re on a gluten-free journey. -
1 cup white rice flour
Rice flour is a chef’s secret for achieving that ultra-crispy texture. You can replace it with cornstarch if you run low on rice flour; it will work just fine! -
2 teaspoons baking powder
This helps to lighten the batter. Without it, you might end up with a denser fry, so don’t skip it! -
½ teaspoon turmeric
This is for color—did you know it also provides a hint of flavor? Plus, who doesn’t love that golden hue? Substitute with curry powder for a different twist! -
½ cup vodka
Trust me on this one! Vodka helps keep the batter light and crisp. If you prefer not to use alcohol, use additional ice-cold sparkling water! -
1¼ cup chilled lager beer
Beer batter is a magical combination creating that wonderful crunchy texture. You can switch to non-alcoholic beer or extra sparkling water for a similar effect! -
Sliced lemon (for garnish)
A squeeze of fresh lemon brightens everything up! Other citrus, like lime, can also work, but lemon is classic. -
Malt vinegar (as needed)
A must for authentic fish and chips lovers. It’s tangy and delicious—don’t skip it! -
Tartar sauce (as needed)
This condiment is the perfect companion, bringing a creamy, tangy element to balance the crispy batter! You can make your own or grab a jar from the store—either way, it’s essential!
Step-by-Step Instructions
Now that we’ve got our ingredients ready, let’s get cooking! Here’s how to whip up the perfect crispy fish and chips:
-
Prep the Potatoes
Start by cutting your peeled Russet potatoes into thick fries—about 1/4 to 1/2 inch thick. Place them into a large bowl of cold water. This soaking step helps release some of the starch and keeps them from turning brown. After about 30 minutes, drain, rinse, and pat them dry. Pro tip: Use a clean kitchen towel to absorb as much moisture as you can; excess water can lead to soggy fries! -
Soak and Season the Potatoes
Now that they’re dry, transfer the fries to a bowl, add ¼ cup of white vinegar, and salt generously. Toss to coat and let them sit for another 15 minutes. This helps to enhance the flavor while prepping for the fryer! -
Heat the Oil
In a deep, heavy-bottomed pot, pour in enough vegetable oil to fill it about 3 inches deep. Heat the oil over medium-high heat. You can test if it’s ready by dropping a small piece of bread in—if it bubbles and turns golden in about 30 seconds, you’re good to go! Keeping an eye on your temperature is key, so use a thermometer if you’ve got one—around 350°F (175°C) is ideal. -
Prepare the Batter
In a mixing bowl, whisk together the all-purpose flour, rice flour, baking powder, turmeric, and a pinch of salt. Make a well in the center, and slowly pour in the vodka and lager beer, stirring until combined. The batter should be slightly lumpy and thick like pancake batter. Remember, don’t overmix! -
Fry the Potatoes
Carefully drop the fries into the hot oil in batches—this prevents overcrowding, which can cause them to steam instead of fry. Cook until they’re golden and crispy, about 4-5 minutes. Use a slotted spoon to transfer them to a paper towel-lined plate. Sprinkle with salt while they’re still hot! -
Cook the Fish
Pat the fish fillets dry with paper towels and season them with kosher salt and freshly ground black pepper. Dip each piece into the batter, letting the excess drip off. Gently swipe the fish into the hot oil, frying them in batches for about 5-7 minutes or until golden brown and cooked through. If your fish fillets are thick, you may need to cook them a tad longer—just keep an eye on the color! -
Drain and Serve
Once cooked, transfer the fish onto a paper towel-lined plate to absorb excess oil. Now it’s time for the grand assembly! Plate up those crispy fries alongside the golden fish, topped with lemon slices, and don’t forget those classic accompaniments like malt vinegar and tartar sauce.
Serving Suggestions
Presentation is key when it comes to fish and chips! For that classic pub-style look, I like to use a large, white platter or a newspaper-lined basket to recreate that cozy fish-and-chips restaurant vibe. Lay the crispy fries on the bottom, then plate the fish next, piled high and garnished with fresh lemon slices. Drizzle malt vinegar on the fries just before serving for an added zing!
Serve it up with a small bowl of tartar sauce on the side—this creamy condiment is an absolute must for the ultimate flavor contrast. You can also add some colorful coleslaw for a refreshing crunch and to balance the richness of the fried goodness!
Recipe Variations
Here are some fun twists and substitutions to try with your fish and chips:
-
Sweet Potato Fries: Swap out regular Russets for sweet potatoes for a slightly sweeter, vibrant alternative. They’re delicious and colorful!
-
Spiced Batter: Mix in spices like paprika or cayenne pepper in your batter for a little extra heat and flavor.
-
Panko Crust: Instead of the beer batter, consider rolling the fish in panko breadcrumbs for an extra crispy texture!
-
Vegetable Option: Make it vegetarian by substituting fish with thick slices of eggplant or zucchini, dipped in the same batter; they fry up beautifully crispy!
-
Gluten-Free: Use a gluten-free flour blend in place of all-purpose flour, along with your rice flour, to accommodate gluten-sensitive eaters.
Chef’s Notes
Fish and chips hold a soft spot in my heart—it’s one of those recipes I’ve seen evolve over the years. Back when I started, the only batter I knew to use was plain old all-purpose flour. Now, I love experimenting! The vodka trick? That was a game-changer—it imparted a lightness to the batter that takes this dish from basic to something special.
Also, I can’t help but chuckle at all the kitchen disasters I’ve encountered while perfecting this recipe. There was a time I misread a recipe and ended up with a batter that was too thin! You live and learn, right? Cooking is all about trial and error, and what matters most is to have a blast while doing it!
FAQs and Troubleshooting
-
Why did my batter not stick to the fish?
Ensure your fish fillets are dry before dipping them into the batter. If they’re too wet, the batter won’t adhere well. -
What if my oil is not hot enough?
If the temperature is too low, your fish and fries will absorb more oil and become greasy. Monitor temperature closely—use a thermometer, if possible! -
How do I know when my fish is cooked?
Make sure it’s golden brown on the outside, and flaky on the inside. If in doubt, a food thermometer should read 145°F (65°C) at the thickest part! -
Can I make this ahead of time?
While best served fresh, you can prepare the batter and potatoes ahead! Just fry everything right before serving for that fresh-off-the-fryer taste.
Nutritional Info
While I believe in enjoying food without guilt, I get that some of you may like to keep tabs on nutritional values! Here’s a rough estimate for one serving (1 piece of fried fish and a handful of fries) of fish and chips:
- Calories: Approximately 700-800 calories
- Protein: 25g
- Carbohydrates: 80g
- Fat: 35g
- Sodium: 900mg
Of course, these numbers can vary based on portion sizes and specific frying methods, but it’s a good idea to indulge wisely!
Final Thoughts
So there you have it—a classic, beloved dish that’s full of history, flavor, and memories! Whether you’re celebrating a special occasion or just want to treat yourself on a weeknight, crispy battered fish and chips is the perfect choice.
I hope this recipe becomes a cherished addition to your family tradition, just like it is for mine. Remember, cooking is not just about following a recipe; it’s about making memories, laughing at kitchen mishaps, and – most importantly – enjoying the delicious outcome with loved ones.
Now, get cooking, and don’t forget to snap a pic of your fish and chips masterpiece! Share it with me over on Feastical—let’s spread the love of good food together! Happy cooking, my friends! 🍽️
Print
Crispy Battered Fish and Chips
- Total Time: 60 minutes
- Yield: 4 servings 1x
- Diet: None
Description
A classic dish of crispy battered fish served with golden fries, perfect for cozy dinners and family gatherings.
Ingredients
- 4 large Russet potatoes (about 2½ pounds, scrubbed and peeled)
- ¼ cup white vinegar
- Vegetable oil (as needed, for frying)
- Kosher salt (as needed)
- 1½ pounds cod or other flaky white fish
- Freshly ground black pepper (as needed)
- 1 cup all-purpose flour
- 1 cup white rice flour
- 2 teaspoons baking powder
- ½ teaspoon turmeric
- ½ cup vodka
- 1¼ cup chilled lager beer
- Sliced lemon (for garnish)
- Malt vinegar (as needed)
- Tartar sauce (as needed)
Instructions
- Prep the potatoes by cutting them into thick fries and soaking them in cold water for 30 minutes.
- Soak the dry potatoes in a bowl with white vinegar and salt for 15 minutes.
- Heat oil in a deep pot to about 350°F (175°C).
- Prepare the batter by whisking together flour, rice flour, baking powder, turmeric, and gradually adding vodka and lager beer.
- Fry the potatoes in batches for 4-5 minutes until golden and crispy, then drain on paper towels.
- Cook the seasoned fish in the hot oil for 5-7 minutes until golden brown and cooked through.
- Drain the fish on paper towels and serve with fries, lemon slices, malt vinegar, and tartar sauce.
Notes
For an authentic experience, use malt vinegar and serve with tartar sauce. Feel free to experiment with different types of fish or substitute potatoes with sweet potatoes for a twist.
- Prep Time: 45 minutes
- Cook Time: 15 minutes
- Category: Main Course
- Method: Frying
- Cuisine: British
Nutrition
- Serving Size: 1 serving
- Calories: 700
- Sugar: 1g
- Sodium: 900mg
- Fat: 35g
- Saturated Fat: 5g
- Unsaturated Fat: 18g
- Trans Fat: 0g
- Carbohydrates: 80g
- Fiber: 8g
- Protein: 25g
- Cholesterol: 60mg
Keywords: fish and chips, crispy fish, comfort food, seafood, British cuisine
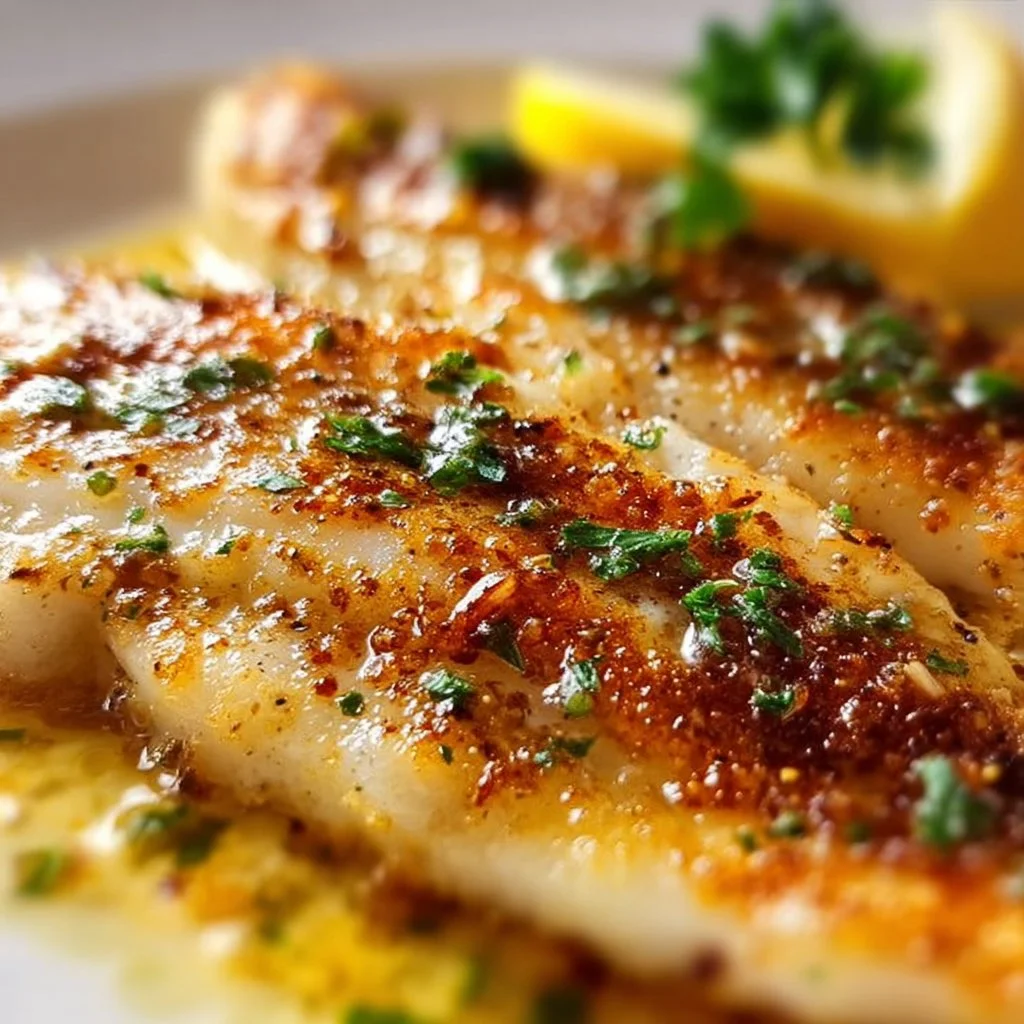
Lemon Butter Fish Fillet
Lemon Butter Fish Fillet: A Delightful Culinary Journey
Hey food lovers! I’m Beau Collier, and I’m thrilled you’ve joined me at Feastical today. We’re diving into a dish that’s as refreshing as a coastal breeze and as comforting as a home-cooked meal: Lemon Butter Fish Fillet. This recipe is not just about the flavors; it’s a celebration of life, laughter, and the connections we create around a hearty plate of food. So let’s roll up our sleeves, grab our spatulas, and embark on this delicious adventure together!
Nothing beats the combination of fresh fish and zesty lemon, especially when you add the richness of butter into the mix. The Lemon Butter Fish Fillet is a dish that puts a spotlight on simplicity without sacrificing flavor. One taste of this light, flaky fish coated in a decadent, creamy lemon sauce will transport you straight to a sunny beachside dinner. Whether you’re preparing a weeknight meal for your family or hosting a dinner party, this dish will effortlessly impress.
Imagine the scene: your loved ones gather around the table, the aroma of garlic and lemon fills the air, and everyone’s faces light up the moment you bring this dish to the table. One bite, and you’ll hear the subtle “mmms” of satisfaction as they savor the buttery goodness nestled on their plates. This isn’t just cooking; this is about crafting experiences and making memories with every forkful.
Not only is this dish easy to make, but it also caters to several palates. With a few simple ingredients that you likely already have in your pantry, you’ll create a delightful seafood dish that’s sure to become a household favorite. So, let’s jump right in and explore how to create this perfect Lemon Butter Fish Fillet!
Personal Story: A Bite of Nostalgia
Growing up, my family hosted Sunday dinners that could put any restaurant to shame. My mom would whip up the most incredible meals, and everyone would gather around the table, sharing stories, laughter, and all sorts of delicious food. One summer, we decided to go on a fishing trip, and I caught my very first fish—I was over the moon! My dad and I filleted it that day, and my mom transformed it into a mouthwatering dish with lemon, butter, and herbs. The taste was beyond words, and it solidified my love for cooking fish.
Years later, I’ve put my own spin on that memory with this Lemon Butter Fish Fillet recipe. Each time I prepare it, I’m transported back to those sun-drenched Sundays filled with love and laughter. It’s a reminder of the simple joys of cooking and sharing good food. And even though my fishing skills may have improved, my love for this dish has only deepened. Every time I make this dish, I cherish that comforting nostalgia and it reminds me how food can weave the fabric of memories we hold dear.
Ingredients: What You’ll Need
Let’s gather our supplies! Here’s what you’ll need to make your Lemon Butter Fish Fillet:
-
2 tablespoons Olive oil
A key player in achieving that golden crust on the fish fillets. If you’re looking for a healthier alternative, grapeseed or avocado oil also works beautifully. -
4 fillets White fish (cod, tilapia, or haddock)
Fresh is best! Each of these options brings its unique flavor and texture to the dish. If you’re feeling adventurous, try salmon or sole for a different twist. -
1 teaspoon Paprika
Adds a rich red color and a subtle warmth. If you’re looking for a smokier flavor, smoked paprika is an excellent choice. -
1 teaspoon Garlic powder
Intensifies flavor without the hassle of peeling and chopping. If you’d rather use fresh garlic, about two cloves minced would do the trick. -
1 teaspoon Onion powder
Another flavorful addition that brings depth to the seasoning profile. You could swap it for finely minced shallots for a fresh flavor boost. -
4 tablespoons Butter
This is where the magic happens! Butter adds creamy richness that complements the fish perfectly. Use a plant-based alternative if you prefer a vegan option. -
2 tablespoons Olive oil (for sauce)
A complementary oil that lightens up the richness of the butter while enhancing the overall flavor. -
4 cloves Garlic, minced
Fresh garlic packs a punch of aromatic flavor. If you’re in a pinch, garlic paste can make for a quick substitute. -
2 lemons (juice and zest)
The star of the dish! Their bright acidity elevates the entire meal. If you don’t have fresh lemons, bottled lemon juice can be used, but fresh is always best. -
1 tablespoon Fresh parsley, chopped
This adds a pop of color and freshness to the final dish. You could swap it with dill for a different herbal note. -
Salt and Pepper (to taste)
Essential for seasoning the fish and balancing the flavors. Always start with a pinch; you can always add more!
Step-by-Step Instructions: Cooking Up a Storm
Alright, culinary enthusiasts, let’s get cooking! Here’s how to whip up these scrumptious Lemon Butter Fish Fillets step-by-step.
-
Prepare the Fish
- Rinse the fish fillets under cold water and pat them dry with paper towels. This step is crucial for getting that lovely sear! Aim to have them as dry as possible, so they can brown beautifully.
-
Seasoning Time
- In a small bowl, mix the paprika, garlic powder, onion powder, salt, and pepper. Sprinkle this seasoning mix evenly over both sides of the fish fillets. This creates a flavorful crust! Don’t be shy; season generously to infuse every bite with flavor.
-
Heat Things Up
- In a large skillet, heat 2 tablespoons of olive oil over medium-high heat. Keep an eye on the oil—it should shimmer when hot, but not smoke.
-
Sear the Fillets
- Carefully add the fish fillets to the skillet, skin side down if applicable. Cook for about 4-5 minutes on one side without moving them. You want to hear that lovely sizzling sound! The fish should lift easily from the pan when it’s ready to flip. If it’s sticking, give it a minute longer.
-
Flip and Finish
- Gently flip the fillets using a spatula and cook for an additional 3-4 minutes on the other side. You want the fish to be opaque and easily flake with a fork. Trust your instincts; fish cooks quickly, so keep an eye on it!
-
Make the Lemon Butter Sauce
- Once the fish is beautifully cooked, carefully remove it from the skillet and keep it warm on a plate. In the same skillet, reduce the heat to medium and add the butter. Let it melt, then toss in the minced garlic. Sauté for about 1-2 minutes until the garlic turns fragrant—don’t let it brown!
-
Zesty Addition
- Squeeze the juice of both lemons into the skillet and add the zest. Stir well and let it simmer for a couple of minutes until the sauce slightly thickens. This is where the magic happens!
-
Combine and Serve
- Return the fish to the skillet for just a minute to coat it in that luscious sauce. Transfer the fillets to your serving plate and pour any remaining sauce over the top. Garnish with fresh parsley for a pop of color and flavor.
Chef’s Tips
- Cooking Temperature: Always cook fish on medium-high heat to get that perfect crust without overcooking the fish.
- Don’t Overcrowd: Give the fish space in the skillet. Overcrowding may cause steaming instead of searing, which we want to avoid.
Serving Suggestions: How to Plate Like a Pro
Now that you’ve prepared this delicious Lemon Butter Fish Fillet, let’s talk about how to serve it up! When plating, presentation is key. Here’s a tip to impress your guests:
- Build the Base: Start with a bed of fluffy couscous or buttery mashed potatoes on the plate. This gives a lovely foundation and absorbs the delicious lemon butter sauce!
- Add the Fish: Place the fish fillet on top, slightly tilted for visual appeal.
- Garnish: Drizzle the remaining lemon butter sauce over the fish and sprinkle fresh parsley on top. The vibrant green will contrast beautifully with the golden fish.
- Serve with Sides: Pair this dish with some sautéed green beans or a simple summer salad for a complete meal that’s not only stunning but also mouthwatering!
Recipe Variations: Mix It Up!
Feeling adventurous? Here are some delightful variations to add a creative twist to your Lemon Butter Fish Fillet:
-
Herb Crusted Version: Before searing, coat the fish in panko breadcrumbs mixed with finely chopped herbs like dill or cilantro. It gives a crunchy, flavorful crust!
-
Spicy Kick: Add a pinch of cayenne pepper or chili flakes to the seasoning mix for a subtle heat that balances beautifully with the lemon.
-
Coconut Twist: Substitute half of the butter with coconut oil and add coconut milk to the sauce for a tropical flair. Pair it with jasmine rice for a fantastic combo!
-
Mediterranean Flair: Add a handful of chopped olives and sun-dried tomatoes to the lemon butter sauce for a robust Mediterranean flavor explosion.
-
Vegan Delight: Use tofu slices marinated in lemon juice and a sprinkle of nutritional yeast for a delightful vegan alternative.
Chef’s Notes
Cooking this Lemon Butter Fish Fillet has become a ritual in my home. It has evolved over the years as new flavors and ingredients have danced their way into my kitchen. I vividly remember a dinner where I turned this dish into a full family affair by asking my kids to help with the seasoning and garnishing. Seeing their little hands sprinkle parsley over the fish while laughing is a memory I cherish.
Every time I make this dish, I keep experimenting and finding new ways to elevate it. It encourages me to be adventurous in the kitchen and to embrace those spontaneous moments that can become wonderful culinary stories.
FAQs and Troubleshooting
-
What if my fish sticks to the pan?
Be sure the pan is properly preheated before adding the fish. If the fillets stick, give them a bit more time to cook—the proteins need a chance to sear and release. -
Can I use frozen fish?
Absolutely! Just ensure it’s fully thawed and patted dry before seasoning. Frozen fish can be just as delicious but needs to be cooked a little longer. -
How can I tell when the fish is done?
Fish is done when it becomes opaque and flakes easily with a fork. A meat thermometer should read 145°F (63°C) at the thickest part of the fillet. -
Can I make the sauce in advance?
Yes! You can prepare the lemon butter sauce ahead of time, just reheat it gently before pouring it over your freshly cooked fish.
Nutritional Info
Let’s take a look at the nutritional makeup of this dish!
- Calories: Approximately 400 per serving (with a standard fillet and sauce).
- Protein: Around 30 grams, making it a fantastic option for filling your belly with goodness.
- Fat: Total fat content is approximately 25 grams (mostly from healthy fats), which includes the benefits of omega-3 fatty acids found in fish.
- Vitamins: Provides a good level of Vitamin D from the fish and Vitamin C from the fresh lemons.
- Carbohydrates: Keep it low if you skip the sides; otherwise, adding a grain will increase it based on your choice.
Keep in mind that nutritional values will vary depending on the type of fish and exact ingredients used.
Final Thoughts
As we wrap up this culinary adventure, I hope you’re as excited about making Lemon Butter Fish Fillet as I am about sharing it with you! Food is more than just sustenance; it’s an experience that brings loved ones together—each bite echoing laughter and joy. With this simple, wholesome recipe, I believe you’ll create not just a cherished meal but treasured memories that linger long after the plates are cleared.
So, gather your loved ones, cook up this delightful dish, and enjoy every moment at the dining table. After all, feel-good food isn’t just a recipe; it’s a celebration of life. Remember, cooking should always feel like a warm hug—not a chore. Until next time, happy cooking! 🍽️✨
Print
Lemon Butter Fish Fillet
- Total Time: 30 minutes
- Yield: 4 servings 1x
- Diet: Gluten-Free
Description
A refreshing and comforting dish featuring flaky fish coated in a creamy lemon butter sauce.
Ingredients
- 2 tablespoons Olive oil
- 4 fillets White fish (cod, tilapia, or haddock)
- 1 teaspoon Paprika
- 1 teaspoon Garlic powder
- 1 teaspoon Onion powder
- 4 tablespoons Butter
- 2 tablespoons Olive oil (for sauce)
- 4 cloves Garlic, minced
- 2 lemons (juice and zest)
- 1 tablespoon Fresh parsley, chopped
- Salt and Pepper (to taste)
Instructions
- Prepare the fish. Rinse the fish fillets under cold water and pat them dry with paper towels.
- Mix the paprika, garlic powder, onion powder, salt, and pepper in a small bowl. Sprinkle this seasoning mix evenly over both sides of the fish fillets.
- Heat 2 tablespoons of olive oil in a large skillet over medium-high heat.
- Sear the fish fillets in the skillet, skin side down if applicable, for about 4-5 minutes on one side.
- Flip the fillets and cook for an additional 3-4 minutes on the other side until opaque.
- Remove the fish from the skillet and keep warm on a plate.
- Add butter to the skillet, letting it melt, then toss in the minced garlic and sauté for 1-2 minutes.
- Squeeze the juice and add the zest of both lemons to the skillet, stirring well and letting it simmer.
- Return the fish to the skillet for a minute to coat in the sauce, then transfer to a serving plate and pour remaining sauce over.
- Garnish with fresh parsley before serving.
Notes
Serve with a bed of fluffy couscous or mashed potatoes and sautéed green beans for a complete meal.
- Prep Time: 15 minutes
- Cook Time: 15 minutes
- Category: Main Course
- Method: Searing
- Cuisine: Seafood
Nutrition
- Serving Size: 1 fillet with sauce
- Calories: 400
- Sugar: 2g
- Sodium: 300mg
- Fat: 25g
- Saturated Fat: 10g
- Unsaturated Fat: 12g
- Trans Fat: 0g
- Carbohydrates: 5g
- Fiber: 0g
- Protein: 30g
- Cholesterol: 70mg
Keywords: Lemon Butter, Fish Fillet, Seafood Recipe, Easy Dinner

Grilled Sea Bass with Herb Butter
Grilled Sea Bass with Herb Butter: A Culinary Adventure Awaits! 🌊🐟
Hey food lovers! Beau Collier here from Feastical, and today, we’re diving into something truly mouthwatering—grilled sea bass with herb butter. Picture this: the sun shining, the grill heating up, and fragrances wafting in from the kitchen. This dish is perfect for a backyard barbecue or a cozy dinner with family. Whether you’re a seasoned grill master or just starting to explore the world of fish, trust me; grilled sea bass is an adventure worth embarking on!
Why sea bass, you ask? Well, this fish is not only incredibly flavorful, but it’s also versatile—it’s like the chameleon of the sea! With its flaky, buttery texture, sea bass is a crowd-pleaser that even your pickiest eaters will rave about. Pair that with a zesty herb butter that brings fresh flavors to the forefront, and you’ve got a dish that’s bound to impress.
As we dive deeper into this recipe, you’ll hear some heartwarming memories that shaped my love for cooking and why I can’t resist sharing it with you all. So, whether you’re here to learn, reminisce, or just get inspired, grab your spatula and let’s light that grill!
Personal Story
Growing up, cooking was more than just a necessity for my family; it was a way to bond. My earliest memories are filled with the joyous clatter of pots and pans, the aromatic wafts of herbs dancing through our kitchen, and laughter shared over meals. One summer evening, my dad decided it was time to grill something special that we’d never attempted before—sea bass. He marinated it in fresh herbs and lemon, firing up our tiny charcoal grill that always seemed to leave a smoky note in the air.
As the fish grilled, we helped out with sides like garlicky mashed potatoes and vibrant salads. That evening was magical—not only did we feast on a delicious meal, but we also learned about unexpected flavors and how simple ingredients could come together to create something truly memorable. The smiles around that table were contagious, and I realized how valuable cooking was—it had a way of bringing us together, no matter what.
Fast forward to today, and I find myself recreating that memory in my kitchen. Sharing an elevated, yet simple dish like grilled sea bass with herb butter is my way of honoring those moments and inspiring you to create your own culinary adventures!
Ingredients
Let’s get cooking! Before I lay out the steps, here’s what you’ll need for our delicious grilled sea bass with herb butter:
-
2 sea bass fillets
Fresh is best! Look for fillets with a nice sheen and no fishy smell. If you can’t find sea bass, feel free to substitute with snapper or cod. -
2 tablespoons olive oil
This will give our fish a beautiful sear. Extra virgin olive oil adds a richer flavor—just make sure it’s suitable for high heat. Alternatively, avocado oil is a great substitution! -
Salt and pepper to taste
Key to bringing out the flavors! Make sure to season generously, but remember, you can always add more later! -
2 tablespoons unsalted butter
This is the star of our herb butter. Unsalted butter lets you control the sodium levels. If you’re looking for a dairy-free option, coconut oil works well! -
1 tablespoon fresh herbs (such as parsley, thyme, or dill), chopped
Fresh herbs elevate this dish! Use whatever herbs you have on hand for a zesty kick. Dried herbs can work, but remember to reduce the amount since they’re more concentrated. -
2 cups mashed potatoes
Creamy and comforting! Use Yukon Gold for a buttery flavor. For a twist, you could use cauliflower mash for a lighter option. -
Microgreens for garnish
These little greens are not just for show—they pack a punch in flavor! Use whatever microgreens you find, or try fresh parsley or chives. -
1 lemon, charred
Grilling lemon brings out its sweetness and adds a touch of smokiness. You can always use lemon juice in a pinch, but fresh is always better!
Step-by-Step Instructions
Now that we’ve got our ingredients lined up, let’s get our grill on! Here’s how to make these fabulous grilled sea bass fillets step by step:
-
Preheat your grill
Make sure your grill is hot before you start cooking—around 400°F (or medium-high heat) is ideal. Preheating ensures those beautiful grill marks and lock in moisture. -
Prep your sea bass
While the grill heats up, drizzle olive oil over both sides of the sea bass fillets. This not only keeps the fish from sticking but also gives it a gorgeous golden color. Season generously with salt and pepper! -
Make your herb butter
In a small bowl, mix the unsalted butter with your fresh herbs. If you’ve got a microplane, use it to zest some lemon into the mix—trust me, it’s a game-changer! This butter can also be made ahead and stored in the fridge for those last-minute cooking sessions. -
Grill it up!
Gently place the fillets on the grill, skin side down if they have skin. Close the lid and let them cook for about 4-5 minutes. It’s important not to touch them too much; we want that lovely crisp! If you’re using skin-on fillets, cooking with the skin can give you a beautiful texture. -
Check for doneness
Using a fish spatula, gently lift the fillet to see if it releases easily; if it does, it’s time to flip! If it’s sticking, give it another minute. Flip carefully, and grill for an additional 4-5 minutes on the other side. The fish is ready when it flakes easily with a fork. -
Char your lemon
While the fish is cooking, place your lemon halves on the grill cut-side down for about 3 minutes or until they have beautiful grill marks. This adds a delightful sweetness! -
Plate it up
For serving, place a generous scoop of mashed potatoes on the plate, top with that gorgeous sea bass, and then slather on your herb butter. Finish everything off with the charred lemon on the side and a sprinkle of microgreens for that fancy touch! -
Dig In!
Take a moment to appreciate the vibrant colors on your plate! Your taste buds are about to embark on an incredible journey. Serve immediately and dig in while it’s hot!
Serving Suggestions
Now that your gorgeous grilled sea bass is plated, let’s talk about how to make that presentation pop! Start with a nice, clean white plate—this allows the vibrant colors of your dish to shine through.
-
Layer Them Beautifully: For a more sophisticated touch, consider placing the mashed potatoes on the bottom and artfully scattering your microgreens around them. It’s not just about taste; we eat with our eyes first!
-
Garnish Creatively: Drizzle a bit of olive oil around the plate for a touch of elegance or add thin slices of fresh lemon, which not only look beautiful but also offer refreshing flavor with every bite.
-
Serve with Style: If you want to turn this into a full meal, consider adding grilled asparagus or a light salad on the side. It’s all about balancing flavors and textures!
Recipe Variations
Feeling adventurous? Here are a few creative twists you can take with this grilled sea bass recipe:
-
Switch Up the Fish: Try using salmon or halibut instead of sea bass for a different flavor profile.
-
Spicy Garlic Butter: Add minced garlic and a pinch of chili flakes to your herb butter for a spicy kick that pairs well with the richness of the fish.
-
Citrus Herb Mix: Use a combination of citrus herbs, like basil and mint, in your butter for a refreshing twist that brightens up flavors.
-
Create a Salsa: Top your sea bass with a mango salsa instead of herb butter for a tropical twist. Just mix diced mango, red onion, cilantro, and a squeeze of lime!
-
Coconut Cream Sauce: If you’re feeling a little tropical, replace mashed potatoes with coconut cream sauce. It’s luscious and adds a whole new dimension of flavor!
Chef’s Notes
Over the years, this grilled sea bass with herb butter recipe has become a staple in my household. I’ve experimented with different herbs and techniques, and what I’ve learned is that the heart of this dish is all about keeping it simple. Cooking shouldn’t be a hassle; it should be a pleasure! The joy of sharing a beautifully cooked meal with friends and family is where the true magic lies.
Also, I’ve had my fair share of kitchen blunders! I once forgot to heat my grill and ended up with raw fish served at a dinner party—lesson learned! Always check that grill first, folks!
FAQs and Troubleshooting
As you embark on this culinary journey, here are a few common questions and their answers to make your cooking experience smoother:
-
What’s the best way to tell if my fish is cooked?
Cooked fish should be opaque and flake easily with a fork. If it’s still translucent in the center, give it a little more time on the heat! -
Can I prep this dish in advance?
While it’s best enjoyed fresh, you can prep the herb butter and mashed potatoes ahead of time. Keep them covered in the fridge until you’re ready to grill! -
Why is my fish sticking to the grill?
Ensure your grill grates are clean and well-oiled. A good non-stick spray or a little olive oil on the grill before cooking will help tremendously. -
What if I don’t have fresh herbs?
Dried herbs will work in a pinch, just remember to reduce the amount (about a third of the fresh quantity). They may not have the same punch but will still add flavor!
Nutritional Info
While the focus is primarily on the deliciousness of the dish, let’s not forget about nutrition! Here’s a general breakdown of what you can expect from a serving of this grilled sea bass with herb butter:
- Calories: Approximately 450
- Protein: 36g
- Fat: 30g (of which saturated fat is around 12g from butter)
- Carbohydrates: 30g (mostly from mashed potatoes)
- Fiber: 4g (depending on the potatoes and any veggies served)
This dish is packed with lean protein and healthy fats, making it a nutritious option that doesn’t skimp on flavor!
Final Thoughts
So there you have it, friends! Grilled sea bass with herb butter is not only a feast for the eyes but also a culinary delight that captures the essence of comfort food. I’ve shared my journey of cooking with you, and now it’s your turn! Gather your loved ones, fire up that grill, and create memories around the dining table.
Cooking is meant to be fun, delicious, and above all, a way to connect with one another. Whether you choose to stick to my recipe or get adventurous with your own twists and variations, remember to savor every bite—and enjoy the process!
Thank you for joining me on this flavorful journey! Keep cooking, sharing, and spreading joy with food. Until next time, my fellow foodies—happy cooking! 🥳🍽️
Print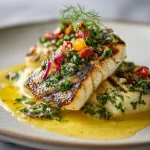
Grilled Sea Bass with Herb Butter
- Total Time: 30 minutes
- Yield: 4 servings 1x
- Diet: Pescatarian
Description
A flavorful and versatile grilled sea bass dish topped with zesty herb butter, perfect for any occasion.
Ingredients
- 2 sea bass fillets
- 2 tablespoons olive oil
- Salt and pepper to taste
- 2 tablespoons unsalted butter
- 1 tablespoon fresh herbs (such as parsley, thyme, or dill), chopped
- 2 cups mashed potatoes
- Microgreens for garnish
- 1 lemon, charred
Instructions
- Preheat your grill to 400°F (medium-high heat).
- Prep your sea bass by drizzling olive oil over both sides and seasoning generously with salt and pepper.
- Make your herb butter by mixing unsalted butter with fresh herbs and lemon zest.
- Grill the fillets skin side down for 4-5 minutes, then gently flip and cook for another 4-5 minutes until they flake easily.
- Char your lemon halves on the grill cut-side down for about 3 minutes.
- Plate by placing mashed potatoes on the plate, topping with sea bass and herb butter, and garnishing with charred lemon and microgreens.
- Dig in and enjoy your delicious creation!
Notes
Feel free to substitute sea bass with snapper or cod. You can also prep the herb butter and mashed potatoes ahead of time.
- Prep Time: 15 minutes
- Cook Time: 15 minutes
- Category: Main Course
- Method: Grilling
- Cuisine: Mediterranean
Nutrition
- Serving Size: 1 serving
- Calories: 450
- Sugar: 2g
- Sodium: 600mg
- Fat: 30g
- Saturated Fat: 12g
- Unsaturated Fat: 12g
- Trans Fat: 0g
- Carbohydrates: 30g
- Fiber: 4g
- Protein: 36g
- Cholesterol: 70mg
Keywords: grilled fish, sea bass, herb butter, summer recipes, grilling
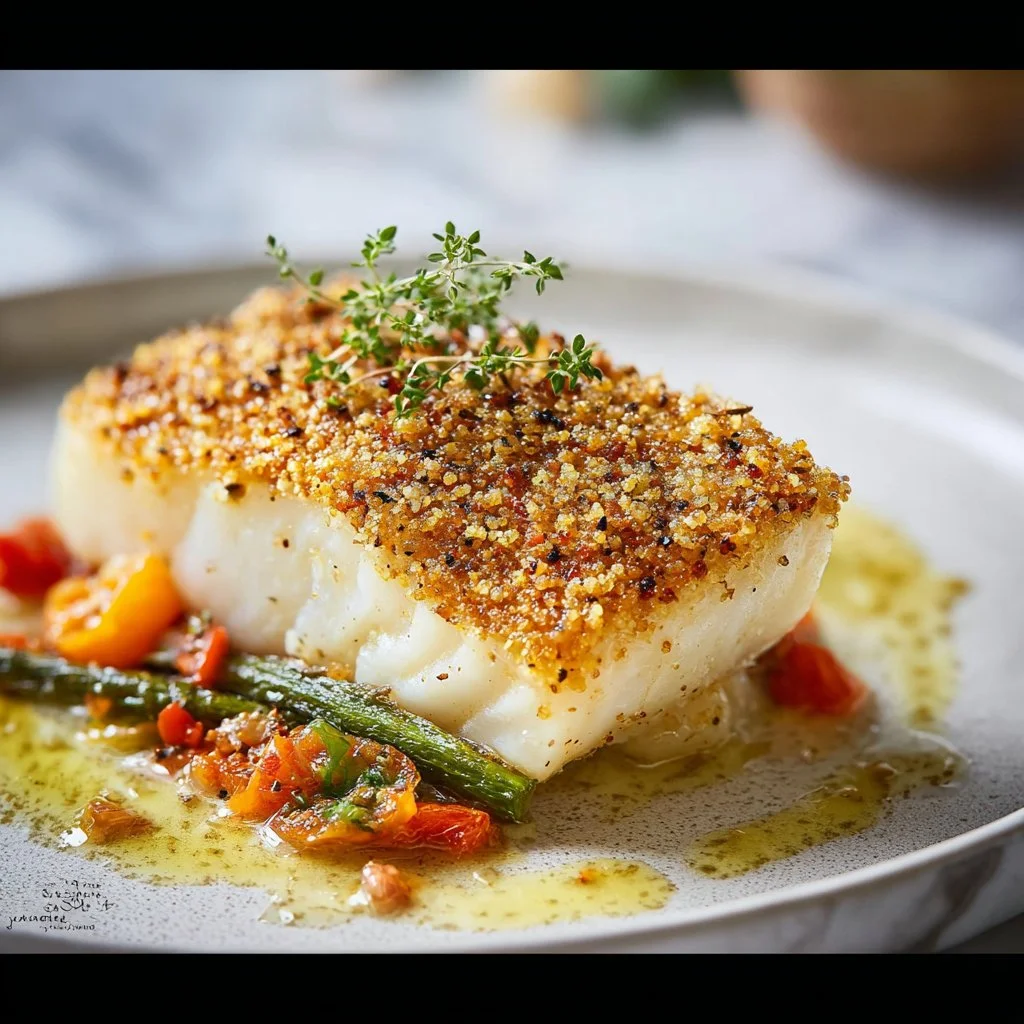
Parmesan-Crusted Sea Bass
Parmesan-Crusted Sea Bass: A Flavorful Catch You Can’t Miss!
Hey there, culinary explorers! It’s your pal Beau here, and today we’re diving into a dish that’s as delightful as it is elegant – Parmesan-Crusted Sea Bass! 🐟✨ If you’ve never tried this dish before, allow me to whisk you away on a flavorful journey that’ll have your taste buds dancing.
Picture this: it’s a cozy Friday evening, the kind where you want to impress without the fuss. Maybe a date night, a family gathering, or simply a treat for yourself after a long week. Well, with my Parmesan-Crusted Sea Bass, you’ll create an unforgettable meal that doesn’t involve hours in the kitchen or stressful prep work. This dish is hearty, beautiful, and brings that “wow” factor right to your dinner table!
But before we get into the nitty-gritty of the recipe, let me share a little backstory. Sea bass has long been a star on my family’s dinner table. From beachside trips to quaint little seaside restaurants, it was the go-to meal that would warm our hearts and our bellies. And with a crispy, cheesy crust and that rich, buttery lemon sauce, we took it to the next level of deliciousness! So, put on your apron, grab your spatula, and let’s get cooking!
Personal Story
I’ll never forget the first time I attempted to recreate my grandmother’s version of Parmesan-Crusted Sea Bass. It was a breezy summer evening, and our family had gathered at the beach for a reunion. As the sun dipped below the horizon, creating a canvas of pink and orange hues overhead, my grandmother took her spot by the grill, the incredible aroma of fish mingling with the salty sea air.
I watched closely as she seasoned the fillets with love, a sprinkle of salt here, a dash of pepper there, and then the pièce de résistance – a generous layer of crispy Parmesan. As she pulled those golden beauties off the grill, my heart raced with anticipation. That first bite was pure heaven! The fish melted in my mouth, the cheese adding a delightful crunch, and the buttery lemon sauce draped over it like a warm hug.
Ever since that magical evening, I’ve been on a mission to perfect this dish. Now, I’m sharing my version with you! So let’s roll up our sleeves and recreate that unforgettable moment together.
Ingredients
Here’s what you’ll need to whip up this delectable Parmesan-Crusted Sea Bass, along with a few tips to guide you:
-
2 sea bass fillets
Freshness is key! If you can get your hands on some wild-caught fillets, do it. They have a flavor that’s hard to beat. If sea bass isn’t available, you can substitute with snapper or tilapia. -
1/2 cup grated Parmesan cheese
Aging is everything! A fresh block of Parmesan, grated just before using, will provide a rich, nutty flavor that pre-grated cheese lacks. Go for the real deal here! -
1/4 cup breadcrumbs
These provide the crunch! Use panko for a lighter, flakier crust. If you’re gluten-free, feel free to switch to gluten-free breadcrumbs or crushed nuts for an extra crunch! -
2 tablespoons olive oil
A good-quality extra virgin olive oil not only enhances flavor but also helps in crisping the crust beautifully. If you’re feeling adventurous, swap it out for melted butter! -
Salt and pepper to taste
Seasoning is everything! Use sea salt and freshly cracked pepper for a pop of flavor that elevates the dish. -
1 lemon (for beurre blanc)
We’ll use both the zest and juice to infuse brightness! If you don’t have fresh lemons, a splash of white wine vinegar can work in a pinch but won’t pack the same punch! -
1/2 cup white wine
Use a dry white wine like Sauvignon Blanc or Pinot Grigio. What you cook with should be something you’d enjoy sipping too! -
1/2 cup heavy cream
This adds that rich, dreamy texture to our sauce! To lighten it up, use half-and-half or non-dairy alternatives, like coconut cream, but expect a flavor difference! -
1/4 cup (cold, cut into cubes) butter
Cold butter is crucial for our beurre blanc. It’ll create that creamy, velvety finish that makes you feel all the culinary feels! -
Roasted baby vegetables (such as carrots, zucchini, and bell peppers)
A rainbow of veggies provides color and loads of nutrients. Roasting brings out their natural sweetness! -
Basil oil (for drizzling)
A drizzle of basil oil adds a fragrant, herbaceous touch. You can easily make your own by blending basil with olive oil! -
Microgreens (for garnish)
These tiny greens pack a flavor punch and add a gourmet touch to your dish. Their peppery bite complements the richness beautifully! -
Parmesan tuile (for garnish)
This is purely for show! Making a tuile involves melting cheese into a crispy wafer, adding elegance to your plate!
Step-by-Step Instructions
Now that we have our ingredients ready, let’s roll up our sleeves and get cooking with this step-by-step breakdown!
-
Preheat the Oven
Preheat your oven to 400°F (200°C). This is important for achieving that perfect golden crust on your sea bass. Make sure to grab your trusty oven mitts – safety first! -
Prepare the Baking Sheet
Line a baking sheet with parchment paper. This helps with easy cleanup and prevents the fish from sticking. It’s a win-win situation! -
Season the Sea Bass
Pat your sea bass fillets dry with paper towels. This helps achieve that much-desired crispy exterior. Once dry, drizzle some olive oil on both sides, then sprinkle salt and pepper generously. Don’t be shy; this is where flavor starts! -
Mix the Crust
In a medium bowl, combine the grated Parmesan and breadcrumbs. This mixture will create the delightful crust we’re aiming for. Feel free to add a pinch of garlic powder or dried herbs if you want to amp up the flavor even more! -
Coat the Fillets
Take each fillet and press the Parmesan-breadcrumb mixture firmly onto the top side, creating a nice crust. Make sure it’s even, and don’t skimp – the more crust, the better! -
Bake the Fish
Place the prepared fillets on your baking sheet and pop them in the oven. Bake for about 15-20 minutes, or until the fish is opaque and the crust is golden brown. Keep an eye on it – every oven is a little different! -
Prepare the Beurre Blanc Sauce
While the fish is baking, let’s whip up that dreamy sauce. In a small saucepan over medium heat, combine the white wine and lemon juice. Allow it to simmer until it reduces by half. This intensifies the flavor! -
Add the Cream
Once reduced, stir in the heavy cream and let it simmer gently for another few minutes. Mix it well, and if you’re feeling fancy, add a dash of lemon zest for a brighter taste. -
Finish the Sauce
Reduce the heat to low, and start adding the cold butter cubes one at a time, whisking continuously until each piece is fully melted before adding the next. This creates that luscious, velvety texture we all crave in a beurre blanc sauce! -
Roast the Vegetables
In a separate baking dish, toss your baby vegetables with olive oil, salt, and pepper, and roast them in the oven for about 15 minutes or until they’re tender and have a bit of caramelization. Yum! -
Serve It Up
Once everything is ready, plate your beautiful sea bass on a bed of roasted veggies, and drizzle that silky beurre blanc sauce over the top. Garnish with a sprinkle of microgreens, a swirl of basil oil, and if you’re feeling adventurous, your homemade parmesan tuile!
Serving Suggestions
When it comes to plating, presentation is key! Aim to make your dish as eye-catching as it is delicious. Start with a generous spoonful of your beautifully roasted baby vegetables at the base of your plate. Place the Parmesan-crusted sea bass gently on top, ensuring that cheesy crust is visible for all to admire.
Once that’s done, take your luxurious beurre blanc sauce and drizzle it in a zig-zag pattern across the fish. This not only adds deliciousness but also an artistic touch! Finish with a delicate drizzle of basil oil and a scattering of microgreens for that fresh pop of color. The contrast of colors will make your dish a showstopper!
Pair your creation with a crisp salad or a side of fluffy quinoa if you desire something a bit lighter. And hey, don’t forget to pour yourself a glass of that white wine you used earlier – it’s the perfect accompaniment for this elegant meal!
Recipe Variations
Now, I know everyone has their own unique twist, right? Here are a few variations that you can try with this fabulous dish to cater to your taste and dietary preferences:
-
Herb-Crusted Variation:
Add finely chopped fresh herbs like parsley, dill, or thyme to your breadcrumb and Parmesan mixture for an herby kick! -
Spicy Twist:
If you want to spice things up, simply add some crushed red pepper flakes to the breadcrumb mixture. It’ll give your dish a lovely kick! -
Coconut-Crusted:
Substitute half the breadcrumbs with unsweetened coconut flakes for a tropical twist. This adds an unexpected flavor profile that’s simply divine! -
Vegetarian Option:
Try this same crust on sliced eggplant or zucchini for a vegetarian version! It’s just as satisfying and packed with flavor. -
Seafood Medley:
Want to go a bit more adventurous? Use a mix of sea bass, scallops, and shrimp with the Parmesan crust. The combination of flavors and textures will take your dish over the top!
Chef’s Notes
As I mentioned earlier, this recipe has a special place in my heart. Over the years, I’ve tweaked it every so often, with one major lesson learned: don’t rush the beurre blanc! It’s tempting to speed through that sauce, but it truly benefits from a little love and patience to achieve that rich, velvety texture.
And here’s a little chuckle for you – the first time I attempted this dish, I accidentally swapped vinegar for wine in the beurre blanc. Can you imagine my horror when I tasted the result? A total kitchen disaster, but hey – it taught me to double-check my ingredients!
FAQs and Troubleshooting
Q1: Why did my Parmesan crust not get crispy?
A: There are a few possibilities! Ensure your fillets are dry before applying the crust, and try broiling the dish for the last few minutes of cooking if it needs extra crispiness.
Q2: Can I make the beurre blanc sauce ahead of time?
A: Yes, but be careful! It’s best made fresh. If you need to make it ahead, keep it warm over low heat and whisk in a bit of water to re-emulsify before serving.
Q3: What do I do if the fish is overcooked?
A: Overcooked fish can dry out quickly. To salvage it, serve it over a creamy sauce or bed of mashed potatoes to help moisten it up!
Q4: What’s the best wine to use for cooking?
A: Choose a dry white wine with good acidity. It should be something you’d drink! Sauvignon Blanc or Chardonnay typically work wonderfully.
Nutritional Info
As we dive into the nutritional aspects of our glorious Parmesan-Crusted Sea Bass, here’s what you can look forward to:
- Calories: Approximately 450-550 per serving, depending on the portion size and how much sauce you use.
- Protein: Our sea bass is a fantastic source of lean protein. One serving typically boasts about 30 grams of protein!
- Fats: With the olive oil, butter, and cream, you’re looking at around 30 grams of fats, but many of these are healthy fats from the olive oil.
- Carbohydrates: With the breadcrumb crust and vegetables, you’ll get approximately 25 grams of carbs per serving.
- Vitamins and Minerals: Rich in Omega-3 fatty acids, vitamins A and C from the veggies, and calcium from that vibrant Parmesan.
And remember, with moderation, this dish can fit into a balanced diet – it’s all about enjoying the comfort food we love!
Final Thoughts
And there you have it, my friends: a stunning and scrumptious Parmesan-Crusted Sea Bass that’s sure to impress. Whether it’s a casual weeknight dinner or a special occasion, this dish brings soulfulness to the table. Cooking doesn’t need to be intimidating; it should reflect joy, love, and the art of sharing good food with good company.
So, what are you waiting for? Grab those ingredients, gather your friends or family, and experience the warmth and connection that comes with cooking and sharing a meal. Until next time, keep that fork ready and your spatula handy, and remember—every home can be a feast at any time! Happy cooking! 🍽️❤️
Print
Parmesan-Crusted Sea Bass
- Total Time: 45 minutes
- Yield: 2 servings 1x
- Diet: Paleo
Description
A delightful Parmesan-Crusted Sea Bass, perfect for impressing your guests and enjoying a cozy meal at home.
Ingredients
- 2 sea bass fillets
- 1/2 cup grated Parmesan cheese
- 1/4 cup breadcrumbs
- 2 tablespoons olive oil
- Salt and pepper to taste
- 1 lemon (for beurre blanc)
- 1/2 cup white wine
- 1/2 cup heavy cream
- 1/4 cup cold butter (cut into cubes)
- Roasted baby vegetables (such as carrots, zucchini, and bell peppers)
- Basil oil (for drizzling)
- Microgreens (for garnish)
- Parmesan tuile (for garnish)
Instructions
- Preheat your oven to 400°F (200°C).
- Prepare a baking sheet lined with parchment paper.
- Season the sea bass fillets by patting them dry, drizzling with olive oil, and sprinkling with salt and pepper.
- Mix the grated Parmesan and breadcrumbs in a medium bowl.
- Coat each fillet by pressing the Parmesan-breadcrumb mixture onto the top side.
- Bake the fish for 15-20 minutes until the fish is opaque and the crust is golden brown.
- Prepare the beurre blanc sauce by simmering white wine and lemon juice until reduced by half.
- Add heavy cream to the sauce and simmer gently.
- Finish the sauce by whisking in cold butter cubes until fully melted.
- Roast baby vegetables tossed in olive oil, salt, and pepper for about 15 minutes.
- Serve the sea bass on roasted veggies, drizzling with beurre blanc sauce and garnishing with microgreens and basil oil.
Notes
For added flavor, consider adding garlic powder or herbs to the breadcrumb mixture. Ensure the fish is dry for a crispier crust.
- Prep Time: 15 minutes
- Cook Time: 30 minutes
- Category: Main Course
- Method: Baking
- Cuisine: Seafood
Nutrition
- Serving Size: 1 fillet
- Calories: 500
- Sugar: 2g
- Sodium: 450mg
- Fat: 36g
- Saturated Fat: 18g
- Unsaturated Fat: 15g
- Trans Fat: 0g
- Carbohydrates: 25g
- Fiber: 3g
- Protein: 30g
- Cholesterol: 120mg
Keywords: sea bass, parmesan, seafood, baked fish, gourmet, elegant, dinner
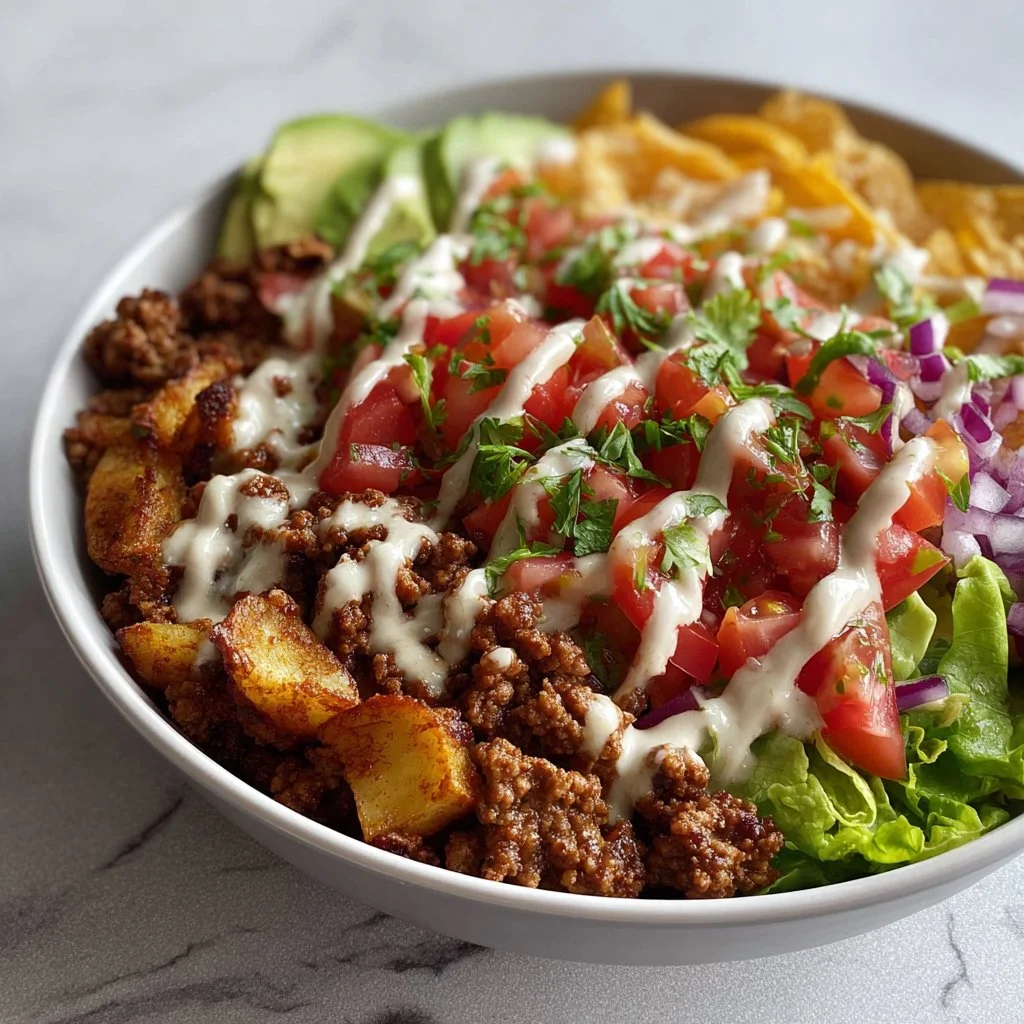
High Protein Taco Bowl
Dive into Flavor: High Protein Taco Bowl Recipe
Hey there, food lovers! I’m so excited to share one of my all-time favorite recipes with you today – the High Protein Taco Bowl! If you’ve been looking for a dish that’s not only packed with flavor but also satisfies your comfort food cravings, you’re in for a treat. Picture this: layers of seasoned ground beef, crispy potatoes, fresh pico de gallo, and creamy avocado, all sitting in a cozy bowl, just waiting to be devoured. Trust me, this bowl is like a fiesta in your mouth!
Now, taco bowls are all the rage right now, and for good reason. They are incredibly versatile and perfect for those busy weeknights when you want something wholesome yet quick. Plus, it’s a delightful social dish – everyone can customize their bowls just how they like it! Ready to whip up some magic in the kitchen? Let’s get this taco party started!
A Tasty Memory
Thinking back on my taco experiences, there’s one occasion that really lights up my culinary memories. It was a warm summer evening during my college days, when I invited a few friends over to celebrate the end of our finals. I wanted to make something special that was both filling and fun – a taco night! We set up an assembly line in the kitchen, with bowls of seasoned ground beef, fresh vegetables, and various toppings. As we built our taco creations, laughter filled the air, and each bite was an explosion of flavor. Those students’ faces lit up with each spoonful, showcasing a blend of joy and satisfaction that I’ll always cherish.
That’s what food does – brings people together, creating lasting memories with every bite. And now, I get to share my Taco Bowl with you, so let’s recreate that magic!
Ingredients
Here’s what you’ll need to conjure up this delightful High Protein Taco Bowl:
-
Ground Beef: The star of the dish! I recommend using lean ground beef for a healthier option. You can also substitute with turkey or plant-based protein for a lighter twist.
-
Potatoes: I love using diced potatoes for their crispy texture. Sweet potatoes can be a great alternative for a touch of sweetness and extra nutrients.
-
Pico de Gallo: A fresh blend of diced tomatoes, onions, cilantro, lime juice, and a hint of chili. If you’re short on time, store-bought salsa also works well.
-
Avocado: Creamy and nutritious, it adds a rich texture to your bowl. If you’re out of avocado, you can use guacamole or Greek yogurt for creaminess.
-
Taco Sauce: A must-have for that authentic flavor! You can whip up your own or grab your favorite from the store.
-
Salt and Pepper: Basic seasonings that elevate your dish. I always recommend fresh cracked pepper for an extra kick!
-
Olive Oil: Perfect for sautéing your ingredients and adding richness. Avocado oil can be a great swap.
-
Favorite Toppings: Get creative! Cheese, beans, corn, jalapeños, or fresh herbs are all fantastic ways to customize your taco bowl.
With these ingredients in hand, you’re set to create a deliciously satisfying meal!
Step-by-Step Instructions
Ready to get cooking? Let’s dive into the taco bowl bliss!
-
Prep Your Ingredients: Start by washing and dicing your potatoes into small cubes. You want them to be bite-sized so they can cook evenly. For added flavor, you could toss them in a bit of olive oil, salt, and pepper before cooking.
-
Cook the Potatoes: Heat a tablespoon of olive oil in a large skillet over medium heat. Add your diced potatoes and cook until they are golden brown and crispy, about 15–20 minutes. Here’s a little chef hack: cover the skillet for the first 10 minutes to steam them slightly, ensuring they cook through!
-
Sauté the Ground Beef: In the same skillet, push the potatoes to one side and add a little more olive oil if needed. Add the ground beef, breaking it up with a spatula. Season with salt and pepper, and cook for about 5–7 minutes until browned, stirring occasionally. Make sure to drain excess fat if necessary.
-
Add Flavor: Once the beef is cooked, stir in your taco sauce. Let it simmer for an additional 2 minutes to allow all those flavors to meld together. You can adjust the seasoning here to suit your taste. Want a kick? Toss in some chili powder or cayenne pepper!
-
Build Your Bowl: Grab your favorite serving bowls and start layering! Start with a hearty base of crispy potatoes, followed by a generous scoop of seasoned ground beef.
-
Top It Off: Add a heap of fresh pico de gallo on top, followed by sliced avocado. Drizzle with extra taco sauce to add that zesty flair.
-
Personalize: Don’t forget your favorite toppings! A sprinkle of cheese or a dollop of sour cream always elevates the flavors. Get creative here – corn, jalapeños, or even a handful of leafy greens work wonders too!
And voilà! You have yourself a delicious High Protein Taco Bowl ready to please any crowd (or just yourself, no judgment here!).
Serving Suggestions
Now that everything is all layered and beautifully displayed, let’s talk presentation. Here are a couple of serving ideas to make your taco bowl really pop:
-
Colorful Bowls: Use clear or colorful bowls to showcase the vibrant layers of your taco bowl. The various colors of the ingredients from the green avocado to the red pico de gallo create a feast for the eyes!
-
Garnishes Galore: Finish plating with freshly chopped cilantro or green onions for a touch of freshness. A few slices of lime on the side not only look good but also allows everyone to add a zest of flavor to their bowls if they desire.
-
Make it Shareable: If you’re hosting a gathering, consider serving the taco contents on a large platter, letting everyone build their own bowl. It sparks creativity and can lead to fun flavor pairings!
Recipe Variations
Here are some fun twists to keep things fresh every time you make your Taco Bowl!
-
Fiesta Chicken Bowl: Swap out the ground beef for shredded chicken marinated in taco spices for a deliciously different version.
-
Cali Style: Add a layer of cilantro lime rice instead of potatoes for a California-inspired taco bowl. Yum!
-
Veggie Lovers Delight: For plant-based options, try using lentils or cooked quinoa. You’ll get a great texture with a protein punch!
-
Southwestern Flair: Toss in some black beans and corn for an extra heartiness. They also contribute a lovely sweetness!
-
Spice it Up: If you’re feeling adventurous, add some chipotle sauce or chopped green chilies for a smoky flavor.
Chef’s Notes
Every recipe tells a story, and this taco bowl has certainly evolved over the years. I started out using pre-packaged taco seasoning when I was a newbie in the kitchen – can you relate? As I experimented with spices, I discovered the beauty of making my own blends. Now, I love adding a bit of cumin and smoked paprika for a unique twist.
And let me tell you, there’s nothing quite as satisfying as hearing your family or friends rave about a meal you made. I’ve had taco bowls turn into surprise dish battles at gatherings – who can come up with the best topping combo? That laughter, those moments, all tied together with food. That’s what really makes this dish special to me.
FAQs and Troubleshooting
Here are some common questions you might have while making your High Protein Taco Bowl:
Q1: What if I don’t have ground beef?
No worries! Ground turkey, chicken or a plant-based substitute (like tempeh or chickpeas) work just as well.
Q2: How do I keep my potatoes crispy?
Make sure to not overcrowd the pan while cooking the potatoes. Giving them space allows for optimal browning.
Q3: I’m not a fan of pico de gallo. What can I use instead?
No problem! You can substitute with your favorite salsa, or even experiment with roasted vegetables for added texture!
Q4: How can I store leftovers?
Store your bowl components separately in airtight containers in the fridge. They’ll last about 3-4 days. Reheat the beef and potatoes before assembling your bowl to keep everything fresh.
Nutritional Info
Let’s chat a bit about that nutrition aspect! With high-protein ground beef and healthy fats from avocado, this taco bowl is balanced and filling.
For one serving, you’ll typically find:
- Calories: ~600-700 kcal (depending on toppings)
- Protein: ~40g (thank you, ground beef!)
- Carbohydrates: ~45g (from potatoes)
- Fat: ~30g (healthy fats from avocado and olive oil)
Of course, the nutrition will vary based on your choices for toppings and any substitutions made.
Final Thoughts
In closing, the High Protein Taco Bowl is more than just a meal — it’s a delightful experience filled with flavor, creativity, and love. Whether you’re serving it up solo or sharing it with loved ones, remember, it’s all about enjoying the process of cooking, tasting, and, most importantly, making bond-worthy memories around the table.
So, go ahead, get your taco vibe on! I’m so excited for you to create this dish. Don’t forget to leave me a comment with your thoughts or your own taco bowl spins. Happy cooking, my foodie friends – let’s keep the kitchen magic alive!
Let’s dig in! 🎉
Print
High Protein Taco Bowl
- Total Time: 35 minutes
- Yield: 4 servings 1x
- Diet: High Protein
Description
A deliciously satisfying taco bowl packed with seasoned ground beef, crispy potatoes, fresh pico de gallo, and creamy avocado.
Ingredients
- 1 lb ground beef (or turkey/plant-based substitute)
- 2 cups diced potatoes (or sweet potatoes)
- 1 cup pico de gallo
- 1 avocado, sliced
- 1/2 cup taco sauce
- Salt and pepper to taste
- 2 tbsp olive oil
- Favorite toppings: cheese, beans, corn, jalapeños, fresh herbs
Instructions
- Prep your ingredients: Wash and dice your potatoes into small cubes.
- Cook the potatoes: Heat olive oil in a large skillet over medium heat and add diced potatoes, cooking until golden brown and crispy (15–20 minutes).
- Sauté the ground beef: Push the potatoes to one side, add more oil if needed, and cook ground beef for about 5–7 minutes until browned.
- Add flavor: Stir in taco sauce and let it simmer for 2 minutes.
- Build your bowl: Layer crispy potatoes at the bottom, followed by seasoned ground beef.
- Top it off: Add pico de gallo and sliced avocado, then drizzle with extra taco sauce.
- Personalize: Add your favorite toppings like cheese or sour cream.
Notes
For a lighter version, use ground turkey or plant-based protein. Store leftovers separately in airtight containers.
- Prep Time: 10 minutes
- Cook Time: 25 minutes
- Category: Main Course
- Method: Sautéing
- Cuisine: Mexican
Nutrition
- Serving Size: 1 bowl
- Calories: 600
- Sugar: 4g
- Sodium: 600mg
- Fat: 30g
- Saturated Fat: 10g
- Unsaturated Fat: 15g
- Trans Fat: 0g
- Carbohydrates: 45g
- Fiber: 5g
- Protein: 40g
- Cholesterol: 105mg
Keywords: taco bowl, high protein, healthy dinner, customizable meal, Mexican food