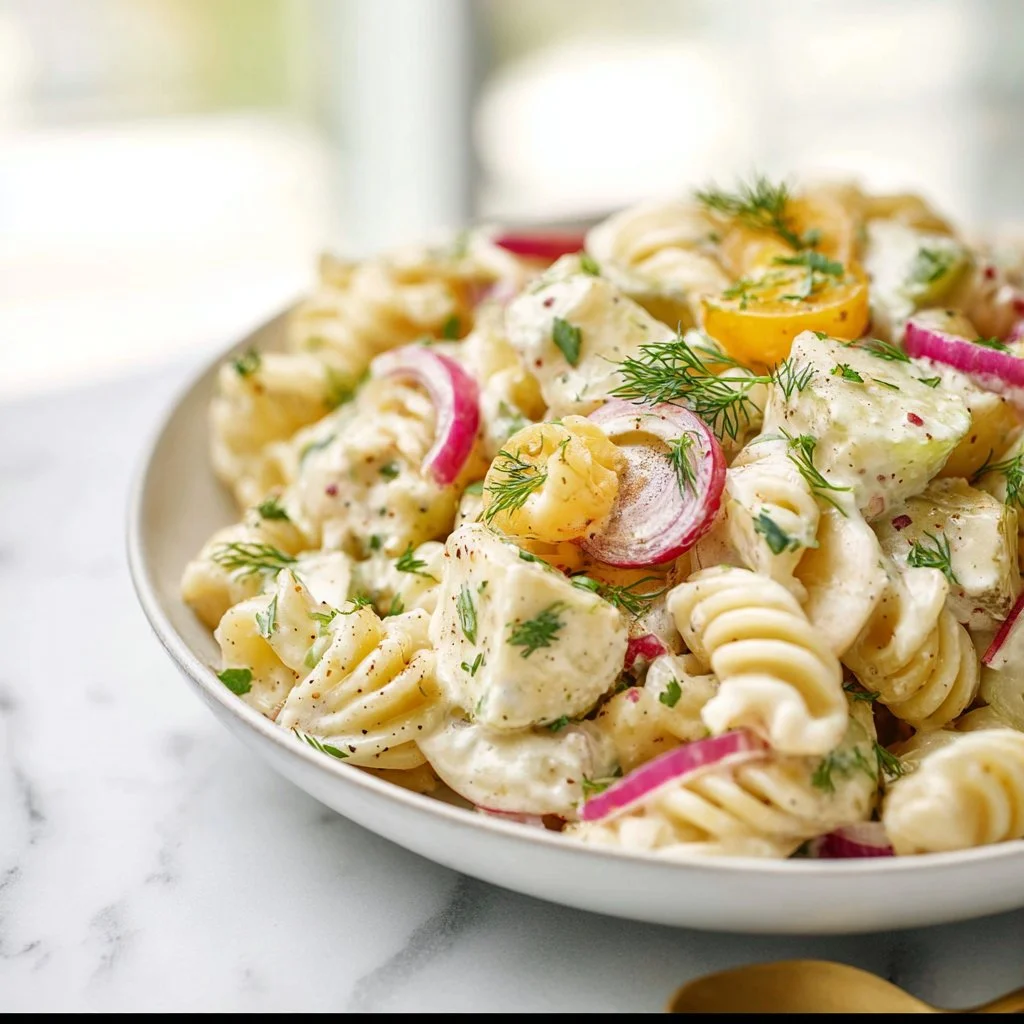
Dill Pickle Pasta Salad
Dive into Summer with Dill Pickle Pasta Salad: A Refreshing Twist!
Hey there, food lovers! I’m Beau Collier, and today, we’re diving into a dish that’s pure joy on a plate: Dill Pickle Pasta Salad. As the weather warms up and picnic vibes start to light the air, there’s nothing quite like a cool, creamy, and zesty pasta salad to elevate your gatherings and mealtime delights! This recipe is packed with flavors that dance in your mouth and conjure up memories of carefree summer picnics. So, let’s get started!
A Taste of Nostalgia
Let me take you back to those long, sun-soaked days of childhood spent in my grandparent’s backyard. My family would gather every Saturday for our weekly BBQ; the smell of grilled burgers and hot dogs wafted through the air like a delicious aroma symphony. One of my favorite dishes was my grandma’s Dill Pickle Pasta Salad. The combination of crunchy pickles, creamy dressing, and delightful bites of tender pasta was absolute heaven.
She would always say, “A little bit of pickle juice makes everything better!” And boy, was she right! As we sat around the table, stories flowed just like the magic of flavors colliding on our plates. Fast forward to today—whenever I whip up this dish, it feels like I’m transported back to her backyard, surrounded by laughter and love. So, whether you’re basking in the sun or hosting a cozy dinner, let’s recreate that spirit and dig into this sensational Dill Pickle Pasta Salad!
Ingredients
To create this delightful salad, you’ll need the following ingredients:
-
12 ounces pasta (rotini, shells, or elbow macaroni): The shape holds the dressing perfectly! Use whole wheat or gluten-free alternatives for dietary preferences.
-
1 cup dill pickles, finely chopped: These add a delightful crunch! You can substitute with bread and butter pickles for a sweeter twist.
-
½ cup pickle juice from the jar: This liquid gold enhances flavor dramatically. It can be replaced with vinegar for acidity.
-
¾ cup mayonnaise: The creamy base. Greek yogurt is a healthier alternative that still packs a creamy punch!
-
¼ cup sour cream or Greek yogurt: Adds tang! If you prefer dairy-free, use a plant-based yogurt.
-
1 cup shredded cheddar cheese (optional but delicious): Adds richness! DJ (dairy junkies) could try pepper jack for a spicy kick!
-
¼ cup fresh dill, chopped (or 1 tablespoon dried dill): Fresh is best for that vibrant pop over dried, but use what you’ve got on hand!
-
½ teaspoon garlic powder: A sprinkle of flavor! Fresh minced garlic is a fabulous swap for a stronger punch.
-
½ teaspoon onion powder: Enhance the taste without the crunch. You can use finely chopped green onions for fresh flavor!
-
Salt and pepper, to taste: Essential for seasoning! Don’t be shy; season until it sings.
Step-by-Step Instructions
Let’s cook up some magic! Here’s how to whip up this delectable pasta salad step by step:
-
Cook the Pasta: Begin by boiling a large pot of salted water. Add your choice of pasta and cook according to the package instructions until al dente (about 8-10 minutes). Remember, we want it tender but not mushy! Strain and rinse under cold water to stop the cooking process—this keeps the pasta from sticking together.
-
Prepare the Dressing: In a large mixing bowl, combine ¾ cup mayonnaise and ¼ cup sour cream (or Greek yogurt). Mix until smooth! Here you can fold in that magical pickle juice. Trust me, it adds a tangy zing!
-
Add Flavors: Stir in the chopped dill pickles, shredded cheese, fresh or dried dill, garlic powder, and onion powder. Simply divine! Don’t forget to taste; add salt and pepper to your liking.
-
Combine with Pasta: Gently mix the cooled pasta into the bowl with the dressing and pickles. Use a spatula to fold it in. You want to coat every piece without breaking the pasta—be gentle but thorough!
-
Chill and Serve: Cover and chill the deliciousness in the refrigerator for at least 30 minutes. This helps the flavors meld together for that delicious taste explosion! Enjoy while chilling—you’ve earned a moment to kickback!
Serving Suggestions
Time to plate this beauty! Serve the Dill Pickle Pasta Salad in a colorful bowl and garnish with a sprinkle of fresh dill and extra dill pickle slices for that eye-catching finish. It’s a stunning addition to any summer table, accompanied by grilled meats or served on its own as a light meal. Plus, don’t forget to have a ladle handy for your guests—everyone will want seconds!
Recipe Variations
Want to mix things up? Here are some creative twists to take your Dill Pickle Pasta Salad to another level:
-
Spicy Twist: Add some sliced jalapeños or diced hot pepper to give your salad a kick! Perfect for the heat lovers out there.
-
Protein Power: Toss in some diced rotisserie chicken or chickpeas for a hearty, protein-packed meal!
-
Veggie Lovers: Add cherry tomatoes cut in half or shredded carrots for vibrant pops of color and crunch.
-
Bacon Bliss: Crumbled bacon will add a smoky richness to the dish that is hard to resist. Just cook it up crispy and sprinkle over the top before serving!
-
Herbed Goodness: Swap the dill for fresh parsley or chives for a different herbaceous flavor.
Chef’s Notes
This recipe is one of those timeless gems that never goes out of style. Over the years, I’ve tried adding a myriad of ingredients, but the classic version always brings back nostalgia. I’ve tested recipes with different pasta and various dressings, but it’s this straightforward concoction that brings a smile to my face and a craving in my heart.
Oh, and a little kitchen story for you: I once accidentally used the brine from a spicy pickle jar instead of the regular dill pickle juice. Let’s just say it turned out a tad more adventurous than planned! But sometimes, those happy accidents lead to brilliant new ideas!
FAQs and Troubleshooting
1. Can I make this salad a day in advance?
Absolutely! In fact, it’s even better the next day as the flavors have more time to meld together.
2. What’s the best way to store leftovers?
Keep any leftovers in an airtight container in the fridge for up to 3 days. Just give it a quick stir before serving!
3. How can I make it vegan?
Use vegan mayonnaise and plant-based yogurt, and skip the cheese or swap it with a vegan alternative.
4. Why is my pasta salad sticky?
This usually happens when pasta is overcooked or not rinsed in cold water. Make sure to cook it al dente, then rinse thoroughly to cool.
Nutritional Info
Let’s keep it real, folks—celebrating food means enjoying it, but we can also be mindful! This Dill Pickle Pasta Salad serves up about 250 calories per serving (1 cup), depending on your ingredients. It’s rich in carbs but offers a bit of protein if you add cheese or chicken. With the fresh pickles and herbs, it sneaks in some vitamins too!
Nutritional Highlights:
- Protein: If you add chicken or cheese, you’ll up the protein content significantly!
- Healthy Fats: From mayo and yogurt, providing richness and flavor to keep you satiated.
Of course, depending on your add-ins and swaps, these numbers can vary, but all the love and care put into this salad make it totally worth it.
Final Thoughts
There you have it! A creamy, refreshing, and utterly delightful Dill Pickle Pasta Salad that exudes love and nostalgia from every bite. As we embrace summer, let’s celebrate warmth, laughter, and gathering around delicious food. No matter where you are—host a picnic, bring it to a potluck, or simply enjoy it on a sunny afternoon on your porch—this dish is sure to evoke those feel-good vibes just like Grandma’s backyard BBQ.
So, grab your ingredients and get ready to make some new memories of your own! And don’t forget to share your pasta salad adventures with me! Until next time, keep cooking, keep smiling, and always, always eat with joy!
Happy feasting! 🍽️🥒
Print
Dill Pickle Pasta Salad
- Total Time: 45 minutes
- Yield: 4 servings 1x
- Diet: Vegetarian
Description
A cool and creamy pasta salad featuring crunchy dill pickles and a zesty dressing perfect for summer gatherings.
Ingredients
- 12 ounces pasta (rotini, shells, or elbow macaroni)
- 1 cup dill pickles, finely chopped
- ½ cup pickle juice from the jar
- ¾ cup mayonnaise
- ¼ cup sour cream or Greek yogurt
- 1 cup shredded cheddar cheese (optional)
- ¼ cup fresh dill, chopped (or 1 tablespoon dried dill)
- ½ teaspoon garlic powder
- ½ teaspoon onion powder
- Salt and pepper, to taste
Instructions
- Cook the Pasta: Begin by boiling a large pot of salted water. Add pasta and cook according to package instructions until al dente (about 8-10 minutes). Strain and rinse under cold water.
- Prepare the Dressing: In a large mixing bowl, combine mayonnaise and sour cream (or Greek yogurt). Mix until smooth and fold in the pickle juice.
- Add Flavors: Stir in chopped dill pickles, shredded cheese, fresh or dried dill, garlic powder, and onion powder. Add salt and pepper to taste.
- Combine with Pasta: Gently mix the cooled pasta into the bowl with the dressing and pickles. Use a spatula to fold it in.
- Chill and Serve: Cover and chill in the refrigerator for at least 30 minutes before serving.
Notes
This salad can be made a day in advance for better flavor. Store leftovers in an airtight container for up to 3 days.
- Prep Time: 15 minutes
- Cook Time: 10 minutes
- Category: Salad
- Method: Mixing
- Cuisine: American
Nutrition
- Serving Size: 1 cup
- Calories: 250
- Sugar: 3g
- Sodium: 600mg
- Fat: 18g
- Saturated Fat: 3g
- Unsaturated Fat: 12g
- Trans Fat: 0g
- Carbohydrates: 25g
- Fiber: 2g
- Protein: 6g
- Cholesterol: 15mg
Keywords: pasta salad, summer recipe, dill pickle salad
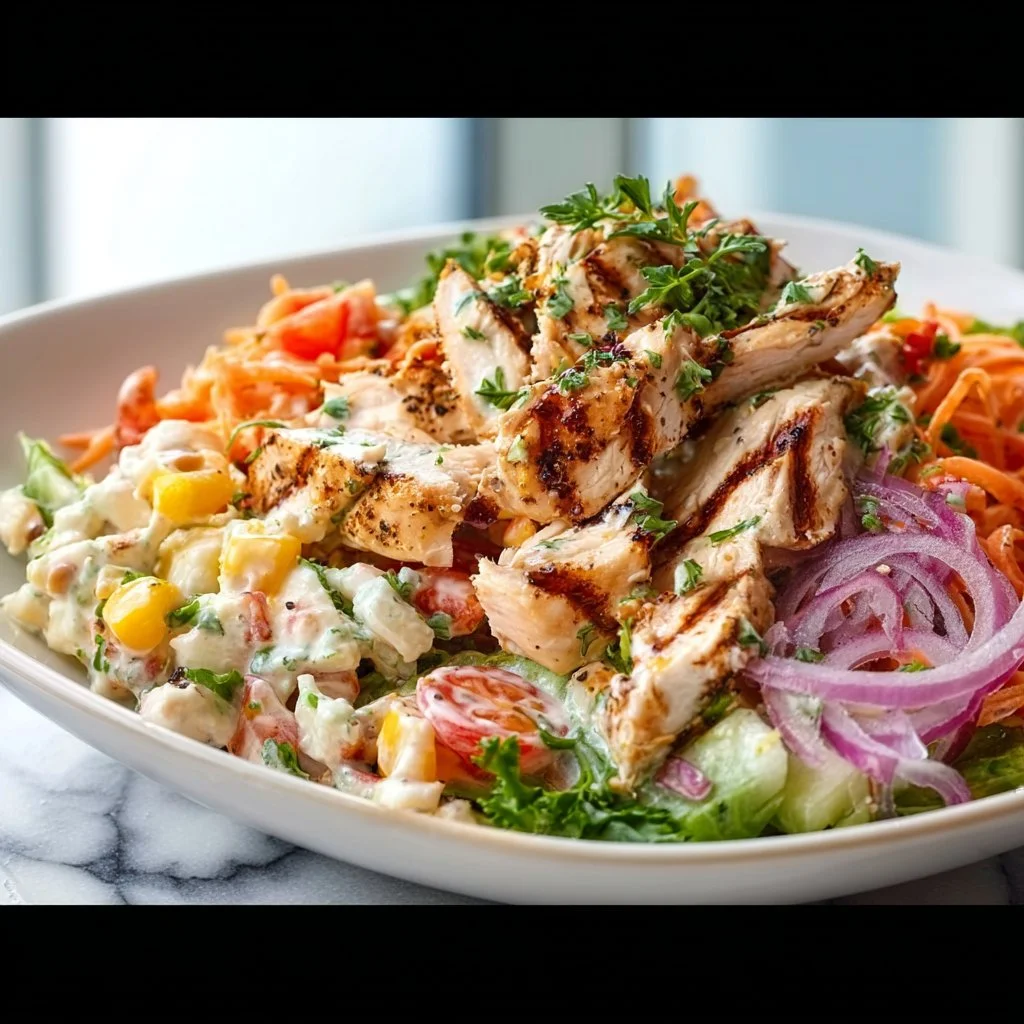
Hawaiian Chicken Salad
Hawaiian Chicken Salad: A Tropical Twist on Your Dinner Table
Hey there! I’m super excited to have you join me today as we whip up something that feels like a mini-vacation on a plate—Hawaiian Chicken Salad! If you’ve ever taken a bite of something and found yourself instantly transported to a sunny paradise, then you know exactly what I’m talking about. This dish is vibrant, refreshing, and downright delicious—a celebration of flavors that will make your taste buds dance!
Picture this: you’re lounging on a tropical beach, the sun warming your skin, while a gentle breeze carries the sweet scent of grilled pineapple and coconut. Well, my friend, that’s the vibe I’m channeling with this recipe. It’s not just food; it’s an experience, a story, a moment shared with family and friends.
I stumbled upon this Hawaiian Chicken Salad one summer while visiting my aunt in Hawaii. She tossed together a mix of fresh ingredients, and as I savored each bite, I could feel the Aloha spirit envelop me. The combination of juicy chicken, bright vegetables, and the unmistakable essence of coconut and pineapple was divine. I knew right then that I had to recreate that magic in my own kitchen, and I’m here to share it all with you. This dish is great for a light lunch, a picnic, or even a backyard barbecue—it’s versatile, easy to prepare, and trust me, your friends will be asking for the recipe!
So grab that apron and let’s dive into the colorful world of flavors with this Hawaiian Chicken Salad. You’re going to want to keep this recipe close because it’s sure to become a family favorite. Ready? Let’s get cooking!
Personal Story
Ah, where do I begin? There’s something special about food that allows us to reminisce about cherished memories. I remember that summer trip to Hawaii like it was yesterday. My aunt, a culinary whiz with an insatiable passion for island flavors, invited me into her kitchen. The sun streamed through the windows, and with each chop of the knife, a wave of nostalgia hit me. She didn’t just cook; she created. The air buzzed with the scent of garlic sizzling in olive oil, mingling perfectly with tangy pineapple juice.
As we prepared the chicken, she shared stories of her first taste of a Hawaiian salad, and the joy on her face as she recalled a family beach day made it seem almost magical. That salad was bright and colorful, bursting with flavors that made every bite feel like a warm hug. It was in that moment, surrounded by love and laughter, that I fell in love with the idea of combining fresh ingredients to create what I now proudly call my Hawaiian Chicken Salad.
Whenever I make this dish, I can’t help but smile and remember those joyful moments. It’s amazing how food brings us together and creates lasting memories. So, let’s bring a little bit of that joy to your kitchen today!
Ingredients
Marinade
-
1/3 cup coconut milk (from a can)
A creamy base that imparts a rich tropical flavor. You can substitute it with almond milk if you’re looking for a lighter option, but I recommend sticking with coconut for the authentic taste! -
1/4 cup pineapple juice (from can, save pineapple pieces)
Sweet and tangy, this juice gives the chicken a lovely marinade. If fresh pineapples are in season, definitely go with fresh juice for a burst of flavor! -
1 tbsp tomato sauce/ketchup
Adds a touch of sweetness and depth. You can skip it if you prefer, but it balances the other flavors beautifully. -
1 tbsp soy sauce
A salty umami kick that can be swapped with tamari for a gluten-free option. -
Zest of 1 lime
Brightens up the flavors—don’t skip this! You can also use lemon zest in a pinch. -
2 garlic cloves, minced
Garlic elevates the flavor profile. Use fresh for the best results, but garlic powder works in a crunch. -
1/4 tsp EACH onion powder, cumin, paprika, ginger powder, salt
A flavorful mix that gives the chicken its zesty personality. Feel free to adjust the spices to your liking!
Chicken & Salad
-
1/2 tbsp olive oil
Used for cooking the chicken. Avocado oil works too, but I love the flavor of olive oil. -
1 large chicken breast, halved horizontally
Lean protein that soaks up the marinade perfectly. You can use chicken thighs for a juicier bite! -
1/2 cup corn
Sweet and crunchy! You can use fresh, frozen, or canned corn—whatever you have on hand. -
1/2 – 3/4 cup pineapple pieces (from can)
Brings that iconic tropical sweetness to the dish. Fresh pineapple is also a fantastic option! -
4 – 6 cups chopped lettuce
I prefer a mix of romaine and butter lettuce for texture. Spinach or kale works great too! -
1/2 avocado, cut into wedges
Creamy and delicious—avocado adds heartiness to the salad! If you’re not an avocado fan, omit or swap with sliced cucumbers. -
1/2 red onion, finely sliced
Adds crunch and a pop of color. If red onion is too strong for you, use shallots instead! -
1/2 cup cherry tomatoes, halved
Juicy and sweet; they make a stunning addition. You can use any tomatoes you have on hand. -
1 small carrot, finely shredded
The shreds add a lovely crunch. You can also use pre-shredded carrots if you’re short on time! -
1 – 1 1/2 cups Coconut Lime Cilantro / Coriander Rice
A dreamy side that pairs perfectly with this salad! If you’re feeling adventurous, swap it out for quinoa or farro.
Dressing
-
1 1/2 tbsp lime juice
Freshly squeezed gives the best flavor! If you’re out of limes, lemon juice is a good substitute. -
2 1/2 tbsp olive oil
Adds richness to the dressing. A flavored olive oil like lemon or garlic will amp up the flavor! -
2 tbsp finely chopped cilantro/coriander
Fresh herb goodness! If cilantro isn’t your thing, parsley is a great substitute. -
1/2 garlic clove, minced
If you love garlic, feel free to add an extra clove! -
1/2 tsp sugar or honey
Balances out the acidity. You can adjust the sweetness to your liking or skip it altogether for a low-carb option! -
1/4 tsp salt
Enhances the flavor. Always taste first and adjust as necessary! -
Black pepper
For seasoning—freshly cracked black pepper elevates any dish!
Step-by-Step Instructions
-
Marinate the Chicken:
- In a medium bowl, whisk together coconut milk, pineapple juice, tomato sauce, soy sauce, lime zest, minced garlic, onion powder, cumin, paprika, ginger powder, and salt.
- Place the chicken breasts in a resealable plastic bag (or a bowl), pour the marinade over the top, and seal it tightly. Allow the chicken to marinate in the fridge for at least 30 minutes or up to 4 hours. This allows the chicken to soak in all those delicious flavors.
Chef’s Tip: Marinating overnight is even better for that extra burst of tropical goodness!
-
Cook the Chicken:
- Heat 1/2 tbsp of olive oil in a skillet over medium heat. When the oil shimmers, remove the chicken from the marinade, letting any excess drip off before placing it in the pan.
- Cook for about 5-6 minutes on each side, or until the chicken is cooked through and no longer pink in the middle (internal temperature should reach 165°F / 74°C).
Chef’s Hack: If you have a meat thermometer, use it! Perfectly cooked chicken makes all the difference.
-
Prepare the Salad:
- While the chicken is cooking, chop your lettuce, slice your red onion, halve the cherry tomatoes, shred the carrot, and prepare the avocado.
- In a large salad bowl, combine the chopped lettuce, corn, pineapple pieces, avocado, red onion, cherry tomatoes, and shredded carrot. Set aside while you finish up the chicken.
-
Make the Dressing:
- In a small bowl, whisk together lime juice, olive oil, chopped cilantro, minced garlic, sugar/honey, salt, and black pepper until nicely blended.
Tip: Adjust the seasoning to your preference. Want it a bit sweeter? Add more honey!
-
Assemble the Salad:
- Once the chicken has cooled slightly, slice it into strips and add it to the large bowl with the salad.
- Drizzle the dressing over the salad and toss everything gently to combine. You want to ensure each leaf is lovingly coated in that zesty goodness.
-
Serve It Up:
- Serve the Hawaiian Chicken Salad in individual bowls, topped with a scoop of coconut lime rice on the side. Add a few more wedges of avocado for good measure, and don’t forget a sprinkle of extra cilantro on top!
Serving Suggestions
Presenting this vibrant Hawaiian Chicken Salad is as fun as eating it! Here are a couple of ideas to make it look as good as it tastes:
-
Colorful Bowls: Layer the ingredients in a clear glass bowl to show off the colors. Think bright green lettuce, golden pineapple chunks, and rich red tomatoes—just gorgeous!
-
Platter Style: Serve it on a large platter family-style. Toss everything together for a communal feel and let everyone help themselves. Trust me; it’s as fun as a beach BBQ!
-
Add a Garnish: Sprinkle some toasted coconut flakes or candied ginger on top for a delightful crunch and extra flair. You can also serve with lime wedges for that fresh kick.
Recipe Variations
Variety is the spice of life, and luckily, this Hawaiian Chicken Salad is incredibly adaptable! Here are a few options to customize this dish to fit your tastes or dietary needs:
-
Add Some Crunch: Toss in some sliced almonds, sesame seeds, or crunchy ramen noodles for a delightful textural contrast.
-
Make it Vegan: Substitute the chicken with grilled tofu or tempeh. Marinate the tofu the same way, and you’ll still enjoy that island flavor.
-
Spicy Kick: If you’re feeling adventurous, add some minced jalapeños or sriracha to the dressing for a spicy twist that pairs beautifully with the sweetness of the pineapple.
-
Rice Alternatives: Swap coconut lime rice with quinoa, bulgur, or cauliflower rice for a lighter version.
-
Tropical Fruits: Garnish with mango or papaya pieces for a touch of tropical sweetness. They’ll take your salad to the next level!
Chef’s Notes
I’ve made this Hawaiian Chicken Salad so many times, and each time it feels like a flavor adventure. I often experiment with whatever I have in my kitchen, and it never disappoints. Just last week, I roasted some bell peppers to throw in, and oh boy, the sweetness against the tanginess of the dressing was a flavor explosion!
Also, I’ve had my fair share of kitchen mishaps—like the time I over-marinated my chicken, and it turned out too salty! Now, I always remind myself (and you!) to keep an eye on the marinating time. Learning from those experiences is what makes cooking fun!
FAQs and Troubleshooting
1. What if my chicken is dry?
Overcooking chicken is a common mishap! To prevent this, always use a meat thermometer to ensure it’s cooked through but still juicy.
2. Can I prepare this salad ahead of time?
Absolutely! You can prep all your ingredients in advance but keep the dressing separate until just before serving to prevent sogginess.
3. What can I do with leftovers?
This salad holds up well for a day or two in the fridge, but you can also turn leftovers into a delicious wrap! Just pile the salad in a tortilla, add some extra dressing, roll it up, and you’re ready to go!
4. How can I make this lower in calories?
You can reduce the amount of coconut milk or omit the oil entirely in the marinade and dressing. Also, using skinless chicken breast can help cut down on fat.
Nutritional Info
While I always encourage enjoying food in moderation, here’s a rough nutritional breakdown for one serving of this Hawaiian Chicken Salad:
- Calories: Approximately 400
- Protein: 30g
- Carbohydrates: 30g
- Fat: 20g
- Fiber: 5g
- Sugar: 8g
This salad is a nutritious combination of lean protein, healthy fats, and fresh vegetables—a perfect balance for a wholesome meal!
Final Thoughts
And there you have it—a deliciously fresh Hawaiian Chicken Salad that’s bound to brighten your day! Food is such a powerful way to connect with others, and this dish is sure to do just that—whether you’re sharing it at a summer cookout or on a lazy weekday lunch.
The beauty of cooking is that it fosters creativity; don’t be afraid to experiment and make the recipe your own. Share it with loved ones and create those joyful moments, just like I did in my aunt’s kitchen.
So what are you waiting for? Grab those ingredients, unleash your inner chef, and let’s bring a taste of Hawaii to your dinner table. Happy cooking, and remember to enjoy every single bite—Aloha!
Print
Hawaiian Chicken Salad
- Total Time: 30 minutes
- Yield: 4 servings 1x
- Diet: Gluten-Free
Description
A vibrant and refreshing Hawaiian Chicken Salad, perfect for a light lunch or picnic, featuring juicy chicken, fresh vegetables, and tropical flavors.
Ingredients
- 1/3 cup coconut milk
- 1/4 cup pineapple juice
- 1 tbsp tomato sauce
- 1 tbsp soy sauce
- Zest of 1 lime
- 2 garlic cloves, minced
- 1/4 tsp EACH onion powder, cumin, paprika, ginger powder, salt
- 1/2 tbsp olive oil
- 1 large chicken breast, halved horizontally
- 1/2 cup corn
- 1/2 – 3/4 cup pineapple pieces
- 4 – 6 cups chopped lettuce
- 1/2 avocado, cut into wedges
- 1/2 red onion, finely sliced
- 1/2 cup cherry tomatoes, halved
- 1 small carrot, finely shredded
- 1 – 1 1/2 cups Coconut Lime Cilantro Rice
- 1 1/2 tbsp lime juice
- 2 1/2 tbsp olive oil (for dressing)
- 2 tbsp finely chopped cilantro
- 1/2 garlic clove, minced (for dressing)
- 1/2 tsp sugar or honey
- 1/4 tsp salt
- Black pepper to taste
Instructions
- Marinate the Chicken: In a medium bowl, whisk together coconut milk, pineapple juice, tomato sauce, soy sauce, lime zest, minced garlic, onion powder, cumin, paprika, ginger powder, and salt. Place the chicken breasts in a resealable plastic bag, pour the marinade over the top, seal it tightly, and let marinate for at least 30 minutes.
- Cook the Chicken: Heat 1/2 tbsp of olive oil in a skillet over medium heat. Remove the chicken from the marinade and cook for about 5-6 minutes on each side until cooked through.
- Prepare the Salad: While the chicken is cooking, chop your lettuce, slice your red onion, halve the cherry tomatoes, shred the carrot, and prepare the avocado. In a large bowl, combine these ingredients with corn and pineapple pieces.
- Make the Dressing: In a small bowl, whisk together lime juice, olive oil, chopped cilantro, minced garlic, sugar/honey, salt, and black pepper.
- Assemble the Salad: Once the chicken has cooled slightly, slice it into strips and add it to the salad bowl. Drizzle the dressing over the salad and toss to combine.
- Serve It Up: Serve the Hawaiian Chicken Salad in individual bowls topped with a scoop of coconut lime rice and avocado wedges.
Notes
Marinating the chicken overnight enhances the flavors. You can customize the salad with additional toppings or substitute ingredients to fit your dietary preferences.
- Prep Time: 15 minutes
- Cook Time: 15 minutes
- Category: Salad
- Method: Grilling
- Cuisine: Hawaiian
Nutrition
- Serving Size: 1 serving
- Calories: 400
- Sugar: 8g
- Sodium: 500mg
- Fat: 20g
- Saturated Fat: 6g
- Unsaturated Fat: 8g
- Trans Fat: 0g
- Carbohydrates: 30g
- Fiber: 5g
- Protein: 30g
- Cholesterol: 70mg
Keywords: Hawaiian Chicken Salad, Tropical Salad, Healthy Lunch
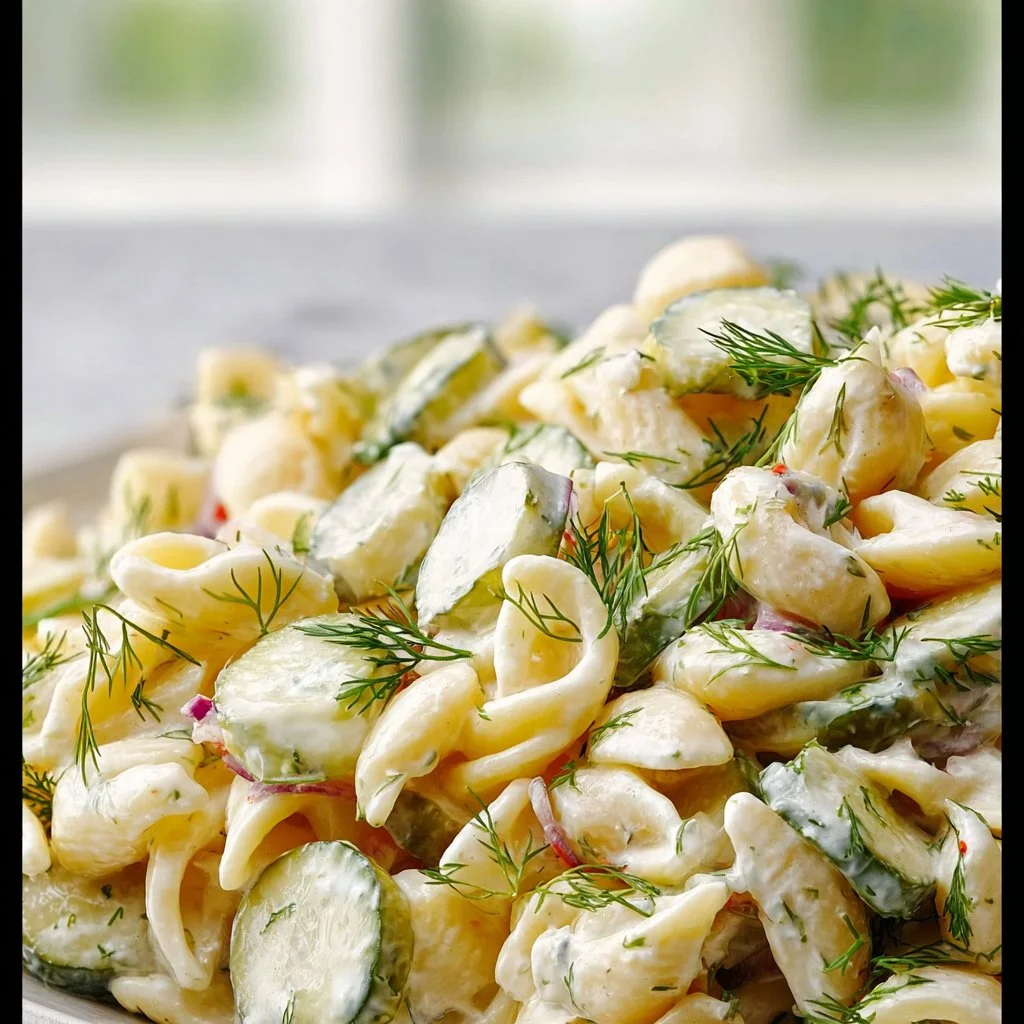
Dill Pickle Pasta Salad
# Dill Pickle Pasta Salad: A Tangy Twist on Tradition

## Introduction

Hey there, fellow foodies! Welcome back to Feastical, where every kitchen experience is elevated by delicious flavors, warm memories, and a dash of creativity. Today, I’m thrilled to share a recipe that's been bringing folks together for generations: Dill Pickle Pasta Salad. This dish is a delightful amalgamation of creamy, tangy, and crunchy textures that take your taste buds for a joyful ride. It’s perfect for family picnics, BBQs, or even just a cozy night in with a movie and a delicious bowl of goodness.

What’s fantastic about this Dill Pickle Pasta Salad is its versatility. It can be served as a side, a main dish, or even as a meal prep star. Plus, it’s one of those recipes that anyone can throw together in a snap, regardless of your culinary skills. I mean, who doesn’t love pasta? And throw in some dill pickles? Well, you’ve got a match made in snack heaven!

Let me take you back for a moment to my childhood. I remember the first time my grandma made this salad for a family gathering. The sun was shining, laughter filled the air, and that colorful bowl of creamy pasta was enticing everyone to help themselves. The way the sharp cheddar, the herbal dill, and the sour notes of the pickles danced together was nothing short of magic. It was so refreshing, and you could feel the love and nostalgia in every bite. That's the power of food—it's not just about taste; it’s about the memories we create around it. So, let’s get started, shall we?

## Personal Story

I remember sitting at my grandma's wooden kitchen table, which was always slightly wobbly but just perfect for a family gathering. Her Dill Pickle Pasta Salad was the crowd-pleaser, and I couldn’t wait to help mix up those beloved ingredients.

As a kid, I was a bit of a picky eater. But there was just something about that salad—its creamy dressing and crunchy pickles called my name. Every summer, we’d gather for family reunions, and each year, the same unspoken rule applied: if Grandma was in the kitchen, everyone was in line for seconds (or thirds!).

One year, I decided to take a leap and add a few extra pickles in the mix. My cousin, who was a tad more adventurous with flavors than I was, loved my idea, and we ended up creating our own little culinary adventure. That small moment sparked a lifelong love of cooking and experimenting in the kitchen. And here we are, years later, still celebrating the joy of food and family!

## Ingredients

Here’s what you’ll need to whip up this delightful Dill Pickle Pasta Salad. Don’t worry; I have tips for each ingredient!

- **2 cups cooked pasta**
  I recommend using shells or elbows since they hold dressing beautifully. If you’re gluten-free, feel free to switch to chickpea or zucchini noodles for a healthier twist.

- **1 cup dill pickles, chopped**
  Go for the classic sour dill pickles! They add the right crunch and acidity. If you’re not a fan of dill, you can choose bread-and-butter pickles for a sweeter vibe.

- **1 cup sharp white cheddar cheese, diced**
  The sharpness of the cheddar adds such a fantastic flavor contrast. If you’re looking for a dairy-free option, try a plant-based cheese.

- **1/4 cup fresh dill, chopped**
  Fresh is best! If you only have dried dill, use about 2 teaspoons. Don’t skimp on this ingredient; it’s what gives the salad its distinct flavor!

- **1/2 cup mayonnaise**
  Feel free to use a lighter version or even Greek yogurt for a tangy twist.

- **1/4 cup sour cream**
  This adds creaminess. Again, you can substitute in more Greek yogurt or even a vegan alternative.

- **1 tablespoon pickle juice**
  Collect the magic from your pickles with this ingredient! If you find it too tangy, you can omit or lessen the amount.

- **Salt and pepper to taste**
  Always add to your preference, but start conservatively and adjust as needed.

## Step-by-Step Instructions

Alright, let’s dive into the cooking process! Grab your utensils, put on your favorite apron, and let’s create some magic.

### Step 1: Cook the Pasta
Start by bringing a large pot of salted water to a rolling boil. Add 2 cups of pasta and cook according to package instructions until al dente. I usually like to undercook it by a minute since it'll continue to cook while cooling. Once it’s done, drain the pasta and rinse it under cold water. This stops the cooking process and ensures our pasta remains perfectly firm.

### Step 2: Prepare the Ingredients
While the pasta is cooling, chop your pickles and cheese. Before you know it, you’ll have that fragrant dill ready as well. Pro tip: Use a sharp knife for the cheese; it’ll make chopping so much easier!

### Step 3: Mix the Dressing
In a large mixing bowl, combine the mayonnaise, sour cream, and pickle juice. Whisk it together until it’s smooth and creamy. You want to make sure it’s well blended, as the dressing is the heart of your salad. This is also the time to season it with a touch of salt and pepper.

### Step 4: Combine
Now it’s time for the fun part! Add the cooled pasta to the mixing bowl and gently fold in the chopped pickles, cheddar cheese, and fresh dill. Make sure everything is coated in the dressing. You want every bite to be bursting with flavor!

### Step 5: Chill
Cover the bowl with plastic wrap or a lid and refrigerate for at least an hour (if you can wait!). Chilling allows the flavors to mingle and intensify. If you want to eat it right away, no worries; it’ll still be delicious!

### Step 6: Enjoy!
When you’re ready to serve, give it one final stir, taste, and adjust the seasoning if necessary. Dig in, and don’t be surprised if you end up eating several servings—this Dill Pickle Pasta Salad is that good!

## Serving Suggestions

Serving can truly elevate your pasta salad experience. For a casual gathering, I love presenting this salad in a large, colorful bowl and letting everyone serve themselves. Adding a sprinkle of extra fresh dill on top creates a beautiful garnish.

If you’re feeling a bit fancy, try serving individual portions in mason jars! They look adorable and are perfect for picnics or meal prepping for the week. Just layer your pasta salad with the creamy goodness on top, so it’s easy to grab and go!

Pair this salad with grilled chicken or a veggie platter for a colorful, balanced meal. You won’t believe how it steals the show at any BBQ or picnic, either!

## Recipe Variations

Here are some flavorful twists to make this recipe your own:

1. **Bacon Dill Pickle Pasta Salad**: Add crispy crumbles of bacon for a smoky flavor and extra crunch. Trust me; it’s a game-changer!

2. **Spicy Kick**: Throw in some diced jalapeños or a sprinkle of red pepper flakes to spice things up. Perfect for those who crave a little heat!

3. **Mediterranean Flair**: Toss in some cherry tomatoes, olives, and feta for a Mediterranean spin. The fresh ingredients paired with dill make for an excellent combination!

4. **Vegan Option**: Swap the cheese and mayo for plant-based alternatives, and you have a delicious vegan dish everyone can enjoy!

5. **Herbal Bliss**: Mix in other fresh herbs like parsley or chives for additional layers of flavor. It's a great way to use up leftover herbs from the fridge!

## Chef’s Notes

I absolutely love how cooking constantly evolves! This Dill Pickle Pasta Salad is a classic dish that has transformed over time, especially in social gatherings. I’ve experimented with cook-outs and potluck dinners, and I can assure you—no one has ever turned down a scoop!

There was one epic summer BBQ when we were running low on space in the fridge; I decided to throw in an entire jar of pickles into the salad. As it turns out, that spontaneous decision became a new favorite amongst my friends! The whole kitchen just erupted with laughter and enthusiasm. Food has that incredible power.

## FAQs and Troubleshooting

**1. My pasta salad is too creamy; how can I fix it?**
If you find the salad too rich, try adding a bit of extra pickle juice or even a splash of vinegar to lighten it up.

**2. How long will this salad last in the fridge?**
This beauty can last about 3-5 days in the fridge. Just be sure it’s in an airtight container to keep all those flavors locked in!

**3. Can I make this salad ahead of time?**
Absolutely! Making it a day in advance allows the flavors to blend even more beautifully. Just give it a quick stir before serving.

**4. I don't have fresh dill. Can I use dried?**
Yes, you can! Just remember that dried dill is more concentrated, so use about 2 teaspoons instead of 1/4 cup.

## Nutritional Info

While I believe that food should be enjoyed and not overly analyzed, it can help to have a rough understanding of what’s on your plate.

A typical serving of Dill Pickle Pasta Salad includes:
- **Calories**: About 350
- **Protein**: Roughly 10g, thanks to the cheese and pasta
- **Carbohydrates**: Approximately 40g
- **Fat**: Around 20g, largely from the mayo and cheese
- **Fiber**: About 2g from the pasta and pickles

Depending on your substitutions, these numbers can vary, but it’s always helpful to have a general idea in mind!

## Final Thoughts

There you go, kitchen rockstars! I hope this Dill Pickle Pasta Salad brings as much joy and comfort to your table as it has to mine over the years. Whether you’re enjoying it at a summer BBQ, a cozy family gathering, or simply for yourself at home, remember that food, at its best, is about connectivity and love.

So, don’t forget to share this recipe with friends and family. Who knows? You might just ignite a culinary memory as you embark on these flavorful adventures together! Until next time, keep those spatulas handy and your taste buds eager. Happy cooking!
Dill Pickle Pasta Salad
- Total Time: 25 minutes
- Yield: 4 servings 1x
- Diet: Vegetarian
Description
A creamy, tangy, and crunchy pasta salad featuring dill pickles, cheddar cheese, and fresh dill—perfect for any occasion.
Ingredients
- 2 cups cooked pasta (shells or elbows)
- 1 cup dill pickles, chopped
- 1 cup sharp white cheddar cheese, diced
- 1/4 cup fresh dill, chopped
- 1/2 cup mayonnaise
- 1/4 cup sour cream
- 1 tablespoon pickle juice
- Salt and pepper to taste
Instructions
- Cook the pasta in a large pot of salted boiling water until al dente, then drain and rinse under cold water.
- Prepare the pickles, cheese, and dill while the pasta cools.
- Mix the mayonnaise, sour cream, and pickle juice in a large bowl until smooth.
- Combine the cooled pasta with the dressing, pickles, cheddar, and fresh dill.
- Chill for at least one hour in the refrigerator.
- Enjoy and serve with additional dill as garnish if desired.
Notes
Feel free to substitute with gluten-free pasta, dairy-free cheese, or Greek yogurt. Can last 3-5 days in the fridge.
- Prep Time: 15 minutes
- Cook Time: 10 minutes
- Category: Side Dish
- Method: No cooking required post pasta prep
- Cuisine: American
Nutrition
- Serving Size: 1 serving
- Calories: 350
- Sugar: 5g
- Sodium: 400mg
- Fat: 20g
- Saturated Fat: 6g
- Unsaturated Fat: 10g
- Trans Fat: 0g
- Carbohydrates: 40g
- Fiber: 2g
- Protein: 10g
- Cholesterol: 30mg
Keywords: Dill Pickle, Pasta Salad, Side Dish, Vegetarian, Comfort Food
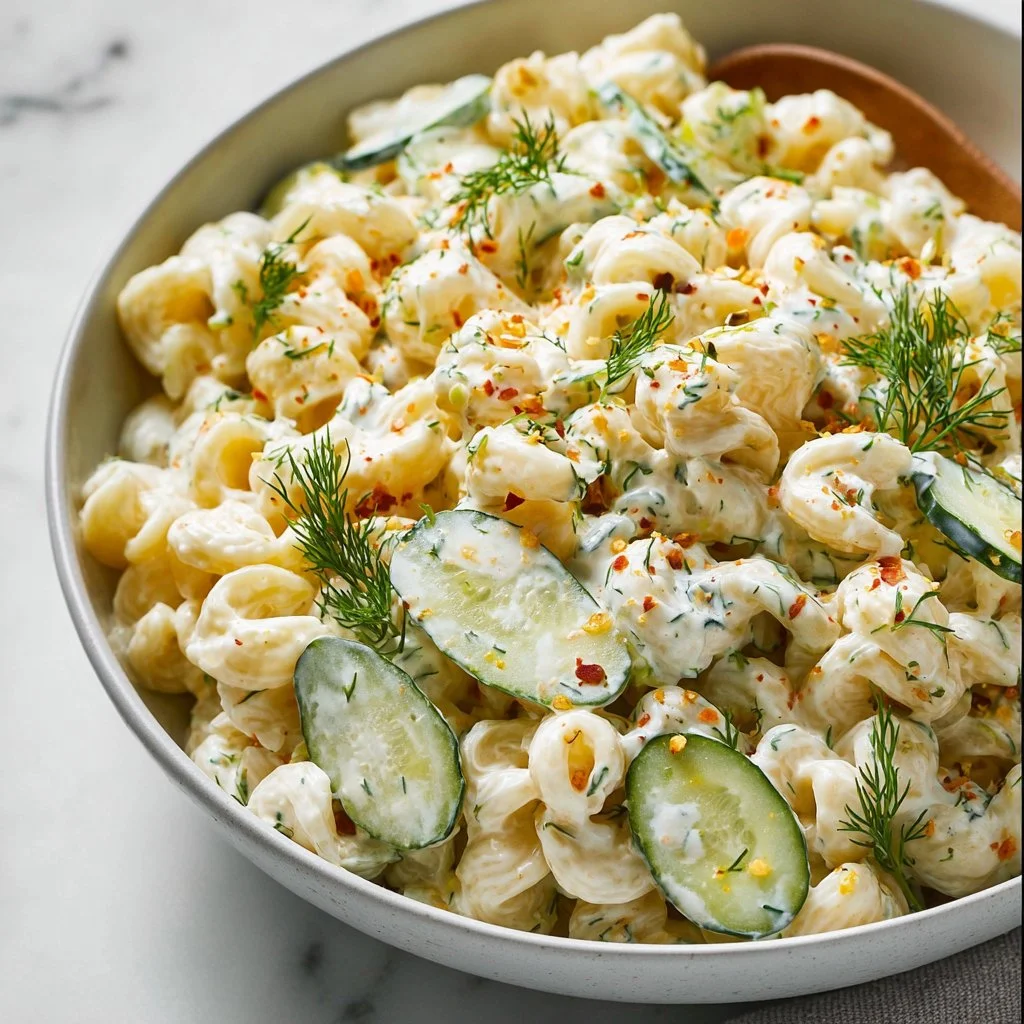
Creamy Dill Pickle Pasta Salad Recipe
Creamy Dill Pickle Pasta Salad Recipe: A Summer Picnic Must-Have!
Hey there, food lovers! I’m so excited you’ve joined me today on Feastical! If you’ve clicked on this post, then you’re likely craving something fresh, tangy, and downright delicious—our star of the show, Creamy Dill Pickle Pasta Salad! This dish is a vibrant celebration of flavors and textures, perfect for summer picnics, BBQs, or just a cozy night in with friends and family.
Picture this: it’s a sun-drenched afternoon, the birds are chirping, and the air is filled with the smell of grass and grilled goodies. You’ve got a bunch of your favorite people gathered around, laughter in the air, maybe a game of frisbee happening in the backyard—sounds like the perfect day, right? Now, imagine setting out a big bowl of this creamy, dreamy pasta salad on your picnic table. Not only will it be the dish everyone dives into first, but it also sparks conversations filled with nostalgic stories about childhood favorites or family gatherings!
This pasta salad is not just a dish; it’s an experience. It brings together the zing of pickles, the creaminess of sour cream and mayo, and the delightful crunch of fresh dill. The pasta serves as a comforting base that holds everything together, making this salad a hit for both pasta lovers and pickle enthusiasts. You might find yourself sneaking back for seconds (or thirds)—don’t worry, I won’t judge!
So grab your apron, unleash your inner chef, and let’s make a dish that will not only satisfy your taste buds but also create wonderful memories around the table. Are you ready? Let’s dive into the details of this delightful dish!
Personal Story
I can still remember the first time I tried a pasta salad with pickles; it was at my best friend’s birthday party back in middle school. There I was, surrounded by a sea of pizza and cake, when my friend’s mom brought out a large bowl of pasta salad bursting with those green beauties! At first, I wasn’t convinced. Pickles? In pasta? But oh boy, was I in for a surprise! One bite in, and I was hooked. The unexpected tang paired with the creamy sauce was absolutely magical.
That day sparked a new culinary adventure for me. I started experimenting with my own versions of pasta salads, each twist making me reminisce about the good times spent with friends and family. This recipe is rooted in that moment—it’s about sharing joy, laughter, and tons of flavor, and I can’t wait for you to taste it!
Ingredients
Here’s everything you need to whip up this creamy dill pickle pasta salad:
-
8 ounces Cavatappi pasta
A fun, spiral-shaped pasta that grabs onto the creamy dressing and all those flavorful bits! Feel free to substitute with elbow macaroni or rotini if you’re more of a traditionalist. -
1 cup sour cream
Adds richness and creaminess. You can swap it with Greek yogurt for a tangy flavor and a lighter feel. -
½ cup mayonnaise
Classic creamy base! If you want to make it lighter, try using a lighter or vegan mayo for a healthier twist. -
¼ cup pickle juice
This is where the magic happens! The pickle juice enhances the flavor profile. If you’re out, you can mix in a bit of lemon juice for tanginess. -
2 teaspoons fresh dill, minced
Fresh dill adds that lovely herbaceous flavor. Dried dill can work in a pinch—just use about half the amount since it’s more concentrated. -
½ teaspoon garlic powder
A little punch of garlic without overwhelming the other flavors. Fresh minced garlic can substitute if you’re feeling extra bold! -
½ teaspoon onion powder
Adds subtle sweetness and depth. Same as with garlic: fresh onion will give you more crunch and a bolder flavor. -
½ teaspoon ground black pepper
To taste! This gives a light kick. Want it spicier? Add in some red pepper flakes! -
1 cup dill pickles, diced
The star of the show! Use your favorite dill pickles, but feel free to experiment with bread-and-butter pickles for a sweeter twist. -
½ cup sharp cheddar cheese, shredded or cubed
This adds deliciously sharp and cheesy goodness! If you’re aiming for a vegan version, omit it or use a dairy-free cheese.
Step-by-Step Instructions
Now, let’s put it all together! Here’s how you can create your very own bowl of creamy dill pickle pasta salad:
Step 1: Cook the Pasta
Start by bringing a large pot of salted water to a boil. Once boiling, add your cavatappi pasta. Cook according to the package directions, typically around 9-11 minutes, until al dente. Stir occasionally to prevent sticking! A little tip: When draining pasta, rinse it under cold water for a few seconds to stop the cooking process and cool it down. This will keep your salad fresh and crisp!
Step 2: Prepare the Dressing
While the pasta is cooking, grab a large mixing bowl. Add the sour cream, mayonnaise, pickle juice, minced fresh dill, garlic powder, onion powder, and black pepper. Give it a good whisk until all ingredients are blended and creamy. My secret tip? Taste and adjust! If it feels a bit thick, add more pickle juice for a tangier kick.
Step 3: Combine Pasta and Dressing
Once your pasta has cooled (it’s important to give it some time!), add it to the mixing bowl with the dressing. Gently fold the pasta and dressing together until every spiral is well-coated. This is your moment to make sure nothing goes dry!
Step 4: Add the Goodies
Now—time for the fun part! Toss in the diced dill pickles and shredded sharp cheddar cheese. Fold these into the pasta salad gently; you want to keep the cheese and pickles intact, adding bursts of flavor in each delightful bite. Here’s a pro-tip: a sprinkle of salt at this point can enhance all the flavors!
Step 5: Chill and Serve
Cover your salad with plastic wrap or a lid, and let it chill in the fridge for at least 30 minutes. This allows the flavors to meld beautifully. When it’s time to serve, give it a gentle stir and a taste test. You might want to add a sprinkle of fresh dill for garnish—because who doesn’t love a little herbaceous touch?
Serving Suggestions
When it comes to presentation, let me tell you—it’s all about those little details! Serve your creamy dill pickle pasta salad in a large, colorful bowl for a casual vibe or glamorous glassware for a fancy gathering.
You can pair it with an assortment of grilled meats—think juicy burgers or tangy BBQ chicken. It’s also fantastic alongside some fresh greens or corn on the cob for that perfect summer plate. Want to make it a meal? Consider adding rotisserie chicken or shrimp tossed in lemon and herbs for a delicious protein boost!
Recipe Variations
Let’s get creative, shall we? Here are some twists you can play with to make this pasta salad truly yours:
-
Bacon Lover’s Delight: Add crispy, crumbled bacon pieces for a smoky flavor. Trust me; everything is better with bacon!
-
Spicy Dill Delight: Mix in chopped jalapeños or a dash of hot sauce if you like things fiery!
-
Veggie-Packed Version: Toss in some diced red bell peppers or sweet corn for extra crunch and color.
-
Herbed Up: Combine fresh dill with other fresh herbs like chives or parsley to amp up the freshness.
-
Mason Jar Meal Prep: Layer in a mason jar starting with dressing at the bottom, then pasta, pickles, and cheese, perfect for on-the-go lunches!
Chef’s Notes
This pasta salad holds a special place in my heart—not only because of those childhood memories but because it’s such a versatile dish! It adapts based on what ingredients you have on hand, allowing creativity to flourish. Whether you stick to the classic recipe or customize it, it always results in a bowl of happiness. I remember once bringing this salad to a potluck, and it disappeared before I even had a chance to grab a second helping! Let’s just say, I took it as a compliment.
FAQs and Troubleshooting
1. Can I make this pasta salad ahead of time?
Absolutely! In fact, it tastes even better the next day after the flavors have had time to meld together. Just ensure you store it in an airtight container in the refrigerator.
2. My pasta salad seems too dry. What do I do?
No worries! You can easily add a splash of pickle juice or a tablespoon of mayonnaise right before serving to loosen it up.
3. Can I double the recipe?
Of course! This salad works great for larger gatherings. Just make sure you use a big enough bowl!
4. Is it suitable for meal prep?
Yes! This salad can be made in bulk, stored in individual containers, and eaten over a few days. Perfect for lunch or quick dinners!
Nutritional Info
While I always say to indulge in the food you love, knowing its nutritional values can help with planning your meals! Here’s a rough breakdown per serving (based on 6 servings):
- Calories: 350
- Protein: 10g
- Carbohydrates: 35g
- Fat: 20g
- Fiber: 2g
- Sugar: 3g
Remember, these are estimates, and the actual values will vary based on personal ingredient substitutes and proportions.
Final Thoughts
And there you have it, folks! Our creamy dill pickle pasta salad is not just a recipe; it’s a flavorful, heartwarming dish piece that’ll brighten up any gathering. Whether you’re a fan of those tangy pickles or just looking for a new favorite recipe to whip up, I’m confident you’ll love this one. So go ahead, gather your friends, enjoy a sunny day outside, and indulge in good food and great company.
I hope you enjoy making and sharing this recipe as much as I do. Keep exploring, keep cooking, and remember—good food brings people together. Until next time on Feastical, happy cooking! 🍽️
Print
Creamy Dill Pickle Pasta Salad
- Total Time: 56 minutes
- Yield: 6 servings 1x
- Diet: Vegetarian
Description
A vibrant and tangy pasta salad perfect for summer picnics and BBQs, featuring creamy dressing and crunchy dill pickles.
Ingredients
- 8 ounces Cavatappi pasta
- 1 cup sour cream
- ½ cup mayonnaise
- ¼ cup pickle juice
- 2 teaspoons fresh dill, minced
- ½ teaspoon garlic powder
- ½ teaspoon onion powder
- ½ teaspoon ground black pepper
- 1 cup dill pickles, diced
- ½ cup sharp cheddar cheese, shredded or cubed
Instructions
- Cook the pasta by bringing a large pot of salted water to a boil. Add cavatappi pasta and cook according to package directions (9-11 minutes) until al dente. Drain and rinse under cold water to cool.
- Prepare the dressing by whisking together sour cream, mayonnaise, pickle juice, dill, garlic powder, onion powder, and black pepper in a large bowl.
- Combine the cooled pasta with the dressing in the mixing bowl, folding gently until well-coated.
- Add diced dill pickles and shredded cheddar cheese, folding gently to incorporate.
- Chill the salad in the fridge for at least 30 minutes before serving to allow flavors to meld.
Notes
For a lighter version, swap sour cream for Greek yogurt. You can also add crispy bacon or veggies for extra flavor.
- Prep Time: 15 minutes
- Cook Time: 11 minutes
- Category: Salad
- Method: Mixing
- Cuisine: American
Nutrition
- Serving Size: 1 serving
- Calories: 350
- Sugar: 3g
- Sodium: 500mg
- Fat: 20g
- Saturated Fat: 5g
- Unsaturated Fat: 10g
- Trans Fat: 0g
- Carbohydrates: 35g
- Fiber: 2g
- Protein: 10g
- Cholesterol: 30mg
Keywords: pasta salad, summer salad, dill pickle salad, picnic recipes, creamy pasta
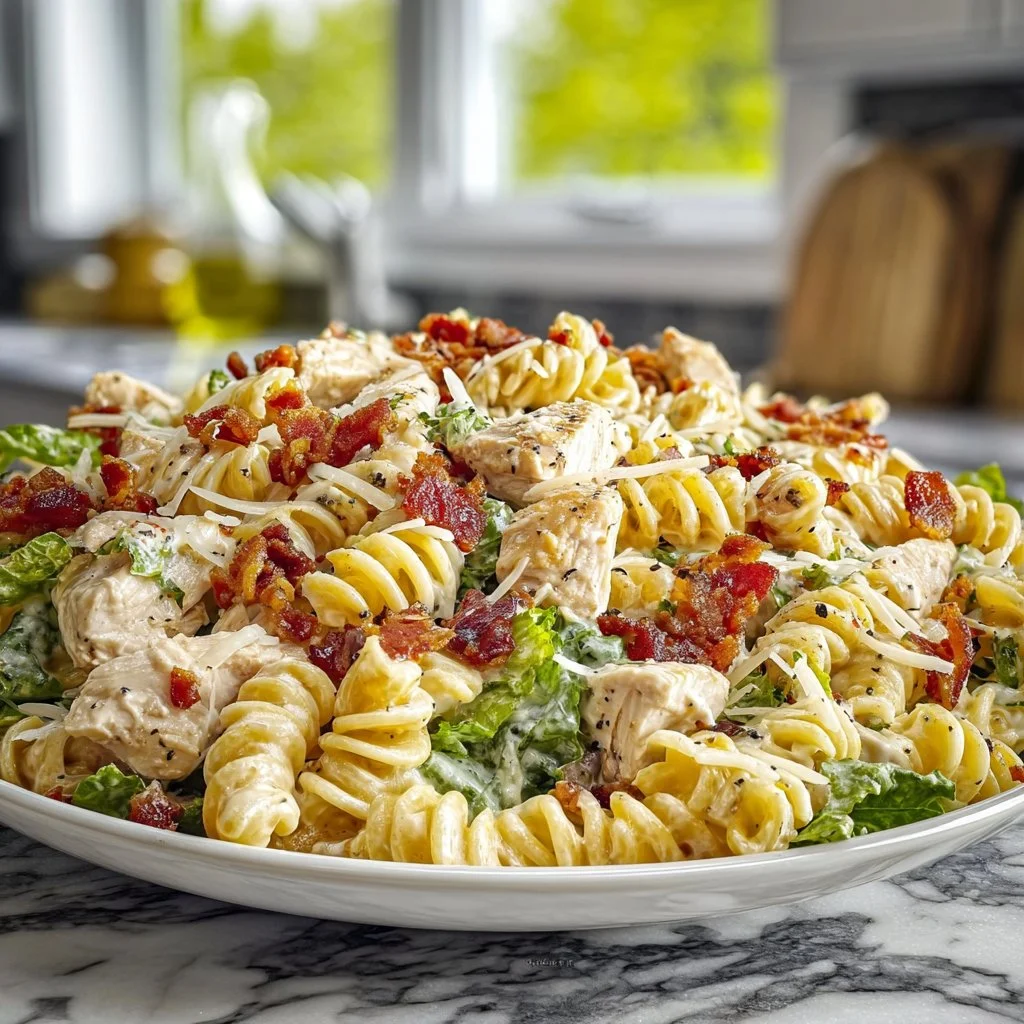
Chicken Bacon Ranch Pasta Salad
Chicken Bacon Ranch Pasta Salad: A Delightful Mix of Comfort and Flavor
Hey there, food friend! If you’re on a quest for a dish that’s as comforting as your favorite blanket and packed with flavor, you’ve come to the right place. Welcome to the world of Chicken Bacon Ranch Pasta Salad! This delightful dish tussles with the cozy vibes of pasta salad while embracing the heartiness of chicken and the irresistible crunch of bacon. It’s a dish that has become a go-to in my kitchen, perfect for lazy Sundays or gatherings with friends. So, grab your apron, and let’s get cooking!
Let’s be real—nothing bridges the gap between casual dining and gourmet flair quite like a hearty pasta salad. Whether it’s a summer barbecue, a family picnic, or the perfect potluck dish, Chicken Bacon Ranch Pasta Salad has got you covered. Packed with succulent pieces of chicken, crispy bacon, and vibrant veggies, this dish dazzles the palate. But it’s not just about the flavors; it’s a celebration of togetherness.
I often remember my Aunt Linda’s backyard cookouts where laughter and delicious food filled the air. She was famous for her pasta salad with a twist—always coming up with new combinations to keep the family guessing. It was there, among the smiles and sunshine, that I learned the true magic of a great recipe: it’s not just about following steps; it’s about the stories and memories you create while sharing a meal.
Today, I’m excited to share with you a recipe that leans into the nostalgia of those lovely gatherings with a modern flair. This Chicken Bacon Ranch Pasta Salad not only packs big flavors but also welcomes twists and variations that can cater to any palate or dietary preference.
So, let’s dive in, shall we? Grab your favorite knife and cutting board; we have some cooking to do!
Personal Story
Ah, Chicken Bacon Ranch Pasta Salad! A dish that takes me back to summers filled with laughter, family, and an endless array of food. I vividly remember my first attempt at making this salad for a summer birthday bash. It was a sunny Saturday afternoon, and the air was alive with the voices of friends and family. I wanted to impress everyone with something deliciously different. After scouring through recipes, I found the perfect inspiration—my beloved Chicken Bacon Ranch Pasta Salad.
I remember cooking up a storm in the kitchen, getting a little too excited and forgetting that I had bacon sizzling in the pan. Imagine my panic as I ran to the stove, only to find a glorious crispy mess—and let’s just say, I had a bit more than I needed. But hey, the more bacon, the better, right? Fast forward to the party, and everyone raved about my creation. It was a hit, and I swear I felt like a culinary rockstar that day!
Now, every time I whip up this pasta salad, I’m not just cooking; I’m reminiscing about that memorable birthday bash. It’s filled with vibrant colors, amazing textures, and the warmth of shared memories. So, keep reading—let’s craft your pasta salad that’s bound to steal the show, just like mine did.
Ingredients
Now that we’re feeling all warm and fuzzy inside, let’s gather our ingredients. Here’s what you’ll need for the ultimate Chicken Bacon Ranch Pasta Salad:
- 8 oz fusilli or rotini pasta: These shapes hold onto dressing and mix-ins beautifully. If gluten-free is your jam, feel free to swap in a gluten-free pasta.
- 1 cup cooked chicken, diced: Any cooked chicken works—rotisserie chicken is a convenient choice! If you want a vegetarian take, try substituting with hearty chickpeas or white beans.
- 6 slices bacon, cooked and crumbled: Can’t go wrong with crispy bacon! Turkey bacon is a lighter alternative if you want to keep it healthier.
- 1 cup cherry tomatoes, halved: Their sweetness adds a nice pop of color. If they’re out of season, canned diced tomatoes will do in a pinch—just drain well!
- 1/2 cup cheddar cheese, shredded: Sharp or mild—whatever tickles your taste buds. Vegan cheese or a sprinkle of nutritional yeast works great for dairy-free options.
- 1/4 cup red onion, diced: A touch of sharpness that elevates the dish. If you’re sensitive to raw onions, consider substituting with green onions for a milder flavor.
- 1 cup ranch dressing: It’s the creamy star of the show! Make your own or use store-bought to save time. For a healthier spin, Greek yogurt mixed with herbs makes a delicious alternative.
- Salt and pepper to taste: Essential for flavor balancing—don’t skip it!
- Fresh parsley for garnish: It adds not only a hint of flavor but also a nice pop of color for presentation.
Step-by-Step Instructions
Ready to create some kitchen magic? Follow these simple steps, and your Chicken Bacon Ranch Pasta Salad will be a masterpiece in no time.
-
Cook the Pasta:
- Bring a large pot of salted water to a rolling boil. Add the fusilli or rotini pasta and cook according to package directions until al dente (usually around 8–10 minutes).
- Chef Tip: Don’t forget to stir occasionally to prevent sticking! When done, reserve a cup of pasta water (it’s a chef secret for adjusting sauce later) and drain the rest. Rinse the pasta under cold water to cool it down—this will keep it from getting mushy.
-
Prepare the Chicken:
- If you’re using leftover chicken or a rotisserie bird, dice it into bite-sized pieces. If you’re cooking fresh chicken, you can boil, grill, or bake it until fully cooked (about 15–20 minutes).
- Chef Tip: Season your chicken with salt, pepper, and maybe a sprinkle of garlic powder to amp up the flavor.
-
Crisp the Bacon:
- Cook the bacon until crispy in a skillet over medium heat. Once done, transfer it to a paper towel-lined plate to drain. Let it cool a bit before crumbling it into smaller pieces.
- Chef Tip: For an extra crispy situation, you can bake the bacon in the oven at 400°F for about 15-20 minutes—mess-free and perfectly crispy!
-
Mix It Up:
- In a large mixing bowl, combine the cooled pasta, diced chicken, crumbled bacon, halved cherry tomatoes, cheddar cheese, and red onion.
- Chef Tip: Toss everything briefly to combine. The key is to ensure even distribution of all those tasty ingredients!
-
Dress It Right:
- Pour in the ranch dressing and season with salt and pepper to taste. Mix gently until everything is well-coated.
- Chef Tip: If the salad seems dry, use some of the reserved pasta water to loosen up the dressing—just a tablespoon at a time.
-
Garnish and Chill:
- Transfer to a serving platter or bowl and sprinkle fresh parsley on top. For the best flavor, give it at least 30 minutes in the fridge to meld the flavors together.
- Chef Tip: If you’re preparing ahead, this salad is perfect for a couple of days in the fridge. Just give it a gentle stir and add a touch more dressing if needed.
Serving Suggestions
Plating your Chicken Bacon Ranch Pasta Salad doesn’t have to be boring! Here’s how to serve it up like a pro:
-
Big, Bold Bowl: Serve it in a large, colorful bowl for a casual look. Place it in the center of your table and let everyone dig in!
-
Individual Servings: For a more refined touch, spoon the salad into mason jars or smaller bowls. This is perfect for picnics or potlucks, allowing everyone to grab their own serving.
-
Garnish Game Strong: Finish with a sprinkle of fresh parsley or even some chopped chives for a pop of color and flavor. You can also sprinkle some extra cheese or even crumbled bacon on top for visual appeal.
-
Pair It Right: This pasta salad goes wonderfully with grilled chicken, garlic bread, or crispy green salads. Pair it with a nice white wine for a delightful touch or iced tea for a refreshing complement.
Recipe Variations
Feeling adventurous in the kitchen? Here are some delicious twists on the classic Chicken Bacon Ranch Pasta Salad:
-
Spicy Kick: Add sliced jalapeños or a dash of hot sauce to spice things up. You can also use buffalo ranch dressing for that real kick!
-
Vegetable Power: Toss in some diced bell peppers, cucumbers, or even shredded carrots for an extra crunch and color.
-
Sneaky Greens: Mix in some baby spinach or kale for a nutrient boost. The dressing will help soften the greens, and you’ll hardly notice they’re there!
-
Pasta Swap: Swap out the pasta for quinoa or rice for a gluten-free, whole grain options. It changes the texture and makes it even more hearty.
-
Herbie Twist: Add fresh herbs like dill, basil, or cilantro for a flavor explosion that brightens up the dish.
Chef’s Notes
As someone who loves to cook, I have to share that I’ve learned plenty through my pasta salad journey. I started making this dish years ago and never looked back. At first, I followed recipes to the letter, but over time, I found joy in experimenting with flavors and ingredients.
You might laugh when I tell you that there was a time I tried adding raisins because someone raved about it, but let’s just say it wasn’t my best culinary move! Now, I prefer sticking with what works to create a classic that can be adapted to anyone’s taste.
Also, this recipe has evolved from being a casual side to becoming featured on my dinner table. It’s easy to throw together, flexible, and truly satisfies even the pickiest eaters.
FAQs and Troubleshooting
Got any questions? Let’s tackle a few common ones!
-
What if my pasta salad is too dry?
- Not a problem! Add a splash of the reserved pasta water or more ranch dressing.
-
Can I make this pasta salad ahead of time?
- Absolutely! Prepare it a day in advance, but add the bacon right before serving to keep it crispy.
-
How can I store leftovers?
- Keep it in an airtight container in the fridge for up to 3 days. Just remember to stir before serving.
-
What can I use instead of ranch dressing?
- You can whip up a creamy dressing using Greek yogurt, vinegar, and herbs or try a vinaigrette for a lighter option.
Nutritional Info
Now, while I’m no nutritionist, a rough estimate of this mouthwatering Chicken Bacon Ranch Pasta Salad is as follows (this can vary based on specific ingredients and portion sizes):
- Calories: Approximately 350-400 per serving (1 cup)
- Protein: ~25 grams
- Carbohydrates: ~35 grams
- Fat: ~15-20 grams
- Fiber: ~2-3 grams
Feel free to adjust ingredients to cater to dietary restrictions—like replacing pasta with zucchini noodles—because who doesn’t love a good twist on health?
Final Thoughts
There you have it, folks! Your journey into the delightful realm of Chicken Bacon Ranch Pasta Salad is officially complete. Whether you choose to make it for a cozy night in or to impress at a gathering, your affection for good food will shine through.
Remember, cooking is all about enjoying the process and making memories. So don’t be afraid to put your own spin on this classic recipe—take risks, laugh off mishaps, and share your culinary tales with those you love.
Now, grab yourself a fork (or maybe a spoon) and dig into your very own pasta salad masterpiece. Here’s to delicious meals and happy memories ahead—let’s feast!
Happy cooking, and until next time, may your kitchen be filled with warmth, love, and a whole lot of good food! 🍴❤️
Print
Chicken Bacon Ranch Pasta Salad
- Total Time: 45 minutes
- Yield: 4 servings 1x
- Diet: Pescatarian
Description
A delightful mix of pasta, chicken, bacon, and ranch dressing, this Chicken Bacon Ranch Pasta Salad is perfect for gatherings and packed with flavor.
Ingredients
- 8 oz fusilli or rotini pasta
- 1 cup cooked chicken, diced
- 6 slices bacon, cooked and crumbled
- 1 cup cherry tomatoes, halved
- 1/2 cup cheddar cheese, shredded
- 1/4 cup red onion, diced
- 1 cup ranch dressing
- Salt and pepper to taste
- Fresh parsley for garnish
Instructions
- Cook the pasta: Bring a large pot of salted water to a rolling boil. Add the fusilli or rotini pasta and cook according to package directions until al dente (usually around 8–10 minutes).
- Prepare the chicken: Dice cooked chicken into bite-sized pieces or cook fresh chicken until fully cooked (about 15–20 minutes).
- Crisp the bacon: Cook the bacon until crispy in a skillet over medium heat and crumble it into smaller pieces.
- Mix it up: In a large mixing bowl, combine the cooled pasta, diced chicken, crumbled bacon, cherry tomatoes, cheddar cheese, and red onion.
- Dress it right: Pour in the ranch dressing and season with salt and pepper to taste. Mix gently until well-coated.
- Garnish and chill: Transfer to a serving platter and sprinkle parsley on top. Chill for at least 30 minutes before serving.
Notes
This salad can be made ahead of time and stored in the fridge for a couple of days. Add bacon right before serving to keep it crispy.
- Prep Time: 15 minutes
- Cook Time: 30 minutes
- Category: Side Dish
- Method: Chilling
- Cuisine: American
Nutrition
- Serving Size: 1 cup
- Calories: 375
- Sugar: 3g
- Sodium: 600mg
- Fat: 18g
- Saturated Fat: 6g
- Unsaturated Fat: 10g
- Trans Fat: 0g
- Carbohydrates: 35g
- Fiber: 3g
- Protein: 25g
- Cholesterol: 45mg
Keywords: pasta salad, chicken salad, bacon salad, ranch salad, summer salad
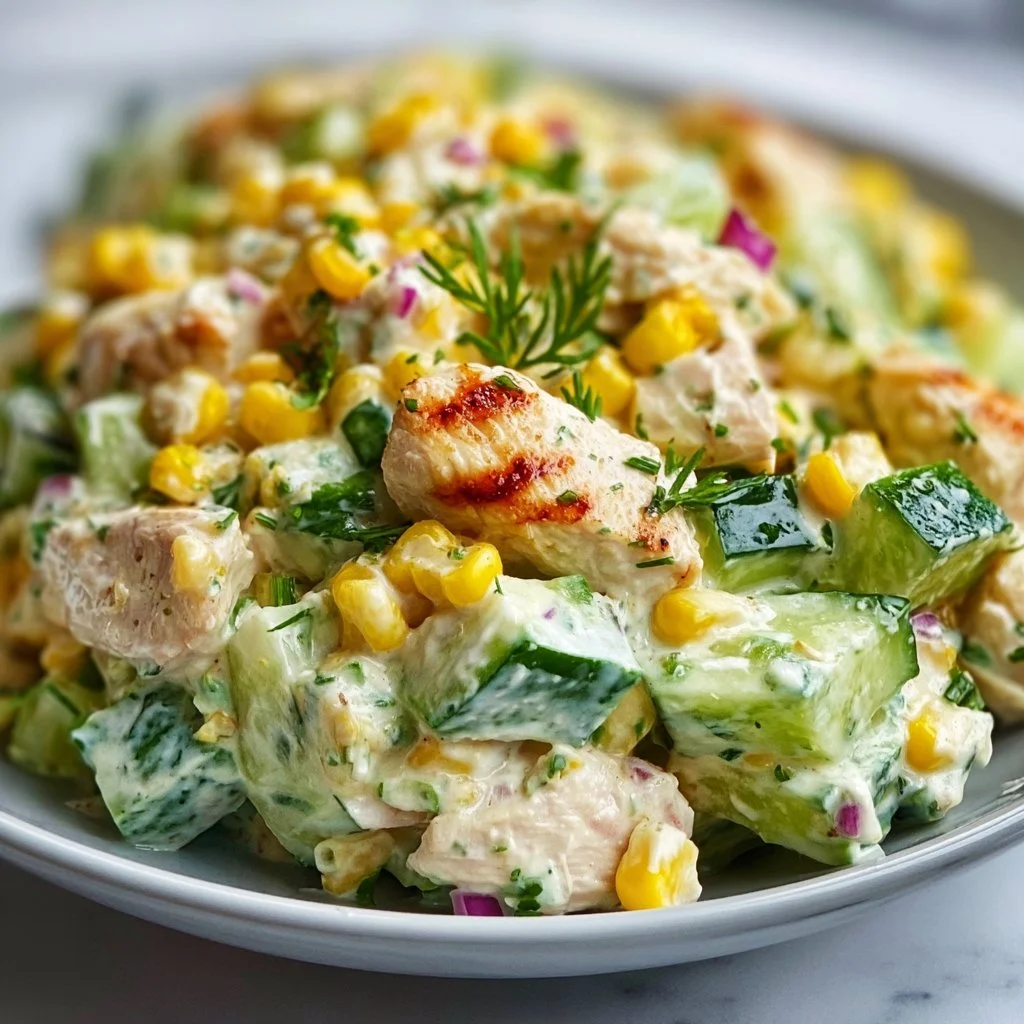
Street Corn Creamy Cucumber Chicken Salad: An Amazing Ultimate Recipe
Street Corn Creamy Cucumber Chicken Salad: An Amazing Ultimate Recipe
Hey there, food lovers! I’m Beau Collier, and I’m thrilled to share one of my all-time favorite recipes that is a true celebration of fresh flavors and comfort—a dish that brings me joy every time I make it. Today, we’re diving into the scrumptious world of Street Corn Creamy Cucumber Chicken Salad. This dish bursts with freshness, combining grilled chicken and sweet corn with crunchy cucumbers and a creamy, flavorful dressing that showcases zesty lime and smoky paprika. It’s the perfect summer dish for picnics, barbecues, or just a cozy dinner at home. You can enjoy it straight from the bowl or as a filling for sandwiches and wraps.
Why the name, you ask? Well, if you’ve ever indulged in Mexican street corn—those luscious, buttery corn on the cob drizzled with lime and sprinkled with cheese—then you’ll appreciate how the flavors in this salad pay homage to that iconic street food. And let me tell you, this salad is not just a pretty face; it’s packed with protein and crunch that’ll leave you feeling satisfied yet ready to dive back into your day.
Like always, I’m here to guide you every step of the way. Cooking shouldn’t feel like a chore, and I aim to keep our time in the kitchen light and fun! So, roll up those sleeves, and let’s get into it!
Personal Story
Growing up, my summers revolved around food, family, and backyard barbecues. I can still hear the laughter and see the smoke wafting up on hot summer days. One dish that always made an appearance during these gatherings was grilled corn on the cob, slathered in butter and loaded with cheese. My aunt would whip it up like a pro, and I remember the way she would sink her teeth into that first bite, her eyes twinkling with delight.
Now, fast forward to my own kitchen, experimenting with recipes and flavors. One evening, I decided to mix those nostalgic flavors into a salad format, and that’s when this Street Corn Creamy Cucumber Chicken Salad was born. Not only did it remind me of those sunny days, but it also became a go-to dish in my personal repertoire, perfect for sharing with friends and family. Every time I make it, I’m reminded of my aunt’s gleeful chatter and the summer sun setting over the grill, a delicious moment frozen in time.
Ingredients
Let’s gather what you’ll need to whip up this delightful Street Corn Creamy Cucumber Chicken Salad:
-
2 cups grilled or roasted chicken, diced: Chicken is the star here, providing protein and heartiness. Feel free to use leftovers or rotisserie chicken for a quick shortcut!
-
1 cup sweet corn, grilled or canned: Sweet corn adds that essential pop of flavor. If using fresh corn, try grilling it first for a smoky profile. Canned corn works great—just drain and rinse to remove excess sodium.
-
1 large cucumber, diced: The cucumber brings a refreshing crunch. For an extra zing, consider using pickling cucumbers or even English cucumbers, which have fewer seeds and a thinner skin.
-
½ cup red onion, finely chopped: Onions lend a touch of sharpness. If you want a milder flavor, soak them in cold water for 10 minutes before adding them, then drain.
-
½ cup mayonnaise: The creamy base of our salad—by trading in half for Greek yogurt (see below), you’ll lighten it up while still keeping it luscious.
-
2 tablespoons Greek yogurt: This tangy, creamy addition not only enhances flavor but also provides a dose of probiotics. You can use regular yogurt or even sour cream, but Greek yogurt holds up best.
-
1 tablespoon lime juice: A burst of acidity that brightens the entire dish. You can substitute with lemon juice if limes aren’t available.
-
1 tablespoon cilantro, chopped: For that fresh, herbal note, plus some color! If you’re not a fan, parsley is a great substitute.
-
1 teaspoon smoked paprika: This spice adds a smoky depth reminiscent of grilled corn. If you want it spicier, try chili powder instead!
-
1 teaspoon salt (to taste): Seasoning to bring all the flavors together.
-
½ teaspoon black pepper: A sprinkle to add warmth and enhance the tastes.
-
Optional: crumbled feta cheese for garnish: This is my secret ingredient that makes everything even better! Feta adds a salty creaminess that pairs beautifully with the other flavors.
Step-by-Step Instructions
Alright, let’s get cooking! Here’s how to put this delicious dish together:
-
Prepare Your Ingredients:
Start by gathering all your ingredients and chopping your veggies. This is known as mise en place, and it makes cooking smoother! Dice the chicken, cucumber, and onion, and don’t forget to chop your cilantro. -
Cook the Chicken:
If you’re using raw chicken, grill or roast it until it reaches an internal temperature of 165°F. Season the chicken with salt, pepper, and a sprinkle of paprika for flavor before grilling. Then, allow it to rest for a few minutes before dicing it up.Chef Tip: If you’re not keen on grilling, a stovetop skillet works just as well. Just add a splash of olive oil and cook over medium heat until golden.
-
Prep the Corn:
If using corn on the cob, grill it for about 10 minutes until charred, then let it cool a bit before slicing the kernels off the cob. If using canned corn, simply drain and rinse it.Chef Hack: For extra smokiness, after grilling, brush the corn with a bit of butter and a pinch of smoked paprika before slicing!
-
Combine the Base Ingredients:
In a large mixing bowl, combine the diced chicken, corn, cucumber, and red onion. Toss gently until these beauties are mixed. -
Whisk the Dressing:
In a separate bowl, whisk together the mayonnaise, Greek yogurt, lime juice, cilantro, smoked paprika, salt, and black pepper until smooth. Taste and adjust seasoning as necessary.Chef Insight: If you like it creamier, add more mayonnaise or yogurt, or even a touch of ranch dressing!
-
Mix, Mix, Mix:
Pour the dressing over your chicken mixture and fold it all together until everything is well coated. Don’t rush this step; fold gently to keep the cucumber crisp. -
Chill Out:
Cover the salad and let it chill in the fridge for at least 30 minutes. This helps the flavors meld together beautifully.Chef Tip: This salad is even better the next day, so feel free to make it ahead of time!
-
Serve:
When you’re ready to dig in, give it another gentle stir. If you fancy, sprinkle some crumbled feta cheese on top for that extra pop of flavor. Serve it chilled on a bed of greens, in a sandwich, or in a tortilla!
Serving Suggestions
Now, let’s talk about how to plate or serve this creamy delight! Place the Street Corn Creamy Cucumber Chicken Salad on a vibrant bed of greens for a colorful and nutritious meal. You can use crisp romaine, mixed greens, or even spinach for some added color.
For a more casual flair, consider serving it in tortilla wraps or sandwich bread for a handheld feast that’s also picnic-friendly! If you’re in the mood for something extra special, why not serve it in avocado halves? You just have to scoop out some flesh (save it for guacamole, of course!) and fill those green cups with the salad—it’s as beautiful as it is delicious.
If you have some extra time, serve this salad alongside homemade tortilla chips. Take flour or corn tortillas and cut them into wedges. Bake or fry them until crispy—they make a fantastic dipper!
Recipe Variations
Let’s jazz things up a bit, shall we? Here are a few creative twists for your Street Corn Creamy Cucumber Chicken Salad:
-
Spicy Kick: Add diced jalapeños or a splash of hot sauce to your dressing for a fiery take that will tingle your taste buds!
-
Tex-Mex Twist: Mix in black beans or diced bell peppers for added texture and flavor. These ingredients also amp up the protein and fiber.
-
Herb Medley: Instead of cilantro, try fresh dill or basil for a completely different herbaceous vibe. Each herb will bring a unique taste that’s equally refreshing!
-
Fruit Fusion: Toss in diced mango or pineapple for a sweet-and-savory combo that pops with tropical flavors.
-
Creamy Avocado: For a richer texture, mash an avocado into the dressing; it makes everything smooth and adds healthy fats.
Chef’s Notes
This recipe has evolved quite a bit over time! What started as a simple chicken salad has turned into a full-blown summer staple for me. The addition of sweet corn and creamy textures give it that irresistible comfort-food vibe. Whenever I serve it up, I’m flooded with memories of those family barbecues, accompanied by laughter and love. The best part? Everyone in the family has their spin on it—my sister loves adding diced tomatoes, while my dad insists on squeezing extra lime juice on top!
Remember, cooking is about experimenting and finding what you love the most. So feel free to play around with the ingredients; there’s truly no wrong way to do it, as long as you have fun along the way!
FAQs and Troubleshooting
Here are some common questions about the recipe that will help you nail it:
1. Can I use leftover rotisserie chicken for this salad?
Absolutely! In fact, rotisserie chicken is one of my go-to shortcuts. It saves time and adds great flavor. Just shred or dice the pieces, and you’re good to go!
2. What if I don’t like cucumber?
No problem! You can substitute cucumbers with diced bell pepper or celery for crunch. Even shredded carrots could add a lovely sweetness and texture.
3. How long can I store the salad?
This salad can be stored in an airtight container in the fridge for up to 3 days. Just note that the cucumbers may lose some crunch over time, so it’s best enjoyed fresh!
4. Can this be made vegan?
You bet! Replace the chicken with chickpeas or grilled tofu, use vegan mayonnaise, and skip the feta. You can also throw in some diced avocado for a rich, creamy texture.
Nutritional Info
Now, let’s talk nutrition. A serving of this Street Corn Creamy Cucumber Chicken Salad (approximately 1 cup) is packed with:
- Calories: ~350
- Protein: ~30g
- Carbohydrates: ~15g
- Fat: ~25g (with healthy fats from avocado and mayonnaise)
- Fiber: ~3g
This nutrient-dense salad provides a great source of protein and healthy fats while keeping carbs in check. Plus, it’s filled with vitamins and minerals from all the fresh ingredients! Whether you’re watching your macros or simply trying to eat wholesome food, this dish holds a delightful balance.
Final Thoughts
So there you have it, folks! The ultimate Street Corn Creamy Cucumber Chicken Salad—packed with flavor, memories, and a touch of summer nostalgia. Each bite is like a bite of sunshine, reminding me that cooking is all about celebrating the good things in life and sharing them with the people we love.
Food should always be an adventure, and I hope you take this recipe and let it inspire you in your kitchen. Whether you stick to the classic version or get adventurous with all those creative twists, there’s no doubt you’ll end up with something delicious. So grab a fork, dig in, and enjoy your time in the kitchen—I know I did!
Thanks for stopping by Feastical today! Until next time! Happy cooking! 🍽️
Print
Street Corn Creamy Cucumber Chicken Salad
- Total Time: 45 minutes
- Yield: 4 servings 1x
- Diet: None
Description
A refreshing summer salad combining grilled chicken, sweet corn, crunchy cucumbers, and a creamy dressing with lime and smoky paprika.
Ingredients
- 2 cups grilled or roasted chicken, diced
- 1 cup sweet corn, grilled or canned
- 1 large cucumber, diced
- ½ cup red onion, finely chopped
- ½ cup mayonnaise
- 2 tablespoons Greek yogurt
- 1 tablespoon lime juice
- 1 tablespoon cilantro, chopped
- 1 teaspoon smoked paprika
- 1 teaspoon salt (to taste)
- ½ teaspoon black pepper
- Optional: crumbled feta cheese for garnish
Instructions
- Prepare your ingredients by chopping the chicken, cucumber, and onion, and chopping the cilantro.
- Cook the chicken until it reaches 165°F, seasoning it with salt, pepper, and paprika before grilling.
- Prep the corn by grilling it for 10 minutes or rinsing canned corn.
- Combine the diced chicken, corn, cucumber, and red onion in a large mixing bowl.
- Whisk the mayonnaise, Greek yogurt, lime juice, cilantro, smoked paprika, salt, and black pepper until smooth.
- Mix the dressing with the chicken mixture gently until well coated.
- Chill the salad in the fridge for at least 30 minutes to meld flavors.
- Serve chilled with optional feta cheese on top.
Notes
For a spicier kick, add diced jalapeños, or for a tropical twist, include diced mango or pineapple.
- Prep Time: 15 minutes
- Cook Time: 30 minutes
- Category: Salad
- Method: Mixing
- Cuisine: Mexican
Nutrition
- Serving Size: 1 serving
- Calories: 350
- Sugar: 5g
- Sodium: 400mg
- Fat: 25g
- Saturated Fat: 4g
- Unsaturated Fat: 10g
- Trans Fat: 0g
- Carbohydrates: 15g
- Fiber: 3g
- Protein: 30g
- Cholesterol: 70mg
Keywords: salad, chicken salad, summer recipe, creamy dressing, healthy meal
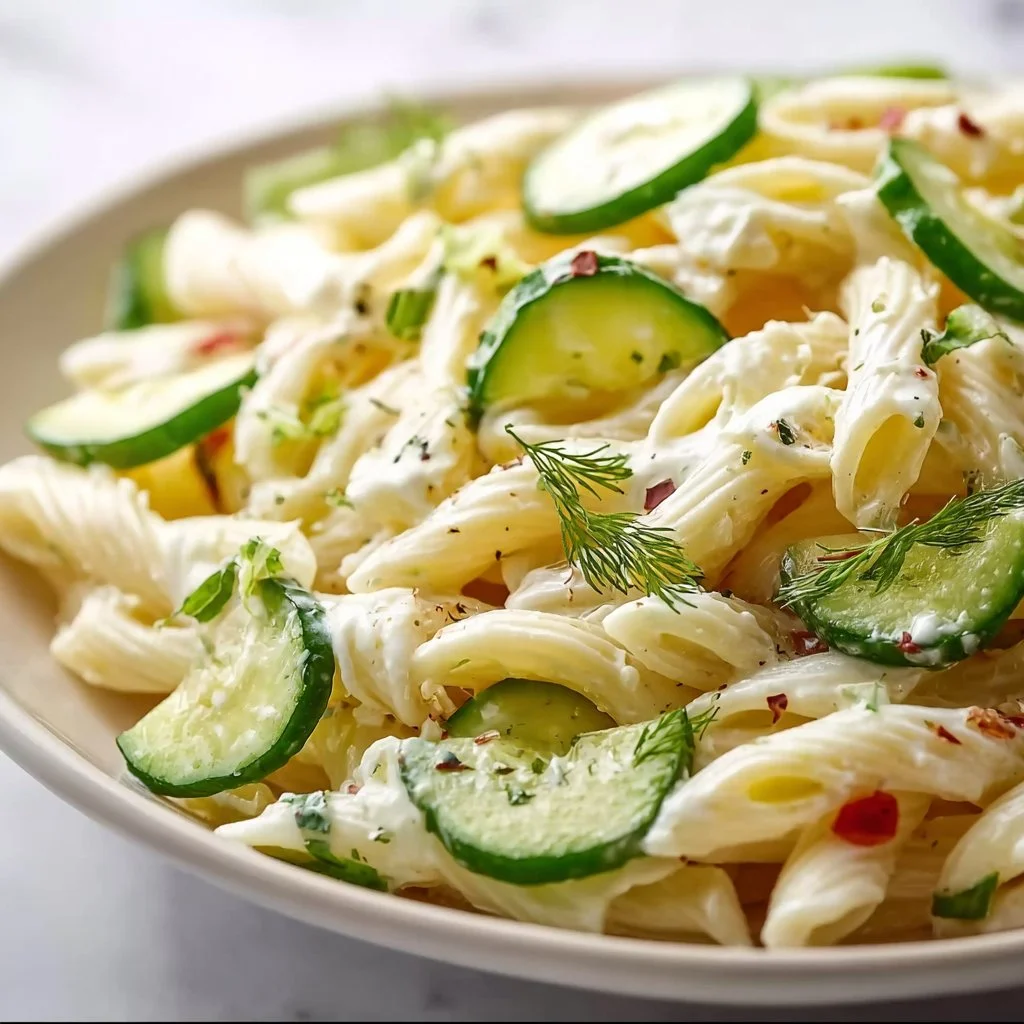
Cucumber Pasta Salad
Cucumber Pasta Salad: A Refreshing Twist for Every Occasion
Hey there, foodie friends! It’s Beau Collier here, and today we’re diving into a delightfully refreshing dish that’s perfect for any gathering, picnic, or just a cozy night in. Let’s talk about Cucumber Pasta Salad—a dish that is as vibrant as it is versatile. Picture this: a medley of colorful ingredients tossed together in a light dressing, each bite bursting with flavor and crunch. Whether it’s a sunny barbecue or just a quick lunch, this salad is a total crowd-pleaser. And trust me, you’re going to want it in your recipe arsenal!
A Taste of Nostalgia
Let me take you back in time for a moment. I remember the summer picnics at my grandma’s house, where her backyard transformed into a culinary wonderland. The warm sun kissed our cheeks as we gathered around the picnic table, filled with an array of homemade dishes. Among them was her famous cucumber salad, which inspired my own version of Cucumber Pasta Salad.
Grandma used to say, “When in doubt, add cucumbers!” And boy, she was right. The cool crunch of cucumbers was always refreshing on a hot summer day, and the addition of pasta just took it to a whole new level. This salad combines nostalgia with a modern twist, making it the perfect dish for today’s feasts. So, let’s channel that summer spirit and whip up a batch of this delicious Cucumber Pasta Salad together!
Ingredients
Here’s what you’ll need to make this vibrant Cucumber Pasta Salad:
-
8 ounces pasta (e.g., bowtie or rotini)
Pasta is our base! Choose a shape that you love. Bowtie adds a playful touch, while rotini captures the dressing beautifully. Feel free to swap for whole wheat or gluten-free pasta if you prefer an alternative. -
1 large cucumber, diced
Crunchy and refreshing, cucumbers are the stars in this dish! English cucumbers without seeds work wonderfully, but any variety will do. If you’re feeling adventurous, try marinated or pickled cucumbers for a zingy twist. -
1 cup cherry tomatoes, halved
Juicy and full of flavor, cherry tomatoes make this salad burst with color. Substitute with grape tomatoes or even some diced heirlooms for variety. -
1/2 red onion, finely chopped
Red onions bring a bit of sharpness and sweetness. If they’re too strong for your taste, soak them in cold water for 10 minutes to mellow the flavor. -
1/4 cup fresh parsley, chopped
Parsley adds a bright, fresh touch! Swap it out for dill or basil if you prefer those flavors instead—both will elevate this dish beautifully. -
1/4 cup olive oil
A rich, flavorful olive oil ties this dish together, adding depth. You can replace it with avocado oil or even a flavored oil, like garlic-infused. -
2 tablespoons vinegar (e.g., red wine or apple cider)
The acid in vinegar balances out the ingredients and adds brightness. Play with flavored vinegars for an extra kick—like balsamic or white wine vinegar. -
Salt and pepper to taste
Seasoning is key! Remember, you can always add more, but it’s tough to take it out once it’s in. Start small and adjust as needed.
Step-by-Step Instructions
Alright, friends, let’s get cooking! Follow these simple steps and you’ll have a scrumptious Cucumber Pasta Salad ready before you know it.
-
Cook the Pasta
Bring a large pot of salted water to a boil. Add in your chosen pasta and cook according to package instructions until al dente. Remember, we want a little bite to our pasta for the perfect texture. Once cooked, drain and rinse under cold water to stop the cooking process. Chef’s tip: Adding a drizzle of olive oil while the pasta cools will prevent sticking! -
Prepare the Veggies
While the pasta cools, grab your cutting board and prep the veggies. Dice the cucumber into bite-sized cubes, halve the cherry tomatoes, and finely chop the red onion and parsley. The sharper your knife, the easier this is—plus, you’ll feel like a pro in the kitchen! -
Mix the Dressing
In a small bowl, whisk together the olive oil and vinegar along with salt and pepper to taste. This vinaigrette is what this salad dreams of! Pro tip: Experiment with adding a touch of honey or mustard for a flavor kick. -
Combine Ingredients
In a large mixing bowl, combine the cooled pasta, diced cucumber, halved cherry tomatoes, chopped red onion, and parsley. Drizzle the dressing over the top. Now comes the fun part! Toss gently until everything is well combined. You want to ensure each piece is coated in that delicious dressing without breaking the pasta. -
Chill and Serve
For best results, let the salad chill in the refrigerator for at least 30 minutes, allowing the flavors to meld together beautifully. When you’re ready to serve, give it another quick toss, adjust any seasoning as needed, and offer it up in a large beautiful serving bowl. Tip: Garnishing with extra parsley or a sprinkle of feta cheese (for a salty touch) adds a lovely presentation!
Serving Suggestions
This vibrant Cucumber Pasta Salad is not just a dish; it’s a centerpiece! Here are some ideas on how to serve it beautifully:
-
Picnic Perfection: Scoop the salad into individual mason jars for a fun, portable serving option! Layer the ingredients for a visual treat and easy grab-and-go treats.
-
Plate it up: Serve family style in a large, colorful serving bowl at your next gathering. Add a few sprigs of parsley on top for that added freshness.
-
On the Side: Complement grilled chicken, shrimp, or steak with a generous serving of this salad; it balances rich flavors perfectly!
Recipe Variations
Ready to put a spin on this Cucumber Pasta Salad? Here are a few creative twists you can try:
-
Mediterranean Style: Add olives, feta cheese, and a sprinkle of oregano for a taste of the Mediterranean.
-
Creamy Dreamy: Swap out the vinaigrette for a creamy dressing like Greek yogurt ranch or tzatziki for a refreshing, cool twist!
-
Asian Fusion: Use sesame oil and rice vinegar in place of olive oil and red wine vinegar. Toss in chopped bell peppers and shredded carrots for additional crunch.
-
Protein Boost: Add chickpeas or diced grilled chicken for a heartier salad, making it perfect for a main dish!
-
Zesty Lime: Substitute the vinegar with lime juice and add diced avocado and cilantro for a fresh twist reminiscent of summer!
Chef’s Notes
As with any recipe, I’ve had my fair share of ups and downs while creating this Cucumber Pasta Salad over the years. I remember once using store-bought dressing in a pinch, and let’s just say it wasn’t the same experience! This recipe has evolved, and each time I make it, I discover new possibilities. The best part is that every family has its distinct flavor preferences, so don’t hesitate to make this salad truly yours!
Over time, I’ve learned that it’s all about balance—find the right ratio of pasta to veggies, and the dressing that suits your taste buds. The beauty of this dish is in its flexibility and ability to showcase the fresh ingredients at their best.
FAQs and Troubleshooting
1. What can I do if my pasta turns sticky?
If you didn’t drizzle olive oil over the pasta while it cooled, it might clump together. Simply rinse it again under cool water before tossing it into the salad.
2. Can I make this salad ahead of time?
Absolutely! In fact, the flavors get better as they marinate. Just hold off adding fresh herbs until right before serving to keep them vibrant.
3. What if I don’t have vinegar?
No worries! You can substitute it with fresh lemon juice or any citrus juice you have on hand. It’ll add a lovely bright flavor!
4. How can I serve this for a crowd?
Double the recipe and serve it in a large bowl with tongs. It’s an easy dish for guests to help themselves and enjoy!
Nutritional Info
This Cucumber Pasta Salad is not only delicious but also offers great nutritional benefits! Here’s a quick breakdown per serving (based on roughly 6 servings):
- Calories: ~200
- Protein: 6g
- Carbohydrates: 30g
- Fiber: 3g
- Sugars: 2g
- Fat: 8g
Packed with fiber, vitamins, and healthy fats, this salad can be part of a balanced meal. Plus, the fresh veggies offer extra nutrients to keep your body happy!
Final Thoughts
So there you have it, my lovely food enthusiasts! Cucumber Pasta Salad is not just a dish; it’s a celebration of flavors, memories, and creativity in the kitchen. Whether you’re sharing it at a cookout or enjoying it on your own, every bite is a joyful connection to the delicious world of food.
I encourage you to embrace the flexibility of this recipe and make it your own. Add your favorite ingredients, experiment with seasonings, and make it a tradition in your home. Cooking is all about love, and every meal is a chance to express that love. So the next time you need a crowd-pleaser or just want something comforting and fresh, remember: your Cucumber Pasta Salad is just a whisk away!
Grab your fork, share a plate, and let the good times roll! Happy cooking, and I can’t wait to hear all about your delightful creations!
Print
Cucumber Pasta Salad
- Total Time: 45 minutes
- Yield: 6 servings 1x
- Diet: Vegetarian
Description
A refreshing and vibrant Cucumber Pasta Salad, perfect for gatherings or a cozy night in, with a delightful blend of crunchy cucumbers and pasta.
Ingredients
- 8 ounces pasta (e.g., bowtie or rotini)
- 1 large cucumber, diced
- 1 cup cherry tomatoes, halved
- 1/2 red onion, finely chopped
- 1/4 cup fresh parsley, chopped
- 1/4 cup olive oil
- 2 tablespoons vinegar (e.g., red wine or apple cider)
- Salt and pepper to taste
Instructions
- Cook the Pasta: Bring a large pot of salted water to a boil. Add in your chosen pasta and cook according to package instructions until al dente. Once cooked, drain and rinse under cold water to stop the cooking process.
- Prepare the Veggies: While the pasta cools, dice the cucumber into bite-sized cubes, halve the cherry tomatoes, and finely chop the red onion and parsley.
- Mix the Dressing: In a small bowl, whisk together the olive oil and vinegar along with salt and pepper to taste.
- Combine Ingredients: In a large mixing bowl, combine the cooled pasta, diced cucumber, halved cherry tomatoes, chopped red onion, and parsley. Drizzle the dressing over the top, and toss gently until well combined.
- Chill and Serve: Let the salad chill in the refrigerator for at least 30 minutes before serving. Adjust any seasoning as needed and serve in a large bowl.
Notes
Garnishing with extra parsley or a sprinkle of feta cheese adds a lovely presentation. This salad is versatile, allowing your creativity with different ingredients.
- Prep Time: 15 minutes
- Cook Time: 10 minutes
- Category: Side Dish
- Method: Mixing
- Cuisine: Mediterranean
Nutrition
- Serving Size: 1 serving
- Calories: 200
- Sugar: 2g
- Sodium: 200mg
- Fat: 8g
- Saturated Fat: 1g
- Unsaturated Fat: 7g
- Trans Fat: 0g
- Carbohydrates: 30g
- Fiber: 3g
- Protein: 6g
- Cholesterol: 0mg
Keywords: Cucumber Pasta Salad, refreshing salad, summer salad, picnic recipe
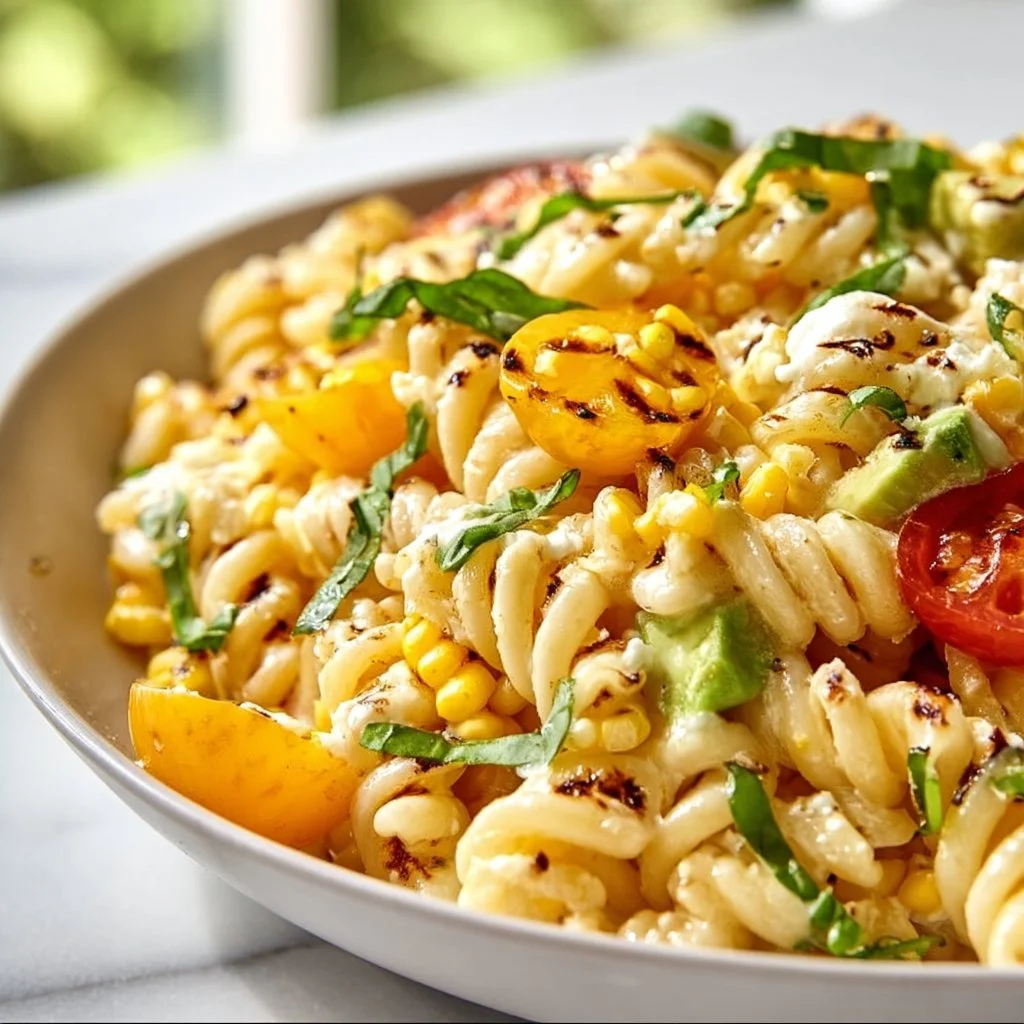
Juicy Street Corn Pasta Salad
Juicy Street Corn Pasta Salad: A Flavorful Fiesta in a Bowl
Hey there, fellow food lovers! Buckle up for a flavor-packed adventure as we whip up something truly special: Juicy Street Corn Pasta Salad. This lively dish takes the classic summer street corn experience and transforms it into a pasta salad that’s perfect for any gathering, picnic, or even a cozy night in. Fresh, zesty, and downright delicious, it’s a burst of sunshine on your plate.
Have you ever had one of those dishes that instantly transports you back to a sun-soaked summer day? Maybe it was a family barbecue in the backyard, or a street fair filled with laughter and the aroma of grilled corn wafting through the air. That’s exactly what this Juicy Street Corn Pasta Salad embodies. It’s an ode to warmth, togetherness, and of course, mouthwatering flavors!
I remember the first time I really fell in love with street corn. I was at a festival, surrounded by friends, music blaring, and the smell of grilled corn in the air. The way they slathered that corn with creamy goodness, sprinkled it with cheese, and topped it off with fresh lime? Pure magic! It just felt like celebration in every bite. I knew I had to capture that essence in a dish that everyone could enjoy, no matter the season.
This pasta salad not only brings the street corn flavor to your table, but it also embraces the versatility of pasta. It’s a fun and refreshing twist that works wonderfully as a side dish or a stand-alone meal. Whether you’re hosting friends, prepping for a family gathering, or just satisfying your own cravings, this recipe has you covered. So let’s get those pots and pans ready because we’re diving into this culinary fiesta!
Personal Story
Ah, the memories of summer! There was a time when my family would gather for our yearly summer cookout. My uncle would take on the grilling duties, and I would squeeze my way through a throng of family members, each one waiting to sink their teeth into juicy, grilled corn fresh off the cob. I can still hear the sizzle and smell the charred sweetness! My grandmother would make her famous chipotle lime mayo, and let me tell you, that stuff was legendary!
One day, inspired by those sunny days filled with laughter and love, I decided to replicate that flavor with a little twist. I thought, “Why not celebrate these bold flavors in a pasta salad, too?” So, I grabbed a box of pasta, some fresh corn from the market, and the rest is history. What came out of that kitchen adventure became an instant hit at our next family gathering, and it’s been a staple ever since. Now, whenever I serve this Juicy Street Corn Pasta Salad, I not only feed my belly but also my soul, bringing back all those cherished memories. Trust me; it’s a dish that carries love, nostalgia, and a whole lot of flavor!
Ingredients
Let’s gather up our ingredients for this colorful creation! Here’s what you’ll need to make your Juicy Street Corn Pasta Salad sing:
-
8 oz Pasta (your choice): Whether you’re a fan of fusilli, penne, or good old elbow macaroni, pasta is the base here. Personalize it! Just remember to cook it al dente for that perfect bite. If you’re gluten-free, opt for chickpea or quinoa pasta!
-
2 cups Fresh Corn (cooked): Grab some sweet corn! You can use frozen corn if fresh isn’t available—just make sure it’s cooked. If you’re feeling adventurous, grill it for extra flavor!
-
1 cup Cherry Tomatoes (halved): These little gems provide sweetness and color. If cherry tomatoes aren’t your jam, go for grape tomatoes or even diced regular tomatoes. Freshness over everything!
-
1/2 cup Red Onion (finely chopped): A little crunch and zing! If raw onion isn’t your thing, soak it in cold water for 10 minutes to mellow out the flavor.
-
1/2 cup Bell Peppers (diced, any color): Bell peppers add crispness and vibrant colors to the dish. You can mix and match colors for a truly festive feel.
-
1/4 cup Cilantro (chopped): It’s fresh, it’s herbaceous! If cilantro isn’t your favorite, parsley can be a nice substitute.
-
1/4 cup Lime Juice: Zesty and bright! Fresh lime juice is best. In a pinch, bottled lime juice will do, but it lacks that fresh punch.
-
3 tbsp Olive Oil: For richness and to marry all the flavors together. Don’t skimp—good quality olive oil makes a difference!
-
Salt and Pepper to taste: Simple but vital! Adjust to your preference. Remember, seasoning as you go is key to a well-balanced dish.
-
1 cup Feta Cheese (crumbled, optional): Crumbled feta adds a creamy, tangy note. Not a fan? You can use goat cheese or omit it entirely.
Now that we’ve got our ingredients lined up, let’s get cooking!
Step-by-Step Instructions
Alright, my kitchen warriors, let’s turn this list of ingredients into a masterpiece! Follow these steps for your Juicy Street Corn Pasta Salad:
-
Cook the Pasta:
Begin by boiling a pot of salted water. Once it reaches a rolling boil, add your pasta. Cook according to package instructions until al dente (usually about 7–10 minutes). Drain and rinse under cold water to stop the cooking process and cool it down. This step is crucial if you want a refreshing salad! -
Prep the Corn:
If using fresh corn, carefully cut the kernels off the cob. If using frozen corn, just pop it into the microwave or sauté it for a couple of minutes until cooked. You want that sweetness to shine! -
Chop Your Veggies:
Dice up the red onion and bell peppers, and halve those cherry tomatoes. The trick to a good salad? The more colorful, the better! -
Combine the Ingredients:
In a large mixing bowl, toss together your cooled pasta, corn, cherry tomatoes, red onion, and bell peppers. Don’t be shy! Use your hands for this—mix until everything is well combined. -
Make the Dressing:
In a separate small bowl, whisk together the lime juice and olive oil. Add a generous pinch of salt and pepper. If you like a little heat, feel free to add a pinch of chili powder or a splash of hot sauce! -
Dress the Salad:
Pour that zesty dressing over your pasta mixture and toss gently. You’d be amazed at how a simple dressing can elevate your dish! -
Fold in the Cilantro and Feta:
Just before serving, gently fold in the chopped cilantro and feta cheese (if using). This keeps the greens fresh and the cheese intact. -
Taste Test:
Here comes the fun part! Take a spoonful and taste. Adjust the seasoning as needed. Do you want more lime? Throw in a squeeze! Want extra salt? Go for it! -
Chill and Enjoy:
For best flavor, let your Juicy Street Corn Pasta Salad chill in the refrigerator for about 30 minutes before serving. This allows all those flavors to really mingle.
Serving Suggestions
Now that our salad is prepped and chilled, how should we serve this colorful dish? Festive, casual, or sophisticated—this pasta salad fits right in!
-
Rustic Plating: Simply scoop a generous portion into a bowl and garnish with extra feta and cilantro on top. Serve it alongside grilled meats or as part of a larger buffet spread.
-
Picnic Perfection: Pack it into mason jars for an adorable picnic treat! Layer the ingredients and dressings separately if you want to keep it fresh until serving.
-
Garnish in Style: If you’re feeling fancy, sprinkle some chili powder on top for an extra burst of color and flavor, or add a sliced lime wedge for that extra zing!
Recipe Variations
Every dish can transform with a few twists! Here are some fun variations to this Juicy Street Corn Pasta Salad that you can try:
-
Spicy Street Corn: Add diced jalapeños or a teaspoon of cayenne pepper to kick things up a notch.
-
Southwestern Style: Incorporate black beans and avocado for extra protein and creaminess, plus a touch of cumin to the dressing.
-
Herb-Infused: Swap out cilantro for fresh basil or dill for a different herby flavor. These herbs will create a whole new vibe!
-
Cheesy Goodness: If feta isn’t your thing, try shredded Monterey Jack or a sprinkle of parmesan for a melted, savory twist.
-
Light & Zesty: For a light version, substitute the pasta with zucchini noodles (zoodles) for a low-carb twist while capturing that fresh taste of summer.
Chef’s Notes
Let me tell you, this recipe has evolved over time! There’s something about mixing it up as seasons change. Sometimes I toss in leftover grilled veggies from a previous BBQ or substitute whatever greens I have on hand. It’s a beautiful way to improvise and let creativity flow! Each batch becomes uniquely yours, which is precisely how cooking should be—an expression of you!
And let’s not forget about the stories that come with each recipe. Over the years, I’ve made this dish for potlucks, birthday parties, and family dinners. Kids have danced around it while adults rave over seconds. When you share food, you share love, and there’s nothing more fulfilling.
FAQs and Troubleshooting
Q: Can I make this salad ahead of time?
A: Absolutely! In fact, letting it chill for a bit allows the flavors to meld beautifully. Just keep it in an airtight container in the fridge for up to 3 days.
Q: The pasta is too sticky; how can I prevent that?
A: Make sure to rinse your pasta after draining to stop the cooking process and prevent it from sticking together.
Q: What if I don’t have any lime?
A: No problem! Lemon juice works perfectly as a substitute and will give you a lovely zesty twist.
Q: Can I add protein to this dish?
A: Definitely! Grilled shrimp, chicken, or even chickpeas would be perfect additions for some heartiness!
Nutritional Info
While specifics can vary by ingredient brands and portion sizes, a serving of this Juicy Street Corn Pasta Salad (approximately 1 cup) generally has:
- Calories: ~300
- Protein: ~8g (with feta)
- Carbohydrates: ~36g
- Dietary Fiber: ~4g
- Total Fat: ~14g
This salad is definitely a wholesome dish, packed with nutrients from fresh veggies, healthy fats from olive oil, and a bit of protein if you choose to add cheese!
Final Thoughts
There you have it, my friends—a delightful, vibrant Juicy Street Corn Pasta Salad that’s just bursting with flavors. This recipe is more than just a salad; it’s an experience, a celebration, and a reminder that food brings people together. So, whether you enjoy this dish on a sunny picnic blanket or at a cozy family dinner, know that you’re indulging in a taste of joy.
Don’t forget to make this recipe your own! Play around with flavors, invite friends to join in the fun of preparing, and savor every bite. After all, the kitchen is not just a space for cooking; it’s where stories are made, laughs are shared, and memories are created.
Until next time, happy cooking, and remember, the best meals come from the heart!
Print
Juicy Street Corn Pasta Salad
- Total Time: 25 minutes
- Yield: 4 servings 1x
- Diet: Vegetarian
Description
A lively pasta salad that captures the flavors of classic summer street corn with fresh ingredients and zesty dressing, perfect for gatherings or picnics.
Ingredients
- 8 oz Pasta (your choice)
- 2 cups Fresh Corn (cooked)
- 1 cup Cherry Tomatoes (halved)
- 1/2 cup Red Onion (finely chopped)
- 1/2 cup Bell Peppers (diced, any color)
- 1/4 cup Cilantro (chopped)
- 1/4 cup Lime Juice
- 3 tbsp Olive Oil
- Salt and Pepper to taste
- 1 cup Feta Cheese (crumbled, optional)
Instructions
- Cook the Pasta: Boil salted water, add pasta, cook until al dente, drain, and rinse with cold water.
- Prep the Corn: Cut kernels off fresh corn or microwave frozen corn until cooked.
- Chop Your Veggies: Dice red onion and bell peppers, halve cherry tomatoes.
- Combine the Ingredients: In a bowl, mix pasta, corn, tomatoes, onion, and peppers.
- Make the Dressing: Whisk lime juice and olive oil with salt and pepper.
- Dress the Salad: Pour dressing over the pasta mixture and toss gently.
- Fold in the Cilantro and Feta: Gently add cilantro and feta just before serving.
- Taste Test: Adjust seasoning to your preference.
- Chill and Enjoy: Refrigerate for about 30 minutes before serving.
Notes
This salad can be made ahead of time and stores well for up to 3 days. Rinse pasta to prevent sticking.
- Prep Time: 15 minutes
- Cook Time: 10 minutes
- Category: Salad
- Method: Mixing
- Cuisine: American
Nutrition
- Serving Size: 1 cup
- Calories: 300
- Sugar: 4g
- Sodium: 350mg
- Fat: 14g
- Saturated Fat: 3g
- Unsaturated Fat: 8g
- Trans Fat: 0g
- Carbohydrates: 36g
- Fiber: 4g
- Protein: 8g
- Cholesterol: 20mg
Keywords: pasta salad, street corn, summer dish, vegetarian, colorful salad
No-Bake Sugar-Free Lemon Pie Recipe
No-Bake Sugar-Free Lemon Pie Recipe
Hey there, food lovers! 🥧 If you’re anything like me, you have a special spot in your heart (and stomach) for desserts that feel like a joyful celebration in every bite. Today, we’re whipping up something fantastic that doesn’t require turning on the oven—yep, you heard me right! This No-Bake Sugar-Free Lemon Pie is the perfect treat for those warm sunny days when you crave something refreshing yet indulgent.
This pie is not just easy to make, but it’s also a guilt-free delight that satisfies your sweet tooth without any of the usual sugar-induced guilt. If you want to impress your friends at the next picnic or simply conjure up some sweet memories while enjoying a slice on your couch, this pie is calling your name. I mean, who doesn’t love a good lemon dessert? With its bright zest and creamy filling, it’s like sunshine on a plate!
In my kitchen, this pie has become a staple after learning a few tricks along the way. As someone who loves sharing kitchen magic, I’m thrilled to spill all my secrets to you in this guide. Grab your apron, and let’s dive into creating this zesty beauty!
Personal Story
Ah, lemons. Just saying the word brings back fragrant memories from my childhood. I remember standing on a stool in my grandmother’s cozy kitchen, helping her whip up lemon meringue pies from scratch. The air was filled with the tangy scent of fresh lemons and the sweet softness of meringue. It was our bonding time, filled with laughter and flour fights—my grandfather’s playful shenanigans always made the kitchen feel extra warm.
The meringue was a bit finicky, though, which made me long for a dessert that was both easy and delicious. Fast forward to my culinary adventures today, and I’ve found that no-bake treats are my jam! This No-Bake Sugar-Free Lemon Pie sums up those cheerful memories, wrapped up in a creamy, dreamy filling that reminds me of those blissful days in my grandma’s kitchen. Let me share this recipe that keeps those joyous flavors alive, minus the fuss of the oven!
Ingredients
To bring this delightful creation to life, gather the following ingredients:
-
1 1/2 cups almond flour
This nutty flour serves as a great base for the crust. It’s gluten-free and offers a light, pleasant texture. If you’re not a fan of almond flour, feel free to swap in your favorite nut flour or even gluten-free oat flour! -
1/4 cup melted butter
Butter adds richness to the crust, creating a buttery flavor that complements the pie. If you prefer a dairy-free version, coconut oil works beautifully too! -
2 tbsp powdered sugar substitute (like erythritol)
This is a sweetener that gives just the right touch of sweetness without the sugar rush. You can also use stevia powdered for a similar effect, just bear in mind that the sweetness levels may vary! -
1 package (8 oz) cream cheese (softened)
Cream cheese provides the rich and creamy texture we crave in a lemon pie. For a lighter option, consider using Greek yogurt, but keep in mind it may alter the flavor slightly! -
1/2 cup powdered sugar substitute
Another layer of sweetness for the filling! If you’re looking for a fun twist, try flavored sugar substitutes like vanilla or coconut! -
1/4 cup fresh lemon juice
Nothing beats fresh lemon juice for that bright, zesty flavor! Feel free to use bottled lemon juice in a pinch, but fresh is always best! -
1 tbsp lemon zest
The zest adds a punch of citrusiness; it amplifies the flavor and gives that aromatic quality. If you’re in a pinch, don’t worry, you can skip the zest, but I highly recommend it! -
1 tsp vanilla extract
A splash of vanilla rounds out the flavors and brings everything together. If you’re looking to experiment, almond extract provides a lovely twist too! -
1 container (8 oz) sugar-free whipped topping (like Cool Whip or homemade)
This heavenly addition provides that airy lightness we love. You can also make your own by whipping heavy cream with a sweetener of your choice!
Step-by-Step Instructions
Ready to dive in? Let’s get to work on this pie!
Step 1: Prepare the Crust
-
In a mixing bowl, combine 1 1/2 cups almond flour and 1/4 cup melted butter along with 2 tbsp powdered sugar substitute. Mix them together until the texture resembles wet sand.
- Chef’s tip: Ensure your butter is not too hot; otherwise, it could make the crust oily.
-
Press the mixture firmly into the bottom and up the sides of an 8-inch pie dish.
- Hack: Use a glass or measuring cup to compact the crust evenly and create a smooth surface.
-
Chill the crust in the fridge for at least 15 minutes to help it set.
- Chef’s tip: A chilled crust will slice beautifully later—patience is key!
Step 2: Create the Creamy Filling
-
In a separate large mixing bowl, beat together 1 package of softened cream cheese and 1/2 cup powdered sugar substitute using a hand mixer or a stand mixer until smooth and creamy.
- Pro tip: Make sure the cream cheese is softened for the best texture. You can microwave it for about 10 seconds if you forgot to take it out early!
-
Add in the 1/4 cup fresh lemon juice, 1 tbsp lemon zest, and 1 tsp vanilla extract. Continue beating until it’s fully combined.
- Little hack: For extra lemony goodness, add a dash of lemon extract if you have it on hand!
-
Gently fold in 1 container of sugar-free whipped topping until fully mixed.
- Tip: Use a spatula to fold; this method keeps the mixture airy and luscious—no deflating allowed!
Step 3: Assemble the Pie
-
Take your chilled crust out of the fridge and spoon the creamy filling into it, spreading it evenly with a spatula.
- Chef’s insight: If you want a beautiful swirl, use the back of a spoon to create a design!
-
Cover the pie with plastic wrap and refrigerate for at least 4 hours, but overnight is even better. This allows the flavors to meld beautifully.
- Tip: If you’re in a hurry, just aim for a minimum of 2 hours—good things come to those who wait, but we’ve all been there, right?
Serving Suggestions
When the time finally comes to enjoy your delightful No-Bake Sugar-Free Lemon Pie, there are a few ways to elevate the presentation! Consider these serving suggestions:
-
Slice It Up: When you’re ready to serve, use a sharp knife dipped in hot water for clean cuts. This produces that perfect slice to show off the filling’s gorgeous color!
-
Garnish: Top each slice with a bit of fresh whipped cream and lemon zest for a pop of color and flavor. Fresh berries, such as blueberries or raspberries, add a nice touch of sweetness and a bit of tartness that really plays well with the lemon!
-
Serving Bowl: If you want to get creative, try using small mason jars for individual servings. Not only do they look adorable, but everyone loves grabbing their own pie in a jar!
Recipe Variations
Feeling adventurous? Here are some fun twists you can try out with your No-Bake Lemon Pie:
-
Berry Bliss: Fold in fresh strawberries or blueberries into the filling for a fruity explosion.
-
Coconut Cream: Add shredded unsweetened coconut to the filling for a tropical vibe. You can even substitute coconut cream for some of the cream cheese for added richness!
-
Chocolate Drizzle: For a decadent touch, melt some sugar-free chocolate chips and drizzle on top before serving.
-
Ginger Snap Crust: Swap out the almond flour for crumbled sugar-free ginger snaps for a spicy, crunchy crust.
-
Matcha Layer: For a unique twist, create a matcha layer by mixing one teaspoon of matcha powder into a portion of the filling before pouring it into the crust.
Chef’s Notes
Throughout my journey as a home chef, this No-Bake Sugar-Free Lemon Pie has evolved from a simple dessert to a cherished family recipe. The joy it brings at gatherings reminds me that cooking doesn’t have to be tedious. I recall one quirky mishap where I accidentally mistook salt for sugar—I don’t recommend that! The look on everyone’s face when they took a bite was priceless! Now, I keep my sweetener close at hand and always double-check.
Cooking is about experimenting and having fun, and it’s okay to laugh at your mistakes! So, my fellow foodies, if you stray off the beaten path while making this pie, don’t sweat it—just embrace the process!
FAQs and Troubleshooting
Q1: Can I use a different sweetener?
Absolutely! You can experiment with your favorite sweeteners, but keep in mind that some alternatives may have varying levels of sweetness, so adjust to your taste!
Q2: Why is my filling a bit runny?
If your filling is runny, it could be due to overmixing. When folding in the whipped topping, remember to do it gently to preserve the airy texture.
Q3: How long will this pie last?
In the refrigerator, your No-Bake Sugar-Free Lemon Pie will last about 3–5 days. But I doubt it’ll last that long—it’s just too good!
Q4: Can I freeze the pie?
Yes, you can! Just be sure to wrap it tightly in plastic wrap and foil. When you’re ready to enjoy it, thaw it in the fridge overnight!
Nutritional Info
This No-Bake Sugar-Free Lemon Pie recipe is not only delicious but also has some impressive nutritional benefits:
- Low in carbs: Perfect for those following a low-carb or keto lifestyle.
- Packed with healthy fats: The almond flour and cream cheese provide healthy fats that can help keep you satisfied.
- Sugar-free: Enjoy it without the traditional guilt of added sugars; it’s a delightful indulgence that won’t spike your blood sugar levels.
Per serving (approximate):
- Calories: 160
- Total carbs: 4g
- Fiber: 2g
- Sugar: 1g (from natural ingredients)
- Fat: 14g
- Protein: 3g
Final Thoughts
There you have it—your guide to making a luscious No-Bake Sugar-Free Lemon Pie! I hope you’re just as excited as I am to whip this up in the kitchen. This pie serves as an invitation to share laughter, love, and deliciousness with those around you, all while keeping it healthy and enjoyable.
So, next time you’re in the mood for something sweet that brings a burst of sunshine into your day, reach for this lemon pie recipe. Remember, it’s all about the experience of cooking, enjoying, and, most importantly, sharing with the people you love. Cheers to more delicious memories—and my friends, happy baking, or rather, “no-baking!” 🍋✨
Print
No-Bake Sugar-Free Lemon Pie
- Total Time: 255 minutes
- Yield: 8 servings 1x
- Diet: Sugar-Free
Description
A refreshing and indulgent no-bake lemon pie that is sugar-free and perfect for warm days.
Ingredients
- 1 1/2 cups almond flour
- 1/4 cup melted butter
- 2 tbsp powdered sugar substitute (like erythritol)
- 1 package (8 oz) cream cheese (softened)
- 1/2 cup powdered sugar substitute
- 1/4 cup fresh lemon juice
- 1 tbsp lemon zest
- 1 tsp vanilla extract
- 1 container (8 oz) sugar-free whipped topping (like Cool Whip or homemade)
Instructions
- Prepare the crust by mixing almond flour, melted butter, and powdered sugar substitute until resembling wet sand. Press into an 8-inch pie dish and chill for 15 minutes.
- Create the creamy filling by beating softened cream cheese and powdered sugar substitute until smooth. Add lemon juice, lemon zest, and vanilla; mix well. Fold in whipped topping gently.
- Assemble the pie by adding the filling to the crust. Cover with plastic wrap and refrigerate for at least 4 hours before serving.
Notes
For clean cuts, dip a knife in hot water while slicing. Garnish with fresh whipped cream, lemon zest, and berries for added flavor.
- Prep Time: 15 minutes
- Cook Time: 240 minutes
- Category: Dessert
- Method: No-Bake
- Cuisine: American
Nutrition
- Serving Size: 1 slice
- Calories: 160
- Sugar: 1g
- Sodium: 300mg
- Fat: 14g
- Saturated Fat: 7g
- Unsaturated Fat: 6g
- Trans Fat: 0g
- Carbohydrates: 4g
- Fiber: 2g
- Protein: 3g
- Cholesterol: 30mg
Keywords: no-bake dessert, sugar-free, lemon pie, refreshing dessert, healthy dessert