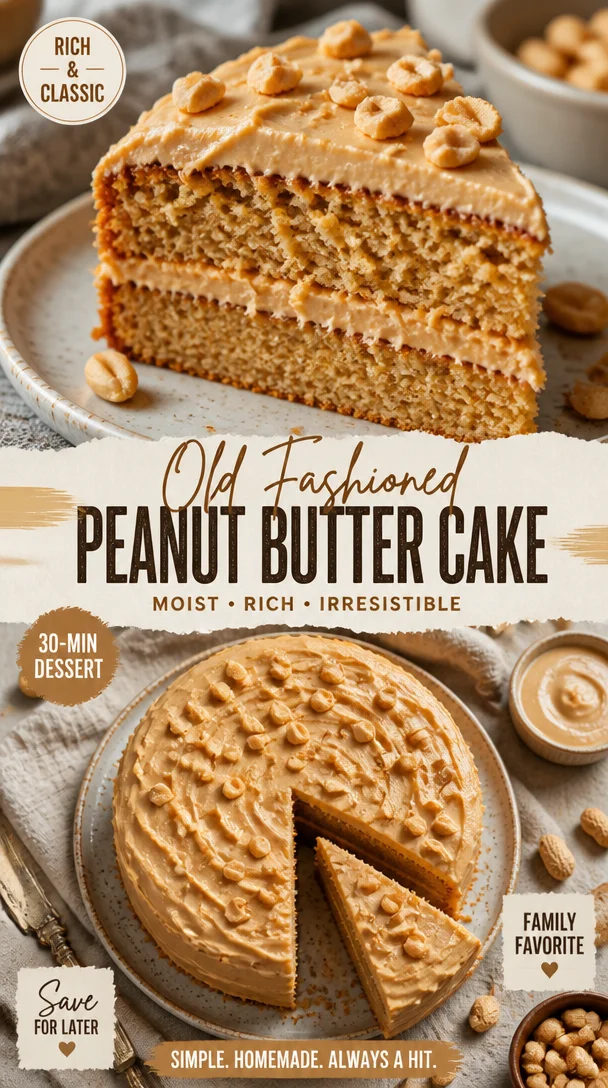
Old Fashioned Peanut Butter Cake
The Ultimate Guide to Old Fashioned Peanut Butter Cake
Introduction
Hey there, fellow foodies! If you’ve ever tasted a slice of peanut butter cake, you know it’s a hug on a plate—warm, comforting, and full of that nutty goodness that makes everything better. Today, I’m excited to share my Old Fashioned Peanut Butter Cake recipe that will make your taste buds dance and your kitchen smell like a cozy cafe. Whether you’re looking for a sweet treat for a special occasion or simply want to indulge in some comfort food, this cake is just the ticket!
Let’s be real: there’s something magical about peanut butter. It’s a staple in many homes, often found tucked away in a pantry or atop breakfast toast. But what if I told you that peanut butter can shine even brighter as the star of a cake? Buckle up, because I’m about to reveal how you can transform a humble jar of peanut butter into a show-stopping dessert that will have everyone asking for seconds!
I’ve spent countless afternoons in my kitchen, mixing and experimenting, all in the name of creating the perfect peanut butter cake. It took some trial and errors, a few taste tests (okay, many!), and a couple of late-night baking sessions, but I’ve finally landed on the recipe that pays homage to the old-fashioned flavors of home baking while delivering a modern twist. So, grab your apron and let’s whip up this delectable delight together!
Personal Story
As a child, I spent much of my summer vacations at my grandma’s house, where the scent of baked goods wafted through the air. One of my fondest memories is standing on a stool by her kitchen counter, watching her whip up an old-fashioned peanut butter cake. I remember her quirky stories, her infectious laughter, and the way her eyes sparkled as she folded each ingredient into the mix. She always said that baking is as much about love as it is about the recipe.
That peanut butter cake was her signature dish—rich, moist, and topped with a luscious frosting that made you forget about everything else. We would crowd around the kitchen table, digging into generous slices while sharing stories from our day. As we savored each bite, I learned that food is not just sustenance; it’s a way to connect with each other, to create memories, and to celebrate life’s little moments.
Years later, I find myself recreating that same peanut butter cake, infusing it with all the love and nostalgia that my grandma poured into every floured surface, every hunk of butter, and every scoop of peanut butter. I can’t wait for you to experience the joy and warmth of this recipe—it’s like bringing a bit of my childhood into your kitchen!
Ingredients
Here’s what you’ll need to craft this delightful Old Fashioned Peanut Butter Cake:
-
3 sticks unsalted butter (12 oz / 339 g, softened)
Butter brings richness and moisture to our cake. If you need a dairy-free option, coconut oil works in a pinch, but the flavor will vary. -
2/3 cup smooth peanut butter (178 g)
Smooth peanut butter gives the cake its signature flavor. Feel free to experiment with crunchy peanut butter if you like a bit of texture in every bite! -
5 cups sifted powdered sugar (568 g)
This is what makes the frosting super sweet, airy, and melt-in-your-mouth. If you want a less sweet option, you can cut this amount down to 4 cups. -
1/2 tsp vanilla extract
A dash of vanilla adds depth. Always opt for the real deal over imitation for the best flavor! -
1 1/2 cups packed light brown sugar (320 g)
Brown sugar contributes to the moisture and adds a subtle caramel flavor. You can substitute with dark brown sugar for a more robust taste. -
1 stick unsalted butter (4 oz / 113 g, softened)
This will be used in the frosting. Remember, softening it at room temperature ensures a smooth mix! -
1/2 cup smooth peanut butter (135 g)
Yup, more peanut butter! This is for the dreamy frosting that tops our cake. -
2 large eggs
Eggs act as binders, giving structure to the cake. If you’re vegan, a chia seed "egg" (1 tbsp chia seeds + 2.5 tbsp water) yields great results, too! -
1/2 cup vegetable oil (99 g)
A neutral oil keeps our cake moist. Canola or avocado oil work wonderfully! -
1 1/2 cups buttermilk (360 g)
Buttermilk adds acidity and moisture, creating a soft crumb. Don’t have buttermilk? Mix regular milk with a splash of vinegar or lemon juice! -
1 1/2 tsp baking powder
This is our leavening agent, making the cake rise. -
1 tsp baking soda
This works alongside the buttermilk to create a light, fluffy texture. -
1 tsp salt
Salt balances the sweetness—you’ll want to keep it! -
3 2/3 cups all-purpose flour
The foundation of our cake. Make sure to sift to avoid lumps! -
2 tsp vanilla extract
Another splash of vanilla for good measure—why not, right?
Step-by-Step Instructions
Now that we have our ingredients lined up, let’s get to the fun part: baking! Don’t worry; I’ll guide you through every step with some handy tips and chef hacks along the way.
-
Preheat your oven to 350°F (175°C). This is super important! A well-preheated oven ensures your cake bakes evenly, so make sure to get this going first.
-
Prepare your cake pans. Grease and flour two 9-inch round cake pans or line them with parchment paper. This will prevent our delicious creation from sticking, allowing for a flawless reveal later on.
-
In a large mixing bowl, beat the 3 sticks of softened butter and the 2/3 cup smooth peanut butter together until light and fluffy—about 3-4 minutes. This step is crucial; incorporating air at this stage will result in a lighter cake.
-
Add the packed brown sugar and continue beating for another 2 minutes. The mixture should be smooth and creamy. If you see some lumps, don’t worry; our dry ingredients will take care of that!
-
Crack in the eggs, one at a time, mixing well after each addition. This allows each egg to fully incorporate, giving our cake the structure it needs.
-
Pour in the vegetable oil and buttermilk (imagine those flavors mingling beautifully!). Mix until just combined. Chef tip: If you’re worried about an oily batter, remember that the oil keeps our cake moist, and that’s what we want!
-
In a separate bowl, whisk together the flour, baking powder, baking soda, and salt. Gradually add the dry ingredients to the wet mixture, mixing until just combined. Be careful not to overmix—this will ensure we have a tender cake.
-
Divide the batter evenly between your prepared pans. A kitchen scale can help you achieve precision, ensuring even baking.
-
Bake for about 30-35 minutes, or until a toothpick inserted into the middle comes out clean. Keep an eye on your cakes; ovens can be quirky!
-
Once baked to perfection, remove from the oven and let them cool in the pans for about 10 minutes. Then, transfer the cakes to wire racks to cool completely.
-
Now, let’s whip up that peanut butter frosting! In a bowl, beat the 1 stick of softened butter and 1/2 cup of peanut butter until smooth. Gradually add the powdered sugar and the 1/2 tsp vanilla extract. Mix until creamy and fluffy. If you want it a bit thicker, add more sugar!
-
When your cakes have cooled completely, frost the top of one layer with a generous amount of peanut butter frosting. Place the second layer on top and frost the top and sides of the entire cake. Get creative with how much frosting you want—the more, the merrier!
Serving Suggestions
Now that you’ve artfully frosted your cake, it’s time to slice and serve! Here’s how to make it look even more irresistible:
- Garnish with chopped peanuts on the top of the cake for a delightful crunch.
- Dust with a sprinkle of cocoa powder for a fancy touch or drizzling some melted chocolate or caramel sauce over the top to take it up a notch.
- For a contrasting touch, serve each slice beside a scoop of vanilla ice cream or a dollop of whipped cream. Trust me; the warm cake and cold ice cream duo is heavenly!
Recipe Variations
Feeling adventurous? Here are some hints to mix things up a bit:
-
Chocolate Peanut Butter Cake: Incorporate cocoa powder into your batter for a rich chocolate base, or swirl in some melted chocolate.
-
Nutty Swirl: Fold in chopped nuts or chocolate chips for extra texture. If you’re feeling wild, try adding crushed pretzels for a sweet-salty kick!
-
Peanut Butter and Jelly Twist: Spread a layer of your favorite jam between the cakes before frosting them. The tartness of the jelly complements the sweetness of the peanut butter perfectly!
-
Gluten-Free Option: Substitute all-purpose flour with a 1:1 gluten-free flour blend for a gluten-free version of this cake.
-
Vegan Delight: Use flax eggs and a plant-based butter or coconut oil to create a vegan-friendly cake that’s just as delicious!
Chef’s Notes
As I’ve experimented with this recipe over the years, I’ve learned that the heart of a great peanut butter cake lies in balancing flavors. Don’t shy away from trying out different brands of peanut butter—some can be smoother or nuttier, which dramatically influences the cake’s outcome. Each time you make it, it’s an opportunity to customize and elevate.
One of my most hilarious kitchen moments occurred during a baking session gone awry when I realized I was out of eggs. In a frenzy, I whisked together some chia seeds and water in a last-ditch effort to save the day. The resulting cake was surprisingly delicious! Lesson learned: when life gives you no eggs, improvise!
FAQs and Troubleshooting
-
Q: My cake turned out dry. What did I do wrong?
A: Cake dryness often stems from overbaking or using too much flour. Make sure to measure your flour properly, and keep an eye on baking time! -
Q: Why did my cake sink in the middle?
A: Cake sinking can be due to underbaking or a sudden temperature change. Be sure your oven is preheated and avoid opening the oven door while it’s baking. -
Q: Can I use chunky peanut butter?
A: Absolutely! It will give your cake a delightful texture. Just keep in mind the flavor profile may shift slightly. -
Q: How should I store any leftover cake?
A: Store your cake in an airtight container at room temperature for up to 3 days or in the refrigerator for up to a week. It also freezes beautifully—just wrap it tightly in plastic wrap and aluminum foil.
Nutritional Info
Now, let’s talk nutrition, shall we? While this Old Fashioned Peanut Butter Cake is undeniably a treat, knowing that it contains a good amount of protein and healthy fats from the peanut butter can make indulging feel a tad more justified.
In a typical slice (1/12th of the cake), you can expect:
- Calories: ~400
- Protein: ~6g
- Fat: ~20g
- Carbohydrates: ~50g
- Fiber: ~1g
- Sugar: ~30g
Keep in mind that these numbers can vary depending on the exact ingredients you use and the size of your slices!
Final Thoughts
Baking this Old Fashioned Peanut Butter Cake is more than just a recipe; it’s an opportunity to create something beautiful and delicious, all while making memories along the way. Every bite is a reminder of the joy brought by simple, homemade goodness.
So whether you’re celebrating a birthday, having a family gathering, or simply indulging because you deserve it, I hope this cake brings as much joy to your kitchen as it did in mine. Remember, cooking is all about creating joy and sharing it with those you love. Happy baking, and as always, I can’t wait to hear how your peanut butter cake turns out! Grab a fork and dig in—let’s make some memories!
Print
Old Fashioned Peanut Butter Cake
- Total Time: 55 minutes
- Yield: 12 servings 1x
- Diet: Vegetarian
Description
A warm, comforting peanut butter cake that captures the essence of home baking with a modern twist.
Ingredients
- 3 sticks unsalted butter (12 oz / 339 g, softened)
- 2/3 cup smooth peanut butter (178 g)
- 5 cups sifted powdered sugar (568 g)
- 1/2 tsp vanilla extract
- 1 1/2 cups packed light brown sugar (320 g)
- 1 stick unsalted butter (4 oz / 113 g, softened)
- 1/2 cup smooth peanut butter (135 g)
- 2 large eggs
- 1/2 cup vegetable oil (99 g)
- 1 1/2 cups buttermilk (360 g)
- 1 1/2 tsp baking powder
- 1 tsp baking soda
- 1 tsp salt
- 3 2/3 cups all-purpose flour
- 2 tsp vanilla extract
Instructions
- Preheat your oven to 350°F (175°C).
- Prepare your cake pans by greasing and flouring or lining with parchment paper.
- Beat the 3 sticks of softened butter and 2/3 cup smooth peanut butter until light and fluffy—about 3-4 minutes.
- Add the packed brown sugar and continue beating for another 2 minutes.
- Crack in the eggs, one at a time, mixing well after each.
- Pour in the vegetable oil and buttermilk, mixing until just combined.
- Whisk together the flour, baking powder, baking soda, and salt in a separate bowl.
- Add the dry ingredients to the wet mixture, mixing until just combined.
- Divide the batter evenly between the prepared pans.
- Bake for about 30-35 minutes, or until a toothpick comes out clean.
- Cool in the pans for about 10 minutes, then transfer to wire racks.
- Beat the 1 stick of softened butter and 1/2 cup of peanut butter until smooth for the frosting.
- Add the powdered sugar and the 1/2 tsp vanilla extract, mixing until creamy.
- Frost the top of one layer with frosting, place the second layer on top, and frost the top and sides of the cake.
Notes
For variations, try adding cocoa powder, nuts, or jam between the layers for a delightful twist.
- Prep Time: 20 minutes
- Cook Time: 35 minutes
- Category: Dessert
- Method: Baking
- Cuisine: American
Nutrition
- Serving Size: 1 slice
- Calories: 400
- Sugar: 30g
- Sodium: 200mg
- Fat: 20g
- Saturated Fat: 8g
- Unsaturated Fat: 11g
- Trans Fat: 0g
- Carbohydrates: 50g
- Fiber: 1g
- Protein: 6g
- Cholesterol: 30mg
Keywords: peanut butter cake, dessert, baking, comfort food, nostalgic recipe
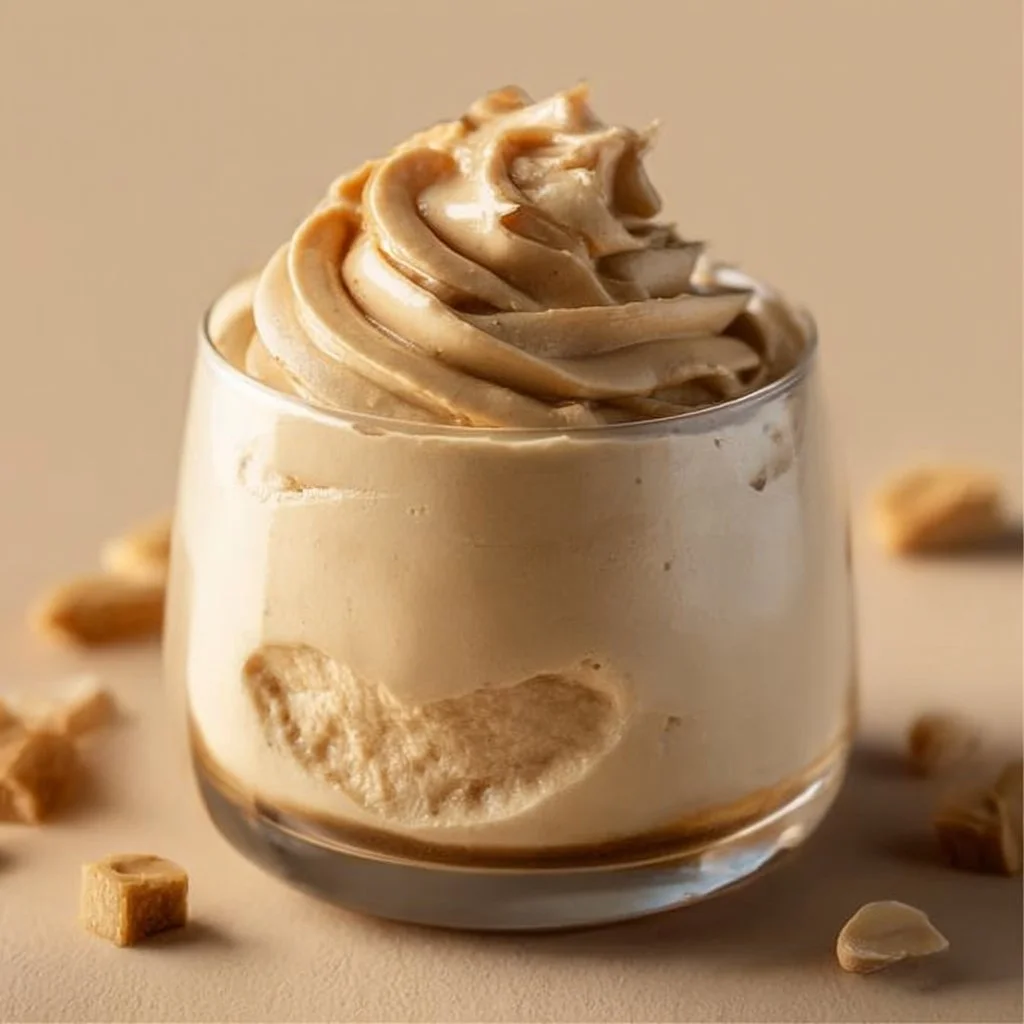
Cottage Cheese Peanut Butter Mousse
Cottage Cheese Peanut Butter Mousse: A Decadent Delight
Hey there, food lovers! I’m Beau Collier, and today we’re diving into something truly special—Cottage Cheese Peanut Butter Mousse! Now, before you raise an eyebrow at the mention of cottage cheese, let me assure you that this dish will change the way you think about an old-school ingredient. It’s creamy, it’s rich, and it brings a level of indulgence that’s hard to beat—all while being simple to whip up. So, grab your favorite mixing bowl, and let’s get this delicious mousse party started!
A Little Kitchen Story: The Comfort of Childhood Treats
Every bite of this mousse reminds me of those lazy Sunday afternoons I spent in the kitchen with my grandma. She’d whip up treats that seemed so luxurious yet were made with the simplest ingredients. I remember her always having a little cottage cheese stashed in the fridge, which she’d toss into all sorts of creations. I’d watch her blend it into smoothies or mix it with fruits and nuts for a healthy snack.
One day, I came to her with a craving for something sweet yet nutritious, and that’s when she introduced me to the idea of mixing cottage cheese with peanut butter. At first, I was a bit unsure—a mousse made with cottage cheese? But after one taste, I was hooked! The creamy texture, combined with the richness of peanut butter and a hint of sweetness from honey, was like a little slice of heaven.
And oh boy, did it bring comfort! It was a treat that felt fancy but was totally easy to make. Fast forward to today, and I’ve taken that delicious memory and turned it into this recipe you’re about to dive into. I promise, once you try it, you’ll see that this mousse is not just a treat; it’s a delicious memory waiting to be made in your kitchen.
Ingredients You’ll Need
To create your own Cottage Cheese Peanut Butter Mousse, here’s what you’ll need:
-
1 cup cottage cheese
A creamy base that’s rich in protein and low in fat. If you’re not a fan of cottage cheese, Greek yogurt is a great substitute. -
2 tablespoons peanut butter
Choose a natural peanut butter for a pure, rich flavor. If you have a nut allergy, try sunflower seed butter for a similar taste! -
2 tablespoons honey or maple syrup
Sweeten things up! Honey gives a fantastic depth of flavor, or use maple syrup for a vegan alternative. -
1 teaspoon vanilla extract
This adds a warm aromatic flavor; you can also infuse a little almond extract for a nice twist. -
A pinch of salt
A little salt elevates all the flavors. Just a tiny pinch will do the trick! -
Optional toppings:
- Cocoa powder: For a rich chocolate flavor, sprinkle this on top!
- Chopped nuts: Add a nice crunch with some chopped almonds or walnuts.
- Berries: Fresh or frozen berries can add a tartness that pairs beautifully with the sweetness.
Let’s not forget; cooking is all about improvisation. Feel free to switch things up based on what you have on hand!
Step-by-Step Instructions
Alright, let’s get down to the good stuff—making this luscious mousse. Follow these steps, and you’ll be enjoying a bowl (or two) of this dessert in no time!
-
Gather Your Ingredients.
First and foremost, set your kitchen up for success. Have all your ingredients measured out and in easy reach. It makes the process smoother, and you won’t have to fumble around searching for the peanut butter or honey when you’re elbow-deep in mixing. -
Blend the Cottage Cheese.
Place 1 cup of cottage cheese in a blender or food processor. Start by blending it alone for about 30 seconds until it’s nice and creamy. This step is super helpful; blending it first helps eliminate those little curds, which transforms the texture into something smooth and mousse-like. Trust me; it’s worth it! -
Incorporate Peanut Butter and Sweetener.
Add 2 tablespoons of peanut butter and 2 tablespoons of honey (or maple syrup) to the blended cottage cheese. Blend again for about 30 seconds, until everything is fully combined. Don’t forget to scrape down the sides with a spatula to make sure the peanut butter is mixed in evenly. You want every spoonful to be as delicious as the last! -
Add Flavorings.
Now, add 1 teaspoon of vanilla extract and a pinch of salt. Blend for another 15 seconds. This is where your mousse really gets that rich, delightful flavor that balances the creaminess with the sweetness. -
Taste for Perfection.
Here’s a pro tip—taste your mousse before finishing. If you want it sweeter, now is the time to adjust the honey or maple syrup. Sometimes, a little extra sweetness can make a world of difference! -
Chill the Mousse.
Transfer the mousse into serving dishes or a large bowl. Cover and let it chill in the fridge for at least 30 minutes. This step is crucial for letting the flavors meld together and achieving that perfect mousse-like texture. -
Serve and Garnish.
After chilling, it’s time to serve! Top each dish with your choice of optional toppings—sprinkle cocoa powder, add some chopped nuts, or throw on fresh berries. Each of these toppings brings its own twist to the mousse!
Serving Suggestions
To plate your Cottage Cheese Peanut Butter Mousse like a pro, follow these tips:
- Use fancy glassware: It makes even the simplest dessert feel special. Clear glasses or jars allow those beautiful layers to show off the mousse’s creamy texture.
- Layer it up: Consider alternating layers of mousse and berries in a glass for a visually stunning presentation. A little eye candy never hurts!
- Serve with a side: Pair the mousse with a warm slice of banana bread or some fresh fruit for a delightful contrast of flavors.
Fun bonus: Mousse can be made ahead of time and stored in the fridge for about 3-4 days. Perfect for meal prepping!
Recipe Variations
Let your creativity shine! Here are some flavor variations and ideas to switch things up:
-
Chocolate Peanut Butter Mousse: Add 2 tablespoons of cocoa powder to the mixture for a rich chocolatey version. You can also mix in chocolate chips for added texture!
-
Caramel Swirl: Drizzle some caramel sauce into the mousse before chilling for a decadent caramel-peanut butter experience.
-
Banana Fanatic: Mash a ripe banana and fold it into the mousse for added natural sweetness and banana flavor.
-
Berry Bliss: Blend in some fresh berries like strawberries or blueberries for a fruity twist. You can also swirl berry puree on top just before serving!
-
Coconut Cream Dream: Add some toasted coconut flakes on top for a tropical feel. If you want to make it even creamier, blend in a bit of coconut yogurt!
Chef’s Notes
You know, every recipe has a little history, and this mousse is no different! It’s evolved over time, started from a simple snack I used to make just for myself, and has transformed into a beloved dessert that guests rave about. When people taste it, they often can’t believe it’s made from cottage cheese! That surprise factor makes it all the more fun to serve.
I’ve had some hilarious kitchen mishaps while trying out flavors, too. One time, I attempted to mix in some spicy pepper flakes, thinking I’d make something adventurous. Let me tell you, the result was not what I had in mind! But hey, that’s part of the beauty of experimenting in the kitchen—sometimes things flop, but other times, they lead to the creation of a new favorite!
FAQs and Troubleshooting
Q: Can I make this mousse without a blender?
A: Absolutely! You can use a hand mixer or even a whisk, though it will take a bit more effort to get that creamy texture. Just be patient while mixing, and you’ll get there!
Q: What if my mousse is too runny?
A: If it’s too runny, it might need more chilling time. Pop it back in the fridge for a little longer. Alternatively, consider adding a spoonful of cornstarch or gelatin (if you want it to set) to thicken it up in the blending stage.
Q: Can I substitute the peanut butter?
A: For sure! Try almond butter, sunflower seed butter, or even tahini for a different flavor profile.
Q: How long will it last in the fridge?
A: This mousse stays good for about 3-4 days in the refrigerator. Just make sure it’s covered well!
Nutritional Info (Per Serving)
Based on a recipe serving of 4:
- Calories: 180
- Protein: 14g
- Fat: 7g
- Carbohydrates: 16g
- Fiber: 2g
- Sugar: 8g
This mousse is a wonderful mix of protein and healthy fats! It can serve as a great post-workout snack or a guilt-free dessert.
Final Thoughts
There you have it—Cottage Cheese Peanut Butter Mousse that’s easy, delicious, and oh-so-satisfying! This recipe is proof that healthy ingredients can be transformed into something wonderfully indulgent. Whether you’re preparing a special dessert for loved ones, meal prepping for the week, or just treating yourself on a Tuesday, this mousse is bound to delight.
Now, go ahead and give this a try—you won’t be disappointed! Remember, the kitchen is your playground, so don’t shy away from trying different flavors and combinations. Until next time, happy cooking, friends—grab that fork, and let’s dig into something delicious together!
Print
Cottage Cheese Peanut Butter Mousse
- Total Time: 40 minutes
- Yield: 4 servings 1x
- Diet: Vegetarian
Description
A creamy and rich mousse made with cottage cheese and peanut butter, offering a delightful balance of flavors. Perfect for a healthy dessert or snack!
Ingredients
- 1 cup cottage cheese
- 2 tablespoons peanut butter
- 2 tablespoons honey or maple syrup
- 1 teaspoon vanilla extract
- A pinch of salt
- Optional toppings: Cocoa powder, chopped nuts, berries
Instructions
- Gather your ingredients.
- Blend the cottage cheese until creamy.
- Incorporate peanut butter and sweetener.
- Add flavorings and blend again.
- Taste for perfection and adjust sweetness if needed.
- Chill the mousse in the fridge for at least 30 minutes.
- Serve and garnish with optional toppings.
Notes
Feel free to improvise with different toppings and flavor variations. This mousse can be stored in the fridge for about 3-4 days.
- Prep Time: 10 minutes
- Cook Time: 0 minutes
- Category: Dessert
- Method: Blending
- Cuisine: American
Nutrition
- Serving Size: 1 serving
- Calories: 180
- Sugar: 8g
- Sodium: 150mg
- Fat: 7g
- Saturated Fat: 1g
- Unsaturated Fat: 6g
- Trans Fat: 0g
- Carbohydrates: 16g
- Fiber: 2g
- Protein: 14g
- Cholesterol: 10mg
Keywords: cottage cheese, peanut butter mousse, healthy dessert, quick recipe, protein snack