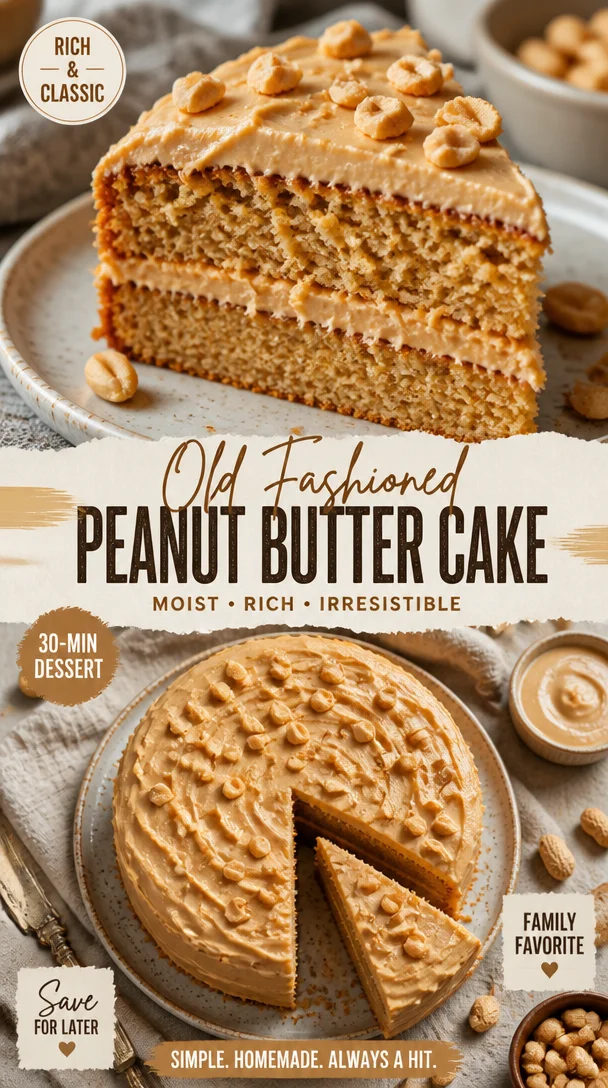
Old Fashioned Peanut Butter Cake
The Ultimate Guide to Old Fashioned Peanut Butter Cake
Introduction
Hey there, fellow foodies! If you’ve ever tasted a slice of peanut butter cake, you know it’s a hug on a plate—warm, comforting, and full of that nutty goodness that makes everything better. Today, I’m excited to share my Old Fashioned Peanut Butter Cake recipe that will make your taste buds dance and your kitchen smell like a cozy cafe. Whether you’re looking for a sweet treat for a special occasion or simply want to indulge in some comfort food, this cake is just the ticket!
Let’s be real: there’s something magical about peanut butter. It’s a staple in many homes, often found tucked away in a pantry or atop breakfast toast. But what if I told you that peanut butter can shine even brighter as the star of a cake? Buckle up, because I’m about to reveal how you can transform a humble jar of peanut butter into a show-stopping dessert that will have everyone asking for seconds!
I’ve spent countless afternoons in my kitchen, mixing and experimenting, all in the name of creating the perfect peanut butter cake. It took some trial and errors, a few taste tests (okay, many!), and a couple of late-night baking sessions, but I’ve finally landed on the recipe that pays homage to the old-fashioned flavors of home baking while delivering a modern twist. So, grab your apron and let’s whip up this delectable delight together!
Personal Story
As a child, I spent much of my summer vacations at my grandma’s house, where the scent of baked goods wafted through the air. One of my fondest memories is standing on a stool by her kitchen counter, watching her whip up an old-fashioned peanut butter cake. I remember her quirky stories, her infectious laughter, and the way her eyes sparkled as she folded each ingredient into the mix. She always said that baking is as much about love as it is about the recipe.
That peanut butter cake was her signature dish—rich, moist, and topped with a luscious frosting that made you forget about everything else. We would crowd around the kitchen table, digging into generous slices while sharing stories from our day. As we savored each bite, I learned that food is not just sustenance; it’s a way to connect with each other, to create memories, and to celebrate life’s little moments.
Years later, I find myself recreating that same peanut butter cake, infusing it with all the love and nostalgia that my grandma poured into every floured surface, every hunk of butter, and every scoop of peanut butter. I can’t wait for you to experience the joy and warmth of this recipe—it’s like bringing a bit of my childhood into your kitchen!
Ingredients
Here’s what you’ll need to craft this delightful Old Fashioned Peanut Butter Cake:
-
3 sticks unsalted butter (12 oz / 339 g, softened)
Butter brings richness and moisture to our cake. If you need a dairy-free option, coconut oil works in a pinch, but the flavor will vary. -
2/3 cup smooth peanut butter (178 g)
Smooth peanut butter gives the cake its signature flavor. Feel free to experiment with crunchy peanut butter if you like a bit of texture in every bite! -
5 cups sifted powdered sugar (568 g)
This is what makes the frosting super sweet, airy, and melt-in-your-mouth. If you want a less sweet option, you can cut this amount down to 4 cups. -
1/2 tsp vanilla extract
A dash of vanilla adds depth. Always opt for the real deal over imitation for the best flavor! -
1 1/2 cups packed light brown sugar (320 g)
Brown sugar contributes to the moisture and adds a subtle caramel flavor. You can substitute with dark brown sugar for a more robust taste. -
1 stick unsalted butter (4 oz / 113 g, softened)
This will be used in the frosting. Remember, softening it at room temperature ensures a smooth mix! -
1/2 cup smooth peanut butter (135 g)
Yup, more peanut butter! This is for the dreamy frosting that tops our cake. -
2 large eggs
Eggs act as binders, giving structure to the cake. If you’re vegan, a chia seed "egg" (1 tbsp chia seeds + 2.5 tbsp water) yields great results, too! -
1/2 cup vegetable oil (99 g)
A neutral oil keeps our cake moist. Canola or avocado oil work wonderfully! -
1 1/2 cups buttermilk (360 g)
Buttermilk adds acidity and moisture, creating a soft crumb. Don’t have buttermilk? Mix regular milk with a splash of vinegar or lemon juice! -
1 1/2 tsp baking powder
This is our leavening agent, making the cake rise. -
1 tsp baking soda
This works alongside the buttermilk to create a light, fluffy texture. -
1 tsp salt
Salt balances the sweetness—you’ll want to keep it! -
3 2/3 cups all-purpose flour
The foundation of our cake. Make sure to sift to avoid lumps! -
2 tsp vanilla extract
Another splash of vanilla for good measure—why not, right?
Step-by-Step Instructions
Now that we have our ingredients lined up, let’s get to the fun part: baking! Don’t worry; I’ll guide you through every step with some handy tips and chef hacks along the way.
-
Preheat your oven to 350°F (175°C). This is super important! A well-preheated oven ensures your cake bakes evenly, so make sure to get this going first.
-
Prepare your cake pans. Grease and flour two 9-inch round cake pans or line them with parchment paper. This will prevent our delicious creation from sticking, allowing for a flawless reveal later on.
-
In a large mixing bowl, beat the 3 sticks of softened butter and the 2/3 cup smooth peanut butter together until light and fluffy—about 3-4 minutes. This step is crucial; incorporating air at this stage will result in a lighter cake.
-
Add the packed brown sugar and continue beating for another 2 minutes. The mixture should be smooth and creamy. If you see some lumps, don’t worry; our dry ingredients will take care of that!
-
Crack in the eggs, one at a time, mixing well after each addition. This allows each egg to fully incorporate, giving our cake the structure it needs.
-
Pour in the vegetable oil and buttermilk (imagine those flavors mingling beautifully!). Mix until just combined. Chef tip: If you’re worried about an oily batter, remember that the oil keeps our cake moist, and that’s what we want!
-
In a separate bowl, whisk together the flour, baking powder, baking soda, and salt. Gradually add the dry ingredients to the wet mixture, mixing until just combined. Be careful not to overmix—this will ensure we have a tender cake.
-
Divide the batter evenly between your prepared pans. A kitchen scale can help you achieve precision, ensuring even baking.
-
Bake for about 30-35 minutes, or until a toothpick inserted into the middle comes out clean. Keep an eye on your cakes; ovens can be quirky!
-
Once baked to perfection, remove from the oven and let them cool in the pans for about 10 minutes. Then, transfer the cakes to wire racks to cool completely.
-
Now, let’s whip up that peanut butter frosting! In a bowl, beat the 1 stick of softened butter and 1/2 cup of peanut butter until smooth. Gradually add the powdered sugar and the 1/2 tsp vanilla extract. Mix until creamy and fluffy. If you want it a bit thicker, add more sugar!
-
When your cakes have cooled completely, frost the top of one layer with a generous amount of peanut butter frosting. Place the second layer on top and frost the top and sides of the entire cake. Get creative with how much frosting you want—the more, the merrier!
Serving Suggestions
Now that you’ve artfully frosted your cake, it’s time to slice and serve! Here’s how to make it look even more irresistible:
- Garnish with chopped peanuts on the top of the cake for a delightful crunch.
- Dust with a sprinkle of cocoa powder for a fancy touch or drizzling some melted chocolate or caramel sauce over the top to take it up a notch.
- For a contrasting touch, serve each slice beside a scoop of vanilla ice cream or a dollop of whipped cream. Trust me; the warm cake and cold ice cream duo is heavenly!
Recipe Variations
Feeling adventurous? Here are some hints to mix things up a bit:
-
Chocolate Peanut Butter Cake: Incorporate cocoa powder into your batter for a rich chocolate base, or swirl in some melted chocolate.
-
Nutty Swirl: Fold in chopped nuts or chocolate chips for extra texture. If you’re feeling wild, try adding crushed pretzels for a sweet-salty kick!
-
Peanut Butter and Jelly Twist: Spread a layer of your favorite jam between the cakes before frosting them. The tartness of the jelly complements the sweetness of the peanut butter perfectly!
-
Gluten-Free Option: Substitute all-purpose flour with a 1:1 gluten-free flour blend for a gluten-free version of this cake.
-
Vegan Delight: Use flax eggs and a plant-based butter or coconut oil to create a vegan-friendly cake that’s just as delicious!
Chef’s Notes
As I’ve experimented with this recipe over the years, I’ve learned that the heart of a great peanut butter cake lies in balancing flavors. Don’t shy away from trying out different brands of peanut butter—some can be smoother or nuttier, which dramatically influences the cake’s outcome. Each time you make it, it’s an opportunity to customize and elevate.
One of my most hilarious kitchen moments occurred during a baking session gone awry when I realized I was out of eggs. In a frenzy, I whisked together some chia seeds and water in a last-ditch effort to save the day. The resulting cake was surprisingly delicious! Lesson learned: when life gives you no eggs, improvise!
FAQs and Troubleshooting
-
Q: My cake turned out dry. What did I do wrong?
A: Cake dryness often stems from overbaking or using too much flour. Make sure to measure your flour properly, and keep an eye on baking time! -
Q: Why did my cake sink in the middle?
A: Cake sinking can be due to underbaking or a sudden temperature change. Be sure your oven is preheated and avoid opening the oven door while it’s baking. -
Q: Can I use chunky peanut butter?
A: Absolutely! It will give your cake a delightful texture. Just keep in mind the flavor profile may shift slightly. -
Q: How should I store any leftover cake?
A: Store your cake in an airtight container at room temperature for up to 3 days or in the refrigerator for up to a week. It also freezes beautifully—just wrap it tightly in plastic wrap and aluminum foil.
Nutritional Info
Now, let’s talk nutrition, shall we? While this Old Fashioned Peanut Butter Cake is undeniably a treat, knowing that it contains a good amount of protein and healthy fats from the peanut butter can make indulging feel a tad more justified.
In a typical slice (1/12th of the cake), you can expect:
- Calories: ~400
- Protein: ~6g
- Fat: ~20g
- Carbohydrates: ~50g
- Fiber: ~1g
- Sugar: ~30g
Keep in mind that these numbers can vary depending on the exact ingredients you use and the size of your slices!
Final Thoughts
Baking this Old Fashioned Peanut Butter Cake is more than just a recipe; it’s an opportunity to create something beautiful and delicious, all while making memories along the way. Every bite is a reminder of the joy brought by simple, homemade goodness.
So whether you’re celebrating a birthday, having a family gathering, or simply indulging because you deserve it, I hope this cake brings as much joy to your kitchen as it did in mine. Remember, cooking is all about creating joy and sharing it with those you love. Happy baking, and as always, I can’t wait to hear how your peanut butter cake turns out! Grab a fork and dig in—let’s make some memories!
Print
Old Fashioned Peanut Butter Cake
- Total Time: 55 minutes
- Yield: 12 servings 1x
- Diet: Vegetarian
Description
A warm, comforting peanut butter cake that captures the essence of home baking with a modern twist.
Ingredients
- 3 sticks unsalted butter (12 oz / 339 g, softened)
- 2/3 cup smooth peanut butter (178 g)
- 5 cups sifted powdered sugar (568 g)
- 1/2 tsp vanilla extract
- 1 1/2 cups packed light brown sugar (320 g)
- 1 stick unsalted butter (4 oz / 113 g, softened)
- 1/2 cup smooth peanut butter (135 g)
- 2 large eggs
- 1/2 cup vegetable oil (99 g)
- 1 1/2 cups buttermilk (360 g)
- 1 1/2 tsp baking powder
- 1 tsp baking soda
- 1 tsp salt
- 3 2/3 cups all-purpose flour
- 2 tsp vanilla extract
Instructions
- Preheat your oven to 350°F (175°C).
- Prepare your cake pans by greasing and flouring or lining with parchment paper.
- Beat the 3 sticks of softened butter and 2/3 cup smooth peanut butter until light and fluffy—about 3-4 minutes.
- Add the packed brown sugar and continue beating for another 2 minutes.
- Crack in the eggs, one at a time, mixing well after each.
- Pour in the vegetable oil and buttermilk, mixing until just combined.
- Whisk together the flour, baking powder, baking soda, and salt in a separate bowl.
- Add the dry ingredients to the wet mixture, mixing until just combined.
- Divide the batter evenly between the prepared pans.
- Bake for about 30-35 minutes, or until a toothpick comes out clean.
- Cool in the pans for about 10 minutes, then transfer to wire racks.
- Beat the 1 stick of softened butter and 1/2 cup of peanut butter until smooth for the frosting.
- Add the powdered sugar and the 1/2 tsp vanilla extract, mixing until creamy.
- Frost the top of one layer with frosting, place the second layer on top, and frost the top and sides of the cake.
Notes
For variations, try adding cocoa powder, nuts, or jam between the layers for a delightful twist.
- Prep Time: 20 minutes
- Cook Time: 35 minutes
- Category: Dessert
- Method: Baking
- Cuisine: American
Nutrition
- Serving Size: 1 slice
- Calories: 400
- Sugar: 30g
- Sodium: 200mg
- Fat: 20g
- Saturated Fat: 8g
- Unsaturated Fat: 11g
- Trans Fat: 0g
- Carbohydrates: 50g
- Fiber: 1g
- Protein: 6g
- Cholesterol: 30mg
Keywords: peanut butter cake, dessert, baking, comfort food, nostalgic recipe
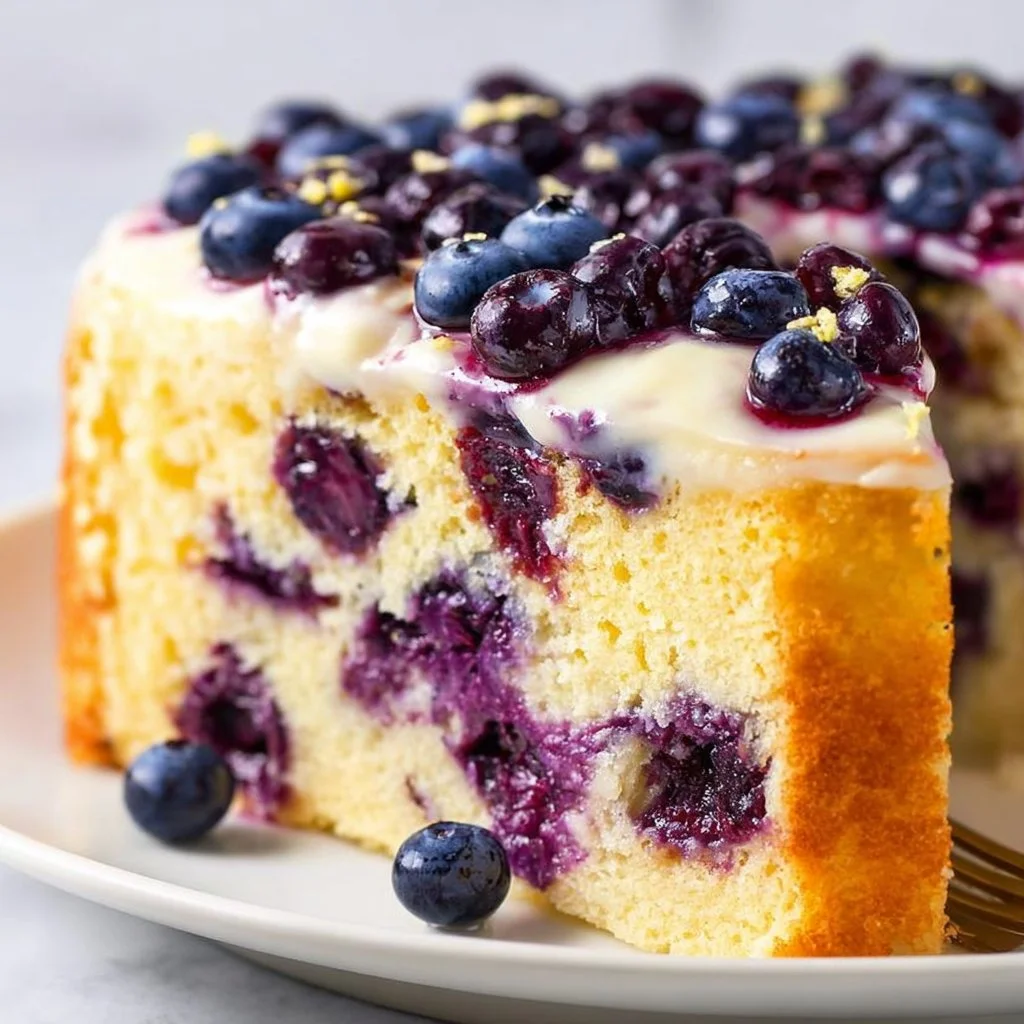
Healthy Lemon Blueberry Cake
The Bright and Zesty Healthy Lemon Blueberry Cake Recipe That Will Make Your Taste Buds Dance!
Hey there, fellow food enthusiasts! I’m Beau Collier, and today we’re diving into a recipe that embodies sunshine on a plate: Healthy Lemon Blueberry Cake. Imagine a cake that’s not just delicious but also crafted to be a little kinder on your waistline. You read that right! This cake brings together the vibrant zing of fresh lemons and the sweetness of blueberries, creating a dessert that feels indulgent while being mindful of your health.
This delightful cake is perfect for any occasion—whether you’re celebrating a birthday, hosting a brunch, or simply treating yourself to a slice of happiness on a Wednesday afternoon. Trust me; each bite is like a mini celebration, bursting with flavor and joy. The best part? It’s so easy to whip up that you won’t have to spend an entire afternoon in the kitchen. So, grab your apron, and let’s create some sweet memories together!
But let’s not just jump into the recipe without some kitchen storytelling. Every dish holds a memory, and this cake is no different. Let me take you back to a sunny day when I stumbled upon the perfect blend of lemon and blueberry: a flavor combo that would forever change how I look at dessert!
Personal Story
I remember the first time I baked a lemon blueberry dessert. It was a warm Saturday afternoon during my summer break in college. My best friend, Alex, and I were on a mission to challenge our culinary skills. We decided to create something fresh and fruity for our outdoor picnic.
After rummaging through the fridge, we found an abundance of lemons and a basket laden with blueberries. An idea sparked! We wanted to create a cake that sang with summer flavors, and what unfolded was pure magic. We laughed, spilled flour all over the counters, and savored the scent of freshly squeezed lemon juice wafting through our tiny apartment. It felt like the world slowed down for a moment as we indulged in the sweet and tangy batter.
We shared that delicious creation with friends, and I’ll never forget the joy we all felt as we relished each bite. That experience not only bonded us in the kitchen but also taught me the beautiful lesson that cooking is all about sharing and love. Now, years later, I’m excited to pass this vibrant lemon blueberry cake recipe onto you, so you can create your own memorable moments!
Ingredients
Let’s gather our ingredients for the Healthy Lemon Blueberry Cake! Here’s what you’ll need:
-
1 ½ cups almond flour
- Why almond flour? It’s gluten-free, low in carbs, and adds a lovely nutty flavor. If you don’t have almond flour, you can use oat flour or all-purpose flour, but the texture and taste may vary!
-
1 cup blueberries (fresh or frozen)
- Tip: Either works great! Fresh blueberries are bursting with flavor, while frozen ones are super convenient. If using frozen, no need to thaw. Just pop them straight into the batter!
-
½ cup maple syrup
- Sweetness made natural! Maple syrup gives a rich flavor, but you can swap it out for honey or agave syrup if that’s what you have on hand.
-
¼ cup coconut oil, melted
- For a moist cake! Coconut oil adds a subtle flavor and healthy fats. If you’re looking for a different option, melted butter or any neutral oil will work just fine.
-
¼ cup lemon juice
- Freshly squeezed is best! It gives your cake that vibrant tang. If you’re in a pinch, bottled lemon juice can work, but it might lack some of the freshness.
-
1 tablespoon lemon zest
- Don’t skip this! The zest provides a concentrated burst of lemon flavor. Use a Microplane to finely zest your lemons without getting too much pith.
-
1 teaspoon baking powder
- A must for rising! Make sure it’s fresh for proper leavening.
-
½ teaspoon baking soda
- A little extra lift. This will help the cake achieve a fluffy texture.
-
¼ teaspoon salt
- Don’t forget the salt! Just a pinch keeps the flavors balanced and enhances the sweetness.
-
½ teaspoon vanilla extract
- Add warmth and depth. You can use almond extract for a unique twist!
Step-by-Step Instructions
Alright, let’s roll up those sleeves and get cooking! Follow these detailed steps, and you’ll soon have a beautiful cake to wow your friends and family.
Step 1: Preheat Your Oven
Start by preheating your oven to 350°F (175°C). This is an essential step, as a properly preheated oven ensures even baking. Trust me; you don’t want to put your batter in a cold oven and mess with your cake’s rise!
Step 2: Prepare Your Baking Pan
Grab an 8-inch round cake pan and grease it with cooking spray or coconut oil. You can also line the bottom with parchment paper for easy removal, especially if you’re feeling fancy!
Step 3: Mix the Dry Ingredients
In a large mixing bowl, combine your almond flour, baking powder, baking soda, and salt. Whisk them together until they are well combined. This step helps distribute the leavening agents evenly throughout the flour for a consistent rise!
Step 4: Mix the Wet Ingredients
In another bowl, whisk together the maple syrup, melted coconut oil, lemon juice, lemon zest, and vanilla extract. Take a moment to inhale the bright aromas; they’re simply divine!
Step 5: Combine Wet and Dry
Now, pour the wet mixture into the bowl of dry ingredients. Gently fold the ingredients together using a spatula. Be careful not to overmix; we want a light, tender crumb in our cake, not a dense brick!
Step 6: Fold in the Blueberries
Once your batter is combined, it’s time to add the star of the show—blueberries! Gently fold them in, preserving their shape and juiciness. The last thing you want is a purple cake, so handle them with care!
Step 7: Pour and Spread
Transfer the batter into the prepared cake pan. Use a spatula to smooth it out evenly, making sure it reaches the edges. A flat surface helps it bake evenly.
Step 8: Bake Away!
Pop your cake into the preheated oven and let it bake for 25-30 minutes until it’s golden brown and a toothpick inserted into the center comes out clean. The kitchen will start to smell unreal—just wait for it!
Step 9: Cool and Serve
Once baked, remove the cake from the oven and let it cool in the pan for about 10 minutes. Then, turn it out onto a wire rack to cool completely. This step is crucial; you don’t want a gooey center when you’re ready to slice!
Serving Suggestions
Now that your cake has cooled, it’s time to serve it up! I love to dust this healthy lemon blueberry cake with a sprinkle of powdered sugar, which adds a touch of elegance.
For an extra kick of flavor, why not serve a dollop of Greek yogurt or whipped coconut cream on the side? Both options add creaminess and contrast beautifully with the cake’s bright flavors. You could even add a few fresh blueberries on top for a pop of color—plus, who can resist that gorgeous berry goodness?
Consider pairing your cake with a refreshing herbal tea or a tall glass of iced lemonade. It’s the perfect way to elevate your dessert experience!
Recipe Variations
Feeling adventurous? Here are some fun and creative twists on this classic lemon blueberry cake:
-
Lemon Poppy Seed Cake: Add 2 tablespoons of poppy seeds to the batter for a delightful crunch and extra aesthetic appeal.
-
Coconut-Lemon Cake: Mix ½ cup of unsweetened shredded coconut into the batter for a tropical feel.
-
Lavender Lemon Cake: Incorporate 1 teaspoon of culinary lavender into your wet ingredients for a sophisticated floral note.
-
Berry Medley Cake: Replace the blueberries with a mix of raspberries, blackberries, and strawberries for a berry blast!
-
Lemon Almond Cake: Add a tablespoon or two of almond extract for an extra layer of flavor that complements the almond flour beautifully.
Chef’s Notes
I’ve been making versions of this cake for years now, and I’ve learned a thing or two along the way. For example, the freshness of your lemons can make a world of difference! Look for bright yellow lemons that feel heavy for their size; they’ll yield the juiciest juice.
Also, I can’t stress enough how important it is to let the cake cool fully before slicing it—patience pays off here! And if you’re ever feeling adventurous, try swirling some lemon curd through the batter before baking for an extra tart surprise.
FAQs and Troubleshooting
1. Why is my cake dense?
This usually happens if the batter is overmixed. Be gentle and fold until just combined!
2. Can I substitute the almond flour?
Absolutely! You can use oat flour, but keep in mind that almond flour has a higher fat content, affecting the moisture and texture.
3. How should I store the cake?
Store your cake in an airtight container at room temperature for 2-3 days. You can also refrigerate it for up to a week, but be sure to bring it back to room temperature before serving for the best texture.
4. Can I freeze the cake?
Yes! Wrap individual slices in plastic wrap and store them in an airtight container in the freezer for up to 2 months. Just defrost at room temperature when you’re ready to enjoy a slice!
Nutritional Info
Now, let’s talk about how this cake fits into a healthy lifestyle! Thanks to its wholesome ingredients, this Healthy Lemon Blueberry Cake packs in some significant nutritional benefits. Here’s a quick breakdown of its health highlights:
-
Almond Flour: High in protein, healthy fats, and vitamin E—making it more nutritious than traditional flour.
-
Blueberries: Loaded with antioxidants, vitamins, and fiber, blueberries help boost heart health and support digestion.
-
Maple Syrup: Naturally sweet, maple syrup is a fantastic alternative to refined sugars, adding minerals and nutrients to your sweet fix.
-
Coconut Oil: Provides healthy medium-chain triglycerides (MCTs), which can provide energy and support brain health.
This cake is not just a treat for your taste buds; it’s a treat for your body too!
Final Thoughts
There you have it, my fabulous foodies! A healthy lemon blueberry cake that’s bursting with flavor and vitality. Whether you’re baking it for a special occasion or just because it’s a Tuesday, you’re creating not just a dessert but also memories filled with joy and love.
Remember, cooking is all about experimentation, and I encourage you to put your own spin on this recipe. Maybe it’ll become a favorite in your kitchen, too! So next time you need a sweet pick-me-up or a go-to dessert for gatherings, you know what to make.
As always, I’d love to hear how your cake turns out or any fun variations you come up with. Happy baking, and until next time, keep spreading love through food!
Let’s keep the feast going at Feastical—where every meal tells a story, and every recipe is a celebration! 🍋💙
Print
Healthy Lemon Blueberry Cake
- Total Time: 45 minutes
- Yield: 8 servings 1x
- Diet: Vegetarian
Description
A delightful and healthy cake that combines the vibrant zing of fresh lemons with the sweetness of blueberries, perfect for any occasion.
Ingredients
- 1 ½ cups almond flour
- 1 cup blueberries (fresh or frozen)
- ½ cup maple syrup
- ¼ cup coconut oil, melted
- ¼ cup lemon juice
- 1 tablespoon lemon zest
- 1 teaspoon baking powder
- ½ teaspoon baking soda
- ¼ teaspoon salt
- ½ teaspoon vanilla extract
Instructions
- Preheat your oven to 350°F (175°C).
- Prepare an 8-inch round cake pan by greasing it or lining with parchment paper.
- Mix the dry ingredients: almond flour, baking powder, baking soda, and salt in a large mixing bowl.
- Whisk together the wet ingredients: maple syrup, melted coconut oil, lemon juice, lemon zest, and vanilla extract in another bowl.
- Combine the wet mixture with the dry ingredients and gently fold together.
- Fold in the blueberries carefully to preserve their shape.
- Transfer the batter into the prepared cake pan and smooth it out evenly.
- Bake for 25-30 minutes or until golden brown and a toothpick comes out clean.
- Cool in the pan for 10 minutes and then turn it out onto a wire rack to cool completely.
Notes
Dust with powdered sugar or serve with Greek yogurt or whipped coconut cream for added flavor.
- Prep Time: 15 minutes
- Cook Time: 30 minutes
- Category: Dessert
- Method: Baking
- Cuisine: American
Nutrition
- Serving Size: 1 slice
- Calories: 250
- Sugar: 8g
- Sodium: 180mg
- Fat: 13g
- Saturated Fat: 5g
- Unsaturated Fat: 6g
- Trans Fat: 0g
- Carbohydrates: 30g
- Fiber: 3g
- Protein: 7g
- Cholesterol: 0mg
Keywords: lemon cake, blueberry cake, healthy dessert, gluten-free cake, spring dessert