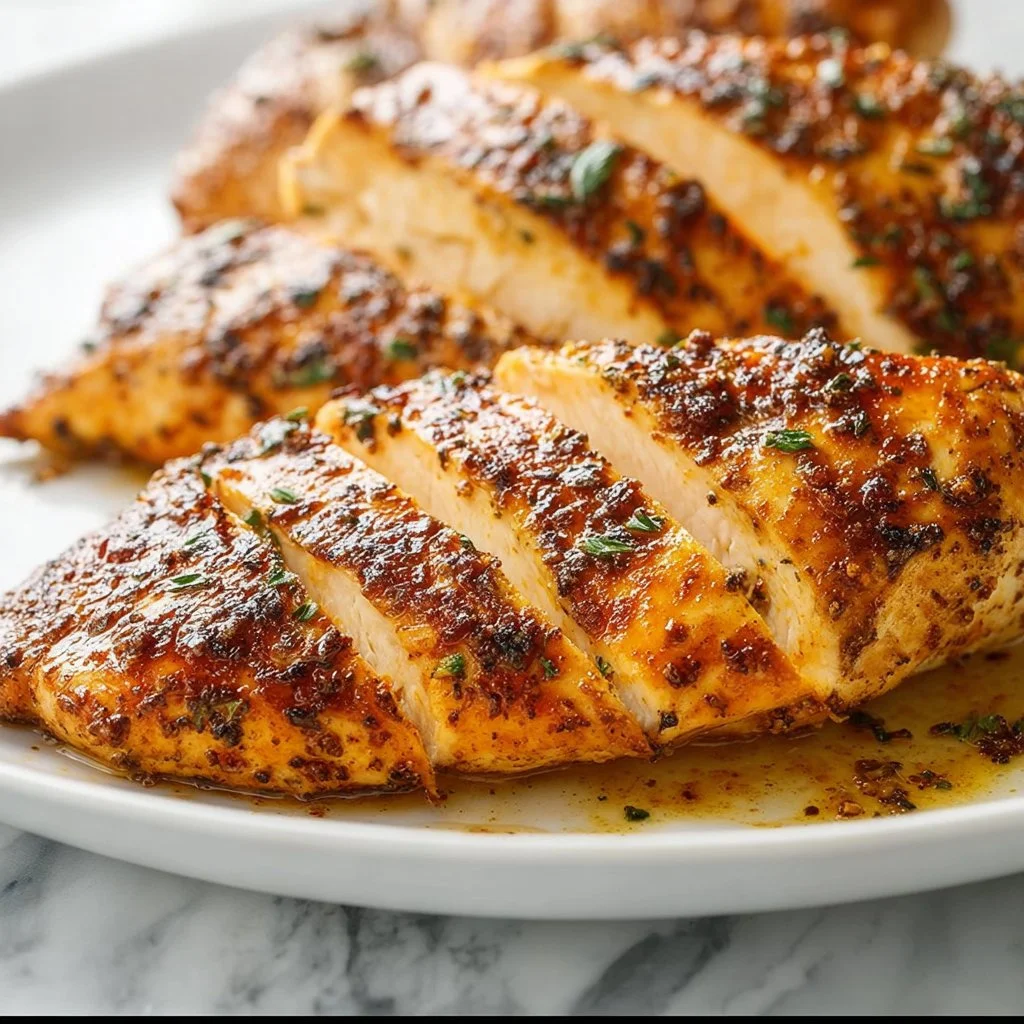
Juicy 30-Minute Baked Chicken Breast
Juicy 30-Minute Baked Chicken Breast: Your New Weekend Go-To!
Hey there, food lovers! I’m Beau Collier, and I’m so glad you’ve stopped by today. If you’re looking for a quick and simple way to whip up a juicy, delicious chicken breast in just 30 minutes, you’ve landed in the right place. Now, I know what you might be thinking: “Can chicken really be juicy and flavorful in such little time?” The answer is a resounding yes!
Today, we’re diving into the delightful world of juicy baked chicken breasts. Honestly, this is one of those recipes that both impresses and satisfies—the kind that can star in a busy weeknight dinner but also shine at special occasions. Imagine pulling a succulent piece of chicken out of the oven, its surface beautifully golden and aromatic, with the savory spices mingling in the air. That’s what I call a feast for the senses!
Personal Story: A Chicken Love Affair
When I think of baked chicken, I can’t help but be transported back to my childhood kitchen, where the air was always filled with the warm, inviting aroma of my mom’s cooking. Every Sunday, she’d roast a whole chicken for the family. It was a labor of love, one that took hours and left us salivating in anticipation as we crammed around the table, sharing stories and laughter.
As I stood on a stool to get a closer look, I admired how she seasoned that bird with a symphony of spices, effortlessly humming along to the kitchen tunes. Fast-forward to today, and I’ve made those memories my own by simplifying her traditional methods. Although I cannot replicate her mastery, I now bring you my 30-minute baked chicken breast—a quick yet scrumptious approach that’ll give you fond memories of your own in no time!
Ingredients
Let’s gather our superstar lineup for this dish, shall we? Here’s what you need to create your juicy baked chicken:
-
4 medium-sized chicken breasts (about 2 pounds total, or two large breasts cut in half horizontally)
- Choose fresh, high-quality chicken for maximum flavor. You can also use bone-in breasts for juicier meat, but you’ll need to adjust the cooking time.
-
1 teaspoon garlic powder
- A pantry staple! For a fresh twist, you could use minced garlic instead.
-
1 teaspoon onion powder
- Perfect for added depth. If you’re feeling adventurous, try using finely chopped fresh onions and sauté them before applying them to the chicken.
-
1 teaspoon paprika
- Paprika adds a subtle smokiness. For a more intense flavor, use smoked paprika.
-
1 teaspoon dried parsley
- A pinch of brightness! You can swap it out for fresh parsley if that’s what you have on hand—just remember to double the amount.
-
1/2 teaspoon dried mustard
- This adds a fantastic zing. If you don’t have it, a teaspoon of Dijon mustard will work in a pinch!
-
1/2 teaspoon chili powder (optional)
- For those who like a little heat! You can use cayenne for a spicier kick.
-
1 1/2 teaspoons kosher salt (or to taste)
- Kosher salt has larger grains, which help to season better. Sea salt works too, but be cautious as it can be saltier.
-
1/4 teaspoon black pepper
- Freshly cracked is best! Don’t be shy—crank it up a notch if you love that peppery taste.
-
2 tablespoons olive oil or avocado oil
- Choose oils with high smoke points for the best results. Olive oil will give a lovely flavor, while avocado oil is neutral and allows the spices to shine.
Step-by-Step Instructions
Alright, it’s time to roll up those sleeves and get cooking! Here’s how you’ll bring this juicy masterpiece to life:
-
Preheat Your Oven:
Preheat your oven to 425°F (220°C). Hot ovens make crispy skin—nobody wants a soggy chicken! -
Prepare Your Chicken:
While that oven heats up, grab your chicken breasts and pat them dry with paper towels. This helps with browning. If you’re using large breasts, slice them in half horizontally for quicker cooking time. -
Seasoning Time:
In a small bowl, mix together the garlic powder, onion powder, paprika, dried parsley, mustard powder, chili powder (if using), salt, and black pepper. Add the olive oil to the spice mix and stir until it forms a thick paste. -
Coat the Chicken:
Rub your spice mixture all over the chicken breasts. Make sure it’s evenly coated—you want every bite to be bursting with flavor! Don’t be shy; you can even gently lift the skin (if it’s skin-on) and apply some of that goodness right underneath. -
Arrange for Cooking:
Place the seasoned chicken in a single layer on a baking sheet lined with parchment paper or foil for easy cleanup. Give them a little space—this will help them cook evenly. -
Bake:
Pop the baking sheet in the oven and bake for 20-25 minutes. Chicken is done when it reaches an internal temperature of 165°F (75°C). If you’re using thin breasts, keep an eye on them—judgment is key! -
Rest Before Serving:
Once your chicken is out of the oven, let it rest for about 5 minutes. This helps the juices redistribute. Trust me; you don’t want to cut into it too soon!
Serving Suggestions
As you transition from oven time to mealtime, the way you plate your dish can elevate the experience! Slice the chicken into thick pieces and arrange them on a vibrant plate. Consider serving it alongside a colorful salad or fluffy garlic mashed potatoes. Perhaps a drizzle of citrusy vinaigrette or a few sprigs of fresh herbs could finish it off beautifully. This dish pairs wonderfully with roasted veggies or creamy coleslaw for that perfect comfort-food mashup!
Recipe Variations
Now for the fun part—mixing things up! Here are a few creative twists to keep this recipe fresh and exciting every time:
-
Herb-Infused: Swap out the dried parsley for your favorite herbs, like thyme, rosemary, or Italian seasoning for a fragrant twist.
-
Citrus Zing: Add a tablespoon of lemon or lime juice to your spice mixture for a bright, zesty contrast.
-
Asian-inspired: Replace the garlic and onion powder with ginger and sesame oil for a delightful Asian flair. Serve it with rice and steamed bok choy!
-
Barbecue Flavor: Brush the chicken with your favorite barbecue sauce in the last few minutes of baking for a sweet and smoky finish.
-
Cheesy Delight: Top your chicken with mozzarella or cheddar cheese in the last 5 minutes of baking and let it melt—hello, cheesy chicken heaven!
Chef’s Notes
As I’ve developed this recipe over the years, I’ve learned that chicken doesn’t have to be boring. It can evolve! My family loves when I switch things up with different spices or marinades. One time, I even experimented with a beer marinade, and I couldn’t believe how juicy the chicken turned out. It’s amazing how a simple recipe can bring together flavors that remind us of home, holidays, and gatherings with friends. So, don’t be afraid to inject your personality into this dish!
FAQs and Troubleshooting
1. Why is my chicken dry?
Overcooking is usually the culprit. Invest in a meat thermometer—chicken is perfect at 165°F (75°C).
2. Can I make this recipe in advance?
Absolutely! Marinate your chicken overnight for deeper flavor. Just be sure to store it in the fridge.
3. What should I serve with baked chicken?
This chicken pairs wonderfully with starches like rice, couscous, or potatoes, as well as steamed or sautéed vegetables. Get creative!
4. What if I only have frozen chicken?
You can use frozen chicken, but you’ll need to thaw it first! Ideally, place it in the fridge overnight. If time is short, submerge it in cold water for an hour or so.
Nutritional Info
Now, I know these days, we tend to pay more attention to nutritional facts. A serving of this juicy baked chicken breast (about 6 ounces) approximately contains:
- Calories: 330
- Protein: 52g
- Fat: 14g (depending on your choice of oil)
- Carbohydrates: 1g
- Sodium: 720mg (if using kosher salt; adjust according to your preference)
It’s a protein-rich choice that fits well in a balanced diet!
Final Thoughts
Thanks for hanging out with me in the kitchen today! I hope you’re feeling excited to give this juicy 30-minute baked chicken breast a try. Remember, cooking should always be an adventure—an opportunity to express yourself and create something wonderful for yourself and your loved ones. This recipe is your canvas. Add your flair, make it memorable, and enjoy every bite!
So grab your apron, put on your favorite tunes, and let’s make some chicken magic happen! If you give it a go, I’d love to see your creations—don’t forget to share with the Feastical family. Happy cooking, friends!
Print
Juicy 30-Minute Baked Chicken Breast
- Total Time: 35 minutes
- Yield: 4 servings 1x
- Diet: Paleo
Description
A quick and simple recipe for juicy, delicious chicken breasts baked to perfection in just 30 minutes.
Ingredients
- 4 medium-sized chicken breasts (about 2 pounds total)
- 1 teaspoon garlic powder
- 1 teaspoon onion powder
- 1 teaspoon paprika
- 1 teaspoon dried parsley
- 1/2 teaspoon dried mustard
- 1/2 teaspoon chili powder (optional)
- 1 1/2 teaspoons kosher salt (or to taste)
- 1/4 teaspoon black pepper
- 2 tablespoons olive oil or avocado oil
Instructions
- Preheat your oven to 425°F (220°C).
- Prepare your chicken breasts by patting them dry with paper towels.
- Mix together the garlic powder, onion powder, paprika, dried parsley, mustard powder, chili powder (if using), salt, and black pepper in a small bowl.
- Add the olive oil to the spice mix and stir until it forms a thick paste.
- Rub the spice mixture all over the chicken breasts, ensuring they are evenly coated.
- Place the seasoned chicken in a single layer on a baking sheet lined with parchment paper.
- Bake for 20-25 minutes until the chicken reaches an internal temperature of 165°F (75°C).
- Let the chicken rest for about 5 minutes before slicing.
Notes
This recipe is versatile. You can experiment with different spices or marinades for a unique flavor each time.
- Prep Time: 10 minutes
- Cook Time: 25 minutes
- Category: Main Course
- Method: Baking
- Cuisine: American
Nutrition
- Serving Size: 1 serving
- Calories: 350
- Sugar: 0g
- Sodium: 720mg
- Fat: 14g
- Saturated Fat: 2g
- Unsaturated Fat: 8g
- Trans Fat: 0g
- Carbohydrates: 1g
- Fiber: 0g
- Protein: 52g
- Cholesterol: 120mg
Keywords: baked chicken, quick dinner, healthy recipe, easy chicken recipes, weeknight meals
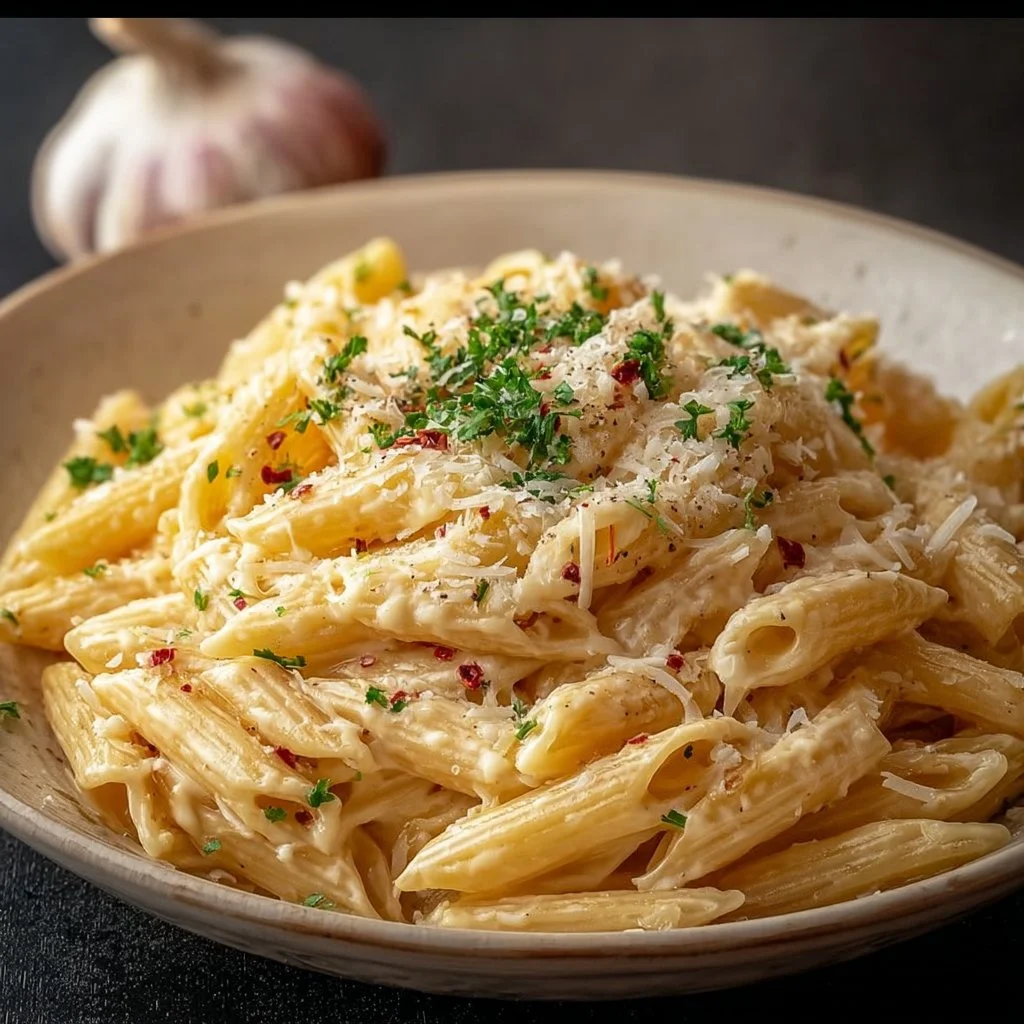
One Pot Creamy Garlic Pasta
One Pot Creamy Garlic Pasta: A Simple, Soulful Delight
Hey there, fellow food lovers! Welcome back to Feastical! Today, I’m thrilled to share one of my absolute favorite recipes that’s been a staple in my kitchen for years: One Pot Creamy Garlic Pasta. This dish isn’t just easy to make; it’s like wrapping yourself in a cozy blanket after a long day! There’s something incredibly satisfying about cooking a whole meal in one pot, and that’s exactly what we’re diving into today.
Pasta, oh glorious pasta! It has this magical ability to bring people together, whether it’s a quiet dinner for one or a lively gathering with family and friends. And when you add creamy garlic sauce to the mix? Well, it’s game over—pure comfort food bliss! Today, we’re keeping it simple and soulful, letting the simple ingredients speak for themselves while delivering a punch of flavor that’ll have you coming back for seconds.
Why is this dish such a crowd-pleaser? For starters, it takes minimal time and effort. I mean, who doesn’t love a recipe that allows you to spend less time in the kitchen and more time enjoying your meal? And with just one pot to clean, it’s a win-win situation. This pasta is perfect for busy weeknights, lazy weekends, or whenever you find yourself craving something creamy and delicious but don’t want to deal with a mess.
So grab your favorite spatula, and let’s make some delicious memories together in the kitchen! Trust me, your taste buds are in for a treat!
Personal Story
Let me take you back to a cozy winter night a few years ago—one that still brings a smile to my face whenever I think about it. I had recently moved into my own apartment, and let me tell you, I was excited to try my hand at cooking; it felt like I had finally stepped into my own kitchen sanctuary. One chilly evening, I invited a few friends over for a movie night. Of course, I wanted to impress them with a delicious meal.
With little kitchen experience and a pantry full of barely-used ingredients, I remembered a creamy garlic pasta dish that my mom used to whip up when I was a kid. So I rolled up my sleeves, grabbed what I had, and started experimenting. The aroma of garlic filled the air, making my apartment feel warm and inviting. My friends arrived to find a bubbling pot of pasta on the stove, and after just one bite, they were hooked! We ended up laughing, sharing stories, and devouring every last drop of that creamy goodness. It was one of those nights where everything just felt right—a perfect blend of good food and great company. Since then, this One Pot Creamy Garlic Pasta has held a special place in my heart and my recipe rotation. And I can’t wait for you to create your own memories with it!
Ingredients
Before we jump into the cooking, let’s gather our ingredients! Here’s what you’ll need for this delicious One Pot Creamy Garlic Pasta:
-
8 oz pasta: Choose any shape you like—spaghetti, penne, or even bowties are great options! The rule of thumb is to pick something that will hold onto the sauce well. For a whole grain option, consider whole wheat or chickpea pasta for added fiber and protein.
-
4 cloves garlic, minced: Garlic is the star of the show here! It adds depth and flavor. If you prefer a milder taste, roasting the garlic first will give it a sweet, caramelized flavor that’s to die for.
-
2 cups milk: I recommend whole milk or 2% for a creamier texture. If you’d like to go dairy-free, oat or coconut milk can work well too—just avoid sweetened varieties!
-
1 cup grated Parmesan cheese: This is where the creaminess gets real! Freshly grated cheese melts better and has a richer flavor than pre-packaged. If you’re feeling adventurous, swap in Pecorino Romano for a sharper kick.
-
Salt and pepper, to taste: Essential for bringing those flavors to life! Remember, seasoning is key—taste as you go!
-
Fresh parsley, chopped (for garnish): Not only does it add a pop of color to your dish, but the freshness of parsley balances the richness of the pasta beautifully. Feel free to swap it out for fresh basil or even a sprinkle of red pepper flakes for a kick!
Step-by-Step Instructions
Alright, my culinary companions, let’s get cooking! Here’s how to whip up this One Pot Creamy Garlic Pasta in no time:
-
Boil the Pasta: In a large pot or skillet, add enough water to cover the pasta (about 4-5 cups) and season it generously with salt. Bring it to a rolling boil. Once boiling, add the pasta. Cook according to the package directions until al dente, usually around 8-10 minutes. Chef’s Tip: Stir occasionally to prevent sticking and to ensure even cooking!
-
Sauté the Garlic: While the pasta is cooking, grab your minced garlic. Once the pasta is cooked, let’s make it even more delicious! Before draining, reserve about 1 cup of pasta water, then drain the pasta in a colander. In the same pot, add a splash of olive oil, and return to medium heat. Toss in the minced garlic, sautéing for about 30 seconds until fragrant. Watch closely, friends! Garlic can burn quickly, and burnt garlic is bitter!
-
Create the Creamy Sauce: Pour in the milk gradually, stirring it into the sautéed garlic. Add in the reserved pasta water gradually (a little at a time) and start to mix everything together. You’ll see it begin to combine and thicken up! Hint: This is a perfect time to taste and adjust your seasoning with salt and pepper.
-
Add the Cheese: Now, sprinkle in that glorious grated Parmesan cheese. Stir it in until the cheese is melted and the sauce has become creamy. This is where the magic happens! If you find the sauce too thick, you can add a splash more of milk or pasta water until it reaches your desired consistency.
-
Combine with Pasta: Toss the pasta back into the pot, mixing it with the creamy sauce until each strand is coated in that deliciousness. There you have it—one pot of creamy garlic bliss!
-
Garnish and Serve: Remove from the heat and sprinkle freshly chopped parsley on top for that burst of freshness! Now it’s time to serve! Chef’s Hack: Drizzle with a little extra virgin olive oil or a squeeze of lemon juice right before serving for an added flavor boost!
Serving Suggestions
When it comes to serving this One Pot Creamy Garlic Pasta, let your creativity flow! Here are a few fun ideas to get you started:
-
Plating: Use shallow bowls or pasta plates. Twirl your pasta in the center and create a little nest of glory. The creamy sauce will pool around it, making it look inviting!
-
Garnishes: Top with a sprinkle of extra Parmesan for that cheesy satisfaction (because you can never have too much cheese!) and a few extra parsley leaves for visual flair.
-
Pairings: This pasta pairs beautifully with a light green salad tossed in vinaigrette to balance out the richness. Add some crusty garlic bread on the side to soak up that creamy sauce—it’s a match made in heaven!
-
Wine: Enjoy a glass of white wine, like Pinot Grigio or Sauvignon Blanc, to complement the garlic flavors.
Recipe Variations
Feeling creative? Here are some delicious variations on the One Pot Creamy Garlic Pasta:
-
Veggie Delight: Toss in some sautéed spinach, cherry tomatoes, or zucchini for added color and nutrition. You can also add roasted veggies for a hint of smokiness.
-
Protein-Packed: Add grilled chicken, shrimp, or even crispy bacon for a heartier meal. Simply cook your protein of choice separately, and toss it in right before serving.
-
Herb Infusion: Experiment with different herbs! Besides parsley, you could use thyme, basil, or even a pinch of Italian seasoning for depth.
-
Spicy Kick: Enhance your dish by adding a pinch of red pepper flakes or a drizzle of sriracha for a bit of heat.
-
Mushroom Magic: Sauté sliced mushrooms along with your garlic for an earthy flavor that pairs beautifully with creamy pasta!
Chef’s Notes
This One Pot Creamy Garlic Pasta recipe has evolved over time as I’ve made it countless times and shared it with friends. It started as a simple dish, but every time I made it, I found ways to enhance the flavors or add different ingredients. I remember one time, on a chilly evening, I had some leftover roasted vegetables that I tossed in, and it turned out to be a crowd favorite! Whether you stick to the classic version or get creative with variations, remember that cooking should always be fun and a little adventurous.
And let’s be real—nothing makes you feel like a culinary rock star quite like whipping up a delicious meal with minimal effort!
FAQs and Troubleshooting
-
Can I use a different type of pasta?
Absolutely! This recipe works with any pasta shape you love. Just keep an eye on the cooking time, as it can vary depending on the pasta. -
What if my sauce is too thick?
If your sauce is too thick, simply stir in a little more milk or reserved pasta water, a tablespoon at a time, until it reaches your desired creaminess. -
How can I make this dish vegan?
To make this dish vegan, use whole-grain or gluten-free pasta, substitute the milk with a plant-based option like almond or oat milk, and swap the Parmesan for nutritional yeast or vegan cheese. -
Can I make this ahead of time?
You can definitely prep the components in advance! Just cook the pasta and sauce separately and combine them before serving. You may need to add a splash of milk to revitalize the sauce when reheating!
Nutritional Info
Let’s talk nutrition! This One Pot Creamy Garlic Pasta is not just satisfying; it’s also packed with some great nutrients. Here’s a quick breakdown (per serving, without added protein):
- Calories: Approximately 400
- Protein: 12g
- Fat: 15g
- Carbohydrates: 51g
- Fiber: 2g
- Sodium: Varies based on added salt
Keep in mind, adding grilled chicken, veggies, or adjustments to the cheese can change the nutritional content, so feel free to experiment based on your dietary needs!
Final Thoughts
And there you have it—my beloved One Pot Creamy Garlic Pasta recipe! I truly hope you give this a try because, trust me, it’s about to become your new go-to dish. Cooking doesn’t have to be complicated to be delicious, and this creamy garlic pasta perfectly encapsulates that philosophy. Remember, food is about sharing, fun, and love, so don’t be afraid to get your hands dirty in the kitchen!
Make it for yourself, your family, or friends; I promise it’ll bring smiles and warm bellies all around. I can’t wait to hear how yours turns out! Don’t forget to share your photos and stories with me, and happy cooking, my foodie friends! Let’s dig in! 🍝✨
Print
One Pot Creamy Garlic Pasta
- Total Time: 25 minutes
- Yield: 4 servings 1x
- Diet: Vegetarian
Description
A simple, soulful delight that combines pasta with a creamy garlic sauce, all cooked in one pot for easy clean-up.
Ingredients
- 8 oz pasta (spaghetti, penne, or bowties)
- 4 cloves garlic, minced
- 2 cups milk (whole or 2%)
- 1 cup grated Parmesan cheese
- Salt and pepper, to taste
- Fresh parsley, chopped (for garnish)
Instructions
- Boil the pasta in a large pot with enough salted water until al dente, about 8-10 minutes.
- Sauté the minced garlic in olive oil in the same pot for 30 seconds until fragrant.
- Create the creamy sauce by adding milk and reserved pasta water gradually.
- Add the grated Parmesan cheese and stir until melted and creamy.
- Combine the pasta back into the pot and mix well with the sauce.
- Garnish with freshly chopped parsley and serve hot.
Notes
For added flavor, drizzle with extra virgin olive oil or a squeeze of lemon juice before serving.
- Prep Time: 10 minutes
- Cook Time: 15 minutes
- Category: Main Course
- Method: Baking
- Cuisine: Italian
Nutrition
- Serving Size: 1 serving
- Calories: 400
- Sugar: 5g
- Sodium: 600mg
- Fat: 15g
- Saturated Fat: 8g
- Unsaturated Fat: 7g
- Trans Fat: 0g
- Carbohydrates: 51g
- Fiber: 2g
- Protein: 12g
- Cholesterol: 30mg
Keywords: creamy pasta, garlic pasta, one pot meals