
Korean Meatball Meal Prep
Korean Meatball Meal Prep: A Cozy Feast for the Busy Foodie
Hey there, foodies! 🌟 I’m Beau Collier, and I’m super excited to share a recipe that’s as vibrant and delicious as it is simple to whip up—Korean Meatball Meal Prep! If you’re anything like me, your weekdays can get a little hectic, but that doesn’t mean we have to sacrifice taste or comfort for convenience. That’s where this dish comes in!
Imagine this: juicy, flavor-packed meatballs that sneak a hint of sweetness and a kick of heat, all served up with fluffy rice and fresh broccoli. It’s a meal that not only makes your taste buds dance but also warms your heart and fills your home with delightful aromas. What’s more? Each bite of these meatballs is like a cozy hug, reminding you that good food brings people together—even if you’re just feeding your future self!
What I love about meal prepping is that you’re not just making one meal; you’re putting in a little bit of love into each container, creating a week’s worth of cozy comfort on the go. So grab your apron, make sure that kitchen playlist is bumped up, and let’s dive into this Korean Meatball adventure!
Personal Story
I remember the first time I tried a dish similar to these meatballs at a small Korean bistro in my hometown. I was a college student, utterly broke but rich in fast-food options. One chilly Friday night, my buddies and I decided to skip our usual burger joint, drawn instead by the intoxicating aroma wafting from that little bistro. As the steaming bowl of meatballs and rice was placed in front of me, my heart soared! They were perfectly seasoned, tender, and had that luscious umami flavor that just makes you want to cozy up and savor every last bite.
Fast forward to now, I’ve taken those incredible flavors and turned them into a meal-prep version that’s simple to prepare, so I can indulge in that same comforting feeling whenever the craving strikes. Plus, I love knowing that sharing recipes like these can bring you that same cozy joy, even amidst life’s chaos. So let’s channel those memories into something that’ll warm up your weekly meals!
Ingredients
Let’s gather our ingredients for this delectable meal prep! Here’s what you’ll need:
For the Meatballs
-
1 lb. Ground Pork: The star of our dish! Ground pork gives the meatballs a tender texture. If you prefer, you can substitute it with ground beef or turkey for a leaner option.
-
1 Large Egg: Acts as a binder to hold everything together. You can swap this with a flax egg (1 tbsp flaxseed meal + 2.5 tbsp water) for a vegan version!
-
1/2 Cup Cracker Crumbs or Bread Crumbs: Adds texture and helps absorb moisture. If you want to keep it gluten-free, use crushed gluten-free crackers or almond flour instead.
-
2 Tbsp. Gochujang Sauce: A sweet and spicy Korean chili paste that’s a flavor bomb! Use less for milder meatballs or try a different chili paste if you’re in a pinch.
-
1/2 tsp. Kosher Salt: Brings out the flavors in the meatballs. Don’t skimp on this one!
-
1/2 tsp. Garlic Powder: A must-have for that warm, aromatic flavor. Fresh minced garlic is even better if you have it on hand!
-
1/4 tsp. Ground Ginger: Adds a lovely zing. In case you don’t have ground ginger, fresh ginger works well too; just double the amount!
For the Side
-
1/2 lb. Fresh Broccoli Florets: The perfect veggie to balance the richness of the meatballs. You can also switch it up for green beans or snap peas if you prefer!
-
1 Tbsp. Olive Oil: For roasting the veggies. Feel free to use sesame oil for an extra layer of flavor!
-
1/2 tsp. Kosher Salt: To season the broccoli.
-
1/4 tsp. Black Pepper: A dash for added flavor.
For the Sauce
-
1 cup Uncooked Basmati Rice: Fluffy and fragrant, it’s the ideal complement to our meatballs. You can sub with brown rice or quinoa for a whole grain option.
-
2 cups Water: Just enough to cook that rice to perfection.
-
1/2 cup Gochujang Sauce: To create a spicy-sweet drizzling sauce that can double as a dipping sauce!
-
1/4 cup Soy Sauce: Introduces a savory depth. Use tamari for a gluten-free option!
-
2 tsp. Sesame Oil: Brings nuttiness to our sauce and rounds out the flavors.
-
1/2 tsp. Garlic Powder: Because garlic is the MVP, right?
-
1/4 tsp. Ground Ginger: Adds brightness to the sauce, enhancing the overall flavor profile.
-
1 1/2 Tbsp. Honey: Sweetness to balance out the spice!
Step-by-Step Instructions
Alright, my cooking friends, it’s time for the fun part—let’s cook it up! Follow these steps for the ultimate Korean meatball experience:
-
Preheat Your Oven: First things first, let’s get that oven preheated to 400°F (200°C). A hot oven means perfectly roasted veggies and meatballs.
-
Mix the Meatball Ingredients: In a large mixing bowl, combine the ground pork, egg, cracker crumbs, gochujang sauce, salt, garlic powder, and ginger. Use your hands (trust me, it’s way more fun!) to mix everything together until just combined. Don’t overmix; we want those meatballs to stay juicy!
-
Shape the Meatballs: Roll the mixture into golf ball-sized meatballs—about 1.5 inches in diameter. This step is fun and will leave you with about 20-24 meatballs. Place them evenly spaced on a baking sheet lined with parchment paper.
-
Prep the Broccoli: In a bowl, toss those fresh broccoli florets with olive oil, salt, and black pepper. Make sure they’re well-coated so they can roast up beautifully!
-
Bake the Meatballs and Broccoli: Once your oven is ready, place the meatballs and seasoned broccoli in there. Roast for about 20-25 minutes or until the meatballs are browned and cooked through. Don’t forget to give everything a little shake halfway through!
-
Cook the Rice: While everything is roasting, wash your basmati rice until the water runs clear. In a medium saucepan, add the rice and water, and bring it to a boil. Once boiling, reduce heat to low, cover, and let it simmer for 15-18 minutes until all the water is absorbed. After cooking, let it sit for 5 minutes before fluffing with a fork.
-
Whisk Up the Sauce: In a small bowl, whisk together the gochujang, soy sauce, sesame oil, garlic powder, ginger, and honey. You want it smooth and well combined—this sauce will add layers of flavor!
-
Assemble Your Meal Prep: Now it’s time to put everything together. In your meal prep containers, add a generous scoop of rice, a serving of those fabulous meatballs, and a hearty portion of roasted broccoli. Drizzle that luscious sauce over the top for added flavor.
Serving Suggestions
When it’s time to dig in, feel free to sprinkle some sesame seeds, chopped green onions, or even some crushed peanuts on top for added crunch and flavor. If you’re looking for something extra, a quick side of kimchi or pickled veggies can elevate this dish even further. Serve it hot, and I promise it’ll be a hit any day of the week!
Recipe Variations
Now, let’s get creative! Here are a few variations you can try to keep things exciting:
-
Meatballs with a Twist: Swap in beef, turkey, or even a plant-based ground meat alternative for a unique spin. Each option brings its own flavor and texture to the table!
-
Spicy Soy Glaze: For less heat, remove some gochujang and replace it with teriyaki sauce for a different flavor profile that’s still packed with umami.
-
Veggie-Packed Meatballs: Add grated zucchini or carrots into the meatball mixture for added nutrients and moisture.
-
Mediterranean Spin: Replace gochujang with harissa and serve with a tahini sauce instead of soy sauce for a Mediterranean flair.
-
Cauliflower Rice: If you’re watching carbs, try serving everything over cauliflower rice instead of basmati!
Chef’s Notes
This recipe has grown with me over the years. I remember experimenting with different spices and marinades until I struck gold with this combo! One fun story: the first time I made these for friends, I accidentally added way too much gochujang. Let’s just say they were definitely spicy! Lesson learned! Over time, I’ve perfected the balance of flavors, and now family and friends ask for them on repeat!
FAQs and Troubleshooting
1. Can I freeze these meatballs?
Absolutely! Both the meatballs and cooked rice freeze beautifully. Just store them in airtight containers. When you’re ready to enjoy, simply reheat in the oven or microwave!
2. What if my meatballs are dry?
If your meatballs turn out dry, it might be due to overcooking. Monitor their cooking time closely next time. Also, adding some moisture with extra sauce or a drizzle of olive oil during cooking can help!
3. Can I use frozen broccoli?
Yes! Just add the frozen broccoli to the baking sheet straight from the freezer. Keep in mind it may need a bit more cooking time to crisp up nicely.
4. How do I know when the meatballs are done?
Use a meat thermometer! Your meatballs are cooked through when they reach an internal temperature of 160°F (70°C). If you don’t have one, cut one open—the inside should be no longer pink!
Nutritional Info
Here’s a rough estimate of the nutritional content per serving (including meatballs, broccoli, and rice):
- Calories: 450–500
- Protein: 30g
- Carbohydrates: 50g
- Fat: 15g
- Fiber: 3g
These numbers can vary based on your specific ingredient choices, but you can easily adjust portions as necessary for your dietary needs!
Final Thoughts
And there you have it—delicious Korean Meatballs perfect for meal prepping and bringing joy to your busy week! This dish not only fills your belly but also feeds your soul. Each bite transports you to a world where comfort and flavor dance hand-in-hand, reminding you that delicious doesn’t have to be complex.
Next time life gets a bit too busy, just remember that with a little love, some quality ingredients, and a sprinkle of creativity, you can whip up meals that not only nourish but also bring a warm smile to your face. So, are you ready to take a culinary adventure? Let’s get cooking, my fellow food lover! 😊
Print
Korean Meatball Meal Prep
- Total Time: 45 minutes
- Yield: 4 servings 1x
- Diet: Paleo
Description
Juicy, flavor-packed Korean meatballs paired with fluffy rice and roasted broccoli—perfect for meal prep and busy weekdays!
Ingredients
- 1 lb. Ground Pork
- 1 Large Egg
- 1/2 Cup Cracker Crumbs or Bread Crumbs
- 2 Tbsp. Gochujang Sauce
- 1/2 tsp. Kosher Salt
- 1/2 tsp. Garlic Powder
- 1/4 tsp. Ground Ginger
- 1/2 lb. Fresh Broccoli Florets
- 1 Tbsp. Olive Oil
- 1/2 tsp. Kosher Salt
- 1/4 tsp. Black Pepper
- 1 cup Uncooked Basmati Rice
- 2 cups Water
- 1/2 cup Gochujang Sauce
- 1/4 cup Soy Sauce
- 2 tsp. Sesame Oil
- 1/2 tsp. Garlic Powder
- 1/4 tsp. Ground Ginger
- 1 1/2 Tbsp. Honey
Instructions
- Preheat your oven to 400°F (200°C).
- Mix the meatball ingredients in a large mixing bowl until just combined.
- Shape the mixture into golf ball-sized meatballs, about 1.5 inches in diameter.
- Prep the broccoli by tossing it with olive oil, salt, and black pepper.
- Bake the meatballs and broccoli for 20-25 minutes until browned and cooked through.
- Cook the basmati rice by boiling with water, then reducing to low and simmering until absorbed.
- Whisk together the sauce ingredients until smooth.
- Assemble your meal prep containers with rice, meatballs, roasted broccoli, and drizzle the sauce over the top.
Notes
You can freeze both the meatballs and cooked rice for convenient meals later.
- Prep Time: 15 minutes
- Cook Time: 30 minutes
- Category: Main Course
- Method: Baking
- Cuisine: Korean
Nutrition
- Serving Size: 1 serving
- Calories: 450
- Sugar: 10g
- Sodium: 600mg
- Fat: 15g
- Saturated Fat: 3g
- Unsaturated Fat: 8g
- Trans Fat: 0g
- Carbohydrates: 50g
- Fiber: 3g
- Protein: 30g
- Cholesterol: 70mg
Keywords: Korean Meatballs, Meal Prep, Easy Dinner, Comfort Food, Healthy Recipe
Tenderized Chicken Breast
Tenderized Chicken Breast: A Delicious Journey to Comfort Food Bliss
Hey there, fellow food enthusiasts! I’m Beau Collier, and today, we’re diving into the world of tenderized chicken breast—a dish that embodies the essence of comfort food. There’s something magical about a perfectly tender chicken breast; it’s like a warm hug on a plate that brings back fond memories and creates new ones. Whether you’re hosting a cozy dinner party or looking for a quick weeknight dinner idea, this recipe is your go-to.
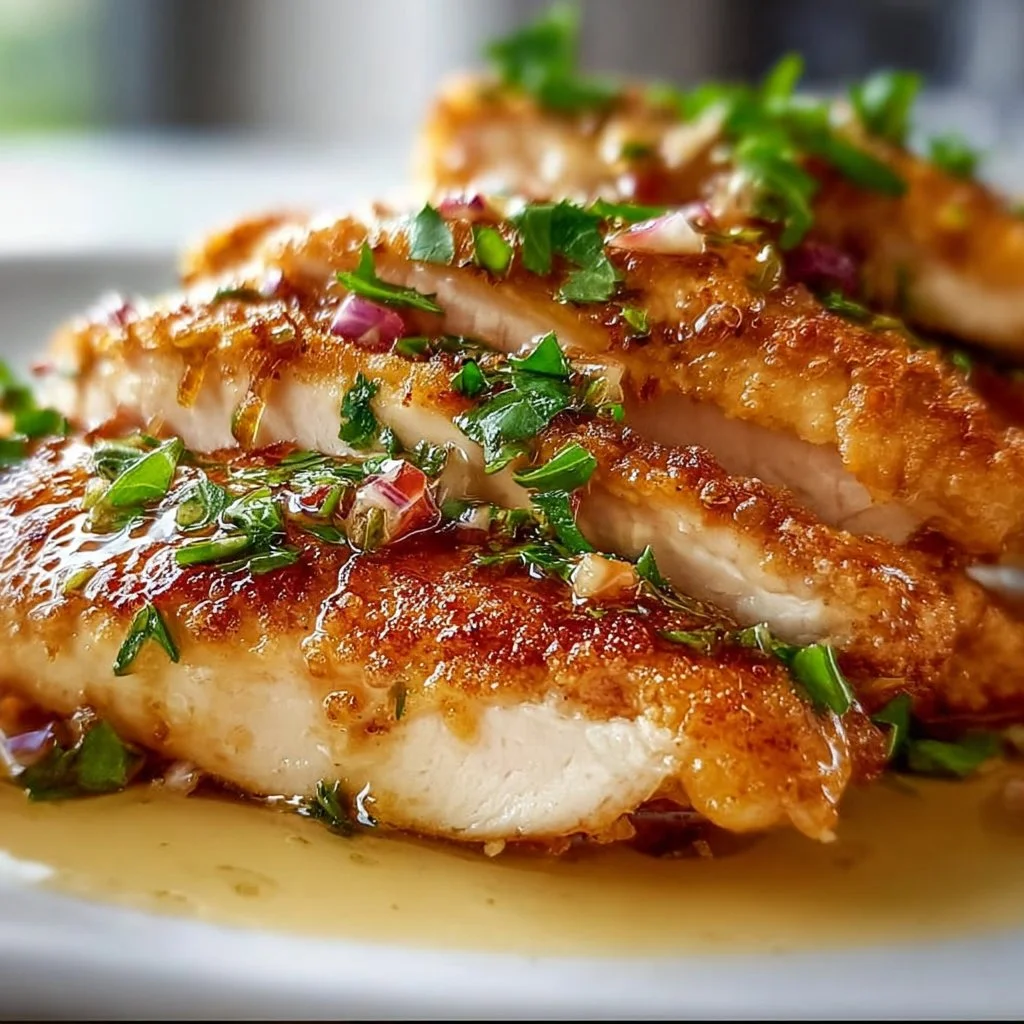
Imagine biting into a beautifully cooked chicken breast, golden on the outside, juicy on the inside, bursting with flavors that dance on your taste buds. That’s the beauty of tenderized chicken! It’s versatile, easy to prepare, and can be the star of any meal. Plus, with just a few simple ingredients, you can elevate this classic dish to new heights.
Cooking, for me, has always been about connection – not only with our ingredients but also with the people we share our meals with. In my house, the kitchen is a gathering spot filled with laughter, storytelling, and of course, delicious aromas that waft through the air. So, roll up your sleeves and let’s get tenderizing because we’re about to turn a simple chicken breast into something truly spectacular!
Personal Story
Let me take you back to a chilly autumn evening when I was just a budding chef, eager to impress my friends with my culinary skills. I had invited them over for dinner, and I was determined to serve them something memorable. I recall pacing around my tiny kitchen, feeling the gentle hum of the oven preheating while listening to my favorite tunes.
For the main event, I chose tenderized chicken breasts – thanks to my grandmother’s not-so-secret technique of using a meat mallet to flatten the chicken for juiciness. It was a family recipe passed down through the generations, and I was excited to keep the tradition alive.
As I pounded the chicken, my friends arrived, each bringing their own contributions to the meal: a decadent dessert, a bottle of wine, and, of course, their contagious laughter. For them, it was just another dinner, but for me, it was a chance to create something special—to share a piece of my family’s culinary history.
The chicken turned out perfectly! Crispy on the outside, tender on the inside, and it filled our dining table with delightful aromas. We dug in, chatting and reminiscing about old times, while I stood back with a smile, knowing I had created not only a meal but a moment we would cherish forever. And that’s why tenderized chicken breast holds a special place in my heart—it’s about love, family, and the power of good food to bring us all together.
Ingredients
To create this dish, we’ll need a handful of ingredients. Here’s what you’ll need to gather:
-
4 boneless skinless chicken breasts: This is your canvas! Feel free to go for organic or free-range for a flavor boost. Not a chicken fan? Try turkey cutlets or tofu for a plant-based option.
-
2 tablespoons olive oil: A healthy fat that adds richness and promotes browning. If you’re looking for a different flavor, avocado oil or melted coconut oil are great alternatives.
-
1 teaspoon garlic powder: For a robust flavor without the mess of fresh garlic. If you prefer fresh, swap it with 2-3 cloves minced garlic.
-
1 teaspoon onion powder: It adds a subtle sweetness and depth. You can use shallot powder if you want a more delicate flavor.
-
1 teaspoon paprika: This brings both color and a bit of smokiness. Sweet, smoked, or even hot paprika can be used, depending on your preference.
-
Salt and pepper to taste: Essential for enhancing all the flavors in this dish. Always taste as you go!
-
Fresh herbs (like thyme or parsley) for garnish: A pop of color and freshness to elevate your dish. Basil or cilantro are great substitutes if you’re feeling adventurous!
Step-by-Step Instructions
Ready to unleash your inner chef? Let’s break down the steps to perfecting tenderized chicken breast!
Step 1: Preparation
Start by preheating your oven to 400°F (200°C). This ensures your chicken gets that crispiness we’re aiming for. While that’s heating up, let’s flatten those chicken breasts!
Step 2: Tenderizing the Chicken
Place each chicken breast between two sheets of parchment paper or plastic wrap. Using a meat mallet or rolling pin, pound the chicken to an even thickness of about ½ inch. This ensures uniform cooking and helps keep the chicken juicy.
Chef Hack: If you don’t have a mallet, a heavy skillet or even a can of veggies works just fine. Just be gentle; you want to tenderize, not obliterate!
Step 3: Seasoning
Once tenderized, pat your chicken dry with paper towels. This helps achieve a beautiful crust later. Drizzle the olive oil over each breast and rub it in to coat evenly. Then sprinkle the garlic powder, onion powder, paprika, salt, and pepper over both sides of the chicken. Make sure to evenly distribute the seasoning so every bite is flavorful!
Step 4: Cooking the Chicken
Heat a large, oven-proof skillet over medium-high heat. Add a little more olive oil—just enough to coat the bottom of the pan. Once the oil is shimmering but not smoking, carefully place the chicken breasts in the skillet. Sear them for about 4-5 minutes on one side until golden brown.
Chef Tip: Don’t overcrowd the pan! If you have too many pieces, you might steam instead of sear, so do it in batches if necessary.
Step 5: Baking
Once the chicken is beautifully browned, carefully flip each breast over. Transfer the skillet to your preheated oven and bake for an additional 15-20 minutes, until the chicken is cooked through and the internal temperature reaches 165°F (75°C).
Pro Tip: For added juiciness, let the chicken rest for 5-10 minutes after taking it out of the oven. This allows the juices to redistribute.
Step 6: Garnishing and Plating
When it’s time to serve, sprinkle your fresh herbs over the chicken for a bright finish. Now, you’re ready to plate up!
Serving Suggestion: Pair your tenderized chicken breasts with a side of roasted vegetables or a fresh salad. The colors on your plate will be a feast for the eyes, and the flavors will leave everyone wanting more!
Recipe Variations
Why stick to the classic when the world of flavors is at your fingertips? Here are a few creative twists to make this dish your own:
-
Herb-Infused Chicken: Marinate the chicken in a mix of olive oil, lemon juice, and fresh herbs (like rosemary or dill) for a zesty punch before cooking.
-
Spicy Southwest Chicken: Add some cumin and chili powder to the seasoning, and serve it with a corn salsa. You’ll have a fiesta on your plate!
-
Italian Style: Top the finished chicken with marinara sauce and mozzarella cheese before baking. You can create a chicken parmesan that’s sure to impress!
-
Sticky Honey Garlic Chicken: Create a glaze of honey, soy sauce, and minced garlic to brush over the chicken during the last few minutes of cooking for a sweet and savory mix.
-
Mediterranean Flavor: Mix in some olives, sun-dried tomatoes, and feta cheese. This twist will transport you to a sunny Mediterranean locale!
Chef’s Notes
As I reflect on my cooking journey, I realize how this tenderized chicken breast recipe has evolved over the years. Initially, I made it with just basic seasonings, but as my palate expanded, so did my creativity in the kitchen! I love experimenting with different flavor profiles and inviting friends to taste-test my efforts.
It’s remarkable how a simple dish can tell a story—one that’s filled with memories of laughter, shared plates, and the joy of cooking together. And remember, if something goes wrong, embrace it! Sometimes those “oops” moments lead to the best kitchen discoveries.
FAQs and Troubleshooting
Why is my chicken dry?
Overcooking is usually the culprit! Make sure to use a meat thermometer to check for doneness, and remember to let it rest post-cooking to keep it juicy.
Can I use bone-in chicken breasts?
Absolutely! Just adjust the cooking time, as bone-in chicken takes longer to cook through. Make sure the internal temperature is 165°F (75°C) before serving.
What if I don’t have an oven-proof skillet?
No problem! You can start in a regular skillet and transfer the chicken to a baking dish. Just ensure it’s well-seasoned before going into the oven!
Can I make this recipe ahead of time?
Definitely! You can prepare chicken breasts in advance and store them in the fridge. Reheat gently in the oven or a skillet to avoid drying them out.
Nutritional Info
Now, let’s chat nutrition! One serving of our tenderized chicken breast (approximately 4 ounces) will provide you with:
- Calories: About 200
- Protein: 30g
- Fat: 8g
- Carbohydrates: 0g
- Fiber: 0g
This dish is packed with protein, making it a great choice for a healthy meal. Pair it with vegetables to round out your plate, and you’re all set for a delicious dinner!
Final Thoughts
And there you have it! Tenderized chicken breast is a simple dish that can adapt to any occasion or flavor preference. The heart of this recipe lies not only in its ease of preparation but in the sense of community and togetherness it fosters. I hope this recipe encourages you to invite friends and family into your kitchen—whether around the stove, the table, or even over a glass of wine!
So grab your ingredients, gather your loved ones, and celebrate the beauty of shared meals. Remember, cooking is all about joy, experimentation, and love. Until next time, keep cooking up wonderful memories and remember that a good meal is always just a recipe away. Happy cooking, my friends, and let’s dig in!
Print
Tenderized Chicken Breast
- Total Time: 35 minutes
- Yield: 4 servings 1x
- Diet: Paleo
Description
A delicious and comforting recipe for tenderized chicken breast, perfect for any occasion.
Ingredients
- 4 boneless skinless chicken breasts
- 2 tablespoons olive oil
- 1 teaspoon garlic powder
- 1 teaspoon onion powder
- 1 teaspoon paprika
- Salt and pepper to taste
- Fresh herbs (like thyme or parsley) for garnish
Instructions
- Preheat your oven to 400°F (200°C).
- Place each chicken breast between two sheets of parchment paper or plastic wrap. Using a meat mallet or rolling pin, pound the chicken to an even thickness of about ½ inch.
- Pat your chicken dry with paper towels, drizzle olive oil over each breast, and rub it in to coat evenly. Sprinkle with garlic powder, onion powder, paprika, salt, and pepper.
- Heat a large, oven-proof skillet over medium-high heat. Add a little more olive oil. Once shimmering, carefully place the chicken in the skillet. Sear for about 4-5 minutes until golden brown.
- Flip the chicken over and transfer the skillet to your preheated oven. Bake for 15-20 minutes until cooked through (internal temperature should reach 165°F/75°C).
- Let the chicken rest for 5-10 minutes before garnishing with fresh herbs and serving.
Notes
Pair with roasted vegetables or a fresh salad for a complete meal.
- Prep Time: 10 minutes
- Cook Time: 25 minutes
- Category: Main Course
- Method: Searing and Baking
- Cuisine: American
Nutrition
- Serving Size: 1 serving
- Calories: 200
- Sugar: 0g
- Sodium: 300mg
- Fat: 8g
- Saturated Fat: 1g
- Unsaturated Fat: 7g
- Trans Fat: 0g
- Carbohydrates: 0g
- Fiber: 0g
- Protein: 30g
- Cholesterol: 70mg
Keywords: chicken breast, comfort food, easy dinner, weeknight meal