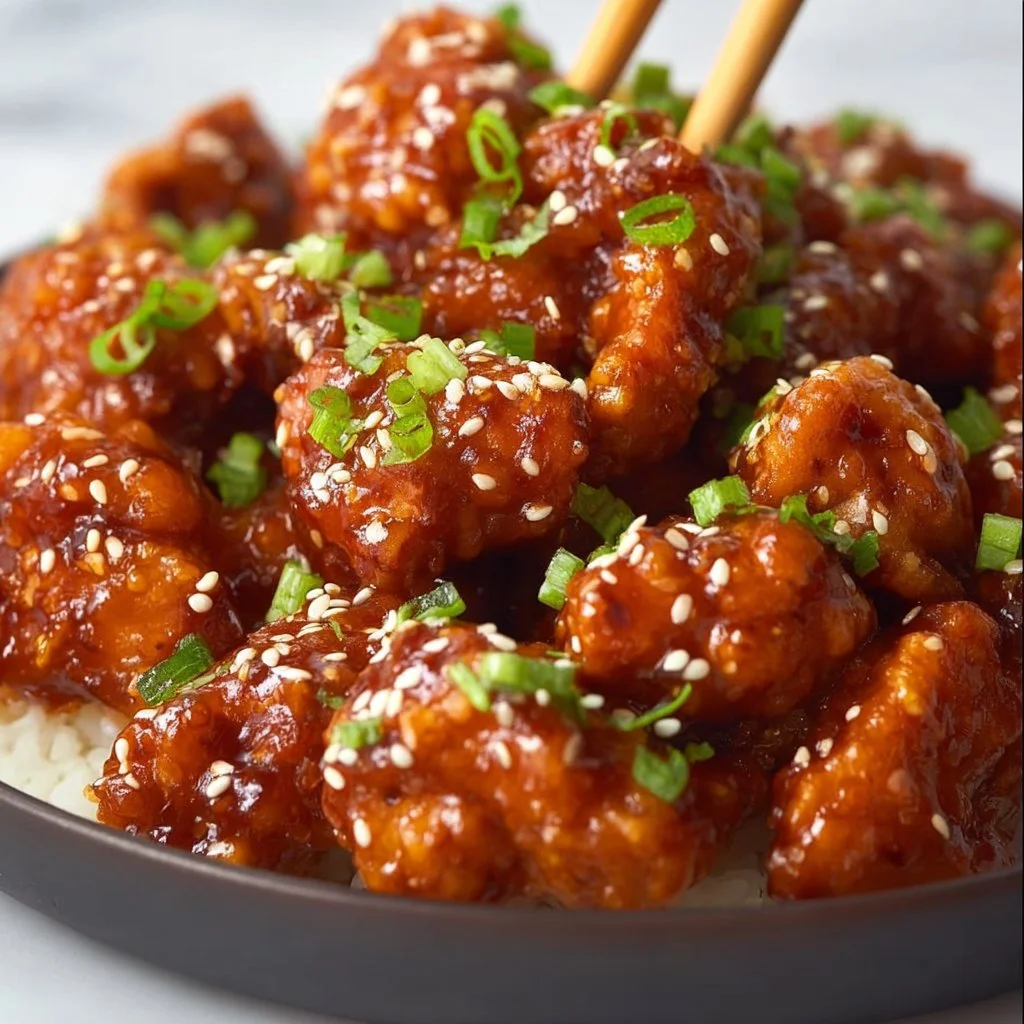
Easy Sesame Chicken
Easy Sesame Chicken: A Feel-Good Favorite!
Hey there, fellow food lovers! It’s Beau Collier, and I’m excited to have you here for a mouthwatering adventure in the kitchen. Today, we’re diving into a true gem of comfort food: Easy Sesame Chicken. This dish brings together tender chicken, a sweet and savory sauce, and a delightful crunch that’s perfect for a cozy weeknight dinner or a fun gathering with friends. So, if you’re craving something that feels like a warm hug on a plate, you’ve come to the right place!
Introduction: Welcome to Your New Favorite Dish
Picture this: you’ve just come home after a long day, and the last thing you want to do is spend hours in the kitchen. What if I told you that you can whip up a delicious, satisfying meal in less than an hour? Enter Easy Sesame Chicken! Not only is this dish incredibly simple to make, but it also packs a flavor punch that will make your taste buds dance with joy.
What I love about this recipe is how it brings together the nostalgic flavors of takeout with the comfort of homemade cooking. Remember those cozy nights when you’d order Chinese takeout, ready to dig in and enjoy every bite? Well, I’m here to tell you that you can recreate that magic right in your own kitchen, and it’s easier than you think!
In this blog post, I’m going to walk you through every step of making Easy Sesame Chicken, from the ingredients you need to some fun personal stories along the way. This is more than just a recipe—it’s about creating memories, laughter, and a meal you’ll want to make over and over again. So, roll up your sleeves, grab your apron, and let’s get cooking!
Personal Story: A Walk Down Memory Lane
When I think of Sesame Chicken, I’m immediately transported back to my childhood. I remember rushing home from school, excited to smell the delicious aromas coming from the kitchen. My mom had a knack for making incredible dishes, but there was something special about her Sesame Chicken that always stood out. It was sweet, slightly tangy, and had that perfect crunch.
One particularly rainy afternoon, my friends and I decided to have an impromptu hangout at my place. My mom, being the rockstar she is, decided to surprise us with her famous dish. As we sat around the table, devouring the succulent pieces of chicken and battling over the last crispy bites, I realized how much food brings people together. It was a simple evening filled with laughter and the kind of memories that warm your heart. That’s why I want to share this Easy Sesame Chicken recipe with all of you; it’s a reminder of the joy that good food can create.
Ingredients: What You Need
Alright, let’s get to the heart of the matter! Here’s what you’ll need to create this delicious Easy Sesame Chicken. I’ve included some chef insights and tips for substitutions along the way to help you customize this dish to your liking!
-
2 pounds boneless, skinless chicken thighs
Trimmed and cut into 1-inch pieces. Chicken thighs are perfect for this dish because they remain juicy and tender, but if you prefer chicken breasts, feel free to use them instead. -
¼ cup water
This will help in tenderizing the chicken and blend with the sauce. You can use chicken broth for extra flavor! -
½ teaspoon kosher salt
(If using fine salt, use a little less. It can be very powerful in smaller quantities, so season carefully!) -
½ teaspoon baking soda
This little trick will help make your chicken wonderfully crispy! It’s a chef hack that works wonders. -
2 large eggs
These are perfect for creating a light batter that will stick to the chicken and help it fry beautifully. -
½ cup cornstarch
This makes everything extra crispy! If you’re out of cornstarch, use an equal amount of flour or arrowroot powder. -
1 tablespoon oil
(Any neutral oil works great—think canola or vegetable oil. This is just to help with frying.) -
Toasted sesame seeds (for garnish)
These add that lovely nutty flavor and a beautiful presentation. You can also use crushed peanuts for a twist! -
½ cup ketchup
Surprising, right? This gives the sauce a nice balance of sweetness and tang. If you want a healthier option, you can use a low-sugar ketchup. -
½ cup water
This will help create the sauce along with the other ingredients. Again, chicken broth can be a great option here! -
½ cup granulated sugar
For that signature sweetness! If you’re looking for a lower-sugar option, consider using honey or a sugar substitute. -
2 tablespoons white vinegar
This helps balance the flavors. You can swap it out for apple cider vinegar if that’s what you have on hand. -
1 tablespoon cornstarch
This will thicken the sauce to your desired consistency. Again, flour can be used here. -
1 tablespoon soy sauce (light sodium)
This adds depth to the dish without being too salty. If you need a gluten-free alternative, use tamari! -
½ teaspoon dark soy sauce (optional)
(If you want a richer color and a touch of extra flavor, this is your go-to.) -
1 stalk green onion
(Cut into thin slices, keeping the greens and whites separate. They add a lovely crunch!) -
Oil (as needed for cooking and frying)
Use enough oil in the pan to keep the chicken from sticking. Typically, about ¼ inch deep will do it.
Step-by-Step Instructions: Let’s Get Cooking!
Now that we’ve gathered our ingredients, it’s time to roll up our sleeves and get to work! Here’s a detailed guide with tips, tricks, and chef hacks that will take your Easy Sesame Chicken to the next level.
1. Prepare the Chicken
Start by trimming the chicken thighs and cutting them into bite-sized pieces. You want them to be about 1 inch, so they cook evenly and are easy to eat.
Tip: Always cut against the grain for more tender bites!
In a medium bowl, combine the chicken with ¼ cup water, ½ teaspoon kosher salt, and ½ teaspoon baking soda. Mix well to ensure every piece is coated evenly. This mixture will help tenderize the chicken; let it sit for about 15 minutes.
2. Create the Batter
While the chicken is marinating, in another bowl, whisk together the 2 large eggs and ½ cup cornstarch until smooth. This mixture will coat the chicken and create that lovely crispy exterior once fried.
Chef Hack: If you’re feeling fancy, you can add a splash of sesame oil to the egg mixture for extra flavor!
3. Fry the Chicken
Heat a large skillet or wok over medium-high heat. Add enough oil to cover the bottom—aim for about ¼ inch. Once the oil is hot (you can test it by dropping in a small amount of batter; it should sizzle), it’s time to start frying the chicken!
Working in batches, dip the marinated chicken pieces into the cornstarch batter, making sure they are well coated. Carefully place them in the hot oil, ensuring they aren’t overcrowded. Fry for about 4-5 minutes on each side or until they are golden brown and crispy. Remove them from the oil and set them aside on a paper towel-lined plate to drain excess oil.
Tip: Keep the fried chicken warm in a low oven (around 200°F) while you fry the rest!
4. Make the Sauce
In a saucepan over medium heat, combine the ½ cup ketchup, ½ cup water, ½ cup granulated sugar, and 2 tablespoons white vinegar. Stir everything together until it’s well mixed, and bring it to a simmer.
Chef Insight: Cooking the sauce a little longer will deepen the flavors!
Add 1 tablespoon cornstarch mixed with 1 tablespoon water to the sauce as it simmers. Stir continuously until the sauce thickens to your desired consistency. For those who love a bit of color, drizzle in ½ teaspoon of dark soy sauce.
5. Combine and Toss
Once your sauce is bubbling and beautifully thickened, add the fried chicken pieces straight into the pan. Toss everything together until each piece is generously coated in that sweet and savory goodness.
Finally, sprinkle the sliced green onion tops over the chicken and give it one last gentle toss.
Pro Tip: For an extra presentation touch, sprinkle a handful of toasted sesame seeds over the top before serving!
Serving Suggestions: Plating Time!
Presentation is key, folks! To plate your Easy Sesame Chicken beautifully, consider serving it over a bed of fluffy jasmine rice or alongside steamed broccoli for a colorful and nutritious meal. You can also wrap it in fresh lettuce leaves for a fun twist!
Drizzle a bit more sauce over the top, and don’t forget to garnish with those gorgeous toasted sesame seeds and green onions. The vibrant colors and textures will make this dish look as good as it tastes!
Recipe Variations: Let’s Get Creative!
-
Spicy Sesame Chicken:
Add a tablespoon of chili paste or Sriracha to your sauce for a little kick. Adjust the heat to your taste! -
Orange Sesame Chicken:
Swap the ketchup for fresh orange juice and add a tablespoon of zest for a refreshing citrus twist! -
Baked Sesame Chicken:
For a healthier version, bake the batter-coated chicken in the oven at 400°F for about 25-30 minutes, flipping halfway through for even crispiness. -
Vegetarian Option:
Substitute the chicken with firm tofu, marinating and frying it the same way. Delicious and plant-based! -
Frozen Veggie Addition:
Toss in some frozen mixed vegetables during the sauce step. It’s an easy way to add nutrients and color to your dish!
Chef’s Notes: A Recipe’s Journey
As with most recipes, this Easy Sesame Chicken has evolved over time. Initially, it started as a takeout favorite, but with some experimenting in my own kitchen, I found ways to make it lighter and even tastier!
One of my funniest kitchen mishaps was when I accidentally added way too much sugar one evening and ended up with a dessert-like sauce! We laughed so hard about it that now, we call it "dessert chicken." That’s the beauty of cooking: it’s all about trial, error, and having a good time in the kitchen.
FAQs and Troubleshooting
1. Why is my chicken not crispy?
Ensure your oil is hot enough when frying. If it’s too cool, the chicken will absorb more oil instead of frying crispy.
2. Can I use skin-on chicken thighs?
Absolutely, just be sure to render the fat properly and adjust your frying time accordingly.
3. How do I store leftovers?
Place any leftovers in an airtight container in the fridge for up to 3 days. To reheat, do so in the oven for the best crispiness!
4. Can I make this dish gluten-free?
Yes! Simply opt for gluten-free soy sauce and ensure your cornstarch is labeled gluten-free as well.
Nutritional Info: A Little Insight
If you’re counting calories or just curious about the nutrition breakdown, here’s a general idea of what you’re getting in one serving of Easy Sesame Chicken:
- Calories: Approximately 320
- Protein: 25g
- Carbohydrates: 40g
- Fat: 10g
- Fiber: 1g
Note: These values can vary based on your specific ingredients and portion sizes. It’s always a good idea to calculate based on your recipe modifications and serving amounts.
Final Thoughts: Time to Savor!
There you have it, my friends: a comprehensive guide to creating Easy Sesame Chicken that’s sure to impress! I hope you’ve enjoyed this journey, full of nostalgia and fun. Cooking is all about love, creativity, and sharing experiences with those you cherish.
So, the next time you’re looking for a quick dinner idea or a dish that brings everyone together, remember this recipe. It’s easy, delicious, and warmens the heart just like a good hug!
I can’t wait to hear all about your versions of Easy Sesame Chicken. Don’t forget to share your creations and tag me! Keep cooking, keep smiling, and most importantly—keep feasting! 🍽️💖
Happy cooking!
Beau Collier

Easy Sesame Chicken
- Total Time: 45 minutes
- Yield: 4 servings 1x
- Diet: Gluten-Free
Description
A heartwarming and delicious take on a classic comfort food, Easy Sesame Chicken features tender chicken coated in a sweet and savory sauce with a delightful crunch.
Ingredients
- 2 pounds boneless, skinless chicken thighs, trimmed and cut into 1-inch pieces
- ¼ cup water
- ½ teaspoon kosher salt
- ½ teaspoon baking soda
- 2 large eggs
- ½ cup cornstarch
- 1 tablespoon oil (neutral oil like canola or vegetable)
- Toasted sesame seeds (for garnish)
- ½ cup ketchup
- ½ cup water
- ½ cup granulated sugar
- 2 tablespoons white vinegar
- 1 tablespoon cornstarch
- 1 tablespoon soy sauce (light sodium)
- ½ teaspoon dark soy sauce (optional)
- 1 stalk green onion, cut into thin slices
- Oil (as needed for cooking and frying)
Instructions
- Prepare the chicken by trimming it and cutting it into bite-sized pieces. Combine with water, salt, and baking soda, then let sit for 15 minutes.
- Create the batter by whisking eggs and cornstarch together until smooth.
- Fry the chicken in hot oil, working in batches, for about 4-5 minutes on each side until golden brown. Drain excess oil on a paper towel.
- Make the sauce by combining ketchup, water, sugar, and vinegar in a saucepan and bringing it to a simmer. Thicken with cornstarch mixed with water if desired.
- Combine the fried chicken with the sauce and toss until well-coated. Garnish with green onion and sesame seeds before serving.
Notes
Serve over jasmine rice or steamed broccoli for a complete meal. Consider adding chili paste for a spicy version or using tofu for a vegetarian option.
- Prep Time: 15 minutes
- Cook Time: 30 minutes
- Category: Main Course
- Method: Frying
- Cuisine: Chinese
Nutrition
- Serving Size: 1 serving
- Calories: 320
- Sugar: 22g
- Sodium: 500mg
- Fat: 10g
- Saturated Fat: 1g
- Unsaturated Fat: 8g
- Trans Fat: 0g
- Carbohydrates: 40g
- Fiber: 1g
- Protein: 25g
- Cholesterol: 200mg
Keywords: Easy Sesame Chicken, comfort food, quick dinner, Asian cuisine

Homemade Butter Chicken
# Homemade Butter Chicken: A Taste of Comfort in Every Bite

Hey there, food lovers! I’m Beau Collier, and I’m here to take you on a delicious journey through one of the most heartwarming dishes you could ever whip up in your kitchen: **Butter Chicken**. If you’re like me, you know that food is not just about nourishment—it's about creating memories, sharing moments, and, of course, lots of flavor!

You'll often find me reminiscing about cozy evenings spent with family. Picture this: it’s a cool autumn evening, and the smell of spices wafts through the air. My mom was in the kitchen, bustling around with her apron wrapped snugly around her waist, and the clattering of pots and pans creating a melody of its own. Butter chicken was a staple at our family dinners, and it was more than just a meal; it was a tradition that brought us all together around the table.

The magic of butter chicken lies in its creamy, spiced sauce, which perfectly coats tender, juicy pieces of chicken. Served with warm naan or a fluffy scoop of rice, it’s the epitome of comfort food—what I like to call a warm hug on a plate. Whether you’re hosting friends or just cozying up after a long day, this recipe promises to bring joy to your heart and belly. So, let’s dive into this vibrant world of flavors and learn how to create an unforgettable butter chicken right in your own kitchen!

## A Little Nostalgic Story

Every cooking adventure starts with a story, right? For me, this one goes back to my childhood. I vividly remember one winter night when the snowflakes were dancing down, and the world turned into a winter wonderland. My family decided to break away from our usual routine. Rather than the pot roast we often had, my mom decided that butter chicken was on the menu—a far from ordinary choice, and oh boy, did it send our taste buds soaring!

That evening, I watched in awe as she combined fragrant spices and creamy goodness, the way the chicken transformed in the pot felt almost magical. The laughter and chatter at the dinner table that night were intertwined with every delicious bite, and believe me, the butter chicken didn't last long! It became a staple for not only our family meals but also gatherings with friends, turning strangers into friends over shared bowls of comfort.

Fast forward to today, and I’m thrilled to share this beloved recipe with you! It’s time to dig into the culinary treasure that is butter chicken and make your own cozy memories in the kitchen.

## Ingredients

Before we start cooking, let’s gather our ingredients! Here’s what you’ll need for this delectable butter chicken:

- **1 lb Chicken Breast (cubed)**
  The star of the show! Chicken breasts are perfect for this dish because they cook quickly and stay tender. If you prefer a richer flavor, feel free to substitute with boneless chicken thighs—just remember to adjust the cooking time.

- **1 cup Plain Yogurt**
  This helps tenderize the chicken and adds a lovely tanginess. If you’re dairy-free, you can use a non-dairy yogurt or even coconut yogurt for a subtle sweetness.

- **1 Onion (finely chopped)**
  The aromatic base of our sauce. Yellow onions work great, but if you prefer a milder flavor, opt for a sweet onion or shallots instead.

- **2 cloves Garlic (minced)**
  An essential element that adds depth to our dish. If you’re out of fresh garlic, garlic powder works in a pinch—just reduce the quantity to ½ teaspoon.

- **1 inch Ginger (grated)**
  Fresh ginger brings a zing that beautifully complements the other spices. Dried ginger can work, but the fresh stuff has this vibrant kick that’s hard to substitute.

- **2 tbsp Butter**
  Creamy, dreamy, and so delicious. You can substitute with ghee (a clarified butter) for a more authentic flavor, or use olive oil for a lighter option.

- **1 can Coconut Milk or Heavy Cream**
  For that luxurious, velvety sauce. Use full-fat coconut milk for a dairy-free alternative, or stick with heavy cream for the creamiest texture.

- **2 tbsp Tomato Paste**
  This adds a rich tomato flavor that balances all the spices. You can replace it with crushed tomatoes or even tomato sauce if that’s what you have on hand.

- **2 tsp Garam Masala**
  The warm spice blend that elevates this dish. It’s pretty flexible, so if you don’t have garam masala, a mix of cumin, coriander, and cinnamon could work well.

- **1 tsp Cumin**
  Earthy and aromatic, cumin adds depth. A quick swap with coriander can also work if you're looking to change things up.

- **1 tsp Paprika**
  This gives a lovely color and slight sweetness. For a spicier kick, you can use smoked paprika or cayenne pepper for some heat.

- **Salt and Pepper to taste**
  Essential for flavoring! Remember to season as you go for a well-balanced dish.

- **Fresh Cilantro (for garnish)**
  This adds a pop of freshness—don’t skip it! If you’re not a fan, parsley can work too, but the flavor won’t be quite the same.

- **Naan (for serving)**
  Pairs perfectly with butter chicken, perfect for scooping up that luscious sauce! You can also try rice, quinoa, or even cauliflower rice for a lighter option.

## Step-by-Step Instructions

Now that you’ve gathered everything, let’s get cooking! Follow these steps to create a butter chicken that’ll impress everyone at your dinner table.

1. **Marinate the Chicken**:
   In a bowl, combine the cubed chicken with plain yogurt. This is where the magic begins! The yogurt not only tenderizes the chicken but infuses it with flavor. Cover and refrigerate for at least 30 minutes, or up to overnight for an even deeper flavor. If you're in a hurry, even a quick 10-minute marination will do.

2. **Sauté the Aromatics**:
   In a large skillet or pot, melt the butter over medium heat. Once melted, toss in the chopped onion. Sauté until it becomes translucent, about 5 minutes—this is where your kitchen will start to smell heavenly! Adding a pinch of salt will help the onions release their moisture and cook evenly.

3. **Add Garlic and Ginger**:
   Stir in the minced garlic and grated ginger, cooking for another 1-2 minutes until fragrant. Don’t walk away during this step; garlic can go from golden to burnt in no time!

4. **Spice It Up**:
   Now it’s time to introduce our spices! Sprinkle in the garam masala, cumin, and paprika. Give it a good stir to toast the spices—this action blooms their flavors and will take your dish to another level. Cook for about 30 seconds until you can smell those incredible aromas.

5. **Incorporate Tomato Paste**:
   Add the tomato paste, stirring until it’s evenly combined. This is where the magic happens! Let it cook for another minute. The combination of all these ingredients begins to form the base of a luscious sauce.

6. **Add the Chicken and Coconut Milk**:
   Toss in the marinated chicken, stirring well to coat it with all those delicious spices. Then, pour in the coconut milk or heavy cream, stirring to create a rich, creamy sauce. Bring it to a gentle simmer and cover the pot. Let it cook for about 15-20 minutes, or until the chicken is cooked through and tender. If you prefer a thicker sauce, you can let it simmer uncovered for the last few minutes.

7. **Season and Garnish**:
   Taste and adjust with salt and pepper, remembering that seasoning can be a game-changer. Finally, chop up some fresh cilantro, sprinkle it on top, and let the flavors meld for a minute longer off the heat.

8. **Serve**:
   Dish up the butter chicken alongside warm naan and fluffy rice. You could drizzle some extra coconut milk on top if you're feeling indulgent. Enjoy every spoonful!

## Serving Suggestions

Now that you’ve whipped up this gorgeous butter chicken, let’s talk plating! Here’s how to serve it:

- **Plate the Sauce**: Use a large, shallow bowl to pour your creamy butter chicken sauce in the center, letting the sauce pool around the chicken. This presentation gives it a restaurant-like flair.

- **Garnish Generously**: Sprinkle fresh cilantro on top, perhaps with a wedge of lime on the side for an extra zing! It adds a lovely burst of color and brightness.

- **Naan or Rice**: Serve warm naan on the side, maybe cut into triangles to make for easy dipping. If you prefer rice, place a generous mound next to the chicken.

- **Coconut Flakes**: For a fun twist, sprinkle toasted coconut flakes over the dish for an added crunch and sweetness—an unexpected but delightful touch!

Feast on this visually stunning dish that feels like a warm embrace with every bite!

## Recipe Variations

Looking to mix things up a bit? Here are some creative twists you can apply to your butter chicken:

1. **Vegetarian Option**: Replace the chicken with cubed paneer or chickpeas for a delicious vegetarian version. You could also use cauliflower for an extra veggie-packed meal!

2. **Spicy Butter Chicken**: If you’re a fan of heat, toss in some chopped green chilies or add a teaspoon of cayenne pepper to bring the fire!

3. **Honey Butter Chicken**: Drizzling a little honey into the sauce just before serving can add a sweet undertone that beautifully contrasts with the spices. You could also try maple syrup if you’re feeling adventurous!

4. **Lemon Chicken Butter**: A squeeze of fresh lemon or lime juice just before serving adds a zesty brightness to the dish and balances out the richness nicely.

5. **Herb-Infused Butter**: Swap the plain butter with herb-infused butter or melted ghee for an aromatic twist. Adding fresh herbs like mint or dill to the garnish can elevate the experience.

## Chef’s Notes

This butter chicken recipe has been a work in progress for me over the years. It has evolved from a simple dish my mom made to a colorful, flavorful extravaganza. I’ve experimented with different spices, and each time, the result is a bit different but always delicious. Cooking is like painting—a few splashes of this and a dash of that can create your own masterpiece.

Also, don’t be afraid to make it your own; cooking should be fun and enjoyable! I remember once attempting to recreate the recipe without my staple spices. Let’s just say that evening was all about ordering takeout instead. Lessons learned, right?

## FAQs and Troubleshooting

Here are some common questions you might have while making this butter chicken:

1. **My sauce is too thin. What did I do wrong?**
   If your sauce turned out too runny, you can simmer it uncovered for a bit longer to reduce and thicken it. Alternatively, mix a teaspoon of cornstarch with a tablespoon of water and stir it into the sauce while it’s simmering.

2. **Can I freeze leftover butter chicken?**
   Yes! Let it cool completely before sealing it in an airtight container. It can last in the freezer for up to three months. Reheat on the stovetop or in the microwave until warmed through.

3. **I didn’t marinate the chicken long enough. Will this ruin the dish?**
   Not at all! While marinating contributes to tenderness and flavor, a shorter marinade will still provide a tasty result. Just be sure not to overcook the chicken, and it will turn out fine!

4. **What do I do if the spices taste too strong?**
   If you’ve accidentally added too much spice, try balancing it with more coconut milk or cream. Adding a touch of sweetness, like a small amount of sugar or honey, can also help round out the flavors.

## Nutritional Info

Let's take a moment to appreciate the nutrition packed in this butter chicken:

- **Calories**: Approximately 390 per serving, depending on the amount of coconut milk and butter used.
- **Protein**: High in protein from chicken and yogurt, offering about 30g of protein per serving, perfect for a post-workout meal.
- **Fats**: The richness primarily comes from the butter and coconut milk, contributing healthy fats to the dish.
- **Carbohydrates**: Minimal carbs from the chicken and yogurt, but pair it with rice or naan to increase your carb intake.
- **Vitamins & Minerals**: Packed with vitamins from the fresh ingredients, especially garlic, ginger, and onions, which are great for overall health benefits.

Keep in mind that this is a comfort food—balance is key! Enjoy it in moderation as part of a well-rounded diet.

## Final Thoughts

Butter chicken is more than just a dish; it’s an experience that brings people together, just like it did for my family all those years ago. It’s a celebration of flavors, memories, and the joy of cooking with love.

As you embark on this culinary adventure, remember that cooking is a journey. Embrace the process, get your hands a little messy, and savor the little moments in between. I can’t wait for you to share your butter chicken stories and make this dish a treasured recipe in your life.

So, grab that fork (or naan!), invite your loved ones, and dig into the warm, comforting world of homemade butter chicken. Let’s create beautiful memories one delicious bite at a time! Happy cooking!

Homemade Butter Chicken
- Total Time: 50 minutes
- Yield: 4 servings 1x
- Diet: Non-Vegetarian
Description
A comforting butter chicken recipe with a creamy, spiced sauce and tender chicken, perfect for cozy dinners.
Ingredients
- 1 lb Chicken Breast (cubed)
- 1 cup Plain Yogurt
- 1 Onion (finely chopped)
- 2 cloves Garlic (minced)
- 1 inch Ginger (grated)
- 2 tbsp Butter
- 1 can Coconut Milk or Heavy Cream
- 2 tbsp Tomato Paste
- 2 tsp Garam Masala
- 1 tsp Cumin
- 1 tsp Paprika
- Salt and Pepper to taste
- Fresh Cilantro (for garnish)
- Naan (for serving)
Instructions
- Marinate the Chicken: In a bowl, combine the cubed chicken with plain yogurt. Cover and refrigerate for at least 30 minutes.
- Sauté the Aromatics: In a skillet, melt the butter over medium heat. Add the chopped onion and sauté until translucent, about 5 minutes.
- Add Garlic and Ginger: Stir in the minced garlic and grated ginger, cooking for another 1-2 minutes until fragrant.
- Spice It Up: Sprinkle in the garam masala, cumin, and paprika. Toast the spices for about 30 seconds.
- Incorporate Tomato Paste: Add the tomato paste, stirring until evenly combined and let cook for another minute.
- Add the Chicken and Coconut Milk: Toss in the marinated chicken, stirring to coat it. Then pour in the coconut milk or heavy cream and bring to a gentle simmer.
- Season and Garnish: Taste and adjust with salt and pepper. Sprinkle fresh cilantro on top.
- Serve: Dish up the butter chicken alongside warm naan and fluffy rice. Enjoy!
Notes
Feel free to adjust spice levels and try using paneer as a vegetarian option.
- Prep Time: 30 minutes
- Cook Time: 20 minutes
- Category: Main Course
- Method: Braising
- Cuisine: Indian
Nutrition
- Serving Size: 1 serving
- Calories: 390
- Sugar: 4g
- Sodium: 500mg
- Fat: 24g
- Saturated Fat: 10g
- Unsaturated Fat: 12g
- Trans Fat: 0g
- Carbohydrates: 30g
- Fiber: 2g
- Protein: 30g
- Cholesterol: 85mg
Keywords: butter chicken, Indian cuisine, comfort food, creamy sauce

BLT Sandwich
The Ultimate BLT Sandwich: A Cherished Classic Reimagined
Hey there, fellow food lovers! Today, we’re diving into the timeless world of sandwiches, particularly the beloved BLT: Bacon, Lettuce, and Tomato. It’s a classic that’s simple yet so richly satisfying. Who doesn’t love the crunch of fresh lettuce, the juicy burst of tomatoes, and the smoky goodness of crispy bacon all nestled between two slices of heavenly bread? In today’s post, I want to celebrate this crowd-pleaser and share a little twist or two that’ll add some zing to your traditional expectations.
Whether you’re gathering around a picnic table, prepping a quick lunch at home, or throwing together snacks for game day, the BLT fits the bill. And let me tell you, it’s more than just a meal; it’s a nostalgic experience. The colors, the tantalizing aromas, and the taste—it’s all part of what makes cooking and sharing meals such a beautiful part of life.
I remember the first time I made a BLT myself. It was during the summer of my high school years, when the garden was overflowing with ripe tomatoes, and my family was busy trying to keep up with the bounty. I ran into the kitchen, determined to whip up something delicious that would satisfy my hunger and celebrate the harvest. And there it was, the perfect sandwich blossomed in front of my eyes. I toasted my bread just right, slathered on some creamy mayonnaise, and layered in the freshest ingredients. The first bite sent me spiraling into summer bliss—every component just singing harmony together. That first BLT made me realize how beautiful the simplest meals can be.
So grab your apron, and let’s embark on this delicious journey together, crafting the ultimate BLT sandwich that’s sure to connect you to those cherished food memories.
Personal Story
When I think of my early encounters with bacon, lettuce, and tomato, I flash back to countless summertime Saturdays spent in my grandmother’s kitchen. She was the queen of comfort food! The air was alive with the scent of sizzling bacon and the promise of family gatherings. Picture this: my cousins and I racing to her lush backyard to pick tomatoes from the vine, laughter echoing like sweet music in the air.
One particular day, I remember her pulling out the ingredients for her famous BLTs. She taught me the trick of using homemade mayonnaise—a delightful treat that made our sandwiches extra special. As we assembled our creations, we’d share stories about everything from school crushes to the latest neighborhood gossip.
That warm summer day infused my love for the BLT with an extra dash of nostalgia that lingers with me to this day. It reminds me that food is so much more than fuel; it’s about connections, moments, and the joy of sharing. Every time I bite into a quality BLT, I can almost hear my grandmother’s laugh and see the vibrant garden in full bloom.
Ingredients
Here’s what you’ll need to put together an unforgettable BLT sandwich:
-
Bacon: The star of the show! I recommend using thick-cut bacon for maximum crunch and flavor. If you’re looking for a healthier option, turkey bacon or pancetta can work wonderfully too.
-
Lettuce: Crisp romaine or iceberg lettuce gives that refreshing crunch. Spinach is a great substitute if you want to mix things up with a bit of extra nutrition.
-
Tomato: Choose ripe, juicy tomatoes—heirloom varieties are my favorite for their robust flavor. For an interesting twist, try sun-dried tomatoes for a different texture and intense taste.
-
Bread: Classic white sandwich bread works like a charm, but I love using sourdough or multigrain for an earthy kick. If gluten-free is your jam, there are plenty of excellent gluten-free loaves on the market.
-
Mayonnaise: This creamy condiment adds a rich layer to your sandwich. Homemade mayo is super easy to make and can elevate your taste game. If you want something lighter, Greek yogurt can do the trick.
-
Salt and Pepper: Basic but essential! Use freshly cracked black pepper for delightful spiciness. A sprinkle of sea salt on your tomatoes enhances their flavor—don’t skip it!
Step-by-Step Instructions
Let’s get cooking! Here’s how to make the ultimate BLT sandwich step by step:
-
Cook the bacon: Start by cooking your bacon. Heat a skillet over medium heat. Lay the bacon strips in a single layer (don’t crowd the pan) and let them sizzle for about 5-7 minutes on each side until they’re crispy. Here’s a little tip: After flipping, turn the heat down a bit to avoid burning. Plus, this will allow the fat to render beautifully.
-
Prepare your bread: While the bacon is cooking, pop your slices of bread into the toaster or a separate skillet to get them warm and toasty—it adds a delightful crunch to your sandwich. If you want an extra indulgent touch, lightly butter one side of the bread before toasting.
-
Slice the tomatoes: After washing your tomatoes, slice them into thick rounds. A serrated knife makes this super easy! The juiciness of the tomatoes is key, so make sure you’re getting fresh ones. This is where the magic happens.
-
Wash your lettuce: Rinse your lettuce leaves under cold water to keep them crisp. Shake off the excess moisture or use a salad spinner. Next, grab a couple of leaves, making sure they’re big enough to cover your sandwich.
-
Assemble the sandwich: Spread a generous layer of mayonnaise on one side of each toasted bread slice. Begin layering with your crispy bacon, followed by juicy tomato slices (don’t forget that sprinkle of salt and pepper!), and finish with crisp lettuce. It’s a symphony of flavors!
-
Top and press: Place the second slice of bread on top (mayonnaise side down), and gently press the sandwich to help all the components bind together.
-
Slice and serve: Use a sharp knife to gently slice your sandwich in half—diagonal always looks fancy! Set it on a platter, and you’re ready to impress.
Serving Suggestions
Serving your BLT is half the fun! Consider cozying it up with a side of crispy potato chips or some homemade coleslaw. You can complement it with a refreshing glass of lemonade or iced tea for that summertime vibe.
For an elegant presentation, you can skewer your sandwich halves with frilly picks or fresh herbs. This not only adds stability but makes it look like a gourmet experience! You could also plate it up next to a vibrant salad; the contrast of colors and textures creates a feast for the eyes.
Recipe Variations
Now, let’s get a little creative! Here are some fun spins on the classic BLT:
-
Avocado BLT: Add creamy slices of avocado for that extra richness and a pop of healthy fats.
-
Spicy BLT: Spice things up with jalapeños or a smear of chipotle mayo—as fiery as you like!
-
Caprese BLT: Switch out the lettuce for arugula, and add fresh basil and mozzarella for a delightful Italian twist.
-
Breakfast BLT: Top it off with a fried or poached egg for a breakfast-inspired BLT that’s sure to kick-start your day!
-
Vegan BLT: Replace bacon with smoky tempeh or eggplant bacon for an entirely plant-based dish, and use vegan mayo to keep it cruelty-free!
Chef’s Notes
As a chef who’s navigated many culinary paths, I’ve seen the BLT transform and adapt over the years. I love how it embraces creativity while retaining its original charm. One of my funniest memories in the kitchen was when I tried to whip up a ‘BLT pancake.’ You guessed it—let’s just say, not all experiments are meant to be ventured! But that’s the beauty of cooking; each trial brings a lesson. Remember, the kitchen is your playground, so don’t hesitate to let your creative juices flow.
FAQs and Troubleshooting
Q: Why is my bacon chewy instead of crispy?
A: Make sure to use thick-cut bacon and cook it over medium heat slowly. If it cooks too fast, it won’t have time to get that perfect crunch.
Q: Can I make this sandwich ahead of time?
A: While the BLT is best enjoyed fresh, you can cook the bacon and prep the ingredients beforehand. Assemble just before serving to keep it crisp.
Q: What can I use if I don’t have mayonnaise?
A: Greek yogurt, hummus, or even pesto can be delicious stand-ins, depending on the flavor profile you’re looking to create!
Nutritional Info
Now let’s chat about the nutrition in our culinary delight! Here’s a rough breakdown of a classic BLT sandwich assuming standard ingredients:
- Calories: Approximately 400–500 calories, depending on portion sizes and ingredients.
- Protein: Roughly 18 grams from bacon.
- Fat: Main source coming from bacon and mayonnaise; consider healthier mayo for a lighter option.
- Carbohydrates: The bread here adds around 40-50 grams, but you can reduce this with lower-carb bread if you prefer.
- Vitamins: Fresh tomatoes and lettuce are a good source of vitamins A and C.
The beautiful thing about food is nutrition can enhance flavor, so adjust based on your dietary preferences!
Final Thoughts
There you have it: the ultimate guide to making a delicious, comforting BLT sandwich that’s brimming with memories, flavors, and opportunities for twists! Cooking is not just about recipes; it’s about sharing experiences, sparking creativity, and making memories with each bite.
So the next time you score some fresh tomatoes or crispy bacon or find yourself in need of a feel-good meal, I hope you’ll think of this cherished sandwich. It’s more than a simple meal—it’s an experience that brings warmth and companionship to our tables.
I can’t wait to hear about your adventures in crafting the perfect BLT! So, gather your favorite versions of these ingredients and get ready to dig in. Happy cooking, friends! 🍅🥓❤️
Print
The Ultimate BLT Sandwich
- Total Time: 25 minutes
- Yield: 2 servings 1x
- Diet: Omnivore
Description
A classic BLT sandwich reimagined with fresh ingredients and personal twists that enhance its nostalgic charm.
Ingredients
- 6 strips thick-cut bacon
- 4 leaves romaine or iceberg lettuce
- 2 ripe tomatoes, sliced
- 4 slices sourdough or multigrain bread
- 4 tablespoons mayonnaise
- Salt and pepper to taste
Instructions
- Cook the bacon: Heat a skillet over medium heat. Lay the bacon strips in a single layer and cook for about 5-7 minutes on each side until crispy.
- Prepare your bread: Toast the slices of bread in a toaster or skillet until golden brown.
- Slice the tomatoes: Wash and slice the tomatoes into thick rounds.
- Wash your lettuce: Rinse the lettuce leaves under cold water and shake off excess moisture.
- Assemble the sandwich: Spread mayonnaise on one side of each slice of toasted bread, then layer with bacon, tomato, and lettuce.
- Top with another slice of bread (mayonnaise side down) and press gently.
- Slice and serve: Cut the sandwich diagonally in half and serve with your favorite sides.
Notes
For variations, consider adding avocado, a fried egg, or using smoky tempeh for a vegan option.
- Prep Time: 10 minutes
- Cook Time: 15 minutes
- Category: Main Course
- Method: Sandwich Assembly
- Cuisine: American
Nutrition
- Serving Size: 1 sandwich
- Calories: 450
- Sugar: 3g
- Sodium: 800mg
- Fat: 30g
- Saturated Fat: 10g
- Unsaturated Fat: 15g
- Trans Fat: 0g
- Carbohydrates: 38g
- Fiber: 3g
- Protein: 18g
- Cholesterol: 40mg
Keywords: BLT sandwich, classic sandwich, bacon sandwich, summer recipes, comfort food

Grilled Cheese
The Ultimate Grilled Cheese: Everyone’s Favorite Comfort Food
Introduction
Hey there, food lovers! If there’s one dish that can spark nostalgia and comfort in the hearts of many, it’s the humble grilled cheese sandwich. Perfectly golden brown and oozing with melty cheese, this is the kind of food that warms not just your belly but your very soul.
When I think of grilled cheese, I can’t help but reminisce about those rainy afternoons spent huddled up with my mom in the kitchen. She’d pull out the cast-iron skillet and butter up slices of bread like it was a piece of art. The sizzling sound as the bread hit the hot pan? Pure magic! Those formative moments shaped my love for good food, and now I’m on a mission to spread that flavor-filled joy with all of you.
In today’s post, we’re diving deep into how to make the ultimate grilled cheese. I’m talking about more than plain old bread and cheese; we’re going to explore fun twists, serving suggestions, and kitchen hacks—all while keeping it light, casual, and downright delicious! So grab your spatula, and let’s get cheesy!
Personal Story
As a kid, I had a ritual: every Saturday morning, after I had completed my Saturday chores—which often involved dragging a vacuum across my room—I would sit down for a luxurious bowl of tomato soup, paired with a perfect grilled cheese. My mom would make it, of course, and she always said the secret was using lots of butter and a mix of cheeses. Who could argue with that?
One Saturday, as I waited impatiently for lunch, I decided to help her by mixing up some spices. Little did I know, I grabbed the cayenne pepper instead of the garlic powder! Just as she was about to take the first bite, that fiery aroma hit us both like a freight train. Let’s just say that day I learned two valuable lessons: always read your spice labels, and a little bit of adventure never hurt anyone—even if it burnt a few taste buds along the way!
To this day, I embrace those spirited moments in the kitchen—whether they come with a pinch of cayenne or a sprinkle of nostalgia. Remember, food is not just about the flavors; it’s about the memories and connection it creates. Now, let’s get on to whipping up your first (or thousandth) grilled cheese masterpiece!
Ingredients
Let’s gather our ingredients for this grilled cheese extravaganza! Here’s your shopping list, along with my little chef insights and substitutions.
-
Bread (your choice): White, whole grain, sourdough, you name it! Each type adds a unique texture and flavor. For a twist, try brioche or a crusty baguette for an elegant touch.
-
Cheese: Cheddar, American, mozzarella—oh my! The world is your cheesy oyster. I recommend a sharp cheddar for the classic vibe, or mix a couple of cheeses for an exciting blend. If you’re dairy-free, you can find delicious plant-based cheeses that melt just as well!
-
Butter: The golden elixir of the grilled cheese! Unsalted butter is preferred for control over seasoning, but salted butter lends a bit of extra flavor if that’s all you have.
-
Optional Ingredients:
- Tomato: Fresh slices add a burst of freshness, especially when layered inside the sandwich.
- Bacon: Who doesn’t love crispy bacon? It adds a savory crunch that’ll take your grilled cheese to the next level.
- Herbs: Fresh basil or parsley sprinkled on top not only looks pretty but adds layers of flavor!
Chef Insight: Always use room-temperature ingredients! It helps everything blend together nicely and cook evenly.
Step-by-Step Instructions
Now that we have everything ready, let’s get to the sizzling part! Here’s how to whip up the ultimate grilled cheese sandwich:
-
Prepare the Ingredients: Start by laying out your bread slices on a clean cutting board. If you’re adding tomatoes or bacon, slice them up now so you’re ready to go.
-
Butter the Bread: Take a generous amount of butter and spread it evenly on one side of each slice of bread. This is where the magic begins! Make sure to cover the entire surface so you get that golden crust. A little secret: if you’re feeling extra fancy, you can mix a sprinkle of garlic powder or herbs into the butter for a flavor boost.
-
Layer the Cheese: On the unbuttered sides of the bread, pile on your shredded cheese. Remember to keep some cheese aside to be used during the final stages of grilling for that gooey stretch that we all love!
-
Heat the Pan: Preheat a skillet over medium heat. You want the heat to be just right—not too hot, or you’ll burn the bread before the cheese melts. Ideally, aim for a sizzling sound when you add the sandwich.
-
Assemble the Sandwich: Place one slice of bread, buttered side down, onto the hot skillet. If you’re adding tomatoes or bacon, now is the time—layer them on before topping with the second slice of bread, buttered side facing up.
-
Grill it Up: Cook the sandwich for about 2-4 minutes. Keep an eye on it! You want to flip only when the bottom is golden brown. Here’s a little chef trick: if the bread is browning too quickly, lower the heat. You want that cheese to melt without burning the outside.
-
The Flip: Once the first side is golden and crispy, gently flip the sandwich using a spatula. If you hear the satisfying crunch, you’re doing it right! Now cook the other side for an additional 2-4 minutes. If it’s browning too fast, don’t hesitate to use a small lid to trap heat and encourage the cheese to melt.
-
Add Extra Cheese: If you’re a cheese lover (and who isn’t?), sprinkle a little reserved shredded cheese on the top during the last minute and cover again to get that dreamy melt.
-
Serve Hot: The moment you see that perfect golden-brown crust and hear that crunch, it’s time to take your masterpiece off the heat! Let it cool for a few moments before cutting it in half.
Serving Suggestions
Nothing says comfort food like a perfectly plated grilled cheese! Here are a few fun ways you can serve it up:
-
On a Plate with Tomato Soup: Serve that warm, grilled goodness alongside a bowl of tomato soup for dunking. It’s the classic combo that never goes out of style!
-
Garnished with Fresh Herbs: After plating, sprinkle some fresh basil or parsley on top of your sandwich for a vibrant flair.
-
Quirky Platter: For a brunch vibe, pair your grilled cheese with a fruit assortment—think strawberries, grapes, and maybe even some avocado slices on the side.
-
Cut Into Triangles: After letting it cool for a bit, cut your sandwich into triangles—you know, the classic “fancy” cut that adds a touch of elegance.
Recipe Variations
Feeling adventurous? Let’s mix it up! Here are some tasty twists on the classic grilled cheese:
-
Caprese Grilled Cheese: Add sliced tomatoes and fresh basil with your mozzarella for a refreshing combo.
-
Bacon & Jalapeño: Spice things up by adding crispy bacon and sliced jalapeños for a smoky and spicy bite.
-
Apple and Brie: Slice up some apples and layer them with brie cheese for a sweet and savory delight.
-
Pesto Delight: Spread some store-bought or homemade pesto on one slice of bread before layering the cheese for an aromatic twist.
-
Buffalo Chicken: For the meat lovers, add shredded buffalo chicken to your grilled cheese for an extra kick!
Chef’s Notes
Ah, grilled cheese: the canvas of our culinary creativity! Over the years, this simple dish has seen countless versions. I love to experiment with whatever’s in the fridge, and it never fails to surprise me how a little twist can create something entirely new.
One particularly memorable kitchen adventure involved trying to recreate a childhood favorite I had at a little roadside diner. They had a “Monte Cristo” style grilled cheese, so naturally, I took the challenge. After a few attempts, I found out that powdered sugar on top and a side of jam transformed my grilled cheese into a gourmet delight!
Remember, cooking is all about exploration and having fun. So throw caution to the wind and let your ingredients inspire your next creation!
FAQs and Troubleshooting
1. My grilled cheese is burning before the cheese melts! What’s wrong?
- This usually means your heat is too high. Lowering the temperature allows the bread to cook slowly while giving the cheese time to melt.
2. How can I keep my grilled cheese from falling apart?
- Press down gently on the sandwich once assembled. Using shredded cheese can also help it stick better.
3. Can I make grilled cheese in advance?
- While grilled cheese is best enjoyed fresh, you can assemble it beforehand and store it in the fridge. Just remember to grill it right before serving!
4. What if I don’t have butter?
- No worries! You can use mayonnaise instead—it creates a golden crust and imparts a nice flavor. Trust me; it’s a game changer!
Nutritional Info (if applicable)
While grilled cheese may be comfort food, it can hold its own nutritionally with tailored tweaks. Here’s a quick breakdown:
- Calories: Typically around 300-500 calories per sandwich (depending on the type and amount of cheese and bread).
- Protein: Cheese provides quality protein, generally around 20g per serving.
- Carbohydrates: Bread contributes most caloric content; trying whole grain can up fiber content!
- Fats: Expect anywhere from 15g to 30g of fat based on your butter and cheese choice.
Want to make it healthier? Use whole grain bread or reduce the amount of cheese, swapping in some avocado or a side salad for balance!
Final Thoughts
In the end, grilled cheese is not just a sandwich; it’s a celebration of simple ingredients and the memories they evoke. Whether enjoyed with soup, on a picnic, or as a midnight snack, it’s the edible embodiment of comfort.
With just a few tips and tricks, you can whip up a gourmet-style grilled cheese from the comfort of your kitchen. So don your apron, grab that spatula, and let’s start crafting delicious moments! Thank you for joining me on this cheesy adventure; I can’t wait to hear about your own kitchen experiments at Feastical! Now, dig in and feel the love in every bite! 🍽️❤️
Print
The Ultimate Grilled Cheese
- Total Time: 18 minutes
- Yield: 2 servings
- Diet: Vegetarian
Description
A nostalgic and comforting grilled cheese sandwich, oozing with melty cheese and perfect for any occasion.
Ingredients
- Bread (your choice): White, whole grain, sourdough, brioche, or baguette
- Cheese: Cheddar, American, mozzarella, or a mix of cheeses
- Butter: Unsalted or salted
- Optional Ingredients: Tomato slices, crispy bacon, fresh herbs (basil or parsley)
Instructions
- Prepare the Ingredients: Lay out your bread slices on a clean cutting board and slice any optional ingredients.
- Butter the Bread: Spread a generous amount of butter evenly on one side of each slice of bread.
- Layer the Cheese: On the unbuttered sides of the bread, pile on the shredded cheese, keeping some aside for later.
- Heat the Pan: Preheat a skillet over medium heat until it’s just right for grilling.
- Assemble the Sandwich: Place one slice of bread, buttered side down, on the skillet, and layer on any optional ingredients before adding the second slice of bread, buttered side up.
- Grill it Up: Cook the sandwich for about 2-4 minutes until the bottom is golden brown.
- The Flip: Once the first side is golden and crispy, gently flip the sandwich and cook the other side for an additional 2-4 minutes.
- Add Extra Cheese: Sprinkle reserved shredded cheese on top during the last minute and cover to melt.
- Serve Hot: Remove the sandwich from the skillet, let it cool for a moment, then cut it in half and enjoy!
Notes
For a gourmet twist, try adding cinnamon sugar on top or serve with jam!
- Prep Time: 10 minutes
- Cook Time: 8 minutes
- Category: Snack
- Method: Grilling
- Cuisine: American
Nutrition
- Serving Size: 1 sandwich
- Calories: 350
- Sugar: 3g
- Sodium: 600mg
- Fat: 25g
- Saturated Fat: 12g
- Unsaturated Fat: 10g
- Trans Fat: 0g
- Carbohydrates: 30g
- Fiber: 2g
- Protein: 15g
- Cholesterol: 55mg
Keywords: grilled cheese, comfort food, easy recipe, quick meal, vegetarian

Quick & Easy Homemade Butter Chicken Recipe
Quick & Easy Homemade Butter Chicken Recipe
Hey there, fellow food lovers! I’m Beau Collier, your culinary guide here at Feastical, where we whip up feel-good food that’s as easy to make as it is to devour. Today, I’m excited to share one of my all-time favorite recipes—Butter Chicken. Now, if you’ve ever enjoyed the rich, creamy goodness of this dish at your favorite Indian restaurant, you’ll be thrilled to learn just how easy it is to replicate in your own kitchen!
Butter Chicken, or "Murgh Makhani," is a dish that radiates warmth and comfort. It’s a luscious blend of tender chicken thighs bathed in a buttery, tangy tomato sauce, with a delightful kick of spices. Whether it’s a cozy weeknight dinner or a show-stopping meal for friends, this recipe is guaranteed to impress. And the best part? You’ll have this dish on the table in less than an hour!
I’ll guide you through each step of the process, sprinkling in some of my chef insights and kitchen hacks, because I believe cooking should always be about joy, not stress. So, put on that apron, grab your favorite cooking playlist, and let’s dive into the heart of what makes Butter Chicken so special!
Personal Story
I’ll never forget the first time I tasted Butter Chicken. I was a wide-eyed teenager on a family trip to a local Indian restaurant. As the rich aroma filled the air, my taste buds danced with anticipation. When that first bite of chicken, drenched in that velvety sauce, hit my palate, it was like a flavor explosion! The combination of spices, the creaminess, and that touch of tomato—it was mesmerizing!
From that moment on, I was hooked. I began experimenting with Indian dishes at home, inspired by my love for the vibrant flavors and aromas. Over the years, I fine-tuned my Butter Chicken recipe, making it accessible, quick, and, yes, always comforting. It has become a staple in my kitchen, often bringing friends and family together around the dinner table, sharing laughter and stories—all while savoring every last bite.
Ingredients
Here’s what you’ll need to whip up your own batch of Butter Chicken:
-
1 ½ pounds skinless boneless chicken thighs: Tender chicken thighs add richness and flavor. If you prefer, you can substitute boneless chicken breasts, but they may dry out quicker, so be mindful of cooking time!
-
3 tablespoons vegetable oil: A neutral oil works best here to sauté the chicken without altering its flavors. Olive oil or canola oil are great alternatives.
-
3 tablespoons butter: The star of the show! Butter adds a creamy richness that is quintessential to Butter Chicken. If you’re looking for a dairy-free version, try using coconut oil.
-
6 garlic cloves (minced): Fresh garlic is essential for that pungent aroma. If you’re in a pinch, garlic powder can work, but fresh is always preferable!
-
1 medium onion (diced): Onions provide a fantastic base for the sauce. Yellow or white onions are perfect here. If you’re short on time, try using a pre-diced onion!
-
1 can (15 ounces) tomato sauce: This creates the rich tomato base. You could also use crushed tomatoes for added texture.
-
2 cups heavy cream: The magic ingredient that turns a simple sauce into something decadent! For a lighter option, you can swap with half-and-half, but it won’t be as creamy.
-
1 teaspoon salt: Essential for bringing out all the flavors.
-
1 teaspoon garlic powder: An extra punch of garlic flavor! You can skip it if you like, but more flavor never hurts, right?
-
1 teaspoon sweet paprika: Sweet paprika adds depth and color to the dish. If you want some smokiness, try smoked paprika as a substitution.
-
½ teaspoon curry powder: This blend typically includes turmeric, cumin, and coriander, offering a hint of warmth. Feel free to adjust the amount based on your taste preference.
-
1 tablespoon Greek yogurt: This adds a tangy creaminess to balance the richness of the sauce. You can substitute with sour cream or omit it entirely if you wish.
-
1 teaspoon sugar: A little sugar balances the acidity from the tomatoes. You can leave it out if you prefer a more savory dish.
-
½ teaspoon black pepper: Freshly ground black pepper brings in a subtle heat.
-
½ teaspoon cayenne pepper (optional): For those who like a kick! Adjust it based on your heat tolerance.
-
1 teaspoon garam masala: This aromatic blend is the finishing touch that elevates the flavors. If you don’t have it, a mixture of cumin, coriander, and cardamom can be a helpful substitute (though it won’t be exactly the same).
Step-by-Step Instructions
Ready to cook up this delight? Let’s do this!
-
Prep Your Station: Before we start cooking, gather all your ingredients and tools—this makes everything go super smoothly! You’ll need a large skillet or sauté pan, a spatula, and some measuring cups and spoons.
-
Sear the Chicken: Heat the vegetable oil in your skillet over medium-high heat. Once hot, add the chicken thighs (cut into bite-size pieces, if you prefer) and sprinkle with salt and pepper. Sear for about 6-8 minutes until golden brown on all sides. (Chef Tip: Don’t overcrowd the pan! Cook in batches if necessary to really get that nice color on the chicken.)
-
Sauté the Aromatics: Remove the chicken from the skillet and set it aside. In the same skillet, add the butter and let it melt. Toss in the diced onion and sauté for about 5 minutes until they’re translucent (nothing beats that sweet, sautéed onion aroma!). Now, add the minced garlic and sauté for an additional minute—just until fragrant.
-
Build the Sauce: Pour in the can of tomato sauce and mix it in. Now, add the heavy cream and stir until combined. Whoo! This is where things get creamy. Bring the sauce to a gentle simmer (don’t let it boil), and add in garlic powder, curry powder, and paprika. Let it simmer gently for about 10 minutes, stirring occasionally. This allows the flavors to meld beautifully.
-
Return the Chicken: Add the seared chicken back into the skillet and mix to coat the chicken in that gorgeous sauce. Reduce the heat to low and stir in the Greek yogurt, sugar, black pepper, and cayenne pepper (if using). Let everything simmer together for another 5-7 minutes so that the chicken becomes tender and flavorful.
-
Finishing Touches: Just before serving, stir in the garam masala. This herby spice blend is what really takes it over the top. Let it simmer for an additional minute, and voilà! Your Butter Chicken is ready!
Serving Suggestions
Now that your dish is all done, let’s talk presentation. A serving of Butter Chicken looks fantastic over a bed of fluffy basmati rice. You can also add some warm naan or roti on the side for digging into all that creamy goodness.
For the perfect finish, garnish with fresh cilantro (or parsley if you’re not a cilantro fan), a drizzle of cream, or even a squeeze of fresh lime for a pop of brightness.
Remember, it’s all about creating that inviting, cozy vibe—you want your guests (or family) to feel right at home while they dive into this delicious plate!
Recipe Variations
Get creative with this Butter Chicken recipe! Here are some fun variations and twists you can try:
-
Vegetarian Delight: Substitute chicken with chickpeas or paneer for a fantastic vegetarian alternative. Just make sure to sauté them slightly before adding them to the sauce.
-
Spicy Twist: Love heat? Add in diced green chilies or increase the cayenne pepper to kick it up another notch!
-
Creamy Coconut: Try using coconut milk instead of heavy cream for a tropical flair—this adds a mild sweetness that pairs beautifully with the spices.
-
One-Pot Wonder: Make it a one-pot meal by adding vegetables like bell peppers or peas!
-
Slow Cooker Version: For a hands-off approach, throw it all into a slow cooker on low for 4-6 hours. Just remember to add the cream toward the end to keep it rich and luscious!
Chef’s Notes
As much as I adore classic Butter Chicken, this dish has evolved for me over the years. I started experimenting with adding different spices or tweaking the level of creaminess. One time, in a rooftop dinner party frenzy, I accidentally added too much cayenne. Instead of despairing, I adjusted with extra cream and sugar—and guess what? It turned out to be a crowd-pleaser!
So, always feel free to adapt recipes to suit your taste. Cooking is a journey, not a destination—each tweak makes it more personal.
FAQs and Troubleshooting
Q: My sauce is too thin; how can I thicken it?
A: If your sauce isn’t thickening to your liking, you can mix a tablespoon of cornstarch with a bit of water to create a slurry and stir it into the simmering sauce. Let it cook for a couple more minutes until thickened.
Q: Can I make this ahead of time?
A: Absolutely! Butter Chicken tastes even better the next day after the flavors have melded together. Just store it in the fridge and reheat gently before serving.
Q: How can I reduce the creaminess of the dish?
A: If you’re looking for a lighter version, simply reduce the amount of heavy cream and substitute with low-fat milk or additional tomato sauce.
Q: Is this recipe dairy-free?
A: To make it dairy-free, swap out the butter and heavy cream for coconut oil and coconut milk. The taste will be different, but it will still be delicious!
Nutritional Info
While Butter Chicken is undeniably delicious, it’s also rich in calories and fat due to the cream and butter. Here’s a general idea of the nutritional information for a typical serving (1 cup, without rice):
- Calories: Approximately 500
- Total Fat: 35g
- Saturated Fat: 20g
- Cholesterol: 150mg
- Sodium: 800mg
- Carbohydrates: 10g
- Fiber: 1g
- Sugar: 5g
- Protein: 40g
Enjoy it in moderation, and it can be part of a delightful meal!
Final Thoughts
There you have it, friends! A quick and easy Butter Chicken recipe that you can whip up any night of the week. It’s packed with flavor, fun, and a whole lot of love. I hope you enjoy making this dish as much as I do, and remember to tag us at Feastical when you share your culinary creations!
Cooking is about joy and connection, and Butter Chicken is the perfect dish to bring everyone together around the table. So, roll up those sleeves, gather your loved ones, and dig into this warm, comforting delight. Until next time—happy cooking! 🍽️
Feel free to customize any portion of this recipe to suit your tastes and dietary preferences. Enjoy your culinary journey!
Print
Quick & Easy Homemade Butter Chicken
- Total Time: 45 minutes
- Yield: 4 servings 1x
- Diet: Non-Vegetarian
Description
A rich and creamy Butter Chicken recipe that’s easy to make at home, perfect for cozy dinners.
Ingredients
- 1 ½ pounds skinless boneless chicken thighs
- 3 tablespoons vegetable oil
- 3 tablespoons butter
- 6 garlic cloves (minced)
- 1 medium onion (diced)
- 1 can (15 ounces) tomato sauce
- 2 cups heavy cream
- 1 teaspoon salt
- 1 teaspoon garlic powder
- 1 teaspoon sweet paprika
- ½ teaspoon curry powder
- 1 tablespoon Greek yogurt
- 1 teaspoon sugar
- ½ teaspoon black pepper
- ½ teaspoon cayenne pepper (optional)
- 1 teaspoon garam masala
Instructions
- Prep your station: Gather all your ingredients and tools.
- Sear the chicken: Heat vegetable oil in skillet, add chicken, and sear until golden brown (6-8 minutes).
- Sauté the aromatics: Remove chicken, add butter and diced onion, sauté for 5 minutes, then add garlic for 1 minute.
- Build the sauce: Pour in tomato sauce, stir in heavy cream, and let it simmer for 10 minutes.
- Return the chicken: Add chicken back, reduce heat, and stir in yogurt, sugar, black pepper, and cayenne (if using). Simmer for 5-7 minutes.
- Finishing touches: Stir in garam masala and simmer for another minute.
Notes
Serve over basmati rice or with naan. Garnish with fresh cilantro and a drizzle of cream.
- Prep Time: 15 minutes
- Cook Time: 30 minutes
- Category: Main Course
- Method: Sautéing
- Cuisine: Indian
Nutrition
- Serving Size: 1 cup
- Calories: 500
- Sugar: 5g
- Sodium: 800mg
- Fat: 35g
- Saturated Fat: 20g
- Trans Fat: 0g
- Carbohydrates: 10g
- Fiber: 1g
- Protein: 40g
- Cholesterol: 150mg
Keywords: Butter Chicken, Indian Cuisine, Easy Recipes
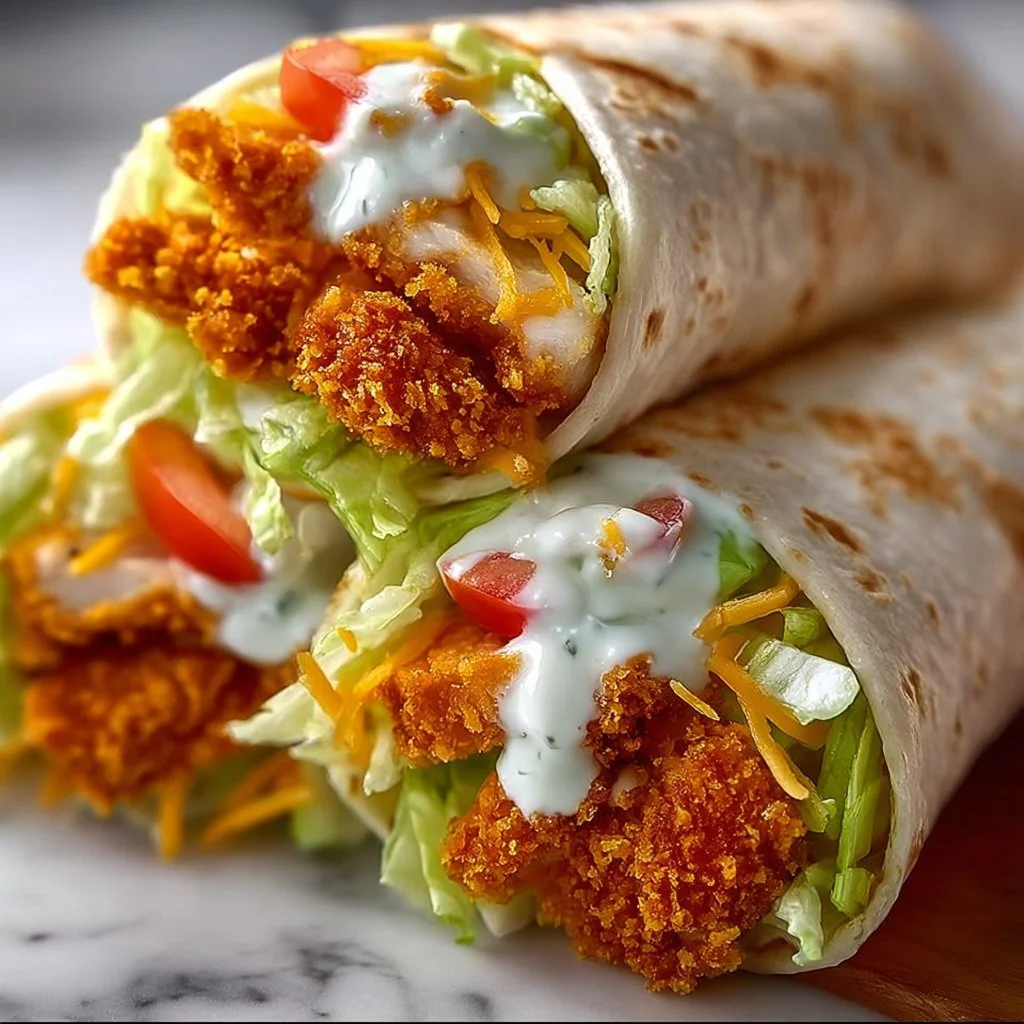
Crispy Chicken Ranch Snack Wrap
Crispy Chicken Ranch Snack Wrap: Your New Go-To Treat!
Hey, food lovers! Welcome back to Feastical, your cozy corner for all things scrumptious. Today, I’m thrilled to share a dish that’s not only easy to whip up but also brings that delightful crunch and burst of flavor we all crave. Say hello to the Crispy Chicken Ranch Snack Wrap! Perfect for lunch, game day, or even a midnight snack, these wraps are vibrant, versatile, and always a crowd-pleaser.
Now, I don’t know about you, but there’s something about chicken wraps that takes me right back to my childhood. Picture this: lazy Saturday afternoons spent at home, the smell of something scrumptious wafting through the house, and the sun shining on our backyard BBQ where my family gathered around the grill. There’s excitement in the air as the sizzle of chicken fills the space, and it’s that excitement that fuels my love for food! Throw in a little ranch dressing, some fresh veggies, and just the right crunch, and those memories come flooding back.
These wraps are a fantastic way to get creative in the kitchen and make use of what you have on hand (a little kitchen hack from yours truly!). Whether you’re using crispy chicken tenders from last night’s dinner or whipping up a fresh batch, these wraps are adaptable and oh-so-satisfying. It’s like a hug wrapped in a tortilla!
So, let’s roll up those sleeves, grab your spatula, and kick things off with the ingredients you’ll need for this fab wrap!
Personal Story
Growing up, my family had a tradition—Saturday night was “Wrap Night.” My mom would lay out spreads of ingredients that could transform bland into grand, and we were free to create our own masterpieces! I remember being just a wee lad, standing on a kitchen chair to reach the counter, eyes wide with anticipation. Crunchy, dippable, overflowing with flavor, my little hands would pile high all my favorite toppings on soft tortilla wraps.
One time, I made a ridiculous concoction with a bunch of random ingredients: cold pizza leftovers, ranch dressing, and whatever veggies I could scrounge up. To my surprise, it tasted amazing! It was moments like these—creating something out of “nothing” and sharing it with my family—that instilled the love of food and cooking in me. Now, when I think of making these Crispy Chicken Ranch Snack Wraps, it reminds me of joy, laughter, and everyone coming together around the dinner table (or in our case, the kitchen counter).
Ingredients
Here’s what you’ll need to transform your kitchen into a flavor haven:
-
Crispy Chicken Tenders
Ready-made or homemade, these are the star of the show! If you want to get adventurous, baked or grilled chicken also works! -
Ranch Dressing
The creamy, tangy accent that pairs beautifully with crispy chicken. Have leftovers from another meal? Those work too! -
Tortilla Wraps
Flour, corn, or whole wheat—choose your favorite! These wraps are your canvas of deliciousness! -
Lettuce
Romaine, iceberg, or spinach—whatever fresh greens you have on hand will add that crunchy, refreshing layer! -
Tomatoes
Chopped fresh tomatoes, cherry tomatoes, or even sun-dried—it’s all about what you love and what’s available! -
Cheese
Cheddar, mozzarella, or pepper jack for a spicy kick! If you’re dairy-free, try vegan cheese or omit it altogether! -
Optional Toppings
Avocado for creaminess, crisp bacon bits for saltiness, or sliced jalapeños for a kick—get creative!
Step-by-Step Instructions
Let’s dive into making these bad boys!
-
Prep Your Chicken:
If you’re going the homemade route, start by breading and frying your chicken tenders. Take boneless chicken breast, dip it in flour, then egg, and finally coat it in breadcrumbs (Panko for extra crunch!). Fry until golden brown. If you’re using store-bought, simply heat them according to package instructions! -
Gather Your Wraps:
On a clean surface, lay out your tortilla wraps. Want to warm them up? Toss them on a skillet for a few seconds on each side—it’ll make them pliable and extra tasty! -
Time for Dressing:
Drizzle a generous amount of ranch dressing down the center of each wrap. The ranch really brings everything together—trust me, you don’t want to skip this step! You can even mix in a little hot sauce if you’re feeling adventurous! -
Layer It Up with Chicken:
Place 2-3 crispy chicken tenders in the center of the wrap. Make sure they are warm and crispy! Feel free to break them into smaller pieces to make wrapping easier! -
Freshen It Up:
Sprinkle lettuce and chopped tomatoes over the chicken. This is your chance to include any other veggies or optional toppings you desire (hello, avocado and bacon!). -
Cheese, Please:
Add a handful of shredded cheese on top of your existing layers! The cheese will melt slightly from the chicken’s warmth, adding an oooey-gooey texture. -
Wrap It Up:
Fold the sides of the tortilla in, then roll it tightly from the bottom up. Tuck the filling in as you go to avoid a tasty explosion! -
Slice and Serve:
Halve the wrap diagonally for a beautiful presentation and to make them easier to handle. Whether you serve it with extra dressing for dipping or a side of chips, you’re set!
Serving Suggestions
When it comes to serving those crispy wraps, simplicity is key. Place your wraps on a rustic wooden board or a colorful plate for a pop of vibrancy! You can add a side of crunchy vegetables or a fresh salad for a well-rounded meal. Try drizzling a bit more ranch on the plate for dipping—don’t be shy with that sauce!
Garnish the dish with a few sprigs of fresh parsley or cilantro to elevate the presentation. If you’re entertaining, arrange the wraps in a circle with some dipping sauce in the center—trust me, your friends will be swooning over this spread!
Recipe Variations
Feeling creative? Here are some delicious twists to kick things up:
-
Buffalo Chicken Ranch Wrap:
Toss your chicken tenders in buffalo sauce for a spicy kick! Pair it with a cool ranch dressing to balance the heat. -
Hipster Veggie Wrap:
Swap crispy chicken for grilled veggies (like bell peppers, zucchini, and asparagus) and try a tahini sauce for a unique flavor twist! -
Loaded Baked Potato Wrap:
Dress your chicken with loaded baked potato toppings! Think bacon, cheddar cheese, and chives for an indulgent treat. -
Southwestern Flair:
Add black beans, corn, and avocado for a Southwest-inspired wrap. Chipotle ranch dressing can take it to the next level! -
Healthy Wrap:
Use whole wheat tortillas, grilled chicken, and lots of fresh veggies like cucumbers and spinach, drizzled with vinaigrette for a lighter version!
Chef’s Notes
This recipe has seen some funky iterations over the years, and I’m not ashamed! From experimenting with sweet sauces to adding the strangest toppings found in my fridge, each wrap is a reflection of my inner kitchen adventurer. The key is to have fun and enjoy the process—don’t hesitate to let your imagination run wild! And trust me, these wraps taste even better when made with love!
FAQs and Troubleshooting
Q: Can I make these wraps ahead of time?
A: Absolutely! Just keep them in the fridge wrapped in parchment paper to prevent them from getting soggy. Just be wary: the crispiness can diminish, but they’ll still be tasty!
Q: What if I don’t have ranch dressing?
A: No worries! You can use any creamy dressing you have handy—like blue cheese, Caesar, or even a homemade yogurt-based sauce.
Q: How can I make these wraps kid-friendly?
A: Get your kiddos involved! Let them choose their toppings; this often results in a heightened willingness to try new things.
Q: My wraps fell apart—what went wrong?
A: Make sure to not overstuff them! It’s tempting, but less is more here, and be sure to wrap them tightly!
Nutritional Info
Let’s break down what you’re putting into these delightful wraps! A standard wrap with chicken, ranch dressing, cheese, and lettuce serves about 2-3 people.
- Calories: Approximately 400-500 calories (depending on toppings and serving size).
- Protein: Roughly 25-30g of protein from the chicken and cheese!
- Fat: Around 20g (again, this varies with toppings and dressing choice).
- Carbohydrates: About 35-40g from the tortillas and veggies.
- Fiber: Involvement of fresh veggies can yield about 3-5g of fiber.
Whenever possible, swap out ingredients for healthier versions, like whole grain tortillas or reduce the ranch for a nutrient boost without losing the flavor!
Final Thoughts
There you have it, foodie friends—a delicious, fun, and super versatile recipe for Crispy Chicken Ranch Snack Wraps! There’s no right or wrong when it comes to crafting these wraps—what matters is that you’re in the kitchen, creating something deliciously yours.
So whether it’s a casual lunch or a game-day feast, let these wraps bring your table together. Remember, the best meals often come from shared stories and a little love. So roll up those wraps, gather your favorite people, and dig in!
Until next time, keep cooking, keep creating, and as always—stay hungry for new flavors!
Print
Crispy Chicken Ranch Snack Wrap
- Total Time: 35 minutes
- Yield: 4 servings
- Diet: None
Description
A delightful wrap filled with crispy chicken, fresh veggies, and creamy ranch dressing, perfect for lunch or snacks.
Ingredients
- Crispy Chicken Tenders
- Ranch Dressing
- Tortilla Wraps
- Lettuce
- Tomatoes
- Cheese
- Optional Toppings: Avocado, Bacon bits, Sliced jalapeños
Instructions
- Prep your chicken: If using homemade, bread and fry your chicken tenders. Heat store-bought as per instructions.
- Gather your wraps on a clean surface. Warm them on a skillet for added flavor.
- Drizzle ranch dressing down the center of each wrap.
- Place 2-3 crispy chicken tenders in the center of the wrap.
- Sprinkle lettuce and chopped tomatoes over the chicken.
- Add shredded cheese on top of the layers.
- Wrap the tortilla tightly from bottom to top.
- Slice the wrap diagonally for serving.
Notes
Serve with extra ranch dressing on the side for dipping and garnished with fresh herbs.
- Prep Time: 15 minutes
- Cook Time: 20 minutes
- Category: Lunch
- Method: Wrapping
- Cuisine: American
Nutrition
- Serving Size: 1 wrap
- Calories: 450
- Sugar: 3g
- Sodium: 500mg
- Fat: 20g
- Saturated Fat: 8g
- Unsaturated Fat: 10g
- Trans Fat: 0g
- Carbohydrates: 40g
- Fiber: 4g
- Protein: 28g
- Cholesterol: 60mg
Keywords: chicken wrap, ranch dressing, easy recipe, snack wrap, crispy chicken
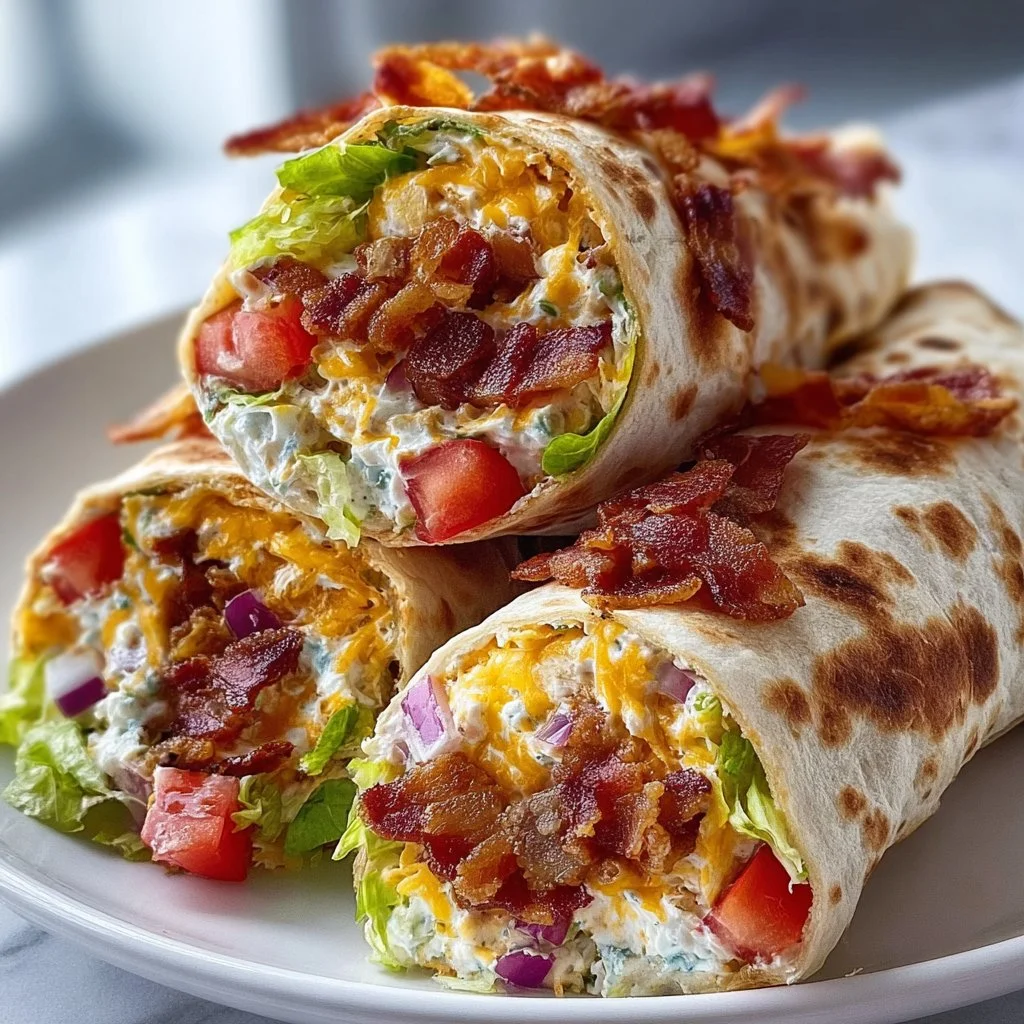
Cheesy Bacon Ranch Wraps
Cheesy Bacon Ranch Wraps: A Flavorful Journey
Hey there, foodies! Beau Collier here, and today let’s dive into a recipe that’s as comforting as your favorite pair of sweatpants and as crowd-pleasing as your go-to playlist at a backyard barbecue. We’re talking about Cheesy Bacon Ranch Wraps—your new best friend for parties, picnics, or just those days when you want something satisfying without spending hours in the kitchen.
Imagine biting into a perfectly wrapped tortilla overflowing with creamy cheese, crispy bacon, and fresh veggies. Each bite is a flavor explosion that feels like a warm hug. And let me tell you a little secret: these wraps are super easy to make, and you can customize them to fit your cravings.
Whether you’re hosting a gathering, looking for a delicious lunch, or prepping a quick snack, these wraps will have you covered. There’s something magical about the combination of ranch dressing with the richness of cream cheese and the savory crunch of bacon. It’s a blend that hits all the right notes!
So, roll up those sleeves, grab your chef’s hat (or your favorite apron), and let’s whip up these scrumptious Cheesy Bacon Ranch Wraps! Trust me; you’re going to want to keep this recipe on hand for when the cravings hit.
Personal Story
Before I share the nitty-gritty details of this fantastic wrap, let me take you on a little stroll down memory lane. Growing up, my family often gathered around the dining table for spontaneous snack nights. One of our favorites was making wraps together, and boy, did we have a blast! We’d pull out every ingredient we could find—deli meats, cheeses, assorted salads—anything that could fit inside a tortilla.
It wasn’t just about the food; it was about the laughter and the creativity that unfolded in our kitchen. Those late-night wrap-making sessions turned into a tradition—a culinary playground where we could experiment and make endless combinations. However, one wrap quickly became the star of the show: the cheesy bacon ranch version.
I remember the first time my sister decided to make it. She piled on the bacon and ranch with such enthusiasm that I thought we might have started a new food trend! From that night on, cheesy bacon ranch wraps became a staple for our family movie nights, always paired with laughter, conversation, and sometimes a bit of friendly competition to see who could create the wildest wrap.
So, here I am, years later, eager to share this nostalgic recipe with you. As we begin to recreate these delicious wraps, I hope you find your own moments of joy and connection in the kitchen, just like we did.
Ingredients
Here’s what you’ll need to bring these delectable wraps to life:
-
4 large flour tortillas
These are the vessel for our delights! Flour tortillas are soft and pliable, making them perfect for wrapping. If you prefer, you can swap in corn tortillas or even lettuce wraps for a gluten-free option. -
8 ounces cream cheese, softened
Cream cheese adds a rich, velvety texture. Make sure to let it soften to room temperature for easier mixing. You can also substitute with Greek yogurt for a tangy twist or use a vegan cream cheese if you’re dairy-free. -
1/2 cup ranch dressing
The true star of the show! Ranch dressing adds that familiar, zesty flavor. You could also try sour cream mixed with your own herbs if you’re looking for a homemade touch or even switch it out for Caesar dressing for a different flair. -
1 cup shredded cheddar cheese
Cheddar cheese brings the cheesy goodness! Feel free to experiment with other varieties like pepper jack for a little kick or a blend of different cheeses for more depth. -
1 cup cooked bacon, chopped
Crispy, smoky bacon makes everything better! If you’re looking for a healthier option, turkey bacon can be a great substitute or even crumble up some crispy tofu for a plant-based alternative. -
1/2 cup green onions, chopped
Green onions add a bit of freshness and crunch. If you don’t have any, red onions or chives will work wonders too! -
1 cup lettuce, shredded
For that nice crunch and freshness! You could use romaine, iceberg, or even baby spinach to vary the taste and texture. -
1 cup diced tomatoes (optional)
Tomatoes brighten up the wraps and add a juicy bite. If you’re not a fan, feel free to leave them out! -
Salt and pepper to taste
Always taste your food; seasoning is key to bringing all these flavors together! A pinch of garlic powder or paprika can also elevate the taste.
Step-by-Step Instructions
Now, let’s get cooking! Follow these steps to make your Cheesy Bacon Ranch Wraps:
-
Prepare Your Ingredients
Start by gathering all your ingredients. This simple step can save you time and keep the process organized. Chop your green onions, chop your cooked bacon, and shred the lettuce. It’s like setting the stage for the main event! -
Mix the Base
In a medium bowl, combine the softened cream cheese with the ranch dressing. Use a whisk or a spatula and mix until everything is smooth and well-combined. Pro Tip: If you want to add a little extra kick, sprinkle in some garlic or onion powder to the mixture! -
Layer It Up
Lay your large tortillas flat on a clean surface. Spread a generous layer of the cream cheese and ranch mixture on each tortilla, leaving about an inch around the edges. This ensures nothing spills out when you roll them up! Chef Hack: Use a rubber spatula to spread the mixture evenly for an ultra-smooth finish. -
Add the Good Stuff
Next, sprinkle a handful of shredded cheddar cheese onto the cream cheese layer, followed by the chopped bacon, green onions, shredded lettuce, and diced tomatoes if you’re using them. Remember, you can customize the amount based on your personal preference—more cheese? Yes, please! -
Let’s Roll
Now comes the fun part! Starting at one end, carefully roll the tortilla tightly. Make sure to tuck in the sides as you roll to keep all the delicious fillings contained. Think burrito, but even better! Tip: If you’re traveling with these wraps, you can use toothpicks to secure them. -
Slice and Serve
Once rolled, use a sharp knife to slice the wraps into pinwheels or halves. This makes them easier to eat and presents beautifully! Chef’s Tip: Arrange them on a platter with some ranch dip or hot sauce for dipping. Trust me; it adds a fun touch! -
Enjoy!
Dig into these cheesy, bacon-flavored goodness wraps. Whether it’s a snack, party platter, or lunch, these wraps are sure to please! And don’t forget to share with your friends. They’ll surely be asking for the recipe!
Serving Suggestions
When it comes to serving these delicious wraps, let your creativity shine! Here are a few fun ideas to elevate your presentation:
-
Platter Arrangement
Place your wraps cut side up on a large serving platter and garnish with fresh veggies like cherry tomatoes and carrots. A drizzle of ranch dressing around the edge can make for a beautiful display. -
Add Dips
Serve with a couple of dipping options like salsa, guacamole, or even a spicy chipotle mayo. It adds a fun interactive element to your meal! -
Mason Jar Snack Packs
For a fun and portable option, layer sliced wraps in mason jars for lunch! Include a small container of dipping sauce on the side—perfect for picnics or busy days. -
Garnish with Herbs
A sprinkle of fresh parsley or cilantro on top of the wraps before serving adds a pop of color and a fragrant touch.
Recipe Variations
Feeling adventurous? Here are some creative twists and variations you can try with your wraps:
-
Spicy Southwest
Add sliced jalapeños or a drizzle of sriracha to your cream cheese mix for a spicy kick. You can also use pepper jack cheese instead of cheddar. -
Mediterranean Style
Swap out the bacon for crumbled feta and add spinach, olives, and sun-dried tomatoes for a Mediterranean twist. -
BBQ Chicken
Shred some cooked chicken and mix it with BBQ sauce. Use this as your protein source for a different take that’s still savory and satisfying. -
Breakfast Wrap
Turn these wraps into breakfast by adding scrambled eggs, diced bell peppers, and avocado. Perfect for those mornings when you want something hearty! -
Vegan Delight
Replace cream cheese with a vegan alternative and use chickpea bacon along with any variety of fresh veggies to create a delicious vegan wrap.
Chef’s Notes
One of the best parts of cooking is how recipes evolve over time. This cheesy bacon ranch wrap has transformed from our family’s late-night concoction into a crowd favorite for gatherings. I remember how we used to debate over the best combination of ingredients, and to this day, it’s still a fun challenge trying new flavors.
Don’t be afraid to get a little messy in the kitchen—great food isn’t always about perfection. It’s about the joy of creation and the laughter that fills your home. And remember, some of our best culinary ideas come from scrambling together what’s left in the fridge!
Just the other day, I tried adding some crispy sweet potato fries inside the wrap, and wow, that added an unbelievable crunch and sweetness that turned the flavor profile upside down. The kitchen is truly a playground; never stop experimenting!
FAQs and Troubleshooting
Q: What if my wraps are falling apart?
A: Make sure you’re rolling them tightly enough and not overstuffing them. You can also secure them with toothpicks or wrap them in foil before serving.
Q: Can I make these wraps ahead of time?
A: Absolutely! Just wrap them tightly in plastic wrap and store them in the fridge. Enjoy them within 1-2 days for the best taste and freshness.
Q: What can I do if I don’t have ranch dressing?
A: No worries! You can whip up a quick homemade ranch with mayo, sour cream, dill, onion powder, and garlic powder. Or try any other creamy dressing you love!
Q: Are there any vegetarian substitutions?
A: Yes! You can easily replace the bacon with roasted veggies or sautéed mushrooms. Feel free to add extra cheese or beans for protein!
Nutritional Info (per wrap)
- Calories: 350
- Protein: 12g
- Carbohydrates: 31g
- Fat: 20g
- Fiber: 3g
- Sodium: 700mg
(Note: Nutritional values can vary based on specific ingredients and portion sizes.)
Final Thoughts
There you have it, folks—Cheesy Bacon Ranch Wraps that are not just a recipe but a wonderful opportunity to gather around the table, connect with loved ones, and enjoy some culinary creativity. Whether you stick closely to the original or have a blast with variations, the key to great food is all about having fun in the kitchen.
So, the next time those snack cravings hit or you’re throwing a gathering, remember this recipe, and let the wraps work their magic. Keep it simple, keep it soulful, and above all, keep enjoying the process of cooking! Grab your fork (or your favorite mug for dipping), and let’s dig in together!
Happy cooking! 🍴✨
There you go, friend—your ultimate guide to creating delicious Cheesy Bacon Ranch Wraps that are not only easy to make but will leave you with lasting memories and satisfied taste buds. What are you waiting for? Get cooking!
Print
Cheesy Bacon Ranch Wraps
- Total Time: 15 minutes
- Yield: 4 servings 1x
- Diet: Omnivore
Description
Deliciously creamy and savory wraps filled with cheese, bacon, and fresh veggies, perfect for gatherings or quick snacks.
Ingredients
- 4 large flour tortillas
- 8 ounces cream cheese, softened
- 1/2 cup ranch dressing
- 1 cup shredded cheddar cheese
- 1 cup cooked bacon, chopped
- 1/2 cup green onions, chopped
- 1 cup lettuce, shredded
- 1 cup diced tomatoes (optional)
- Salt and pepper to taste
Instructions
- Prepare your ingredients by gathering them and chopping the green onions, bacon, and shredding the lettuce.
- Mix the softened cream cheese with the ranch dressing in a medium bowl until smooth.
- Layer tortillas flat and spread the cream cheese mixture on each one, leaving space around the edges.
- Add shredded cheddar cheese, chopped bacon, green onions, lettuce, and diced tomatoes on top.
- Roll tightly from one end, tucking in the sides as you go.
- Slice the wraps into pinwheels or halves for serving.
- Enjoy! Serve with ranch dip or hot sauce for extra flavor.
Notes
These wraps are customizable; feel free to experiment with different ingredients or sauces based on your preferences.
- Prep Time: 15 minutes
- Cook Time: 0 minutes
- Category: Appetizer
- Method: No Cooking
- Cuisine: American
Nutrition
- Serving Size: 1 wrap
- Calories: 350
- Sugar: 3g
- Sodium: 700mg
- Fat: 20g
- Saturated Fat: 10g
- Unsaturated Fat: 6g
- Trans Fat: 0g
- Carbohydrates: 31g
- Fiber: 3g
- Protein: 12g
- Cholesterol: 40mg
Keywords: wraps, bacon, ranch, easy recipes, party snacks
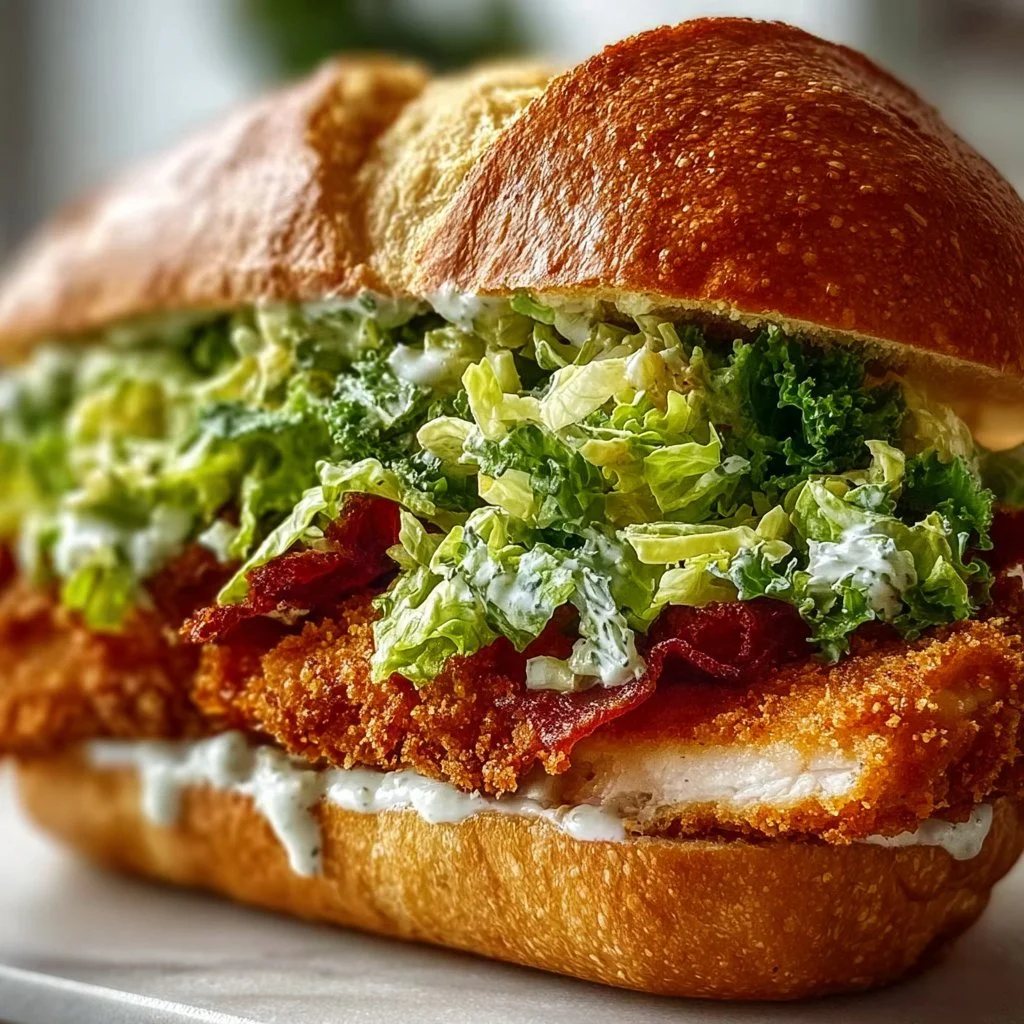
Crispy Chicken Caesar Sandwich
# Crispy Chicken Caesar Sandwich: A Comfort Food Classic

## Introduction

Hey there, food lovers! Beau Collier here, and oh boy, do I have a treat for you today! If you've been on the hunt for a sandwich that’s as cozy as it is delicious, look no further than my Crispy Chicken Caesar Sandwich. This masterpiece combines the heartiness of fried chicken, the zing of creamy Caesar dressing, and the crunch of crisp lettuce—all perched between two slices of your favorite sandwich bread. It’s a flavor explosion that feels like a warm hug, no matter the time of year!

Now, I know what you might be thinking. "Crispy chicken on a sandwich?! Isn’t that just for fast food?" Well, yes and no! This isn't just your average drive-thru delight; this is a culinary adventure, a celebration of texture and taste that you can whip up right in the comfort of your own kitchen. With just a handful of ingredients and a few simple steps, you’ll be able to create something that rivals even the best of restaurants. Plus, who doesn’t get excited when they bite into a crispy piece of chicken, slathered in creamy dressing, and surrounded by fresh, crunchy greens? It’s the perfect combination of flavors that will have you coming back for seconds (or thirds) in no time!

So, grab your apron and let’s dive into this deliciousness. But before we get started, let’s harken back to a day that truly embodies why this sandwich is close to my heart!

## Personal Story

Picture this: it’s a sunny Saturday afternoon, and I’m a kid in my grandma's cozy kitchen. The aroma of fried chicken fills the air, mixing gently with the scent of fresh garden herbs that she picks just outside her door. It wasn’t just any ordinary day; grandma was whipping up her famous fried chicken, and I had the unique privilege of being her sous chef. She had a magical way of turning simple ingredients into something extraordinary, always reminding me that cooking is about love and creativity.

As we batted around the kitchen, she would talk about her garden, her love for food, and how every meal is a story waiting to be told. She once made a crispy chicken salad served on sandwich bread, slathered with her homemade Caesar dressing. I remember the first bite; the crunch of the coating paired with the zesty, creamy sauce brought an explosion of flavors that left me wanting more. That very moment sparked my passion for cooking, and it's why today, I’m excited to share my very own version of the Crispy Chicken Caesar Sandwich! It’s not just food; it’s a bite of cherished memories and a tribute to my grandma's culinary wisdom.

## Ingredients

Let’s gather our ingredients for the star of the show: the Crispy Chicken Caesar Sandwich! Here’s what you’ll need:

- **2 pieces of crispy fried chicken**
  - *Tip*: You can use leftover fried chicken or make your own from scratch! If you're pressed for time, store-bought rotisserie chicken works wonderfully. Just make sure it’s crispy to keep that essential texture!

- **2 slices of sandwich bread**
  - *Chef Insight*: Ciabatta or a crusty sourdough are my personal favorites because their texture holds up well against the juicy chicken. But honestly, use whatever you have on hand—it's about what you love!

- **Caesar dressing**
  - *Substitution*: If you’re short on time, bottled Caesar dressing works in a pinch. But if you want to impress, try making your own with olive oil, garlic, anchovies, and Parmesan!

- **Leafy lettuce (Romaine or iceberg)**
  - *Tip*: Romaine provides great crunch and flavor. If you want to amp up the health factor, you could use spinach or kale!

- **Parmesan cheese**
  - *Substitution*: Grated Parmesan brings amazing flavors, but feel free to use Pecorino Romano for a bit more zing or even vegan cheese if you’re going plant-based!

- **Black pepper**
  - *Chef Insight*: Freshly cracked black pepper elevates your dish, adding a wonderful bite. If you like it spicy, try adding crushed red pepper flakes!

## Step-by-Step Instructions

Now that we have all our ingredients ready, it’s time to bring this sandwich to life! Here’s how to assemble your Crispy Chicken Caesar Sandwich.

### Step 1: Prepare your crispy chicken

If you’re starting with homemade fried chicken, heat oil in a deep skillet or fryer to 350°F (175°C). Dredge your chicken in seasoned flour, dip it in an egg wash, and coat it again in breadcrumbs for an extra crunch. Fry for about 5-7 minutes per side, or until golden brown. Drain on paper towels.

*Chefs Hack*: If you prefer a healthier option, consider oven-baking! Coat the chicken lightly with oil and bake at 425°F (220°C) for about 25-30 minutes.

### Step 2: Toast the bread

While your chicken is frying or cooling down, pop your sandwich bread in a toaster or on a hot skillet with a little butter to get a nice, golden brown crust.

*Tip*: Toasting your bread not only adds flavor but also helps prevent it from getting soggy from the dressing.

### Step 3: Assemble the sandwich

Once your chicken is crispy and your bread is toasted, let’s build this beauty! Start with one slice of bread and layer it with the leafy greens of your choice. Then, place that crispy chicken right on top.

*Pro Tip*: For extra flavor, drizzle some Caesar dressing over the chicken—don’t be shy!

### Step 4: Add the finishing touches

Next, sprinkle a generous amount of grated Parmesan over the chicken and greens. Add a few twists of black pepper to taste, and finish it off with another drizzle of Caesar dressing for good measure.

*Chef Insight*: For a gourmet touch, you might want to add fresh herbs like basil or parsley!

### Step 5: Top it off

Finally, place the second slice of toasted bread on top to complete your sandwich. Gently press down to ensure everything stays intact. Slice it in half, and you've got a gorgeous sandwich ready to impress!

*Final Tip*: For an Instagram-worthy presentation, angle your cuts for a fun visual effect!

## Serving Suggestions

Now that your Crispy Chicken Caesar Sandwich is ready, it’s time to eat! You can serve it up on a simple plate or get a little fancier. Arrange your sandwich on a wooden board and accompany it with a side of homemade fries or a light salad.

*Pro Tip*: A side of extra Caesar dressing for dipping is always a hit! Add a few cherry tomatoes and pickles for a pop of color for your plate.

## Recipe Variations

Feeling adventurous? Here are some creative variations and swaps you might want to try:

1. **Spicy Chicken Caesar Sandwich**: Add a drizzle of Sriracha or a spicy mayo to your dressing for a kick that’ll wake up your taste buds!

2. **Buffalo Chicken Caesar**: Toss your crispy chicken in Buffalo sauce before assembly for a zesty twist.

3. **Veggie Caesar Sandwich**: Replace chicken with crispy tofu or grilled vegetables for a vegetarian delight!

4. **Bacon Caesar Sandwich**: Layer in some crispy bacon for an indulgent crunch that complements the sandwich beautifully.

5. **Gluten-Free Alternative**: Use gluten-free bread and double-check your dressing’s ingredients to ensure it fits dietary needs.

## Chef’s Notes

Every recipe has a story, and this one is no different! I’ve made a version of the Crispy Chicken Caesar Sandwich for countless gatherings, each time adding a little something special based on seasonal ingredients or my mood. One funny moment was when I decided to use leftover chicken from a BBQ party. We ended up with an out-of-this-world BBQ Chicken Caesar Sandwich! A delightful mistake that taught me to always experiment!

This sandwich has evolved over time, too—what started as a simple assembly now has layers and flavors, with each bite telling a different story.

## FAQs and Troubleshooting

1. **Why is my chicken not crispy?**
   - Make sure to double-dip in flour and egg, and always let the chicken cool on a wire rack to keep it crispy!

2. **Can I prep this sandwich ahead of time?**
   - For best results, assemble right before serving. You can prep individual fillings in advance, though!

3. **What dressing should I use if I don't have Caesar?**
   - You can try ranch or blue cheese dressing if you're feeling adventurous—just adjust your seasonings accordingly!

4. **How do I store leftovers?**
   - Store any leftover components separately and assemble the sandwich fresh to maintain that crispiness!

## Nutritional Info

While I advocate for well-rounded enjoyment of food, it’s good to keep in mind what you’re indulging in. A standard Crispy Chicken Caesar Sandwich, made with chicken, Caesar dressing, lettuce, and bread, can offer around:

- **Calories**: 550-700 calories depending on ingredients
- **Protein**: 34-40g from the chicken
- **Fat**: 30-45g, depending on the dressing and bread choice
- **Carbs**: 40-50g from the bread

You can easily adjust these values by going lighter on the dressing, opting for whole-grain bread, or choosing leaner cuts of chicken.

## Final Thoughts

There you have it, folks! Your journey to making a Crispy Chicken Caesar Sandwich is complete. This delicious creation is not just a meal; it’s an experience that binds memory and flavor. Cooking is a beautiful adventure, and I hope this recipe inspires you to explore your own kitchen with joy and creativity.

So the next time you're craving something comforting, remember: food is about connection, joy, and a dash of love. Take a bite of this sandwich and let it transport you back to those cherished moments, just like it does for me.

Let’s keep this food journey going—share your sandwich creations with me, and let’s keep the culinary conversation alive! Until next time, happy cooking!

Crispy Chicken Caesar Sandwich
- Total Time: 45 minutes
- Yield: 2 servings 1x
- Diet: None
Description
A cozy and delicious sandwich featuring crispy fried chicken, creamy Caesar dressing, and fresh lettuce, all nestled between toasted bread.
Ingredients
- 2 pieces of crispy fried chicken
- 2 slices of sandwich bread
- Caesar dressing
- Leafy lettuce (Romaine or iceberg)
- Parmesan cheese
- Black pepper
Instructions
- Prepare your crispy chicken. Heat oil in a deep skillet or fryer to 350°F (175°C), dredge chicken in seasoned flour, dip in an egg wash, coat in breadcrumbs, and fry for 5-7 minutes per side.
- Toast the bread in a toaster or hot skillet with butter until golden brown.
- Assemble the sandwich with leafy greens on one slice of bread, followed by the crispy chicken.
- Add grated Parmesan and black pepper, drizzling more Caesar dressing on top.
- Top with the second slice of toasted bread, slice in half, and enjoy!
Notes
For healthier options, consider oven-baking the chicken or using gluten-free bread. Experiment with different toppings to suit your taste!
- Prep Time: 15 minutes
- Cook Time: 30 minutes
- Category: Main Course
- Method: Frying
- Cuisine: American
Nutrition
- Serving Size: 1 sandwich
- Calories: 600
- Sugar: 2g
- Sodium: 800mg
- Fat: 35g
- Saturated Fat: 10g
- Unsaturated Fat: 20g
- Trans Fat: 0g
- Carbohydrates: 40g
- Fiber: 2g
- Protein: 35g
- Cholesterol: 70mg
Keywords: Crispy Chicken, Caesar Sandwich, Comfort Food, Fried Chicken Sandwich, Quick Lunch

Crispy Cheesy Roll Ups
Crispy Cheesy Roll Ups: A Culinary Adventure You’ll Love
Hey there, fellow foodies! I’m Beau Collier, your guide to a deliciously fun journey in the kitchen, where I share my love for all things cozy and comforting. Today, we’re diving into a recipe that will instantly transport you back to simpler times: Crispy Cheesy Roll Ups! Imagine sinking your teeth into golden brown morsels packed with gooey, melty cheese, paired beautifully with a warm bowl of tomato soup or marinara sauce for dipping. It’s pure joy on a plate!
There’s something so nostalgic about crunchy, cheesy snacks. They evoke memories of childhood lunches and rainy days spent inside, huddling around the table with friends. And let me tell you, these crispy delights are not just for kids—they’re pure happiness for adults, too! Simple to make, yet endlessly satisfying, this recipe is bound to become a go-to in your kitchen repertoire.
In today’s post, I’ll guide you through the entire process of crafting these delicious roll-ups, sharing personal stories and tips along the way. Whether you’re hosting a casual get-together or just treating yourself to a cozy night in, this dish is sure to impress. So grab your apron and let’s get cooking together!
Personal Story
Growing up, my kitchen was bustling with laughter and the tempting aroma of my mom’s cooking. One of my favorite memories was when she would whip up these crispy cheesy roll-ups for us after school. With my siblings and I coming home famished and ready for a treat, the sight of those little golden rolls sizzling in the skillet was pure magic.
I remember sitting at the kitchen counter, devouring them while they were still steaming hot, dipping them into rich tomato soup. It felt like a hug in every bite, the kind of comfort you can only find in food made from the heart. As I grew older and started experimenting in my own kitchen, these roll-ups became my go-to treat for friends and family gatherings. With every crunch and cheesy pull, I was reminded of those warm, fuzzy moments shared around the table with my loved ones.
Now, as I share this recipe with all of you, I hope to inspire similar moments of joy and togetherness in your own kitchens.
Ingredients
Here’s what you’ll need to make these delicious Crispy Cheesy Roll Ups. Don’t worry, each ingredient is simple, and I’ve included some tips for making the most of them:
-
Bread (sliced, preferably white or whole wheat)
The base of our roll-ups! White bread gives a classic texture, while whole wheat adds a nutty flavor. You can also try sourdough for an extra tart twist. If gluten-free is your thing, any gluten-free bread will do. -
Cheese (your choice, such as cheddar or mozzarella)
The star of the show! Cheddar gives a sharp, tangy flavor, while mozzarella melts to perfection for that gooey goodness. Feel free to mix and match! Pepper Jack offers a nice kick if you’re feeling adventurous! -
Butter (for grilling)
Butter adds richness and ensures that your roll-ups get that golden-brown crust. If you’re looking for a healthier alternative, olive oil works wonderfully, too! -
Tomato soup or marinara sauce (for dipping)
A flavorful sidekick! You can use store-bought or homemade sauces. For something different, try a spicy salsa or even a creamy ranch for dipping, if you’re feeling cheeky!
Step-by-Step Instructions
Ready to bring these cheesy dreams to life? Let’s get cooking! Follow these steps:
-
Prepare Your Ingredients:
Start by gathering all your ingredients and laying them out on your kitchen counter. This makes the process feel seamless and fun. You’ll thank yourself later for having everything in one place! -
Flatten the Bread:
Using a rolling pin, gently flatten each slice of bread. This step helps ensure that you can roll them up easily and that they cook evenly. If you’re feeling fancy, you could even use a wine bottle if no rolling pin is around! -
Add the Cheese:
Place a slice or a handful of your chosen cheese onto each flattened piece of bread. Don’t be shy! The more cheese, the better! You want it to be generous enough that it melts and oozes out when you bite into it. -
Roll It Up:
Carefully roll the bread from one end to the other, making sure the cheese is encased snugly inside. You can secure the roll with a toothpick; it helps keep everything together while you cook. -
Butter Up:
In a small bowl, mix melted butter (or olive oil) with a pinch of salt. Brush this mixture over your roll-ups for that golden crunch. -
Pan-Fry:
Heat a skillet over medium heat. Once hot, place your roll-ups (with the seam side down) in the pan. Cook for about 3-4 minutes per side, or until they reach that beautiful golden brown and are crispy. Keep an eye on them; you want them to be crispy but not burnt. Flip them with care! -
Serve and Enjoy:
Once it’s done, place them on a paper towel to absorb any excess butter. Serve them hot with your dipping sauce on the side. Enjoy the oohs and aahs as you present these crispy delights to your friends and family!
Serving Suggestions
Presentation is key! To elevate your serving game, arrange the crispy cheesy roll-ups on a large platter, artfully drizzling the tomato soup or marinara sauce in a small bowl in the center. You can also sprinkle some fresh herbs—like basil or parsley—over the top for a pop of color and added flavor. For extra flair, consider garnishing your dish with a bowl of mixed olives or a side salad for freshness. Trust me, a little garnish goes a long way!
Recipe Variations
Here are some fun twists you can try to shake up the classic recipe:
-
Vegetable Lovers:
Add finely chopped veggies like spinach, bell peppers, or mushrooms inside the roll-ups for added texture and flavor. -
Meat it Up:
Toss in some ham or pepperoni slices for a heartier option. These savory goodies pair beautifully with melted cheese! -
Herb Infusion:
Experiment with different herbs! Try mixing some Italian seasoning or garlic powder into your butter for a fragrant surprise with every bite. -
Spicy Crunch:
For a little heat, add some sliced jalapeños or crushed red pepper flakes into the cheese mix before rolling it up. -
Sweet Surprise:
For a sweet twist, use cream cheese as your base with a sprinkle of cinnamon sugar and serve with a side of warm chocolate sauce for dipping!
Chef’s Notes
These roll-ups are endlessly adaptable, which is one of the things I love most about them! They’ve come a long way from my mom’s classic version—with every tweak, I’ve learned something new. From using different breads to experimenting with cheese types, the possibilities are as exciting as a new recipe book. Remember to have fun in the kitchen, and don’t stress if they don’t turn out picture-perfect. It’s all about good times and good eats!
FAQs and Troubleshooting
-
What if my roll-ups are falling apart?
If your roll-ups are unraveling, make sure to secure them with toothpicks before frying, or you can use a bit of cheese to seal the edges. -
Can I make these in advance?
Yes! You can assemble them ahead of time, store them in the fridge, and fry them just before serving. Just be mindful that they’ll need slightly longer in the skillet. -
How do I know when they are done cooking?
Keep an eye on that golden-brown color. Generally, about 3-4 minutes on each side should do the trick, but don’t hesitate to cut one open to check for gooeyness! -
What cheese is the best for this recipe?
That really depends on your preference, but mozzarella is fantastic for its meltability! Cheddar adds a lovely flavor, so I’d say mix and match according to what you have on hand!
Nutritional Info
Here’s a quick breakdown of what you can expect in one serving of the classic Crispy Cheesy Roll Up (with cheese and bread):
- Calories: Around 200-250, depending on the cheese you choose.
- Fat: 10-15g (mostly from butter & cheese)
- Protein: 8-10g
- Carbohydrates: 25-30g
- Fiber: 1-2g
Remember, these numbers can fluctuate based on your ingredient choices and portion sizes. Feel free to modify the recipe to fit your dietary needs!
Final Thoughts
I hope you’re feeling as excited as I am to whip up these Crispy Cheesy Roll Ups. They’re perfect for a cozy night in or as a crowd-pleasing appetizer at your next get-together. Remember, it’s about more than just food; it’s about sharing wonderful moments with friends and family.
So gather your loved ones, thank the good old days for inspiring us, and enjoy the joy of cooking and eating together. I can’t wait to hear how yours turn out! Share your stories and variations, and always remember—around here, food is love, laughter, and warm hugs. Happy cooking, and let’s dig in!
Print
Crispy Cheesy Roll Ups
- Total Time: 30 minutes
- Yield: 2 servings 1x
- Diet: Vegetarian
Description
Delicious, crispy roll-ups filled with gooey, melty cheese, perfect for dipping in tomato soup or marinara.
Ingredients
- 4 slices of bread (white or whole wheat)
- 1 cup cheese (cheddar or mozzarella)
- 2 tablespoons butter (for grilling)
- 1 cup tomato soup or marinara sauce (for dipping)
Instructions
- Prepare your ingredients by gathering everything on your kitchen counter.
- Flatten each slice of bread using a rolling pin.
- Add a slice or handful of cheese to each piece of flattened bread.
- Roll the bread tightly, enclosing the cheese securely inside.
- Butter the roll-ups with melted butter or olive oil mixed with salt.
- Pan-Fry in a skillet over medium heat for 3-4 minutes on each side until golden brown and crispy.
- Serve hot with your dipping sauce and enjoy!
Notes
These roll-ups are adaptable; try adding vegetables or different cheeses for variety.
- Prep Time: 15 minutes
- Cook Time: 15 minutes
- Category: Appetizer
- Method: Pan-Frying
- Cuisine: American
Nutrition
- Serving Size: 1 serving
- Calories: 250
- Sugar: 2g
- Sodium: 300mg
- Fat: 15g
- Saturated Fat: 7g
- Unsaturated Fat: 8g
- Trans Fat: 0g
- Carbohydrates: 30g
- Fiber: 2g
- Protein: 10g
- Cholesterol: 30mg
Keywords: cheese roll-ups, crispy snacks, comfort food, easy appetizer, childhood recipe

Grilled Herb Chicken Bowl with Sweet Potato Fries & Avocado Salsa
Grilled Herb Chicken Bowl with Sweet Potato Fries & Avocado Salsa
Hey there, flavor adventurers! If you’re ready to embark on a culinary journey full of color, crunch, and comforting vibes, then welcome to another delicious recipe here at Feastical! Today, we’re diving into a vibrant, feel-good dish: the Grilled Herb Chicken Bowl with Sweet Potato Fries and Avocado Salsa. It’s got everything you need – protein, fiber, healthy fats, and a whole lot of taste to boot!
Now, I know what you’re thinking: "Grilled chicken? Sweet potato fries? Sounds incredible, but can I really make this?" Absolutely! Whether you’re a kitchen whiz or just getting your feet wet with the spatula, this dish is perfect for anyone craving a hearty meal that doesn’t skimp on flavor. Trust me, once you grill up that juicy chicken, toss those crispy sweet potatoes in spice, and mix up that fresh avocado salsa, you’ll feel like a culinary superstar!
Let’s get rolling and create a dish that not only satisfies your belly but also fills your heart with joy. This meal is all about bringing people together, so grab your loved ones (and maybe a drink or two) and let’s whip this up! You’ll impress everyone at the table, and who knows, they might even ask for seconds. So, get those aprons on, and let’s dig into the delicious details!
Personal Story
One of my fondest memories in the kitchen is from a sunny Saturday afternoon when my family and I decided to host a little backyard barbecue. It was the start of summer, and we were all itching to make the most of those warm, sunny days. As I fired up the grill, I could smell the sweet aroma of marinated chicken wafting through the air, mingling with the laughter of friends and family.
I remember prepping the chicken with my mom, who is a culinary wizard in her own right. She was showing me her special herb marinade, which she swore would make the chicken sing with flavor. As we mixed in garlic powder, dried oregano, and a splash of lemon juice, I could see her eyes sparkling with excitement. "Food is all about love, Beau," she said. And that stuck with me. This meal became not just about eating but celebrating each other, sharing stories, and making memories.
Sure enough, we plated up our grilled chicken alongside sweet potato fries and her vibrant avocado salsa. As we sat outside, the sunlight casting a warm glow, we dug into that beautiful bowl of joy, laughter echoing around us. That meal wasn’t just delicious; it was connection on a plate. So, gather your own loved ones and let’s recreate that spirit together!
Ingredients
For the Chicken
-
2 large chicken breasts, butterflied or sliced into fillets
Pro tip: Butterflying the chicken helps it cook evenly and stay juicy. If you can’t find large breasts, feel free to use thighs for extra flavor. -
2 tbsp olive oil
Chef insight: Extra virgin olive oil adds a beautiful richness. You can substitute with avocado oil if you prefer a higher smoke point. -
1 tbsp lemon juice
Substitution tip: In a pinch, lime juice or even a splash of vinegar can keep the zest alive! -
1 tsp garlic powder
Flavor note: Fresh minced garlic can work here too—about 2 cloves should do the trick! -
1 tsp dried oregano
Chef hack: Dried herbs are great, but if you have fresh oregano, it can elevate the flavors even more! -
1 tsp paprika
Insight: Smoked paprika will add an extra depth to the chicken’s flavor. -
Salt & pepper to taste
Chef tip: Always season your proteins well! A pinch of salt can be the difference between good and great.
For the Sweet Potato Fries
-
2 large sweet potatoes, sliced into wedges
Substitution idea: If you want to change it up, try other root vegetables like butternut squash or even regular potatoes! -
1 tbsp olive oil
Again, feel free to use avocado oil for its high smoke point! -
1/2 tsp smoked paprika
Flavor shout-out: This adds a delightful smoky flavor that pairs perfectly with sweet potatoes. -
1/2 tsp garlic powder
Pro tip: Fresh minced garlic can also be used for extra pungency. -
Salt & pepper to taste
Remember, seasoning is key here!
For the Avocado Salsa
-
2 ripe avocados, diced
Pro tip: Make sure your avocados are ripe for the best flavor and creaminess! -
1 medium tomato, diced
Variations: You can use cherry tomatoes for extra sweetness or heirloom tomatoes for a colorful twist. -
1/4 cup red onion, finely chopped
Flavor note: Soak your diced onions in cold water for a few minutes to mellow their sharpness if needed. -
1 tbsp fresh cilantro, chopped
Substitution idea: If you’re not a cilantro fan, fresh parsley will work well too. -
1 tbsp lime juice
Tip: This not only adds flavor but also helps keep the avocado from browning! -
Salt & pepper to taste
For Assembly
-
2 cups cooked quinoa or brown rice
Healthy tip: Both make excellent bases, but quinoa has a higher protein content if you’re looking for a boost! -
Mixed greens or spinach for serving
Serving suggestion: Fresh greens add a lovely crunch and extra nutrients to the dish.
Step-by-Step Instructions
1. Marinade the Chicken
Start by making your chicken irresistible. In a medium bowl, combine the olive oil, lemon juice, garlic powder, dried oregano, paprika, salt, and pepper. Mix them well. Now, take those chicken breasts and coat them in the marinade. Feel free to get your hands in there—this is where the love part comes in! Cover your bowl and let the chicken marinate for at least 30 minutes (or up to overnight in the fridge for an extra flavor punch).
2. Prepare Sweet Potato Fries
While the chicken marinates, you can shift gears to the sweet potatoes. Preheat your oven to 425°F (220°C). Slice the sweet potatoes into wedges and place them in a large bowl. Toss them with olive oil, smoked paprika, garlic powder, salt, and pepper until they’re evenly coated. Spread them out in a single layer on a baking sheet lined with parchment paper. Pop them in the oven and let them roast for about 25-30 minutes, flipping halfway through until they’re beautiful and golden brown.
3. Grill the Chicken
After the sweet potatoes have entered the oven, let’s get the grill ready! Preheat your grill to medium-high heat. Remove the chicken from the marinade and toss it onto the grill. Cook it for about 6-7 minutes per side or until its internal temperature reaches 165°F (75°C). The key here is to not flip the chicken too soon—let those grill marks make their appearance! When the chicken’s done, remove it from the grill and let it rest for about 5 minutes before slicing it.
4. Make the Avocado Salsa
While everything is grilling and roasting, it’s party time for the salsa! In a medium bowl, combine the diced avocados, tomato, red onion, cilantro, lime juice, salt, and pepper. Gently fold the mix until everything is well combined. The lime juice will keep the avocados fresh and zesty! Go ahead and give it a taste; adjust the seasoning or add more lime if you like it tangy!
5. Assemble the Bowl
Now, the fun part—assembling your chicken bowls! Start with a generous scoop of quinoa or brown rice at the base. Next, pile on those roasted sweet potato fries. Then, elegantly place the sliced grilled chicken on top. Finally, crown it with that invigorating avocado salsa. Feel free to add a handful of mixed greens for extra color and crunch!
Serving Suggestions
Once you’ve assembled your glorious creation, it’s time to make it look Instagram-ready! Serve it in wide, shallow bowls for a beautiful presentation. For a touch of flair, consider garnishing with a lime wedge, a sprinkle of fresh cilantro, or even some crushed red pepper flakes for an added kick. The vibrant colors of the chicken, sweet potatoes, and salsa make this bowl an eye-catching centerpiece.
You could also serve it with a side of chips and a light, refreshing dip for those snacky family members. If you’re entertaining, consider a light salad or a fruity dessert to follow up this hearty meal.
Recipe Variations
Now that you’re a pro at making this dish, let’s explore some creative twists to keep your taste buds dancing:
-
Herb Swaps: Switch up the flavor profile by using herbs like thyme or rosemary for the chicken marinade if you’re in the mood for something fresh and piney.
-
Spicy Kick: Feeling bold? Add a chopped jalapeño to your avocado salsa for a delightful heat that complements the dish beautifully.
-
Sweet Potato Alternatives: If you’re looking for lower-carb options, try zucchini or eggplant fries roasted with the same spices for a lighter take.
-
Grains Galore: Switch your base to farro, barley, or cauliflower rice to mix things up while maintaining that wholesome vibe.
-
Protein Boost: Want a vegetarian version? Swap the chicken for grilled tofu or tempeh marinated in the same herbs for a delicious alternative.
Chef’s Notes
This recipe has been a staple in my kitchen, one that continuously evolves as I explore new flavors and cuisines. I’ve had countless dinner parties where this dish has stolen the spotlight—there’s just something about that smoky chicken paired with sweet potatoes and fresh salsa that gets everyone excited.
I also remember a time when I accidentally grabbed cinnamon instead of paprika for the sweet potatoes—let’s just say it was a very interesting experiment! But hey, that’s the beauty of cooking—you learn from the mishaps, and they tend to make the best stories, right?
FAQs and Troubleshooting
1. My chicken is dry! What did I do wrong?
- Not enough marinade time or overcooking the chicken can lead to dryness. Always marinate longer if you can and use a meat thermometer!
2. Why aren’t my sweet potato fries crispy?
- Make sure to give them enough space on the baking sheet. Crowding them will lead to steaming instead of roasting.
3. How do I keep my avocado salsa fresh?
- Store any leftovers in an airtight container. Press plastic wrap directly onto the salsa’s surface to minimize air exposure.
4. Can I make this dish ahead of time?
- Absolutely! You can prep the components separately and assemble the bowl just before serving to keep everything fresh.
Nutritional Info
Curious about the nutritional value of this delightful dish? Here’s a breakdown to help you plan your meals:
- Calories: Approximately 450-500 per serving
- Protein: 30-35 grams (depending on the chicken portion)
- Carbohydrates: 40-45 grams
- Healthy Fats: 15-20 grams
- Fiber: 8-10 grams (thanks to the quinoa and sweet potatoes!)
This nourishing bowl keeps you full while delivering an array of vitamins and nutrients—what’s not to love?
Final Thoughts
As you bring this Grilled Herb Chicken Bowl with Sweet Potato Fries and Avocado Salsa to life, remember that cooking is all about enjoyment and connection. This dish is not just about satisfying hunger; it’s a celebration of flavors, colors, and shared moments around the table.
So here’s to the laughter around the dinner table, the satisfied smiles, and those "seconds, please!" requests. Whether it’s for a casual weeknight family dinner or serving up love to friends on a special occasion, this recipe is sure to hit the spot every single time.
Happy cooking, my fellow foodies! Can’t wait to hear how your bowls turn out—let’s make some kitchen magic together! 🍴✨
Print
Grilled Herb Chicken Bowl with Sweet Potato Fries & Avocado Salsa
- Total Time: 60 minutes
- Yield: 4 servings 1x
- Diet: Gluten-Free, Dairy-Free
Description
A vibrant, feel-good dish featuring juicy grilled chicken, crispy sweet potato fries, and fresh avocado salsa, perfect for any meal.
Ingredients
- 2 large chicken breasts, butterflied or sliced into fillets
- 2 tbsp olive oil
- 1 tbsp lemon juice
- 1 tsp garlic powder
- 1 tsp dried oregano
- 1 tsp paprika
- Salt & pepper to taste
- 2 large sweet potatoes, sliced into wedges
- 1 tbsp olive oil
- 1/2 tsp smoked paprika
- 1/2 tsp garlic powder
- Salt & pepper to taste
- 2 ripe avocados, diced
- 1 medium tomato, diced
- 1/4 cup red onion, finely chopped
- 1 tbsp fresh cilantro, chopped
- 1 tbsp lime juice
- Salt & pepper to taste
- 2 cups cooked quinoa or brown rice
- Mixed greens or spinach for serving
Instructions
- Marinade the chicken by mixing olive oil, lemon juice, garlic powder, oregano, paprika, salt, and pepper in a bowl. Coat the chicken in the marinade and let it sit for at least 30 minutes.
- Preheat the oven to 425°F (220°C) and prepare sweet potato fries by tossing with olive oil, smoked paprika, garlic powder, salt, and pepper. Roast for 25-30 minutes.
- Grill the marinated chicken on medium-high heat for 6-7 minutes per side until fully cooked and resting for 5 minutes after grilling.
- Make the avocado salsa by combining diced avocados, tomato, red onion, cilantro, lime juice, salt, and pepper in a bowl.
- Assemble the bowl with quinoa or brown rice, topped with sweet potato fries, grilled chicken, and avocado salsa.
Notes
For a vegetarian version, swap chicken for grilled tofu or tempeh. Adjust seasonings to taste.
- Prep Time: 30 minutes
- Cook Time: 30 minutes
- Category: Main Course
- Method: Grilling, Baking
- Cuisine: American
Nutrition
- Serving Size: 1 bowl
- Calories: 450
- Sugar: 7g
- Sodium: 400mg
- Fat: 20g
- Saturated Fat: 3g
- Unsaturated Fat: 15g
- Trans Fat: 0g
- Carbohydrates: 45g
- Fiber: 10g
- Protein: 30g
- Cholesterol: 70mg
Keywords: grilled chicken, sweet potato fries, avocado salsa, healthy meal, summer dishes