
Healthy Twix Cups
Healthy Twix Cups: A Sweet Treat with a Guilt-Free Twist!
Hey there, fellow foodies! It’s your buddy, Beau Collier, back at it with another delicious twist on a classic treat that’s bound to tickle your taste buds—Healthy Twix Cups! When that sweet tooth kicks in, there’s no need to sacrifice health for flavor. With these cute little cups, you can revel in that rich, buttery caramel, crunchy “cookie,” and smooth chocolate you crave, minus the guilty pangs after.
Now, I know what you might be thinking: “Healthy and Twix? Can they really exist in the same sentence?” Well, my friend, put on your apron and let’s dive into this guilt-free indulgence that will leave you feeling good inside and out.
A Sweet Memory That Inspired Me
Let me take you back to my childhood when evenings were often wrapped in the warm embrace of my family kitchen. My mom and I would make sweet treats together for movie nights, and our favorite concoction was the ever-popular Twix bar. I distinctly remember the sound of the chocolate lightly cracking as we dug in. We loved that perfect balance of crunchy cookie, silky caramel, and decadent chocolate… Ahh, pure bliss!
Fast forward to now, when I realized I wanted to recreate that nostalgic joy but with a healthy spin. I wanted something delightful, yet made with wholesome ingredients, so I could indulge without feeling like I needed to jog five miles afterward. And that’s how the concept of these Healthy Twix Cups was born! With every bite, they bring back that sweet nostalgia and laughter-filled nights spent with loved ones. So, let’s whip up this delightful recipe together!
Essential Ingredients for Your Healthy Twix Cups
To create these scrumptiously healthy Twix Cups, you’ll need the following ingredients:
-
1 cup almond flour: This gluten-free flour gives our cups a wonderful, nutty flavor while serving as a great binder. If you need a substitution, you can use oat flour or coconut flour, though be cautious with the ratios as they tend to absorb more moisture.
-
1/4 cup coconut oil, melted: This healthy fat helps to create that luscious, melt-in-your-mouth texture. If you’re not a fan of coconut oil, go ahead and use unsalted butter or ghee—your choice!
-
2 tablespoons honey or maple syrup: This is our natural sweetener! Honey is a bit thicker, while maple syrup is runnier. Feel free to adjust the sweetness to your liking or substitute with agave syrup for a vegan option.
-
1/4 teaspoon sea salt: Just a pinch will enhance the sweet flavors and elevate the taste of the chocolate.
-
1/2 cup natural peanut butter: Creamy peanut butter adds protein and that delicious nutty flavor we all crave. If you’re looking for a nut-free option, almond butter or sunflower seed butter can do the trick!
-
1/4 cup dark chocolate chips: Look for chocolate with at least 70% cocoa for a richer flavor and less sugar. You can also melt a dark chocolate bar if you prefer.
-
1 tablespoon coconut milk: This will thin out our chocolate a bit for smooth drizzling. Have a can handy and make sure to shake it well! Almond milk would also work if you have that on hand!
With these simple ingredients, we’re about to create a treat that not only satisfies your sweet tooth but is also kind to your body. Let’s get cooking!
Step-by-Step Instructions to Make Healthy Twix Cups
Now that we have our ingredients all lined up and ready to go, let’s walk through the steps for creating these Healthy Twix Cups together.
Step 1: Prepare Your Pan
Start by lining a muffin tin with paper liners. This will make it easy to pop out the cups once they’ve set, so you don’t have to worry about sticking.
Step 2: Create the Cookie Base
In a medium bowl, combine the almond flour and melted coconut oil. Stir until it’s well mixed. Add in the honey (or maple syrup) and a pinch of the sea salt.
Chef Hack: Use a fork to mix everything together—it helps ensure there are no lumps and makes the process a tad quicker!
Step 3: Form the Cookie Cups
Now, take about 1 tablespoon of the dough mixture and press it firmly into the bottom of each muffin liner. Aim for an even layer to create that lovely cookie-like crust. I like to use the back of a small measuring cup to really pack it in!
Step 4: Add the Peanut Butter Layer
Next up, take your peanut butter and scoop about 1 tablespoon onto each pressed cookie base. Gently smooth it out, spreading it so that we have a nice layer of that creamy goodness.
Tip: If your peanut butter is too firm, give it a quick zap in the microwave for about 15 seconds. This will make it easier to spread!
Step 5: Time for the Chocolate
In a small microwave-safe bowl, combine the dark chocolate chips and coconut milk. Microwave in 30-second intervals, stirring in between until the chocolate is completely melted and smooth.
Pro Tip: Be careful not to overheat the chocolate; it can seize up really quickly!
Drizzle that luscious melted chocolate generously over the peanut butter layer. Try to cover all the peanut butter, so it’s hidden under a beautiful chocolate shell!
Step 6: Chill Until Firm
Pop the muffin tin in the refrigerator for about 1-2 hours, or until the cups are firm. Waiting might be the hardest part, but I promise it’s worth it!
Step 7: Serve and Enjoy!
Once they’re set, remove the cups from the muffin tin by pulling out the paper liners. If any chocolate has overflowed, simply trim with a knife!
Now, plate these delightful cups up, maybe with a sprinkle of sea salt on top for aesthetic appeal. Gather your friends and family, and indulge in these bites of heaven!
Serving Suggestions for Healthy Twix Cups
These Healthy Twix Cups not only taste amazing, but they also look stunning on the plate! To serve, arrange them on a beautiful platter. You can even drizzle some extra melted chocolate around them for a fun presentation.
Hint: Pair these cups with fresh fruit like strawberries or bananas to add a simple, colorful touch. You can also sprinkle some chopped nuts or coconut flakes on top for an added crunch and extra flavor burst!
Recipe Variations: Mix It Up Your Way!
While the original recipe is already a winner, don’t hesitate to get creative! Here are some fun variations you can try:
-
Mocha Twix Cups: Add a teaspoon of instant coffee granules to the melted chocolate for that perfect pick-me-up with cocoa.
-
Coconut Crunch: Incorporate shredded coconut into the peanut butter layer for delightful texture and flavor.
-
Nut-Free Version: Substitute the peanut butter with sunflower seed butter for a nut-free option that’s also school-safe!
-
Vegan Delight: Simply swap the honey with maple syrup and use dairy-free chocolate to make it fully vegan.
-
Spiced Twix Cups: Add a sprinkle of cinnamon or nutmeg to the almond flour mixture for a warming, cozy flavor.
Feel free to mix and match to discover your favorite combination!
Chef’s Notes: A Little Chef Wisdom
As a home cook, I’ve seen how recipes evolve over time. What started as a simple attempt to make Healthy Twix Cups became a family favorite that brings joy to everyone who tries them. There’s something magical about taking a classic recipe, giving it a little TLC, and transforming it into something new and healthier.
And sometimes, when I’m feeling adventurous, I throw in different ingredients based on what I have in the pantry. That’s the beauty of cooking! Embrace the freedom and let your creativity shine in the kitchen!
FAQs and Troubleshooting: Your Questions Answered!
1. My cups are too crumbly! What did I do wrong?
If your cups are crumbly, it might be that you didn’t use enough binding ingredients like coconut oil or peanut butter. Add a touch more melted coconut oil next time, or ensure you’re packing the ingredients well.
2. Can I leave these out at room temperature?
While they can sit out for a short time, I recommend keeping them refrigerated to maintain their firmness. The coconut oil will soften at room temperature.
3. How can I sweeten these without honey or maple syrup?
You can use mashed bananas, unsweetened applesauce, or stevia to keep your cups sweet while keeping the sugars low. Just adjust the consistency as needed!
4. Help! My chocolate seized when melting! What now?
No biggie! Melt some more chocolate and add a splash of oil (coconut or vegetable) to bring it back to life. Just remember to keep the heat gentle next time!
Nutritional Info for Healthy Twix Cups
Let’s take a peek at what makes these Healthy Twix Cups a smart choice! Here’s the approximate nutritional info per cup:
- Calories: 120
- Protein: 4g
- Fat: 9g
- Carbohydrates: 9g
- Fiber: 2g
- Sugar: 3g
These stats may vary slightly based on your specific ingredients and serving sizes, but overall, you can feel great about indulging in these treats. Packed with wholesome fats, fiber, and natural sweetness, they’re the perfect mix of delicious and nutritious!
Final Thoughts: Your Sweet Adventure Awaits!
There you have it—your very own guide to creating mouthwatering Healthy Twix Cups. I hope you enjoyed this recipe as much as I cherished bringing it to life for you. Whether you’re satisfying a sweet craving, hosting a fun get-together, or simply treating yourself (you totally deserve it!), these cups will surely delight.
Remember, cooking should always be fun— a way to express yourself, share love, and create memories. So gather your friends, pop on your favorite playlist, and get ready to whip up a batch of these delightful cups.
Until next time, happy cooking and scrumptiously sweet adventures await you—all with a little love and a pinch of creativity!
Now who’s ready for a bite? 🍫✨
Print
Healthy Twix Cups
- Total Time: 120 minutes
- Yield: 12 servings 1x
- Diet: Gluten-Free, Vegetarian
Description
Indulge in these Healthy Twix Cups, a guilt-free twist on the classic treat featuring a buttery caramel, crunchy cookie, and smooth chocolate.
Ingredients
- 1 cup almond flour
- 1/4 cup coconut oil, melted
- 2 tablespoons honey or maple syrup
- 1/4 teaspoon sea salt
- 1/2 cup natural peanut butter
- 1/4 cup dark chocolate chips
- 1 tablespoon coconut milk
Instructions
- Prepare your pan by lining a muffin tin with paper liners.
- Create the cookie base by combining almond flour and melted coconut oil, then stirring in honey and sea salt.
- Form the cookie cups by pressing 1 tablespoon of the mixture into the bottom of each muffin liner.
- Add the peanut butter layer by scooping 1 tablespoon onto each cookie base and smoothing it out.
- Microwave the dark chocolate chips and coconut milk in 30-second intervals, stirring until smooth.
- Drizzle the melted chocolate over the peanut butter layer.
- Chill the muffin tin in the refrigerator for 1-2 hours until firm.
- Serve and enjoy once firm, optionally sprinkling with sea salt.
Notes
Feel free to substitute ingredients to suit dietary preferences, such as using sunflower seed butter for a nut-free option.
- Prep Time: 15 minutes
- Cook Time: 0 minutes
- Category: Dessert
- Method: Chilling
- Cuisine: American
Nutrition
- Serving Size: 1 cup
- Calories: 120
- Sugar: 3g
- Sodium: 60mg
- Fat: 9g
- Saturated Fat: 6g
- Unsaturated Fat: 3g
- Trans Fat: 0g
- Carbohydrates: 9g
- Fiber: 2g
- Protein: 4g
- Cholesterol: 0mg
Keywords: Healthy Twix Cups, dessert, gluten-free, sweet treats, healthy snacks, guilt-free dessert
Zero Sugar Brownies with Greek Yogurt
Dive Into Decadence: Zero Sugar Brownies with Greek Yogurt
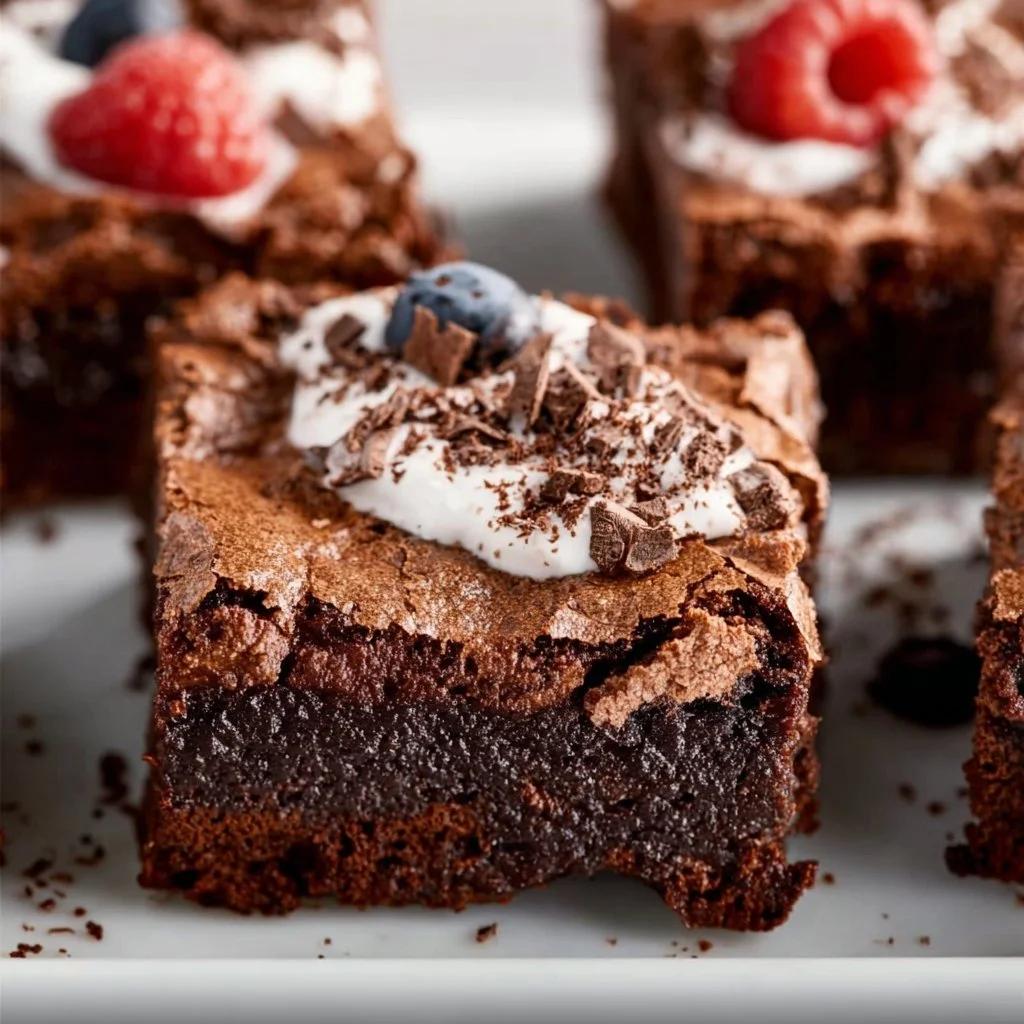
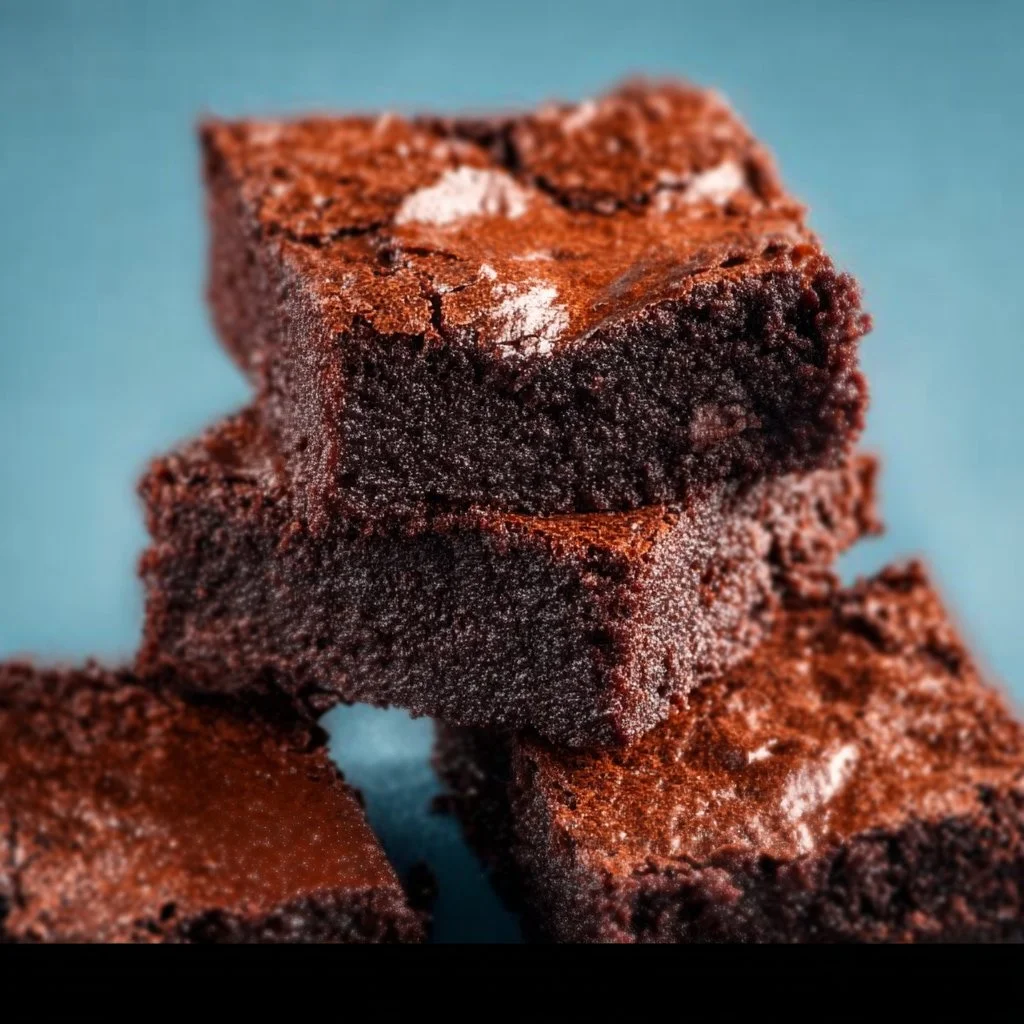
Hey there, fellow foodies! I’m Beau Collier, and today we’re on a delicious mission to make dessert a guilt-free pleasure without sacrificing flavor. Let’s talk about brownies—the quintessential sweet treat that conjures up feelings of nostalgia and warmth. You know the kind, right? The fudgey, chewy bites that remind you of lazy afternoons and cozy movie nights. But what if I told you that you could indulge in these deliciousness while keeping it healthy? That’s right! Enter the magical realm of Zero Sugar Brownies with Greek Yogurt.
These brownies are not just good for the palate; they’re a feel-good treat that will have your taste buds doing the happy dance. You might be wondering how we’re ditching the sugar while still keeping the sweetness. The secret lies in a few key ingredients that we’ll dive into shortly. Trust me—once you whip up a batch of these beauties, you’ll be sharing them with friends, family, and anyone who crosses your delicious path!
Whether you’re counting calories, watching your sugar intake, or simply looking for a healthier dessert option, this recipe checks all the boxes. And the best part? You can whip these up in no time, making it a simple, quick treat that fits right into your busy life. So, grab your apron, and let’s embark on this sweet adventure together, where flavor and health unite in perfect harmony.
Personal Story
You know, every great recipe comes with a story, and mine definitely does! I remember being a wide-eyed kid standing on a stool in my grandma’s kitchen, watching her whisk together ingredients for her infamous brownies. The aroma of chocolate would waft through the air, wrapping around me like a warm hug. No matter how many dishes had to be washed, those moments spent with her, laughing and creating, were etched into my heart.
Grandma always believed that the best treats were made with love, and I’ve carried that thought into my own cooking adventures. Fast forward to today, I wanted to channel that same love into a healthier version that everyone could enjoy—with no sugar crash afterwards! These Zero Sugar Brownies with Greek Yogurt are my modern twist on a timeless classic, and they’re perfect for sharing—just like Grandma would’ve wanted. So, let’s get into the fun part: the ingredients!
Ingredients
Before we get to baking, let’s gather our ingredients! Here’s what you’ll need for these luscious brownies, plus some handy tips:
-
1 cup Greek yogurt: This creamy delight is our secret weapon. It adds moisture, richness, and a hefty dose of protein. If you need a dairy-free alternative, look for a plant-based yogurt that’s thick and creamy.
-
1/2 cup unsweetened cocoa powder: Choose a high-quality cocoa powder for an intense chocolate flavor. If you’re feeling adventurous, try using dark cocoa for an even deeper chocolate experience!
-
1/2 cup almond flour (or any flour of choice): Almond flour gives a nice nuttiness and moisture to our brownies. Don’t have it? No problem! You can swap it out for whole wheat flour, oat flour, or even coconut flour (just use less of it, as it’s denser).
-
1/4 cup unsweetened applesauce: This is our natural sweetener that also adds moisture. Feel free to substitute it with mashed bananas or a bit of pumpkin puree if you’re looking for a flavor twist!
-
1/4 cup sweetener of choice (e.g., erythritol, stevia): Picking your sweetener can be fun; however, make sure to adjust the quantity according to your sweetness preference. If you’re using granulated sweeteners, erythritol works really well for baking.
-
1 teaspoon vanilla extract: A little splash of vanilla elevates the flavors beautifully. If you want to amp things up, try using vanilla bean paste!
-
1/4 teaspoon salt: A pinch of salt enhances the chocolate taste, so don’t skip it. It’s like a magic trick for flavor!
-
1/2 teaspoon baking powder: This is our little leavening agent that gives our brownies that perfect texture. You can also use baking soda if you’re in a pinch, but be aware that it’ll give a different flavor.
Step-by-Step Instructions
Alright, let’s roll up our sleeves and dive into the fun part—baking these heavenly brownies!
Step 1: Preheat Your Oven
Start by preheating your oven to 350°F (175°C). This little step is vital for ensuring that your brownies bake evenly. While that’s warming up, you can throw together all your ingredients!
Step 2: Prepare Your Baking Dish
Grab an 8×8-inch baking pan and line it with parchment paper or lightly grease it. This will make it super easy to pop the brownies out after baking—trust me, it’s a game changer!
Step 3: Mix the Wet Ingredients
In a mixing bowl, add the Greek yogurt, unsweetened applesauce, and vanilla extract. Using a whisk (or a fork if that’s what you have on hand!), mix these ingredients together until smooth. This is where your kitchen will start to smell amazing!
Step 4: Combine the Dry Ingredients
In a separate bowl, combine the unsweetened cocoa powder, almond flour, sweetener, salt, and baking powder. Whisk them together to break up any lumps. Remember, this is where the brownie magic happens!
Step 5: Merge Wet and Dry
Now, pour the dry mix into the bowl with the wet ingredients. Gently fold the dry mixture in until just combined—don’t over-mix or your brownies will be tough! Aim for a smooth batter with some airflow still in it. That’ll give you that fudgy texture!
Step 6: Bake It Up
Pour the batter into your prepared baking dish and smooth the top with a spatula. Pop it into the preheated oven and let it bake for about 25-30 minutes, or until a toothpick inserted in the center comes out with a few moist crumbs (not wet batter!).
Step 7: Cool and Slice
Once baked, remove the brownies from the oven, and let them cool in the pan for at least 10-15 minutes. Patience pays off—cooling helps them firm up, leading to cleaner cuts later! Once cool, lift them out using the parchment paper, slice them into squares, and prepare for pure bliss.
Serving Suggestions
Now that your scrumptious brownies are baked and cooled, it’s time to serve them up in style! Here are a few engaging serving suggestions to elevate your presentation:
-
Elegant Plate: Place a square of brownie on a beautiful white plate and dust it with a dash of cocoa powder or powdered sweetener for a touch of sophistication.
-
Pair with Whipped Topping: Top a warm brownie with a dollop of sugar-free whipped cream or a scoop of your favorite Greek yogurt swirled with a bit of honey.
-
Add Fresh Berries: Fresh strawberries or raspberries add a vibrant pop of color and a refreshing contrast to the rich brownies.
-
Drizzle of Chocolate: Melting a little sugar-free chocolate and drizzling it over the top makes for a photographer’s dream and a chocolate lover’s paradise!
Get creative and remember to serve these up warm for that gooey-hug vibe!
Recipe Variations
If you’re looking to switch things up a bit, here are a few fun variations for these brownies:
-
Nutty Brownies: Stir in a handful of chopped walnuts or pecans before baking for an added crunch and flavor.
-
Mint Chocolate Swirl: Add a teaspoon of peppermint extract to your batter and swirl in some unsweetened cocoa and Greek yogurt mixture for a refreshing minty twist.
-
Fruity Delight: Fold in some dark chocolate chips or dried cherries into the batter for bursts of sweetness and texture.
-
Spiced Version: Sprinkle in some cinnamon or chili powder for a tantalizing twist on flavor. It’ll take you by surprise!
-
Coconut Bliss: Fold in shredded coconut for a tropical vibe; you’ll create a brownie with a chewy texture that’s surprisingly delightful!
Chef’s Notes
Cooking is such a journey of love, and this recipe has gone through its evolution just like I have! Initially, I used regular sugar and butter in my experimenting phase. As I learned more and embraced healthier eating, I found the wonders of Greek yogurt and natural sweeteners, and the brownies transformed! They became not just a sweet treat but a good-for-you dessert bursting with flavor.
And you know, brownies are like a blank canvas—completely open for creativity. I remember a funny kitchen mishap when I accidentally swapped baking soda for baking powder. The resulting brownies were a funky mountain of goo! But hey, those spontaneous moments often lead to the best “don’t do this, but try that!” stories.
FAQs and Troubleshooting
-
Why didn’t my brownies rise?
If your brownies didn’t rise, double-check your baking powder’s freshness. An expired leavening agent can lead to flat brownies. -
How do I store leftovers?
These brownies stay fresh in an airtight container at room temperature for a few days or in the fridge for up to a week. You can also freeze them for longer storage — just make sure to wrap them tightly! -
Can I substitute the Greek yogurt with something else?
Absolutely! You can use a silken tofu or any thick plant-based yogurt for a non-dairy version. Just keep the texture similar! -
What do I do if my brownies are too dry?
If your brownies come out dry, next time, try reducing the baking time slightly. An oven thermometer can also ensure your oven is at the correct temperature. And remember, a little gooeyness is perfectly okay!
Nutritional Info
Let’s break down the nutrition in these delightful brownies a bit!
- Per Brownie (assuming you cut into 16 servings):
- Calories: Approximately 70-80
- Protein: 2g (bless you, Greek yogurt!)
- Fat: 3g (depending on your flour choice)
- Carbohydrates: 10g
- Sugar: 0g!
These figures may vary based on specific brands used, but overall, you’re looking at a guilt-free indulgence that truly satisfies your sweet tooth without the sugar overload!
Final Thoughts
So there you have it—my exciting journey into the world of Zero Sugar Brownies with Greek Yogurt! I hope you enjoyed it as much as I loved sharing it. Baking should always feel like a joyful adventure in the kitchen. Don’t forget, cooking is about experimenting and making it your own, so feel free to put your unique twist on these brownies.
Gather your loved ones, serve those brownies warm with a side of laughter and delicious conversations, and watch how they bring everyone together. Here at Feastical, we believe in the magic of food, and these delightful brownies are a perfect example of how a little creativity can lead to something truly wonderful. Happy baking, folks!
Print
Zero Sugar Brownies with Greek Yogurt
- Total Time: 40 minutes
- Yield: 16 servings 1x
- Diet: Vegetarian
Description
Guilt-free, delicious brownies made with Greek yogurt, perfect for satisfying your sweet tooth without the sugar crash.
Ingredients
- 1 cup Greek yogurt
- 1/2 cup unsweetened cocoa powder
- 1/2 cup almond flour
- 1/4 cup unsweetened applesauce
- 1/4 cup sweetener of choice (e.g., erythritol, stevia)
- 1 teaspoon vanilla extract
- 1/4 teaspoon salt
- 1/2 teaspoon baking powder
Instructions
- Preheat your oven to 350°F (175°C).
- Prepare an 8×8-inch baking pan by lining it with parchment paper or greasing it.
- Mix the Greek yogurt, unsweetened applesauce, and vanilla extract until smooth.
- Combine the cocoa powder, almond flour, sweetener, salt, and baking powder in another bowl.
- Merge the dry mixture into the wet ingredients, gently folding until just combined.
- Pour the batter into the prepared baking dish, smoothing the top with a spatula.
- Bake for about 25-30 minutes, or until a toothpick comes out with a few moist crumbs.
- Cool the brownies in the pan for at least 10-15 minutes, then slice and serve.
Notes
For variations, consider adding nuts, chocolate chips, or spices. Serve warm with chocolate drizzle or fresh berries.
- Prep Time: 10 minutes
- Cook Time: 30 minutes
- Category: Dessert
- Method: Baking
- Cuisine: American
Nutrition
- Serving Size: 1 brownie
- Calories: 75
- Sugar: 0g
- Sodium: 50mg
- Fat: 3g
- Saturated Fat: 0.5g
- Unsaturated Fat: 2g
- Trans Fat: 0g
- Carbohydrates: 10g
- Fiber: 1g
- Protein: 4g
- Cholesterol: 5mg
Keywords: zero sugar brownies, healthy dessert, Greek yogurt dessert, guilt-free brownies, low sugar brownies

Healthy Baked Churro Bites
Healthy Baked Churro Bites: An Irresistible Twist on a Classic Treat
Hey there, food lover! Imagine taking a bite of something warm, sweet, and spiced just right—right? I’m Beau Collier, and today we’re diving into a delightful recipe that will awaken your taste buds and add a sprinkle of joy to your day: Healthy Baked Churro Bites. Now, I know churros might sound like a guilty pleasure reserved for fairs and festivals, but I’m here to break that notion with a healthier, oven-baked version that doesn’t skimp on flavor or fun.
Churros, those crispy, sugary coils of happiness, have been a cherished treat in Spanish and Latin American cultures for generations. The scent of cinnamon wafting through the air as they fry up fresh is enough to make anyone do a little happy dance. However, thanks to our chic little recipe, you can embrace this joy in a healthier way—without guilt!
So, whether you’re gearing up for a cozy movie night, planning a festive gathering, or just whipping up a sweet snack because it’s Tuesday, this recipe is perfect for you! I promise, these bites will have you and your loved ones reaching for a second (or third) helping, minus any of that heavy feeling typical of fried treats. Let’s jump into this scrumptious journey of creating healthy baked churro bites!
A Dash of Nostalgia
Growing up, I was that kid who always wanted dessert before dinner—anyone else guilty of that? My family would frequently visit a charming little café where the churros were legendary. They came coated in cinnamon sugar, and one bite would send me straight to cloud nine. I can still hear the sizzle of the churros as they fried, the warm glow of the sun streaming through the café window, and my family laughing and sharing the treat.
One sunny afternoon, I decided to get a little adventurous. I wanted to replicate that joyous experience in my own kitchen, but with a healthier twist. The last thing I wanted was to feel weighed down from indulging in something I loved. That was the spark that ignited my creativity! I wanted to create churro bites that came together simply and without all the guilt. Fast forward to today, and I can confidently say these little bites capture that childhood joy, plus they’ll keep you feeling light and happy. That’s the kind of food magic I live for!
Ingredients
Here’s what you need to whip up these heavenly bites:
-
1 cup almond flour
A fantastic low-carb option that’s packed with fiber and protein. If you’re looking for a nut-free alternative, you can use sunflower seed flour—just be mindful of the taste difference! -
1/4 cup coconut flour
Offers a mild sweetness and is wonderfully absorbent. Swap with another gluten-free flour like oat flour if coconut isn’t your jam! -
1/4 cup sweetener
Use erythritol for a zero-calorie option, or coconut sugar for a more natural approach. Want more flavor? Brown sugar works beautifully too! -
1 tsp baking powder
A key ingredient for creating those fluffy bites—make sure it’s fresh for the best results! -
1/2 tsp cinnamon
The main spice hero of our churros! You can always amp up the cinnamon for that extra warmth and comfort. -
1/4 tsp salt
Enhances all the flavors; don’t skip it! If you’re watching sodium intake, you can reduce to a pinch. -
2 eggs
They bind everything together and make them oh-so-fluffy. If you’re vegan, replace them with flax eggs (2 tbsp ground flaxseed mixed with 6 tbsp water works like magic). -
1/4 cup melted coconut oil
This will add healthy fats and moisture. Unsalted butter or avocado oil can be substituted for a different flavor. -
1 tsp vanilla extract
A must for a well-rounded flavor. You could also try using almond extract for a unique twist. -
Cinnamon and sweetener mixture for coating
This is where the magic happens! Mix equal parts cinnamon and your sweetener choice. It adds that classic churro finish!
Step-by-Step Instructions
Preheat and Prep
-
Preheat your oven to 350°F (175°C). Getting the oven ready means that by the time your dough is ready, your baking surface is ready too!
-
Prepare a baking sheet. Line it with parchment paper for easy cleanup and to prevent sticking. Your future self will thank you for this!
Mix It Up
-
In a mixing bowl, combine the dry ingredients: almond flour, coconut flour, sweetener, baking powder, cinnamon, and salt. Whisk them together until fully mixed. This step helps all those flavors mingle well and ensures even baking.
-
In a separate bowl, whisk the wet ingredients: eggs, melted coconut oil, and vanilla extract until well combined. Incorporate all those liquid lovelies for a smooth texture.
Combine and Shape
-
Merge the wet and dry mixtures together. Stir until you have a thick dough-like consistency. It’ll be sticky, and that’s okay! You want to aim for a dough that holds together when squeezed.
-
Get your hands slightly wet (this will help with the stickiness), then scoop out a tablespoon of dough and roll it into a small ball. Place them about one inch apart on your prepared baking sheet.
Bake to Perfection
- Bake for 15-18 minutes until they’re golden brown on the edges and tender inside. Keep an eye on them after 15 minutes—oven times may vary. A toothpick inserted into the center should come out clean!
Sweet Coating Time
-
While the churro bites are baking, make your cinnamon-sugar coating by mixing equal parts cinnamon and your sweetener choice in a small bowl.
-
Once they’re out of the oven, let them cool for about 5 minutes, then gently roll them in the cinnamon-sugar mixture while they’re still warm. This will create that irresistible shell we all know and love!
Serving Suggestions
Plate those beautiful churro bites in a fun stack or a little basket. You can add a pinch of extra cinnamon sugar on top for good measure! Serve them with a side of creamy Greek yogurt or a luscious dark chocolate sauce for dipping. Imagine having these mini bites paired with a warm mug of chai or hot cocoa. Talk about a cozy combo!
Recipe Variations
Feeling adventurous? Here are a few ways to switch it up:
-
Chocolate Hazelnut Swirls: Add a spoonful of your favorite chocolate hazelnut spread right in the center before rolling into balls.
-
Coconut Churro Bites: Mix in shredded coconut into the dough for a tropical spin.
-
Nutty Crunch: Add chopped nuts (like pecans or walnuts) into the dough for a delightful crunch.
-
Spiced Churro Delight: Experiment with other spices! A bit of nutmeg or cardamom can lend a warm, unique flavor.
-
Sugar-Free Option: Use a sugar-free chocolate sauce or a drizzle of nut butter instead of the cinnamon-sugar for a different take!
Chef’s Notes
As I developed this recipe, I remembered the joy that churros brought to my family and me. It’s amazing how food can elicit such beautiful memories! Each iteration made me realize that there’s always room for improvement or a new technique to learn. I’ve swapped in different flours, played with spices, and each time, I found something delightful. Don’t be afraid to riff on this recipe—that’s where the real magic lies! Food is a celebration, so have fun with it!
FAQs and Troubleshooting
-
Why did my churro bites flatten?
Make sure you’re using freshly opened baking powder, and avoid overmixing. If the dough is too wet, add a bit more almond flour until the consistency is more dough-like. -
Can I freeze these?
Absolutely! Allow them to cool, then store them in a sealed bag in the freezer. Reheat them for a delicious snack anytime! -
What if they are too dry?
Ensure you’re measuring the flour correctly. Spoon the flour into your measuring cup, and level it off—too much flour can dry them out. -
Can I use a different sweetener?
You can use brown sugar, maple syrup, or honey. Just adjust the measurements, as liquid sweeteners may affect the dough’s consistency.
Nutritional Info
These Healthy Baked Churro Bites come in at roughly:
- Calories: 80-90 per bite
- Fat: 6g (mainly heart-healthy fats from coconut oil and almond flour)
- Carbohydrates: 5g net carbs
- Fiber: 2g
- Protein: 2g
They’re a delightful treat that fits into many dietary preferences while satisfying that sweet tooth!
Final Thoughts
And there you have it, friends! Healthy Baked Churro Bites that are easy to whip up, delicious, and full of stories waiting to be created at your dinner table. Food is all about connection—bringing people together, telling stories, and spreading joy through every bite. So, whether you’re indulging for breakfast, dessert, or a delightful snack, remember that good food doesn’t have to be complicated or heavy.
Try these out for your next gathering or, better yet, make them just for yourself! I promise they’ll warm your heart and home. Until next time, grab your spatula and let’s keep creating wholesome kitchen magic together! Happy cooking!
Print
Healthy Baked Churro Bites
- Total Time: 28 minutes
- Yield: 12 servings 1x
- Diet: Gluten-Free
Description
Delicious and guilt-free baked churro bites that capture the joy of a classic treat without the heaviness of frying.
Ingredients
- 1 cup almond flour
- 1/4 cup coconut flour
- 1/4 cup sweetener (erythritol or coconut sugar)
- 1 tsp baking powder
- 1/2 tsp cinnamon
- 1/4 tsp salt
- 2 eggs
- 1/4 cup melted coconut oil
- 1 tsp vanilla extract
- Cinnamon and sweetener mixture for coating
Instructions
- Preheat your oven to 350°F (175°C).
- Prepare a baking sheet lined with parchment paper.
- Combine the dry ingredients in a mixing bowl: almond flour, coconut flour, sweetener, baking powder, cinnamon, and salt.
- Whisk the wet ingredients: eggs, melted coconut oil, and vanilla extract until well combined.
- Merge the wet and dry mixtures together until you have a thick dough-like consistency.
- Wet your hands slightly, then scoop out a tablespoon of dough and roll it into a small ball.
- Place the dough balls about one inch apart on your prepared baking sheet.
- Bake for 15-18 minutes until golden brown on the edges.
- Mix equal parts cinnamon and your sweetener choice in a small bowl for coating.
- Once out of the oven, let cool for 5 minutes, then roll in the cinnamon-sugar mixture.
Notes
These bites are great served with Greek yogurt or dark chocolate sauce for dipping.
- Prep Time: 10 minutes
- Cook Time: 18 minutes
- Category: Dessert
- Method: Baking
- Cuisine: Spanish
Nutrition
- Serving Size: 1 bite
- Calories: 85
- Sugar: 2g
- Sodium: 100mg
- Fat: 6g
- Saturated Fat: 5g
- Unsaturated Fat: 1g
- Trans Fat: 0g
- Carbohydrates: 7g
- Fiber: 2g
- Protein: 2g
- Cholesterol: 30mg
Keywords: baked churros, healthy dessert, gluten-free, snack recipes

Low Calorie Chocolate Chip Cookies
Low-Calorie Chocolate Chip Cookies That’ll Make You Feel Good
Hey there, fellow food lovers! It’s Beau Collier from Feastical, bringing you another delightful recipe that combines comfort and health in the most delicious way possible. Today, we’re diving into the world of sweets, but with a twist that keeps you feeling fabulous—Low-Calorie Chocolate Chip Cookies! Yes, you heard that right! These little gems are packed with flavor but won’t break the calorie bank.
Cookies aren’t just a treat; they’re a hug in bite-sized form. I remember the first time I baked cookies with my grandma in her cozy kitchen. The aroma of vanilla and chocolate swirling around us was pure magic. I still recall how we’d sneak bites of the dough when we thought no one was looking. This nostalgia is what fuels my kitchen creativity today, and I love to reinterpret classic recipes into healthier versions. After all, you shouldn’t have to sacrifice flavor for health.
Get ready to whip up a batch of these delightful Low-Calorie Chocolate Chip Cookies that are perfect for snacking, sharing, or even sneaking into your lunchbox. Let’s get started!
Personal Story: A Grandma’s Love
Believe me, no cookie can ever compare to those made with love by my grandma! She’d always have a batch of freshly baked cookies waiting for us after school. I remember racing home, dropping my backpack at the door, and heading straight to the kitchen. Seeing the flour dusting her apron and the warm, golden cookies on the cooling rack was sheer bliss.
As time went on, I learned to cherish those moments, and I made it my mission to perfect her recipes. But I’ve also come to realize that with changing lifestyles and health trends, there’s room to infuse those cherished memories with a little bit of modern flair. That’s where this Low-Calorie Chocolate Chip Cookie recipe comes into play. It turns out that cookies can be both nostalgic and healthy, and I’m here to show you how to enjoy them without the guilt—because who says we can’t have our cookies and eat them too?
Ingredients
Here’s what you’ll need for these cookies—simple, wholesome, and totally guilt-free!
-
1 cup oats
Oats are not just for breakfast! They add chewy texture and are great for heart health. You can use rolled oats or quick oats—just avoid instant, as they can be overly processed. -
1 ripe banana
This banana is your natural sweetener! Mashed bananas give moisture and a lovely, subtle sweetness. No ripe bananas? No problem! Applesauce can work as a substitute. -
1/2 cup unsweetened applesauce
Another fantastic source of moisture, applesauce keeps these cookies soft. It’s also a great substitute for oil or butter in baking. If you want some extra flavor, try using cinnamon-flavored applesauce! -
1/2 cup chocolate chips
Of course, we need the star of the show! Using dark or semi-sweet chocolate chips can amp up the antioxidant factor while keeping the cookies rich. Go for dairy-free if you’re keeping it vegan! -
1/2 teaspoon vanilla extract
A splash of vanilla enhances the sweetness and rounds out all those flavors beautifully. Never skip this step! -
1/2 teaspoon baking powder
This little magic ingredient helps your cookies rise and achieve that fluffy texture. -
Pinch of salt
A tiny bit of salt elevates the sweetness and balances the flavors, making everything taste even better!
Step-by-Step Instructions
Let’s make these cookies irresistibly chewy and chocolaty! Follow these steps, and I promise you’ll have cookies to enjoy in no time.
-
Preheat Your Oven
Preheat that oven to 350°F (175°C). A well-heated oven is crucial for that perfect bake. -
Mash That Banana
In a mixing bowl, grab your ripe banana and mash it with a fork until it’s smooth and creamy. Fun tip: The riper the banana, the sweeter it will be! -
Mix the Wet Ingredients
Add the applesauce and vanilla extract to the mashed banana. Stir until everything is well combined. This mixture will be the foundation of your cookie dough! -
Combine the Dry Ingredients
In another bowl, mix your oats, baking powder, and a pinch of salt. It’s crucial to mix these together before combining with the wet ingredients to ensure even baking. -
Bring It All Together
Slowly fold the dry ingredients into the wet mixture. This is where the magic happens! Use a spatula and stir gently until fully incorporated—don’t over mix, or you’ll end up with tough cookies! -
Add Chocolate
Gently fold in the chocolate chips. Yes, this is the best part! -
Scoop and Drop
Using a spoon or cookie scoop, drop dollops of the dough onto a parchment-lined baking tray. Leave some space between the cookies, as they will spread slightly. -
Bake
Slide the tray into the oven and bake for about 12-15 minutes or until the edges are lightly golden. Keep an eye on them; overbaking can lead to dry cookies! -
Cool Down
Once baked, take them out and let them cool on the tray for about 5 minutes before transferring them to a wire rack. This helps them set and firm up!
Serving Suggestions
Now that you have your cookies all baked and cooled, how do you serve them? I love to plate them in a nice stack on a rustic wooden board, perhaps with a glass of your favorite almond milk or dairy-free beverage on the side. If you’re feeling really indulgent, serve them warm with a scoop of low-calorie ice cream on top. Yes, please! A sprinkle of sea salt or a drizzle of honey can take it over the top—seriously, it’s the gourmet touch they deserve.
Recipe Variations
Want to mix things up? Here are a few variations that you can try with this base recipe:
-
Nutty Add-in: Toss in a handful of chopped nuts like walnuts or almonds for added crunch and protein.
-
Spiced Up: Add a teaspoon of cinnamon or pumpkin spice to the dry ingredients for a warm, cozy flavor twist.
-
Fruity Treat: Throw in some dried cranberries or raisins for a fruity burst that complements the chocolate.
-
Coconut Delight: Add unsweetened shredded coconut for a tropical flair—who doesn’t love a cookie that feels like a mini-vacation?
-
Peanut Butter Swirl: Fold in a couple of tablespoons of natural peanut butter for a nutty and creamy version. Just keep in mind, this will change the calorie count!
Chef’s Notes
Here’s a little secret—these cookies can be a customizable base! You can easily adapt them based on what you have at home. I once whipped up a batch using leftover pumpkin puree and spices, and they turned out heavenly! Baking is all about creativity; don’t be afraid to experiment and make these cookies your own.
I’ve also had plenty of funny moments in the kitchen. Like that time I accidentally mistook salt for sugar and ended up with a batch of cookies that were… well, to put it lightly, a bit too seasoned! Lesson learned: always double-check your ingredients before diving in!
FAQs and Troubleshooting
-
Why are my cookies spreading too much?
If your cookies are spreading too thin, try chilling the dough for 30 minutes before baking. This helps the fats solidify and keeps your cookies fluffy! -
Can I make these vegan?
Absolutely! These cookies are naturally vegan as long as you use dairy-free chocolate chips and make sure your applesauce is free from any added sugars. -
What if my dough is too dry?
If your dough seems too dry, feel free to add a splash of almond milk or more applesauce to moisten it up. -
How do I store the cookies?
Keep your cookies in an airtight container at room temperature for about a week. They also freeze well! Just be sure to separate layers with parchment paper.
Nutritional Info
These cookies may be low-calorie, but they’re not low in satisfaction! Here’s a rough breakdown of the nutrition per cookie (based on 12 servings):
- Calories: ~80 per cookie
- Fat: 2.5g
- Carbohydrates: 14g
- Fiber: 2g
- Sugar: 3g (naturally from banana and applesauce)
- Protein: 1g
Not too shabby for a sweet treat, right?
Final Thoughts
So there you have it—my Low-Calorie Chocolate Chip Cookie recipe that’s bursting with flavor but keeps things light! I hope you find joy in every bite and that these cookies bring a wave of nostalgia and happiness to your kitchen, just like they do for me. Whether you’re sharing them with friends or enjoying them alone with a good book, these cookies are meant to make you feel good inside and out.
Feel free to share your thoughts and any variations you try. And remember, baking should always be fun! So grab that spatula and get ready to create some cookie magic. Until next time, my foodie friends—keep cooking, keep exploring, and always celebrate the magic of food! 🍪
Print
Low-Calorie Chocolate Chip Cookies
- Total Time: 25 minutes
- Yield: 12 cookies 1x
- Diet: Vegan
Description
Delicious low-calorie chocolate chip cookies that are guilt-free and packed with flavor!
Ingredients
- 1 cup oats
- 1 ripe banana
- 1/2 cup unsweetened applesauce
- 1/2 cup chocolate chips
- 1/2 teaspoon vanilla extract
- 1/2 teaspoon baking powder
- Pinch of salt
Instructions
- Preheat your oven to 350°F (175°C).
- Mash the banana in a mixing bowl until smooth and creamy.
- Add the applesauce and vanilla extract to the mashed banana; stir until combined.
- Combine oats, baking powder, and a pinch of salt in another bowl.
- Bring the dry ingredients into the wet mixture, stirring gently until incorporated.
- Add the chocolate chips and fold gently into the dough.
- Scoop dollops of dough onto a parchment-lined baking tray.
- Bake for 12-15 minutes until edges are golden.
- Cool on the tray for 5 minutes before transferring to a wire rack.
Notes
These cookies can be customized with nuts, spices, or other mix-ins to suit your taste!
- Prep Time: 10 minutes
- Cook Time: 15 minutes
- Category: Dessert
- Method: Baking
- Cuisine: American
Nutrition
- Serving Size: 1 cookie
- Calories: 80
- Sugar: 3g
- Sodium: 50mg
- Fat: 2.5g
- Saturated Fat: 0.5g
- Unsaturated Fat: 2g
- Trans Fat: 0g
- Carbohydrates: 14g
- Fiber: 2g
- Protein: 1g
- Cholesterol: 0mg
Keywords: low-calorie, chocolate chip cookies, healthy dessert
Healthy Brownies
The Ultimate Healthy Brownies: A Guilt-Free Indulgence
Hey there, foodie friends! I’m Beau Collier, and I’m thrilled to have you here at Feastical. Today, we’re diving into a recipe that’s a game changer in the world of sweet treats: Healthy Brownies! Yes, you read that right—brownies that are not just delicious but also packed with goodness. Before you raise your eyebrows, let me assure you, these brownies taste indulgently rich while sneaking in nutritious ingredients that will make your body (and taste buds) dance with joy!
The inspiration for this scrumptious dish comes from a sweet little memory nestled deep in my heart. Growing up, my kitchen was my playground, and there was no dessert quite like the classic brownie. I remember standing on a stool beside my grandma while she whisked butter and sugar together, filling the air with a heavenly aroma. We’d sneak bites of the batter, giggling and hoping Mom wouldn’t catch us. Oh, those were the days! Fast forward to now, and while I still cherish those nostalgic flavors, I’m all about providing a healthier twist without sacrificing taste.
These Healthy Brownies are made with black beans for protein, almond or peanut butter for creaminess, and cocoa powder to satisfy that chocolate craving. Plus, the use of honey or maple syrup adds natural sweetness, making it a guilt-free treat you can enjoy any time of day. Whether you’re meal prepping for the week or need something sweet to impress your friends at gatherings, these brownies are perfect, and I’m here to guide you every step of the way!
So, let’s roll up those sleeves, and I promise we’ll create a batch of these delicious brownies that you’ll want to share—and maybe even keep all to yourself! Grab your favorite mug of coffee or tea, and let’s get started!
Personal Story
Ah, let me take you back to summer afternoons spent at my grandma’s house. The sun would shimmer through her kitchen window, and the smell of chocolate would be in the air. One particularly special day, she decided we were going to tackle her famous brownie recipe together. Little did I know, this would be the day I fell head over heels in love with baking!
As we melted the butter on the stovetop, she regaled me with stories of her childhood, how her friends would come over to “help” her bake, but they mostly ended up eating the batter. Just as I was about to plop too much flour into the bowl—a common rookie mistake—she caught my hand with a twinkling smile. “Baking is an art, my dear,” she said. “And like all art, it takes practice.”
That day I found my passion, not just for the act of baking but the joy it brings people. These Healthy Brownies embody that spirit of bringing love into the kitchen, proving that even when you swap traditional ingredients for healthier ones, the magic can still happen!
Ingredients
Now that we’re in the kitchen together, let’s check out the simple ingredients you’ll need to whip up these healthy brownies. Each of them plays a role in creating that luscious texture while keeping things nutritious!
-
1 cup black beans, rinsed and drained:
- These little legumes pack a protein punch and provide moisture without adding extra fat. If you don’t have black beans, you can substitute them with kidney beans or even chickpeas for a different flavor!
-
1/2 cup almond butter or peanut butter:
- This creamy goodness binds everything together and adds healthy fats. If you have nut allergies, try sunflower seed butter or tahini!
-
1/2 cup cocoa powder:
- Pure cocoa adds the rich, chocolatey flavor we crave. Make sure it’s unsweetened! If you want a unique twist, you can use carob powder for a hip, earthy vibe.
-
1/2 cup honey or maple syrup:
- Both of these natural sweeteners will satisfy your sweet tooth while offering different flavor notes. For a vegan option, stick with maple syrup!
-
2 large eggs:
- These give our brownies structure. If you’re egg-free, try a flaxseed meal substitute (1 tablespoon flaxseed meal + 2.5 tablespoons water = 1 egg; let it sit for 5 minutes).
-
1 tsp vanilla extract:
- A crucial flavor enhancer, it elevates the brownie experience. If you’re out of vanilla, a dash of almond extract can add a lovely twist.
-
1/2 tsp baking powder:
- This helps the brownies rise slightly, giving them that perfect chewy texture! If you’re gluten-free, double-check that your baking powder is suitable!
-
1/4 tsp salt:
- Don’t skip this—salt balances out sweetness and enhances flavors! You could use sea salt or pink Himalayan salt for an extra flair.
-
1/2 cup dark chocolate chips (optional):
- Because, let’s face it, who doesn’t love chocolate? Dark chocolate chips are a fantastic way to add bursts of chocolate goodness, but feel free to omit if you want a lighter version!
Step-by-Step Instructions
Ready to get baking? Let’s dive into the fun part! Here’s how to transform those simple ingredients into a heavenly tray of Healthy Brownies.
-
Preheat Your Oven:
Start by preheating your oven to 350°F (175°C). This step is super important! A properly preheated oven ensures even baking. While it warms up, you can get the rest of your ingredients ready! -
Blend the Black Beans:
In a food processor, toss in the rinsed and drained black beans. Blend them until they’re smooth—like velvet! It’s essential for the consistency of the brownies. Scrape down the sides a couple of times for an even mix. If you don’t have a food processor, a good old mash with a fork or potato masher will work too, but the smoother, the better! -
Add the Nut Butter:
Next, add your choice of almond or peanut butter to the beans. This will create a rich, creamy mixture that keeps the brownies moist. Blend it in until fully combined. If you want a more nutty flavor, feel free to add a touch more nut butter! -
Incorporate the Wet Ingredients:
Now, it’s time to add the sweet stuff! Pour in the honey or maple syrup, the eggs, and the vanilla extract. Blend until you have a consistent batter—smooth like a dreamy chocolate shake! This is the point to taste it too; you might want to adjust the sweetness according to your preference! -
Dry Ingredients Come Into Play:
With the blender running, add the cocoa powder, baking powder, and salt. You should see the mixture darken as the cocoa blends in. Keep blending until everything is just combined—don’t overdo it! If you love a solid chocolate punch, don’t hesitate to throw in a few chocolate chips at this point! -
Pour and Bake:
Line an 8×8-inch baking dish with parchment paper or grease it lightly. Pour the brownie batter into the dish and spread it evenly using a spatula (you might want to use a rubber spatula to scrape down the sides of the food processor, too—it’s too good to waste!). Pop your dish into the preheated oven and bake for about 20-25 minutes. A toothpick inserted in the center should come out with a few moist crumbs on it (not wet batter!). -
Cool and Slice:
Once baked to perfection, remove the dish from the oven and let it cool in the pan for about 15 minutes before transferring it to a wire rack. But if you’re impatient (like me), you can swoon at the warm, fudgy goodness directly from the pan! Slice into squares once cooled and ready to treat yourself!
Serving Suggestions
The presentation is key, and how we serve these Healthy Brownies can turn a simple treat into a showstopper! Here are a few delightful ways to serve them:
-
On Their Own: Sometimes, the simplest way is the best way! Place a brownie in a cute dessert dish and admire its rustic beauty!
-
Topped with Fruit: Add a dollop of Greek yogurt, a sprinkle of fresh berries, or sliced bananas drizzled with a bit of honey to elevate the “feel-good” vibe.
-
With Ice Cream: For a splash of indulgence, serve a warm brownie with a scoop of low-fat vanilla ice cream or coconut milk ice cream for a vegan twist! The contrast of warm and cold is heavenly.
-
Dust with Powdered Sugar: A light dusting of powdered sugar adds a gourmet finish; just be careful not to overdo it—it’s not a snowstorm!
-
Drizzle of Chocolate Sauce: If you want to go all out, drizzle some melted dark chocolate over the brownies before serving; it’s both beautiful and delish!
Recipe Variations
Time to mix it up! Here are some fun ideas and variations that you can try to tailor this healthy brownie recipe to your taste and dietary preferences:
-
Nut-Free Version: Use sunflower seed butter instead of almond or peanut butter for a completely nut-free option, perfect for packed lunches!
-
Flavored Brownies: Add a teaspoon of instant coffee granules to the batter for a mocha kick, or even a pinch of cayenne pepper for a surprising spicy chocolate experience!
-
Enhanced Texture: Fold in some oats or chopped nuts for a delightful crunch to your brownies. Walnuts, pecans, or even hazelnuts can really amp up that flavor!
-
Swirl it Up: Create a gorgeous brownie with a cream cheese swirl by mixing 4 oz of softened cream cheese with 1/4 cup of powdered sugar and vanilla, placing dollops on top of the batter before swirling them together.
-
Seasonal Flavors: For an autumn touch, add a sprinkle of pumpkin spice or apple cinnamon for a cozy seasonal twist!
Chef’s Notes
I absolutely love how this recipe has evolved over time. When I first made healthy brownies, I was skeptical. Would they really satisfy my chocolate cravings? I received a few sideways glances when I mentioned the main ingredient was black beans. But hey, never underestimate the power of creativity in the kitchen!
I always get a kick out of watching friends take their first bite, their eyes lighting up in surprise at the rich flavor without the guilt. It’s those moments that make all the experimenting worthwhile. And remember, if things don’t turn out perfect the first time, that’s okay! Every simmer, stir, and scrape is a lesson learned. So embrace the journey, my friends!
FAQs and Troubleshooting
Q: Can I make these brownies vegan?
Absolutely! Just swap the eggs for a flaxseed substitute mentioned earlier, and you’ve got a vegan winner!
Q: Why are my brownies too dense?
If your brownies are dense, you may have blended the batter too much or not added enough leavening agent. Ensure your baking powder is fresh and blend until just combined—trust me on this one!
Q: What’s the best way to store leftovers?
Place any leftover brownies in an airtight container at room temperature for up to three days. For longer storage, you can freeze them—just wrap them tightly in plastic wrap, and store in a freezer bag!
Q: Can I double the recipe?
For sure! Just use a 9×13 pan and adjust the baking time slightly (you might need an additional 5-10 minutes). You’ll have more to share with friends and family, or keep them for yourself—no judgment here!
Nutritional Info
Here’s the lowdown on why these healthy brownies are a guilt-free indulgent treat:
- Black Beans: High in fiber and protein, they help keep you full longer and are excellent for gut health.
- Nut Butter: Provides healthy fats and a variety of vitamins and minerals—plus, it keeps the brownies moist and satisfying.
- Cocoa Powder: Rich in antioxidants, cocoa provides those feel-good vibes you crave when indulging in sweets!
- Honey/Maple Syrup: Natural sweeteners that add flavor—and let’s not forget some vitamins and minerals from the natural sources!
- Eggs: They’re not just for structure—eggs also contribute to protein and essential amino acids.
This healthy brownie is a delicious way to enjoy dessert without the guilt while keeping nutrition in mind!
Final Thoughts
And there you have it, my sweet-toothed friends—a mouthwatering recipe for Healthy Brownies that not only satiate your chocolate cravings but also leave you feeling fabulous! Remember, embracing healthier ingredients doesn’t mean losing out on flavor. You can indulge while nourishing your body, and that’s what cooking (and love) is all about!
So, get in that kitchen, have some fun, and let the alluring aroma of chocolate fill your home. I can’t wait for you to create this recipe and experience those warm, fuzzy feelings that come from both baking and sharing! If you try it out, don’t forget to tag @Feastical in your photos—I would love to see your creations! Happy baking, and until next time, keep feeding the joy! 🍫✨
Print
Healthy Brownies
- Total Time: 40 minutes
- Yield: 12 servings 1x
- Diet: Vegan
Description
Delicious guilt-free brownies made with black beans and natural sweeteners, perfect for satisfying your chocolate cravings without the guilt.
Ingredients
- 1 cup black beans, rinsed and drained
- 1/2 cup almond butter or peanut butter
- 1/2 cup cocoa powder
- 1/2 cup honey or maple syrup
- 2 large eggs
- 1 tsp vanilla extract
- 1/2 tsp baking powder
- 1/4 tsp salt
- 1/2 cup dark chocolate chips (optional)
Instructions
- Preheat the oven to 350°F (175°C).
- Blend the black beans in a food processor until smooth.
- Add the nut butter and blend until combined.
- Incorporate the honey or maple syrup, eggs, and vanilla, blending until smooth.
- Add cocoa powder, baking powder, and salt, and blend until just combined.
- Pour the brownie batter into a greased or lined 8×8-inch dish.
- Bake for 20-25 minutes until a toothpick comes out with moist crumbs.
- Cool for 15 minutes before slicing into squares.
Notes
These brownies can be customized with various nut butters or sweeteners. Perfect for meal prep or as a healthy dessert option.
- Prep Time: 15 minutes
- Cook Time: 25 minutes
- Category: Dessert
- Method: Baking
- Cuisine: American
Nutrition
- Serving Size: 1 brownie
- Calories: 180
- Sugar: 10g
- Sodium: 200mg
- Fat: 8g
- Saturated Fat: 1g
- Unsaturated Fat: 7g
- Trans Fat: 0g
- Carbohydrates: 25g
- Fiber: 5g
- Protein: 5g
- Cholesterol: 30mg
Keywords: healthy brownies, guilt-free dessert, chocolate recipe, vegan brownies, high protein dessert