
The Best Greek Yogurt Brownies – Easy & Fudgy
# The Best Greek Yogurt Brownies – Easy & Fudgy
## Introduction
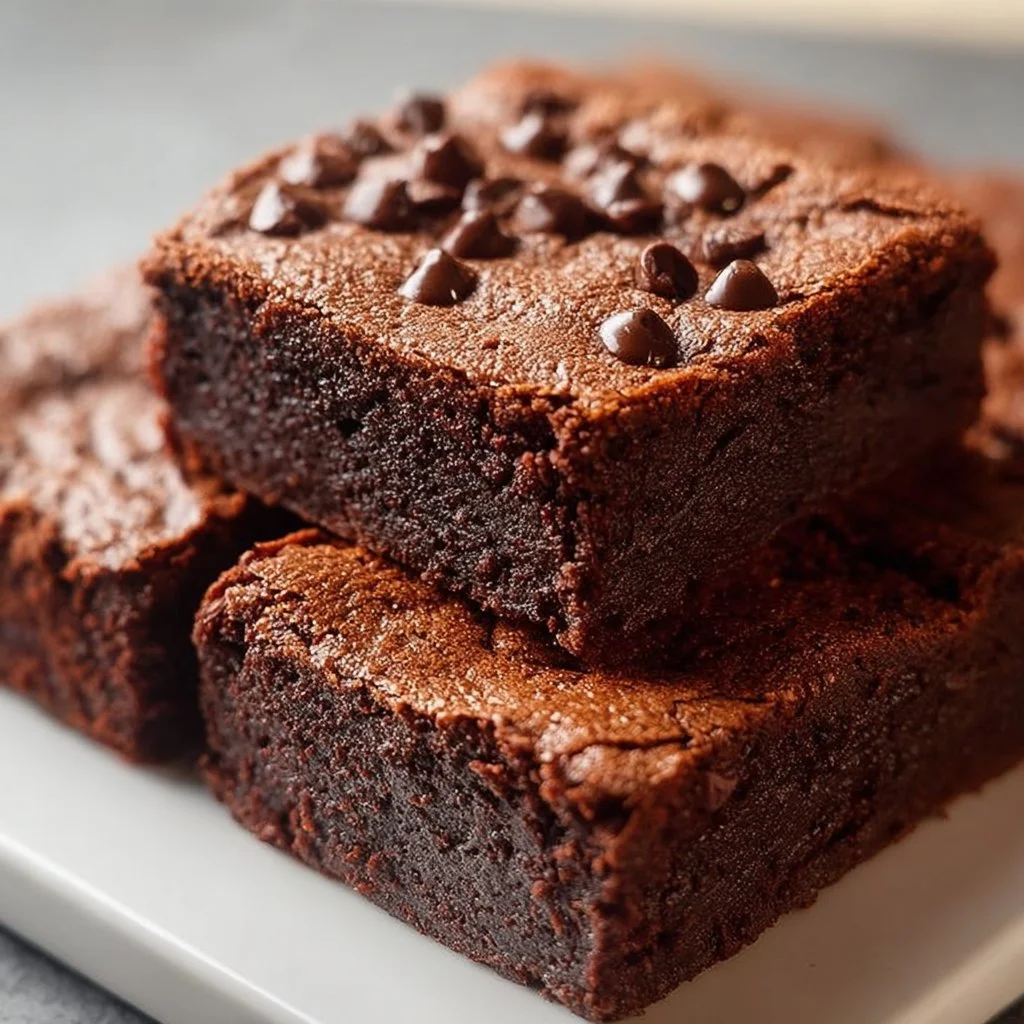
Hey there, fellow foodies! Today, we’re diving into something that’s equal parts dreamy and delicious—the best Greek yogurt brownies. Now, hold on a second! You might be raising an eyebrow, thinking that 'healthy' and 'brownies' don't really gel together. But let me tell you, these brownies are the perfect marriage of indulgence and healthiness. They’re fudgy, rich, and oh-so-fulfilling while sneaking in some protein and probiotics, thanks to that luscious Greek yogurt. It’s like enjoying a slice of heaven without guilt hanging over your head!
Feastical isn’t just about mouth-watering flavors; it’s about creating food that brings warmth to your heart and richness to your soul. Picture it: a rainy afternoon, the kind that makes you want to curl up on the couch with a good book, maybe a cup of tea, and a gooey brownie in hand. Who doesn't want that? You’ll get the feel-good vibes without skimping on flavor.
Plus, the process is super simple! You don’t need to be a kitchen wizard or have ten years of culinary experience under your belt. I’m here to guide you through every step like the friend that helps you out while you’re figuring out where that spatula went. So, slap on your apron, preheat that oven, and let’s get whirl into the world of these fudgy Greek yogurt brownies that’ll make you swoon!
## Personal Story
Growing up, dessert was always a family affair in my house. My mom had a soft spot for sweets, and every weekend, she’d roll up her sleeves and whip up something chocolaty and comforting. My favorite memories were of us gathered in the kitchen, laughter mixing with the smell of melting chocolate. One weekend, she decided to take a healthier spin on our usual brownies. She swapped out oil and butter for Greek yogurt.
At first, I didn’t believe it would work out. But when I took that first bite of her *healthy* brownies—I was blown away! They were just as fudgy as the classic version, with a rich chocolate flavor that kept us reaching for more. Those brownies taught me two important lessons: health and indulgence can exist hand-in-hand, plus, a little creativity in the kitchen goes a long way. That magical combination inspired me—even set me on the path to creating my own recipes to share with all of you!
## Ingredients
Here’s what you’ll need to whip up these brownies:
- **½ cup (120g) Greek yogurt**
This creamy delight adds richness and moisture. You can substitute low-fat yogurt for a lighter version or even try a dairy-free option like coconut yogurt for a unique flavor twist.
- **¼ cup (60ml) maple syrup or honey**
Here’s where the sweetness comes in! Maple syrup gives a wonderful depth of flavor, while honey adds that classic sweetness. If you prefer less sugar, you can use a sugar substitute like stevia—but do adjust according to taste.
- **2 large eggs**
Eggs provide that essential binding element and help create a wonderful texture. You can use flax eggs (1 tablespoon ground flax mixed with 2.5 tablespoons water) for a vegan twist!
- **1 teaspoon vanilla extract**
A must-have for any sweet treat! It brings a warm, inviting flavor. You can double up on the vanilla for an even richer taste if you’re feeling indulgent.
- **½ cup (45g) unsweetened cocoa powder**
This is what gives our brownies their chocolatey kick! For a twist, try using dark cocoa powder for a deeper flavor profile.
- **½ teaspoon baking powder**
This leavening agent helps our brownies rise slightly, making them light yet fudgy. If you’re keeping things gluten-free, make sure your baking powder is certified gluten-free.
- **¼ teaspoon salt**
Salt enhances the sweetness and rounds out the flavors, making everything more delicious. A touch of sea salt as a topping can also add a lovely finishing touch!
- **½ cup (60g) almond flour or oat flour**
Almond flour contributes a lovely nutty flavor, while oat flour adds more wholesome goodness. If you’re nut-free, go for oat flour or even all-purpose flour.
- **½ cup (90g) semi-sweet or dark chocolate chips**
These are the cherry on top. Rich and melty, chocolate chips are a must! Go for dark chocolate if you want a less sweet, more sophisticated flavor.
## Step-by-Step Instructions
### Step 1: Preheat Your Oven
First things first! Preheat your oven to 350°F (175°C). Preheating is crucial to get that perfect bake and to keep your brownies wonderfully fudgy. Trust me, it makes a world of difference!
### Step 2: Prepare Your Baking Dish
Grab an 8x8-inch (20x20 cm) baking dish. Grease it lightly with cooking spray or line it with parchment paper for easy removal later on. If you want a more rustic look, skip the parchment and go straight to greasing—there’s just something homely about that!
### Step 3: Mix the Wet Ingredients
In a large mixing bowl, combine the Greek yogurt, maple syrup (or honey), eggs, and vanilla extract. Whisk them together until smooth. This is where the magic happens! Don’t rush this step—make sure all the ingredients meld together beautifully.
### Step 4: Add the Dry Ingredients
Now, sift in the cocoa powder, baking powder, and salt. This is a great opportunity to incorporate air into your brownie mixture, giving them that dreamy texture you crave. Mix until combined, but don’t over-stir! A few lumps are just fine.
### Step 5: Fold in the Flour
Next up, add the almond flour or oat flour. Gently fold it into the mixture until just combined. Again, this is where you want to be gentle. Overmixing can result in tough brownies, and we’re after fudgy, melt-in-your-mouth goodness here!
### Step 6: Stir in the Chocolate Chips
Now, let’s get chocolaty! Toss in the chocolate chips, giving a nice stir to ensure they are evenly distributed throughout the batter. Feel free to taste a chip—quality control is important, after all!
### Step 7: Pour and Spread
Pour the batter into your prepared baking dish and use a spatula to spread it evenly. Don’t fret if it looks a little thick; that’s what makes these brownies so fudgy!
### Step 8: Bake to Perfection
Slide your brownies into the oven and bake for 20-25 minutes. You want them to be set around the edges but still a bit soft in the middle. Remember, they’ll continue to cook a little as they cool, resulting in that perfect gooey center.
### Step 9: Cool and Cut
Once baked, remove them from the oven and allow them to cool in the dish for about 10 minutes. Then transfer them to a wire rack to cool completely. Or, if you're impatient like I am, dig in right away—just know that they might fall apart a bit! Once cooled, cut them into squares and prepare to be in brownie heaven!
## Serving Suggestions
So how do you serve up these delightful brownies? The options are endlessly delicious! For a touch of class, dust some powdered sugar or cocoa powder on top before serving. Pair them with a scoop of vanilla ice cream or a dollop of Greek yogurt to elevate them further. If you’re feeling playful, drizzle some melted chocolate or a homemade berry sauce on top—trust me, your taste buds will thank you!
## Recipe Variations
Now, let’s get creative! Here are a few ideas to switch up this classic recipe:
1. **Nutty Brownies:** Add ½ cup of chopped nuts like walnuts or pecans for added crunch and flavor.
2. **Minty Fresh:** Incorporate a few drops of peppermint extract into the batter for a refreshing mint chocolate brownie.
3. **Cherry Delight:** Mix in some chopped cherries or raspberries for a fruity twist that complements the chocolate beautifully.
4. **Spicy Twist:** Add a pinch of cayenne pepper or chili powder for an unexpected kick that balances the sweetness.
5. **Coconut Bliss:** Fold in some shredded coconut for a tropical flair that’ll transport you to summer days!
## Chef’s Notes
You know, I have to confess, this recipe has had its fair share of experiments! The first time I made these, I used way too much cocoa powder and forgot the sugar! It was pretty much a cocoa brick—but it inspired me to play with the recipe until it was just right. Now I can whip these brownies up in no time for parties or cozy nights in. You never know what kind of masterpiece you’ll create in the kitchen! It’s all about having fun and experimenting with flavors, so don’t be afraid to make it your own!
## FAQs and Troubleshooting
**1. Why are my brownies too dry?**
Make sure not to overbake them; they should be set at the edges and slightly gooey in the center. If you’ve accidentally baked them too long, try serving them with ice cream to soften them up!
**2. Can I make these brownies vegan?**
Absolutely! Use flax eggs instead of regular eggs and coconut yogurt in place of Greek yogurt, ensuring you check that all ingredients are plant-based.
**3. How do I store leftovers?**
Store any leftovers in an airtight container at room temperature for up to three days or in the refrigerator for up to a week. If you want to keep them longer, consider freezing them for later enjoyment!
**4. Can I use other types of flour?**
Definitely! You can use all-purpose flour or even a gluten-free blend. Just make sure to monitor the texture, as it can vary slightly with different flours.
## Nutritional Info (if applicable)
These rich Greek yogurt brownies pack a satisfying punch while still keeping things a bit lighter than your traditional brownie. Each brownie (based on a standard 16-serving batch) typically has around:
- **Calories:** 140
- **Protein:** 4g
- **Carbohydrates:** 18g
- **Fat:** 6g
- **Fiber:** 2g
That makes them a guilt-free treat you can enjoy without sacrificing flavor! Plus, the protein from the Greek yogurt gives you a nice little boost.
## Final Thoughts
And there you have it, folks! The best Greek yogurt brownies that are not only easy to make but downright delicious. I hope you gather your loved ones around to enjoy the magic that happens when you bake! Remember, every brownie is like a cozy little hug that reminds us to savor life’s sweeter moments. So next time you want to treat yourself, reach for this recipe, whip up some joy, and dig in! Happy baking, and don’t forget to share your creations with me over on Feastical! Let’s keep the food love flowing!

The Best Greek Yogurt Brownies – Easy & Fudgy
- Total Time: 35 minutes
- Yield: 16 servings 1x
- Diet: Vegetarian
Description
Indulge in these fudgy Greek yogurt brownies that perfectly blend healthiness with deliciousness, offering a rich chocolate flavor and a guilt-free treat.
Ingredients
- ½ cup (120g) Greek yogurt
- ¼ cup (60ml) maple syrup or honey
- 2 large eggs
- 1 teaspoon vanilla extract
- ½ cup (45g) unsweetened cocoa powder
- ½ teaspoon baking powder
- ¼ teaspoon salt
- ½ cup (60g) almond flour or oat flour
- ½ cup (90g) semi-sweet or dark chocolate chips
Instructions
- Preheat your oven to 350°F (175°C).
- Prepare your baking dish by greasing an 8×8-inch (20×20 cm) baking dish or lining it with parchment paper.
- Mix the Greek yogurt, maple syrup (or honey), eggs, and vanilla extract in a large mixing bowl until smooth.
- Add the cocoa powder, baking powder, and salt, and mix until combined.
- Fold in the almond flour or oat flour gently until just combined.
- Stir in the chocolate chips until evenly distributed.
- Pour the batter into the prepared baking dish and spread evenly.
- Bake for 20-25 minutes until set around the edges but slightly soft in the middle.
- Cool for 10 minutes before transferring to a wire rack to cool completely, then cut into squares.
Notes
These brownies can also be made vegan by substituting eggs with flax eggs and Greek yogurt with coconut yogurt.
- Prep Time: 10 minutes
- Cook Time: 25 minutes
- Category: Dessert
- Method: Baking
- Cuisine: Greek
Nutrition
- Serving Size: 1 brownie
- Calories: 140
- Sugar: 5g
- Sodium: 100mg
- Fat: 6g
- Saturated Fat: 2g
- Unsaturated Fat: 3g
- Trans Fat: 0g
- Carbohydrates: 18g
- Fiber: 2g
- Protein: 4g
- Cholesterol: 35mg
Keywords: brownies, Greek yogurt, healthy dessert, fudgy brownies, easy baking
Cottage Cheese Protein Brownies Made Easy
Cottage Cheese Protein Brownies Made Easy
Welcome to Feastical, where comfort food meets a healthy twist! Today, we’re diving into a delightful treat that’ll satisfy your sweet tooth while delivering a protein punch—Cottage Cheese Protein Brownies! If you’re like me and believe that dessert should not only taste good but also contribute to your well-being, these brownies are about to become your new best friend in the dessert aisle of life.
Ah, brownies! That dense, fudgy goodness that can turn any frown upside down. Whether it’s a rainy day or a celebration, brownies have this magical ability to bring comfort to our tummies and joy to our hearts. But what if I told you that you could enjoy brownies without the guilt or the sugar crash that usually follows? Cue the entrance of our star ingredient: cottage cheese!
Yes, you heard that right! Cottage cheese not only adds a fantastic creaminess to your brownies but also packs a hefty protein punch, making these treats a little more virtuous than their traditional counterparts. And the best part? You don’t have to be a master chef to whip these up—they’re super easy, and the end result is heavenly.
So, pull up a stool, grab your spatula (don’t worry, I won’t judge if it’s hiding in that obscure kitchen drawer), and let’s embark on this delicious journey together. I promise these brownies will taste like a little hug in every bite—sweet, satisfying, and oh-so-comforting! Plus, they’ll disappear faster than you can say "I have my protein for the day!"
Personal Story
You know, my love for brownies goes way back to when I was a kid, digging through my mom’s recipe box. Every Sunday, we would gather in the kitchen, a mix of flour dust and laughter filling the air. Mom’s classic brownie recipe was the holy grail of sweet indulgences—fudgy, rich, and always topped with a sprinkle of sea salt.
I remember one particular Saturday when my friends came over for a sleepover. With no mom in sight (she was busy flipping pancakes), we seized the moment and decided to tackle the brownie-making venture ourselves. Spoiler: it didn’t go as planned. The bowls became battlegrounds of flour, cocoa powder, and a few eggs that made a daring escape.
But amidst the chaos, we learned the magic that happens when you mix ingredients with a little love and laughter. Those brownies turned out to be a glorious, albeit slightly messy victory. Each bite was a reminder that it’s not just about the end product but the journey and memories made along the way. Fast forward to today, and I’m still whipping up brownies—just with a healthier twist!
Ingredients
Here’s what you’ll need to create your Cottage Cheese Protein Brownies, along with some insider tips:
-
1 Cup Cottage Cheese (or 1 Cup Silken Tofu for a dairy-free version):
- Adding cottage cheese gives the brownies incredible moisture and protein. If you’re vegan or lactose-intolerant, silken tofu will do the trick—smooth and creamy!
-
1/2 Cup Unsweetened Cocoa Powder:
- Offers deep chocolate flavor without added sugar. Trust me, no substitutions here; it’s essential for that authentic brownie taste!
-
1 Cup Almond Flour (can replace with all-purpose flour):
- Almond flour not only adds nuttiness but also makes the brownies gluten-free. If you don’t have almond flour on hand, regular flour works fine, but the texture will be slightly different.
-
2 Eggs (or 2 Flaxseed Eggs for a vegan option):
- If you’re looking for a vegan-friendly option, mix 2 tablespoons of flaxseed meal with 6 tablespoons of water and let it sit until it thickens. This acts as a great binder!
-
1/3 Cup Maple Syrup (or monk fruit syrup for a keto-friendly version):
- Sweetness without the guilt! Maple syrup adds a rich flavor, but if you’re watching your sugar, go for that monk fruit syrup.
-
1 Teaspoon Vanilla Extract:
- Because everything good needs a dash of vanilla! This elevates the flavor profile beautifully.
-
1 Teaspoon Baking Powder:
- Always check if it’s fresh; nothing worse than flat brownies!
-
1/4 Teaspoon Salt:
- Optional! If you’re watching your sodium intake, you can leave it out, but a pinch of salt enhances the sweetness.
-
1 Cup Dark Chocolate Chips (optional; try sugar-free varieties):
- Because more chocolate is always a good idea! Use your favorite kind, whether it’s dark, milk, or even some sneaky sugar-free chips.
Step-by-Step Instructions
Let’s get down to the good stuff—making these brownies!
Step 1: Preheat the Oven
First things first, preheat your oven to 350°F (175°C). Don’t skip this step! Starting with a preheated oven ensures an even bake, so your brownies cook perfectly every time.
Step 2: Prepare Your Pan
Grab an 8×8-inch baking dish. Grease it lightly or line it with parchment paper for easy removal later (we all want that glorious brownie pull-out moment!).
Step 3: Blend Your Base
In a mixing bowl (or a food processor if you’re feeling fancy), toss in the 1 cup of cottage cheese (or silken tofu). Blend it until it’s smooth and creamy—think velvety silk! It’s the secret to those moist brownies.
Step 4: Incorporate the Dry Ingredients
In a separate bowl, combine 1/2 cup cocoa powder, 1 cup almond flour, 1 teaspoon baking powder, and 1/4 teaspoon salt. Whisk them together to ensure no lumps of cocoa hang around; we need a uniform, fudgy texture.
Step 5: Add Wet Ingredients
In the creamy cottage cheese concoction, add 2 eggs (or flaxseed eggs), 1/3 cup maple syrup, and 1 teaspoon of vanilla extract. Mix until everything is well blended. Consider it your brownie magic potion!
Step 6: Combine the Mixtures
Gradually add the dry ingredients to the wet mixture. Stir gently—this keeps your brownies light and fluffy. If you’re feeling adventurous, now’s the time to fold in 1 cup of dark chocolate chips. Yes, please!
Step 7: Pour and Spread
Pour your brownie batter into the prepared baking dish. Use a spatula to spread it evenly—feel free to lick the spatula as a special treat!
Step 8: Bake Away
Pop the dish into your preheated oven for 25-30 minutes. They’re ready when a toothpick inserted into the center comes out somewhat clean (a few crumbs are completely okay—this means they’re fudgy!).
Step 9: Cool and Cut
Once out of the oven, let the brownies cool in the pan for about 10-15 minutes before transferring them to a wire rack. Once cool, cut them into generous squares or one huge slice if you’re feeling rebellious.
Serving Suggestions
These brownies are delectable served warm with a scoop of your favorite vanilla ice cream or a dollop of whipped cream on top. Want to jazz it up? Drizzle a little homemade chocolate sauce or a sprinkle of sea salt for that sweet and salty experience. You could also serve them alongside a fresh berry compote for a refreshing, fruity contrast.
When hosting friends or family, arrange the brownies on a cute platter and top with a dusting of powdered sugar—a simple yet elegant touch!
Recipe Variations
- Nutty Chocolate Delight: Stir in some chopped walnuts or pecans into the batter for a nutty crunch!
- Minty Fresh Brownies: Add a few drops of peppermint extract for a mint chocolate experience that’s to die for.
- Peanut Butter Swirl: Dollop some peanut butter on top of the brownie batter and swirl it in before baking for that extra creamy flavor.
- Coconut Bliss: Mix in shredded coconut for a tropical twist!
- Fruit Infusion: Toss in some fresh raspberries or blueberries for a burst of flavor and antioxidants.
Chef’s Notes
Oh, the memories these brownies have evoked! They’ve evolved since my first attempts, where I relied heavily on sugar and flour. With my quest towards healthier options, cottage cheese became a staple in my kitchen. Plus, who doesn’t love finding ways to indulge without sacrificing health?
These brownies have become a crowd favorite at gatherings, proving that healthy can be delicious. I still chuckle remembering that chaotic sleepover night from my childhood, and now I’ve come full circle, finding joy in healthier baking instead of just sugar-laden treats!
FAQs and Troubleshooting
1. Why are my brownies too dry?
If your brownies turned out dry, it’s often due to overbaking. Every oven varies, so keep an eye on them! Remove them once a toothpick comes out with a few moist crumbs, not a clean toothpick.
2. Can I use regular flour instead of almond flour?
Absolutely! Just remember, using all-purpose flour changes the flavor slightly, and the texture will be less moist. Ensure it’s fresh too!
3. How do I store my brownies?
Store them in an airtight container at room temperature for up to 3 days, or refrigerate for up to a week. You can also freeze them for longer storage—just layer parchment paper between pieces to keep them from sticking!
4. Can I make these brownies nut-free?
Of course! Substitute almond flour with all-purpose flour or an oat flour for a nut-free version.
Nutritional Info
These Cottage Cheese Protein Brownies offer a satisfying and healthy way to indulge your sweet tooth without the guilt. Here’s a basic nutritional breakdown for a serving (1 brownie):
- Calories: Approximately 150 calories
- Protein: 6 grams
- Fat: 8 grams
- Carbs: 15 grams
- Fiber: 2 grams
- Sugar: 4-6 grams (depending on your sweetener)
(Please note that the nutritional values may vary depending on the specific ingredients you use.)
These brownies not only provide a delicious treat but also bring in protein from the cottage cheese, making them a healthy post-workout snack or an afternoon pick-me-up!
Final Thoughts
There you have it—my beloved Cottage Cheese Protein Brownies, and I promise, once you take a bite, you might just declare them the best healthy dessert ever! They’re creamy, chocolatey, and packed with protein, turning every treat time into a guilt-free celebration.
Cooking is all about experimenting, having fun, and making connections. These brownies have a special place in my heart, and I can’t wait to see how they fit into your kitchen adventures! Thank you for joining me today in whipping up this delicious dish. Remember, food is meant to be enjoyed, so dig in, share, and, most importantly, make delicious memories along the way. Happy baking! 🍫✨
Print
Cottage Cheese Protein Brownies Made Easy
- Total Time: 45 minutes
- Yield: 16 servings 1x
- Diet: Vegetarian
Description
Healthy and delicious brownies packed with protein from cottage cheese, delivering a guilt-free treat.
Ingredients
- 1 Cup Cottage Cheese (or 1 Cup Silken Tofu for a dairy-free version)
- 1/2 Cup Unsweetened Cocoa Powder
- 1 Cup Almond Flour (can replace with all-purpose flour)
- 2 Eggs (or 2 Flaxseed Eggs for a vegan option)
- 1/3 Cup Maple Syrup (or monk fruit syrup for a keto-friendly version)
- 1 Teaspoon Vanilla Extract
- 1 Teaspoon Baking Powder
- 1/4 Teaspoon Salt (optional)
- 1 Cup Dark Chocolate Chips (optional; try sugar-free varieties)
Instructions
- Preheat the oven to 350°F (175°C).
- Prepare an 8×8-inch baking dish; grease it lightly or line with parchment paper.
- Blend the cottage cheese (or silken tofu) until smooth and creamy.
- Incorporate the dry ingredients: cocoa powder, almond flour, baking powder, and salt.
- Add the wet ingredients: eggs (or flaxseed eggs), maple syrup, and vanilla extract; mix well.
- Combine the dry ingredients with the wet mixture; fold in dark chocolate chips if desired.
- Pour the batter into the prepared baking dish and spread evenly.
- Bake for 25-30 minutes until a toothpick comes out with a few crumbs.
- Cool in the pan for 10-15 minutes before transferring to a wire rack and cutting into squares.
Notes
Serve warm with vanilla ice cream or a dollop of whipped cream. Try adding nuts or fruit for variations.
- Prep Time: 15 minutes
- Cook Time: 30 minutes
- Category: Dessert
- Method: Baking
- Cuisine: American
Nutrition
- Serving Size: 1 brownie
- Calories: 150
- Sugar: 5g
- Sodium: 100mg
- Fat: 8g
- Saturated Fat: 3g
- Unsaturated Fat: 5g
- Trans Fat: 0g
- Carbohydrates: 15g
- Fiber: 2g
- Protein: 6g
- Cholesterol: 30mg
Keywords: brownies, cottage cheese, healthy dessert, protein brownies, gluten-free