Cherry Crumble
Dive into Deliciousness with Cherry Crumble
Hey there, my fellow food lovers! Today, we’re diving into a dish that has all the charm of summer nostalgia and the cozy warmth of a homey kitchen: Cherry Crumble. Picture this — the sweet, tangy burst of fresh cherries topped with a buttery, golden crumble that’s crisp, crumbly, and totally irresistible. Whether you’re hosting a backyard barbecue or simply treating yourself to a well-deserved dessert, this Cherry Crumble is a delicious way to celebrate every moment.
Cherry season is a fleeting delight. Every year, I eagerly await those luscious cherries to hit the market. There’s just something about standing in the sun, hand-picking those juicy gems with their deep red hues that makes my heart sing. And when it comes time to use them, I have a little ritual: I play my favorite music, pour a glass of something refreshing, and get to work. Trust me, making this dish is as delightful as eating it!
Now, I know what you might be thinking: “Is making a crumble really as easy as you say?” The answer is a resounding yes! With just a few simple steps and some kitchen staples, you’ll have a dessert that impresses friends and family alike. Plus, the aroma wafting through your home while it’s baking? Pure magic! So, grab those cherries, roll up your sleeves, and let’s get cooking!
A Cherry-filled Memory
I can still remember the first time I made Cherry Crumble. It was a sweltering summer afternoon, and my best friend and I were rummaging through my grandmother’s recipe box, searching for something to satisfy our sweet tooth. That box was treasure trove filled with beloved family recipes, and we stumbled upon a handwritten card that read "Cherry Crumble – Grandma’s Favorite."
That day, we picked cherries from the tree in Grandma’s backyard, laughing and joking as we avoided the guide to getting stained (spoiler alert: we weren’t very successful!). As we prepared our ingredients, Grandma wandered in with her apron — the one with little cherries printed all over it — and shared stories of her own summer adventures with cherries. We baked that crumble together and feasted on it warm with scoops of vanilla ice cream melting on top. The taste was heavenly, but it was the laughter and love that made the moment truly unforgettable. Ever since then, Cherry Crumble has held a special place in my heart, and I’m here to help you create your own cherished memories with this fabulous dish!
Ingredients
For this delightful Cherry Crumble, you’ll need:
-
2 cups fresh cherries, pitted and halved
Juicy, sweet cherries are the star of the show! Make sure they’re ripe for optimal flavor. If fresh cherries aren’t available, frozen cherries work well too — just let them thaw and drain excess liquid. -
1 cup rolled oats
These oats add texture and a nutty flavor. If you want a gluten-free version, look for certified gluten-free oats. -
1/2 cup all-purpose flour
Flour is essential for binding your crumble together. For a gluten-free option, use almond flour or a gluten-free all-purpose blend. -
1/2 cup brown sugar
This adds a deep caramel flavor to the topping. You can substitute with coconut sugar for a slightly different but equally tasty sweetness. -
1/3 cup butter, melted
Butter gives your crumble richness and helps create that irresistible crust. For a vegan option, use melted coconut oil or vegan butter. -
1 teaspoon cinnamon
A pinch of spice elevates the flavor profile! Feel free to experiment with nutmeg or pumpkin spice for a different twist. -
1/4 teaspoon salt
A small amount of salt balances the sweetness. It’s an essential ingredient that enhances all the flavors!
Step-by-Step Instructions
Alright, foodie friends, let’s roll up our sleeves and get started on this delightful Cherry Crumble! Follow these steps, and you’ll have a stunning dessert ready in a flash.
-
Preheat Your Oven
Start off by preheating your oven to 350°F (180°C). This is crucial as it ensures even baking, crispy topping, and gooey cherries. -
Prepare the Baking Dish
Grab your favorite baking dish (an 8×8 square or a round dish works great!). Lightly grease it with butter or non-stick spray to prevent sticking. This also adds a little extra buttery flavor! -
Prepare the Cherries
If you’re using fresh cherries, wash them and remove the pits. Halving them allows for better flavor distribution and makes them easier to eat. Toss them with a little sugar (about 1 tablespoon) and set them aside while you prep the crumble. This will create a lovely syrup as the cherries release their juices. -
Make the Crumble Topping
In a medium bowl, combine the rolled oats, flour, brown sugar, cinnamon, and salt. Pour in the melted butter and mix until everything is well combined. You want a crumbly texture, so don’t overmix! There should still be some visible pieces of butter. -
Assemble
Spread the cherries evenly in the prepared baking dish. Sprinkle the crumble mixture generously over the top, ensuring all the cherries are covered. -
Bake to Perfection
Place the dish in the preheated oven and bake for about 30-35 minutes, or until the topping is golden brown and the cherries are bubbling. Your kitchen will soon be filled with the most mouthwatering aroma! -
Serve Warm
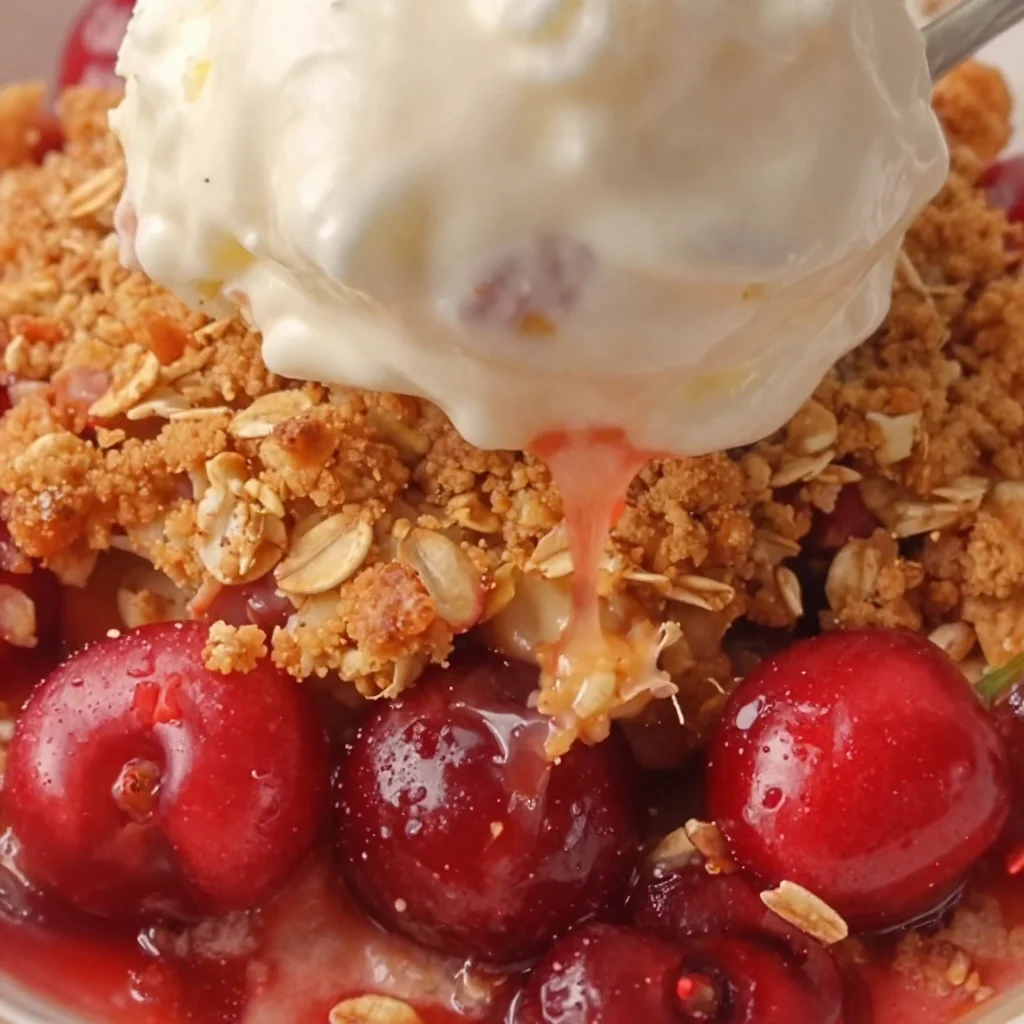
Once it’s out of the oven, let it cool for about 10 minutes (if you can wait!). Serve it warm with a generous scoop of vanilla ice cream or a dollop of whipped cream. You can also sprinkle some fresh mint for a pop of color and flavor!
Serving Suggestions
Plating your Cherry Crumble is almost as enjoyable as making it. Here’s how to do it like a pro:
- Option 1: Serve it right from the baking dish! It has that homespun charm and feels extra cozy.
- Option 2: Scoop individual portions into bowls, allowing everyone to customize with their choice of ice cream or toppings.
- Option 3: For a more elegant presentation, use a ring mold to create a pretty layer of cherries topped with the crumble in the center of a dessert plate, garnished with a mint leaf.
No matter how you choose to serve it, I promise your friends and family will be clamoring for seconds!
Recipe Variations
Ready to mix things up a bit? Here are some creative twists on the classic Cherry Crumble:
-
Mixed Berry Crumble: Swap out some of the cherries for blueberries, raspberries, or even strawberries. A mix of berries adds a fun complexity to the flavors!
-
Nutty Crunch: Incorporate chopped nuts like almonds, pecans, or walnuts into your crumble topping for added texture and a health boost.
-
Peachy Cherry Combo: Add sliced peaches for a delightful summer twist. The sweetness of peaches complements the tartness of cherries beautifully!
-
Spiced Up Crumble: For an autumn feel, add a dash of nutmeg or ginger to your crumble topping. It adds warmth and depth of flavor.
-
Coconut Lover: Stir in some shredded coconut to the crumble for a tropical vibe. It beautifully complements the cherries!
Chef’s Notes
Creating the perfect Cherry Crumble has been a journey for me. Over the years, I’ve played with different ratios of sugar, butter, and oats to get just the right texture. The beauty of this recipe is its versatility — you can really make it your own! I’ve had moments of kitchen disasters (yes, I’ve burned a few crumble toppings along the way), but they taught me patience and creativity in the kitchen. Now, each time I make it, I become a little nostalgia machine, recalling sunny summer days with friends and family.
FAQs and Troubleshooting
Let’s tackle some common questions and potential hiccups for making this Cherry Crumble:
-
Why is my topping too dry?
It might be that you didn’t add enough butter! Ensure the mixture is evenly combined; it should be moist but crumbly. You can also add a splash of water or milk if necessary. -
How do I keep my cherries from getting mushy?
Avoid overbaking! Keep a close eye on your crumble near the end of the baking time. The cherries should be softened but still retain some shape. -
Can I use frozen cherries?
Absolutely! Just make sure to thaw and drain the excess liquid before mixing them into the crumble. You may need to adjust cooking time slightly as frozen cherries may take a bit longer to heat up. -
What should I do if I don’t have fresh cherries?
Canned cherries work in a pinch! Just drain them well to avoid excess moisture, and you’re set.
Nutritional Info
For those of you keeping an eye on nutritional content, here’s a rough estimate of what you can expect for one serving (without ice cream):
- Calories: 280
- Total Fat: 12g
- Saturated Fat: 7g
- Carbohydrates: 42g
- Dietary Fiber: 3g
- Sugars: 20g
- Protein: 3g
Remember, these values can vary based on specific brands and ingredients used, so feel free to adjust based on your preferences!
Final Thoughts
And there you have it, my dear food adventurers — a simple, scrumptious Cherry Crumble recipe that is perfect for any occasion. This dessert serves as a beautiful reminder of the joy of cooking and the love that can come from it. Gather your friends, enjoy the smiles it brings, and sprinkle a little more joy into your lives, one crumble at a time.
Thank you for spending this time with me! I hope you create amazing memories in your kitchen while making Cherry Crumble. It’s all about laughter, love, and of course, delicious food! Until next time, happy cooking! 🍒✨
Print
Cherry Crumble
- Total Time: 50 minutes
- Yield: 4 servings 1x
- Diet: Vegetarian
Description
A delightful Cherry Crumble featuring sweet, tangy cherries topped with a buttery, golden crumble. Perfect for summer gatherings or as a comforting dessert.
Ingredients
- 2 cups fresh cherries, pitted and halved
- 1 cup rolled oats
- 1/2 cup all-purpose flour
- 1/2 cup brown sugar
- 1/3 cup butter, melted
- 1 teaspoon cinnamon
- 1/4 teaspoon salt
Instructions
- Preheat your oven to 350°F (180°C).
- Prepare a baking dish by lightly greasing it with butter or non-stick spray.
- Prepare the cherries by washing, pitting, and halving them. Toss with 1 tablespoon of sugar and set aside.
- Make the crumble topping by combining the oats, flour, brown sugar, cinnamon, and salt in a medium bowl. Mix in the melted butter until crumbly.
- Assemble by spreading the cherries in the prepared dish and topping with the crumble mixture.
- Bake in the preheated oven for 30-35 minutes until golden brown and bubbling.
- Serve warm with vanilla ice cream or whipped cream.
Notes
Feel free to customize your crumble with nuts or other fruits, such as peaches or mixed berries.
- Prep Time: 15 minutes
- Cook Time: 35 minutes
- Category: Dessert
- Method: Baking
- Cuisine: American
Nutrition
- Serving Size: 1 serving
- Calories: 280
- Sugar: 20g
- Sodium: 250mg
- Fat: 12g
- Saturated Fat: 7g
- Unsaturated Fat: 4g
- Trans Fat: 0g
- Carbohydrates: 42g
- Fiber: 3g
- Protein: 3g
- Cholesterol: 30mg
Keywords: Cherry Crumble, dessert, summer, baking, fruity dessert