Your New Weeknight Hero: Tori Chili is Here to Save Dinner
Hey friends, Beau here from Feastical! Let me paint you a picture. It’s been one of those days. You’re tired, maybe a little hangry, and the siren song of the takeout menu is getting louder by the minute. But your wallet (and maybe your well-being) is gently whispering, “Hey, remember that we like to cook?” I get it. I’ve been there more times than I can count.
That exact feeling is precisely why I’m so excited to share one of my all-time favorite, no-fuss, flavor-packed recipes with you today: Tori Chili. Now, don’t let the name fool you—this isn’t a heavy, slow-simmered pot of beans. “Tori” means chicken in Japanese, and this dish is a beautiful fusion of Chinese-Japanese flavors that comes together in a flash. We’re talking tender, juicy pieces of chicken, wok-tossed in a glossy, clingy sauce that’s the perfect dance partner of sweet, tangy, and spicy.
It’s the kind of meal that feels like a treat but is deceptively simple to whip up. In about 20 minutes, you can transform a few humble ingredients into a dinner that will have everyone at the table asking for seconds. And the best part? We love to serve it over a fluffy mountain of steamed rice with soft, creamy scrambled eggs. It’s a complete, comforting, and utterly craveable bowl of goodness. So, let’s ditch the takeout temptation and create some real-deal kitchen magic together. Your fork is waiting!
The Night I Discovered My Go-To Comfort Food
I’ll never forget the first time I truly *met* Tori Chili. It wasn’t in a fancy restaurant or from a family recipe passed down through generations. Nope. It was in a tiny, hole-in-the-wall izakaya (a Japanese pub) in a random back alley, after a long, rainy day of traveling. My friend and I were soaked, exhausted, and desperately pointing at pictures on a menu we could barely read.
The dish that arrived was unassuming—a simple bowl of rice topped with this glistening, dark-orange chicken and a soft pile of scrambled eggs. One bite, and I was a changed man. The warmth of the ginger, the kick of the chili, the sweet tang of the sauce… it was like a warm hug for my soul. It was the ultimate “feel-good” food. I must have asked the waiter three times what it was called, scribbling “Tori Chili” on a napkin like it was culinary treasure. I went home obsessed, and after countless attempts (and a few delicious failures), I finally nailed down my own version. It’s a recipe that always brings me back to that cozy, happy place, and now, I’m so thrilled to share that feeling with you.
Gathering Your Flavor All-Stars
One of the best things about this Tori Chili is the ingredient list. You probably have most of this in your pantry right now! Here’s everything you’ll need to serve four hungry people (or two very hungry people with fantastic leftovers).
- 500g (about 1 lb) Chicken Breast, cut into bite-sized pieces: I like breast for its lean, quick-cooking nature, but chicken thighs are an amazing swap for even more juiciness and flavor. Don’t be shy with the knife here—keeping the pieces uniform ensures they all cook at the same time.
- Salt & Pepper to taste: The fundamentals! We’re seasoning the chicken directly to build layers of flavor from the inside out.
- 3 tbsp Cornstarch: This is our secret weapon for that incredibly crispy, golden exterior on the chicken. It creates a delicate crust that the glorious sauce will cling to later. Potato starch works beautifully here too if that’s what you have on hand.
- 1 tbsp Neutral Oil: Think vegetable, canola, or avocado oil. We need something with a high smoke point to get a good sear without any off-flavors.
For the Magical Sweet & Spicy Sauce:
- 4 tbsp Ketchup: Before you raise an eyebrow, trust me! This isn’t just for burgers. It gives the sauce a tangy-sweet tomato base and that signature glossy look. For a more refined touch, you can use tomato paste thinned with a bit of water and a pinch of sugar.
- 2 tbsp Soy Sauce: The salty, umami backbone of our sauce. Use tamari or coconut aminos for a gluten-free version.
- 1 tbsp Rice Vinegar: This adds a bright, clean acidity that cuts through the richness. A splash of apple cider vinegar can step in if needed.
- 2 tbsp Sugar: Balances the heat and acidity. Brown sugar, honey, or maple syrup would all add their own delicious nuance.
- 2 tsp Chili Garlic Sauce (adjust to heat level): This is where the “chili” comes in! Start with 2 tsp for a medium kick, and add more if you’re feeling brave. Sriracha works in a pinch, but chili garlic sauce has a better texture and garlicky punch.
- 1 tbsp Water: Just a splash to loosen everything up and help the sauce meld together.
- 1 tsp Grated Ginger & 1 clove Garlic, minced: The aromatic heart and soul of the dish. Fresh is absolutely best here—it makes all the difference!
Let’s Get Cooking: Your Step-by-Step Guide to Glory
Ready to see some magic happen? This whole process is faster than waiting for a pizza delivery. Let’s do this!
- The Prep is Key. First things first, let’s get our chicken ready. Pat those bite-sized pieces dry with a paper towel—this is a chef’s hack for a crispier crust. Toss them in a bowl with a good pinch of salt and pepper, then sprinkle over the cornstarch. Get your hands in there and toss until every single piece is lightly and evenly coated. It should look like a light, dusty snow has fallen on your chicken. Set this aside while you whisk together the sauce.
- Whisk Up the Liquid Gold. In a separate medium bowl, combine all of your sauce ingredients: the ketchup, soy sauce, rice vinegar, sugar, chili garlic sauce, water, ginger, and garlic. Whisk it until the sugar has dissolved and the sauce is smooth and homogenous. Giving it a taste now is a great idea—you can adjust the spice or sweetness to your liking. Set this flavor bomb within arm’s reach of the stove.
- Golden Brown and Delicious. Place a large skillet or wok over medium-high heat and add your oil. You’ll know it’s ready when the oil shimmers. Carefully add your coated chicken in a single layer, giving each piece a little room to breathe. Don’t crowd the pan! If you need to, cook in two batches. We’re looking for a beautiful golden-brown sear on all sides, which should take about 5-7 minutes total. The cornstarch coating will create a fantastic, slightly crispy exterior while keeping the inside tender.
- The Grand Sauce Finale. Once the chicken is cooked through, it’s showtime! Reduce the heat to medium-low. Pour your pre-mixed sauce right into the pan. It will sizzle and bubble gloriously. Stir constantly, letting the sauce heat up, thicken, and turn wonderfully glossy as it coats every nook and cranny of the chicken. This should only take 2-3 minutes. You’ll see it transform before your eyes—when the sauce clings to the chicken without pooling at the bottom of the pan, you’re done!
Plating Up Your Masterpiece
Now for the really fun part—building your bowl! This is where Tori Chili truly becomes a meal. My absolute favorite way to serve it is the classic, comforting way.
Start with a generous bed of fluffy steamed white rice (or brown rice for a nuttier flavor). While your chicken was cooking, I hope you had a small pan going to whip up some soft, creamy scrambled eggs. Just whisk a couple of eggs with a splash of milk or water, cook them low and slow, and you’ve got the perfect pillow for your chicken. Pile the eggs right on top of the rice.
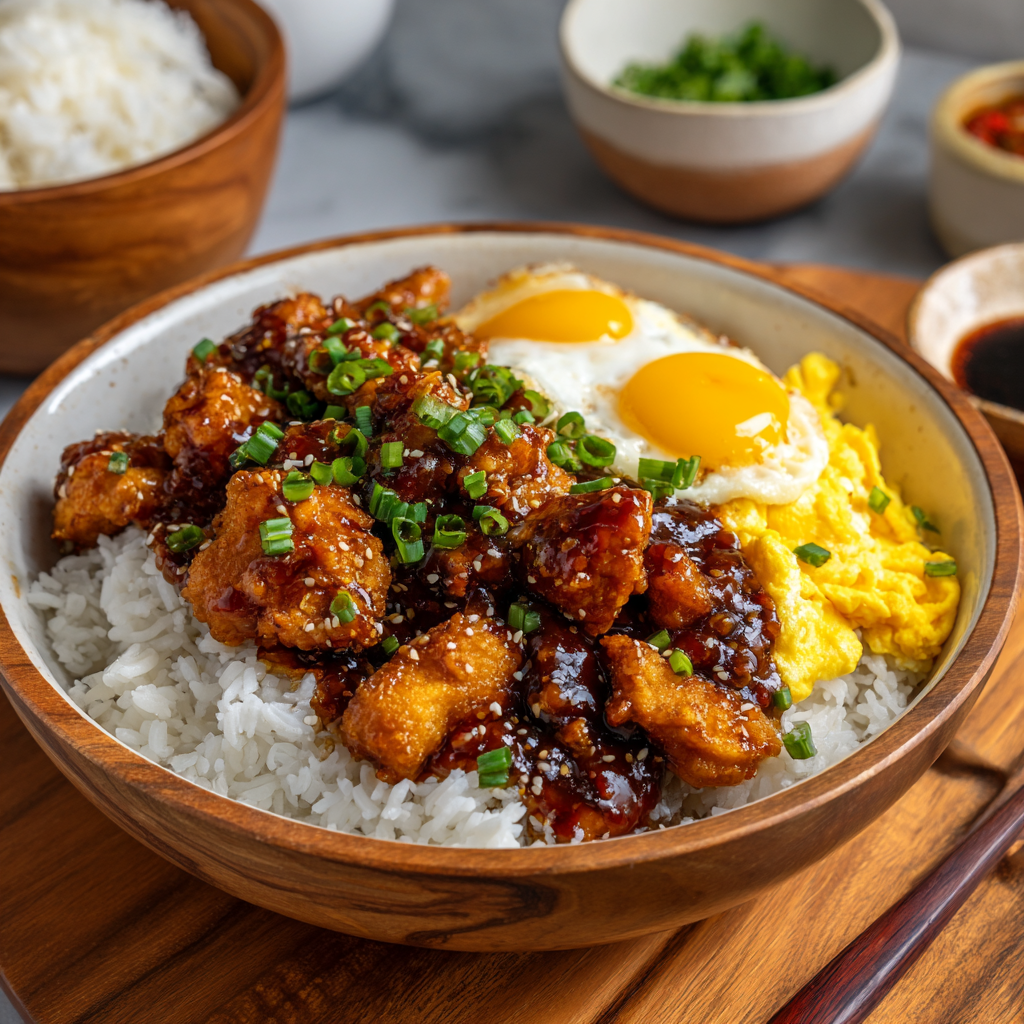
Now, lovingly spoon that glistening Tori Chili over the eggs and rice. The final touches? A sprinkle of thinly sliced green onions for a fresh bite and a dash of toasted sesame seeds for a little nutty crunch. The contrast of textures and temperatures—the hot, saucy chicken, the soft, mild eggs, and the warm rice—is nothing short of perfection. Dig in immediately and prepare for the compliments to roll in!
Make It Your Own: Delicious Twists on Tori Chili
The beauty of this recipe is its flexibility. Once you’ve mastered the basic formula, feel free to get creative! Here are a few of my favorite ways to mix it up:
- The Veggie-Packed Power Bowl: Add a whole onion (sliced) and a colorful bell pepper (cut into strips) to the pan right after the chicken is cooked. Sauté for 2-3 minutes until they just start to soften, then proceed with the sauce. A handful of frozen edamame tossed in at the end is also a fantastic addition!
- Sweet & Sour Swap: For a fruitier, tangier vibe, replace the ketchup with an equal amount of pineapple juice and add a tablespoon of apple cider vinegar. Toss in some fresh pineapple chunks with the sauce for a tropical twist.
- Go Gluten-Free & Low-Carb: It’s easy! Use tamari instead of soy sauce and serve your Tori Chili over cauliflower rice. It’s just as satisfying and a great lighter option.
- Extra Umami Kick: Stir a teaspoon of miso paste into the sauce mixture for an incredible depth of savory flavor. It’s a total game-changer.
- The “Clean Out the Fridge” Version: Got some broccoli florets, carrots, or mushrooms? Chop ’em up and toss them in! This recipe is wonderfully forgiving and a great way to use up lingering veggies.
Beau’s Kitchen Confidential
This recipe has evolved so much since that first napkin-scribble version. I used to be afraid of the cornstarch, thinking it would make the chicken gummy, but it’s the very thing that makes it so good! My biggest “Aha!” moment was realizing that pre-mixing the sauce is non-negotiable. Trying to add the ingredients separately to the pan always led to a rushed, unevenly flavored mess. Now, the whisk-and-pour method is my religion.
A funny story: I once, in a sleepy morning daze, accidentally used cinnamon instead of pepper when coating the chicken. Let me tell you, it was… an interesting flavor profile. Not my finest hour, but it taught me to always double-check my spice jars! Stick with pepper, folks.
Your Tori Chili Questions, Answered!
I’ve made this recipe a hundred times, and I’ve heard all your brilliant questions. Here are the ones that pop up most often.
Q: My sauce didn’t get thick and glossy. What happened?
A: No worries! This usually means the heat was too low when you added the sauce, or you didn’t let it bubble and reduce for long enough. The cornstarch from the chicken needs that good heat to activate and thicken the sauce. If it’s still too thin after 3-4 minutes, you can make a “slurry” by mixing 1 tsp of cornstarch with 1 tbsp of cold water and stirring it in. It should thicken up in under a minute.
Q: Can I make this ahead of time?
A: You can! The sauce can be mixed and stored in the fridge for up to 3 days. The chicken is best cooked fresh, but you can prep and coat it in cornstarch a few hours ahead. Keep it in the fridge on a plate until you’re ready to cook. The final dish reheats well, but the crispy coating on the chicken will soften.
Q: Is there a way to make it less spicy for my kids?
A: Absolutely. Family-friendly cooking is my jam. Simply reduce the chili garlic sauce to 1/2 a teaspoon, or leave it out entirely. You can always serve extra chili sauce on the side for the heat-lovers at the table to add to their own plates.
Q: My chicken stuck to the pan! Help!
A> This is a common one. First, make sure your pan and oil are properly hot before adding the chicken. A good test is flicking a tiny bit of water into the oil—if it sizzles, you’re good to go. Also, resist the urge to move the chicken around right away. Let it sear for a minute or two on the first side to form a crust, and it will release from the pan much more easily.

Tori Chili (Sweet & Spicy Chicken)
Description
Hey friends, Beau here! This Tori Chili is a fast, flavor-packed weeknight hero. Tender chicken, a glossy sweet-and-spicy sauce, and optional soft scrambled eggs make it a complete, crave-worthy meal. Ready in about 20 minutes, it’s the perfect antidote to takeout cravings.
Ingredients
Chicken
-
500 g (1 lb) chicken breast, cut into bite-sized pieces (thighs also work)
-
Salt & pepper, to taste
-
3 tbsp cornstarch (or potato starch)
-
1 tbsp neutral oil (vegetable, canola, avocado)
Sweet & Spicy Sauce
-
4 tbsp ketchup
-
2 tbsp soy sauce (or tamari for gluten-free)
-
1 tbsp rice vinegar
-
2 tbsp sugar (or honey/maple syrup)
-
2 tsp chili garlic sauce (adjust for heat)
-
1 tbsp water
-
1 tsp grated ginger
-
1 clove garlic, minced
Optional Garnish & Sides
-
Steamed rice (white, brown, or cauliflower rice)
-
Soft scrambled eggs
-
Sliced green onions
-
Toasted sesame seeds
Instructions
1. Prep the Chicken
Pat chicken pieces dry. Season with salt and pepper, then toss in cornstarch until evenly coated. Set aside.
2. Make the Sauce
In a bowl, whisk together ketchup, soy sauce, rice vinegar, sugar, chili garlic sauce, water, ginger, and garlic. Adjust sweetness or spice to taste.
3. Cook the Chicken
Heat oil in a skillet or wok over medium-high heat. Add chicken in a single layer (cook in batches if needed). Sear 5–7 minutes until golden brown and cooked through.
4. Finish with Sauce
Reduce heat to medium-low. Pour sauce over the chicken and stir constantly for 2–3 minutes until thickened and glossy.
5. Plate & Serve
-
Serve over a bed of rice.
-
Top with soft scrambled eggs if desired.
-
Garnish with green onions and sesame seeds.
Notes
-
Veggie Boost: Add bell peppers, onions, broccoli, or edamame after cooking chicken.
-
Sweet & Sour Twist: Substitute ketchup with pineapple juice and a splash of vinegar; add pineapple chunks.
-
Low-Carb Option: Serve over cauliflower rice.
-
Extra Umami: Stir 1 tsp miso paste into the sauce.
-
Kid-Friendly: Reduce chili garlic sauce to ½ tsp or omit.
Nourishing Your Body & Soul
While I’m all about flavor first, I also believe in knowing what’s going into our bodies. This Tori Chili is a pretty well-balanced meal, especially when served with rice and eggs! Here’s a rough breakdown per serving (including the chicken and sauce, but not including rice or eggs, as those can vary so much).
Per Serving (approx.):
Calories: ~390 kcal
Protein: ~30 g
Carbohydrates: ~20 g
Fat: ~18 g
Sugar: ~10 g
Sodium: ~700 mg
Remember, this is comfort food that’s packed with lean protein to keep you full and satisfied. The sauce does contain sugar and sodium, but by making it at home, you’re in complete control—you can adjust the sugar and use low-sodium soy sauce if you prefer. It’s all about finding the balance that makes you feel good!
One Last Bite of Wisdom
And there you have it, friends! My go-to recipe for when life gets busy, but my cravings get specific. This Tori Chili is more than just a recipe; it’s a 20-minute passport to a seriously satisfying dinner that never fails to hit the spot. It’s proof that you don’t need a ton of time or fancy ingredients to put something truly delicious and memorable on the table.
I hope this recipe finds its way into your regular rotation and becomes a trusted friend in your kitchen, just like it is in mine. If you make it (and I really hope you do!), tag me on social with #Feastical so I can see your beautiful creations. Now, go forth and cook something Feastical!
With a full heart and an even fuller plate,
Beau