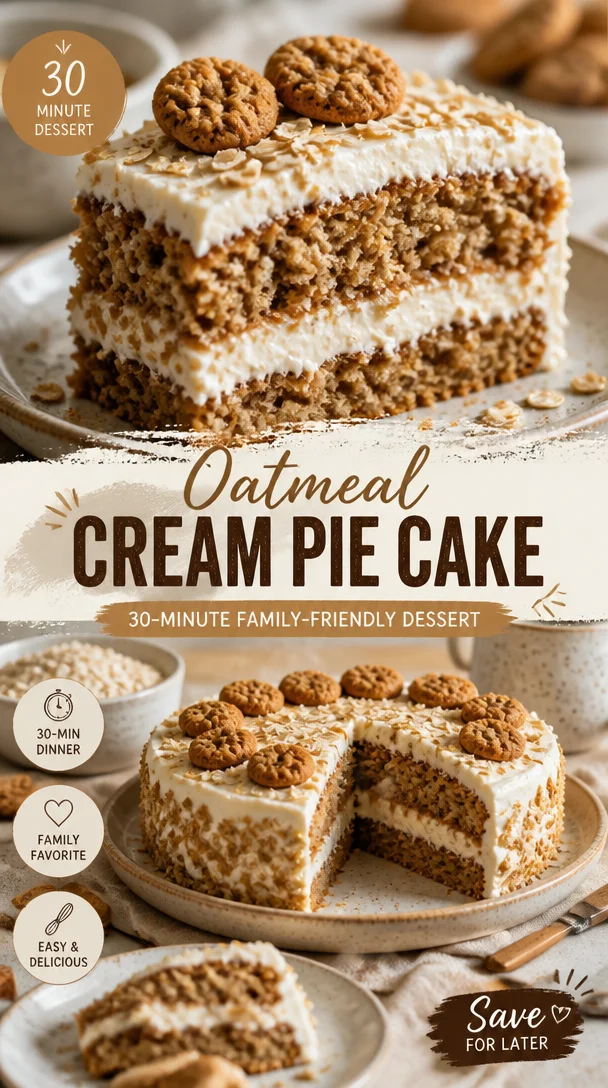
Oatmeal Cream Pie Cake: 30-Minute Family-Friendly Dessert
Oatmeal Cream Pie Cake: A Warm Hug on a Plate
Hey there, fellow foodies! It’s Beau Collier, and today I have something super special for you: Oatmeal Cream Pie Cake! Imagine the chewy, spiced goodness of oatmeal cookies slathered with creamy filling, layered up into a cake that sings of nostalgia and comfort. This cake isn’t just a dessert; it’s a celebration of flavors and memories that will take you right back to those carefree days of childhood.
If you grew up loving those classic oatmeal cream pies from the store, you’re in for a delightful surprise with this recipe. It’s like taking a childhood favorite and giving it a grown-up twist, bringing back all the cozy vibes while offering a new level of indulgence.
With simple ingredients and straightforward steps, I promise you can whip this cake up even if you’re still on the hunt for your lost spatula! So grab your aprons, preheat that oven, and let’s dive into the sweet world of Oatmeal Cream Pie Cake. Trust me, your family and friends will be begging for seconds!
Personal Story
I’ll never forget the first time I made oatmeal cream pies with my grandmother. It was one of those classic rainy afternoons, and the house was filled with the warm, inviting scent of cinnamon and brown sugar, a smell so comforting it felt like being wrapped in a cozy blanket. We mixed the dough and rolled it out with so much love and laughter that I’m pretty sure some of the cookies didn’t make it to the baking sheet!
We spent the afternoon tasting, laughing, and crafting the perfect cream filling. While the cookies baked, we played cards and shared stories, proving that the kitchen really is the heart of the home. Those little moments sparked a lifelong passion for baking, and years later, I thought—why not turn that beloved memory into something even more special? Hence, the Oatmeal Cream Pie Cake was born! It’s a tribute to those afternoons spent with my grandmother, wrapped in love, laughter, and lots of deliciousness.
Ingredients
Here’s what you’ll need to create this delightful Oatmeal Cream Pie Cake. Each ingredient adds something special to the mix:
-
2 1/2 cups water: Essential for cooking the oats, this adds moisture and gives the cake that hearty, comforting vibe.
-
2 cups quick cook oats (uncooked): Provides the chewy texture that makes oatmeal cookies so irresistible. If you can’t find quick-cook oats, rolled oats will work—just soak them a bit longer!
-
2 2/3 cup all-purpose flour: This is the main structure of your cake. When measuring, remember to spoon the flour into your measuring cup and level it off for the most accurate measurement.
-
1 tbsp + 1 tsp ground cinnamon: Brings warmth and a lovely spice that enhances the oatmeal flavor. You can swap it for nutmeg or allspice if you’re feeling adventurous!
-
1 teaspoon fine sea salt: Balances the sweetness and enhances the overall flavor. Don’t skip this—salt is a key player!
-
1/2 tsp nutmeg: Adds depth and a hint of earthiness, perfect for those cozy fall vibes.
-
2 teaspoons baking soda: This gives your cake that necessary lift, making it light and fluffy. Don’t mix it up with baking powder; they are not interchangeable!
-
1 cup unsalted butter (room temperature): The rich creaminess of butter elevates this cake. Make sure it’s soft enough to cream well with the sugars.
-
1 cup Domino® Granulated Sugar: Sweetens the cake perfectly without overpowering it. You can use coconut sugar or honey for a healthier twist.
-
1 cup Domino® Light Brown Sugar (packed): Offers a caramel-like flavor that complements the oats beautifully. If you’re out of brown sugar, mix regular sugar with a bit of molasses!
-
1 tbsp vanilla extract: Always use pure vanilla for the best flavor. It’s the secret ingredient that makes everything better!
-
3 large eggs (room temperature): Binding ingredients and raising the cake’s structure. You can replace eggs with flaxseed meal mixed with water for a vegan twist.
-
1/4 cup full-fat sour cream (room temperature): Makes the cake moist and adds a tangy depth. Greek yogurt can be a great substitute!
-
2 1/2 cups unsalted butter (room temperature): This is for the incredible frosting, making it smooth and buttery rich. Remember to let it soften fully for the best texture!
-
4 cups powdered sugar: The sweet touch in the frosting. You can sift it for a lighter, fluffier frosting texture.
-
2 tbsp heavy cream: This will help achieve that dreamy, spreadable frosting consistency. You could also use milk, but the heavier the cream, the better!
-
2 tsp vanilla extract: For more of that sweet, comforting flavor—because you can never have too much vanilla!
-
1 tsp vanilla bean paste: For those tiny flavorful specks in your frosting. It’s a bit more special—if you don’t have it, it’s OK to skip!
-
1 cup white chocolate chips: Add them to the frosting for a pleasant sweetness and a touch of decadence.
-
1/4 cup + 3 tbsp heavy cream: For the glaze, helping it become luxurious and pourable.
-
White food coloring (optional): If you want that pristine white glaze—perfect for presentation!
-
Oatmeal cream pie cookies (for decorating): A fun finishing touch that makes this cake stand out. You can use homemade or store-bought cookies as a playful garnish!
Step-by-Step Instructions
Follow along as we bring this beauty to life!
-
Cook the Oats: In a medium saucepan, bring 2 1/2 cups water to a boil. Stir in 2 cups of quick-cook oats and let them cook for about 1 minute. Remove from heat and let them cool. This step will drive the moisture into those oats for a deliciously chewy texture!
-
Preheat the Oven: While the oats are cooling, preheat your oven to 350°F (175°C). Grease and flour your cake pans—if you want to skip the flour part, consider lining the pans with parchment paper for easy removal later.
-
Mix the Dry Ingredients: In a large bowl, whisk together the flour, cinnamon, salt, nutmeg, and baking soda. This ensures that the baking soda is evenly distributed throughout the flour mixture—keeping your cake light!
-
Cream the Butters and Sugars: In a stand mixer (or a large bowl with a hand mixer), cream together the room-temperature unsalted butter with the granulated and brown sugars until fluffy and light. This usually takes about 4–5 minutes. Little chef hack: scrape down the sides often!
-
Add the Eggs and Vanilla: Add in the eggs, one at a time, mixing thoroughly after each addition. Then, pour in the vanilla extract. This is when the magic starts happening, and your batter begins to take on that lovely structure.
-
Incorporate the Oats and Sour Cream: Mix in the cooled oats and sour cream until combined. Your dough might look a bit chunky—don’t worry; that’s what we want!
-
Combine Wet and Dry: Gradually add the dry mix to the wet ingredients, mixing until just combined. Overmixing can lead to a tough cake—so be gentle with those muscles!
-
Pour and Bake: Divide the batter evenly between your prepared cake pans. Bake for about 30–35 minutes, or until a toothpick inserted in the center comes out clean. Your kitchen will start to smell like a warm hug!
-
Cool the Cakes: Allow the cakes to cool in the pans for about 10 minutes, then turn them out onto wire racks to cool completely. This is crucial—frosting a warm cake can lead to smeared frosting!
-
Make the Frosting: In a mixing bowl, combine softened unsalted butter, powdered sugar, heavy cream, vanilla extract, and vanilla bean paste. Mix until fluffy and well combined, about 3–4 minutes. Add in the white chocolate chips and mix until distributed.
-
Assemble the Cake: Place one layer on a serving plate. Spread a generous amount of frosting on top and then place the second layer on top. Use the remaining frosting to coat the sides and top of the cake.
-
Decorate: Drizzle with the heavy cream glaze (mix heavy cream with some powdered sugar until it’s pourable) and decorate the top with oatmeal cream pie cookies. A sprinkle of extra white chocolate chips adds an adorable touch!
Serving Suggestions
Now comes the best part—serving your Oatmeal Cream Pie Cake! I suggest slicing it into generous pieces (because who can resist a big slice?) and serving it with a dollop of whipped cream or a scoop of vanilla ice cream beside it.
For an elegant presentation, dust the plate with a little powdered sugar and add a sprig of mint for a pop of color! This cake makes an impressive centerpiece for any celebration or dinner party, and smiles will abound as everyone takes the first bite—trust me!
Recipe Variations
Let’s shake things up! Here are some fun variations and swaps to try:
-
Spiced-Up Cake: Add some pumpkin spice to the batter for an autumn twist, or try swapping in some ginger for a nice kick!
-
Nutty Goodness: Fold in some chopped nuts (like pecans or walnuts) into the cake batter for extra texture. It complements the oatmeal beautifully.
-
Chocolate Chip Lovers Unite: Throw in some semisweet or dark chocolate chips for a chocolate-infused twist.
-
Boozy Glaze: Pour in a splash of bourbon or rum into your heavy cream glaze for a decadent, grown-up indulgence!
-
Gluten-Free Option: Use a 1:1 gluten-free flour blend in place of all-purpose flour!
Chef’s Notes
As I whipped up this Oatmeal Cream Pie Cake for the umpteenth time, I couldn’t help but smile with nostalgia. It’s amazing how a simple recipe can evolve into something more every time you bake it. Initially, I wanted to keep it true to the classic cookie, but I found myself adding layers, both literally and figuratively. Each new ingredient and tweak brings a new layer of flavor and connection to memories—what’s more beautiful than that?
FAQs and Troubleshooting
Q: My cake is too dense! What happened?
A: Most likely, you overmixed your batter after combining the wet and dry ingredients. Be careful with the mixing!
Q: How do I know when my cake is done?
A: Insert a toothpick in the center; if it comes out clean or with a few moist crumbs, your cake is good to go!
Q: Can I prepare the components ahead of time?
A: Absolutely! You can bake the cakes a day ahead and frost them just before serving. Just store them in airtight containers!
Q: My frosting is too runny; what should I do?
A: Don’t fret! Just add a bit more powdered sugar until it reaches your desired consistency.
Nutritional Info
Each slice of Oatmeal Cream Pie Cake is around 400 calories, with the iconic mix of carbs, fats, and proteins. It has a fair amount of sugar due to the frosting and filling, but hey—good comfort food is about balance, right? Made primarily of wholesome ingredients like oats and dairy, you’re nourishing your body while treating your sweet tooth!
Final Thoughts
And there you have it! A delightfully indulgent Oatmeal Cream Pie Cake that’s guaranteed to warm your heart and satisfy your cravings. This recipe is not just about the flavors but all the memories and love that come with each bite. It’s a celebration of comfort food at its finest. Whether you’re baking this for a special occasion or treating yourself on a cozy weekend, I know it’ll bring joy to your kitchen.
So go on! Gather those ingredients and let’s make some magic happen. Don’t forget to share the love—snap a picture of your masterpiece and tag @Feastical! I’d love to see how you’ve made this recipe your own. Until next time, happy baking and remember, every meal should feel like a warm hug.
Print
Oatmeal Cream Pie Cake
- Total Time: 50 minutes
- Yield: 12 servings 1x
- Diet: Vegetarian
Description
A delightful cake combining the chewy goodness of oatmeal cookies with a creamy filling, celebrating nostalgia and comfort.
Ingredients
- 2 1/2 cups water
- 2 cups quick cook oats (uncooked)
- 2 2/3 cups all-purpose flour
- 1 tbsp + 1 tsp ground cinnamon
- 1 teaspoon fine sea salt
- 1/2 teaspoon nutmeg
- 2 teaspoons baking soda
- 1 cup unsalted butter (room temperature)
- 1 cup Domino® Granulated Sugar
- 1 cup Domino® Light Brown Sugar (packed)
- 1 tbsp vanilla extract
- 3 large eggs (room temperature)
- 1/4 cup full-fat sour cream (room temperature)
- 2 1/2 cups unsalted butter (room temperature, for frosting)
- 4 cups powdered sugar
- 2 tbsp heavy cream
- 2 teaspoons vanilla extract (for frosting)
- 1 teaspoon vanilla bean paste
- 1 cup white chocolate chips
- 1/4 cup + 3 tbsp heavy cream (for glaze)
- White food coloring (optional)
- Oatmeal cream pie cookies (for decorating)
Instructions
- Cook the oats: In a medium saucepan, bring 2 1/2 cups water to a boil. Stir in 2 cups of quick-cook oats and let them cook for about 1 minute. Remove from heat and let them cool.
- Preheat the oven to 350°F (175°C) and grease and flour your cake pans.
- Mix the dry ingredients: In a large bowl, whisk together the flour, cinnamon, salt, nutmeg, and baking soda.
- Cream the butters and sugars: In a stand mixer, cream together the room-temperature unsalted butter with the granulated and brown sugars until fluffy.
- Add the eggs one at a time, mixing thoroughly after each addition, then pour in the vanilla extract.
- Incorporate the cooled oats and sour cream until combined.
- Combine the wet and dry ingredients gradually until just combined.
- Pour the batter evenly into prepared cake pans and bake for about 30–35 minutes.
- Cool the cakes in the pans for about 10 minutes, then turn them out onto wire racks to cool completely.
- Make the frosting: Combine softened unsalted butter, powdered sugar, heavy cream, vanilla extract, and vanilla bean paste. Mix until fluffy.
- Assemble the cake: Place one layer on a serving plate, spread frosting on top, then place the second layer on top and coat with remaining frosting.
- Decorate with the heavy cream glaze and oatmeal cream pie cookies.
Notes
Serve with whipped cream or vanilla ice cream for an extra treat.
- Prep Time: 15 minutes
- Cook Time: 35 minutes
- Category: Dessert
- Method: Baking
- Cuisine: American
Nutrition
- Serving Size: 1 slice
- Calories: 400
- Sugar: 45g
- Sodium: 300mg
- Fat: 20g
- Saturated Fat: 10g
- Unsaturated Fat: 8g
- Trans Fat: 0g
- Carbohydrates: 55g
- Fiber: 4g
- Protein: 6g
- Cholesterol: 80mg
Keywords: Oatmeal Cake, Cream Pie, Dessert, Comfort Food

Ingredient Apricot Pillow Cookies for Busy Weeks
Apricot Pillow Cookies: A Sweet Tribute to Comfort and Nostalgia
Hey there, fellow food aficionados! Today we’re diving into a delicious recipe that’s near and dear to my heart—Apricot Pillow Cookies. If you haven’t had the pleasure of trying these soft, delectable morsels, let me tell you, you’re in for a treat!
When I think of cookies, I can’t help but recall the warmth of my grandmother’s kitchen, where the scent of baking goods wafted through the air, blending with the laughter of family and friends gathering around the table. Apricot Pillow Cookies were one of her signature desserts, a true labor of love, and a perfect blend of sweet and tangy flavors. Every bite felt like a hug from her that transported me back to those lazy Sunday afternoons, where the world outside melted away, and all that mattered was the deliciousness we brought to life in the kitchen.
These cookies are not just a dessert; they’re a symbol of love, warmth, and shared memories. They capture the essence of what food should be—comforting, delightful, and capable of bringing people together. So grab your apron, put on your favorite playlist, and let’s embark on this baking adventure!
Personal Story: The Kitchen Magic
One of my fondest memories involves me as a wide-eyed child, standing alongside my grandmother in her cozy kitchen. The walls were adorned with family photos, each frame holding a story of its own. The counter was a chaotic blend of flour, sugar, and excitement. I remember asking her how she created those fluffy, light cookies that seemed to dance on your taste buds. With a wink, she simply said, “It’s all about love, Beau.”
As she rolled the dough into little pillows of joy, she’d encourage me to let my imagination run wild with the flavors. I’d sprinkle a touch of cinnamon sometimes or even add a dash of vanilla just for fun. But the heart of the cookie—the apricot preserves—remained a staple. The sweet-tart goodness would burst inside the soft shell, and each cookie was more than just a treat; it was a lesson in creativity and a reminder of tradition.
I’ve carried this recipe through the years, adapting here and there, but it always brings me back to those moments in my grandma’s kitchen. So let’s keep this beautiful tradition alive and create our own batch of Apricot Pillow Cookies that will surely fill your home with joy (and a heavenly aroma)!
Ingredients
Let’s gather our ingredients! Here’s what you’ll need to create these delightful cookies:
Dough:
-
1 3/4 cups flour (sifted): Sifting is key for light and airy cookies! It also helps to eliminate any lumps. You could use all-purpose flour, but for a gluten-free option, a 1:1 gluten-free blend works great!
-
1/2 tsp lemon zest: This adds a fresh brightness to the cookies. Feel free to substitute with orange zest for a different citrus twist!
-
1/4 tsp salt: A pinch of salt enhances sweetness! If you’re on a low-sodium diet, you can reduce the quantity, but I wouldn’t skip it entirely.
-
8 oz cream cheese (soft to room temperature): This is the secret to a creamy and rich texture in the dough. If you’re looking for a lighter option, you can use Neufchâtel cheese instead.
-
1 cup butter (soft to room temperature): Using unsalted butter gives you control over your cookie’s overall salt content. Margarine can be a substitute, but it may alter the flavor slightly.
Filling:
- 1 jar quality apricot preserves: The star of the show! Use a good-quality preserve for the best flavor. You can swap out apricot for peach or raspberry jam if you’re feeling adventurous.
Additional:
-
Egg whites for brushing: This helps give the cookies a lovely golden finish. If you prefer a vegan option, you can use almond milk for a gentle wash.
-
Granulated sugar for sprinkling: A little sweetness on top never hurt anyone! If you want to get fancy, try using coarse sugar for extra crunch.
Step-by-Step Instructions
Alright, let’s get to the fun part—baking these delicious cookies!
Step 1: Prepare Your Dough
-
Mix the Dry Ingredients: In a large bowl, combine your sifted flour, lemon zest, and salt. This combo is where the magic begins! Use a whisk to blend them well, ensuring the zest is evenly distributed.
-
Cream the Cheese and Butter: In another bowl, beat the softened cream cheese and butter together until it’s light and fluffy—about 3-4 minutes. Pro tip: make sure your butter is truly at room temperature; it should be soft enough to poke without resistance.
-
Combine: Gradually add the dry ingredients to the butter and cream cheese mixture, mixing on low speed until everything is just combined. Don’t over-mix! We want that tender texture.
-
Chill: Cover the dough with plastic wrap and refrigerate for at least 1 hour (or overnight if you can wait that long!). This will make it easier to handle later and enhance the flavors.
Step 2: Form the Cookies
-
Preheat the Oven: Before you pull out that dough, preheat your oven to 350°F (175°C). This gives your cookies a nice baking start!
-
Scoop and Shape: Once the dough has chilled, scoop out about a tablespoon of dough and flatten it in your palm. Place a small dollop (about a teaspoon) of apricot preserves in the center and fold the dough over to make a pillow shape. Seal the edges well—no one likes a leak during baking!
-
Brush and Sprinkle: Place your pillows on a prepared baking sheet lined with parchment paper. Brush the tops with egg whites and sprinkle granulated sugar over them for that lovely crunch!
Step 3: Bake and Enjoy!
-
Bake: Slide those beauties into the oven and bake for about 15-18 minutes or until they’re lightly golden. The aroma will fill your space with pure joy!
-
Cool and Serve: Let the cookies cool on a wire rack for about 10 minutes. Trust me; the wait is worth it! These cookies are best enjoyed warm, but they’ll keep well in an airtight container for a week (if they last that long!).
Serving Suggestions
Once your Apricot Pillow Cookies have cooled, it’s time to serve! You can plate them in a charming cookie jar on your kitchen counter to showcase your hard work or arrange them on a beautiful serving platter dusted lightly with powdered sugar.
Consider pairing these cookies with a cup of herbal tea or a glass of milk. Feel free to get creative—drizzle a bit of warm chocolate sauce over them, or try a scoop of vanilla ice cream on the side for a heavenly dessert!
Recipe Variations
Now that you’ve mastered the classic Apricot Pillow Cookies, why not play around with a few variations? Here are some fun ideas to get you started:
-
Different preserves: Swap the apricot preserves for any fruit jam you love—think raspberry, peach, or even fig!
-
Spice it up: Add a dash of cinnamon or nutmeg to the dough for a warm, cozy flavor.
-
Stuffed: Go gourmet and add a couple of chopped nuts, like walnuts or almonds, to the filling for some added texture.
-
Chocolate lovers: Mix in chocolate chips into the dough for a decadent twist, or drizzle melted chocolate over the cooled cookies.
-
Vegan pillows: Substitute the cream cheese and butter for plant-based versions and try a flax egg instead of egg white for the wash!
Chef’s Notes
Every time I make these cookies, I can’t help but chuckle at the time I completely miscalculated the amount of filling. The dough was bursting at the seams, and they ended up looking more like little plump dumplings! While they looked a tad ridiculous, they ended up tasting incredible—still my family’s favorite mishap!
Through the years, I’ve adapted this recipe to fit different dietary needs and preferences, but the spirit of it—the love, the warmth, the deliciousness—remains unchanged. It has become a staple in my home, just like it was in my grandmother’s.
FAQs and Troubleshooting
1. Why are my cookies flat?
If your cookies spread too much, it could be due to overmixing the dough or not chilling it long enough. Make sure the butter and cream cheese are at room temperature but not overly soft, and don’t skip the chilling step!
2. Can I use a different type of flour?
Absolutely! While all-purpose flour yields the best results, you can use a gluten-free flour blend as long as it contains xanthan gum to help with structure.
3. What can I do if I don’t have any apricot preserves?
No worries! Any fruity filling works, from other jams to pie filling—be creative!
4. How do I store these cookies?
Keep them in an airtight container at room temperature for up to a week. For longer storage, you can freeze them. Just make sure to place parchment paper between layers to avoid sticking!
Nutritional Info (Approximate)
Each cookie (when making about 24) contains approximately:
- Calories: 120
- Protein: 1.5g
- Carbohydrates: 18g
- Fat: 5g
- Sugar: 5g
Nutritional Note:
These numbers are approximations based on the ingredients listed. They can vary based on specific brands and measurements used. Always check the labels if you’re tracking macros!
Final Thoughts
And there you have it—my heartfelt recipe for Apricot Pillow Cookies! As you bake and enjoy these delightful treats, remember that each cookie carries a story, a memory, and a little bit of love.
Whether you’re sharing them with friends, family, or just keeping them to yourself (no judgment here!), I hope these cookies bring as much joy to your home as they have in mine. So don your apron, grab those ingredients, and let’s create some delicious memories together!
Happy baking, food friends! 🍪
Print
Apricot Pillow Cookies
- Total Time: 78 minutes
- Yield: 24 cookies 1x
- Diet: Vegetarian
Description
Deliciously soft cookies filled with apricot preserves, reminiscent of warm family memories and kitchen comforts.
Ingredients
- 1 3/4 cups flour (sifted)
- 1/2 tsp lemon zest
- 1/4 tsp salt
- 8 oz cream cheese (soft to room temperature)
- 1 cup butter (soft to room temperature)
- 1 jar quality apricot preserves
- Egg whites for brushing
- Granulated sugar for sprinkling
Instructions
- Mix the dry ingredients: In a large bowl, combine your sifted flour, lemon zest, and salt.
- Cream the cheese and butter: In another bowl, beat the softened cream cheese and butter together until light and fluffy—about 3-4 minutes.
- Combine: Gradually add the dry ingredients to the butter and cream cheese mixture, mixing on low speed until just combined.
- Chill: Cover the dough with plastic wrap and refrigerate for at least 60 minutes.
- Preheat the oven: Before pulling out the dough, preheat your oven to 350°F (175°C).
- Scoop and shape: Once chilled, scoop out about a tablespoon of dough, flatten it, place a teaspoon of apricot preserves in the center, and fold the dough over.
- Brush and sprinkle: Place on a prepared baking sheet, brush with egg whites, and sprinkle with granulated sugar.
- Bake: Bake for about 15-18 minutes until lightly golden.
- Cool and serve: Allow to cool on a wire rack for about 10 minutes before enjoying.
Notes
For a vegan option, substitute cream cheese and butter with plant-based alternatives and use almond milk as a wash.
- Prep Time: 15 minutes
- Cook Time: 18 minutes
- Category: Dessert
- Method: Baking
- Cuisine: American
Nutrition
- Serving Size: 1 cookie
- Calories: 120
- Sugar: 5g
- Sodium: 100mg
- Fat: 5g
- Saturated Fat: 3g
- Unsaturated Fat: 2g
- Trans Fat: 0g
- Carbohydrates: 18g
- Fiber: 0g
- Protein: 1.5g
- Cholesterol: 25mg
Keywords: cookies, apricot cookies, dessert, baking, comfort food