
Bibimbap
The Ultimate Bibimbap: A Comfort Food Journey from My Kitchen to Yours
Hey there fellow food lovers! It’s Beau Collier here, and let me tell you, I am bubbling over with excitement to share one of my absolute favorite dishes with you today: Bibimbap! If you haven’t had the pleasure of indulging in a bowl of this spectacular Korean delight yet, you’re in for a treat.
Bibimbap, pronounced “bee-beem-bop,” translates to “mixed rice,” and it’s an explosion of color, flavor, and comfort all in one bowl. Imagine fluffy rice topped with marinated beef, a rainbow of sautéed vegetables, and a beautifully fried egg, all drizzled with spicy gochujang sauce and fragrant sesame oil. It’s as much a feast for the eyes as it is for the stomach.
But Bibimbap is not just about feeding your hunger; it’s about feeding your soul. Anytime I prepare this dish, it takes me back to my childhood memories of cooking with my family. The vibrant colors of the vegetables remind me of my mom’s garden, the sizzling sound of the beef cooks me up like a warm hug, and the spicy gochujang brings a little kick of fun that dances on your taste buds.
In this joyful journey, I’ll guide you through every step of preparing a traditional Bibimbap while sprinkling in my personal stories, useful tips, and plenty of chef hacks along the way. Whether you’re new to cooking or a seasoned pro, this recipe is guaranteed to bring warmth and connection to your kitchen. So tie on your apron, and let’s cook up some happiness!
Personal Story
As I reminisce about my childhood, one unforgettable memory comes to mind. Picture this: me, a scrappy little chef in training, standing on a stool beside my mom, who was each morning whipping up her famous Bibimbap for our family. The way she meticulously arranged the vegetables like an artist painting on a canvas always fascinated me. Each ingredient represented a vibrant part of her love for us; the tenderness of the marinated beef, the earthy crunch of fresh vegetables, and of course, that glorious golden egg on top.
One vivid Saturday morning stands out. My mom decided to let me take the lead, insisting I could make the Bibimbap on my own. I’ll never forget the gleaming wok sizzling away as I excitedly tossed the vegetables and danced around the kitchen humming to my favorite tunes. When we finally sat down to eat, our family of five was gathered around the dinner table, sharing laughs and stories while devouring my creation. The joy of serving my family a meal filled with love and laughter ignited a flame in me that still burns today.
That meal was not just food; it was connection. Bibimbap has since become my go-to dish for gatherings, impromptu dinners, or simply to indulge in myself when I need a little pick-me-up. Now, let’s create this beloved dish together in your kitchen, so you can experience that same warmth and happiness!
Ingredients
Before we begin, let’s gather everything we need to make a soul-satisfying bowl of Bibimbap:
-
2 cups cooked rice
- Tip: Use short-grain rice for the best texture. Brown rice is a healthier alternative, though it takes longer to cook.
-
1 cup marinated beef (bulgogi)
- Substitute: For a quick swap, use marinated tofu or tempeh for a plant-based version that packs a punch!
-
1 cup assorted seasoned vegetables
- Suggestions: Think spinach, carrots, bean sprouts, zucchini, or any colorful veggies you have on hand. Be creative and use what you love!
-
2 fried eggs
- Insight: A runny yolk adds creaminess to the dish, but you can scramble the eggs if you prefer.
-
2 tablespoons gochujang (Korean chili paste)
- Substitute: If you can’t find gochujang, mix together miso paste with sriracha for a spicy and savory alternative.
-
1 tablespoon sesame oil
- Tip: Toasted sesame oil has a deeper flavor, so try using it for an extra punch.
-
Sesame seeds for garnish
- Cooking Hack: Lightly toasting the sesame seeds enhances their nutty flavor!
-
Green onions for garnish
- Substitution: Chopped chives work as a great alternative if green onions aren’t available.
Step-by-Step Instructions
Alright, my culinary comrades, let’s roll up our sleeves and get cooking! Follow these steps and let the kitchen magic unfold.
-
Cooking the Rice:
- Begin by cooking your rice. If using a rice cooker, simply add the rinsed rice and water according to the instructions. If stovetop is your thing, combine 1 cup of rice with 1.5 cups of water. Bring it to a boil, lower the heat, cover, and let it simmer for 18-20 minutes. Once done, fluff it with a fork and set aside.
-
Marinade the Beef:
- If you’re using bulgogi, the marinating part should already be done! If not, toss your sliced beef in a mixture of soy sauce, sugar, sesame oil, and minced garlic and let it absorb those yummy flavors for at least 30 minutes.
-
Sauté the Vegetables:
- In a large skillet or wok, heat some vegetable oil over medium-high heat. Start with the sturdier veggies like carrots and zucchini, sauté them for about 3-4 minutes until they start softening.
- Next, toss in the spinach and bean sprouts, cooking just until they’re tender and vibrant. Add a pinch of salt to taste, and don’t forget to stir those beauties!
-
Cook the Beef:
- Push the veggies to the side and add the marinated beef to the skillet. Sizzle until it’s browned and cooked through, about 5-6 minutes. This step is crucial because the beef will blend its flavor into the vegetables.
-
Fry the Eggs:
- In a separate non-stick pan, heat a bit of oil and crack in your eggs. Cook them sunny-side up or to your preference, ensuring the yolks remain runny for that creamy element in the bowl.
-
Assemble the Bibimbap:
- In individual bowls, start with a generous serving of rice. Artfully arrange the sautéed vegetables and marinated beef on top. Crown each bowl with a fried egg, and drizzle over your gochujang and sesame oil. Finish off with a sprinkle of sesame seeds and chopped green onions.
-
Mix it Up:
- At the table, dig in and stir everything to combine the colors, flavors, and textures into a delightful masterpiece. This is where the magic happens—every bite is a celebration!
Serving Suggestions
Bibimbap is as beautiful as it is delicious, so take some time to plate it nicely. Layer your rice at the bottom, then make an attractive pattern with the veggies and beef on top. Top it off with the egg, then garnish with a sprinkle of sesame seeds and green onions. The vibrant colors will make your dish pop, inviting everyone to come and share in the experience!
Serve your Bibimbap with small bowls of extra gochujang on the side so everyone can tailor the spice level to their liking. It’s a meal that encourages sharing, mixing, and mingling—just like good food should!
Recipe Variations
Getting a little creative is the best part of cooking! Here are some variations to consider for your Bibimbap:
-
Vegetarian Delight: Swap out the beef for marinated tofu. The soy and sesame flavors complement everything beautifully.
-
Seafood Twist: Try adding shrimp or even octopus for a delightful ocean-inspired twist on the classic.
-
Kimchi Kick: Love that fermented tang? Add some chopped kimchi alongside your veggies for an extra layer of flavor and spice!
-
Noodle Base: For a carb twist, use noodles instead of rice. It gives an entire new dimension and texture to the dish!
-
Spicy Gochujang Alternative: If you’re not a fan of spicy, take down the gochujang by using a milder chili paste or even miso.
Chef’s Notes
As my Bibimbap journey continued over the years, its beauty transformed. From elaborate family gatherings, it has now morphed into something I whip up on a quiet Wednesday night—often with whatever veggies I have left in the fridge! What started as a recipe passed down through generations has become a canvas for creativity and love in my kitchen.
I’ve even had a few cooking fails along the way—missing sesame a few times or accidentally setting the stove to high and realizing I was creating a crispy rice disaster! But you know what? Those moments are just as precious as those glorious successes.
FAQs and Troubleshooting
Q: My rice turned out mushy, how can I fix this?
A: Be sure to measure your water correctly next time! Mushy rice often comes from too much water or overcooking. Try using slightly less water than usual and watch the cooking time.
Q: How can I make my beef more flavorful?
A: Allow the beef to marinate longer! Overnight is ideal, but a minimum of one hour can do wonders for flavor absorption.
Q: What if I don’t have gochujang?
A: No worries! You can make a quick fix with chili powder, sugar, and soy sauce, or substitute it with sriracha for some heat.
Q: Can I use frozen vegetables?
A: Absolutely! Just be sure to thaw and drain any excess water before sautéing. Fresh is great, but frozen will save you time too!
Nutritional Info
As a hearty dish packed with good-for-you ingredients, Bibimbap can fit well into various diets. At a glance, here’s what a serving generally offers:
- Calories: 500 – 700 (depending on beef and rice choice)
- Protein: Approximately 28g from the beef and egg
- Fat: Healthy fats from sesame oil and egg
- Carbohydrates: 60g from rice and veggies, which provide fiber and necessary nutrients
- Vitamins & Minerals: A colorful array of veggies will ensure you get vitamins A, C, and iron.
(Nutritional values will vary based on ingredients and portion sizes.)
Final Thoughts
There you have it, my cozy and colorful guide to making Bibimbap! From the nostalgic childhood memories to the creative spins you can put on this bright bowl of goodness, my hope is that you find joy in cooking and sharing this meal with friends and family.
This dish is truly a canvas for your culinary artistry—mix, match, and have fun! Whether you’re taking a step back into your own kitchen memories or creating new ones, Bibimbap has the magical ability to bring people together, celebrate cultures, and warm hearts.
So, grab your ingredients, gather your loved ones, and get ready to dive into a bowl of bliss. Happy cooking, and remember—food is all about love, laughter, and those beautiful moments we create around the table.
Now, let’s feast! 🍽️
Print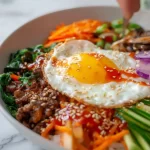
The Ultimate Bibimbap
- Total Time: 50 minutes
- Yield: 4 servings 1x
- Diet: Vegetarian (if using tofu)
Description
A vibrant and comforting Korean dish featuring fluffy rice topped with marinated beef, assorted vegetables, and a fried egg, all drizzled with gochujang sauce.
Ingredients
- 2 cups cooked rice
- 1 cup marinated beef (bulgogi) or marinated tofu
- 1 cup assorted seasoned vegetables (spinach, carrots, bean sprouts, zucchini)
- 2 fried eggs
- 2 tablespoons gochujang
- 1 tablespoon sesame oil
- Sesame seeds for garnish
- Green onions for garnish
Instructions
- Begin by cooking your rice. If using a rice cooker, simply add the rinsed rice and water according to the instructions. If stovetop is your thing, combine 1 cup of rice with 1.5 cups of water, bring it to a boil, lower the heat, cover, and let it simmer for 18-20 minutes. Once done, fluff it with a fork and set aside.
- If you’re using bulgogi, the marinating part should already be done! If not, toss your sliced beef in a mixture of soy sauce, sugar, sesame oil, and minced garlic and let it absorb those yummy flavors for at least 30 minutes.
- In a large skillet or wok, heat some vegetable oil over medium-high heat. Start with the sturdier veggies like carrots and zucchini, sauté for about 3-4 minutes until they start softening. Next, toss in the spinach and bean sprouts, cooking just until they’re tender and vibrant. Add a pinch of salt to taste.
- Push the veggies to the side and add the marinated beef to the skillet. Sizzle until it’s browned and cooked through, about 5-6 minutes.
- In a separate non-stick pan, heat a bit of oil and crack in your eggs. Cook them sunny-side up or to your preference.
- In individual bowls, start with a generous serving of rice. Artfully arrange the sautéed vegetables and marinated beef on top. Crown each bowl with a fried egg, drizzle over your gochujang and sesame oil, and finish with sesame seeds and green onions.
- At the table, dig in and stir everything to combine into a delightful masterpiece.
Notes
Use short-grain rice for the best texture. Feel free to customize with your favorite vegetables or proteins.
- Prep Time: 30 minutes
- Cook Time: 20 minutes
- Category: Main Course
- Method: Stovetop
- Cuisine: Korean
Nutrition
- Serving Size: 1 bowl
- Calories: 600
- Sugar: 5g
- Sodium: 900mg
- Fat: 25g
- Saturated Fat: 4g
- Unsaturated Fat: 21g
- Trans Fat: 0g
- Carbohydrates: 75g
- Fiber: 4g
- Protein: 30g
- Cholesterol: 185mg
Keywords: bibimbap, korean dish, comfort food, easy recipe, mixed rice

Greek Meatball Bowl
Greek Meatball Bowl: A Culinary Adventure Awaits!
Hey there, foodies! Beau Collier here, and I’m excited to take you on another mouth-watering journey to the heart of Mediterranean cuisine. Sure, we all have our comfort food routines, but sometimes, it’s time to shake things up a bit, right? Enter the Greek Meatball Bowl—packed with flavor, freshness, and a whole lot of love. If you’re ready to tantalize your taste buds and wow your friends with a vibrant and satisfying meal, you’re in for a treat!
Now let’s set the scene: Picture yourself at a sunny beachside taverna in Greece, the sound of waves lapping against the shore fills the air, while the aroma of fresh herbs and spices dances playfully around you. That’s the vibe I want to capture in this dish! It’s all about balancing bold flavors with simple ingredients, making it perfect for any occasion—weeknight dinners, casual get-togethers, or even meal prep for the week ahead.
But before we dive into the ingredients and cooking steps, let me give you a little backstory on why this dish holds such a special place in my heart.
A Flavorful Connection: A Nostalgic Memory
Growing up, weekends were synonymous with my Grandma Maria’s kitchen. It was a whirlwind of laughter, messy countertops, and my Grandma’s classic Greek meatballs simmering in a rich tomato sauce. I remember standing on a little stool, my eyes wide with excitement, as she guided me through the steps of creating her "secret" family recipe.
Between squeezing fresh lemon juice and handfuls of parsley, she imparted bits of wisdom about the magic of flavor. “Cooking is more than just a recipe, Beau,” she’d say, “it’s a way to share our love.” When I close my eyes, I can still see the bright colors of the fresh ingredients and hear her chuckle when I added a little too much garlic. Each meatball was like a mini morsel of love, often served with fluffy rice or warm pita. This dish is a modern twist on that experience—one that connects the past with the present, welcoming friends and family around the table for good food and great stories.
Let’s dive into how you too can recreate this delightful Greek Meatball Bowl at home!
Ingredients
Here’s the list of what you’ll need to whip up these mouth-watering bowls:
Meatballs:
-
1 lb ground beef or lamb
Tip: Ground lamb has a richer flavor and pairs wonderfully with the Mediterranean spices. If you prefer a leaner option, ground turkey works too! -
1/4 cup breadcrumbs
Chef Insight: Breadcrumbs are great for binding! You can use panko for extra crunch or even crushed crackers if you’re in a pinch. -
1/4 cup grated Parmesan cheese
Substitution Tip: For a dairy-free version, try nutritional yeast for that cheesy flavor without the cheese! -
1/4 cup chopped fresh parsley
Freshness Tip: Fresh herbs elevate the dish! If parsley isn’t your thing, fresh dill or mint works beautifully! -
1 egg
Binding Agent: This helps everything stick together. A flax egg can substitute for a vegan option if needed. -
2 cloves garlic, minced
Flavor Booster: Fresh garlic adds depth! If you don’t have fresh, 1/2 teaspoon of garlic powder can work. -
1 tsp dried oregano
Chef’s Note: Oregano is quintessential in Greek cuisine. Experiment with a bit of herbes de Provence for a unique spin! -
Salt and pepper, to taste
Seasoning Tip: Always taste as you go! Proper seasoning is key to flavor-packed dishes.
To Serve:
-
Olive oil
Drizzle it on everything! Olive oil is a staple in Mediterranean diets and truly enhances flavor. -
Chopped vegetables (e.g., cucumber, tomato, red onion)
Fresh and Crunchy: Use whatever veggies you have on hand. Think bell peppers, radishes, or even a citrus salad! -
Tzatziki sauce
Find it or Make it: This creamy cucumber yogurt sauce takes your bowl to the next level! You can use store-bought or homemade—either way, it’s a must! -
Pita bread or rice
Serving Base: Enjoy with warm, fluffy rice for a hearty dish, or light and fluffy pita for a fun wrap experience.
Step-by-Step Instructions
Alright, time to get our hands dirty! Follow these steps to create your Greek Meatball Bowl masterpiece:
Step 1: Preheat and Prep
Preheat your oven to 400°F (200°C). This will give your meatballs a nice golden crust! While that heats up, line a baking sheet with parchment paper for easy cleanup. We all know the less dish washing, the better!
Step 2: Mix the Meatball Ingredients
In a large mixing bowl, combine your ground beef or lamb, breadcrumbs, grated Parmesan cheese, parsley, egg, minced garlic, dried oregano, salt, and pepper. Here comes the fun part—get in there with your hands! Mixing by hand ensures an even distribution of all those lovely ingredients. Just don’t overmix, or your meatballs might turn out tough!
Step 3: Shape Your Meatballs
Using your hands, form the mixture into balls about 1-2 inches in diameter—think bite-sized deliciousness! Place them on the prepared baking sheet, leaving a little space between each one. This will allow them to cook evenly.
Step 4: Bake to Perfection
Drizzle a little olive oil over the meatballs (because who doesn’t love a golden crust?) and pop them in the oven. Bake for about 20-25 minutes, or until they’re cooked through and have that delectable golden brown color.
Step 5: Prepare Your Veggie Toppings
While the meatballs are baking, chop up your veggies—cucumbers, tomatoes, and red onions—as colorful toppings. A splash of lemon juice and a pinch of salt mixed in boosts their flavor.
Step 6: Assemble Your Bowls
Once the meatballs are ready, it’s assembly time! Start with a base of fluffy rice or warm pita. Top it off with those freshly chopped veggies, a generous scoop of tzatziki sauce, and a sprinkle of extra parsley if you’re feeling fancy.
Step 7: Enjoy!
Grab a fork (or dig in with pita for that extra fun), and enjoy the wonderful flavor explosion! Don’t forget to share your creation with friends—they’ll be asking for seconds!
Serving Suggestions
Presentation is key! To really impress, use a large bowl or shallow plate. Start with a mound of rice or a few pieces of pita, layer on those meatballs, and heap on the fresh veggies like a colorful salad. Drizzle with tzatziki sauce and add a sprinkle of parsley on top for that Instagram-worthy finish!
If you’re feeling indulgent, add a few olives or a slice of feta cheese. Pair this bowl with a crisp white wine or a refreshing iced tea for the perfect summer meal vibe.
Recipe Variations
Let’s mix things up! Here are a few creative twists you can try:
- Spicy Meatballs: Add a pinch of red pepper flakes to the meat mix for a zesty kick!
- Mediterranean Bowl: Swap out the tzatziki for a tahini sauce for a nutty, creamy alternative.
- Vegetarian Option: Replace meat with chickpeas or lentils—blend them well with some binding ingredients to form your meatballs.
- Whole Grain Swap: Use quinoa or farro instead of rice for added texture and nutrients.
- Herbed Rice: Cook your rice with a hint of lemon zest and fresh dill to infuse more flavor.
Chef’s Notes
Oh, the memories cooking with Grandma Maria! What strikes me most about this recipe is that it can evolve as people do. I’ve seen it change based on ingredients available or how I felt that day. When I got busy with work, I found joy in tweaking recipes for simplicity. This Greek Meatball Bowl is my go-to for those hectic days—it’s quick enough to pull together while still feeling special.
Sometimes, I play with different herbs or even make a spicy version just to keep it interesting. That’s the beautiful part of cooking—there are no hard rules, just delicious possibilities!
FAQs and Troubleshooting
1. My meatballs are falling apart! What did I do wrong?
It’s likely you didn’t use enough binding ingredients! Make sure to include breadcrumbs and an egg. If it continues to happen, you might need to mix a little more.
2. Can I make this dish ahead of time?
Absolutely! You can prep the meatballs and refrigerate them for a day or two before cooking. You can also freeze them before baking for a quick weeknight meal.
3. What if I don’t have tzatziki sauce?
No worries! You can simply mix yogurt with grated cucumber, lemon juice, and a pinch of garlic as a quick substitute. Or, use hummus!
4. How can I know when meatballs are done?
Using a meat thermometer, check for an internal temperature of 160°F (70°C) for beef. If you don’t have one, cut one in half to ensure there’s no pink inside.
Nutritional Info
While I’m not a nutritionist, I can share some general info! This Greek Meatball Bowl is rich in protein from the meat, and you’re getting a healthy dose of veggies on top. The olive oil provides heart-healthy fats, and if you go with whole grain rice or quinoa, you’ll pack in some fiber. Just keep in mind portion sizes and pairing it with other sides can affect the overall calories.
On average, one serving of the meatballs (about four meatballs) alongside veggies and rice can range from 400 to 500 calories. It’s a balanced meal that packs a flavorful punch!
Final Thoughts
There you have it, food lovers—a cozy and comforting Greek Meatball Bowl that’s both simple and satisfying! It’s an homage to my memories with Grandma while also being a canvas for your creativity in the kitchen.
So, the next time you want to impress at dinner or just treat yourself to something delicious, give this bowl a go. Remember, cooking is all about sharing, so invite some friends over, play some music, and let the good times and flavors flow!
Thanks for coming along on this culinary adventure with me today. Don’t forget to check back for more scrumptious recipes and kitchen hacks at Feastical. Until next time, happy cooking!
Print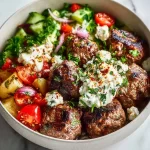
Greek Meatball Bowl
- Total Time: 40 minutes
- Yield: 4 servings 1x
- Diet: Gluten-Free
Description
A vibrant and satisfying Greek Meatball Bowl packed with flavor and freshness, perfect for any occasion.
Ingredients
- 1 lb ground beef or lamb
- 1/4 cup breadcrumbs
- 1/4 cup grated Parmesan cheese
- 1/4 cup chopped fresh parsley
- 1 egg
- 2 cloves garlic, minced
- 1 tsp dried oregano
- Salt and pepper, to taste
- Olive oil, for drizzling
- Chopped vegetables (e.g., cucumber, tomato, red onion)
- Tzatziki sauce
- Pita bread or rice
Instructions
- Preheat your oven to 400°F (200°C) and line a baking sheet with parchment paper.
- Mix the meatball ingredients in a large mixing bowl until well combined.
- Shape the mixture into 1-2 inch balls and place them on the prepared baking sheet.
- Bake for about 20-25 minutes until golden brown and cooked through.
- Prepare your veggie toppings while the meatballs are baking, adding lemon juice and salt.
- Assemble your bowls with a base of rice or pita, meatballs, veggies, and tzatziki sauce.
- Enjoy your delicious Greek Meatball Bowl!
Notes
You can make the meatballs ahead of time and refrigerate or freeze them before baking. Substitute tzatziki sauce with yogurt mixed with cucumber if necessary.
- Prep Time: 15 minutes
- Cook Time: 25 minutes
- Category: Main Course
- Method: Baking
- Cuisine: Mediterranean
Nutrition
- Serving Size: 1 bowl
- Calories: 450
- Sugar: 5g
- Sodium: 500mg
- Fat: 20g
- Saturated Fat: 6g
- Unsaturated Fat: 10g
- Trans Fat: 0g
- Carbohydrates: 35g
- Fiber: 4g
- Protein: 25g
- Cholesterol: 80mg
Keywords: Greek, Meatballs, Mediterranean, Healthy, Bowl
Lemon Garlic Chicken Bowl
# Lemon Garlic Chicken Bowl: A Fresh and Zesty Delight

## Introduction

Hey there, food lovers! Let’s talk about one of those dishes that embodies the spirit of comfort while being refreshingly light and zesty – the Lemon Garlic Chicken Bowl! If you’re anything like me, you love a meal that’s not only packed with flavor but also quick to whip up after a busy day. Think of this bowl as your go-to for a weeknight dinner that feels like a special occasion.

Imagine this: You walk through the door, and the tantalizing aroma of garlic and lemon greets you. It’s like a warm hug for your senses! This dish combines juicy, pan-seared chicken, vibrant vegetables, and nutty quinoa, all drizzled with a citrusy dressing that brightens up every bite. It’s also a forgiving recipe, so if you’re a budding chef still mastering that perfect sear, don’t worry – I’m here to guide you every step of the way!

In the spirit of sharing, I want to let you in on a little secret: this bowl isn’t just about feeding your hunger; it’s about bringing people together. I can’t count how many times I’ve gathered friends and family around my kitchen table, laughter echoing while we dig into generous portions of this colorful concoction. So, whether you’re looking to impress guests or simply treat yourself to something scrumptious, the Lemon Garlic Chicken Bowl is just the ticket!

Now, grab your spatula and let’s dive into this bright and flavorful creation that’s as easy to make as it is delightful to eat!

---

## Personal Story

Flashback to a sun-drenched Saturday afternoon at my grandmother’s house, where I had the privilege of witnessing the magic of home cooking. My grandma, with her apron tied snugly around her waist, would prepare simple yet flavorful meals. One dish stood out that day: her lemony garlic chicken.

As she sautéed the chicken, the kitchen instantly transformed into a haven filled with vibrant scents. I remember her saying, “Cooking is about love and sharing,” as she tossed in fresh herbs and zesty lemon slices. That day, we sat around a table, plates heaping with chicken and perfectly steamed veggies, and I felt a connection that only good food can create.

Years later, I channeled her warm, comforting vibes into this Lemon Garlic Chicken Bowl recipe. It’s not just a dish; it's a piece of nostalgia, a way for me to share those cherished moments with you, my fellow foodies. When you whip this up, I want you to feel that same warmth and togetherness, making memories of your own!

---

## Ingredients

Now that we're all warmed up, let’s gather the players for our Lemon Garlic Chicken Bowl. Here’s what you’ll need, along with some handy tips:

- **2 Chicken Breasts**
  - Fresh, boneless, and skinless is best. You can swap with thighs if you prefer dark meat for added flavor, or use tofu for a vegetarian option.

- **2 Tablespoons Olive Oil**
  - This versatile oil is what gives our chicken that beautiful golden crust. Feel free to use avocado oil if you like a higher smoke point or want a different flavor.

- **3 Cloves Garlic, Minced**
  - Fresh garlic is key! If you’re short on time, garlic powder works in a pinch (about 1 teaspoon for this recipe), but fresh is always the way to go for that intense flavor.

- **Juice of 1 Lemon**
  - Fresh lemon juice brightens every component of this dish. If you can’t find lemons, try lime juice for a fun twist!

- **Salt and Pepper to Taste**
  - Don’t skip this! Seasoning elevates your dish. I recommend using kosher salt and freshly cracked pepper for a punchier taste.

- **1 Cup Broccoli Florets**
  - Fresh or frozen works here. Broccoli gives a lovely crunch, but feel free to swap it for asparagus or snap peas for a different texture.

- **1 Bell Pepper, Sliced**
  - Use any color: red, yellow, or green! Bell peppers add sweetness and color. If you can’t find fresh, jarred roasted peppers can be a tasty alternative.

- **1 Cup Cooked Quinoa**
  - This super grain adds a delightful nuttiness and texture. If you’re looking for something different, brown rice or farro will work well too!

- **Fresh Parsley for Garnish**
  - A sprinkle of fresh herbs adds a beautiful finish. If you’re not into parsley, basil or cilantro would be fantastic alternatives!

---

## Step-by-Step Instructions

Let’s get cooking! Follow these steps for a delicious Lemon Garlic Chicken Bowl that’s sure to impress.

### Step 1: Prepare Your Ingredients
Before you start cooking, gather and prep everything. Dice your garlic, juice that lemon, chop the broccoli, slice the bell pepper, and cook your quinoa if you haven’t already. This makes the cooking process much smoother and way more enjoyable. Plus, you can dance around the kitchen while you prep—multitasking!

### Step 2: Season and Sear the Chicken
Heat the olive oil in a large skillet over medium-high heat. Once it's shimmering, season both sides of the chicken breasts liberally with salt and pepper (trust me, this makes a difference!). Place the chicken in the skillet, making sure not to crowd the pan. Sear for about 5–7 minutes on each side or until golden brown and cooked through (internal temperature should reach 165°F). Pro tip: Don’t flip too soon! Let it develop that delicious crust.

### Step 3: Add Garlic and Zest
When the chicken is almost done cooking, add minced garlic to the pan. Stir it around for about 30 seconds until fragrant, but keep an eye on it—garlic can burn quickly! Once the chicken is cooked, pour in the lemon juice, scraping up those tasty browned bits from the bottom of the pan. This adds more depth to your dish.

### Step 4: Toss in the Veggies
Remove the chicken from the skillet and let it rest on a plate. In the same skillet, toss in the prepared broccoli and bell pepper. Sauté for about 4–5 minutes until they’re tender-crisp and a vibrant color. You can add a splash of water to steam them if needed. Get those colors popping!

### Step 5: Assemble the Bowl
Now it’s time for the fun part! In a bowl, start with a generous serving of quinoa. Slice the seared chicken and arrange it on top. Add those beautiful sautéed veggies, then drizzle any remaining lemon-garlic juice from the pan over it all. Don’t skip this step; it’s what ties the entire dish together! Finish off with a sprinkle of fresh parsley.

---

## Serving Suggestions

When plating your Lemon Garlic Chicken Bowl, think about color and texture. Create a layered effect by first adding your quinoa, then the sliced chicken, followed by the bright veggies. A drizzle of extra olive oil and a few lemon wedges on the side make for a lovely presentation.

Consider serving this dish with a crisp green salad or a light, citrusy dressing to complement the flavors. It’s perfect for a quick lunch or dinner, and who doesn’t love a meal that looks as good as it tastes?

---

## Recipe Variations

Here are a few creative twists to bring new life to your Lemon Garlic Chicken Bowl:

1. **Mediterranean Flair**: Add kalamata olives and feta cheese for a Mediterranean vibe!

2. **Spicy Kick**: Toss in some red pepper flakes or sriracha to your chicken while it cooks for added heat.

3. **Citrus Mix**: Try using a mix of citrus juices – orange and lime alongside lemon for a tropical twist.

4. **Grain Swap**: Experiment with other grains like farro, couscous, or even brown rice for a different texture and flavor profile.

5. **Herb Infusion**: Ditch the parsley and use fresh dill or cilantro instead for a totally new flavor experience.

---

## Chef’s Notes

Throughout my journey in the culinary world, this Lemon Garlic Chicken Bowl has evolved into one of my all-time favorites. I used to make it in a hurry, often burning the garlic (oops!), but that just added to the charm of learning in the kitchen.

It’s a reminder that not every dish needs to be perfect; what matters is the joy it brings to those sharing it. Over time, I’ve tweaked the ingredients and tried various swaps, and I love that it accommodates everyone’s tastes.

So don’t be afraid to make this dish your own – it’s all about what makes you happy!

---

## FAQs and Troubleshooting

- **Q: My chicken is tough. What went wrong?**
  - A: Overcooking is likely the culprit! Make sure to use a meat thermometer to check for doneness without drying it out. Also, let the chicken rest afterward; it helps retain the juices.

- **Q: Can I make this ahead of time?**
  - A: Absolutely! You can cook the chicken and veggies and store them separately in the fridge. Just reheat when you’re ready to eat. Quinoa holds up well, too.

- **Q: What if I don’t have quinoa?**
  - A: No problem! You can use rice, couscous, farro, or even cauliflower rice for a low-carb option.

- **Q: How do I store leftovers?**
  - A: Store in an airtight container in the fridge for up to 3 days. Just note that the veggies may lose some crunch.

---

## Nutritional Info

One serving of this Lemon Garlic Chicken Bowl (approximately 1/4 of the recipe) provides a healthy balance of protein, vegetables, and wholesome grains. Here's a quick nutritional breakdown:

- **Calories**: Approximately 450
- **Protein**: 35g (from chicken and quinoa)
- **Carbohydrates**: 30g (primarily from quinoa and vegetables)
- **Fat**: 15g (mostly from olive oil)
- **Fiber**: 6g (thanks to broccoli and quinoa)

This dish is rich in vitamins, particularly from the veggies, and keeps you feeling full without weighing you down. Plus, it’s perfect for meal prep, keeping your nutrition on point throughout the week!

---

## Final Thoughts

Cooking is about exploration, sharing stories, and creating moments around the dinner table. I hope this Lemon Garlic Chicken Bowl not only fills your stomach but also warms your heart as you enjoy it with loved ones. Each bite is a fresh reminder of how food has the power to connect us.

So, gather your ingredients, put on your favorite tunes, and let your kitchen fill with laughter and the aroma of zesty goodness. Don’t forget to share your creations and stories, as I’d love to hear how your bowl turns out! Until next time, happy cooking, folks! Let’s dig in!

Lemon Garlic Chicken Bowl
- Total Time: 35 minutes
- Yield: 4 servings 1x
- Diet: Gluten-Free
Description
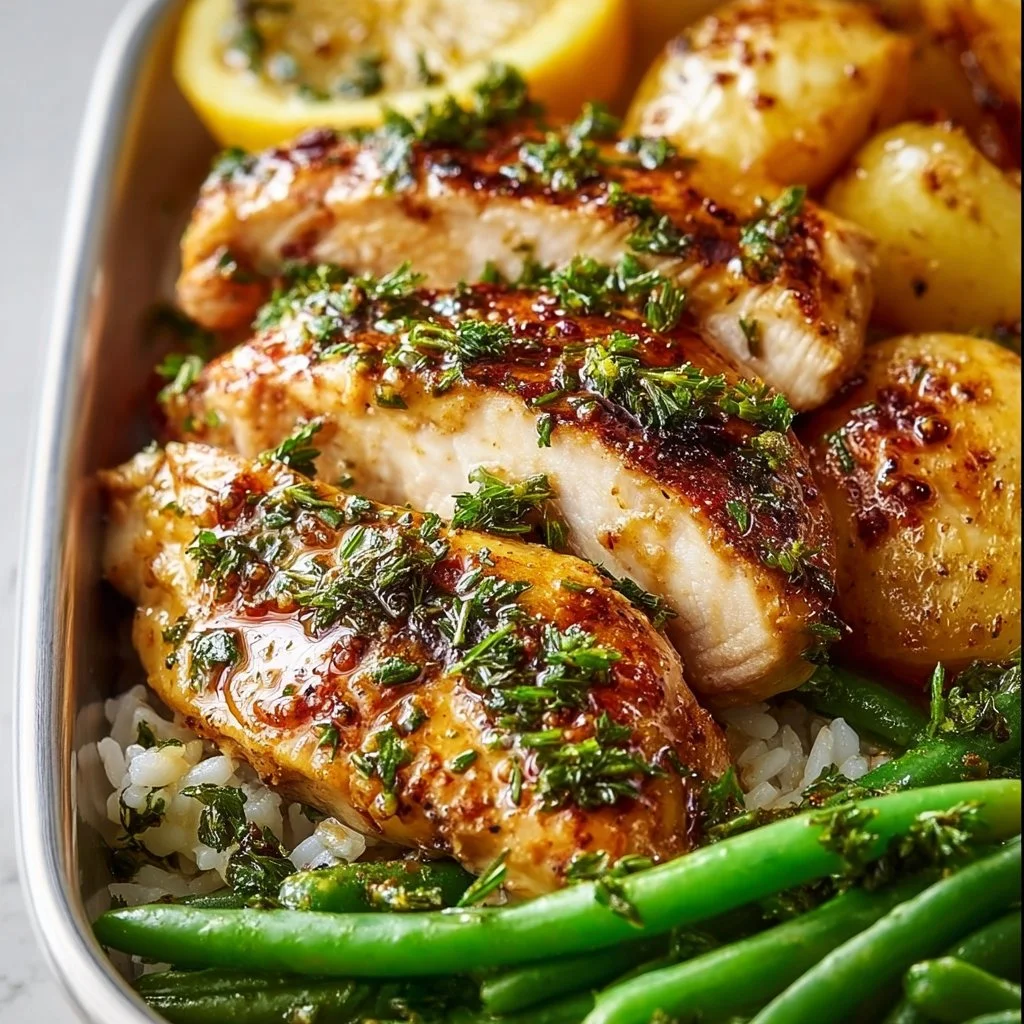
A fresh and zesty dish featuring pan-seared chicken, vibrant vegetables, and nutty quinoa, all drizzled with a citrusy lemon-garlic dressing.
Ingredients
- 2 Chicken Breasts, boneless and skinless
- 2 Tablespoons Olive Oil
- 3 Cloves Garlic, Minced
- Juice of 1 Lemon
- Salt and Pepper to Taste
- 1 Cup Broccoli Florets
- 1 Bell Pepper, Sliced
- 1 Cup Cooked Quinoa
- Fresh Parsley for Garnish
Instructions
- Prepare Your Ingredients: Gather and prep everything—dice garlic, juice lemon, chop broccoli, slice bell pepper, and cook quinoa.
- Season and Sear the Chicken: Heat olive oil in a skillet over medium-high heat, season chicken, and sear for 5–7 minutes on each side until cooked through.
- Add Garlic and Zest: When chicken is almost done, add minced garlic and sauté for 30 seconds, then add lemon juice.
- Toss in the Veggies: Remove chicken and sauté broccoli and bell pepper for 4–5 minutes.
- Assemble the Bowl: Start with quinoa, top with sliced chicken and sautéed veggies, and drizzle remaining lemon-garlic juice.
Notes
Feel free to swap chicken with tofu for a vegetarian option or experiment with different grains like brown rice or couscous.
- Prep Time: 15 minutes
- Cook Time: 20 minutes
- Category: Main Course
- Method: Pan-Seared
- Cuisine: American
Nutrition
- Serving Size: 1 serving
- Calories: 450
- Sugar: 2g
- Sodium: 350mg
- Fat: 15g
- Saturated Fat: 2g
- Unsaturated Fat: 10g
- Trans Fat: 0g
- Carbohydrates: 30g
- Fiber: 6g
- Protein: 35g
- Cholesterol: 75mg
Keywords: chicken, quinoa, lemon, garlic, healthy dinner, easy recipe

Stuffed Chicken Breast
Stuffed Chicken Breast: A Heartwarming Culinary Escape
Hey there, food lovers! Welcome back to Feastical! Today, we’re diving into the comforting world of stuffed chicken breast—a dish that’s not only delicious but also packed with memories. Picture this: it’s a chilly evening, the aroma of garlic and melted cheese fills the air, and family gathers around the dining table, ready to dig into a meal that feels like a warm hug. That’s the magic of stuffed chicken!
Stuffed chicken breast is a dish that’s as versatile as it is scrumptious. You can fill it with all sorts of goodies—from cheeses to veggies to even sweet ingredients if you’re feeling adventurous. What I love about this dish is how it caters to everybody’s taste buds while being simple enough to whip up on a busy weeknight.
Not to mention, it looks pretty impressive on the plate, so it’s perfect for entertaining guests or treating yourself! Not to scare you with fancy-pants vibes though—I’m here to keep things light, fun, and approachable. Whether you’re a seasoned pro or just discovering your way around the kitchen, I promise you can master this dish with ease, and I’ll be here to guide you every step of the way.
So, grab your apron, roll up those sleeves, and let’s embark on this culinary adventure together!
Personal Story
Ah, stuffed chicken—how do I even begin to describe my love for this dish? Let me take you back to my childhood. Every Sunday, my family had a special routine: Dad would fire up the grill, while Mom would work her magic in the kitchen, preparing a feast that filled our home with mouthwatering scents.
One of my favorite memories is the Sunday Mom decided to experiment with stuffed chicken breast. I can still remember the excitement in the air as she introduced us to her creation. The combination of gooey mozzarella, vibrant spinach, and just a sprinkle of garlic was beyond delicious. Watching her as she meticulously rolled and secured each chicken breast made me appreciate the love that goes into cooking.
From that day on, stuffed chicken became a tradition in our house. It was a dish that brought us together, sparking laughter, stories, and the sharing of moments around the table. Fast forward to today, and here I am sharing this cherished recipe with you to create memories of your own! Let’s create something that’s not just a meal but a gathering of hearts.
Ingredients
Here’s what you’ll need to bring our stuffed chicken breast to life:
-
4 chicken breasts: These are the stars of our show! Look for breasts that are uniform in size for even cooking. If you prefer, you can use bone-in chicken for a little extra flavor.
-
1 cup fresh spinach: Fresh spinach adds a great color and nutritional punch! You can substitute with kale or Swiss chard if you like. Want to save time? Use pre-washed, bagged spinach.
-
1 cup mozzarella cheese, shredded: Who doesn’t love stretchy, gooey cheese? You can easily swap in provolone or gouda for a different melt factor!
-
1/2 cup Parmesan cheese, grated: This salty, nutty cheese elevates our dish. Pecorino Romano or nutritional yeast for a vegan twist can work beautifully too!
-
2 tablespoons olive oil: Olive oil adds richness and helps in the cooking process. You could use butter or even avocado oil if you prefer.
-
Salt and pepper to taste: Essential for bringing all those flavors together. Feeling adventurous? Try adding some smoked paprika or crushed red pepper for a bit of heat!
-
1 teaspoon garlic powder: A fantastic shortcut for flavor! If you have fresh garlic, it can be even better; just adjust the amount to about 1-2 cloves, minced.
-
1 teaspoon onion powder: Adds a lovely depth of flavor. In a pinch, yellow onion, finely chopped, can do the trick!
Now that we have our ingredients all lined up, let’s roll up our sleeves and get cooking!
Step-by-Step Instructions
-
Preheat your oven: To 375°F (190°C). This gives it ample time to heat up while we prepare our chicken!
-
Prepare the spinach filling: In a mixing bowl, combine the fresh spinach, mozzarella, and Parmesan cheese. Season it with some salt, pepper, garlic powder, and onion powder. Mix it all up until the spinach is evenly coated in those cheesy goodness and seasonings. This filling is incredibly forgiving—if you love roasted red peppers or artichokes, toss them in!
-
Butterfly the chicken breasts: Using a sharp knife, carefully slice each chicken breast in half horizontally, but don’t cut all the way through! You want to create a pocket. Open it up like a book, and voilà, your canvas is ready!
-
Stuff those chicken breasts: Take a generous portion of your spinach filling and spoon it into the pocket of each chicken breast. Don’t be shy; pack it in!
-
Secure the chicken: I like to use kitchen twine or toothpicks to hold the chicken closed. If using toothpicks, remember to take them out before serving—even crackers have their limits!
-
Sear the chicken: In an oven-safe skillet, heat your olive oil over medium-high heat. Season the outside of the chicken breasts with salt and pepper. Once the oil is shimmering, add the chicken, searing each side for about 3-4 minutes until golden brown. This step develops an incredible crust and locks in the juices.
-
Bake to perfection: Transfer the skillet to your preheated oven and bake for 20-25 minutes or until the internal temperature reaches 165°F (74°C). Keep that delicious smell wafting through the house!
-
Let it rest: Once out of the oven, allow the chicken to rest for about 5-10 minutes before slicing. This helps keep the juices inside and makes each bite incredibly moist.
And just like that, you have a stunning stuffed chicken breast that’ll impress even the pickiest eaters! Easy peasy, right?
Serving Suggestions
When it comes to serving this stunning dish, you’ve got options! Here are a few tips to plate it beautifully:
-
Slice and serve: After allowing your stuffed chicken to rest, slice each breast in half to reveal that gorgeous filling. Serve it on a bed of garlic mashed potatoes or quinoa for a beautiful presentation.
-
Garnish generously: Fresh herbs like basil, parsley, or even a sprinkle of red pepper flakes on top can elevate the dish and add a pop of color.
-
Pair with sides: Consider complementing your stuffed chicken with roasted vegetables, a light salad, or some crusty bread to soak up those delicious juices.
-
Drizzle with sauce: If you’re feeling fancy, a light balsamic glaze or a homemade tomato sauce can add that extra zing!
Remember, the goal is to make it look as delightful as it tastes, so don’t be afraid to get a little creative!
Recipe Variations
Feeling the need to mix it up? Here are some delightful twists and variations you can try with your stuffed chicken:
-
Pesto and Sun-Dried Tomato: Swap the spinach for a few tablespoons of pesto and add some chopped sun-dried tomatoes for a flavorful Mediterranean vibe.
-
Mushroom and Swiss: Sauté chopped mushrooms and mix them with Swiss cheese for a wonderfully earthy option.
-
Buffalo Chicken: If you’re a fan of heat, mix cream cheese, shredded chicken, and buffalo sauce for a spicy kick!
-
Caprese Style: Stuff with fresh mozzarella, cherry tomatoes, and basil for a summery, fresh taste.
-
Vegan Option: Use thick slices of eggplant or portobello mushrooms instead of chicken, and fill with vegan cheese and spinach. Bake until tender!
Chef’s Notes
This stuffed chicken breast recipe has evolved over the years, transitioning from a family favorite to a kitchen staple in my own home. I’ve tried everything from different cheese blends to various herbs, always finding something unique and delightful.
One of my funniest kitchen moments happened when I was about to serve this dish to guests; I realized I had forgotten to secure the chicken! It fell open on the plate, but instead of panicking, I simply decorated the plate with a flourish of herbs and called it a “deconstructed stuffed chicken.” Sometimes, embracing the silliness in cooking only adds to the fun!
Cooking should always be about joy, exploration, and sharing moments with others. May your adventures in the kitchen be just as beautiful and memorable!
FAQs and Troubleshooting
1. Why did my chicken turn out dry?
Dry chicken is often due to overcooking. Use a meat thermometer to ensure it doesn’t exceed 165°F (74°C). Also, letting it rest after cooking helps retain moisture.
2. Can I make this ahead of time?
Absolutely! Stuff the chicken breasts a day in advance, store them in the fridge, and cook them when you’re ready. Just add a bit of cooking time if they’re cold.
3. What if my filling leaks out?
If your filling leaks out, it could be due to overstuffing. Make sure to seal the edges well with toothpicks or twine. A little leakage is still delicious, so don’t stress too much!
4. How can I tell when the chicken is done?
Using a meat thermometer is the best way. Check the thickest part of the chicken for a temperature of 165° F (74° C). If you don’t have a thermometer, make sure the juices run clear when you cut into it.
Nutritional Info (if applicable)
This stuffed chicken breast recipe is packed with protein, vitamins, and minerals. Here’s a rough breakdown per serving (not including any sides):
- Calories: Approx. 350
- Protein: 40g
- Carbohydrates: 3g
- Total Fat: 20g
- Saturated Fat: 7g
- Fiber: 1g
- Sugars: 1g
Feel free to adjust the cheese or oil content for a lower-fat option, and replace with veggie sides to add more fiber without sacrificing flavor!
Final Thoughts
Cooking can be an exploration, a journey filled with flavors, experimentation, and heartfelt connections. Stuffed chicken breast is one of those dishes that bridges the gap between simple weeknight dinners and special occasions. It’s comforting yet extravagant, so it’s everything you want in a meal.
As you create your stuffed chicken masterpieces, remember to make it your own, have fun, and, most importantly, share it with the people you love. Who knows? Maybe you’ll end up making some wonderful memories just like I did!
Thanks for stopping by Feastical today! I can’t wait to hear how your stuffed chicken adventures go—share your experience in the comments below, and let’s keep the conversation going. Until next time, happy cooking, my friends!
Print
Stuffed Chicken Breast
- Total Time: 40 minutes
- Yield: 4 servings 1x
- Diet: None
Description
A deliciously comforting stuffed chicken breast filled with spinach, mozzarella, and Parmesan, perfect for family gatherings or simple weeknight dinners.
Ingredients
- 4 chicken breasts
- 1 cup fresh spinach
- 1 cup mozzarella cheese, shredded
- 1/2 cup Parmesan cheese, grated
- 2 tablespoons olive oil
- Salt and pepper to taste
- 1 teaspoon garlic powder
- 1 teaspoon onion powder
Instructions
- Preheat your oven to 375°F (190°C).
- Prepare the spinach filling by mixing fresh spinach, mozzarella, Parmesan, salt, pepper, garlic powder, and onion powder in a bowl.
- Butterfly the chicken breasts by slicing them in half horizontally, without cutting through.
- Stuff each chicken breast pocket with the spinach filling.
- Secure the chicken using kitchen twine or toothpicks.
- Sear the chicken in an oven-safe skillet with olive oil over medium-high heat for 3-4 minutes on each side.
- Bake in the preheated oven for 20-25 minutes until the internal temperature reaches 165°F (74°C).
- Let the chicken rest for 5-10 minutes before slicing.
Notes
Feel free to get creative with the filling by adding roasted red peppers or herbs. Serve with a side of roasted vegetables or a light salad.
- Prep Time: 15 minutes
- Cook Time: 25 minutes
- Category: Main Course
- Method: Baking
- Cuisine: American
Nutrition
- Serving Size: 1 serving
- Calories: 350
- Sugar: 1g
- Sodium: 600mg
- Fat: 20g
- Saturated Fat: 7g
- Unsaturated Fat: 8g
- Trans Fat: 0g
- Carbohydrates: 3g
- Fiber: 1g
- Protein: 40g
- Cholesterol: 100mg
Keywords: stuffed chicken, chicken breast, family dinner, comfort food, easy recipes
Flavorful Mushroom Stuffed Chicken Breast
Flavorful Mushroom Stuffed Chicken Breast: A Comforting Classic
Hey there, fellow food lovers! I’m Beau Collier, and I’m thrilled you’re here at Feastical, where the kitchen is always buzzing with delicious energy! Today, we’re diving into a recipe that’s sure to become a staple in your household: Flavorful Mushroom Stuffed Chicken Breast. This dish radiates comfort, warmth, and the kind of cozy vibes that can make even the most mundane weeknight feel like a special occasion.
Picture this: It’s a chilly evening, you’re winding down from a long day, and the aroma of garlic and earthy mushrooms fills the air as you prepare dinner. You can hear the sizzle as the chicken cooks to golden perfection, and you can’t help but feel excited about the delightful meal that’s just moments away. This dish isn’t just delicious; it’s a memory-maker, a conversation starter, and a downright hug on a plate!
Why stuffed chicken, you may wonder? Well, it’s versatile, impressive, and, let’s be real, absolutely delicious! Plus, stuffing chicken breast means you get to infuse it with all sorts of flavor—think creamy, cheesy goodness combined with earthy mushrooms and vibrant spinach. Whether you’re planning a romantic dinner, a cozy gathering with friends, or just treating yourself to something special, this recipe is the ticket to a fabulous culinary experience!
So, grab your favorite apron, put on some tunes, and let’s embark on this tasty journey together! I promise to make this recipe not only simple and approachable but also show you a few chef hacks along the way—a dash of love and creativity is all it takes to serve up something magical. Are you ready? Let’s get cooking!
Personal Story
Ah, the memories! Allow me to take you back to one of my favorite childhood culinary moments. Growing up, my grandmother was the undisputed queen of the kitchen. No occasion was too small for a lovingly prepared feast, and she had a knack for taking ordinary ingredients and turning them into unforgettable meals.
One rainy afternoon, I remember her teaching me how to make stuffed chicken breasts, reigning over her cozy kitchen with her vibrant personality and infectious laughter. As we chopped mushrooms and sautéed garlic, she shared stories of her own mom teaching her the same recipe. The kitchen was filled with the scent of savory delights, an experience that felt like magic.
That day, we made a glorious mess, giggling over spilled flour and wrestling with stubborn knife skills. What stuck with me the most wasn’t just the technique, but the joy we shared—how food has this magical ability to bring people together, create connection, and exchange love. Today, as I share this Flavorful Mushroom Stuffed Chicken Breast recipe with all of you, I carry that same love-filled spirit into my own kitchen. Let’s continue that beautiful legacy together—and trust me, your family and friends will appreciate it!
Ingredients
Here’s what you’ll need to whip up this delightful dish—don’t worry; I’ll share some insights and tips along the way!
-
4 Chicken Breasts
Look for boneless, skinless chicken breasts for ease. If you’re looking for a healthier alternative, you can try using turkey cutlets. -
2 Cups Mushrooms, Chopped
I recommend using cremini or button mushrooms for their earthy flavors. If you want to switch things up, try shiitake or portobello mushrooms for a deeper taste! -
1 Cup Spinach, Chopped
Fresh spinach adds a vibrant color and nutritious flair. If fresh isn’t available, frozen spinach works just fine—just make sure to squeeze out the excess moisture! -
1/2 Cup Cream Cheese, Softened
This creamy goodness acts as a rich binder. If you’re looking for a lighter version, try using ricotta or a dairy-free cream cheese for a similar effect. -
1/2 Cup Shredded Mozzarella Cheese
Mozzarella gives that delicious melty texture. Feel free to mix it up with provolone or even a sprinkle of parmesan for a flavor twist! -
2 Cloves Garlic, Minced
Garlic is a game-changer! Use fresh garlic for the best flavor. For a milder option, try roasted garlic, which brings a sweet, caramelized depth to the dish. -
1 Teaspoon Olive Oil
This helps sauté the veggies. You can substitute it with another oil, like avocado oil, for a high smoke point. -
Salt and Pepper to Taste
These staples are essential for brightness! Experiment with herbs like thyme or rosemary for extra flavor. -
Fresh Parsley for Garnish
Fresh herbs brighten the dish beautifully. If parsley isn’t your thing, try fresh basil or cilantro for a twist!
Step-by-Step Instructions
Are you ready to bring this dish to life? Let’s break it down step by step and add those little chef hacks along the way!
Step 1: Prepare the Stuffing
-
Sauté the Veggies: In a skillet over medium heat, add 1 teaspoon of olive oil. Once hot, toss in the minced garlic and sauté until fragrant—about 30 seconds. Now, add the chopped mushrooms and spinach. Cook for around 4-5 minutes or until the mushrooms are tender and the spinach is wilted. Chef Tip: Season with a pinch of salt and pepper while sautéing to build flavor right from the start.
-
Mix in the Creaminess: Transfer the sautéed mixture to a bowl and allow it to cool slightly. Then, mix in the softened cream cheese and shredded mozzarella until combined. You want it creamy but not too runny. Chef Insight: This stuffing is super versatile, so feel free to add chopped herbs or spices for an extra flavor kick!
Step 2: Prepare the Chicken
-
Butterfly the Chicken: Using a sharp knife, carefully butterfly each chicken breast. This means slicing them horizontally, being careful not to cut all the way through, creating a pocket for your scrumptious stuffing. Quick Chef Hack: If you pound the chicken breasts gently with a meat mallet or rolling pin, they’ll cook evenly and stuff more easily!
-
Fill the Chicken: Spoon the mushroom and cheese mixture into the pocket of each chicken breast. Be generous, but don’t overstuff—otherwise, it may burst while cooking. Use toothpicks to secure the openings if needed. Tip: Just make sure to remove the toothpicks before serving!
Step 3: Cook to Golden Perfection
-
Pan-Seer the Chicken: In the same skillet, add a bit more olive oil (about 1 tablespoon) and heat over medium-high. Once hot, place the stuffed chicken breasts in the skillet. Sear for about 4-5 minutes on one side until browned before flipping them over. Chef Tip: Try not to move them too much—let that glorious golden crust develop!
-
Finish Cooking: Once flipped, reduce the heat to medium. Cover the skillet to help the chicken cook through (about 7-10 minutes more, depending on thickness). Check for doneness using a meat thermometer (165°F internal temperature). Quick Note: If your chicken breasts are thick, you can transfer them to a preheated oven at 375°F for about 15-20 minutes to finish cooking.
Step 4: Serve and Enjoy
- Let It Rest: Once cooked, remove the chicken from the skillet and let it rest for 5 minutes. Resting allows the juices to redistribute, keeping it tender and flavorful. Pro Tip: This is a great time to whip up a quick salad or side!
Serving Suggestions
Now that you’ve got your stunning Flavorful Mushroom Stuffed Chicken Breast ready to shine, let’s talk about presentation! I love serving this dish on a warm plate, garnished with freshly chopped parsley for that vibrant touch.
Plate it Up
- Serve with Sides: Pair it with a light salad, roasted vegetables, or creamy mashed potatoes to create a plate that’s as colorful as it is delicious!
- Drizzle Some Sauce: Elevate your dish by drizzling a simple balsamic reduction or homemade garlic butter over the top—talk about a flavor explosion!
- Garnish, Garnish, Garnish: A sprinkle of parmesan or fresh basil will not only add more flavor but will also look stunning for your dinner guests!
Recipe Variations
Want to spice things up? Here are a few creative twists to customize your Flavorful Mushroom Stuffed Chicken Breast!
-
Add Bacon: For that irresistible savory twist, sauté some crumbled bacon with the mushrooms—because who doesn’t love bacon?
-
Cheesy Spinach & Artichoke: Swap the mushroom stuffing for a spinach-artichoke blend—perfect for all the cream cheese lovers out there!
-
Mediterranean Style: Toss in some sun-dried tomatoes, feta cheese, and olives for a Mediterranean flair—a delicious way to switch up the flavor profile.
-
Herb Infusion: Mix in fresh herbs like dill, tarragon, or oregano into the stuffing for a burst of fresh flavor that’s simply delightful.
-
Gluten-Free Options: If you’re keeping it gluten-free, you can use gluten-free breadcrumbs instead of the stuffing for a lovely texture.
Chef’s Notes
I have to share this little tidbit—my very first attempt at making stuffed chicken didn’t go as planned. Let’s just say it was a bit of a kitchen disaster! I was in such a rush that I didn’t seal the chicken properly, and it burst open in the pan—yikes! Although I was a bit disheartened, that experience taught me invaluable lessons about patience in the kitchen. Cooking is all about learning and growing, and I hope this recipe brings you as much joy as it has me over the years!
Over the years, this recipe has evolved, and I love experimenting with different flavors and ingredients. It’s become a crowd-pleaser at my family gatherings, and every time I make it, it brings me back to that rainy afternoon in my grandmother’s kitchen, where it all started.
FAQs and Troubleshooting
1. Can I make this dish ahead of time?
Absolutely! Stuff the chicken breasts a day in advance and store them in the refrigerator. When you’re ready to cook, simply take them out and let them sit at room temperature for about 15 minutes before cooking.
2. What if my chicken breasts are uneven in thickness?
If you notice some parts are thicker, you can pound them down using a meat mallet, ensuring even cooking. Alternatively, you can slice them into smaller portions for more equal sizes.
3. How do I know when the chicken is done?
The best way to check is by using a meat thermometer. You’ll want it to reach 165°F for perfect doneness. No thermometer? Just cut into the chicken—if the juices run clear and there’s no pink, you’re good to go!
4. Can I freeze leftovers?
Definitely! Cooked stuffed chicken can be frozen for up to 3 months. Just make sure to let it cool before storing, and wrap it tightly to prevent freezer burn!
Nutritional Info (Estimated Per Serving)
- Calories: 350
- Protein: 30g
- Fat: 22g
- Carbohydrates: 5g
- Fiber: 1g
(Please note that nutritional info can vary based on exact measurements and brands used.)
Final Thoughts
And there you have it, my food-loving friends! Your Flavorful Mushroom Stuffed Chicken Breast is ready to shine on your dinner table, bringing comfort and joy to your evening. I hope this recipe not only fills your belly but also fills your heart with the warmth of cooking and sharing meals together.
Remember, cooking is all about creativity, experimentation, and most importantly, fun! So don’t be afraid to tweak this recipe to suit your taste or let it inspire you to create something entirely new! Whether you whip it up for family, friends, or just for yourself, I know this dish will deliver that soulful comfort we all crave.
Thank you for joining me in the kitchen today, and I can’t wait to hear about your adventures with this recipe. Until next time, keep cooking, keep exploring, and most importantly, keep sharing love through food—because that’s what it’s all about! Happy cooking!
Print
Flavorful Mushroom Stuffed Chicken Breast
- Total Time: 45 minutes
- Yield: 4 servings 1x
- Diet: Poultry
Description
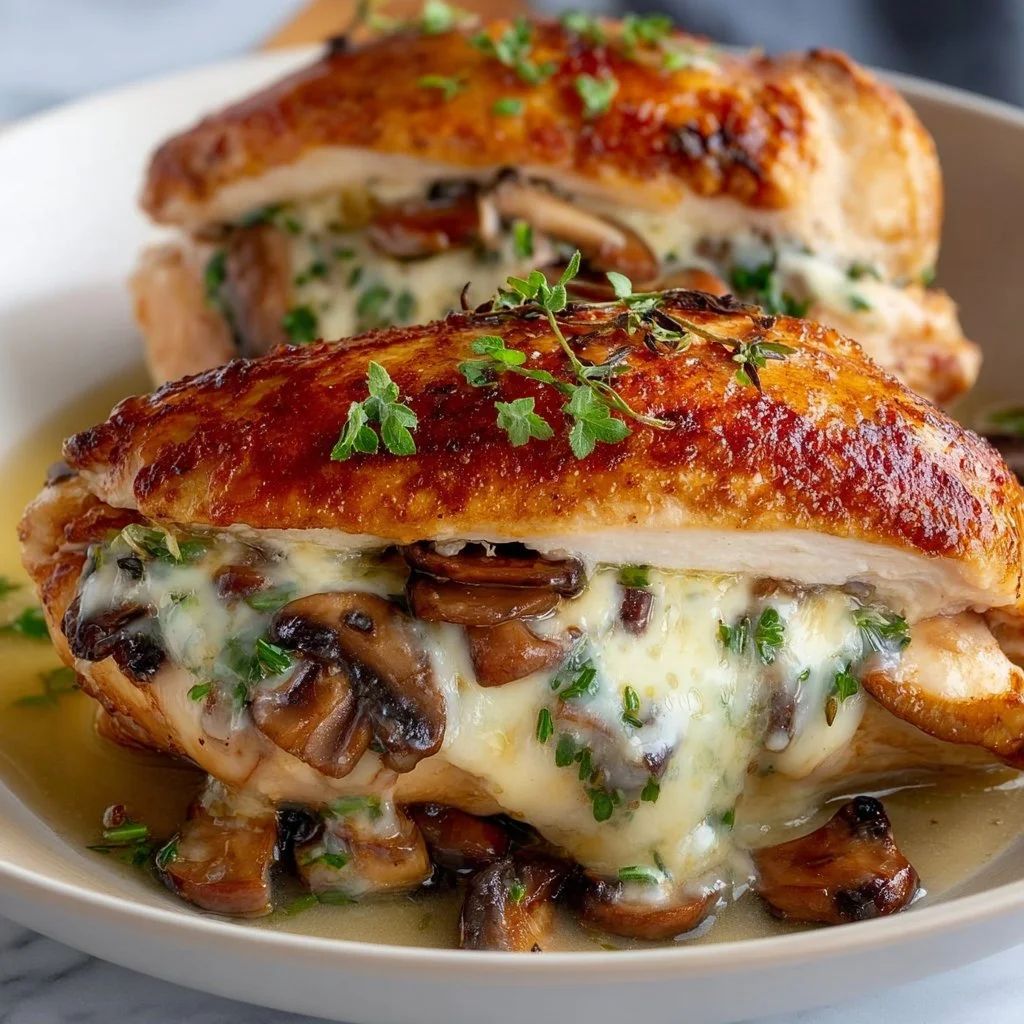
A comforting and delicious stuffed chicken breast filled with earthy mushrooms, creamy cheese, and fresh spinach.
Ingredients
- 4 Chicken Breasts
- 2 Cups Mushrooms, Chopped
- 1 Cup Spinach, Chopped
- 1/2 Cup Cream Cheese, Softened
- 1/2 Cup Shredded Mozzarella Cheese
- 2 Cloves Garlic, Minced
- 1 Teaspoon Olive Oil
- Salt and Pepper to Taste
- Fresh Parsley for Garnish
Instructions
- Sauté the Veggies: In a skillet over medium heat, add 1 teaspoon of olive oil. Once hot, toss in the minced garlic and sauté until fragrant—about 30 seconds. Add the chopped mushrooms and spinach. Cook for around 4-5 minutes until tender.
- Mix in the Creaminess: Transfer the sautéed mixture to a bowl and allow it to cool slightly. Mix in the softened cream cheese and shredded mozzarella until combined.
- Butterfly the Chicken: Using a sharp knife, carefully butterfly each chicken breast to create a pocket.
- Fill the Chicken: Spoon the mushroom and cheese mixture into the pocket of each chicken breast. Use toothpicks to secure if needed.
- Pan-Seer the Chicken: In the same skillet, add more olive oil and heat over medium-high. Sear the stuffed chicken breasts for about 4-5 minutes on one side until browned before flipping.
- Finish Cooking: Reduce the heat to medium, cover, and cook for about 7-10 minutes more or until the internal temperature reaches 165°F.
- Let It Rest: Remove the chicken from the skillet and let it rest for 5 minutes before serving.
Notes
Serve with a light salad or roasted vegetables. Drizzling a balsamic reduction enhances the dish beautifully.
- Prep Time: 15 minutes
- Cook Time: 30 minutes
- Category: Main Course
- Method: Sautéing
- Cuisine: Italian
Nutrition
- Serving Size: 1 serving
- Calories: 350
- Sugar: 2g
- Sodium: 450mg
- Fat: 22g
- Saturated Fat: 9g
- Unsaturated Fat: 10g
- Trans Fat: 0g
- Carbohydrates: 5g
- Fiber: 1g
- Protein: 30g
- Cholesterol: 90mg
Keywords: stuffed chicken, mushroom, comfort food, easy dinner, flavorful chicken

Irresistibly Easy Spinach Cottage Cheese Flagels for Any Meal
Irresistibly Easy Spinach Cottage Cheese Flagels for Any Meal
Hey there, food lovers! I’m Beau Collier, and I’m thrilled to have you join me today at Feastical, where we whip up dishes that not only taste great but also feel like home. If you’re looking for a delightful recipe that’ll make your taste buds dance and your heart sing, you’ve come to the right place. Today, I’m excited to share a little gem I like to call Spinach Cottage Cheese Flagels.
Now, you might be wondering, "What on earth is a flagel?" Picture your favorite bagel, but without that heavy doughy feel. Think of it like a lighter, fluffier cousin that’s still incredibly satisfying. And don’t let the name fool you—these flagels are a versatile treat that can hop from brunch to dinner or even a midnight snack without breaking a sweat.
Loaded with spinach, creamy cottage cheese, and a hint of mozzarella, these flagels are not only delicious but also packed with protein. And the best part? They come together in no time! So grab that apron, and let’s embark on a flavor-packed journey where we merge comfort, nourishment, and a sprinkle of creativity.
Let me tell you, cooking these flagels is like making magic happen in your kitchen. The aroma that wafts through as they bake is nothing short of comforting—a beautiful blend of cheesy goodness and earthy greens that invites everyone to gather around. And trust me, once you make your first batch, you’ll find yourself reaching for those fluffy creations again and again.
So, are you ready to make some culinary magic? Let’s dive into this wholesome recipe that’s perfect for any occasion, whether you’re hosting a brunch, enjoying a cozy family dinner, or just treating yourself to something special. With that being said, let me share a little story with you that will set the tone for our delightful adventure.
Personal Story
Many years ago, I had just moved to a new city and was navigating my way through life, cooking, and a whole lot of takeout. One Sunday morning, I decided it was time to break the cycle of convenience foods and reacquaint myself with my passion for home-cooked meals.
I rummaged through my fridge and stumbled upon a generous tub of cottage cheese. I was pleasantly surprised to find a bag of fresh spinach hiding in the corner, too. As I stood there, I felt a rush of nostalgia wash over me—my grandmother used to whip up mouthwatering spinach and cheese pastries every weekend, filling our house with a savory aroma that warmed the very essence of my soul.
Inspired by those cherished memories, I decided it was high time to create a dish that echoed those comforting flavors. After some experimenting with ingredients I had on hand, the Spinach Cottage Cheese Flagel was born! Nestled in the heart of my kitchen, I mixed, kneaded, and shaped my way into a new tradition that has kept the memory of my grandmother alive in the most delicious way.
Each bite transported me back to those sweet Sunday mornings, where laughter and love filled the air. Now, whenever I whip up these flagels, I not only feed my stomach but also my soul. Join me as we carry on the legacy of joyous home-cooking with these irresistible flagels, which are as forgiving as they are tasty!
Ingredients
Now that I’ve set the stage, let’s gather our ingredients to make these unbelievable Spinach Cottage Cheese Flagels. Here’s what you’ll need:
-
1 cup Cottage Cheese
Use full-fat for extra creaminess and a richer flavor. If you’re feeling adventurous, you can try ricotta for a sweet and moist texture or even vegan alternatives like silken tofu! -
2 tablespoons Olive Oil
Not only does it add moisture, but it also brings a lovely flavor. If you’re looking for a change, avocado oil is a fantastic substitute that works wonders. -
1 large Egg
For binding and fluffiness. If you’re vegan or just looking to egg-speriment, mix 1 tablespoon of ground flaxseed with 3 tablespoons of water and let it sit for a few minutes until it thickens! -
1 cup All-Purpose Flour
This is your base and provides structure. If you’re gluten-free, almond flour works great and adds a bit of nuttiness! -
1 teaspoon Baking Powder
This helps our flagels puff up beautifully. Always check the freshness of your baking powder—nobody likes flat flagels! -
1 teaspoon Salt
Opt for sea salt for a touch of extra flavor. You can also experiment with garlic salt for an extra kick. -
2 cups Baby Spinach
Finely chopped for the best results. But hey, if spinach isn’t your jam, you can substitute with kale or even arugula for a peppery twist. -
1 cup Shredded Mozzarella Cheese
For that gooey, melty goodness! If you prefer a tangier taste, feta cheese is an incredible alternative that really elevates the flavor.
With these simple yet dynamic ingredients, you’ll be on your way to creating something truly special. Now let’s roll up our sleeves and get cooking!
Step-by-Step Instructions
Step 1: Preheat the Oven
Preheat your oven to 375°F (190°C). This ensures that when your flagels hit the oven, they’ll bake perfectly, becoming golden and delicious.
Step 2: Combine the Wet Ingredients
In a medium-sized bowl, combine 1 cup of cottage cheese, 2 tablespoons of olive oil, and 1 large egg. Using a fork or a whisk, mix until everything is well combined. The cottage cheese should break down a bit, but don’t worry if you see some lumps; they’ll add lovely texture!
Step 3: Add Dry Ingredients
In a separate bowl, mix together 1 cup of all-purpose flour, 1 teaspoon of baking powder, and 1 teaspoon of salt. Gradually add this dry mixture to your wet ingredients. Mix until a dough begins to form. If it feels a little dry, don’t hesitate to add a tablespoon of water or extra olive oil to achieve a smooth consistency.
Step 4: Incorporate Spinach and Cheese
Fold in the 2 cups of fine-chopped baby spinach and 1 cup of shredded mozzarella cheese. Make sure they’re evenly distributed through the dough. This is where the magic happens—watch as those vibrant greens blend into the creamy base, creating a visually appetizing texture!
Step 5: Shape Your Flagels
Once everything’s combined, turn the dough onto a lightly floured surface. Divide the mixture into 4-6 equal portions, depending on how big you prefer your flagels. Shape each portion into a round disc and create a hole in the center to form the traditional flagel shape (think bagel, but a bit thinner). Don’t worry about perfection; rustic is totally in!
Step 6: Bake & Enjoy!
Transfer your flagels onto a baking sheet lined with parchment paper. Bake in that preheated oven for about 20-25 minutes, or until they are puffed and golden brown. You’ll know they’re ready when your kitchen smells like a cheesy, spinachy heaven!
Step 7: Cool & Serve
Once baked, allow the flagels to cool for a few minutes on a wire rack. This helps maintain their delightful texture. Serve them warm, or store them in an airtight container at room temperature for later. Trust me; these beauties won’t last long!
Serving Suggestions
Now that your Spinach Cottage Cheese Flagels are out of the oven, let’s talk about how to enjoy them! You can serve them warm as-is, but why stop there?
-
Spread the Love: Slather a bit of cream cheese or avocado on top for added richness. A dollop of herb-infused cream cheese or a tomato chutney can elevate your flagel experience to gourmet status!
-
Slice Them Up: For a brunch party, slice your flagels into wedges and serve them on a platter with fresh fruit, smoked salmon, or asparagus. They can double as an impressive hors d’oeuvre!
-
Dip It Good: Pair them with a homemade dip—humus, tzatziki, or even a spicy salsa. Your guests may even find themselves fighting over the last piece.
With so many ways to enjoy your flagels, you’re bound to impress anyone who sits at your table.
Recipe Variations
Let’s get creative! The beauty of this recipe is that it’s incredibly versatile. Here are a few fun twists you can try:
-
Herbed Goodness: Add fresh herbs like dill, chives, or parsley into the mix for an aromatic boost. You can also sprinkle some Italian seasoning for a Mediterranean flair.
-
Savory Cheese Pairing: Try mixing half mozzarella and half crumbled feta for a wonderful contrast of creamy goodness and sharp tanginess.
-
Batch of Fun: Make mini flagels! Roll out smaller portions and bake until they’re just golden. These bite-sized pieces make perfect appetizers for parties.
-
Ons-the-go Option: Wrap them around some sliced turkey, lettuce, and tomato for the ultimate portable lunch or snack!
-
Sweet Twist: You can even add a hint of cinnamon to the dough and use a sweetened cream cheese filling for a delightful breakfast option.
The possibilities are endless, and I encourage you to experiment and find what flavor combinations speak to you!
Chef’s Notes
Here at Feastical, I believe food is deeply personal. Every recipe tells a story, reflecting the love and memories baked into it. I cherish the times I spent recreating my grandmother’s recipes, always eager to add my twist to them.
Over the years, these Spinach Cottage Cheese Flagels have become a staple in my kitchen. They started as a whimsical Sunday experiment and transformed into a treasured family favorite. I often find myself looking back on those fun attempts, chuckling at the moments of trial and error that led to success.
And you know what? Cooking is all about the joy of creating, the laughter you add, and the stories you gather along the way. So, don’t shy away from experimenting—or from sharing those kitchen mishaps; they often lead to the best stories!
FAQs and Troubleshooting
Here are some common questions and troubleshooting tips to help you become a flagel master!
Q1: Why did my flagels not rise?
If your flagels came out flat, it’s likely that your baking powder was expired. Always check the expiration date! Also, make sure you’re not overmixing the dough, which can result in dense flagels.
Q2: Can I freeze these flagels?
Absolutely! Once they’re completely cooled, you can wrap them tightly in plastic wrap and freeze. Just pop them in the toaster or oven to reheat later, and they’ll still taste fantastic!
Q3: The dough feels too sticky—what should I do?
If your dough is too sticky to handle, add a little more flour, but do it gradually to avoid making them too dense. A little stickiness is fine and can lead to a more tender result!
Q4: How can I tell when flagels are perfectly baked?
Look for a beautiful golden-brown crust, and give them a gentle tap—if they sound hollow, they’re likely done!
Nutritional Info
Now, let’s talk about the nutritional benefits of these Spinach Cottage Cheese Flagels. Each flagel comes packed with protein from the cottage cheese and mozzarella, providing a satisfying meal that fuels your day. Spinach adds substantial vitamins A, C, and K, along with iron and antioxidants—it’s a beautiful way to get your greens in!
While specific nutritional values may vary depending on ingredients used, a standard flagel contains:
- Calories: ~150-200 (depending on size and ingredients)
- Protein: ~9-12g
- Fat: ~7-10g
- Carbohydrates: ~20-25g
They’re a wonderful option for meal prep, satisfying hunger without being overly heavy.
Final Thoughts
There you have it, folks—your guide to making irresistible Spinach Cottage Cheese Flagels that will brighten any meal! Whether you’re enjoying them fresh from the oven, making creative variations, or sharing a laugh over kitchen stories, I can promise each bite will be filled with love and satisfaction.
Food is a celebration—a way to gather with loved ones, make memories, and nourish our bodies. I hope you feel inspired to whip up a batch of these delightful flagels and make them your own! So fluff up that dough, roll up your sleeves, and let’s get busy in the kitchen together.
Thank you for joining me today at Feastical! I’d love to hear how your flagels turned out, along with any stories you’d like to share. Until next time, keep cooking, keep laughing, and keep making those beautiful memories. Happy feasting!
Print
Irresistibly Easy Spinach Cottage Cheese Flagels
- Total Time: 40 minutes
- Yield: 4 servings 1x
- Diet: Vegetarian
Description
Light and fluffy flagels made with spinach and cottage cheese, perfect for any meal.
Ingredients
- 1 cup Cottage Cheese
- 2 tablespoons Olive Oil
- 1 large Egg
- 1 cup All-Purpose Flour
- 1 teaspoon Baking Powder
- 1 teaspoon Salt
- 2 cups Baby Spinach, finely chopped
- 1 cup Shredded Mozzarella Cheese
Instructions
- Preheat the oven to 375°F (190°C).
- Combine the cottage cheese, olive oil, and egg in a medium-sized bowl.
- Add the flour, baking powder, and salt to the wet ingredients and mix until a dough forms.
- Incorporate the baby spinach and mozzarella cheese into the dough until evenly distributed.
- Shape the dough into 4-6 round discs with a hole in the center.
- Transfer the shaped flagels to a baking sheet lined with parchment paper.
- Bake for 20-25 minutes until puffed and golden brown.
- Cool on a wire rack for a few minutes before serving.
Notes
These flagels can be served warm with toppings like cream cheese or smoked salmon.
- Prep Time: 15 minutes
- Cook Time: 25 minutes
- Category: Snack
- Method: Baking
- Cuisine: American
Nutrition
- Serving Size: 1 flagel
- Calories: 175
- Sugar: 2g
- Sodium: 300mg
- Fat: 7g
- Saturated Fat: 3g
- Unsaturated Fat: 4g
- Trans Fat: 0g
- Carbohydrates: 22g
- Fiber: 1g
- Protein: 10g
- Cholesterol: 45mg
Keywords: flagels, spinach, cottage cheese, snack, vegetarian, baking