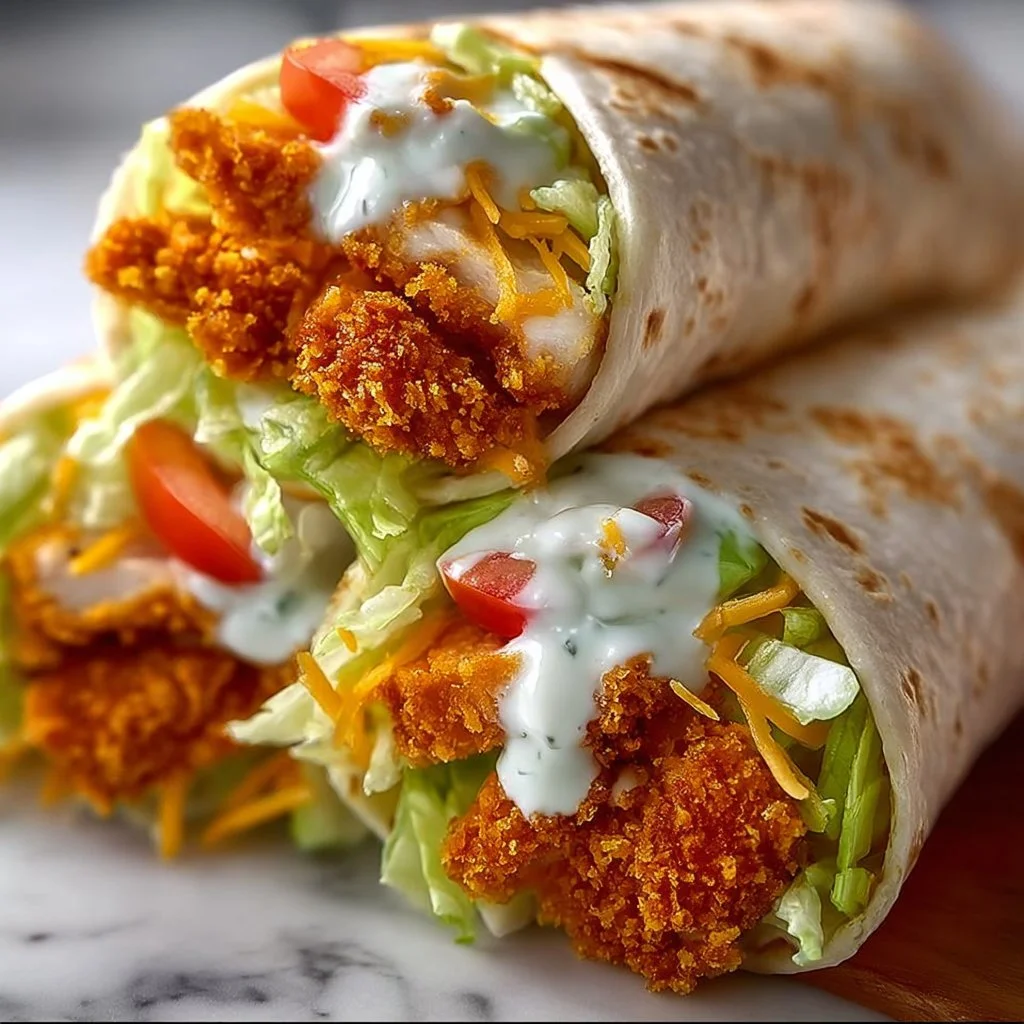
Crispy Chicken Ranch Snack Wrap
Crispy Chicken Ranch Snack Wrap: Your New Go-To Treat!
Hey, food lovers! Welcome back to Feastical, your cozy corner for all things scrumptious. Today, I’m thrilled to share a dish that’s not only easy to whip up but also brings that delightful crunch and burst of flavor we all crave. Say hello to the Crispy Chicken Ranch Snack Wrap! Perfect for lunch, game day, or even a midnight snack, these wraps are vibrant, versatile, and always a crowd-pleaser.
Now, I don’t know about you, but there’s something about chicken wraps that takes me right back to my childhood. Picture this: lazy Saturday afternoons spent at home, the smell of something scrumptious wafting through the house, and the sun shining on our backyard BBQ where my family gathered around the grill. There’s excitement in the air as the sizzle of chicken fills the space, and it’s that excitement that fuels my love for food! Throw in a little ranch dressing, some fresh veggies, and just the right crunch, and those memories come flooding back.
These wraps are a fantastic way to get creative in the kitchen and make use of what you have on hand (a little kitchen hack from yours truly!). Whether you’re using crispy chicken tenders from last night’s dinner or whipping up a fresh batch, these wraps are adaptable and oh-so-satisfying. It’s like a hug wrapped in a tortilla!
So, let’s roll up those sleeves, grab your spatula, and kick things off with the ingredients you’ll need for this fab wrap!
Personal Story
Growing up, my family had a tradition—Saturday night was “Wrap Night.” My mom would lay out spreads of ingredients that could transform bland into grand, and we were free to create our own masterpieces! I remember being just a wee lad, standing on a kitchen chair to reach the counter, eyes wide with anticipation. Crunchy, dippable, overflowing with flavor, my little hands would pile high all my favorite toppings on soft tortilla wraps.
One time, I made a ridiculous concoction with a bunch of random ingredients: cold pizza leftovers, ranch dressing, and whatever veggies I could scrounge up. To my surprise, it tasted amazing! It was moments like these—creating something out of “nothing” and sharing it with my family—that instilled the love of food and cooking in me. Now, when I think of making these Crispy Chicken Ranch Snack Wraps, it reminds me of joy, laughter, and everyone coming together around the dinner table (or in our case, the kitchen counter).
Ingredients
Here’s what you’ll need to transform your kitchen into a flavor haven:
-
Crispy Chicken Tenders
Ready-made or homemade, these are the star of the show! If you want to get adventurous, baked or grilled chicken also works! -
Ranch Dressing
The creamy, tangy accent that pairs beautifully with crispy chicken. Have leftovers from another meal? Those work too! -
Tortilla Wraps
Flour, corn, or whole wheat—choose your favorite! These wraps are your canvas of deliciousness! -
Lettuce
Romaine, iceberg, or spinach—whatever fresh greens you have on hand will add that crunchy, refreshing layer! -
Tomatoes
Chopped fresh tomatoes, cherry tomatoes, or even sun-dried—it’s all about what you love and what’s available! -
Cheese
Cheddar, mozzarella, or pepper jack for a spicy kick! If you’re dairy-free, try vegan cheese or omit it altogether! -
Optional Toppings
Avocado for creaminess, crisp bacon bits for saltiness, or sliced jalapeños for a kick—get creative!
Step-by-Step Instructions
Let’s dive into making these bad boys!
-
Prep Your Chicken:
If you’re going the homemade route, start by breading and frying your chicken tenders. Take boneless chicken breast, dip it in flour, then egg, and finally coat it in breadcrumbs (Panko for extra crunch!). Fry until golden brown. If you’re using store-bought, simply heat them according to package instructions! -
Gather Your Wraps:
On a clean surface, lay out your tortilla wraps. Want to warm them up? Toss them on a skillet for a few seconds on each side—it’ll make them pliable and extra tasty! -
Time for Dressing:
Drizzle a generous amount of ranch dressing down the center of each wrap. The ranch really brings everything together—trust me, you don’t want to skip this step! You can even mix in a little hot sauce if you’re feeling adventurous! -
Layer It Up with Chicken:
Place 2-3 crispy chicken tenders in the center of the wrap. Make sure they are warm and crispy! Feel free to break them into smaller pieces to make wrapping easier! -
Freshen It Up:
Sprinkle lettuce and chopped tomatoes over the chicken. This is your chance to include any other veggies or optional toppings you desire (hello, avocado and bacon!). -
Cheese, Please:
Add a handful of shredded cheese on top of your existing layers! The cheese will melt slightly from the chicken’s warmth, adding an oooey-gooey texture. -
Wrap It Up:
Fold the sides of the tortilla in, then roll it tightly from the bottom up. Tuck the filling in as you go to avoid a tasty explosion! -
Slice and Serve:
Halve the wrap diagonally for a beautiful presentation and to make them easier to handle. Whether you serve it with extra dressing for dipping or a side of chips, you’re set!
Serving Suggestions
When it comes to serving those crispy wraps, simplicity is key. Place your wraps on a rustic wooden board or a colorful plate for a pop of vibrancy! You can add a side of crunchy vegetables or a fresh salad for a well-rounded meal. Try drizzling a bit more ranch on the plate for dipping—don’t be shy with that sauce!
Garnish the dish with a few sprigs of fresh parsley or cilantro to elevate the presentation. If you’re entertaining, arrange the wraps in a circle with some dipping sauce in the center—trust me, your friends will be swooning over this spread!
Recipe Variations
Feeling creative? Here are some delicious twists to kick things up:
-
Buffalo Chicken Ranch Wrap:
Toss your chicken tenders in buffalo sauce for a spicy kick! Pair it with a cool ranch dressing to balance the heat. -
Hipster Veggie Wrap:
Swap crispy chicken for grilled veggies (like bell peppers, zucchini, and asparagus) and try a tahini sauce for a unique flavor twist! -
Loaded Baked Potato Wrap:
Dress your chicken with loaded baked potato toppings! Think bacon, cheddar cheese, and chives for an indulgent treat. -
Southwestern Flair:
Add black beans, corn, and avocado for a Southwest-inspired wrap. Chipotle ranch dressing can take it to the next level! -
Healthy Wrap:
Use whole wheat tortillas, grilled chicken, and lots of fresh veggies like cucumbers and spinach, drizzled with vinaigrette for a lighter version!
Chef’s Notes
This recipe has seen some funky iterations over the years, and I’m not ashamed! From experimenting with sweet sauces to adding the strangest toppings found in my fridge, each wrap is a reflection of my inner kitchen adventurer. The key is to have fun and enjoy the process—don’t hesitate to let your imagination run wild! And trust me, these wraps taste even better when made with love!
FAQs and Troubleshooting
Q: Can I make these wraps ahead of time?
A: Absolutely! Just keep them in the fridge wrapped in parchment paper to prevent them from getting soggy. Just be wary: the crispiness can diminish, but they’ll still be tasty!
Q: What if I don’t have ranch dressing?
A: No worries! You can use any creamy dressing you have handy—like blue cheese, Caesar, or even a homemade yogurt-based sauce.
Q: How can I make these wraps kid-friendly?
A: Get your kiddos involved! Let them choose their toppings; this often results in a heightened willingness to try new things.
Q: My wraps fell apart—what went wrong?
A: Make sure to not overstuff them! It’s tempting, but less is more here, and be sure to wrap them tightly!
Nutritional Info
Let’s break down what you’re putting into these delightful wraps! A standard wrap with chicken, ranch dressing, cheese, and lettuce serves about 2-3 people.
- Calories: Approximately 400-500 calories (depending on toppings and serving size).
- Protein: Roughly 25-30g of protein from the chicken and cheese!
- Fat: Around 20g (again, this varies with toppings and dressing choice).
- Carbohydrates: About 35-40g from the tortillas and veggies.
- Fiber: Involvement of fresh veggies can yield about 3-5g of fiber.
Whenever possible, swap out ingredients for healthier versions, like whole grain tortillas or reduce the ranch for a nutrient boost without losing the flavor!
Final Thoughts
There you have it, foodie friends—a delicious, fun, and super versatile recipe for Crispy Chicken Ranch Snack Wraps! There’s no right or wrong when it comes to crafting these wraps—what matters is that you’re in the kitchen, creating something deliciously yours.
So whether it’s a casual lunch or a game-day feast, let these wraps bring your table together. Remember, the best meals often come from shared stories and a little love. So roll up those wraps, gather your favorite people, and dig in!
Until next time, keep cooking, keep creating, and as always—stay hungry for new flavors!
Print
Crispy Chicken Ranch Snack Wrap
- Total Time: 35 minutes
- Yield: 4 servings
- Diet: None
Description
A delightful wrap filled with crispy chicken, fresh veggies, and creamy ranch dressing, perfect for lunch or snacks.
Ingredients
- Crispy Chicken Tenders
- Ranch Dressing
- Tortilla Wraps
- Lettuce
- Tomatoes
- Cheese
- Optional Toppings: Avocado, Bacon bits, Sliced jalapeños
Instructions
- Prep your chicken: If using homemade, bread and fry your chicken tenders. Heat store-bought as per instructions.
- Gather your wraps on a clean surface. Warm them on a skillet for added flavor.
- Drizzle ranch dressing down the center of each wrap.
- Place 2-3 crispy chicken tenders in the center of the wrap.
- Sprinkle lettuce and chopped tomatoes over the chicken.
- Add shredded cheese on top of the layers.
- Wrap the tortilla tightly from bottom to top.
- Slice the wrap diagonally for serving.
Notes
Serve with extra ranch dressing on the side for dipping and garnished with fresh herbs.
- Prep Time: 15 minutes
- Cook Time: 20 minutes
- Category: Lunch
- Method: Wrapping
- Cuisine: American
Nutrition
- Serving Size: 1 wrap
- Calories: 450
- Sugar: 3g
- Sodium: 500mg
- Fat: 20g
- Saturated Fat: 8g
- Unsaturated Fat: 10g
- Trans Fat: 0g
- Carbohydrates: 40g
- Fiber: 4g
- Protein: 28g
- Cholesterol: 60mg
Keywords: chicken wrap, ranch dressing, easy recipe, snack wrap, crispy chicken
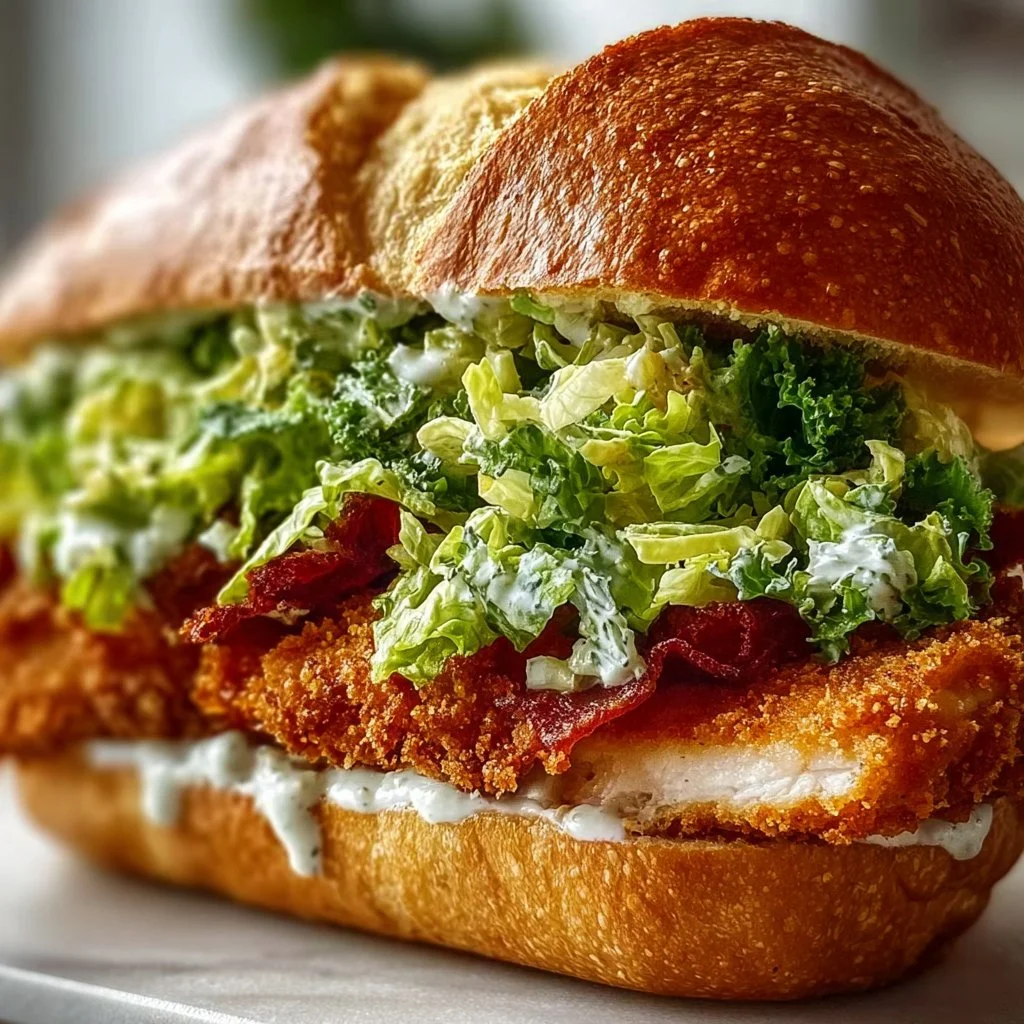
Crispy Chicken Caesar Sandwich
# Crispy Chicken Caesar Sandwich: A Comfort Food Classic

## Introduction

Hey there, food lovers! Beau Collier here, and oh boy, do I have a treat for you today! If you've been on the hunt for a sandwich that’s as cozy as it is delicious, look no further than my Crispy Chicken Caesar Sandwich. This masterpiece combines the heartiness of fried chicken, the zing of creamy Caesar dressing, and the crunch of crisp lettuce—all perched between two slices of your favorite sandwich bread. It’s a flavor explosion that feels like a warm hug, no matter the time of year!

Now, I know what you might be thinking. "Crispy chicken on a sandwich?! Isn’t that just for fast food?" Well, yes and no! This isn't just your average drive-thru delight; this is a culinary adventure, a celebration of texture and taste that you can whip up right in the comfort of your own kitchen. With just a handful of ingredients and a few simple steps, you’ll be able to create something that rivals even the best of restaurants. Plus, who doesn’t get excited when they bite into a crispy piece of chicken, slathered in creamy dressing, and surrounded by fresh, crunchy greens? It’s the perfect combination of flavors that will have you coming back for seconds (or thirds) in no time!

So, grab your apron and let’s dive into this deliciousness. But before we get started, let’s harken back to a day that truly embodies why this sandwich is close to my heart!

## Personal Story

Picture this: it’s a sunny Saturday afternoon, and I’m a kid in my grandma's cozy kitchen. The aroma of fried chicken fills the air, mixing gently with the scent of fresh garden herbs that she picks just outside her door. It wasn’t just any ordinary day; grandma was whipping up her famous fried chicken, and I had the unique privilege of being her sous chef. She had a magical way of turning simple ingredients into something extraordinary, always reminding me that cooking is about love and creativity.

As we batted around the kitchen, she would talk about her garden, her love for food, and how every meal is a story waiting to be told. She once made a crispy chicken salad served on sandwich bread, slathered with her homemade Caesar dressing. I remember the first bite; the crunch of the coating paired with the zesty, creamy sauce brought an explosion of flavors that left me wanting more. That very moment sparked my passion for cooking, and it's why today, I’m excited to share my very own version of the Crispy Chicken Caesar Sandwich! It’s not just food; it’s a bite of cherished memories and a tribute to my grandma's culinary wisdom.

## Ingredients

Let’s gather our ingredients for the star of the show: the Crispy Chicken Caesar Sandwich! Here’s what you’ll need:

- **2 pieces of crispy fried chicken**
  - *Tip*: You can use leftover fried chicken or make your own from scratch! If you're pressed for time, store-bought rotisserie chicken works wonderfully. Just make sure it’s crispy to keep that essential texture!

- **2 slices of sandwich bread**
  - *Chef Insight*: Ciabatta or a crusty sourdough are my personal favorites because their texture holds up well against the juicy chicken. But honestly, use whatever you have on hand—it's about what you love!

- **Caesar dressing**
  - *Substitution*: If you’re short on time, bottled Caesar dressing works in a pinch. But if you want to impress, try making your own with olive oil, garlic, anchovies, and Parmesan!

- **Leafy lettuce (Romaine or iceberg)**
  - *Tip*: Romaine provides great crunch and flavor. If you want to amp up the health factor, you could use spinach or kale!

- **Parmesan cheese**
  - *Substitution*: Grated Parmesan brings amazing flavors, but feel free to use Pecorino Romano for a bit more zing or even vegan cheese if you’re going plant-based!

- **Black pepper**
  - *Chef Insight*: Freshly cracked black pepper elevates your dish, adding a wonderful bite. If you like it spicy, try adding crushed red pepper flakes!

## Step-by-Step Instructions

Now that we have all our ingredients ready, it’s time to bring this sandwich to life! Here’s how to assemble your Crispy Chicken Caesar Sandwich.

### Step 1: Prepare your crispy chicken

If you’re starting with homemade fried chicken, heat oil in a deep skillet or fryer to 350°F (175°C). Dredge your chicken in seasoned flour, dip it in an egg wash, and coat it again in breadcrumbs for an extra crunch. Fry for about 5-7 minutes per side, or until golden brown. Drain on paper towels.

*Chefs Hack*: If you prefer a healthier option, consider oven-baking! Coat the chicken lightly with oil and bake at 425°F (220°C) for about 25-30 minutes.

### Step 2: Toast the bread

While your chicken is frying or cooling down, pop your sandwich bread in a toaster or on a hot skillet with a little butter to get a nice, golden brown crust.

*Tip*: Toasting your bread not only adds flavor but also helps prevent it from getting soggy from the dressing.

### Step 3: Assemble the sandwich

Once your chicken is crispy and your bread is toasted, let’s build this beauty! Start with one slice of bread and layer it with the leafy greens of your choice. Then, place that crispy chicken right on top.

*Pro Tip*: For extra flavor, drizzle some Caesar dressing over the chicken—don’t be shy!

### Step 4: Add the finishing touches

Next, sprinkle a generous amount of grated Parmesan over the chicken and greens. Add a few twists of black pepper to taste, and finish it off with another drizzle of Caesar dressing for good measure.

*Chef Insight*: For a gourmet touch, you might want to add fresh herbs like basil or parsley!

### Step 5: Top it off

Finally, place the second slice of toasted bread on top to complete your sandwich. Gently press down to ensure everything stays intact. Slice it in half, and you've got a gorgeous sandwich ready to impress!

*Final Tip*: For an Instagram-worthy presentation, angle your cuts for a fun visual effect!

## Serving Suggestions

Now that your Crispy Chicken Caesar Sandwich is ready, it’s time to eat! You can serve it up on a simple plate or get a little fancier. Arrange your sandwich on a wooden board and accompany it with a side of homemade fries or a light salad.

*Pro Tip*: A side of extra Caesar dressing for dipping is always a hit! Add a few cherry tomatoes and pickles for a pop of color for your plate.

## Recipe Variations

Feeling adventurous? Here are some creative variations and swaps you might want to try:

1. **Spicy Chicken Caesar Sandwich**: Add a drizzle of Sriracha or a spicy mayo to your dressing for a kick that’ll wake up your taste buds!

2. **Buffalo Chicken Caesar**: Toss your crispy chicken in Buffalo sauce before assembly for a zesty twist.

3. **Veggie Caesar Sandwich**: Replace chicken with crispy tofu or grilled vegetables for a vegetarian delight!

4. **Bacon Caesar Sandwich**: Layer in some crispy bacon for an indulgent crunch that complements the sandwich beautifully.

5. **Gluten-Free Alternative**: Use gluten-free bread and double-check your dressing’s ingredients to ensure it fits dietary needs.

## Chef’s Notes

Every recipe has a story, and this one is no different! I’ve made a version of the Crispy Chicken Caesar Sandwich for countless gatherings, each time adding a little something special based on seasonal ingredients or my mood. One funny moment was when I decided to use leftover chicken from a BBQ party. We ended up with an out-of-this-world BBQ Chicken Caesar Sandwich! A delightful mistake that taught me to always experiment!

This sandwich has evolved over time, too—what started as a simple assembly now has layers and flavors, with each bite telling a different story.

## FAQs and Troubleshooting

1. **Why is my chicken not crispy?**
   - Make sure to double-dip in flour and egg, and always let the chicken cool on a wire rack to keep it crispy!

2. **Can I prep this sandwich ahead of time?**
   - For best results, assemble right before serving. You can prep individual fillings in advance, though!

3. **What dressing should I use if I don't have Caesar?**
   - You can try ranch or blue cheese dressing if you're feeling adventurous—just adjust your seasonings accordingly!

4. **How do I store leftovers?**
   - Store any leftover components separately and assemble the sandwich fresh to maintain that crispiness!

## Nutritional Info

While I advocate for well-rounded enjoyment of food, it’s good to keep in mind what you’re indulging in. A standard Crispy Chicken Caesar Sandwich, made with chicken, Caesar dressing, lettuce, and bread, can offer around:

- **Calories**: 550-700 calories depending on ingredients
- **Protein**: 34-40g from the chicken
- **Fat**: 30-45g, depending on the dressing and bread choice
- **Carbs**: 40-50g from the bread

You can easily adjust these values by going lighter on the dressing, opting for whole-grain bread, or choosing leaner cuts of chicken.

## Final Thoughts

There you have it, folks! Your journey to making a Crispy Chicken Caesar Sandwich is complete. This delicious creation is not just a meal; it’s an experience that binds memory and flavor. Cooking is a beautiful adventure, and I hope this recipe inspires you to explore your own kitchen with joy and creativity.

So the next time you're craving something comforting, remember: food is about connection, joy, and a dash of love. Take a bite of this sandwich and let it transport you back to those cherished moments, just like it does for me.

Let’s keep this food journey going—share your sandwich creations with me, and let’s keep the culinary conversation alive! Until next time, happy cooking!

Crispy Chicken Caesar Sandwich
- Total Time: 45 minutes
- Yield: 2 servings 1x
- Diet: None
Description
A cozy and delicious sandwich featuring crispy fried chicken, creamy Caesar dressing, and fresh lettuce, all nestled between toasted bread.
Ingredients
- 2 pieces of crispy fried chicken
- 2 slices of sandwich bread
- Caesar dressing
- Leafy lettuce (Romaine or iceberg)
- Parmesan cheese
- Black pepper
Instructions
- Prepare your crispy chicken. Heat oil in a deep skillet or fryer to 350°F (175°C), dredge chicken in seasoned flour, dip in an egg wash, coat in breadcrumbs, and fry for 5-7 minutes per side.
- Toast the bread in a toaster or hot skillet with butter until golden brown.
- Assemble the sandwich with leafy greens on one slice of bread, followed by the crispy chicken.
- Add grated Parmesan and black pepper, drizzling more Caesar dressing on top.
- Top with the second slice of toasted bread, slice in half, and enjoy!
Notes
For healthier options, consider oven-baking the chicken or using gluten-free bread. Experiment with different toppings to suit your taste!
- Prep Time: 15 minutes
- Cook Time: 30 minutes
- Category: Main Course
- Method: Frying
- Cuisine: American
Nutrition
- Serving Size: 1 sandwich
- Calories: 600
- Sugar: 2g
- Sodium: 800mg
- Fat: 35g
- Saturated Fat: 10g
- Unsaturated Fat: 20g
- Trans Fat: 0g
- Carbohydrates: 40g
- Fiber: 2g
- Protein: 35g
- Cholesterol: 70mg
Keywords: Crispy Chicken, Caesar Sandwich, Comfort Food, Fried Chicken Sandwich, Quick Lunch
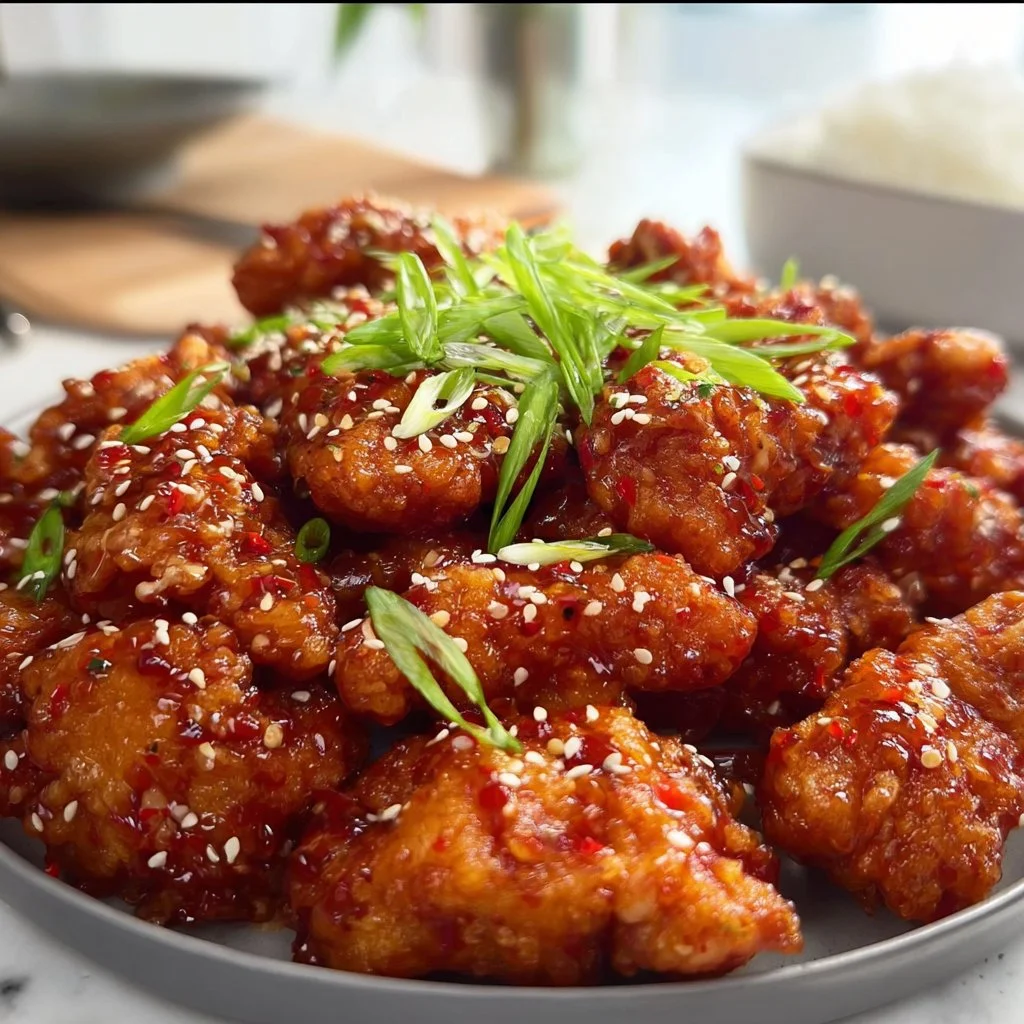
Healthy Korean Fried Chicken
Feast on Flavor: Healthy Korean Fried Chicken Recipe
Hey there, my fellow food enthusiasts! I’m thrilled to have you here in my cozy corner of the internet, where flavors meet comfort, and the kitchen is always bustling with good vibes! Today, I’m sharing a scrumptious recipe that’s not just easy to whip up but also gives a delicious twist to a classic favorite – Healthy Korean Fried Chicken!
Now, who doesn’t love fried chicken? Juicy, crispy, and utterly satisfying, it’s the kind of dish that can make any meal a festivity. However, traditional recipes often come chock-full of oil and calories—which is where we come in with our healthy twist. We’ll be using the wonders of an air fryer (or oven, if you don’t have one) to achieve that perfectly crispy exterior without the guilt. Trust me, by the end of this post, you’ll not only know how to make this finger-licking good dish, but you’ll also feel like a pro in the kitchen!
But wait—let’s pause for a moment! You’re probably wondering, “Beau, what inspired you to create this healthier take on a beloved dish?” Well, sit tight and grab a snack because I have a story that’ll take you on a quick culinary adventure!
Personal Story
Korean fried chicken holds a special place in my heart, not just because of its fantastic crunch and succulent flavor, but for the nights spent gathering around the dinner table with my family and friends. I can vividly recall my very first experience with it during a family outing to a bustling Korean restaurant in the city. The plates of golden-fried chicken arrived, glistening under the restaurant lights, and before we knew it, the table was a battlefield of spicy sauces, sticky fingers, and laughter.
As we dug in, my mom shared stories of her travels through Korea and how she learned to appreciate the art of balancing flavors—sweet, savory, spicy—creating a delightful symphony for the taste buds.
Fast forward a few years, and I found myself experimenting with flavors at home. I realized that we could enjoy the deliciousness of Korean fried chicken without the post-meal sluggishness that often follows indulgent meals. And voilà, the idea for a healthy rendition was born! With the use of air frying, some clever substitutions, and the right seasoning, we can relive those memorable evenings while keeping our health in check.
So let’s roll up our sleeves, and let’s get cooking!
Ingredients
To make this Healthy Korean Fried Chicken, you’ll need the following ingredients:
-
Chicken Pieces (Thighs or Drumsticks): These cuts are juicy and flavorful, perfect for frying! If you’re looking for a lighter option, boneless, skinless chicken breasts can work, but remember they might not be as moist.
-
Cornstarch: This is our secret weapon to achieving that coveted crispy coating. It creates a light and airy texture. If you want to keep it gluten-free, go for rice flour!
-
Garlic Powder: A must for that aromatic flavor! If you’re feeling adventurous, freshly minced garlic adds an extra punch.
-
Onion Powder: Like garlic powder, this adds depth to the flavor. Use finely chopped onions if you prefer, but adjust the cooking time accordingly.
-
Salt and Pepper: Simple seasonings, but don’t underestimate their power! They elevate the overall taste, so be generous… but not overly so.
-
Paprika: Just a dash can add a subtle smokiness. You can also opt for smoked paprika for an extra flavor layer!
-
Spicy Sauce (Gochujang, Soy Sauce, Honey, Vinegar): This sauce is where the magic happens. Gochujang gives that distinctive Korean spice, while honey adds sweetness. For a diet-friendly swap, use a sugar substitute!
-
Air Fryer or Oven: Either will do, but the air fryer gives a wonderful crunch without using much oil. If you’re going for the oven, just keep an eye on the temperature and cooking time.
Step-by-Step Instructions
Preparing the Chicken
-
Marinate Your Chicken: Start by giving those chicken pieces a good rinse and pat them dry with paper towels. This step is key for achieving that crispy texture. In a large bowl, add your chicken pieces and season them generously with salt, pepper, garlic powder, onion powder, and paprika. Give it a good mix ensuring every piece is well coated.
Chef tip: Let it marinate for at least 30 minutes—if you have a few hours or overnight, even better!
-
Coat with Cornstarch: Once marinated, it’s time to give the chicken a light dusting with cornstarch. This is where the crisp factor kicks in! Just toss the chicken in a bowl of cornstarch to coat it evenly.
Pro tip: Shake off any excess cornstarch before cooking. You want a thin layer for that crunch!
Cooking the Chicken
-
Air Frying: If you’re using an air fryer, preheat it to 380°F (193°C). Place the coated chicken in the basket in a single layer. Don’t overcrowd—work in batches if necessary.
Chef hack: Spritz a little cooking spray to help the cornstarch crisp up even more!
-
Frying Time: Cook for about 25-30 minutes, turning halfway through, until golden brown and cooked through (the internal temperature should be at least 165°F/75°C).
-
Oven Option: If you’re in it for the oven, preheat it to 400°F (200°C). Line a baking sheet with parchment paper and arrange the chicken pieces in a single layer. Bake for about 30-35 minutes, flipping halfway until they’re crispy and golden.
Making the Spicy Sauce
-
Sauce It Up: While the chicken is cooking, let’s whip up that spicy sauce! In a small saucepan over medium heat, combine 2 tablespoons of gochujang, 1 tablespoon soy sauce, 2 tablespoons honey (or your sugar substitute), and a tablespoon of vinegar. Stir until combined, and let it simmer for a few minutes until it thickens slightly.
Secret sauce tip: Adjust the spice level by adding more gochujang or a sprinkle of chili flakes!
-
Toss and Coat: Once the chicken is done, transfer it to a large bowl and drizzle over your spicy sauce. Toss gently but thoroughly to coat all pieces evenly!
Serving Suggestions
Now that your Healthy Korean Fried Chicken is all ready and glistening, it’s time to plate it up! I love serving this dish with a side of steamed rice or quinoa for a healthy balance. You can also throw in some stir-fried veggies or a simple cucumber salad to add freshness to the plate!
Garnish your chicken with sesame seeds and thinly sliced green onions to give it a beautiful finish. A squeeze of fresh lime just before serving adds a bright note that’ll tantalize your taste buds.
Recipe Variations
Feeling adventurous? Here are some creative variations and twists to your Healthy Korean Fried Chicken:
-
Sweet and Spicy: Add a tablespoon of sriracha to your sauce for an extra kick!
-
Garlic Parmesan: Swap out the spicy sauce for a garlic butter glaze topped with freshly grated Parmesan cheese for a fusion delight.
-
Herbaceous Touch: Mix in fresh herbs like cilantro or basil to the sauce for a refreshing twist or garnish.
-
Gluten-Free: As mentioned earlier, substitute the soy sauce with tamari or coconut aminos to make this dish gluten-free.
-
Baking Soda Kick: This might sound unusual, but adding a pinch of baking powder can enhance the crispiness—give it a try!
Chef’s Notes
You know, every recipe has a little backstory! When I first tried my hand at making Healthy Korean Fried Chicken, it was one of those exhilarating culinary experiments where I thought, “What’s the worst that could happen?” Well, after a few (okay, more than a few) attempts and kitchen messes, I discovered that perfecting the balance between the crispiness and flavor was a true art.
Through trial and error, I’ve learned that even kitchen mishaps can lead to some of the most delicious surprises! The taste of victory after dialing in the technique with the air fryer and crafting that spicy sauce is an experience I’ll carry with me forever.
FAQs and Troubleshooting
-
Why isn’t my chicken crispy?
- If your chicken isn’t getting that crisp you desire, it could be due to overcrowding the air fryer or oven, or not using enough cornstarch. Give it space to breathe!
-
Is the chicken cooked through?
- Always use a meat thermometer! The internal temperature should reach 165°F (75°C) for chicken to be safe to eat.
-
Can I make this ahead of time?
- Yes! You can fry the chicken ahead of time and just reheat it in the air fryer for a few minutes before tossing it in the sauce.
-
What if I don’t have gochujang?
- No problem! You can substitute it with a mix of chili sauce and miso paste for a different gumbo vibe!
Nutritional Info
Now, let’s talk about the nutrition aspect of our delightful Korean Fried Chicken. Each serving (based on 4 servings) contains approximately:
- Calories: 290
- Protein: 24g
- Fat: 11g
- Carbohydrates: 25g
- Fiber: 1g
- Sugar: 5g
Feel free to adjust ingredients based on your dietary needs—whether that’s using lean cuts of chicken, reduced sugar in your sauce, or even a lower-sodium soy sauce!
Final Thoughts
And there you have it—your very own Healthy Korean Fried Chicken recipe that’s sure to impress friends and family while keeping your health goals on track! Cooking doesn’t have to be about perfection; it’s about enjoying the process and the company around you. Dive into the flavors, experiment with variations, and most importantly, bring that joyful spirit into your kitchen.
So, what are you waiting for? Grab those ingredients, channel your inner chef, and let each bite of this delightful dish transport you to those cherished family dinners. Happy cooking, my friends—until next time, let’s keep feasting strong! 🍗✨
Print
Healthy Korean Fried Chicken
- Total Time: 65 minutes
- Yield: 4 servings
- Diet: Healthy, Low-Calorie
Description
A healthier twist on classic Korean fried chicken, made crispy in an air fryer with a delicious spicy sauce.
Ingredients
- Chicken Pieces (Thighs or Drumsticks)
- Cornstarch (or rice flour for gluten-free)
- Garlic Powder
- Onion Powder
- Salt and Pepper
- Paprika
- Spicy Sauce (Gochujang, Soy Sauce, Honey, Vinegar)
- Air Fryer or Oven
Instructions
- Marinate Your Chicken: Rinse and pat dry chicken pieces. Season with salt, pepper, garlic powder, onion powder, and paprika. Mix well and marinate for at least 30 minutes.
- Coat with Cornstarch: Dust the marinated chicken with cornstarch, ensuring even coverage.
- Preheat the Air Fryer: Set to 380°F (193°C) or oven to 400°F (200°C) for baking.
- Cook in Air Fryer: Place coated chicken in a single layer, cook for 25-30 minutes, turning halfway through.
- Bake in Oven: Arrange chicken on a lined baking sheet and bake for 30-35 minutes, flipping halfway.
- Make the Spicy Sauce: Combine gochujang, soy sauce, honey, and vinegar in a saucepan, simmer until thickened.
- Toss and Coat: Transfer cooked chicken to a bowl, drizzle sauce over and toss to coat.
Notes
For a lighter option, use boneless, skinless chicken breasts. Adjust spice level by adding more gochujang or chili flakes.
- Prep Time: 30 minutes
- Cook Time: 35 minutes
- Category: Main Course
- Method: Air Frying
- Cuisine: Korean
Nutrition
- Serving Size: 1 serving
- Calories: 290
- Sugar: 5g
- Sodium: 600mg
- Fat: 11g
- Saturated Fat: 2g
- Unsaturated Fat: 6g
- Trans Fat: 0g
- Carbohydrates: 25g
- Fiber: 1g
- Protein: 24g
- Cholesterol: 85mg
Keywords: healthy korean fried chicken, crispy chicken, air fryer recipes, low calorie chicken

Crispy Chicken Caesar Sandwich
Crispy Chicken Caesar Sandwich: A Comfort Food Classic
Hey food friends! Welcome back to another delicious journey here at Feastical! Today, we’re diving into a recipe that’s not only mouthwateringly good but also super satisfying to whip up: the Crispy Chicken Caesar Sandwich. Imagine biting into a crisp, golden-brown chicken breast layered with fresh romaine lettuce, drizzled with creamy Caesar dressing, and sandwiched snugly between two slices of crusty bread. Can you feel the excitement? Trust me, this is comfort food at its absolute best!
Growing up, I was always the kid who ran to the kitchen with my heart set on a special meal. One dish that frequently made its charming appearance was, you guessed it, the classic Chicken Caesar Salad. My family would put a twist on it, turning it into sandwiches, and every bite was an adventure. The tanginess of the dressing paired with the crispy chicken made it feel like a party in my mouth—as if every bite shouted, "This is what happiness tastes like!" Today, I’m thrilled to share my take on this timeless dish, transforming it into a handheld delight perfect for lunch, dinner, or any snack attack.
Now, whether you’re cooking for a crowd or just treating yourself, this recipe is here for you. Spoiler alert: all you need is a few simple ingredients and the love to create a heartwarming meal that will bring smiles around the table. So grab your apron and let’s get cooking on this fabulous Crispy Chicken Caesar Sandwich!
Personal Story
As a kid, my favorite place to be was in the kitchen with my mom. Our family had a tradition every Sunday where we’d make a big batch of Chicken Caesar Salad. One particular Sunday, the weather turned stormy, and we found ourselves cooped up inside. Instead of our usual salad, my mom decided to get creative. We turned the salad into sandwiches, using whatever crusty bread we had and letting our taste buds guide us.
We got messy with breadcrumbs and drizzles of dressing, and I remember the laughter as we fought for the last crispy piece of chicken. My mom taught me that cooking is all about using what you have and not being afraid to get a little experimental. From that day on, I never thought of Caesar salad the same way. It became a cherished family memory that transformed into a delightful sandwich, and now, I pass that joy onto all of you with this recipe!
Ingredients
Let’s check out our ingredient lineup for this Crispy Chicken Caesar Sandwich. Here’s what you’ll need:
-
2 boneless, skinless chicken breasts
Fresh, high-quality chicken breasts are essential. For a juicier alternative, consider using thigh fillets or even tofu for a vegetarian twist. -
1 cup breadcrumbs
I recommend using Italian-seasoned breadcrumbs for extra flavor. If you’re gluten-free, try using almond flour or gluten-free breadcrumbs. -
1/2 cup grated Parmesan cheese
This adds a delightful nutty flavor to your chicken. For a dairy-free version, try using nutritional yeast for a cheesy essence! -
Salt and pepper to taste
Always taste your dish as you go! Freshly cracked pepper adds a kick, while salt enhances all the flavors. -
2 tablespoons olive oil
Perfect for pan frying and adding richness. Avocado oil is a great alternative if you’re looking for a higher smoke point. -
4 slices of crusty bread
Baguette, ciabatta, or sourdough works beautifully! Whole grain is a fabulous substitution for a healthier option. -
1 cup romaine lettuce, chopped
The crunch is key for texture! Feel free to mix it up with spinach or arugula for a pepperier taste. -
1/2 cup Caesar dressing
Homemade is always best, but store-bought is convenient! Swap it for garlic aioli for an extra punch.
Step-by-Step Instructions
Alright, let’s get cooking! Here’s how to whip up your Crispy Chicken Caesar Sandwich step by step:
Step 1: Prepare the Chicken
- Preheat your oven to 375°F (190°C). Then grab a cutting board and lay out your chicken breasts. Pat them dry with a clean towel—this helps them crisp up beautifully!
- Season the chicken breasts generously with salt and pepper on both sides. Feel free to add your favorite spices—garlic powder or paprika work wonders!
Step 2: Breading the Chicken
- Set up a breading station: You’ll need three shallow bowls. In the first, place some flour (great for a little extra crunch), in the second one, mix the breadcrumbs and Parmesan cheese, and leave the third empty for the egg wash.
- Beat 1-2 eggs in the empty bowl—this will help the breadcrumbs stick.
- Coat each chicken breast first in the flour, then the egg wash, and finally in the breadcrumb-Parmesan mixture. Press down gently, ensuring a good coating. This step is where the magic happens, so take your time!
Step 3: Cook the Chicken
- Heat the olive oil in a large skillet over medium-high heat. Once it’s shimmering (but not smoking), carefully add the breaded chicken to the pan.
- Cook for about 4-5 minutes on one side until it’s golden brown. Don’t overcrowd the pan—this might make the chicken steam instead of fry!
- Once it’s golden, flip the chicken and swap it to a baking sheet. Pop it in the preheated oven and let it bake for another 15-20 minutes until cooked through (internal temperature of 165°F).
Step 4: Toast the Bread
- As the chicken finishes baking, slice your bread into thick pieces if not pre-sliced.
- In the same skillet, toast the bread for about 1-2 minutes on each side until it’s golden and crispy. This step makes all the difference!
Step 5: Assemble the Sandwich
- Once your chicken is cooked, take it out and let it rest for a few minutes. Meanwhile, chop your romaine lettuce and get your Caesar dressing ready.
- Spread a generous amount of dressing on the bottom slice of your toasted bread.
- Layer your crispy chicken on top, followed by the chopped romaine lettuce.
- Top it off with a drizzle of more Caesar dressing and another slice of toasted bread. Cut in half for easier handling, and voilà!
Serving Suggestions
Now that you have your Crispy Chicken Caesar Sandwich all ready, it’s time to dig in! For a delightful presentation, serve your sandwich on a wooden board lined with some crunchy pickle slices and a handful of crispy potato chips or a side of sweet potato fries. You could even add a small bowl of extra Caesar dressing for dipping—because we all know that extra sauce is always a good idea!
To elevate your meal experience, set up a little outdoor picnic or gather around the dinner table with some friends and family. You’ll be the chef of the hour, and I guarantee the smiles around the table will be as bright as the flavors in this dish!
Recipe Variations
Now, let’s talk about shaking things up! Here are a few fun twists and variations for your Crispy Chicken Caesar Sandwich:
-
Buffalo Chicken Caesar: Spice things up by tossing the fried chicken in some buffalo sauce before assembling the sandwich. A drizzle of ranch dressing can also add an extra creamy touch!
-
Mediterranean Twist: Swap out the Caesar dressing for tzatziki sauce, and add some sliced cucumbers, olives, and feta cheese for a fresh Mediterranean flavor.
-
Avocado Lover’s Delight: Layer on some sliced ripe avocado before adding the mayo for added creaminess and healthy fats.
-
Chickpea Version: For a vegetarian option, you can bread and fry chickpea patties instead of chicken breasts. Season well, and you’ll have a hearty sandwich everyone will love!
-
Sourdough Spin: Use sourdough bread, and add a smear of garlic butter on the exterior for that buttery, toasted richness that complements the chicken nicely.
Chef’s Notes
I have to admit, creating this sandwich has been one of those culinary love stories that has evolved in my kitchen. Originally, it started with just a simple chicken Caesar salad, but as I experimented, I found that crispy, golden-brown chicken paired with cool, fresh toppings really elevated the whole experience. I remember one time attempting to use leftover fried chicken from a family feast; it turned out to be an absolute hit!
Every time I make this sandwich, it takes me back to those rainy Sundays creating memories with my mom. There’s something beautiful about how food can transport us back in time, isn’t there?
FAQs and Troubleshooting
Now, let’s tackle some common questions and potential pitfalls you might encounter while making this recipe:
1. Why is my chicken not crispy?
Ensure your oil is hot enough before adding the chicken. If it’s too cool, the chicken will absorb more oil and become soggy instead of crispy.
2. Can I make this sandwich ahead of time?
While it’s best enjoyed fresh, you can prep the chicken and dressing in advance. Just toast the bread just before serving!
3. How do I know when the chicken is cooked through?
Using a meat thermometer is the best way—chicken should reach an internal temperature of 165°F. If you don’t have one, you can cut the chicken in the thickest part, and the juices should run clear.
4. What if I can’t find crusty bread?
Don’t fret! Any bread you have on hand will work, but a thicker slice will hold up better with all the delicious fillings.
Nutritional Info
Here’s a quick rundown of the nutritional info for one delicious Crispy Chicken Caesar Sandwich:
- Calories: Approximately 500-600 depending on bread and toppings
- Protein: 40g (from chicken and cheese)
- Fat: 25g (primarily from olive oil and cheese)
- Carbohydrates: 45g (from bread and dressing)
- Fiber: 3g (from lettuce and bread)
Note: Nutritional values might vary based on specific brands used and portion sizes.
Final Thoughts
And there you have it, my friends—the Crispy Chicken Caesar Sandwich that warms the heart and satisfies your cravings! Cooking and sharing food should always bring joy, not stress; I hope this recipe inspires you to put on your chef hat, get creative, and share a delicious meal with the people you love.
So next time you need a comforting bite, remember this sandwich—a delightful symphony of flavors, beautiful memories, and all the love you poured into it. Don’t forget to customize it your way, and most importantly, have a blast in the kitchen. Happy cooking, and let’s feast our way into happiness! Cheers to good food and great company!
Now go hit the kitchen and make some magic happen! Bon appétit!
Print
Crispy Chicken Caesar Sandwich
- Total Time: 45 minutes
- Yield: 4 servings 1x
- Diet: Non-Vegetarian
Description
A mouthwatering Crispy Chicken Caesar Sandwich made with golden-brown chicken, fresh romaine lettuce, and creamy Caesar dressing. Perfect for any occasion!
Ingredients
- 2 boneless, skinless chicken breasts
- 1 cup breadcrumbs (Italian-seasoned preferred)
- 1/2 cup grated Parmesan cheese
- Salt and pepper to taste
- 2 tablespoons olive oil
- 4 slices of crusty bread (baguette, ciabatta, or sourdough)
- 1 cup romaine lettuce, chopped
- 1/2 cup Caesar dressing
Instructions
- Preheat your oven to 375°F (190°C) and pat dry the chicken breasts.
- Season them with salt and pepper on both sides.
- Set up a breading station with flour, breadcrumb-Parmesan mixture, and egg wash.
- Coat each chicken breast in flour, then egg, then breadcrumbs.
- Heat olive oil in a skillet over medium-high heat and cook chicken until golden brown.
- Transfer the chicken to a baking sheet and bake for 15-20 minutes.
- Slice your bread thickly and toast in the skillet.
- Assemble the sandwich with toasted bread, chicken, romaine, and Caesar dressing.
Notes
For extra flavor, consider using homemade Caesar dressing and alternative toppings like avocado or buffalo sauce.
- Prep Time: 15 minutes
- Cook Time: 30 minutes
- Category: Main Course
- Method: Baking and Frying
- Cuisine: American
Nutrition
- Serving Size: 1 sandwich
- Calories: 600
- Sugar: 3g
- Sodium: 800mg
- Fat: 25g
- Saturated Fat: 7g
- Unsaturated Fat: 12g
- Trans Fat: 0g
- Carbohydrates: 45g
- Fiber: 3g
- Protein: 40g
- Cholesterol: 90mg
Keywords: Crispy Chicken, Caesar Sandwich, Comfort Food, Easy Recipe, Family Meal