Strawberry Matcha Marble Cookies – Swirled Butter Cookies with Tea and Berry Flavors
Let’s Bake Some Happy (and a Little Magic!)
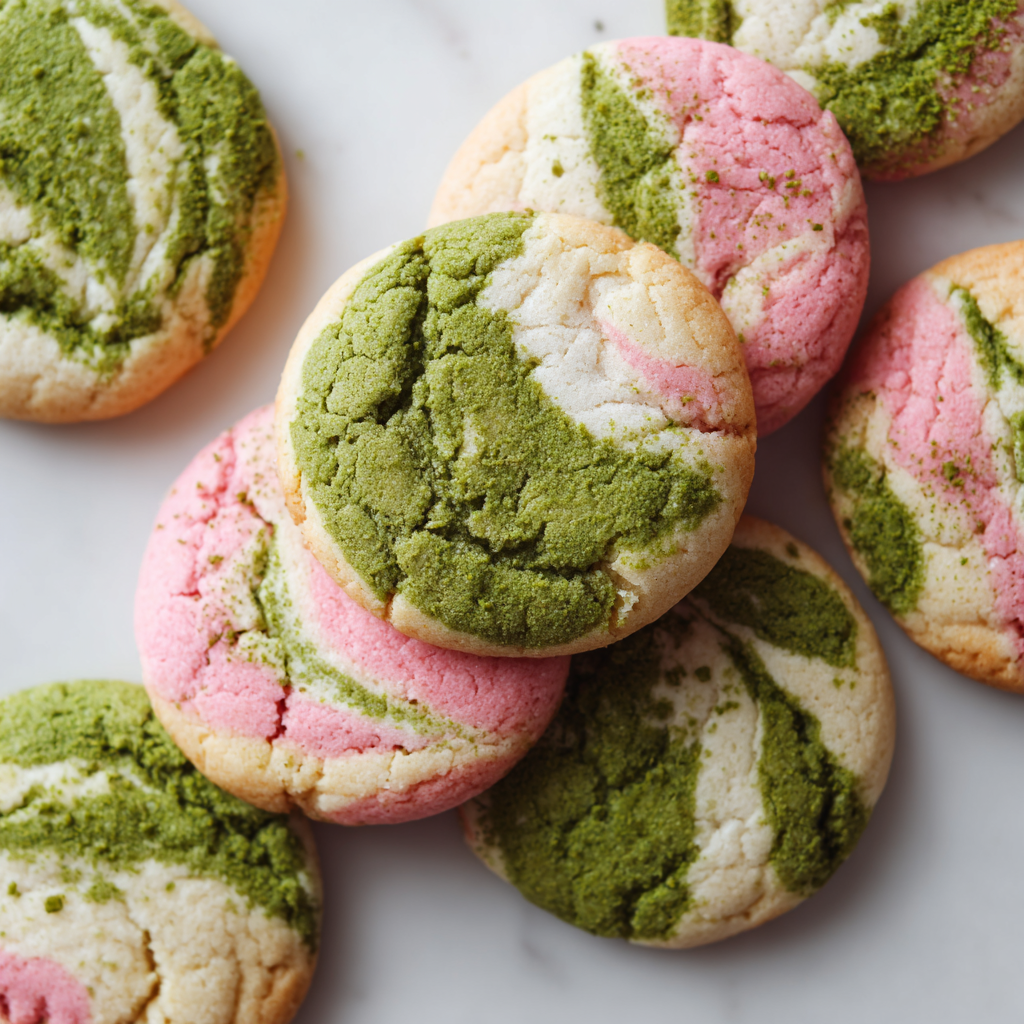
Hey friends, Beau here! Grab your favorite apron and let’s have some fun. Today, we’re not just baking cookies; we’re creating edible artwork. I’m talking about my Strawberry Matcha Marble Cookies – buttery, soft, and absolutely breathtaking. Imagine the deep, earthy whisper of ceremonial-grade matcha, the sunny, fruity kiss of strawberry, and the classic comfort of vanilla, all swirled together in one gorgeous, melt-in-your-mouth bite.
I know “marble” might sound like a fancy-pants baking challenge, but trust me, it’s pure, simple kitchen joy. It’s the kind of recipe that makes you feel like a pastry wizard with minimal effort. These cookies are my go-to when I want to impress at a tea party, pack a seriously lovely gift box, or just turn a regular Tuesday into something special. They look like you fussed for hours, but our little secret? It’s mostly just playful squishing and twisting. So, preheat that oven, and let’s dig into the marbling magic together!
The Day I Discovered Marbling (And a Happy Mess)
This recipe was born from a happy accident, as the best ones often are. A few years back, I was determined to make my nephew’s birthday cookies “extra.” I had a batch of green matcha dough and a batch of pink strawberry dough ready to go. Then, in a classic Beau move, I got distracted by a bubbling pot on the stove. When I turned back, my then-toddler nephew had “helped” by smooshing the two colorful dough balls together into one magnificent, marbled lump.
Instead of starting over, I rolled it out, cut some shapes, and crossed my fingers. What came out of the oven was a revelation! Each cookie was a unique, stunning landscape of green and pink swirls. The flavors melded perfectly, and the textures were somehow even better. It taught me that sometimes, the best recipes come from letting go of perfect separation and embracing the beautiful blend. Now, every time I make these, I think of that messy, joyful kitchen moment and smile.
Your Cookie Canvas: What You’ll Need
Here’s the lineup for our masterpiece. I’ve added my little chef notes next to each one because knowing the “why” makes you a more confident baker!
For the Base Dough:
- 1 cup (227g) unsalted butter, softened – This is the soul of our cookie. True softness is key – it should dent easily when poked but not be oily or melted. This creams into the sugar perfectly for that tender crumb.
- 1 cup (200g) granulated sugar – Our sweetener and texture-helper. It helps the cookies spread just right and get those lightly crisp edges.
- 2 large eggs – They bind everything together and add richness. Make sure they’re at room temperature to play nicely with the butter.
- 1 teaspoon vanilla extract – The flavor backbone. Use the real stuff! It rounds out the matcha and strawberry beautifully.
- 2 ¾ cups (345g) all-purpose flour – The structure. I fluff my flour in the container before gently spooning it into the measuring cup and leveling it off. This avoids dense, dry cookies.
- ½ teaspoon baking powder + ½ teaspoon baking soda – Our dynamic leavening duo. The powder gives lift, the soda encourages spread and browning. Yes, we need both!
- ¼ teaspoon salt – The flavor enhancer. It makes all the other flavors pop and balances the sweetness. Don’t skip it.
For the Flavor & Color Swirls:
- 1 tablespoon matcha powder – Chef’s Insight: Splurge on a good culinary or ceremonial-grade matcha if you can. The color will be a vibrant jade green, and the flavor will be smooth and complex, not bitter. This is where the magic happens!
- 1 tablespoon freeze-dried strawberry powder – My #1 recommended option. It gives an intense, natural strawberry flavor and that gorgeous pink hue without adding extra moisture. You can buy it or make it by blitzing freeze-dried strawberries in a clean coffee grinder until powdery.
- Substitution Tip: No powder? Use ½ teaspoon strawberry extract + a tiny drop of pink food gel. The extract gives flavor, the gel gives color. Natural food colorings work great too!
- 2–3 teaspoons flour (optional) – Sometimes, especially if your kitchen is warm, the dough can get a tad sticky after adding the flavorings. A dusting of extra flour helps you handle it for perfect marbling.
Let’s Create the Swirl: Step-by-Step
Follow these steps, and you’ll have a tray of edible art in no time. I’m walking you through every twist and turn!
- Make the Master Dough. In a large bowl, cream your softened butter and sugar together with a hand mixer or stand mixer fitted with the paddle attachment. Don’t rush this! Beat on medium-high for a solid 2-3 minutes until it’s pale, fluffy, and almost looks like whipped cream. This incorporates air, which equals a lighter cookie. Scrape down the bowl. Add the eggs one at a time, beating well after each so they fully incorporate. Mix in the vanilla.
- Bring It Together. In a separate bowl, whisk together your flour, baking powder, baking soda, and salt. With your mixer on low, add the dry ingredients to the wet in two additions. Mix just until no dry flour remains. Overmixing at this stage leads to tough cookies. We want tender!
- Divide and Conquer. Now, weigh or eyeball dividing your dough evenly into three separate bowls. (Yes, three! One for matcha, one for strawberry, and one for plain vanilla. The vanilla acts as a beautiful, neutral canvas that lets the other colors shine.)
- Color and Flavor Time!
- Bowl 1 (Pink): Add your strawberry powder (or extract+color). Mix with a spatula or your hands until the color is fully, evenly distributed. It smells amazing already, right?
- Bowl 2 (Green): Add your matcha powder. Mix thoroughly. You’ll see that beautiful earthy green come to life.
- Bowl 3 (Vanilla): Leave this one just as it is – our buttery masterpiece.
Chef Hack: If any dough feels too sticky to handle comfortably for marbling, work in 1 teaspoon of flour at a time until it’s pliable but not dry.
- The Marbling Magic – Choose Your Adventure!Method A: The Color Block (My Go-To): Pinch off small, rough pieces of each color of dough (about marble-sized). Press them together randomly into a ball about the size of a golf ball. Give it a gentle twist, then flatten it slightly into a thick disc on your baking sheet. This method gives awesome abstract swirls.
Method B: The Elegant Spiral: Roll a small piece of each color into a short rope. Lay the three ropes side-by-side and pinch them together at one end. Twist them together gently, then coil the twist into a spiral (like a cinnamon bun). Flatten slightly. This gives a stunning, defined swirl pattern.
- Bake to Perfection. Preheat your oven to 350°F (175°C). Line your baking sheets with parchment paper. Space your cookie dough discs about 2 inches apart—they’ll spread a little. Bake for 9 to 11 minutes. You’re looking for the edges to be just barely turning golden. The centers will still look soft—this is perfect! They’ll firm up as they cool. Overbaking is the enemy of a soft, chewy cookie.
- The Patient Part. Let the cookies cool on the hot baking sheet for 5 full minutes. This lets them set. Then, use a spatula to transfer them to a wire rack to cool completely. I know it’s hard to wait, but this prevents breakage and lets the flavors settle.
How to Serve These Showstoppers
Presentation is half the fun with these beauties! For a simple afternoon treat, pile them high on a rustic wooden board or a vintage plate. They pair divinely with a cup of hot green tea, a latte, or a glass of cold milk.
Want to make them gift-ready? Stack a few in a clear cellophane bag tied with baker’s twine, or arrange them in a decorative tin lined with parchment. They’re the perfect “just because” or “thank you” gift that always wows. For a party, create a dessert platter with these, some dark chocolate-dipped fruits, and maybe some mini macarons. The color combo is simply unforgettable.
Make It Your Own: Fun Variations
Love the marble technique? Let’s play with it! Here are a few of my favorite twists:
- Chocolate Matcha Marble: Swap the strawberry powder for 2 tablespoons of sifted unsweetened cocoa powder. You get a stunning dark brown and green swirl with a classic chocolate-matcha pairing.
- Lemon Blueberry Marble: Use the zest of one lemon and a drop of yellow coloring for one portion. For another, use 1 tablespoon of powdered dried blueberries (processed like the strawberries) for a purple-blue hue. Keep the third vanilla. Bright and zingy!
- “Everything But The…” Marble: Feeling adventurous? Divide dough into four parts. Do matcha, strawberry, cocoa, and leave one vanilla. Combine small pieces of all four for a wild, confetti-like cookie that’s pure fun.
- Gluten-Free Swap: Use a 1:1 gluten-free all-purpose flour blend (I like the ones with xanthan gum already included). The texture will be slightly more delicate but just as delicious.
- Vegan Version: Use a high-quality plant-based butter (sticks, not tubs) and a flax egg (1 tbsp ground flax + 3 tbsp water per egg, set for 5 mins). The marbling works the same way!
Beau’s Kitchen Notes & Stories
Over the years, I’ve learned a few things. First, every batch will be uniquely beautiful—embrace it! No two cookies have the same swirl, and that’s the charm. Second, if your dough gets too soft while you’re working, just pop it in the fridge for 10-15 minutes to firm up. Chilled dough also spreads a little less, giving you a slightly thicker cookie.
This recipe has evolved from that first toddler-assisted batch. I added the vanilla portion later to give the eye a place to rest between the vibrant colors, and I found the freeze-dried berry powder was a game-changer for flavor. Baking, like life, is all about happy evolution. Don’t be afraid to make it your own!
Your Questions, Answered
- Q: My colors bled together into a muddy brown/green. What happened?A: This usually means the dough was too warm or was over-mixed when combining the colors. Work with cool dough, and when you press the colors together, do it gently and just enough to adhere. We’re marbling, not fully blending!
- Q: Can I make the dough ahead of time?A: Absolutely! You can prepare the three colored doughs, wrap them tightly in plastic wrap, and refrigerate for up to 2 days. Let them sit at room temp for 15-20 minutes to become pliable before marbling and baking.
- Q: My matcha tastes bitter. How can I prevent that?A: Two tips: 1) Use a higher-quality matcha meant for drinking (ceremonial grade). Lower-grade “culinary” matcha can be harsh. 2) Ensure your baking powder and soda are fresh. Old leaveners can create a bitter aftertaste that amplifies the matcha’s bitterness.
- Q: The cookies spread too much and lost their swirl definition.A: Your butter was likely too soft or the dough wasn’t chilled. Next time, ensure your butter is just soft, not melty. If your kitchen is hot, chill the shaped cookies on the baking sheet for 10 minutes before putting them in the oven.

Strawberry Matcha Marble Cookies Recipe
Description
These Strawberry Matcha Marble Cookies are soft, buttery, and beautifully swirled with natural green tea and strawberry flavors. They look fancy but are actually simple to make. Perfect for tea time, gifts, or when you want cookies that stand out on the plate.
Ingredients
Base Dough
-
1 cup (227 g) unsalted butter, softened
-
1 cup (200 g) granulated sugar
-
2 large eggs, room temperature
-
1 tsp vanilla extract
-
2¾ cups (345 g) all-purpose flour
-
½ tsp baking powder
-
½ tsp baking soda
-
¼ tsp salt
Flavor Swirls
-
1 tbsp matcha powder
-
1 tbsp freeze-dried strawberry powder
(or ½ tsp strawberry extract + tiny drop pink food color) -
2–3 tsp extra flour (only if dough gets sticky)
Instructions
-
Preheat oven to 350°F (175°C). Line baking sheets with parchment.
-
Cream butter & sugar
Beat butter and sugar for 2–3 minutes until light and fluffy. -
Add wet ingredients
Mix in eggs one at a time, then vanilla. -
Mix dry ingredients
In another bowl whisk flour, baking powder, baking soda, and salt. -
Combine
Add dry ingredients to wet and mix just until a soft dough forms. -
Divide dough
Split evenly into 3 bowls. -
Flavor & color
-
Bowl 1: mix in matcha powder
-
Bowl 2: mix in strawberry powder
-
Bowl 3: leave plain vanilla
If sticky, mix in a little extra flour.
-
-
Marble the dough
Pinch small pieces of each color, press together, gently twist, and roll into balls. Flatten slightly into thick discs. -
Bake
Place 2 inches apart. Bake 9–11 minutes until edges are lightly golden and centers look soft. -
Cool
Let rest 5 minutes on tray, then move to rack.
Notes
-
Use soft, not melted butter for good texture.
-
Don’t overmix after adding flour — keeps cookies tender.
-
If dough gets warm, chill 10–15 minutes before shaping.
-
Twist colors gently — too much mixing will blur the marble.
-
Better matcha = brighter color and smoother flavor.
Nutritional Info (Because We Like to Know!)
Here’s a general estimate per cookie (based on a yield of 24). Remember, this is a treat meant to be savored for its joy and flavor!
- Calories: ~140
- Fat: 7g
- Carbohydrates: 18g
- Sugar: 9g
- Protein: 2g
These values are approximate and can vary based on specific ingredients used and cookie size. The matcha does provide a small dose of antioxidants (like EGCG) and a gentle lift from natural caffeine, while the strawberry powder adds a touch of vitamin C. Mostly, though, they provide a big dose of baking happiness!
Final Thoughts from My Kitchen to Yours
And there you have it, friends – the full story of my beloved Strawberry Matcha Marble Cookies. More than just a recipe, I hope this is an invitation to play in the kitchen, to embrace beautiful imperfections, and to create something that delights all the senses.
The best part about these cookies isn’t just how stunning they look on Instagram (though, go ahead, snap that pic!). It’s the moment you break one in half to see the unique swirl inside, or the smile on someone’s face when you offer them a plate. It’s food that feels like a celebration. So, give it a whirl, make a glorious mess, and taste the magic. Happy baking!
Always remember – in my kitchen and yours, food should taste like a warm hug. Now, go enjoy your well-earned cookies!