Unlock Takeout Magic at Home: Your Secret Stir-Fry Weapon Is Here!
Hey friends! Beau here from Feastical, and let’s be real – ever stare at a lackluster stir-fry and think, “Why doesn’t this taste like my favorite takeout?” I’ve been there too, waving my spatula like a disappointed wizard. That all changed when I cracked the code to restaurant-style stir-fry magic. It’s not fancy equipment or mysterious ingredients… it’s this glorious brown garlic sauce simmering in my wok right now. Imagine: sticky-sweet soy, punchy garlic, and that rich umami depth hugging every piece of chicken, shrimp, or crispy tofu. This sauce isn’t just a recipe – it’s your weeknight superhero. We’re talking 10 minutes flat (yes, really!), one pan, and flavors that’ll make your taste buds high-five. Whether you’re juggling kids, deadlines, or just craving something more than steamed broccoli, this sauce turns “meh” into “MORE!” Let’s ditch the bland and build some saucy confidence together. Your wok’s waiting!
Wok This Way: My Saucy Revelation
Picture 22-year-old me in my first apartment kitchen – neon green walls, a wok I bought because it looked cool, and zero clue. I’d invited my now-wife over for a “gourmet stir-fry date night.” Spoiler: It was a salty, soggy disaster. The broccoli wept, the chicken sulked, and my ego? Crumbled like overcooked tofu. Then, my Thai neighbor Mrs. Lim caught me sulking by the dumpster (true story!). She marched upstairs, threw out my store-bought gloop, and showed me her sacred sauce jar – whispering, “Flavor lives here, boy.” As she stirred that garlicky elixir, the kitchen filled with a scent so intoxicating, my cat tried to climb the wok. That sauce transformed my sad veggies into something shimmering and alive. It wasn’t just dinner; it was a revelation. Now, every time I whisk up this brown garlic hug, I think of Mrs. Lim’s wink and that beautiful moment when I realized: great food isn’t about perfection. It’s about sharing the messy, delicious journey.
Your Flavor Arsenal: What You’ll Need
Gather these pantry pals – flexibility is our motto! Swap fearlessly:
- Soy Sauce (2/3 cup): The umami backbone! Use low-sodium if sensitive to salt, or swap with tamari for gluten-free magic. Chef’s secret: cheap soy sauce works great here – save the fancy stuff for dipping!
- Chicken Broth (1/2 cup): Adds savory depth. Veggie broth works beautifully for plant-based versions, or use water + 1/2 tsp mushroom powder in a pinch.
- Rice Wine (1/3 cup): That subtle tang! No shaoxing wine? Dry sherry or even apple juice + 1 tsp vinegar mimics the balance. (Avoid “cooking wine” – it’s salt-bomb city!).
- Sugar (3.5 tbsp): Balances the salt. Brown sugar adds caramel notes, honey brings floral vibes. Coconut sugar? Go wild – just dissolve it well!
- Sesame Oil (1 tbsp): The nutty finish! DON’T cook with it – add raw at the end. Toasted sesame oil is non-negotiable for aroma.
- White Pepper (1/4 tsp): Sneaky heat without black specks. Ground black pepper works if you’re in a bind.
- Cooking Oil (2 tbsp): High smoke point is key! Peanut, avocado, or canola. Olive oil? Not here, friend – it’ll bitter-up when searing.
- Garlic & Ginger (1 tbsp each, minced): FRESH ONLY. No jars! Grate frozen ginger if peeling annoys you (game-changer!).
- Cornstarch Slurry (2 tbsp cornstarch + 1/4 cup water): Our thickener! Arrowroot works for paleo, but avoid flour – it turns gluey.
Wok Stars: Building Your Sauce Step-by-Step
Ready for stir-fry stardom? Let’s fire it up! Pro tip: Prep everything first – once that wok’s hot, it’s go-time.
- Whisk the Flavor Base: Grab a bowl. Combine soy, broth, rice wine, sugar, sesame oil, and white pepper. Whisk until sugar dissolves! Chef’s Hack: Taste now – too salty? Add 1 tsp water. Too flat? Pinch more sugar. Adjusting raw sauce is easier!
- Slurry Up: In a tiny bowl (or cup!), mix cornstarch and water until milky-smooth. No lumps allowed! Why? Lumps = weird jelly blobs in your sauce. Tragedy averted.
- Heat the Pan: Crank that burner HIGH. Add oil – it should shimmer like a desert mirage in 30 seconds. Test with one ginger shred – if it sizzles instantly, you’re golden! Wok Wisdom: Cast iron or carbon steel rocks. Non-stick? Okay, but don’t expect fiery “wok hei” char.
- Aromatics Awaken: Swirl oil, then add garlic and ginger. STIR CONSTANTLY for 15 seconds max! They should golden, not brown. Burnt garlic = bitter doom. Nostalgia Alert: That sizzle? That scent? That’s Mrs. Lim’s spirit cheering you on.
- Simmer & Merge: Pour in your sauce mix. It’ll bubble violently – that’s good! Let it boil 30 seconds to mellow the alcohol. Reduce heat to medium. Science Snack: Boiling melds flavors and cooks off the raw wine edge.
- Thicken the Plot: Stir your slurry (it settles!), then drizzle it in while stirring the sauce. Within 20 seconds, it’ll transform from thin soup to glossy lava! Texture Trick: Too thick? Splash broth. Too thin? Mix more slurry (1 tsp cornstarch + 1 tbsp water) and add.
- Finish Strong: Kill the heat. Sauce thickens more as it cools. Toss immediately with your pre-cooked stir-fry (meat/veggies). Rule #1: Never pour sauce over food – always toss in the pan for clingy perfection!
Plate It Like a Pro (Minimal Effort, Max Vibes)
Ditch the takeout containers! Pile that saucy stir-fry high on steamed jasmine rice (or cauliflower rice for low-carb). Top with sliced scallions and sesame seeds for crunch. Craving drama? Serve in hollowed-out roasted pineapple halves for tropical flair. Family-style is my jam – plonk the sizzling wok right on the table (use a trivet, please!) with extra sauce on the side. Pair with a crisp lager or chilled green tea. Remember: sticky fingers and happy sighs are the best garnishes.
Shake Up Your Sauce: 5 Tasty Twists
This sauce is your flavor playground! Try these riffs:
- Spicy Dragon: Add 1 tbsp chili garlic paste or 2 minced Thai chilies with the ginger.
- Citrus Zing: Stir in 1 tsp orange zest + 2 tbsp orange juice with the soy mix. Perfect with shrimp!
- Teriyaki Vibe: Swap 1/4 cup broth for pineapple juice + extra 1 tbsp sugar. Glaze salmon or tofu.
- Mushroom Umami Bomb: Replace broth with mushroom stock + add 1 tsp porcini powder. Vegan heaven!
- Peanut Bliss: Whisk 3 tbsp creamy peanut butter into the warm sauce at the end. Hello, satay noodles!
Beau’s Backstage Sauce Secrets
Confession: This recipe started as scribbles on a takeout menu! Over 200 batches later (and one infamous “salt avalanche” incident involving my dog stealing a measuring cup), here’s what I’ve learned: This sauce FREEZES like a dream. Portion into ice cube trays, then bag the cubes – instant flavor bombs for lazy nights. It also evolves beautifully! My kids now beg for the “pink sauce” (add 1 tbsp beet juice – don’t knock it!). Biggest lesson? Don’t stress precision. Cooking’s a vibe. Burned the garlic slightly? Scoop it out and laugh. Sauce too thick? Thin it and call it “glaze.” The goal isn’t Michelin stars – it’s that moment when your dinner guest closes their eyes and murmurs, “Wow.” That’s the real recipe.
Your Sauce SOS: Solved!
Let’s troubleshoot common stir-fry sauce dramas:
Q: Why did my sauce turn into gloopy pudding?
A: Over-thickening happens! You likely added too much slurry or boiled too long. Fix it: whisk in hot broth 1 tbsp at a time until it loosens. Next batch, add slurry slower – it thickens fast!
Q: Tastes too salty! Help!
A: Easy saves: Add 1 tsp vinegar (rice or apple cider) + 1 tsp sugar to balance. Toss with unsalted rice or extra veggies. Future tip: use low-sodium soy and taste before adding slurry.
Q: Can I make this ahead? How long does it keep?
A: Absolutely! Store cooled sauce airtight in the fridge for 5 days. It thickens when cold – just reheat gently with a splash of water or broth. Freezes 3 months.
Q: Garlic burns INSTANTLY in my pan. What am I doing wrong?
A: Your pan’s too hot or oil’s too scant. Ensure oil shimmers but doesn’t smoke. Have garlic/ginger prepped RIGHT by the stove. Still nervous? Remove pan from heat for 10 sec before adding aromatics, then return to flame.

Stir-Fry Sauce (Brown Garlic Sauce)
- Total Time: 10 minutes
Description
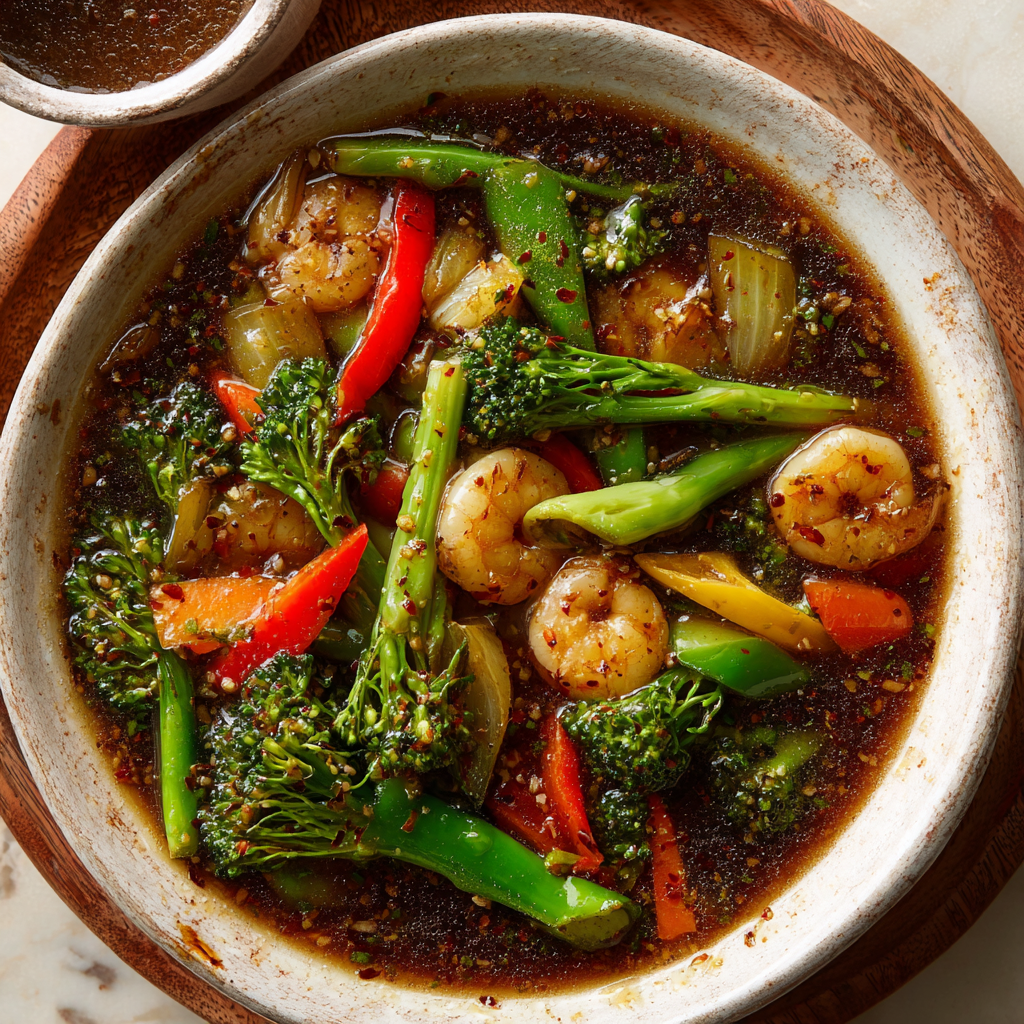
Tired of bland stir-fries at home? This brown garlic sauce is your weeknight superhero! Sticky-sweet, umami-packed, and garlicky, it clings beautifully to chicken, shrimp, tofu, or vegetables. Ready in just 10 minutes, one pan, and no mysterious ingredients. Your takeout cravings, solved.
Ingredients
-
2/3 cup soy sauce (low-sodium or tamari for gluten-free)
-
½ cup chicken or vegetable broth
-
1/3 cup rice wine (or dry sherry / apple juice + 1 tsp vinegar)
-
3 ½ tbsp sugar (brown sugar, honey, or coconut sugar)
-
1 tbsp toasted sesame oil (add at the end)
-
¼ tsp white pepper (or black pepper)
-
2 tbsp cooking oil (peanut, canola, or avocado)
-
1 tbsp fresh minced garlic
-
1 tbsp fresh minced ginger
-
2 tbsp cornstarch + ¼ cup water (slurry for thickening)
Instructions
-
Mix the Sauce: In a bowl, whisk together soy sauce, broth, rice wine, sugar, sesame oil, and white pepper until sugar dissolves.
-
Prepare Slurry: Mix cornstarch and water until smooth; set aside.
-
Heat Pan: Place wok or skillet over high heat. Add oil; it should shimmer in 30 seconds.
-
Sauté Aromatics: Add garlic and ginger; stir constantly for 15 seconds. Avoid burning.
-
Simmer Sauce: Pour in sauce mixture; let it boil for 30 seconds, then reduce heat to medium.
-
Thicken Sauce: Stir slurry and drizzle slowly into sauce, stirring constantly until thick and glossy (20 seconds). Adjust thickness with extra broth if needed.
-
Combine: Toss your pre-cooked stir-fry (protein + vegetables) directly in the pan with the sauce for full coverage.
Notes
-
Flavor Tweaks: Taste the sauce before adding slurry – adjust sugar or water for balance.
-
Make Ahead: Store in an airtight container in the fridge up to 5 days; freezes up to 3 months.
-
Garlic Safety: Garlic burns fast; prepped and ready, add it quickly to hot oil.
-
Texture: Too thick? Thin with broth. Too thin? Add more slurry slowly.
- Prep Time: 5 minutes
- Cook Time: 5 minutes
Nutrition
- Calories: 70Cal per ¼ cup serving
- Fat: 3g
- Carbohydrates: 8g
- Protein: 2g
Nutritional Notes (Per Serving, Approx.)
Calories: 70 | Carbs: 8g | Fat: 3g | Protein: 2g
Note: Values are for sauce only (about 1/4 cup per serving). Add protein/veggies/rice for a balanced meal! Sodium alert: Soy sauce is salty – low-sodium versions cut sodium by ~30%.
Final Thoughts: Why This Sauce Beats Takeout Every Time
This brown garlic stir-fry sauce isn’t just a recipe—it’s a kitchen superpower. Once you master it, you’ll never look at takeout the same way. It’s cheaper, healthier, and infinitely customizable, whether you’re craving spicy, sweet, or extra garlicky.
The best part? It celebrates imperfection. Burned the garlic a little? Add a pinch of sugar to balance it. Sauce too thick? Splash in broth. Cooking is supposed to be fun, not stressful.
So grab that wok (or skillet!), channel your inner Mrs. Lim, and make some stir-fry magic. Your taste buds—and your wallet—will thank you.