Forget Store-Bought: Your New Favorite Seedy Sourdough Crackers Are Here!
Hey friends, Beau here! Let’s talk about one of life’s simple, crunchy pleasures: the perfect cracker. You know the one. It’s sturdy enough to scoop up a hefty glob of hummus but delicate enough to let a sharp cheddar shine. It has a satisfying snap, a nutty aroma, and a flavor that keeps you reaching for just one more. For too long, we’ve settled for the stuff in plastic sleeves from the grocery aisle. But what if I told you that the most incredible, flavorful, and downright satisfying crackers are hiding in your kitchen right now, just waiting to be baked?
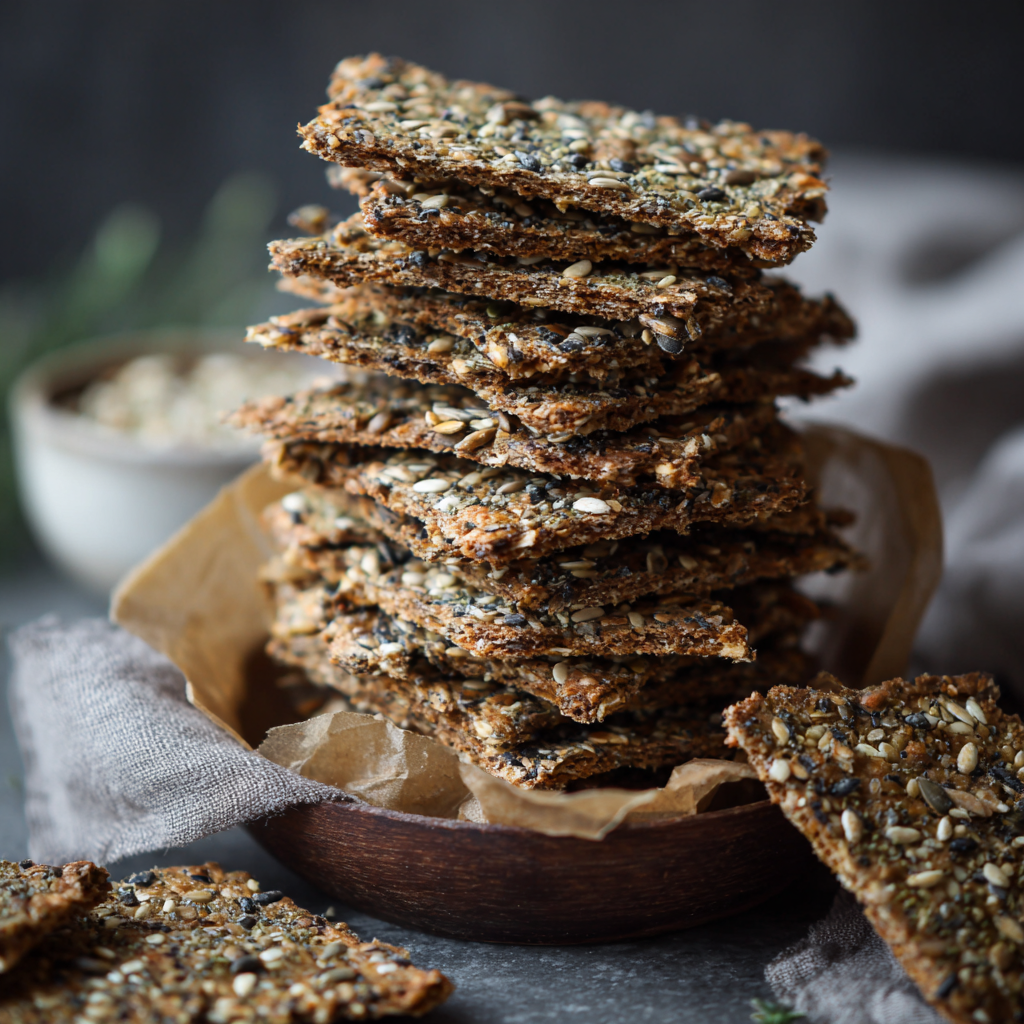
That’s right, I’m talking about turning that jar of sourdough discard sitting on your counter into a golden, seedy, tangy masterpiece. These Seedy Sourdough Crackers are a game-changer. They’re crispy, packed with texture, and have that subtle fermented tang that makes sourdough so irresistible. This isn’t just a recipe; it’s a brilliant way to reduce food waste and create something truly special from what you might have otherwise tossed. Whether you’re a sourdough pro or just starting your fermentation journey, this is your invitation to roll up your sleeves, dust your counter with a little flour, and experience the magic of homemade. So, let’s preheat that oven and transform that sleepy starter into your new snack-time superstar!
The Happy Accident That Started It All
I’ll never forget the first time I made these. It was a lazy Sunday morning, and my sourdough starter, “Bubbles,” was looking a little… dejected. I’d missed a feeding, and a solid cup of discard was staring back at me, begging for a purpose. I hate waste more than I hate a soggy bottom on a pie, so the mission was clear: create something delicious, and create it now. I started throwing things into a bowl—some whole wheat flour, a chunk of soft butter, a generous pinch of salt. It felt less like baking and more like kitchen therapy. I rolled the dough out thin, scattered every seed and grain I could find in my pantry over the top, and sent it into the oven with a hopeful heart.
The smell that filled my kitchen was pure magic—toasty, nutty, and warm. But the real moment of truth was the sound. That first CRACK as I broke a piece off the sheet was so crisp and clean, it was downright musical. I slathered a warm piece with goat cheese, and my taste buds did a happy dance. It was a flavor and texture experience no store-bought box could ever deliver. That happy accident, born from a desire to not waste a single bubble, is now a Feastical staple. It’s a reminder that sometimes, the best recipes aren’t meticulously planned—they’re discovered with a little intuition and a lot of love for good food.
Gathering Your Cracker Crew: The Ingredients
This is where the fun begins! We’re making a double batch because, trust me, you’ll want plenty to share (or not to share, no judgment here). Here’s your shopping and scooping list.
- 2 cups (8 oz) Whole Wheat Flour: This is our base, giving the crackers a rustic, nutty depth that all-purpose flour just can’t match. Chef’s Insight: If you only have all-purpose, that’s okay! The crackers will be a bit lighter and less whole-grainy, but still delicious.
- 1 1/2 teaspoons Salt: Don’t be shy! Salt is crucial for balancing the tang of the sourdough and making the flavors pop. I use fine sea salt.
- 1/2 teaspoon Baking Soda & 1/2 teaspoon Baking Powder: Our dynamic leavening duo! They work together to give the crackers a little lift and that perfect, delicate crispness.
- 1 1/2 teaspoons Sugar: Just a touch to round out the flavors. It doesn’t make the crackers sweet, I promise. It just balances the tang.
- 2 cups (18 oz) Unfed Sourdough Starter (Discard): The star of the show! This can be straight from the fridge, thick or a little thin—it’s all good. This recipe is very forgiving. Using discard gives you all the fermented flavor without the wait.
- 8 tablespoons (4 oz) Unsalted Butter, room temperature: Soft, creamy butter is the key to a flaky, tender, and rich cracker. Pro Tip: If you forgot to take your butter out, you can grate cold butter right into the flour mixture for a similar effect.
- 4–6 tablespoons Mixed Grains and Seeds: This is your chance to get creative! I love a mix of poppy seeds, sesame seeds, chopped sunflower seeds, ground oats, flaxseed, and chia. The more variety, the more texture and nutrition!
Optional Twists (Go Wild!)
- 1 tsp dried rosemary or thyme: For a fragrant, herby vibe that’s perfect with cheese.
- 1/2 tsp garlic powder or smoked paprika: A quick way to add a savory, smoky kick.
- 1/4 cup finely grated Parmesan cheese: Mix it right into the dough for a serious umami depth.
Let’s Get Rolling: Your Step-by-Step Guide to Crackers
Ready to make some magic? Follow these steps, and you’ll be a cracker-making pro in no time. I’ve sprinkled in my favorite chef hacks to make the process even smoother.
- Preheat and Prep. Fire up your oven to 350°F (175°C). This is our target temperature for golden, even baking. Line two large baking sheets with parchment paper. Chef’s Hack: No parchment? A light spray of oil will work, but parchment makes cleanup a dream and ensures nothing sticks.
- The Dry Team Assembles. In a large bowl, whisk together your whole wheat flour, salt, baking soda, baking powder, and sugar. Give it a good whisk for about 30 seconds. We’re not just mixing; we’re aerating the flour and making sure our leaveners are evenly distributed. This is the secret to a consistent texture in every single cracker.
- Bring in the Wet Team. Now, plop in your sourdough starter and that lovely softened butter. I like to use a sturdy spatula or even my hands at this point. Mix until a shaggy, stiff dough forms. It might seem dry at first, but keep working it. The dough should come together and hold its shape without being sticky. Chef’s Note: If it’s genuinely too dry and crumbly, add a teaspoon of water. If it’s sticky, add a tablespoon of flour. You’re in control!
- Divide and Conquer. Turn the dough out onto a lightly floured surface and divide it into two equal portions. This makes it much easier to roll out thinly. Working with one portion at a time, place it between two sheets of parchment paper. This is the ultimate hack for no-stick, no-fuss rolling!
- Roll It Real Thin. Grab your rolling pin and roll the dough out to about 1/16 of an inch thickness. That’s seriously thin—you should almost be able to see the parchment paper through it. This is non-negotiable for the ultimate crisp factor. Thin dough = crispy crackers. Thick dough = hard tack. We want crispy!
- The Seed Shower. Peel off the top layer of parchment. Now, generously sprinkle your seed mix (and any optional herbs or spices) all over the surface. Place the parchment back on top and give it one more gentle roll with the pin. This presses the seeds in so they don’t fall off after baking.
- Score and Shape. Using a pizza cutter, a sharp knife, or even a bench scraper, score the dough into whatever shape you like—squares, rectangles, or even triangles! You don’t need to cut all the way through; just scoring the surface makes it easy to snap apart after baking. This gives you that rustic, artisanal look.
- Bake to Perfection. Carefully slide the parchment paper with the scored dough directly onto your prepared baking sheet. Bake for 20-25 minutes. Key Tip: Rotate the pans halfway through baking to ensure they get evenly golden and crisp. You’re looking for a light brown color across the top. They will crisp up more as they cool!
- The Cool Down. This is the hardest part: patience! Let the giant cracker sheets cool completely on the baking sheet. Once cool, break them apart along the score lines into perfect, individual crackers.
How to Serve These Seedy Sensations
Okay, you’ve got a big beautiful bowl of homemade crackers. Now what? The possibilities are endless, but here are a few of my favorite ways to serve them up.
The Ultimate Grazing Board: This is their natural habitat. Arrange these crackers alongside a sharp aged cheddar, a creamy brie, some spicy salami, a pile of grapes, and a dollop of grainy mustard. Watch them disappear first.
Soup’s Best Friend: Crumbled over a creamy tomato soup or a hearty lentil stew, these crackers add the perfect crunchy texture. They’re a million times better than any store-bought crouton.
The Dip Vehicle: Their sturdy nature makes them ideal for scooping. Think thick hummus, tangy tzatziki, a vibrant beet dip, or a simple whipped feta. They can handle it all without snapping mid-scoop!
Straight from the Jar: Let’s be real, the best way to eat them is by the handful, standing over the kitchen counter, appreciating your own handiwork. You’ve earned it.
Make It Your Own: 5 Tasty Twists
Once you’ve mastered the basic recipe, the flavor world is your oyster! Here are a few of my favorite variations to keep things exciting.
- Everything Bagel Bliss: Swap the seed mix for a generous coating of everything bagel seasoning. It’s a flavor explosion you already know and love.
- Spicy Sriracha & Cheddar: Mix 2 tablespoons of sriracha and 1/4 cup of finely grated sharp cheddar right into the dough. You get a gorgeous orange hue and a spicy, cheesy kick.
- Rosemary & Sea Salt: A classic for a reason. Add 1 teaspoon of finely chopped fresh rosemary to the dough and finish with a flaky sea salt sprinkle before baking. So simple, so elegant.
- Vegan-Friendly Version: This is an easy swap! Use solid coconut oil or a good vegan butter in place of the dairy butter. The result is just as flaky and delicious.
- Gluten-Free Adventure: Replace the whole wheat flour with a 1:1 gluten-free all-purpose flour blend. The texture will be slightly different, but you’ll still get a wonderfully crispy, tangy cracker.
Beau’s Kitchen Chronicles: A Few Parting Thoughts
This recipe has evolved so much since that first lazy Sunday. I’ve learned that a slightly wetter starter makes for a dough that’s easier to roll paper-thin. I’ve accidentally baked them for 30 minutes and ended up with crackers that could probably stop a bullet (lesson learned: set a timer!). And I’ve found that the dough freezes beautifully. Just roll it out between parchment, stack the sheets, and freeze flat. You can bake from frozen, just add a few extra minutes to the bake time. It’s a lifesaver for unexpected guests. The best part? I get emails from you all, the Feastical family, with your own wild and wonderful variations. That’s what cooking is all about—sharing, adapting, and finding joy in every crunchy bite.
Cracker Questions? I’ve Got Answers!
Over the years, I’ve heard all your brilliant questions. Here are the most common ones to help you on your cracker journey.
Q: My crackers are chewy, not crisp! What happened?
A: The number one culprit is thickness! If you don’t roll the dough thin enough, the center can stay soft. The second culprit is under-baking. They should be lightly golden all over. If they’re still a bit soft after cooling, just pop them back in the oven for another 5 minutes. Also, make sure you let them cool completely on the sheet—they continue to crisp up as they cool.
Q: Can I use active, bubbly starter instead of discard?
A: You absolutely can! The result will be a slightly airier, lighter cracker because the active yeast is, well, active. The flavor might be a little less tangy since the discard has more acetic acid. Both ways are delicious, so use what you have!
Q: How should I store these, and how long do they last?
A> To keep them super crisp, store them in an airtight container at room temperature. They’ll be at their prime for about a week. If your kitchen is humid, you can add a small food-safe silica gel packet to the container (the kind you find in store-bought seaweed snacks or beef jerky) to absorb any moisture.
Q: My dough is too sticky/wet to handle. Help!
A> No worries, this is an easy fix! Different starters have different hydration levels. Just add a tablespoon of whole wheat flour at a time until the dough comes together and is no longer sticky. It should be smooth and pliable.
The Good Stuff: A Peek at the Nutrition
Now, I’m not a nutritionist, but I am a guy who loves to know what’s going into my body. One of the best things about making food from scratch is that you control the ingredients. These crackers are a fantastic source of fiber and healthy fats from the whole wheat flour and seed mix. The fermentation process in the sourdough starter can also help pre-digest some of the grains, making nutrients more bioavailable and often easier on the stomach. Compared to many store-bought crackers, you’ll find these have less processed junk and more real, whole-food goodness. It’s a snack you can feel genuinely good about.
Approximate Nutritional Info per serving (about 8 crackers): Calories: 150, Fat: 7g, Carbohydrates: 18g, Fiber: 2g, Protein: 3g, Sodium: 180mg.
Print
Seedy Sourdough Crackers : Crunchy, Nutty, and Naturally Fermented
Description
Hey friends, Beau here! Say goodbye to store-bought crackers and hello to crispy, tangy, seedy perfection. Made from your sourdough discard, these crackers are crunchy, flavorful, and full of texture—perfect for cheese boards, dips, soups, or just snacking straight from the jar. Plus, they reduce food waste while turning your starter into a true superstar!
Ingredients
Dry Ingredients:
-
2 cups (8 oz) whole wheat flour (or all-purpose for a lighter version)
-
1 1/2 tsp salt
-
1/2 tsp baking soda
-
1/2 tsp baking powder
-
1 1/2 tsp sugar
Wet Ingredients:
-
2 cups (18 oz) unfed sourdough starter (discard)
-
8 tbsp (4 oz) unsalted butter, room temperature
Seeds & Mix-ins (4–6 tbsp total):
-
Poppy seeds, sesame seeds, sunflower seeds, flaxseed, chia, oats—get creative!
Optional Flavor Twists:
-
1 tsp dried rosemary or thyme
-
1/2 tsp garlic powder or smoked paprika
-
1/4 cup finely grated Parmesan cheese
Instructions
1. Preheat & Prep:
-
Preheat oven to 350°F (175°C).
-
Line two large baking sheets with parchment paper.
2. Mix Dry Ingredients:
-
Whisk together flour, salt, baking soda, baking powder, and sugar.
3. Combine with Wet Ingredients:
-
Add sourdough starter and butter to the dry mix. Use a spatula or your hands to form a shaggy dough. Adjust with 1 tsp water if too dry or 1 tbsp flour if too sticky.
4. Divide & Roll:
-
Split dough in half. Roll each portion between two sheets of parchment paper to 1/16-inch thickness (very thin for ultimate crisp).
5. Add Seeds & Score:
-
Remove top parchment. Sprinkle seeds/herbs over dough and gently roll again to press them in.
-
Score dough into squares, rectangles, or triangles using a pizza cutter or knife (don’t cut all the way through).
6. Bake:
-
Transfer sheets to baking pans. Bake 20–25 minutes until light golden. Rotate halfway for even baking.
-
Cool completely on the sheet to allow crackers to crisp fully, then break along score lines.
Notes
-
-
Crackers are chewy: Dough too thick or under-baked. Roll thinner and bake until lightly golden.
-
Using active starter: Can swap discard with bubbly starter; crackers will be airier and slightly less tangy.
-
Sticky dough: Add 1 tbsp flour at a time until manageable.
-
Storage: Airtight container at room temperature; best within a week. Add a silica gel packet in humid climates.
-
Nutrition
- Calories: 150Cal per 8 crackers
- Fat: 7 g
- Carbohydrates: 18 g
- Fiber: 2 g
- Protein: 3g
Your New Go-To Snack Awaits
And there you have it, my friends! From a jar of lonely sourdough discard to a towering pile of the most incredible, seedy, tangy, and satisfying crackers you’ve ever crunched. This recipe is a testament to the idea that the best foods don’t have to be complicated. They just have to be made with a little bit of heart and a whole lot of delicious intention.
I hope this recipe becomes a trusted favorite in your home, just like it is in mine. It’s a reminder that magic happens when we get our hands a little dusty with flour and our kitchens smelling like toasted seeds. So, what are you waiting for? Your sourdough starter is calling. Go make some crackers!
Final Thoughts: Your Homemade Cracker Revolution Starts Now
So, there you have it. What began as a simple mission to rescue a cup of sourdough discard has unfolded into your new secret weapon for snacking. You’re no longer just a baker; you’re an alchemist, transforming humble ingredients into golden, seedy works of art.
Forget settling for the bland, the overly salted, or the mysteriously preserved. You now hold the key to a cracker that is unabashedly yours—crisp, flavorful, and born from your own kitchen. Each satisfying SNAP is a testament to your effort, and every seed-speckled surface is a badge of honor.
This is more than a recipe; it’s an invitation to a more flavorful, less wasteful way of life. It’s about the quiet satisfaction of creating something beautiful from what you already have. It’s about the joy of sharing a homemade gift that says, “I made this just for you.”
So preheat that oven, liberate that jar of starter, and get ready for the incredible aroma of toasty seeds and warm sourdough to fill your home. Your journey to cracker perfection is just a bake away.
Now go on, get cracking!
Happy Baking,
Beau