Quesadilla Wedges: Your New Go-To for Crispy, Cheesy, Dunkable Joy
Hey friend, Beau here! Let’s talk about one of life’s simple, perfect equations: Hungry + Short on Time = Quesadilla Wedges. We’ve all been there. It’s 3 p.m., your stomach is rumbling like a distant thunderstorm, or the kids are home and looking at you with those “feed me now” eyes. You need something fast, something satisfying, something that feels like a treat but won’t turn your kitchen into a war zone.
That’s where these magical little triangles come in. Forget everything you think you know about boring old quesadillas. We’re taking that concept, giving it a fun, dippable makeover, and turning it into the ultimate snack, lunch, or even a lazy dinner hero. They’re crispy on the outside, gloriously melty on the inside, and just begging to be dragged through a pool of cool sour cream or zesty salsa.
This isn’t just a recipe; it’s a blueprint for deliciousness. It’s the culinary equivalent of a trusty pair of jeans—comfortable, reliable, and you can dress it up or down depending on the day. Whether you’re packing a lunchbox, need a game-day snack spread, or just want a happy little moment of cheesy bliss, these wedges have got your back. So, let’s fire up the skillet and turn a humble tortilla into a masterpiece of melty goodness.
The Quesadilla That Started It All
My love affair with quesadillas began not in a fancy restaurant, but in my best friend’s cluttered, sun-drenched kitchen after school. We were maybe ten, armed with nothing but a reckless hunger and a questionable level of adult supervision. His mom, a saint of patience, would point to the fridge and say, “If you can make it, you can eat it.”
Our creation was… primitive. We’d slap a tortilla in a too-hot pan, dump a mountain of orange cheddar on one half, fold it over, and pray. We’d usually burn the first side, flip it with our fingers (ouch!), and end up with a semi-melted, oddly-shaped cheesy pocket. But when we sliced it into jagged triangles and dunked them straight into the jar of salsa? Pure heaven. It wasn’t just food; it was a victory. It was independence, shared with a friend, with crumbs everywhere and laughter filling the room. That’s the spirit I want to bring to Feastical. Food doesn’t have to be complicated to be incredible. Sometimes, the most memorable meals are the simple ones you make with (or for) the people you love.
Gathering Your Flavor Arsenal
Here’s the beautiful part: the ingredient list is short, sweet, and super flexible. This is your foundation—feel free to build your dream wedge from here!
- 1 Large Flour Tortilla (Burrito-size): This is your canvas. I love a good burrito-size tortilla because it gives you more surface area for filling and more wedges to share (or not share, no judgment). For a nuttier, sturdier option, a whole wheat tortilla works great. For a truly crisp, almost cracker-like wedge, try a corn tortilla—just know it’ll be a bit more delicate to fold.
- ½ Cup Shredded Cheese: The glue that holds our cheesy dream together. A blend is my secret weapon. I love a mix of sharp cheddar for punch, and monterey jack or mozzarella for that epic, stretchy melt. Pre-shredded bags are convenient, but shredding a block yourself melts smoother and creamier—a little chef’s hack for you!
- ¼ Cup Cooked, Shredded Chicken (Optional): Want to level up from snack to meal? This is your move. I use leftover rotisserie chicken (the MVP of quick cooking), or shredded baked chicken breast. For a vegetarian protein punch, black beans or pinto beans, rinsed and drained, are phenomenal.
- Optional Sides for Dipping: This is where the party starts! Have fun with a dipping station:
- Mild Salsa: Classic, refreshing, and adds a little zing.
- Sour Cream or Greek Yogurt: The cool, creamy counterpart to the warm, crispy wedge. Greek yogurt is a fantastic protein-packed swap.
- Guacamole: Because avocado makes everything better. Always.
- Pickled Jalapeños: For a tangy, spicy kick right on the side.
Building Your Crispy, Cheesy Masterpiece
Ready? This is the fun part. We’re going for golden-brown perfection and a river of melted cheese. Follow these steps, and you’ll be a wedge wizard in no time.
- Prep Your Fillings: First, get everything ready to go. Shred your cheese if you haven’t already, and have your chicken or beans standing by. This is called “mise en place” (everything in its place), and it keeps the cooking process calm and smooth. No frantic scrambling while your tortilla is in the pan!
- Assemble with Care: Lay your tortilla flat on a cutting board. Sprinkle your cheese evenly over one half of the tortilla only, leaving a small border around the edge. If you’re adding chicken or beans, scatter them over the cheese. This half-and-half method is key! Folding is easier, and you get a perfect cheese seal. Now, fold the bare half over the loaded half, like you’re closing a book. Press down gently.
- Heat the Skillet: Place a dry, non-stick or well-seasoned cast-iron skillet over medium heat. Let it get nice and warm for a minute. No oil needed! The tortilla will toast in its own time, and the cheese fat will do the rest. A medium heat is crucial—too high, and you’ll have a charred outside and cold cheese inside. Too low, and you’ll get a soggy, greasy tortilla.
- Cook to Golden Perfection: Gently lay your folded quesadilla in the hot skillet. Cook for 2-3 minutes, until the bottom is beautifully golden brown with some darker toasty spots. Here’s my favorite flip hack: Use a wide, flexible spatula to lift one side, then confidently but gently slide your hand under the quesadilla to support it as you flip. It feels very chef-like! Cook the other side for another 2-3 minutes until equally golden and the cheese is audibly sizzling and melted. If you’re nervous about the cheese melting, you can cover the skillet with a lid for the last minute to trap the heat.
- The All-Important Rest: Transfer your gorgeous, crispy quesadilla to a cutting board. This next step is non-negotiable: let it rest for 1-2 minutes. I know, the temptation is real! But this allows the molten cheese to set just slightly, so when you cut it, it doesn’t all ooze out immediately. It makes for a much cleaner slice and saves your fingers from lava-hot cheese.
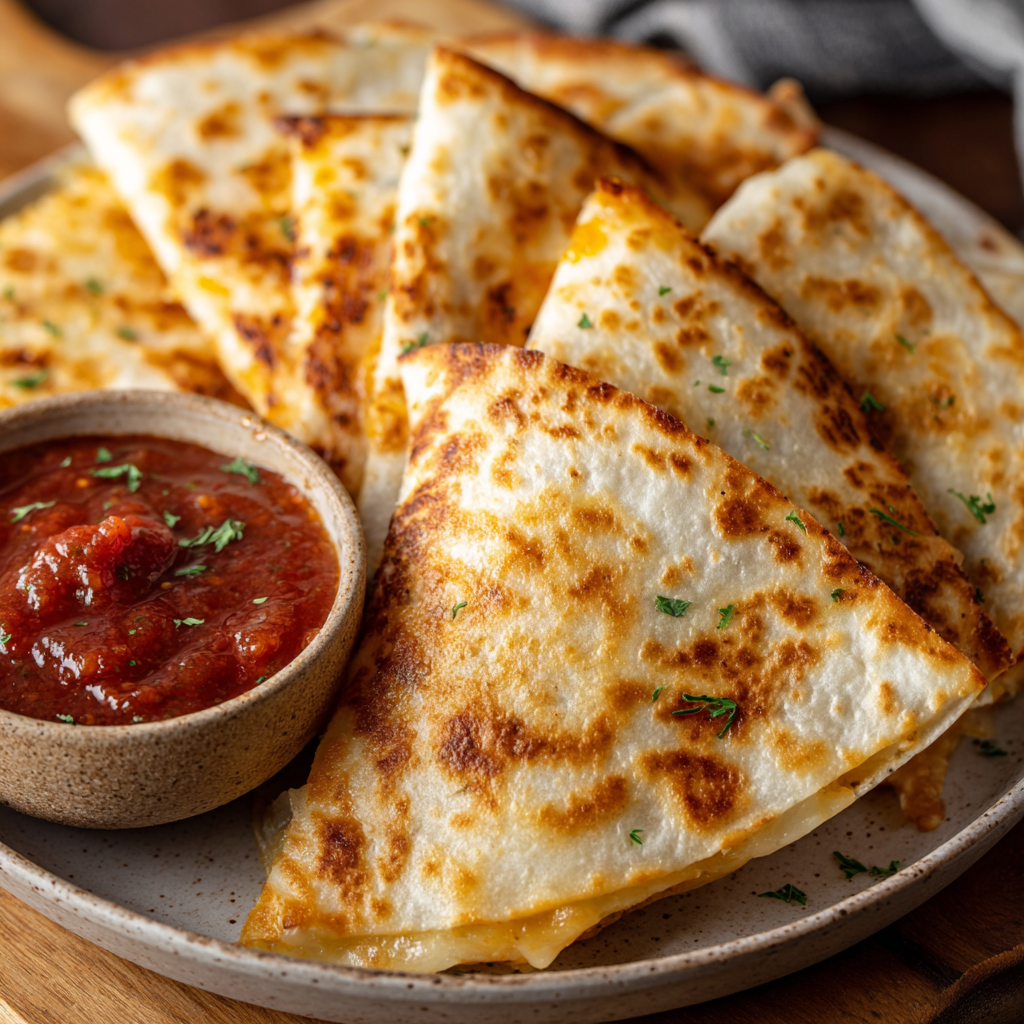
- Slice into Wedges: Using a sharp chef’s knife or a pizza cutter, slice the quesadilla like a pie. Cut it in half, then cut each half into 2 or 3 triangles. You’ll get 4 to 6 perfect, dippable wedges. Listen to that satisfying crunch as you cut—that’s the sound of success.
How to Serve These Cheesy Triangles
Presentation is half the fun! For a casual snack, just pile the wedges on a plate with a few bowls of dipping sauces in the middle—let everyone dig in. For a lunchbox, let them cool completely before packing in a container with a small side cup of salsa or sour cream (tip: put the dip in a tiny sealed container to avoid soggy wedges).
Want to make it a meal? Serve 3-4 wedges alongside a big, crisp green salad with a lime vinaigrette, or a cup of black bean soup. For a party platter, make a few different kinds (try the variations below!), stack the wedges on a big board, and surround them with all the dips, some olives, and pickled vegetables. It’s an instant crowd-pleaser that looks like you fussed way more than you did.
Get Creative! Flavor Twists & Swaps
The basic wedge is a masterpiece, but the real magic happens when you make it your own. Here are a few of my favorite riffs:
- The “Fajita” Wedge: Sauté a few strips of bell pepper and onion until soft. Add them with your cheese, and throw in a sprinkle of fajita seasoning. Feels like a party in every bite.
- Breakfast for Lunch: Scramble an egg with a pinch of salt and pepper. Spread it over the cheese, then add a sprinkle of cooked, crumbled breakfast sausage or bacon. Dip in sour cream or even a little maple syrup on the side. Trust me.
- Veggie-Packed Power Wedge: Mix a handful of fresh baby spinach into the cheese. The heat wilts it perfectly. You can also add finely chopped mushrooms or sun-dried tomatoes.
- “Pizza” Wedge: Use mozzarella cheese, add a few slices of pepperoni or salami, and a tiny drizzle of pizza sauce inside before folding. Dip in warm marinara. Kid (and adult) heaven.
- Dairy-Free Delight: Use your favorite vegan shredded cheese and a dairy-free tortilla. The key is to cover the skillet while cooking to help the vegan cheese melt thoroughly.
Beau’s Kitchen Notes
This recipe has evolved from those burnt-finger after-school snacks into my ultimate comfort hack. I’ve made these for my niece’s playdates (always a hit), for last-minute guests with a glass of wine, and for myself on more “I just need cheesy carbs” nights than I can count. The biggest lesson? Don’t overcrowd the pan. If you’re making multiple quesadillas, give them space or cook them one at a time. Stacking them on a baking sheet in a low oven (200°F) will keep them warm and crisp while you finish the batch.
Also, embrace the imperfect flip! Even if a little cheese escapes and sizzles on the pan, that’s not a mistake—it’s a crispy, cheesy bonus bite for the cook. Consider it your quality control tax.
Your Questions, Answered
Q: My cheese isn’t melting before the tortilla burns. Help!
A: Your heat is too high! Dial it back to a true medium. If the outside is browning too fast, you can also add a tiny sprinkle of water to the skillet and immediately cover it with a lid. The steam will help melt the cheese without further browning the tortilla.
Q: Can I make these ahead of time?
A: Absolutely! Cook and slice the wedges, let them cool completely, then store in an airtight container in the fridge for up to 2 days. Re-crisp them in a toaster oven or air fryer at 350°F for 3-4 minutes. The microwave will make them soft and chewy (which some people love!).
Q: What’s the best way to cut them without squishing?
A: A sharp knife or a pizza cutter pressed down firmly and rolled in one motion works best. Letting the quesadilla rest before cutting is the #1 trick to prevent squishing and cheese escape.
Q: My kids are picky. Any super simple version?
A> Stick to just cheese and a very mild, mild salsa for dipping. Sometimes, I’ll use a cookie cutter to cut the folded, uncooked tortilla into fun shapes (stars, hearts) before cooking. They cook faster, so watch them closely!

Quesadilla Wedges : Easy, Cheesy Triangles for Lunch or Snack
Description
Fast, satisfying, and endlessly customizable, these Quesadilla Wedges are your answer to snack-time emergencies, easy lunches, and lazy dinners. Crispy on the outside, melty on the inside, and made for dipping—this is comfort food at its most reliable.
Ingredients
-
1 large flour tortilla (burrito-size)
-
½ cup shredded cheese
(cheddar, Monterey Jack, mozzarella, or a blend) -
¼ cup cooked shredded chicken (optional)
(or black beans for vegetarian option)
For Dipping (Optional but Encouraged):
-
Salsa
-
Sour cream or Greek yogurt
-
Guacamole
-
Pickled jalapeños
Instructions
-
Prep the Fillings
Shred cheese and prepare any add-ins so everything is ready to go. -
Assemble
Lay tortilla flat. Sprinkle cheese evenly over one half only.
Add chicken or beans if using. Fold tortilla in half and press gently. -
Heat the Skillet
Warm a dry nonstick or cast-iron skillet over medium heat. -
Cook Until Golden
Place folded quesadilla in skillet.
Cook 2–3 minutes per side, until golden brown and cheese is fully melted.
(Cover skillet for last minute if needed to help cheese melt.) -
Rest, Then Slice
Transfer to cutting board and rest 1–2 minutes.
Slice into 4–6 wedges using a sharp knife or pizza cutter. -
Serve & Dip
Serve warm with your favorite dipping sauces.
Notes
-
Medium heat is key: Too hot burns the tortilla before cheese melts.
-
Rest before cutting: Prevents cheese from escaping.
-
No oil needed: The tortilla crisps beautifully on its own.
-
Escaped cheese = bonus: Crispy pan cheese is a chef’s reward.
Nutritional Snapshot (Cheese-Only Version)
Please note: This is an estimate for 1 large cheese quesadilla, sliced into 4 wedges. Values will change with added proteins, beans, or different tortillas.
- Prep Time: 5 minutes
- Cook Time: 5 minutes
- Total Time: 10 minutes
- Servings: 1-2
Per Serving (2 wedges): Approximately 250-300 calories | 10-15g protein | 12g fat | 25g carbohydrates. It’s a balanced little package of carbs for energy, protein and fat for staying power, and a whole lot of joy. To boost the nutrition, use a whole-grain tortilla, add lean chicken or beans, and serve with a veggie-rich side like carrot sticks or a side salad.
The Last Bite
And there you have it! The humble, glorious quesadilla wedge, transformed from a quick fix into a moment of real, cheesy happiness. I hope this recipe becomes a reliable friend in your kitchen, just like it is in mine. It’s proof that you don’t need fancy ingredients or hours of time to make something truly delicious that brings people together.
So next time that 3 p.m. hunger hits, or you need a surefire win for the lunchbox, remember this: a tortilla, some cheese, and a hot skillet are all you need to create a little magic. Now, go forth and dip! And don’t forget to tag @Feastical if you make them—I love seeing your creations.
With a full heart and a crispy wedge,
Beau