The Irresistible Snap: Why This Pecan Toffee Crunch is My Go-To Holiday Hero
Hey friends, Beau here! Welcome back to Feastical, your cozy corner for recipes that feel like a warm hug. Can you smell it? That intoxicating, buttery, nutty aroma that seems to weave its way through every happy holiday memory? For me, that scent will always be my Grandma Mae’s Pecan Toffee Crunch. It’s the sound of a satisfying snap as you break a piece, the rich melt of chocolate on your tongue, and the joyful crunch of toasted pecans. It’s pure, unadulterated magic in a candy jar.
Now, I know what some of you might be thinking: “Beau, candy-making? That sounds… intimidating.” Trust me, I hear you. The ghost of sugar thermometers past can be a little spooky. But what if I told you that this legendary treat is not only achievable but also incredibly fun to make? This isn’t just a recipe; it’s a kitchen adventure we’re going on together. We’re talking about transforming a few simple, humble ingredients into a golden, shatteringly crisp confection that will have your friends and family looking at you like you’re a certified pastry wizard. So, tie on your favorite apron, grab your trustiest heavy pot, and let’s create some sweet, crunchy magic. This Pecan Toffee Crunch is about to become your new secret weapon for gifting, grazing, and downright impressing everyone you know.
A Pinch of Nostalgia: The Toffee That Started It All
My love affair with this toffee began in my grandma’s kitchen, a place that always smelled of cinnamon and unconditional love. Every December, Grandma Mae would transform into a candy-making force of nature. She’d have tins and tins of goodies lined up, but the crown jewel was always her Pecan Toffee Crunch. She never used a fancy double boiler or even a digital thermometer—she relied on her senses. She’d swirl the molten, bubbling sugar and butter in her big, weathered pot, and I’d watch, mesmerized, as it turned from pale gold to a deep, gorgeous amber.
The true test was the “hard crack” stage. She’d have a small glass of ice water on the counter, and she’d drizzle a tiny thread of the hot toffee into it. She’d then fish it out and, with a triumphant grin, hand it to me. “You tell me, Beau-Beau,” she’d say. “Is it ready?” I’d bite into the cooled strand, and if it snapped cleanly between my teeth with a sound that echoed in my ears, I’d give her the thumbs up. That simple ritual, that moment of shared judgment, made me feel like the most important sous-chef in the world. This recipe is her legacy, and every time I make it, I’m right back in that warm, loving kitchen, learning from the best.
Gathering Your Golden Ingredients
This toffee is a beautiful example of how a few quality ingredients can create something truly spectacular. Here’s your shopping list, complete with a little chef-ly insight for each one.
- 2 cups Granulated Sugar: This is the backbone of our toffee, providing the structure and that classic crisp snap. It caramelizes with the butter to create that deep, complex flavor we’re after.
- 3 sticks Margarine + 1 stick Butter: Now, I know this combo might raise an eyebrow! This was Grandma Mae’s secret. The margarine (use a good quality stick margarine, not a tub spread) has a higher water content and different fat structure that can help prevent the sugar from crystallizing, leading to a more consistent texture. The stick of butter brings that irreplaceable, rich, creamy flavor. Using all butter can work, but the margarine blend is a fantastic little hack for foolproof toffee.
- ¼ cup White Karo Syrup: Don’t skip this! This light corn syrup is another guardian against crystallization. It helps interfere with the sugar molecules, ensuring our toffee stays smooth and crunchy, not grainy and sandy.
- 2 cups Chopped Pecan Pieces: We’re adding these right into the toffee itself. They toast in the hot sugar, releasing their oils and becoming incredibly fragrant. They provide a wonderful nutty flavor and textural contrast throughout every single bite.
- ⅔ cup Chocolate Morsels: I’m using semi-sweet here for a perfect balance against the sweet toffee, but feel free to use milk chocolate if you prefer a sweeter finish. The heat from the freshly poured toffee will melt them perfectly for an easy, no-fuss spread.
- ½ cup Grated Pecans: These are for the beautiful finish on top! Grating or very finely chopping the pecans creates a delicate, almost powdery texture that adheres beautifully to the melted chocolate and gives a gorgeous, professional look.
Crafting the Crunch: Your Step-by-Step Guide to Toffee Perfection
Ready for the main event? Let’s do this. Read through all the steps once before you begin. Candy-making is a fast-paced dance, and it helps to know the moves ahead of time!
- Prep Your Station. Before you even think about turning on the stove, get everything ready. This is the cardinal rule of candy-making! Butter a large, rimmed baking sheet (a jelly roll pan is perfect) and have it waiting nearby. Measure out ALL your ingredients and have them within arm’s reach. Once the cooking starts, you won’t have time to run to the pantry. Trust me on this.Chef’s Hack: Having a bowl of ice water nearby is a great idea, just in case you get any hot sugar on your skin. A quick plunge stops the burn instantly.
- The Meltdown. In a heavy-bottomed, large pot (I use a Dutch oven for its excellent heat distribution), combine the sugar, margarine, butter, and Karo syrup. Place it over medium heat and start stirring. I like to use a wooden spoon or a heat-resistant spatula.Chef’s Hack: The “heavy-bottomed” part is non-negotiable. A thin pot will scorch the sugar, giving you a bitter toffee. We want golden, not burnt!
- The Patient Stir. Now, you’re going to stir. And stir. And stir some more. Keep the heat at a steady medium. You’ll see the mixture start to melt, bubble, and slowly transform from a cloudy, pale yellow to a clearer, more vibrant golden color. This is where patience is your best friend. Don’t be tempted to crank up the heat!Chef’s Hack: If you see sugar crystals forming on the sides of the pot, take a wet pastry brush and wash them down. This prevents those crystals from seeding and making your entire batch grainy.
- Watch the Thermometer. Attach your candy thermometer to the side of the pot, making sure the tip is immersed in the toffee but not touching the bottom. Keep stirring constantly. We’re waiting for it to hit 310°F (Hard Crack Stage). This is the most critical step! At this temperature, the sugar syrup will form hard, brittle threads when dropped in ice water.
- Nutty Integration. As soon as you hit 310°F, immediately stir in the 2 cups of chopped pecan pieces. The temperature will drop—this is normal! Keep cooking and stirring until the temperature comes back up to 300°F. The pecans are now perfectly toasted and integrated.
- The Grand Pour. Working quickly but carefully (this stuff is crazy hot!), immediately pour the molten toffee onto your prepared baking sheet. Tilt the pan or use an offset spatula to spread it into a relatively even layer. Don’t worry if it’s not perfect; its rustic charm is part of the appeal!
- Chocolate Blanket. Right away, while the toffee is still piping hot, sprinkle the chocolate morsels evenly over the top. Wait about 2-3 minutes to let them soften and melt from the residual heat. Then, take a spatula or the back of a spoon and gently spread the chocolate into a smooth, even layer over the entire surface.
- The Finishing Touch. Before the chocolate sets, shower the top with your finely grated pecans. This not only adds fantastic flavor and texture but also gives the toffee that beautiful, finished look.
- The Hardest Part: The Wait. Now, walk away. I mean it. Let the toffee cool completely at room temperature. Do not, I repeat, DO NOT put it in the refrigerator to speed this up. That can cause the chocolate to “sweat” later and can sometimes make the toffee sticky. Let it cool naturally for at least 30-45 minutes until it’s firm and the chocolate is set.
- The Satisfying Snap. Once it’s completely cool, it’s time for the fun part! Use your hands to break it into rustic, irregular pieces. You can also place it on a cutting board and give it a sharp tap with the handle of a knife to crack it. Listen for that signature snap—it’s the sound of success!
Sharing the Sweetness: How to Serve Your Homemade Toffee
You’ve just created a masterpiece—now let’s show it off! My favorite way to serve this toffee is piled high in a big, beautiful ceramic bowl or a rustic wooden dough bowl right in the center of the holiday dessert table. It invites people to grab a piece, to linger and chat.
For gifting, this toffee is absolute gold. Layer the pieces between sheets of parchment paper in a decorative tin or a cellophane bag tied with a festive ribbon. Add a little tag that says “Homemade Pecan Toffee Crunch” and you have a gift that genuinely comes from the heart (and the kitchen!). It’s also an incredible topping—crush a few pieces and sprinkle them over vanilla ice cream, a slice of cheesecake, or even your morning oatmeal for a seriously decadent start to the day.
Mix It Up! Creative Twists on the Classic
Once you’ve mastered the classic, the flavor world is your oyster! Here are a few of my favorite ways to play with this recipe:
- The Salty-Sweet Sensation: After you sprinkle on the grated pecans, finish the toffee with a light flaky sea salt (like Maldon). The contrast is absolutely mind-blowing.
- Dark Chocolate Dream: Swap the semi-sweet morsels for a high-quality dark chocolate (around 70%). Its slight bitterness creates an incredibly sophisticated and deep flavor profile.
- Nutty Alternatives: Not a pecan person? No problem! Use an equal amount of almonds or hazelnuts. If using hazelnuts, you can even add a 1/2 teaspoon of Frangelico to the toffee along with the nuts for an extra flavor boost.
- The “Everything Bagel” of Toffee: Use a mix of nuts! Try 1 cup of pecans and 1 cup of almonds. You can even add a handful of toasted pumpkin seeds for a fun twist.
- Dairy-Free Delight: You can make this dairy-free by using a plant-based butter and margarine substitute (make sure they are stick form, not tub) and dairy-free chocolate chips. The results are still phenomenal!
Beau’s Kitchen Chronicles: A Few Parting Thoughts
This recipe has evolved a tiny bit from Grandma Mae’s original—I’m a stickler for that candy thermometer now, mostly because I once ruined a batch by guessing! But the soul of it remains unchanged. It’s a recipe that demands your attention but rewards you tenfold. I’ve made this toffee in a dozen different kitchens, for holiday parties, as a “thank you” for neighbors, and just because I needed a little kitchen therapy. It never fails to bring a smile. Remember, your first batch might not be perfect, and that’s okay. Even the “mistakes” are usually delicious. The goal is to have fun and create something with your own two hands. That’s the real magic of Feastical.
Your Toffee Questions, Answered!
Let’s tackle some common questions to make sure your toffee journey is smooth sailing.
Q: My toffee turned out grainy and sandy. What happened?
A: This is almost always caused by sugar crystallization. This can happen if you didn’t stir constantly, if sugar crystals on the side of the pot fell in, or if the heat was too high. Next time, make sure to stir diligently, wash down the sides of the pot with a wet pastry brush, and keep the heat at a steady medium.
Q: Can I double this recipe?
A: I don’t recommend it, especially if you’re new to candy-making. Doubling the volume can throw off the cooking times and temperature stability, making it harder to get a consistent result. It’s better to make two separate batches for guaranteed perfection.
Q: Why did my chocolate get streaky when I tried to spread it?
A: This usually means you tried to spread the chocolate before it had fully melted from the toffee’s heat, or after the toffee had cooled too much. Be patient and let the chocolate morsels sit for a full 2-3 minutes on the hot toffee until they look shiny and soft before you start spreading.
Q: How should I store this, and how long does it last?
A: Store your toffee in an airtight container at room temperature, with layers separated by parchment paper. It will stay perfectly crisp and delicious for up to 2 weeks (if it lasts that long!). Keep it away from humidity.

Pecan Toffee Crunch
Description
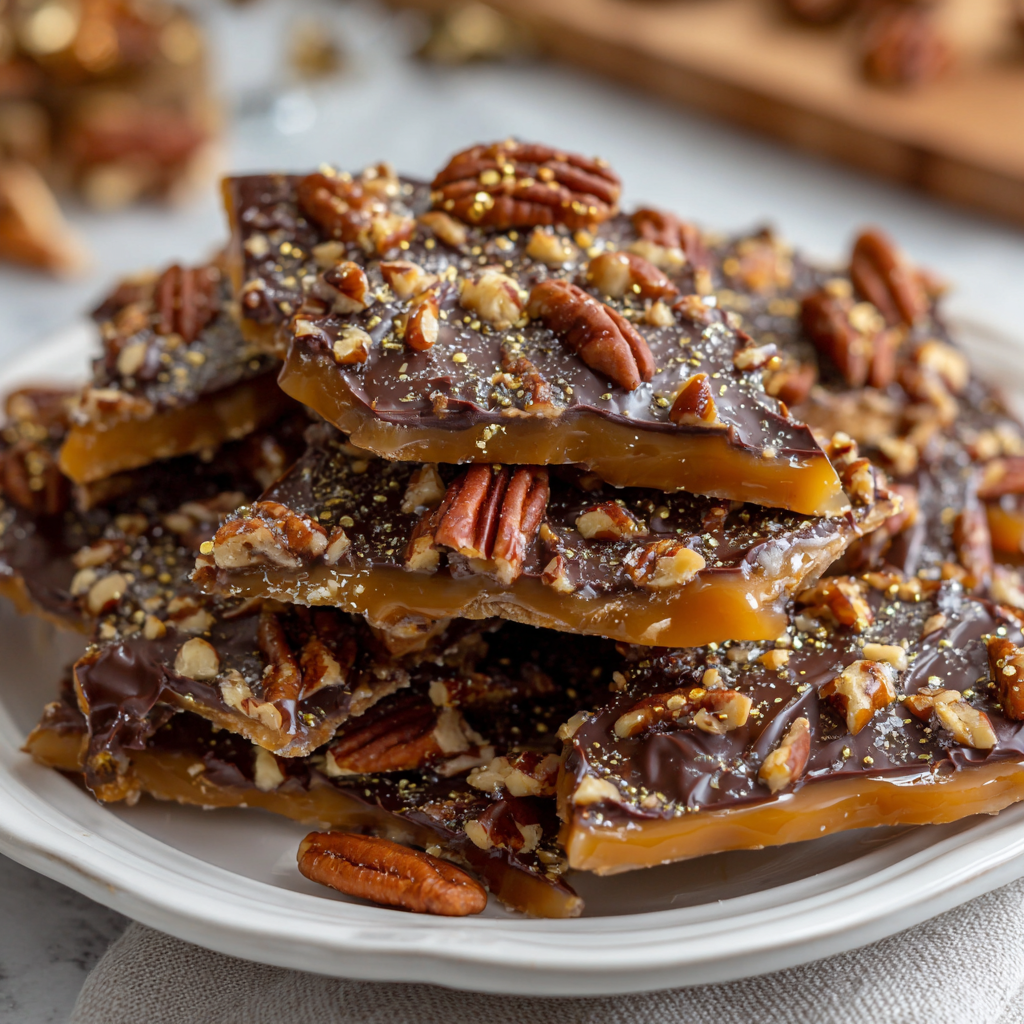
Pecan Toffee Crunch
Golden, buttery, crunchy, chocolate-topped holiday magic
Ingredients
-
2 cups granulated sugar
-
3 sticks margarine + 1 stick butter (all stick form)
-
¼ cup light corn syrup (Karo)
-
2 cups chopped pecans
-
⅔ cup semi-sweet chocolate morsels (or milk chocolate)
-
½ cup finely grated pecans for topping
Instructions
-
Prep your pan: Butter a large, rimmed baking sheet (or jelly roll pan). Have all ingredients measured and ready—candy-making moves fast.
-
Cook the toffee:
-
In a heavy-bottomed pot, combine sugar, margarine, butter, and corn syrup over medium heat.
-
Stir constantly with a wooden spoon or heatproof spatula.
-
Wash down any sugar crystals forming on the pot sides with a wet pastry brush.
-
-
Monitor temperature: Attach a candy thermometer; cook until 310°F (hard crack stage).
-
Add pecans: Stir in 2 cups chopped pecans immediately; cook until temperature returns to ~300°F.
-
Pour and spread: Carefully pour hot toffee onto prepared pan; spread evenly with a spatula.
-
Add chocolate: Sprinkle chocolate morsels over hot toffee; wait 2–3 minutes to soften, then spread into an even layer.
-
Top with grated pecans: Sprinkle finely grated pecans over melted chocolate for texture and visual appeal.
-
Cool completely: Let toffee cool at room temperature for 30–45 minutes until firm. Do not refrigerate.
-
Break into pieces: Once cooled, break into rustic pieces with your hands or a sharp tap from a knife handle. Listen for the signature snap!
Notes
-
Grainy toffee? Usually sugar crystallization. Stir constantly, wash down pot sides, and keep heat medium.
-
Streaky chocolate? Let chocolate sit 2–3 minutes on hot toffee before spreading.
-
Doubling recipe? Better to make two separate batches for consistent results.
-
Storage: Airtight container at room temperature, layers separated with parchment paper. Lasts up to 2 weeks.
Nutrition
- Calories: 150 Cal per 1 oz piece
- Sugar: 12g
- Fat: 10g
- Carbohydrates: 15g
- Protein: 2g
A Note on Nutrition
Hey, let’s be real—this is a celebratory treat, a bite of pure joy! It’s not a health food, and that’s exactly the point. Enjoy it mindfully and in moderation as part of a balanced diet. The provided nutritional info is an estimate per serving (about a 1-ounce piece). The pecans do bring a small amount of healthy fats and protein to the party, but the star of the show here is the unforgettable flavor and experience. So, savor each buttery, crunchy, chocolatey bite without an ounce of guilt!
Your New Holiday Tradition Awaits
And there you have it, friends! My heart and soul poured into this recipe, just for you. Making this Pecan Toffee Crunch is more than just following steps; it’s about creating moments. It’s about the quiet focus of stirring the pot, the triumphant feeling when you hit the right temperature, and the sheer joy of sharing something you made with love.
I am so incredibly proud of you for taking on this candy-making challenge. You’ve got this. So, go forth, create that satisfying snap, and fill your kitchen with the most incredible buttery, nutty aroma. And when you do, I’d love to see it! Tag me on social @Feastical or @BeauCollier so I can cheer you on. Now, get in that kitchen and make some magic. Happy cooking!
The Warm & Cozy Send-Off
So there you have it, friends—the story, the secrets, and the simple steps behind my beloved Pecan Toffee Crunch. It’s more than just a recipe; it’s a edible heirloom, a tangible piece of my family’s history that I’m so thrilled to now share with you. This holiday season, I hope you’ll carve out a little time to create your own kitchen magic. Let the scent of butter and toasting pecans fill your home, and the sound of that first satisfying snap be the start of a new tradition. From my kitchen to yours, happy baking, and may your days be filled with warmth, love, and just the right amount of crunch.
With all my love,
Beau