Wake Up to Magic: Overnight Crème Brûlée French Toast
Hey friends, Beau here! Let’s talk about one of life’s greatest simple pleasures: a brunch that feels like a standing ovation without you having to break a sweat. You know the scene. It’s a lazy Saturday morning, or maybe a holiday, and you’re torn between wanting to be the host with the most and actually, you know, enjoying the company. You deserve a recipe that does the heavy lifting for you, a dish that whispers “you brilliant culinary genius” while you’re still sipping your first coffee. That, my friends, is the sheer power of our Overnight Crème Brûlée French Toast.
This isn’t just any French toast. This is the French toast that dreams are made of. We’re taking everything we love about the elegant, crackly-topped dessert—crème brûlée—and marrying it to the cozy, comforting soul of baked French toast. The result? A buttery, caramelized masterpiece that bakes up golden and bubbling, with a hidden treasure of a caramel base that becomes the glorious, crackly crown when you flip it over. The best part? You do almost all the work the night before. Just assemble, let it chill, and in the morning, you pop it in the oven. The aroma alone will make you a legend in your own kitchen. So, let’s get ready to make some brunch magic that’s as easy as it is unforgettable.
The Brunch That Started It All
This recipe takes me right back to my first “grown-up” holiday hosting gig. I was determined to impress my family with a Christmas morning spread that would knock their cozy socks off. But I also knew I wanted to be present—not chained to the stovetop, flipping individual slices of French toast while everyone else was opening gifts and laughing. I remember digging through my grandma’s old recipe box and finding a faded, butter-stained card for “Overnight French Toast.” It was a starting point, but my chef’s brain started whirring. What if we gave it that crème brûlée treatment? A little more brown sugar, a generous pour of cream, and a splash of that orange liqueur I loved from my favorite dessert. The next morning, when I pulled that golden, puffed-up pan out of the oven and flipped the first slice to reveal that shimmering, crackly caramel crust, I heard a collective gasp. It was a silent, then very loud, victory. That dish taught me a lesson I carry through all my cooking now: the most impressive meals are often the ones that give you your time back.
Gather Your Ingredients for Brunch Bliss
Here’s the beautiful lineup of simple ingredients that transform into something truly spectacular. This is where the magic begins!
- 1 stick (1/2 cup) unsalted butter: This is the rich, creamy foundation of our caramel layer. Using unsalted lets you control the seasoning perfectly. Chef’s Tip: If you only have salted, it’s okay! Just skip any additional salt in the recipe.
- 1 cup packed dark brown sugar: Dark brown sugar has more molasses, which gives our caramel a deeper, almost toffee-like flavor compared to light brown sugar. It’s the secret to that rich, complex sweetness.
- 2 tablespoons light corn syrup: Don’t be scared! This little bit isn’t for extreme sweetness; it’s a wizard that prevents the caramel from crystallizing and seizing up, ensuring a smooth, saucy base every single time. Honey or maple syrup can work in a pinch, but the texture might be slightly different.
- 1 loaf crusty white bread, unsliced: This is your canvas! A sturdy, crusty loaf like a French baguette or a rustic Italian bread is perfect because it holds up to the custard without turning to mush. Great Swap: Challah or brioche will make this extra decadent, while a day-old sourdough adds a wonderful tangy contrast.
- 5 large eggs: The backbone of our custard. They create that lush, creamy texture that sets up perfectly in the oven.
- 1 1/2 cups half-and-half: This is the sweet spot between milk and heavy cream, giving us incredible richness without being overly heavy. For a lighter version, whole milk works. For an ultra-indulgent treat, go for heavy cream!
- 1 teaspoon pure vanilla extract: The soul-warming aroma that makes everything smell and taste like home. Always use the real stuff if you can!
- 1 teaspoon triple sec (orange liqueur, optional): This is my secret weapon! It subtly enhances the vanilla and adds a whisper of bright citrus that cuts through the richness. Don’t worry, the alcohol cooks off. If you don’t have it, a teaspoon of orange zest is a fantastic non-alcoholic substitute.
Let’s Build Your Overnight Masterpiece
Ready to create some kitchen magic? Follow these steps, and you’ll be a brunch hero in no time. I’ve packed each one with my favorite chef hacks to ensure your success.
- Create the Caramel Base: Grab a medium saucepan and place it over medium heat. Add your butter, dark brown sugar, and corn syrup. Let it melt together, stirring frequently with a whisk. You’re looking for it to become completely smooth and just start to bubble gently. This should only take about 3-5 minutes. Chef’s Hack: Don’t walk away! Butter and sugar can go from perfectly golden to burnt in a flash. Once it’s bubbly and unified, immediately pour this liquid gold into your 9×13-inch baking dish. Tilt the dish to spread it into a beautiful, even layer. The smell alone is worth it.
- Prepare the Bread Layer: Now, take your loaf of bread and slice it into thick, generous slices—about 1 to 1.5 inches thick. You want sturdy soldiers that can soak up all that custardy goodness. Arrange the slices tightly over the caramel layer in the dish. It’s okay if they overlap a little or are snug; we’re building a delicious bread puzzle.
- Whisk the Dreamy Custard: In a large bowl, crack in your eggs and give them a quick whisk to break them up. Then, pour in the half-and-half, vanilla extract, and that secret weapon, the triple sec. Whisk it all together until it’s completely smooth and homogenous. You shouldn’t see any strands of egg white. Pro Tip: Whisk gently to avoid incorporating too much air and creating foam. We want a silky custard, not a bubbly one.
- The Soak is Everything: Slowly and deliberately, pour the custard mixture over the arranged bread slices. Try to cover every slice evenly. Now, here’s a crucial step for perfection: gently press down on the bread with your fingers or a spatula. This helps the bread start absorbing the custard right away. You’ll see it drinking it up like a sponge!
- Patience in the Fridge: Cover the baking dish tightly with plastic wrap or a lid. Now, the hardest part: walk away. Tuck it into your refrigerator and let it rest overnight, or for at least 8 hours. This slow soak is non-negotiable. It allows the custard to fully penetrate every single pore of the bread, resulting in that unbelievably creamy, uniform texture that won’t leak liquid when baked.
- Bake to Golden Perfection: The next morning, take the dish out of the fridge about 20-30 minutes before you plan to bake it. Preheat your oven to a steady 350°F (175°C). Remove the cover and place the dish directly into the hot oven. Bake it uncovered for 35-40 minutes. You’ll know it’s done when the top is puffed, beautifully golden brown, and the edges are bubbling furiously with that amazing caramel.
- The Grand Finale: Take the pan out of the oven—be careful, it’s hot!—and let it rest on a wire rack for about 5 minutes. This rest period allows the custard to set just a bit more, making it easier to serve. Then, take a thin spatula, slide it under a slice, and carefully lift and flip it onto a plate. That stunning, glossy, crackly caramel that was on the bottom is now the glorious top! Serve immediately.
How to Serve This Showstopper
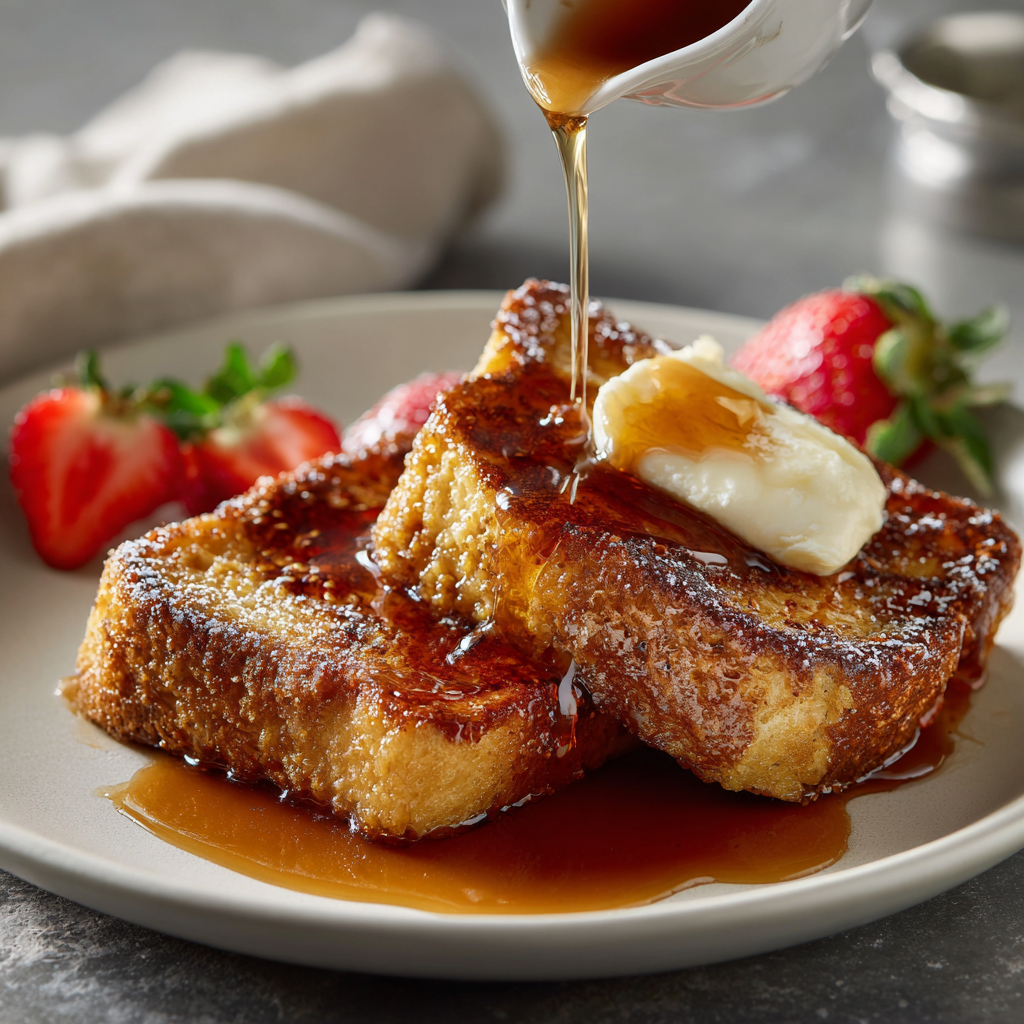
Plating this beauty is part of the fun! Since it’s already rich and decadent, you don’t need much to make it a complete meal. I love serving each caramel-side-up slice with a light dusting of powdered sugar for a pretty snowy effect. A handful of fresh berries—raspberries, strawberries, or blueberries—adds a wonderful pop of color and a fresh, tart contrast to the sweetness. If you really want to lean into the indulgence, a drizzle of pure maple syrup or a dollop of freshly whipped cream is absolutely heavenly. For the savory lovers in the crowd (like me!), serving this with a side of crispy bacon or savory breakfast sausages creates the perfect sweet-and-salty balance that will have everyone coming back for seconds.
Make It Your Own: Delicious Twists & Swaps
The beauty of this recipe is its versatility. Once you’ve mastered the classic, feel free to get creative and play with flavors!
- Apple Cinnamon Twist: Before you pour the caramel into the baking dish, scatter a layer of thinly sliced apples (like Granny Smith or Honeycrisp) over the bottom. Sprinkle the apples with a teaspoon of cinnamon. Then proceed with the caramel and the rest of the recipe. You’ll get a built-in apple pie filling!
- Nutty & Nice: Add a fantastic crunch by sprinkling a half-cup of chopped pecans or walnuts over the caramel sauce right after you pour it. The nuts will toast as it bakes, adding a wonderful texture.
- Chocolate Lover’s Dream: For a truly decadent version, sprinkle a cup of semi-sweet chocolate chips over the bread slices right after you arrange them, before you pour the custard on top.
- Dairy-Free & Delicious: This is easily adaptable! Use vegan butter, and swap the half-and-half for a rich, creamy canned coconut milk. The result is incredibly lush and has a subtle coconut flavor that pairs beautifully with the caramel.
- Boozy Berry Bliss: Macerate some berries the night before! Toss a cup of mixed berries with a tablespoon of that triple sec and a teaspoon of sugar. Let them sit in the fridge, and spoon this boozy berry compote over the finished French toast right before serving.
Beau’s Kitchen Notes
This recipe has been a living, evolving thing in my kitchen for years. I once, in a sleepy daze, used a whole baguette that was far too long for the pan and had to break it into pieces to fit. It turned into a kind of bread-pudding-meets-French-toast hybrid that was messy, hilarious, and absolutely delicious. Don’t be afraid of imperfection! I’ve also learned that the type of bread is your biggest variable. A super-soft sandwich loaf will give you a more spoonable, bread-pudding texture (which is still amazing!), while a crusty, airy loaf gives you that definitive custard-soaked slice. Both are wins in my book. This dish is about joy, not stress.
Your Questions, Answered!
I’ve gotten a lot of questions about this recipe over the years. Here are the most common ones to help you out.
- Can I make this without the overnight soak? You can, but you’ll be missing the key feature! The overnight rest isn’t just for convenience; it’s crucial for the texture. A quick soak (even 30 minutes) will result in a less creamy center and a more “eggy” layer on the bottom, rather than that uniform custard throughout. Trust me, the wait is worth it.
- My caramel sauce hardened in the pan after I poured it. Did I mess up? Not at all! This is totally normal. The caramel will firm up significantly once it hits the cold baking dish and chills in the fridge. Don’t worry one bit. As it bakes, it will melt back down into a luscious sauce and bubble up around the bread, creating that incredible topping.
- Can I freeze this? I don’t recommend freezing the assembled, unbaked casserole. The custard can separate and the bread can become unpleasantly soggy upon thawing. However, you can successfully freeze the baked French toast. Let it cool completely, cut it into portions, wrap them tightly, and freeze for up to 2 months. Reheat in the oven or a toaster oven to bring back the crispness.
- The center seems a little wobbly when I take it out. Is it done? A slight jiggle in the very center is okay—it will continue to set as it rests. However, if it looks truly liquidy, it needs more time. The top should be uniformly puffed and golden brown, and you should see that caramel bubbling vigorously around the edges.

Overnight Crème Brûlée French Toast : Buttery, Caramelized Brunch Magic
Description
Hey friends, Beau here! Let’s be honest—sometimes, the best brunches are the ones that make you look like a culinary wizard while you’re still in your pajamas, coffee in hand. This Overnight Crème Brûlée French Toast is just that: a make-ahead miracle that transforms simple ingredients into a golden, caramelized masterpiece. The buttery brown sugar base melts into a luscious sauce, and the bread soaks up a rich vanilla custard overnight. In the morning? You just pop it in the oven and let your kitchen smell like heaven.
Ingredients
For the Caramel Base
-
½ cup (1 stick) unsalted butter
-
1 cup packed dark brown sugar
-
2 tablespoons light corn syrup (or honey/maple syrup in a pinch)
For the French Toast
-
1 loaf crusty white bread (French or Italian), sliced 1–1½ inches thick
-
5 large eggs
-
1½ cups half-and-half (or whole milk/heavy cream)
-
1 teaspoon pure vanilla extract
-
1 teaspoon triple sec or 1 teaspoon orange zest (optional)
Instructions
-
Make the Caramel Base:
In a medium saucepan over medium heat, melt the butter, brown sugar, and corn syrup together until smooth and just beginning to bubble (about 3–5 minutes). Pour into a 9×13-inch baking dish and tilt to coat evenly. -
Arrange the Bread:
Slice the bread and lay the slices tightly in the dish over the caramel layer. Slight overlap is fine—think cozy, not perfect. -
Whisk the Custard:
In a large bowl, whisk together eggs, half-and-half, vanilla, and triple sec (if using) until smooth. Pour evenly over the bread. Press lightly to help the bread absorb the mixture. -
Chill Overnight:
Cover tightly with plastic wrap and refrigerate for at least 8 hours or overnight. This slow soak creates that signature creamy, custard-like texture. -
Bake to Perfection:
Preheat your oven to 350°F (175°C). Uncover the dish and bake for 35–40 minutes, until golden and puffed, with bubbling caramel around the edges. Let rest 5 minutes before serving. -
Serve & Enjoy:
Flip each portion onto a plate so the caramel side is up. Serve with fresh berries, powdered sugar, or a dollop of whipped cream.
Notes
-
Bread matters: Use a day-old loaf for best texture—it’ll hold up beautifully.
-
No corn syrup? Maple syrup gives a deeper, rustic sweetness.
-
Add flair: Sprinkle pecans, chocolate chips, or sliced apples over the caramel before layering the bread.
-
Storage: Leftovers keep well in the fridge for up to 3 days. Reheat in the oven to restore crispness.
Nutrition
- Calories: 420 Cal Per Serving
- Fat: 22g
- Carbohydrates: 48g
- Protein: 9g
Nutritional Information (Per Serving)
Let’s keep it real, friends. This is a special occasion treat, a celebration in a baking dish. It’s rich, indulgent, and meant to be savored. Here’s a general breakdown per serving (based on 6 servings) so you can enjoy it mindfully. Please note that this is an estimate and can vary based on the specific brands of ingredients you use. If you’re following a strict dietary plan, I always recommend calculating with your exact ingredients.
- Calories: ~420
- Protein: 9g
- Fat: 22g
- Saturated Fat: 12g
- Carbohydrates: 48g
- Sugar: 31g
- Fiber: 1g
- Sodium: 210mg
Your New Brunch Secret Weapon
And there you have it! Your guide to the most stress-free, crowd-pleasing brunch dish that will have everyone thinking you trained under a pastry chef. This Overnight Crème Brûlée French Toast is more than a recipe; it’s a ticket to a relaxing, delicious morning surrounded by good food and great people. It’s the dish you’ll be asked to bring to every potluck and the one your family will request for birthdays and holidays. I hope it brings as much joy and ease to your kitchen as it has to mine. Now, go forth and bake! And don’t forget to tag me @Feastical when you make it—I love seeing your creations!
Final Thoughts: Your Brunch Victory Awaits
So, there you have it. The secret to a stress-free, showstopping brunch isn’t a secret at all—it’s a little planning and a recipe that’s designed to make you look like a rockstar. This Overnight Crème Brûlée French Toast is more than just a dish; it’s your ticket to actually enjoying those slow, magical mornings with the people you love.
You’ve got the blueprint for that perfect, crackly caramel crown and the impossibly creamy custard center. You have the tricks, the twists, and the confidence to make it your own. Remember, the real work happens while you’re dreaming, leaving you with nothing but the simple joy of baking and the unforgettable aroma of success.
So go ahead, be the hero of your next lazy weekend or holiday gathering. Whip this up, tuck it in the fridge, and wake up to your own kitchen magic. You’ve totally got this.
Happy cooking, and enjoy every delicious bite!