Ornament Oreo Truffles: Your New Favorite Holiday Party Trick!
Hey friends, Beau here! Can you smell it? That’s the scent of sugar cookies, pine trees, and pure, unadulterated holiday magic starting to swirl in the air. And you know what that means—it’s time to roll up our sleeves, put on our favorite festive apron, and create some edible joy that’ll have everyone talking.
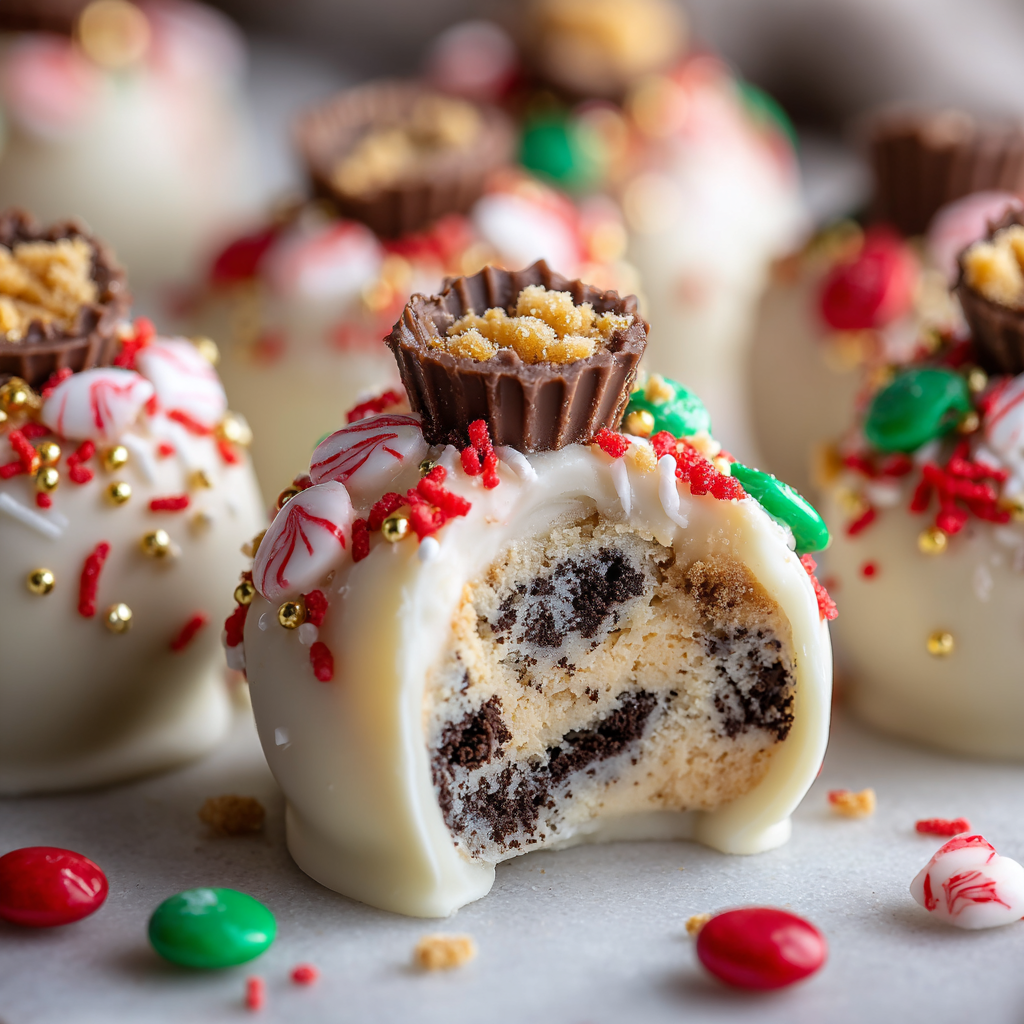
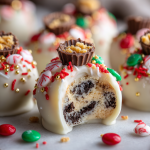
Today, we’re diving headfirst into one of my all-time favorite, foolproof, crowd-pleasing recipes: Ornament Oreo Truffles. Imagine this: a rich, creamy, no-bake Oreo cheesecake center, hugged by a sleek shell of smooth white chocolate, and dressed up like the most adorable mini-ornaments you’ve ever seen. They’re creamy, they’re crunchy, and they are absolutely dressed to impress.
I’m talking Christmas cheer in every single bite. The best part? You don’t need to be a pastry chef to pull these off. Whether you’re the designated dessert-bringer for the family potluck or you just want to whip up something special that makes your kitchen smell like happiness, these truffles are your secret weapon. They’re simple, soulful, and so satisfying to make. So, grab your food processor (or a trusty zip-top bag and a rolling pin!), and let’s make some magic together.
The Christmas Eve Kitchen Catastrophe (That Started a Tradition)
I have to share a little story with you. A few years back, I volunteered to bring dessert to my family’s massive Christmas Eve bash. I had this grand plan for a complicated, four-layer yule log cake. Spoiler alert: it was a disaster of epic proportions. The cake cracked, the frosting split, and I was left staring at a culinary crime scene at 10 PM on December 24th with a kitchen covered in chocolate splatters.
In a mild panic, I scanned my pantry. Oreos. Cream cheese. Some leftover candy from a baking project. A lightbulb went off. I threw everything together, rolled them into balls, and gave them a quick dip in some melting wafers. To make them look festive, I raided my kids’ candy stash and stuck a little hook on top. They were a little rustic, I’ll admit, but when I brought them to the party? They were the first platter to be wiped clean. My aunt still asks me every year, “Are you bringing your famous ornament balls?”
That kitchen fail taught me a beautiful lesson: the best holiday treats aren’t about perfection; they’re about the love and fun you stir into them. These truffles are proof that a little creativity (and a lot of Oreos) can save the day and start a delicious new tradition.
Gathering Your Truffle-Making Squad: The Ingredients
Here’s the beautiful part: you only need a handful of simple ingredients to create something truly spectacular. I’ve doubled the classic recipe here to make a party-sized batch of 80 truffles because, trust me, you’ll want plenty to share (and a few to hide for yourself!).
- 80 Oreo Cookies, finely crushed: This is the heart and soul of our truffle. I don’t scrape out the filling—we use the whole cookie! That creamy center is part of the magic. Chef’s Insight: For a deeper chocolate flavor, you can use Double Stuf Oreos, but your mixture will be a bit softer.
- 16 oz (2 blocks) Cream Cheese, softened: This is what transforms crushed cookies into that luscious, creamy, cheesecake-like filling. Pro Tip: Make sure your cream cheese is at room temperature. This is non-negotiable for a smooth, lump-free mixture! If you forget to take it out, you can microwave it for 10-15 seconds on low power.
- 48 oz White Chocolate or Vanilla Candy Melts: This is our ornament’s shiny coat. Substitution Tip: High-quality white chocolate chips will taste amazing but can be trickier to melt smoothly. Candy melts (like Wilton or Merckens) are designed for coating and will give you a perfect, snap-able shell every time. I’m using them here for foolproof success!
- 80 mini Reese’s Peanut Butter Cups: These are the adorable “ornament tops” that also add a fantastic peanut butter surprise. Unwrap them all before you start dipping—it’s a great job for a helper!
- 2 cups Red Licorice Lace (like Twizzlers Pull ‘n’ Peel): Cut into 2-inch strips. This creates the cute little hook for our ornament. If you can’t find red, any color will work!
- 2 tbsp Holiday Nonpareils or Sprinkles: For that festive sparkle. This is where you can really let your personality shine—use your favorite holiday sprinkles!
Let’s Get Rolling: Your Step-by-Step Guide to Truffle Perfection
Okay, team. This is where the fun begins. I’ll walk you through each step with all my favorite little hacks to make this process smooth, fun, and totally stress-free.
Step 1: Create the Truffle Mixture
First, we need to turn those Oreos into a fine, dark sand. You have two great options here. The Food Processor Method is my go-to for speed and consistency. Just toss in the Oreos (in batches if needed) and pulse until you have fine, even crumbs. The Low-Tech Method is just as effective! Place the Oreos in a large, sturdy zip-top bag, press out the air, and seal it. Then, grab a rolling pin and channel any holiday stress into crushing those cookies into a uniform crumb. No big pieces left!
Now, in a large mixing bowl, combine the Oreo crumbs with your softened cream cheese. If you’re adding the peppermint twist, now’s the time for that 1 tsp of peppermint extract. Use a hand mixer or just a sturdy spatula to blend it all together. You’ll know it’s ready when the mixture is completely uniform, dark, and holds together when you pinch it. It should look like a thick, fudgy dough. Chef’s Hack: Scrape down the sides of the bowl a few times to make sure everything is fully incorporated.
Step 2: Shape and Chill
Line a large baking sheet with parchment paper. This is crucial for easy cleanup and preventing sticking. Now, using a small cookie scoop (about 1 teaspoon in size) or a measuring spoon, portion out the mixture. Roll each portion between your palms to form a smooth, round ball. Place each ball on the prepared tray.
Once all the truffles are rolled, pop the entire baking sheet into the freezer for 20-30 minutes. Don’t skip this step! This firming-up stage is what makes dipping them in chocolate so much easier. A firm, cold truffle won’t fall apart in the warm chocolate.
Step 3: Melt the Chocolate Like a Pro
While the truffles are chilling, it’s time to melt your coating. Place your candy melts or white chocolate chips in a microwave-safe bowl. The key to smooth, perfect melting is low and slow. Microwave on high power for 30 seconds, then stop and stir. Even if it doesn’t look melted, stir! Then, microwave for another 30 seconds and stir again. Continue this process in 15-20 second bursts, stirring vigorously each time, until the chocolate is completely smooth and fluid.
Chef’s Hack: If your chocolate seems too thick, you can add a tiny, tiny amount of coconut oil or vegetable shortening (about 1/2 teaspoon at a time) to thin it out to a perfect dipping consistency.
Step 4: The Grand Dip & Decorate
This is the most fun part! Take your truffles out of the freezer. Working with a few at a time (so they stay cold), drop one truffle into the melted chocolate. Use a fork or a dipping tool to gently roll it around until it’s completely coated. Lift it out with the fork, and gently tap the fork on the edge of the bowl to shake off any excess chocolate. This is the secret to a thin, professional-looking shell.
Carefully place the dipped truffle back onto the parchment-lined tray. Now, for the magic—act quickly before the shell sets! Gently press a mini peanut butter cup onto the top to form the ornament cap. Then, take a 2-inch piece of your red licorice lace, fold it into a “J” or hook shape, and tuck it under the front of the peanut butter cup. Finally, while the chocolate is still wet, add a pinch of your festive sprinkles or nonpareils. Repeat with all the truffles!
Step 5: Set, Store, and Celebrate!
Let the truffles sit at room temperature until the chocolate shell is completely firm and hard. This usually takes about 30-60 minutes. If you’re in a hurry, you can pop them in the refrigerator for 15-20 minutes to speed things up. Once set, transfer them to an airtight container. They store beautifully in the refrigerator for up to a week… if they last that long!
How to Serve These Edible Ornaments
Presentation is half the fun! I love arranging these truffles on a large platter or a tiered dessert stand to really show off their adorable ornament shape. For an extra festive touch, line the platter with a piece of burlap or a holiday-themed tea towel to look like tree skirts.
These are the perfect make-ahead dessert for any holiday gathering. They’re a superstar on cookie swap platters, the perfect sweet ending to a Christmas dinner, or a wonderful homemade gift. Package a few in a cute cellophane bag tied with a ribbon, and you’ve got a present that’s straight from the heart (and the kitchen!).
Get Creative! Fun Flavor Twists & Swaps
Once you’ve mastered the classic, the world is your oyster… or should I say, your truffle! Here are a few of my favorite ways to mix things up:
- Peppermint Sparkle: Add 1 tsp of peppermint extract to the Oreo mixture for a refreshing, minty center. For the coating, use crushed candy canes instead of sprinkles for a classic holiday combo.
- Colorful Ornament Ball: Instead of all white chocolate, divide your coating and melt some red and green candy melts too. Dip a third of your truffles in each color for a vibrant, multicolored platter that looks like a box of classic Christmas ornaments.
- Glitter & Gold: For a truly elegant look, skip the sprinkles. After dipping, while the chocolate is still wet, dust the truffles with edible gold or silver dust for a sophisticated shimmer.
- Nut-Free Variation: If you have nut allergies, simply swap the mini Reese’s for another topping. A yellow peanut-shaped candy (like a Mike and Ike) can work, or just use a larger, festive sprinkle or a solid milk chocolate disk.
- Golden Oreo Joy: For a different flavor profile, try using Golden Oreos instead of the classic chocolate ones. You’ll get a blondie-like truffle that’s just as delicious!
Beau’s Chef’s Notes: A Few Parting Thoughts
This recipe has evolved so much since that frantic Christmas Eve. I’ve learned that using a cookie scoop is the real key to uniform truffles—no more lopsided ornaments! I also used to be intimidated by dipping, but the fork-tapping method truly changed the game for me. The biggest evolution, though, has been in the decorations. My kids love helping with this part now, and every year they come up with a new “design.” Some years the ornaments have faces, other years they’re covered in so many sprinkles you can barely see the chocolate. And you know what? Those are always my favorites.
Your Ornament Truffle Questions, Answered!
Let’s tackle a few common questions to ensure your truffle-making is a breeze.
Q: My truffle mixture is too soft/sticky to roll. What did I do wrong?
A: This usually happens if the cream cheese was too warm or if you used Double Stuf Oreos. No worries! Just pop the whole bowl of mixture into the refrigerator for 20-30 minutes to firm up before rolling. You can also lightly dampen your hands with water while rolling to prevent sticking.
Q: Why is my melted chocolate seizing up or getting clumpy?
A> The enemy of melted chocolate is water! Even a single drop can cause it to seize. Make sure your bowl, utensils, and truffles are completely dry. If it does seize, try stirring in a small amount of vegetable oil (a teaspoon at a time) to bring it back. If it’s beyond saving, it’s best to start with a new batch of melts.
Q: Can I make these truffles ahead of time?
A: Absolutely! They are the perfect make-ahead dessert. You can store them in an airtight container in the refrigerator for up to a week, or even freeze them for up to 3 months. Just thaw in the fridge before serving.
Q: My chocolate coating is too thick. How can I thin it out?
A: This is a common issue. Simply add a very small amount of paramount crystals, coconut oil, or vegetable shortening (start with 1/2 teaspoon) to the melted chocolate and stir until smooth. This will thin it to a perfect dipping consistency.
Ornament Oreo Truffles
Description
There’s nothing quite like the smell of chocolate, cookies, and holiday cheer swirling in the kitchen. These Ornament Oreo Truffles are creamy, chocolatey, and perfectly festive—like mini edible ornaments for your holiday spread. The best part? No baking required! With just a few simple ingredients, you can create a treat that will wow your friends, family, and coworkers.
Ingredients
-
80 Oreo cookies, finely crushed (whole cookies, filling included)
-
16 oz (2 blocks) cream cheese, softened
-
48 oz white chocolate or vanilla candy melts
-
80 mini Reese’s Peanut Butter Cups, unwrapped
-
2 cups red licorice lace (like Twizzlers Pull ‘n’ Peel), cut into 2-inch strips
-
2 tbsp holiday nonpareils or sprinkles
-
Optional: 1 tsp peppermint extract for a minty twist
Tips:
-
Room-temperature cream cheese ensures a smooth, lump-free truffle mixture.
-
Candy melts give a perfect, glossy coating that sets nicely.
-
A cookie scoop helps create uniform truffles.
Instructions
1. Make the Truffle Base
-
Crush Oreos into fine crumbs using a food processor or place in a zip-top bag and crush with a rolling pin.
-
In a large bowl, mix Oreo crumbs with cream cheese (and peppermint extract if using) until fully combined. The mixture should hold together when pinched.
2. Shape and Chill
-
Line a baking sheet with parchment paper.
-
Using a small cookie scoop or teaspoon, form balls from the mixture and place them on the sheet.
-
Freeze for 20–30 minutes to firm up.
3. Melt the Chocolate
-
Melt candy melts in a microwave-safe bowl in 30-second intervals, stirring after each interval until smooth.
-
If the chocolate is too thick, add a tiny amount of coconut oil or vegetable shortening (½ tsp at a time) to thin.
4. Dip and Decorate
-
Dip chilled truffles in melted chocolate using a fork or dipping tool. Tap off excess chocolate.
-
Place back on parchment. Press a mini peanut butter cup on top to form the ornament cap.
-
Insert a 2-inch licorice strip under the cup to create a hook.
-
Sprinkle nonpareils on top while chocolate is still wet.
5. Set and Store
-
Let truffles sit until chocolate is firm (30–60 minutes at room temperature).
-
Store in an airtight container in the fridge for up to 1 week or freeze for up to 3 months.
Notes
-
Peppermint Sparkle: Add peppermint extract to the filling; top with crushed candy canes.
-
Colorful Ornaments: Use red and green candy melts for variety.
-
Elegant Touch: Dust truffles with edible gold or silver for a sophisticated look.
-
Nut-Free Option: Replace peanut butter cups with chocolate disks or decorative candies.
Nutrition
- Calories: 120 Cal per truffle
- Sugar: 9g
- Fat: 7g
- Carbohydrates: 12g
Nutritional Information (For Your Info!)
Alright, let’s be real—these are a treat, through and through! But I believe in transparency, so here’s a general breakdown per truffle (approximate, as ingredients can vary). Remember, this is for one truffle from a batch of 80.
Per Truffle: Calories: 120 | Carbohydrates: 12g | Fat: 7g | Sugar: 9g | Protein: 1g
The main thing to know is that these are a rich, indulgent dessert perfect for sharing and savoring. The joy they bring is worth every bite! Enjoy them mindfully as part of your holiday celebrations.
Final Thoughts from My Kitchen to Yours
Well, there you have it, my friends. My ultimate guide to creating these unforgettable Ornament Oreo Truffles. More than just a recipe, this is an invitation to create a little bit of edible magic this holiday season. It’s about the laughter that happens while you’re rolling the balls, the pride you feel when you see that perfect, shiny shell, and the joy of sharing something you made with love.
So don’t stress about perfection. Embrace the fun, maybe get a little messy, and create a treat that’s as full of personality as you are. I can’t wait for you to try them. From my Feastical family to yours, have the happiest, most delicious holiday season!
Let me know in the comments how your truffles turn out! And if you snap a pic, tag me on social @feastical—I love seeing your creations.
Happy Cooking,
Beau
<!– End Final