
Your New Favorite Grab-and-Go Snack is Just 10 Minutes Away
Hey friends, Beau here! Let’s be real for a second. How many times has that 3 PM slump hit you like a ton of bricks, sending you on a desperate scavenger hunt through the pantry for something—anything—that isn’t a bag of chips or a sad, forgotten candy bar from last Halloween? Your energy is crashing, your focus is fading, and your stomach is staging a full-scale mutiny. We’ve all been there. That exact feeling, my friends, is precisely why I’m so obsessed with the magic of No-Bake Energy Balls.
These little power-packed spheres of joy are the ultimate kitchen hack for busy lives. They’re the answer to your hangry prayers, the hero of your hectic afternoon, and the perfect pre-workout fuel that actually tastes like a treat. The best part? You don’t need to turn on your oven, you probably have most of the ingredients in your pantry right now, and they come together faster than you can decide what to watch on Netflix tonight.
We’re talking a simple, wholesome mix of gluten-free oats, creamy nut butter, a touch of natural sweetness from maple syrup, and a powerhouse punch of seeds for staying power. They’re customizable, kid-friendly, and so satisfying. Think of them as a protein bar’s cooler, more delicious cousin—the one that knows how to have a good time without any of the processed junk. So, let’s ditch the crummy cravings and whip up a batch of these feel-good bites together. Your future self, brimming with energy and satisfaction, will thank you.
A Batch of Energy Balls and a Side of Nostalgia
This recipe takes me right back to my early days in a tiny apartment kitchen with counter space the size of a postage stamp. I was constantly testing recipes for Feastical, and my wonderful (and incredibly patient) friends were my unofficial taste-testers. One Tuesday, my buddy Leo was coming over after his marathon training runs, and he’d always be ravenous. I wanted to have something ready for him that was quick, energy-dense, and wouldn’t weigh him down.
I remember scrounging through my cabinets, pulling out a half-empty jar of almond butter, some oats, a bottle of maple syrup from a recent trip to Vermont, and the last of a bag of chocolate chips. I mixed it all together in one bowl, rolled them into little lumpy balls, and tossed them in the fridge. When Leo tried one, his eyes lit up. “Dude, what are these? They’re incredible!” He promptly nicknamed them “Power Pellets” and would always ask if I had a stash for him. That was the moment I knew this wasn’t just a recipe; it was a tool for connection, a way to show care through food, even something as simple as a no-bake snack. It’s a feeling I hope you get to share, too.
Gathering Your Energy-Ball Arsenal
The beauty of this recipe is in its flexibility, but let’s talk about what each ingredient brings to the party. This is your culinary toolkit for creating the perfect bite!
- 1 cup gluten-free rolled oats: This is the foundation, the heartiness that gives these balls their substance. Chef’s Insight: Make sure you’re using rolled oats (sometimes called old-fashioned oats), not quick oats. Rolled oats have a better texture and hold up perfectly without getting mushy. They’re naturally gluten-free, but always check the packaging if you have a severe allergy.
- 1/2 cup nut butter: This is the glue that holds everything together and provides healthy fats and protein. Substitution Tip: Creamy peanut butter is a classic, but almond butter, cashew butter, or even sunflower seed butter (for a nut-free version) work beautifully! Just make sure it’s a natural, stir-able kind. The super-processed, oily separated ones can sometimes change the texture.
- 1/4 cup maple syrup or honey: Our natural sweetener! It adds just enough sweetness to feel like a treat and helps bind the ingredients. Substitution Tip: Pure maple syrup keeps this recipe vegan, but raw honey works great too. If you need a sugar-free option, a sticky liquid like date syrup is a fantastic swap.
- 2 tbsp chia seeds or flaxseeds: Don’t let their size fool you—these tiny seeds are nutritional powerhouses, adding fiber, omega-3s, and a lovely little crunch. Chef’s Insight: If you use flaxseed, I recommend ground flaxseed (flax meal) for easier digestion and a smoother texture, but whole works in a pinch!
- 1/4 cup mini chocolate chips or dried fruit (optional): The fun mix-in! This is where you can really make these your own. Substitution Tip: Mini chocolate chips are my weakness, but chopped dried cranberries, raisins, chopped apricots, or even cacao nibs for a less-sweet chocolatey crunch are all amazing.
- 1/2 tsp vanilla extract: The flavor enhancer. A splash of vanilla adds a warm, comforting depth that makes these taste like they came from a fancy bakery.
- Pinch of salt: The secret weapon! Salt balances the sweetness and makes all the other flavors pop. Trust me on this one.
Let’s Get Rolling: Your Foolproof Guide
Ready to make some magic? Grab a medium-sized mixing bowl and a spatula—that’s seriously all the equipment you need. Let’s do this!
Step 1: The Big Mix. In your bowl, combine the rolled oats, nut butter, maple syrup, chia or flax seeds, vanilla extract, and that all-important pinch of salt. Now, dig in with a sturdy spatula or wooden spoon and mix until everything is fully combined. You’ll know it’s ready when there are no dry spots of oats left and the mixture looks uniformly sticky. Chef’s Hack: If your nut butter is straight from the fridge and a little stiff, pop it in the microwave for 15-20 seconds to loosen it up. It makes mixing a total breeze.
Step 2: The Fun Part. Now, stir in your chosen mix-ins! Fold those chocolate chips or dried fruit pieces evenly throughout the mixture. This is also a great time to taste-test (one of the best perks of being the chef!). Does it need a pinch more salt? A tiny drizzle more maple syrup? Adjust to your liking.
Step 3: Ball Time! Here’s where you get hands-on. Using a tablespoon or a small cookie scoop, portion out the mixture. Then, roll each portion between your palms to form a smooth, compact ball, about 1 inch in diameter. Chef’s Hack: If the mixture is too sticky to handle, lightly wet your hands with cold water. This creates a non-stick barrier and makes rolling clean, perfect balls incredibly easy. If the mixture is too dry and crumbly, see the troubleshooting section below—it’s a simple fix!
Step 4: The Chill Session. Place your beautiful energy balls on a plate or baking sheet lined with parchment paper. Pop them in the refrigerator for at least 20-30 minutes to let them firm up. This chilling step is crucial—it allows the oats and chia seeds to soak up the moisture, transforming your mixture from sticky to perfectly firm and chewy. Chef’s Insight: I know it’s tempting to skip this, but patience is key here! It makes all the difference in the final texture.
And that’s it! You’ve just created a week’s worth of healthy snacks. See? I told you it was easy.
How to Serve & Savor Your Creation
Once they’re set, transfer your energy balls to an airtight container. They’ll keep happily in the fridge for up to two weeks (if they last that long!), or you can freeze them for up to three months for a ready-to-go stash.
I love grabbing one with my morning coffee for a sustained energy boost, tossing a couple in a small container for a mid-afternoon pick-me-up at my desk, or even having one as a post-dinner treat that satisfies my sweet tooth without the sugar crash. They’re the perfect portable snack for hikes, road trips, or just stashing in your bag for whenever hunger strikes.
Mix It Up: Endless Flavor Possibilities
The basic formula is your playground! Once you’ve mastered the classic, try one of these delicious twists:
- Cranberry Orange Bliss: Swap the chocolate chips for dried cranberries and add the zest of one orange to the mixture. So bright and refreshing!
- Almond Joy Delight: Use almond butter, swap half the oats for unsweetened shredded coconut, and use dark chocolate chips. You’ll feel like you’re on a tropical vacation.
- Gingerbread Spice: Add a teaspoon of molasses along with the maple syrup, and mix in ½ tsp of cinnamon, ¼ tsp of ginger, and a pinch of nutmeg and cloves. Holiday flavors all year round!
- Protein Power-Up: For an extra protein kick, stir in 2-3 tablespoons of your favorite vanilla or chocolate protein powder. You may need to add a teaspoon of milk or water if the mixture gets too dry.
- Sunflower Seed Crunch (Nut-Free): Use sunflower seed butter and pumpkin seeds (pepitas) instead of chia seeds. A perfect safe option for school lunches.
Beau’s Kitchen Notes & Stories
This recipe has evolved so much since that first batch for Leo. I’ve made them for countless potlucks, new parents (the ultimate gift!), and as a quick fix for my own crazy days. I once accidentally used steel-cut oats instead of rolled oats—do not recommend, friends. We ended up with a batch of… let’s call them “texturally challenging pebbles.” Lesson learned!
The other beautiful thing about this recipe is that it’s a fantastic one to make with kids. There’s no hot oven involved, and they love getting their hands dirty to roll the balls. It’s a wonderful way to get them excited about cooking and eating wholesome ingredients. Don’t stress about making them perfectly round. Lumpy, imperfect, made-with-love balls taste just as good, I promise.
Your Questions, Answered!
Q: My mixture is too dry and crumbly! It won’t stick together when I try to roll it. What did I do wrong?
A: No worries, this is an easy fix! The dryness usually means your nut butter was a bit too thick or you measured your oats a little too generously. Simply add more moisture. Add another tablespoon of nut butter or maple syrup (or even a tiny splash of milk) and mix it in. It should come together perfectly.
Q: My mixture is too wet and sticky! How can I salvage it?
A: This means you might have a particularly runny nut butter or added a touch too much syrup. The solution is to add more dry ingredients. Mix in another tablespoon or two of oats or some extra chia seeds until the consistency is firm enough to roll.
Q: Can I make these without nut butter?
A: Absolutely! For a nut-free version, sunflower seed butter is my top recommendation. Tahini (sesame seed paste) also works, but it will give a more savory, halva-like flavor, so you might want to add a little extra sweetener.
Q: How long do they really last, and can I freeze them?
A: In an airtight container in the fridge, they’ll stay fresh and delicious for up to 2 weeks. They are also a fantastic candidate for freezing! Place them in a single layer on a baking sheet to freeze solid, then transfer to a freezer bag. They’ll keep for up to 3 months. Thaw in the fridge or just grab one and let it thaw for 10-15 minutes on the counter.
Print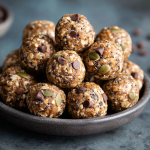
No-Bake Energy Balls
Description
Hey friends, Beau here! We all know that 3 PM slump—the one that sends you rummaging through the pantry for anything remotely edible. Enter these No-Bake Energy Balls: tiny, power-packed snacks that are nutritious, portable, and downright addictive.
Ingredients
Base Ingredients:
-
1 cup gluten-free rolled oats
-
½ cup nut butter (almond, peanut, cashew, or sunflower seed for nut-free)
-
¼ cup maple syrup or honey
-
2 tbsp chia seeds or flaxseeds
-
½ tsp vanilla extract
-
Pinch of salt
Optional Mix-Ins:
-
¼ cup mini chocolate chips or dried fruit
Instructions
1. The Big Mix:
-
Combine oats, nut butter, maple syrup, chia/flax seeds, vanilla, and salt in a medium bowl. Mix until uniform and sticky.
Chef’s Hack: Warm cold nut butter 15–20 sec in microwave for easier mixing.
2. Mix-Ins:
-
Fold in chocolate chips, dried fruit, or any other desired add-ins. Taste and adjust sweetness or salt if needed.
3. Roll Time:
-
Using a tablespoon or small cookie scoop, portion the mixture and roll between palms into 1-inch balls.
Tip: Wet hands slightly for non-stick rolling. Too dry? Add a bit more nut butter or maple syrup. Too wet? Add oats or chia seeds.
4. Chill Session:
-
Place balls on parchment-lined tray and refrigerate 20–30 min until firm and chewy.
Notes
-
First batch for friends taught me patience: proper chilling is key for perfect texture.
-
Kids love rolling these—no oven required and hands-on fun!
-
Imperfectly shaped balls taste just as good as perfect ones.
Nutrition
- Calories: 120 Cal per ball
- Fat: 7 g
- Carbohydrates: 12 g
- Fiber: 2 g
- Protein: 3 g
Quick Nutritional Overview
(Approximate values per ball, based on a batch of 14 using peanut butter and chocolate chips)
- Calories: 120
- Protein: 3g
- Carbohydrates: 12g
- Fat: 7g
- Fiber: 2g
Remember, these are estimates and can vary based on your specific ingredients and brands. They’re a source of healthy fats, complex carbs, and a little protein for lasting energy!
Final Thoughts
What began as a desperate kitchen experiment to feed a hungry friend has revealed itself to be so much more than a recipe. These no-bake energy balls are a testament to the idea that the most powerful solutions are often the simplest. They are nutrition science made accessible, a creative outlet made edible, and a gesture of care made delicious.