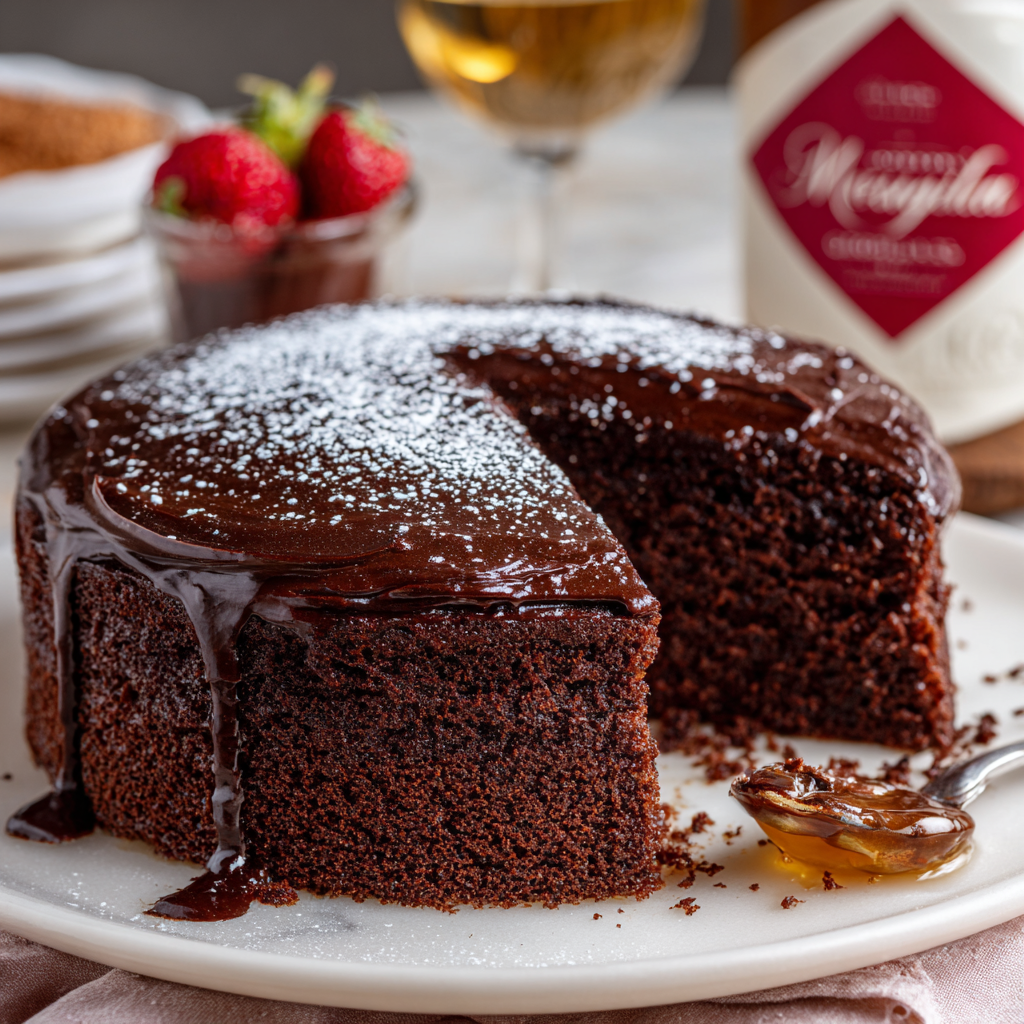
Your New Go-To Moist Chocolate Cake Recipe (Seriously, It’s a Game-Changer)
Hey friends, Beau from Feastical here! Let’s have a real talk for a second. Is there anything in this world more universally comforting, more celebratory, more downright soul-satisfying than a perfect slice of chocolate cake? I’m not talking about a dry, crumbly, “meh” piece of cake. I’m talking about the moist chocolate cake of your dreams. The kind that’s so deeply chocolatey, so tender, and so melt-in-your-mouth good that you have to close your eyes for a second after the first bite. The kind that makes you wonder if you should just eat it with a fork or if it’s socially acceptable to just dive in face-first.
Well, my foodie friends, that cake is right here. This isn’t just a recipe; it’s my kitchen workhorse, my secret weapon for birthdays, potlucks, and those “I just need chocolate cake NOW” moments. It’s incredibly simple to make, but the results are pure magic. We’re using a simple, one-bowl method (minimal cleanup for the win!) and one secret ingredient that takes the chocolate flavor to a whole new level. So, preheat that oven, grab your favorite mixing bowl, and let’s bake a cake that’s about to become a legend in your household. Get ready to fall in love.
The Cake That Started It All
This cake recipe takes me right back to my grandma’s kitchen. Her house always smelled like a beautiful mix of fresh linen, garden soil, and, without fail, something sweet baking in the oven. For every single birthday in our family, without exception, she would make her famous chocolate cake. It was a towering, glorious thing, slathered in a fudgy frosting that would crack when you cut into it.
I remember standing on a wobbly wooden stool, “helping” her by carefully pouring the flour while she held the measuring cup. My job was always to add the vanilla extract – a sacred duty I took very seriously. But the most vivid memory is of her adding a cup of hot, strong coffee to the batter. Little-kid me was horrified! “Coffee?! Grandma, that’s going to taste so bitter!” I’d protest. She’d just wink and say, “Trust me, Beau-Beau. It’s the magic.” And oh, was she right. That coffee doesn’t make the cake taste like coffee; it just makes the chocolate taste more like chocolate. It’s the ultimate kitchen trick, and it’s one I’ve carried with me ever since. Every time I make this cake, it’s like getting a warm, chocolatey hug from her.
Gathering Your Chocolate Dream Team
Here’s everything you’ll need to create this masterpiece. The beauty of this list is its simplicity – you probably have most of this in your pantry right now! Let’s break it down.
- 1 ¾ cups all-purpose flour: The sturdy foundation of our cake. For a slightly lighter crumb, you can sift it first, but it’s not totally necessary. For a gluten-free swap, a 1:1 GF baking blend works wonderfully here.
- ¾ cup unsweetened cocoa powder: This is where the magic starts! Use a good-quality cocoa powder for the best, richest flavor. I’m a huge fan of Dutch-processed cocoa for its deep, mellow flavor, but natural unsweetened cocoa works perfectly too.
- 2 cups granulated sugar: Sweetens the deal and helps create that beautifully tender crumb.
- 1 ½ tsp baking powder & 1 ½ tsp baking soda: Our dynamic leavening duo! They work together to give this cake its impressive rise and airy texture. Make sure they’re not expired for maximum lift.
- 1 tsp salt: Do not skip this! Salt is the flavor enhancer that makes all the chocolatey goodness pop and prevents the cake from tasting flat.
- 2 large eggs: They should be at room temperature to incorporate better into the batter, giving the cake structure and richness.
- 1 cup whole milk: The fat content in whole milk adds incredible moisture and tenderness. For a dairy-free version, unsweetened almond or oat milk are great substitutes.
- ½ cup vegetable oil: Oil, unlike butter, keeps this cake supremely moist and soft for days. Canola or a light olive oil also work.
- 2 tsp vanilla extract: The classic flavor backbone that complements the chocolate so well.
- 1 cup boiling water & 1 cup hot brewed coffee: Here’s the secret weapon! The hot liquid “blooms” the cocoa powder, intensifying its flavor. The coffee is the ultimate enhancer – it makes the chocolate taste richer and deeper without a trace of coffee flavor. If you’re avoiding caffeine, just use all boiling water.
Let’s Bake! Your Step-by-Step Guide to Cake Victory
Don’t let the number of steps fool you—this process is a breeze. Read through once, then let’s get mixing!
Step 1: Prep Like a Pro. First things first, preheat your oven to 350°F (175°C). This is non-negotiable for even baking. Now, grab your two 9-inch round cake pans. My absolute best hack for ensuring a cake that releases perfectly every time? Line the bottoms with a circle of parchment paper, then grease the parchment and the sides of the pan with a little butter or baking spray, and finally dust it with a light coating of cocoa powder (instead of flour) to avoid any white spots on your beautiful chocolate cake. Set those aside.
Step 2: The Dry Team Assembles. In a large bowl—seriously, make sure it’s big enough for all the ingredients—whisk together your flour, cocoa powder, sugar, baking powder, baking soda, and salt. Give it a really good whisk for about a minute. This not only combines everything but also aerates the dry ingredients, which helps with our texture. Taste the air—it already smells amazing, right?
Step 3: The Wet Team Joins the Party. Now, make a well in the center of your dry ingredients and add in the eggs, milk, vegetable oil, and vanilla extract. Using a hand mixer (or a sturdy whisk and some serious elbow grease), beat everything together on medium speed for a full two minutes. This step is crucial for building the structure of the cake, so set a timer! The batter will be thick and glorously shiny.
4. The Secret Weapon: Hot Liquid. Here’s where things get interesting. Carefully pour in the boiling water and hot coffee. The batter will look thin and soupy. This is exactly what you want! Don’t panic. It’s this thin batter that steams in the oven, creating an unbelievably moist and tender crumb. Gently stir until the water is just combined. You’ll have a liquidy, pourable batter. Chef’s hack: I sometimes add the hot liquid in two batches to avoid any splashing.
Step 5: Bake to Perfection. Immediately pour the batter evenly into your prepared pans. I like to use a kitchen scale to ensure each pan has exactly the same amount of batter for even layers. Pop them into your preheated oven and bake for 30-35 minutes. Do NOT open the oven door before the 30-minute mark! The cakes are done when a toothpick inserted into the center comes out with a few moist crumbs clinging to it, or with just a tiny smear of melted chocolate. It shouldn’t have wet batter.
Step 6: The All-Important Cool Down. This is the hardest part: patience. Let the cakes cool in their pans on a wire rack for exactly 10 minutes. This allows them to set up enough to handle. Then, run a knife around the edge of each pan, invert them onto the wire rack, and carefully peel off the parchment paper. Let them cool completely before you even *think* about frosting. I’m serious! Frosting a warm cake is a one-way ticket to a melted, sliding mess. For a speed-up, you can pop them in the fridge for a bit once they’re no longer hot to the touch.
How to Serve This Beauty
Once your cakes are completely cool, the fun begins! For a classic look, slather a generous amount of chocolate fudge frosting or vanilla buttercream between the layers and all over the top and sides. I love a rustic, “naked cake” look where you can see a little of the cake through the frosting. Garnish with a sprinkle of flaky sea salt, some chocolate shavings, or a handful of fresh raspberries for a pop of color and tartness. A giant glass of cold milk or a hot cup of coffee is the only mandatory beverage pairing.
Mix It Up! Delicious Variations
This recipe is a fantastic blank canvas. Here are a few of my favorite ways to play with it:
- Mocha Madness: Add 1 teaspoon of instant espresso powder to the dry ingredients for an extra coffee kick.
- Chocolate Orange: Swap the vanilla extract for orange extract and add the zest of one orange to the batter for a bright, citrusy twist.
- Peppermint Patty: Add 1 teaspoon of peppermint extract to the batter and frost with a fluffy white mint frosting.
- “Cupcake” It: This batter makes about 24 perfect cupcakes. Just reduce the baking time to 18-22 minutes.
- Dairy-Free/Vegan: Use plant-based milk, swap the eggs for flax eggs (2 tbsp ground flaxseed + 6 tbsp water, let sit 5 mins), and use a vegan frosting. The oil already makes it dairy-free!
Beau’s Chef Notes & Kitchen Stories
This recipe has been with me for over a decade, and it’s evolved in tiny ways. I used to be a butter-only guy, but I was converted to the church of oil after realizing it genuinely creates a moister cake that stays soft for longer. The coffee tip is 100% from my grandma, and I will never, ever make a chocolate cake without it.
One time, I was filming a video for the blog and I was so busy chatting to the camera that I completely forgot to add the sugar. I baked it, frosted it, and took a bite live on camera… and my face must have been a picture. It was the most bitter, tragic hockey puck you’ve ever tasted. So learn from my mistake: always double-check your ingredients are in the bowl! It’s a tough lesson, but hey, even pros mess up. That’s what makes cooking real and fun.
FAQs & Troubleshooting: Your Questions, Answered
Q: My cake sunk in the middle! What happened?
A: Ah, the classic cake sink. This usually happens for one of three reasons: 1) The oven door was opened too early, causing a temperature drop before the structure had set. 2) The cake was underbaked. 3) There was too much leavening (baking soda/powder). Make sure your measurements are level and your baking agents are fresh!
Q: Can I make this cake ahead of time?
A: Absolutely! This cake actually tastes better the next day as the flavors have more time to meld. You can bake the layers, let them cool completely, wrap them tightly in plastic wrap, and store them at room temperature overnight or in the freezer for up to 3 months. Thaw overnight before frosting.
Q: The batter was so thin—is that normal?
A> YES! I promise. This is the most common thing people worry about, but it’s perfectly normal. That thin batter is the secret to its incredibly moist and tender texture. Trust the process.
Q: My cake is a little dry. What did I do wrong?
A> The most likely culprit is overbaking. Ovens can vary, so your cake might be done a few minutes before or after the recommended time. Start checking at the 30-minute mark. Also, be sure to measure your flour correctly—scooping directly from the bag can pack in too much flour. Instead, spoon the flour into your measuring cup and level it off.

Moist Chocolate Cake
Description
Hey friends! Beau here. If you’ve ever bitten into a dry chocolate cake and sighed in disappointment, today’s your redemption. This moist, deeply chocolatey cake is tender, melt-in-your-mouth delicious, and surprisingly easy to make. With a secret ingredient that amplifies the chocolate flavor (hint: it’s coffee), this recipe is perfect for birthdays, potlucks, or “I need chocolate NOW” moments.
Ingredients
Dry Ingredients:
-
1 ¾ cups all-purpose flour
-
¾ cup unsweetened cocoa powder
-
2 cups granulated sugar
-
1 ½ tsp baking powder
-
1 ½ tsp baking soda
-
1 tsp salt
Wet Ingredients:
-
2 large eggs, at room temperature
-
1 cup whole milk (or plant-based milk)
-
½ cup vegetable oil
-
2 tsp vanilla extract
Secret Weapon:
-
1 cup boiling water
-
1 cup hot brewed coffee
Instructions
Preheat oven to 350°F (175°C). Line two 9-inch round pans with parchment, grease, and dust lightly with cocoa powder.
In a large bowl, whisk together flour, cocoa, sugar, baking powder, baking soda, and salt. Aerating the dry mix helps make the cake fluffy.
Make a well in the center. Add eggs, milk, oil, and vanilla. Beat on medium speed for 2 minutes until shiny and smooth.
Carefully pour in boiling water and hot coffee. The batter will be thin—this is normal and ensures a moist, tender cake. Stir until just combined.
Divide batter evenly between pans. Bake 30–35 minutes. Check doneness by inserting a toothpick—it should come out with a few moist crumbs.
Cool cakes in pans for 10 minutes, then invert onto a wire rack and remove parchment. Let cool completely before frosting.
Notes
-
Even Layers: Use a kitchen scale to divide batter evenly.
-
No Coffee? Replace with hot water; chocolate flavor will still shine.
-
Faster Cooling: Once slightly cooled, refrigerate for 10–15 minutes.
-
Moisture Hack: Don’t overbake and measure flour correctly—spoon and level instead of scooping.
Nutrition
- Calories: 320 kcal (per slice
- Fat: 13g
- Saturated Fat: 2g
- Carbohydrates: 48g
- Protein: 4g
Nutritional Information (Per Slice, Unfrosted)
This is a rough estimate and will vary based on specific ingredients used.
Yield: 12 slices | Prep Time: 20 min | Bake Time: 35 min | Cool Time: 1 hr
Calories: ~310 | Fat: 12g | Saturated Fat: 2.5g | Carbohydrates: 47g | Sugar: 28g | Protein: 4g | Sodium: 280mg
Final Thoughts
And there you have it—the only chocolate cake recipe you’ll ever need. It’s a testament to the fact that the most legendary dishes are often the simplest ones, passed down through generations and perfected with love (and a little bit of coffee). This cake is more than just a dessert; it’s a promise of a good time, a reason to gather, and a guaranteed way to make any day feel a little more special.
Whether you’re celebrating a milestone, comforting a friend, or simply treating yourself after a long week, this cake is your answer. It’s forgiving, flexible, and foolproof. So, don your apron, embrace the magic, and get ready to make someone’s day with a single, sublime bite.