Spooky, Chewy, and Totally Unforgettable: Let’s Bake M&M Monster Cookies!
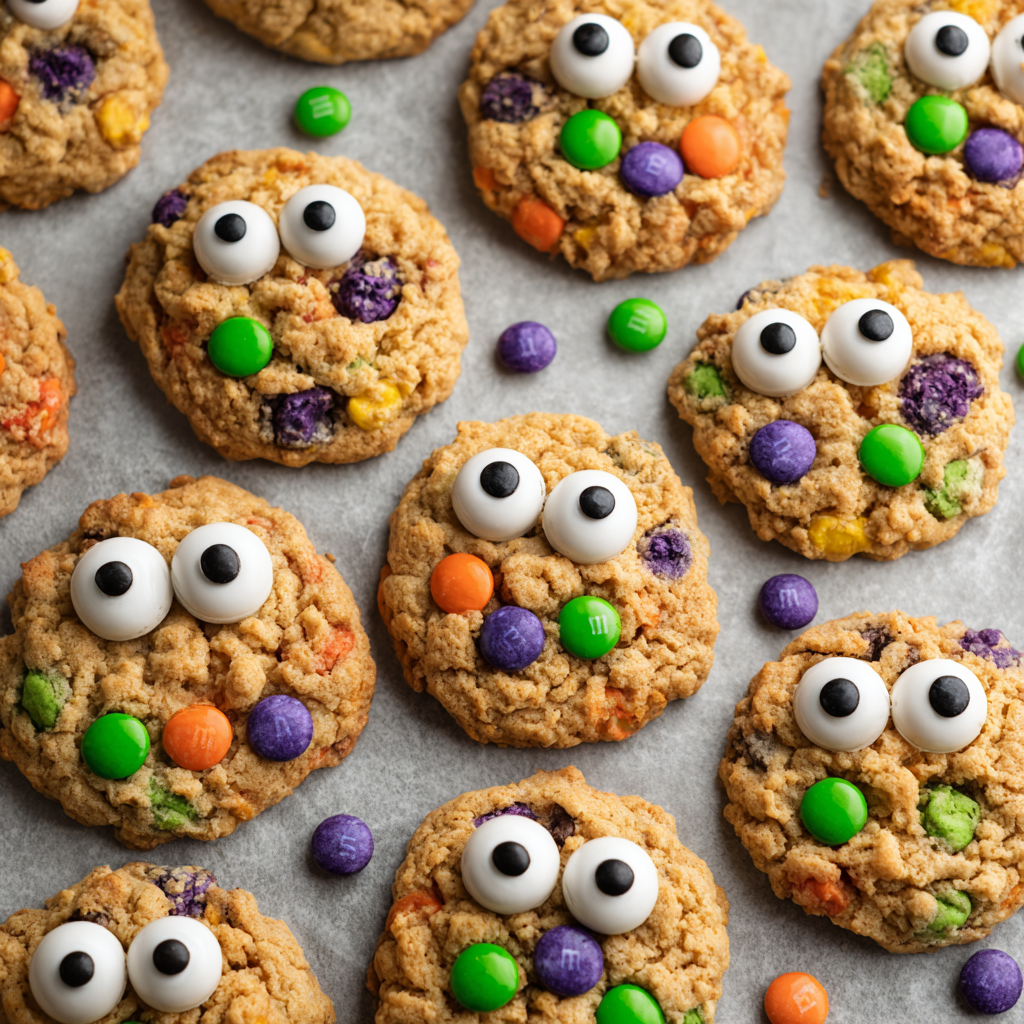
Hey there, cookie monsters! Beau Collier here from Feastical, and I am *beyond* excited you’ve wandered into my kitchen today. Halloween’s creeping closer, and you know what that means? It’s prime time for treats that are equal parts delicious and delightfully spooky! Forget the complicated stuff – we’re diving headfirst into pure, unadulterated cookie joy with my absolute favorite: M&M Monster Cookies. Picture this: chewy, buttery cookie perfection with crispy edges, absolutely LOADED with those vibrant orange, purple, green, and white Ghoul Mix M&M’s, and topped with adorable (and edible!) candy eyes staring right back at you. They’re like little edible monsters, bursting with personality and guaranteed to make everyone grin – whether you’re handing them out to trick-or-treaters, bringing them to a party, or just sneaking a few for yourself (no judgment here!).
These aren’t just cookies; they’re edible happiness, a warm hug in baked form. They capture that magical Halloween feeling – playful, colorful, and a little bit mischievous. I promise, this recipe is foolproof. Whether you’re a seasoned baker who knows their way around a stand mixer or someone who considers microwaving popcorn a culinary adventure, I’ve got your back. We’re keeping it simple, soulful, and oh-so-satisfying. So, preheat those ovens, grab your favorite mixing bowl (and maybe a mug of cider or coffee), and let’s whip up a batch of these unforgettable monster munchies together! Trust me, your kitchen is about to smell amazing, and your inner cookie monster is gonna do a happy dance.
The Great Halloween Cookie Caper: A Batch of Memories
These monster cookies? They instantly teleport me back to my niece Lily’s 5th Halloween. She was obsessed with all things “monster-y” that year – fuzzy slippers, picture books, you name it. Determined to make her party special, I decided to create a cookie worthy of her imagination. I envisioned these grand, intricate monster shapes… but reality (and my questionable artistic skills with cookie cutters) had other plans. What emerged from the oven looked less like fearsome beasts and more like… well, lumpy blobs with candy eyes askew. Total kitchen fail vibes!
Feeling slightly deflated, I handed one to Lily. She studied it intensely for a second, her little brow furrowed. Then, her eyes lit up like mini jack-o’-lanterns. “Uncle Beau!” she squealed, pointing at a particularly lopsided specimen. “LOOK! This one has a BIG green eye and a TINY purple eye! It’s SO silly! It’s perfect!” She proceeded to name each uniquely wonky cookie (“Mr. Wobblegob,” “Squintina,” “One-Eyed Pete”). Her pure, unfiltered joy, seeing personality in what I saw as flaws, completely changed my perspective. That’s the magic of these cookies – they don’t need to be perfect. Their charm lies in their colorful chaos and the fun you have making them. Every time I bake them now, I see Lily’s delighted face, and I remember: sometimes the “mistakes” create the sweetest memories. These truly are cookies baked with love (and maybe a dash of delightful imperfection).
Gathering Your Monster-Making Crew: The Ingredients
Alright, team, let’s round up the colorful cast of characters for our cookie stars! This is where the fun begins. Here’s what you’ll need to summon these chewy, eye-popping delights (makes about 24 generous cookies):
- 1 cup unsalted butter, softened: This is the heart of the cookie, giving it that rich flavor and dreamy chew. Chef’s Insight: “Softened” means it should give slightly when pressed but still hold its shape – not melted! If you only have salted butter, just reduce the added salt below to 1/4 tsp. Room temp butter creams like a dream!
- 1 cup light brown sugar & ½ cup granulated sugar: The dynamic duo! Brown sugar brings deep molasses notes and moisture for chewiness, while granulated sugar helps with spread and crisp edges. Sub Tip: Out of light brown? Dark brown works, adding a slightly deeper flavor.
- 2 large eggs: Our binding agents, adding structure and richness. Chef’s Hack: Crack them into a small bowl first! Avoid shell surprises in your dough.
- 1 ½ tsp vanilla extract: Pure vanilla is best here! It enhances all the other flavors. Insight: That little extra half teaspoon makes a noticeable difference – don’t skip it!
- 2 ½ cups all-purpose flour: The foundation. Chef’s Must-Do: For accurate measuring, fluff the flour in the bag, spoon it lightly into your measuring cup, and level it off with a knife. Don’t scoop and pack!
- 1 tsp baking soda: Our leavening agent, helping the cookies rise and spread. Key Tip: Make sure it’s fresh! Old baking soda loses its oomph. Test it with a drop of vinegar – it should fizz vigorously.
- ½ tsp salt: Crucial! It balances the sweetness and makes all the flavors pop. Always use fine table salt for baking unless specified otherwise.
- 1 ½ cups M&M’s Ghoul Mix: The STAR of the spooky show! Those Halloween colors (orange, purple, green, white) are essential for the monster vibe. Sub Tip: Can’t find Ghoul Mix? Regular M&M’s in similar colors work perfectly. Reserve about 1/4 cup for topping!
- ½ cup chocolate chips (optional, but highly recommended!): For extra pockets of gooey chocolate bliss. Semi-sweet is classic, but milk or dark work too. Chef’s Secret: Mini chocolate chips distribute even better! This is the “monster” upgrade.
- Candy eyes (varied sizes!): The personality factor! Find these in the baking aisle near sprinkles. Pro Tip: Using different sizes (small and medium/large) gives your monsters WAY more character. Get creative!
Conjuring Cookie Magic: The Step-by-Step Spell
Ready to transform these ingredients into monster masterpieces? Let’s get mixing! Grab your favorite bowl and spatula – this is where the real fun happens. Follow these steps, and you’ll have perfect cookies every time.
- Preheat & Prep (Oven to 350°F / 175°C): “Preheat your oven nice and early! This is non-negotiable for even baking. While it heats up, line your baking sheets with parchment paper. Chef’s Lifesaver: Parchment prevents sticking *and* makes cleanup a breeze. No parchment? Silicone mats work great too. Avoid greasing the pan – it can make cookies spread too much!”
- Cream Butter & Sugars (Until Fluffy!): “In a large bowl (or your stand mixer fitted with the paddle), beat the softened butter, brown sugar, and granulated sugar together. Chef’s Key: Beat it on medium-high speed for a good 2-3 minutes! You want it light, pale, and seriously fluffy. This incorporates air, which is key for texture. Scrape down the sides of the bowl halfway through.”
- Beat in Eggs & Vanilla: “Add the eggs one at a time, beating well after each one until fully incorporated. Then beat in that glorious vanilla extract. Pro Tip: Adding eggs one by one prevents the mixture from curdling. It should look smooth and creamy.”
- Whisk Dry, Then Combine: “In a separate medium bowl, whisk together the flour, baking soda, and salt. Why whisk? This ensures the leaveners and salt are evenly distributed. Now, gradually add the dry ingredients to the wet mixture, mixing on low speed just until combined after each addition. CRUCIAL TIP: Stop mixing as soon as no dry flour streaks remain! Overmixing = tough cookies. Use a spatula for the last bit if needed.”
- Fold in the Fun (M&M’s & Chips!): “Time for the colorful chaos! Add the 1 1/4 cups of M&M’s (saving that 1/4 cup for later!) and the chocolate chips (if using) to the dough. Chef’s Technique: Use a sturdy spatula and gently *fold* them in. Don’t vigorously stir! We want to keep those beautiful candies intact and avoid smearing color everywhere. Fold just until evenly distributed.”
- Scoop & Space: “Using a cookie scoop (a #40 scoop or about 2 tablespoons), portion the dough into balls. Roll them gently between your palms if needed. Place them on your prepared baking sheets, spacing them at least 2 inches apart. Why space? These guys spread! Giving them room ensures they bake evenly and don’t merge into one giant cookie monster (unless you want that!).”
- Top with Personality: “Here’s where your monsters come alive! Take the reserved M&M’s and gently press a few onto the top of each dough ball. Then, add those candy eyes! Chef’s Creative Nudge: Go wild! Make some with two big eyes, some with one big and one small, some with eyes close together, some far apart. Wonky is wonderful! Press them in firmly so they stay put during baking.”
- Bake to Perfection (10-12 min): “Slide those sheets into your preheated oven. Bake for 10-12 minutes. What to look for: The edges should be set and beautifully golden brown, while the centers still look soft and slightly underbaked. They might look puffy – that’s okay! Chef’s Golden Rule: DO NOT overbake! They firm up as they cool. Those soft centers are the secret to ultimate chewiness.”
- Cool & Conquer: “Remove the baking sheets from the oven. Let the cookies cool on the sheet for exactly 5 minutes. Why on the sheet? This allows them to set enough to move without breaking. Then, very carefully transfer them to a wire rack using a spatula to cool completely. Patience Tester: I know it’s hard, but try to let them cool mostly before devouring – they solidify into chewy perfection!”
Showtime! Serving Your Spooky Sensations
Okay, your monster cookies are cool, colorful, and ready for their close-up! How to serve these delightful beasts? Keep it fun and festive! Pile them high on a big, colorful platter or a rustic wooden board – the contrast makes those vibrant M&M’s and googly eyes really pop. For a Halloween party, arrange them around a bowl of “monster punch” (green limeade anyone?). Pack them into treat bags tied with orange and black ribbon for adorable party favors or classroom treats. And the absolute *perfect* pairing? A tall, ice-cold glass of milk, of course! Dunking these chewy, chocolatey monsters is pure bliss. A cup of hot apple cider or a pumpkin spice latte also makes a fantastic autumnal companion. However you serve them, get ready for smiles, maybe a few giggles at the funny faces, and lots of “wows!”
Monster Mash-Up: Creative Twists on the Classic
Want to play mad scientist with your monster cookies? Go for it! Here are some fun spins:
- The Peanut Butter Beast: Swap out 1/2 cup of the butter for creamy peanut butter! Adds a delicious nutty depth that pairs amazingly with chocolate and M&M’s. You could even add 1/2 cup chopped peanuts for extra crunch.
- Oatmeal Monster Mash: Replace 1 cup of the all-purpose flour with old-fashioned rolled oats. This adds wonderful texture, heartiness, and a slightly different chew. Perfect for a “hairy” monster vibe!
- Gluten-Free Ghouls: Easily done! Use a 1:1 gluten-free all-purpose flour blend (like Bob’s Red Mill or King Arthur). Ensure your M&M’s and chocolate chips are GF (most are, but always check!).
- Candy Carnival: Mix up the candy! Try Reese’s Pieces for a peanut butter twist, or add some chopped Halloween-themed chocolates or even a handful of candy corn for extra seasonal fun (press those in at the end like the M&M’s).
- Salty-Sweet Specter: Add 1/2 cup of crushed pretzel pieces or potato chips (yes, really!) with the M&M’s. The salty crunch creates an addictive contrast against the sweet, chewy cookie.
M&M-Monster Cookies
- Total Time: 35 mins
Description
Halloween baking just got a whole lot more fun (and colorful)! These M&M Monster Cookies are soft, chewy, and loaded with Ghoul Mix M&M’s and candy eyes that stare back at you with goofy charm. Every bite is a perfect mix of buttery dough, chocolatey goodness, and playful monster vibes. Whether you’re making them for a party, a bake sale, or a midnight snack raid, these cookies are guaranteed to bring smiles and giggles.
Ingredients
-
1 cup unsalted butter, softened
-
1 cup light brown sugar
-
½ cup granulated sugar
-
2 large eggs
-
1 ½ tsp vanilla extract
-
2 ½ cups all-purpose flour
-
1 tsp baking soda
-
½ tsp salt
-
1 ½ cups Ghoul Mix M&M’s (reserve ¼ cup for topping)
-
½ cup chocolate chips (optional but delicious)
-
Candy eyes (varied sizes for personality)
Instructions
-
Preheat & Prep: Oven at 350°F (175°C). Line baking sheets with parchment paper.
-
Cream Butter & Sugars: Beat butter, brown sugar, and granulated sugar until light and fluffy (2-3 min).
-
Add Eggs & Vanilla: Mix in eggs one at a time, then vanilla.
-
Combine Dry Ingredients: Whisk flour, baking soda, and salt separately, then add gradually to wet mixture. Don’t overmix!
-
Mix-Ins: Fold in 1 ¼ cups M&M’s and chocolate chips.
-
Scoop Dough: Roll ~2 tbsp portions into balls and place 2 inches apart on baking sheet.
-
Decorate Before Baking: Press a few reserved M&M’s and candy eyes into the tops.
-
Bake: 10–12 minutes, until edges are golden but centers are still soft.
-
Cool: Rest on baking sheet 5 minutes, then transfer to a wire rack.
Notes
wap in peanut butter for half the butter, drizzle white chocolate “bandages” for mummy cookies, or mix in pretzels for a salty-sweet monster mash-up.
- Prep Time: 20 mins
- Cook Time: 10–12 mins
Nutrition
- Calories: 210 Cal Per Cookie, Approx
- Fat: 10g
- Protein: 2g
Final Thoughts: More Than Just a Cookie
M&M Monster Cookies are more than a Halloween treat—they’re edible joy. From the first creamy bite of buttery dough to the crunch of colorful candies, every element is designed to delight. They remind us that baking isn’t just about perfection; it’s about creativity, connection, and a little bit of mischief.
Whether you stick to the classic recipe or experiment with global flavors, these cookies are a celebration of playfulness. So gather your ingredients, embrace the imperfections (wonky eyes = more personality!), and bake up a batch of happiness. After all, the best treats aren’t just eaten—they’re experienced.