Sunshine in a Bite: Your New Favorite Mini Lemon Curd Tarts
Hey friends, Beau here from Feastical! Grab a cup of coffee (or hey, a glass of crisp rosé) and pull up a stool. Today, we’re making magic. Not the rabbit-out-of-a-hat kind, but the kind that happens when you whisk together some simple ingredients and end up with a dessert so bright and joyful, it practically hums with happiness. I’m talking about my Mini Lemon Curd Tarts.
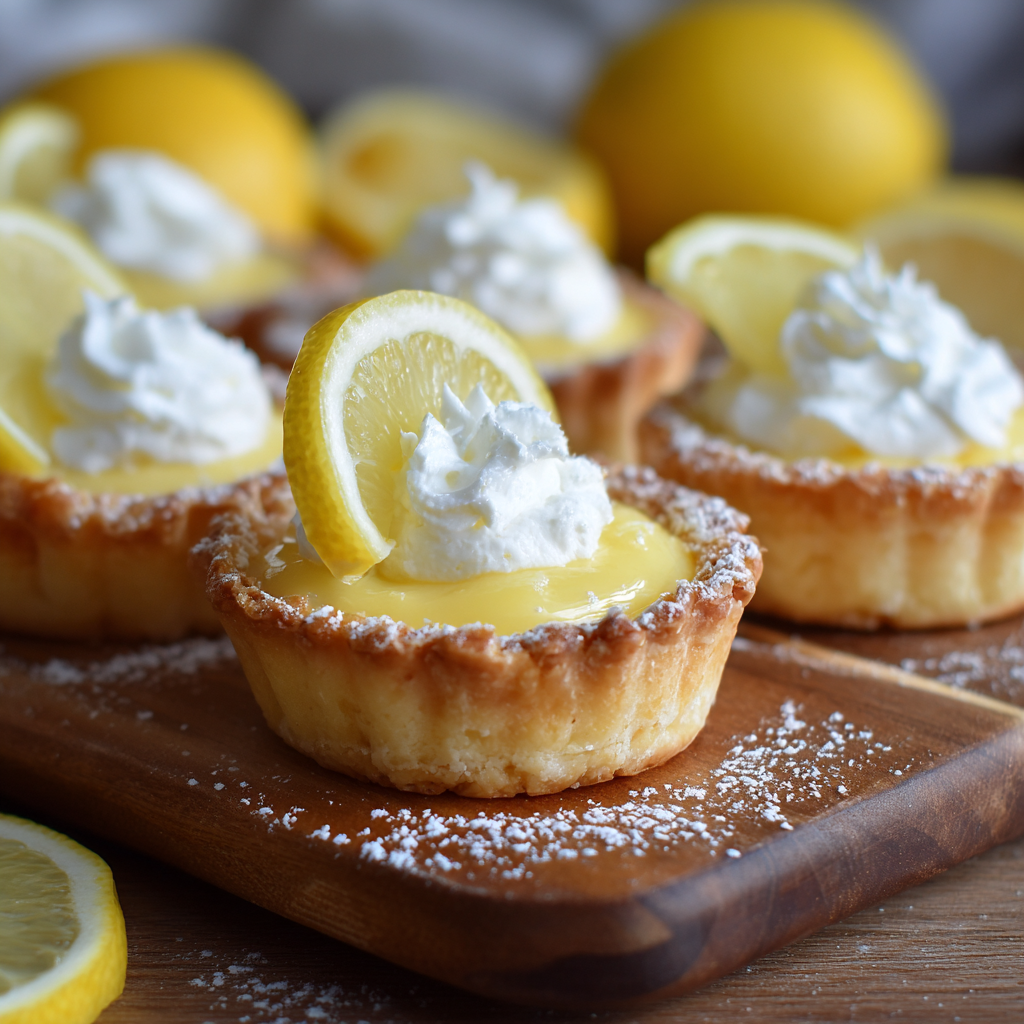
Picture this: a crisp, buttery, melt-in-your-mouth shortbread crust. Now, fill that little vessel with the smoothest, most luscious lemon curd you’ve ever tasted—tangy, sweet, and sunshine-yellow. Top it with a single perfect berry or a twist of zest. It’s elegant enough to make your guests think you studied pastry in Paris, but I promise you, the process is pure, simple, feel-good cooking.
These tarts are my go-to for spring gatherings, Easter brunch, baby showers, or those “I just need something beautiful today” moments. They feel fancy but are incredibly approachable. Whether you’re a confident baker or someone who considers store-bought dough a superhero-level kitchen hack, this recipe is for you. We’re keeping it soulful, satisfying, and absolutely delicious. So, preheat that oven, friends. We’re about to bake a little slice of sunshine.
The Tart That Started It All: Grandma Mabel’s Lemon Legacy
Every recipe has a heartbeat, a story that gives it flavor beyond the ingredients. For me, these tarts will always taste like my Grandma Mabel’s sun-drenched kitchen in July. She wasn’t a fancy cook, but she was a *great* one. Her signature move was a towering, slightly lopsided lemon meringue pie that appeared at every family picnic.
My job, as the shortest sous-chef in an apron two sizes too big, was to zest the lemons. I’d watch the yellow confetti pile up, the citrus oil misting the air, and she’d tell me, “Beau, the zest is where the soul of the lemon lives. Don’t you dare waste it.” Then, she’d let me lick the whisk after she made the curd—a tangy, sweet, electric shock of flavor that made my eyes go wide.
These mini tarts are my love letter to that memory. They capture that same perfect balance of her pie—the buttery crust, the puckery-sweet filling—but in a friendly, shareable, no-fuss size. They’re Grandma Mabel’s spirit, updated for our busy, beautiful lives. Every time I make them, I think of her, and I know she’d approve, especially of the part where you get to lick the spoon.
Gathering Your Sunshine: The Ingredients
Here’s the beautiful part: you don’t need a pantry full of obscure items. These ingredients are simple, but each one plays a starring role. Let’s break it down.
- For the Buttery Tart Shells:
- 1 ¼ cups all-purpose flour: The foundation. Spoon and level it into your measuring cup for accuracy—don’t scoop directly from the bag or you’ll pack in too much!
- ⅓ cup powdered sugar: This is our secret weapon for a tender, melt-in-your-mouth crust. Its fine texture keeps things delicate, unlike granulated sugar which can make it gritty.
- ¼ tsp salt: Never skip this! It’s the flavor enhancer that makes the butter and sugar sing.
- ½ cup (1 stick) unsalted butter, VERY cold and cubed: I can’t stress “COLD” enough. This is what creates those lovely flaky pockets in your crust. I pop my cubed butter in the freezer for 10 minutes before I start.
- 1 large egg yolk: The binder that brings our dough together and adds rich color and tenderness.
- 1-2 tbsp ice water: Just enough to bring it together. The ice prevents the butter from warming up.
- For the Luscious Lemon Curd Filling:
- ¾ cup fresh lemon juice (about 4-5 lemons): Fresh is non-negotiable for that vibrant, wake-up-your-taste-buds zing. Bottled juice just won’t give you the same magic.
- Zest of 2 lemons: Remember Grandma Mabel’s lesson! This is pure citrus gold, packed with aromatic oils.
- 1 cup granulated sugar: Balances the intense tartness of the lemon.
- 3 large eggs + 1 extra yolk: The eggs are the superstars that thicken our curd into a silky custard. The extra yolk adds even more luxurious texture.
- ½ cup (1 stick) unsalted butter, cut into tablespoons: Whisked in at the end, it creates that glossy, smooth, decadent finish. Use room temp butter so it incorporates seamlessly.
- Pinch of salt: Again, the flavor fairy. It rounds out all the sharp edges.
- For the (Optional) Light & Fluffy Boost & Garnish:
- ½ cup heavy whipping cream: Want a lighter, mousse-like filling? Whip this to stiff peaks and fold it into the cooled curd. It’s a game-changer!
- Fresh berries, mint sprigs, lemon zest twists: Your edible confetti. Blueberries, raspberries, a single blackberry—anything goes for that pop of color and freshness.
- Powdered sugar, for dusting: The final snowy touch that makes everything look professionally pretty.
Let’s Build Some Tarts: Step-by-Step with Chef Beau
Ready? Put on some good music, and let’s get our hands in the dough. This is the fun part.
- Make the Tart Dough (The “Pulse & Press” Method):In your food processor, pulse the flour, powdered sugar, and salt a couple times to combine. Scatter those icy-cold butter cubes over the top. Now, pulse in short bursts—about 10-12 times—until the mixture looks like coarse sand with some pea-sized butter bits still visible. That’s perfect! Those bits will steam in the oven for flakiness. Add the egg yolk and pulse a few times to combine. With the processor running, drizzle in the ice water, one tablespoon at a time, just until the dough *begins* to clump together. Don’t over-process! Tip it out onto plastic wrap, press it into a disc, wrap it tight, and chill for at least 1 hour. This relaxes the gluten and re-chills the butter, which is the key to a non-shrinky, super-flaky crust.
- Roll, Cut, & Dock:On a lightly floured surface, roll your chilled dough to about ⅛-inch thickness. Use a round cutter slightly larger than your mini tart pan wells (a 3.5-4 inch cutter works great). Gently press the rounds into your greased pans. Don’t stretch the dough—just let it settle in. Use a fork to prick the bottoms all over (this is called “docking”) to prevent air bubbles. Pop the whole tray in the freezer for 15 minutes. This is another pro hack for preventing shrinkage!
- Blind Bake to Golden Perfection:Preheat your oven to 375°F (190°C). Line your frozen tart shells with parchment paper or foil and fill with pie weights, dried beans, or uncooked rice. Bake for 15 minutes. Carefully remove the parchment and weights, then bake for another 8-10 minutes, until the shells are golden brown and dry. Let them cool completely in the pans on a wire rack.
- Create the Silky Lemon Curd (The “Low & Slow” Whisk):In a medium saucepan (non-reactive, like stainless steel), whisk together the lemon juice, zest, sugar, eggs, extra yolk, and salt. Place the pan over medium-low heat. Now, whisk. Constantly. And I mean it—don’t stop for a second. You’re coaxing the eggs to thicken the mixture without scrambling them. In about 8-10 minutes, it will transform into a thick pudding-like consistency that coats the back of a spoon. Immediately remove it from the heat!
- The Butter Finish & Chill:Strain the curd through a fine-mesh sieve into a bowl to catch any stray cooked egg bits and the zest (this guarantees absolute silkiness). While it’s still hot, whisk in the room-temperature butter, one tablespoon at a time, until it’s fully melted and incorporated. Press plastic wrap directly onto the surface of the curd to prevent a skin from forming and chill for at least 2 hours, until completely cold and set.
- Optional Fluffy Upgrade:If you want that airy texture, whip your heavy cream to stiff peaks in a chilled bowl. Gently fold it into the chilled lemon curd until no white streaks remain. It becomes a lemon cloud!
- Assemble & Garnish:Spoon or pipe your cooled lemon curd (or lemon mousse) into the completely cooled tart shells. Smooth the tops. You can chill them again for 30 minutes to firm up. Right before serving, add your garnish—a few berries, a twist of zest, a mint leaf. A light dusting of powdered sugar makes them look like they came from a patisserie.
How to Serve These Little Gems
Presentation is half the fun! Arrange these sunny tarts on a simple white platter or a tiered dessert stand for real “wow” factor. For a casual backyard gathering, I love setting them out on a rustic wooden board. They’re the perfect finger food dessert.
Pairing is key. These tarts are rich and citrusy, so they love a companion. Serve them with a dollop of lightly sweetened whipped cream or a scoop of vanilla bean ice cream for contrast. On a brunch table, they’re gorgeous next to a pot of coffee and a fruit salad. For a truly special occasion, a glass of Moscato d’Asti, a crisp Riesling, or even a lightly sweet sparkling wine is an absolute dream pairing. The bubbles and acidity cut through the richness beautifully.
Make It Your Own: Delicious Twists & Swaps
Once you’ve mastered the classic, the kitchen playground opens up! Here are a few of my favorite riffs:
- Berry Swirl: Before adding the lemon curd, drop a tiny spoonful of seedless raspberry or strawberry jam into each tart shell. Then add the curd and give it one quick swirl with a toothpick for a gorgeous marbled effect.
- Tropical Escape: Substitute half the lemon juice with fresh lime juice and add a teaspoon of toasted coconut to the crust mixture. Garnish with toasted coconut flakes.
- Lavender Dream: Infuse the cream (if using) or steep 1 tsp of culinary lavender in the warm lemon curd for 5 minutes before straining. It adds a beautiful, floral note that’s incredibly elegant.
- Dairy-Free Delight: Use a high-quality vegan butter (the kind that comes in sticks) in both the crust and the curd. For the curd, ensure your non-dairy butter has a high fat content for the best texture.
- Gingersnap Crust: Swap the shortbread crust for one made from crushed gingersnap cookies and butter. The spicy-sweet combo with the lemon is out-of-this-world good.
Beau’s Kitchen Notes & Stories
This recipe has been a living, evolving thing in my kitchen. The first time I made lemon curd, I got distracted by a phone call and turned the heat up too high. Let’s just say I ended up with sweet lemon scrambled eggs—a true culinary tragedy! The lesson? Low heat and patience are your best friends here.
I’ve also learned that the tart shells are incredibly forgiving. If a patch tears when you’re pressing it into the pan, just take a little scrap of dough, moisten it, and patch it up like you’re fixing a hole in drywall. No one will ever know. And if you’re in a serious time crunch, using high-quality store-bought mini tart shells and lemon curd is absolutely nothing to be ashamed of. It’s about the joy of sharing something delicious, not perfection. Some of my most memorable Feastical moments have come from “doctored-up” store-bought bases!
Your Questions, Answered
- Q: Can I make these ahead of time?A: Absolutely! You can bake the shells 1-2 days ahead and store them in an airtight container at room temp. The lemon curd can be made up to 5 days ahead and kept in the fridge. Assemble the tarts the day you plan to serve them for the crispiest crust.
- Q: My curd isn’t thickening! What did I do wrong?A: First, don’t panic. It likely just needs more time. Keep whisking over medium-low heat. If it’s still soupy after 15 minutes, you can temper in another egg yolk. Whisk a little of the hot curd into a bowl with the extra yolk, then whisk it all back into the pot. This should do the trick!
- Q: Why did my tart shells shrink so much?A: The two main culprits are not chilling the dough long enough and stretching it when you put it in the pan. Chilling relaxes the gluten, and not stretching it prevents it from snapping back. The freezer step before baking is also a critical shield against shrinkage.
- Q: Can I use a regular muffin tin instead of mini tart pans?A: You can! Grease the wells well, press the dough in, and follow the same baking process. They’ll be a bit deeper, so you might get 8-10 tarts instead of 12, and the shape will be more like a mini cup. Still totally delicious.
Mini Lemon Curd Tarts : Bright, Buttery & Elegant
Description
These Mini Lemon Curd Tarts are the kind of dessert that looks elegant but is totally doable at home. Each tart has a crisp, buttery shortbread-style shell filled with smooth, tangy lemon curd. They’re perfect for spring gatherings, brunch tables, or anytime you want a fresh, citrusy treat in a small, beautiful package.
Ingredients
Tart Shells
-
1¼ cups (155 g) all-purpose flour
-
⅓ cup (40 g) powdered sugar
-
¼ teaspoon salt
-
½ cup (115 g) unsalted butter, very cold and cubed
-
1 large egg yolk
-
1–2 tablespoons ice water
Lemon Curd
-
¾ cup (180 ml) fresh lemon juice
-
Zest of 2 lemons
-
1 cup (200 g) granulated sugar
-
3 large eggs + 1 egg yolk
-
Pinch of salt
-
½ cup (115 g) unsalted butter, cut in pieces
Optional Garnish
-
Fresh berries
-
Whipped cream
-
Powdered sugar
-
Extra lemon zest
Instructions
1️⃣ Make the Tart Dough
-
In a food processor, pulse flour, powdered sugar, and salt.
-
Add cold butter and pulse until mixture looks like coarse crumbs.
-
Add egg yolk and pulse briefly.
-
Add ice water 1 tablespoon at a time until dough just comes together.
-
Form into a disk, wrap, and chill at least 1 hour.
2️⃣ Shape & Bake Shells
-
Preheat oven to 375°F (190°C). Grease a mini tart pan or muffin tin.
-
Roll dough to about ⅛-inch thick and cut circles slightly larger than the wells.
-
Press gently into pan and prick bottoms with a fork.
-
Freeze 15 minutes.
-
Line with paper and weights (beans or rice).
-
Bake 15 minutes, remove weights, then bake 8–10 more minutes until golden.
-
Cool completely.
3️⃣ Make Lemon Curd
-
In a saucepan (not aluminum), whisk lemon juice, zest, sugar, eggs, yolk, and salt.
-
Cook over medium-low heat, whisking constantly, until thick enough to coat a spoon (about 8–10 minutes).
-
Remove from heat and strain through a sieve into a bowl.
-
Whisk in butter pieces until smooth.
-
Cover surface with plastic wrap and chill at least 2 hours.
4️⃣ Assemble
-
Spoon or pipe chilled lemon curd into cooled tart shells.
-
Add berries or whipped cream if desired.
-
Chill 30 minutes before serving for best texture.
Notes
-
✅ Use fresh lemon juice — bottled won’t taste as bright.
-
✅ Keep butter and dough cold for crisp, non-shrunken shells.
-
✅ Whisk curd constantly to prevent scrambled eggs.
-
✅ Straining the curd gives extra smooth texture.
-
✅ Shells and curd can be made ahead and assembled later.
Nutritional Information (Per Tart, Approximate)
Let’s keep it real—this is a dessert, a treat meant to be savored. One of these delightful mini tarts contains roughly: Calories: 280 | Total Fat: 16g | Saturated Fat: 10g | Cholesterol: 105mg |
Final Thoughts
So there you have it—your roadmap to sunshine in a pastry shell. These Mini Lemon Curd Tarts are more than just a dessert; they’re an experience. They’re the taste of a memory, the joy of a quiet afternoon in the kitchen, and the happy surprise on a friend’s face when they take that first bright, buttery bite.
Remember this: cooking, especially baking, isn’t about rigid perfection. It’s about the rhythm of the whisk, the scent of lemon zest hitting the air, the satisfying press of dough into a pan. It’s about creating something with your hands that brings a moment of pure, simple happiness to someone’s day. Whether you follow this recipe to the letter or scribble your own notes in the margins, you’re adding your own chapter to its story.
Don’t be intimidated. Embrace the patched crust, the slightly lopsided swirl, the proud dusting of powdered sugar. This is feel-good food. This is connection—to Grandma Mabel, to the friends around your table, and to the simple, profound pleasure of making something delicious.
So go on. Zest those lemons. Get a little flour on your apron. And bake a little bit of sunshine. I promise, it’s the best kind of magic there is.
With love and a full heart,
Beau @ Feastical