
Homemade Marshmallow Easter Eggs: Your New Sweet Spring Tradition
Hey friends, Beau here from Feastical! Is there anything that says “spring is here” quite like a pastel-wrapped basket filled with goodies? For me, the crown jewel has always been those fluffy, melt-in-your-mouth marshmallow eggs, enrobed in a thin, crisp shell of chocolate. That first bite—the gentle crack of the chocolate giving way to a cloud of sweet, vanilla-kissed fluff—is a little bite of pure, unadulterated joy.
But here’s my chef’s secret: the store-bought versions can’t hold a candle to what you can make in your own kitchen. When you make marshmallow eggs at home, you control the fluffiness (maximum cloud-like texture, please), the chocolate quality (the good stuff!), and the love that goes into each one. These aren’t just candies; they’re edible memories waiting to be made. And the best part? They’re surprisingly simple. No fancy equipment needed, just a stand mixer or a good arm, a saucepan, and a willingness to get a little powdered sugar on your nose. So, tie on your favorite apron, cue up some happy tunes, and let’s turn your kitchen into the sweetest Easter candy workshop. I promise, the result is more than worth it.
The Marshmallow Egg That Started It All
My love for these treats goes way back. Every Easter, my grandma would have a special, slightly lopsided marshmallow egg waiting just for me, tucked beside the dyed eggs in my basket. She’d always say, “This one has extra fluff, just for my Beau.” I believed her completely. One year, I was finally deemed “old enough” to help. I remember standing on a step-stool, watching in awe as she poured a shimmering, hot syrup into her big, chrome mixer. The transformation from clear liquid to a towering, glossy, white mountain of marshmallow was nothing short of kitchen magic. My job was the all-important “vanilla pour” and, of course, the first taste test of the bowl scrapings. That sweet, sticky memory of connection, of learning that food magic is something you can make, is the heart of this recipe. Every time I shape these eggs, I’m back in her sunny kitchen, and I hope this recipe creates that same spark of magic and togetherness for you and your crew.
Gathering Your Sweet Supplies
Here’s everything you’ll need to create your own marshmallow masterpiece. Don’t let the gelatin scare you—it’s just the wizard behind the fluffy curtain!
For the Marshmallow Filling:
- 3 envelopes unflavored gelatin: This is our structure-giver! It’s what transforms the liquid syrup into that iconic, bouncy texture. Make sure it’s unflavored and fresh for the best set.
- 1 cup cold water, divided: We use half to “bloom” the gelatin (making it soft and spongy) and the other half in the syrup. Cold water for the bloom is key!
- 2 cups granulated sugar: The sweet soul of the operation. It caramelizes slightly when cooked, giving marshmallow its depth of flavor beyond just sweetness.
- 1 cup light corn syrup: Chef’s insight: This is the guardian against crystallization. It keeps the sugar syrup smooth and the final marshmallow tender, not gritty. For a swap, you can use agave nectar or honey, but note that honey will impart its own distinct flavor.
- ¼ teaspoon salt: A tiny bit to balance all that sweetness and make the vanilla flavor pop. Trust me on this.
- 1 teaspoon pure vanilla extract: The aromatic finish. For a fun twist, try almond or clear vanilla extract for that classic “marshmallow” scent.
For Coating & Finishing:
- 12–16 oz milk, dark, or semi-sweet chocolate, chopped or in chips: Use the best quality you love to eat! Chocolate chips work in a pinch, but bar chocolate (like Ghirardelli or Baker’s) melts and coats more smoothly. This is your chance to be the chocolatier.
- Cornstarch or powdered sugar, for dusting: Our non-stick superhero for shaping. I prefer cornstarch as it absorbs moisture better without adding extra sweetness to the outside.
- Optional decorations: Pastel sprinkles, toasted shredded coconut, or a contrasting drizzle of white chocolate. Let your inner artist play!
Crafting Your Fluffy Clouds: Step-by-Step
Ready to work some sugar magic? Follow these steps, and you’ll be a marshmallow master in no time.
- Bloom the Gelatin: In the bowl of your stand mixer (fitted with the whisk attachment), sprinkle the gelatin over ½ cup of cold water. Don’t stir it! Just let it sit and absorb for 10 minutes. It will look like a wrinkly, solid sponge—that’s perfect. This step ensures it dissolves evenly later.
- Cook the Syrup: Meanwhile, in a medium saucepan, combine the sugar, corn syrup, salt, and the remaining ½ cup of water. Stir just until the sugar looks wet. Chef’s hack: Brush down the sides of the pan with a wet pastry brush to prevent sugar crystals from forming. Now, bring it to a boil over medium-high heat without stirring. Attach a candy thermometer and let it cook until it reaches precisely 240°F (the soft-ball stage). This temperature is crucial for the right texture!
- The Magic Merge: With the mixer on low speed, carefully and slowly pour the blazing hot sugar syrup directly into the bloomed gelatin. Go slow to avoid splatters. Once it’s all in, crank the speed to high and whip for a full 10-12 minutes. Watch the transformation! It will go from watery, to opaque, to a thick, glossy, white wonder that forms stiff peaks. It should about triple in volume.
- Flavor & Prep: In the last minute of whipping, add the vanilla. While it whips, generously dust a baking sheet with cornstarch. This is your shaping station.
- Shape the Eggs: Dust your hands liberally with cornstarch. The marshmallow will be sticky! Scoop out a heaping tablespoon of fluff and gently form it into an egg shape between your palms. Place it on the dusted sheet. Repeat with remaining marshmallow, re-dusting your hands often. Don’t stress about perfection—homemade charm is the goal! Let them sit, uncovered, for 1-2 hours to form a slight “skin.”
- The Chocolate Dip: Melt your chocolate in a deep, narrow bowl (a liquid measuring cup works great) in 30-second bursts in the microwave, stirring well between bursts. Let it cool slightly so it’s not piping hot. One by one, drop a marshmallow egg into the chocolate. Use a fork to flip it, ensure it’s coated, then lift it out, letting excess chocolate drip back into the cup. Transfer to a parchment-lined sheet. Immediately add sprinkles if using. Let the chocolate set completely at room temperature (about 1 hour).
Sharing the Sweetness: How to Serve
These little gems deserve a special presentation! Nestle them in pastel paper cupcake liners for a classic candy shop look. They’re the star of any Easter basket—just tuck them in among the plastic grass. For a gorgeous dessert table, arrange them on a cake stand or a platter lined with edible Easter straw. I love pairing them with a strong cup of coffee after brunch or serving them as the grand finale to a spring dinner party. They also make the most heartfelt, handcrafted gift. Place a few in a cute cellophane bag tied with ribbon, and you’ve just made someone’s day sweeter.
Make It Your Own: Fun Flavor Twists
Once you’ve mastered the classic, the playground is open! Here are a few of my favorite riffs:
- Peanut Butter Paradise: Add ½ cup of smooth peanut butter to the mixer along with the vanilla. For the ultimate combo, coat in milk chocolate and roll in crushed peanuts.
- Fruity Fluff: Swap the vanilla for 1 teaspoon of strawberry, raspberry, or orange extract. Add a drop or two of gel food coloring for a pastel pink or orange center!
- Coconut Cream Dream: Fold ½ cup of finely shredded toasted coconut into the finished marshmallow before shaping. Coat in dark chocolate and roll in more coconut.
- Cookies & Cream: After whipping, gently fold in ¾ cup of crushed Oreo cookie pieces (creme and all). The speckled look is so fun!
- Dairy-Free/Vegan Option: Use agar-agar (follow package instructions for substitution amounts) instead of gelatin, and ensure your chocolate and corn syrup are vegan-friendly.
Beau’s Kitchen Notes & Stories
This recipe has been my springtime labor of love for years, and it’s evolved with every batch. My first attempt? Let’s just say the eggs looked more like abstract marshmallow blobs, and my chocolate was a grainy mess. I learned that patience with the syrup temperature and gently melting the chocolate are non-negotiable. I also learned that inviting friends over for a “Marshmallow Egg Decorating Party” is the best way to do it. Kids (and adults!) love shaping and decorating their own. The kitchen gets messy, there’s laughter, and the results are always hilariously beautiful. Don’t be afraid to make a mess—that’s where the best memories (and the best tasting notes for your blog) come from!
Your Questions, Answered
Q: My marshmallow is SO sticky! How do I handle it?
A: Dust, dust, and dust again! Cornstarch or powdered sugar is your best friend. Don’t be shy with it on your hands, the work surface, and the eggs themselves. A little cornstarch on the finished egg gets sealed in by the chocolate.
Q: Can I make these ahead of time?
A: Absolutely! Once fully set, store them in a single layer in an airtight container at room temperature for up to 1 week. They’re actually even better the next day as the flavors meld.
Q: Why did my chocolate get streaky or thick?
A: This usually means the chocolate got too hot and “seized.” The fix? Gently stir in a tiny amount of neutral oil (like coconut or vegetable) a teaspoon at a time until it smooths back out. For perfect dipping, consider tempering your chocolate or using high-quality “dipping” chocolate or candy melts.
Q: I don’t have a candy thermometer. Can I still make these?
A: For consistent results, a thermometer is highly recommended. However, in a pinch, you can use the “soft-ball stage” test: drop a bit of syrup into a cup of cold water. If you can roll it into a soft, pliable ball with your fingers, it’s ready.
Homemade Marshmallow Easter Eggs : Soft, Fluffy & Chocolate Covered Treats
Description
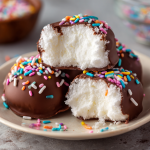
These homemade marshmallow Easter eggs are soft, fluffy, and coated in a smooth chocolate shell. They have that signature crack-and-cloud bite everyone loves — but fresher, softer, and more flavorful than store-bought. While marshmallow sounds fancy, the process is straightforward and totally doable with a mixer and a saucepan. Perfect for Easter baskets, dessert tables, or gifting.
Ingredients
Marshmallow Filling
-
3 envelopes unflavored gelatin
-
1 cup cold water, divided
-
2 cups granulated sugar
-
1 cup light corn syrup
-
1/4 teaspoon salt
-
1 teaspoon vanilla extract
Chocolate Coating
-
12–16 oz milk, semi-sweet, or dark chocolate (chips or chopped bars)
-
Cornstarch or powdered sugar, for dusting
Optional Decorations
-
Sprinkles
-
Toasted coconut
-
White chocolate drizzle
Instructions
-
Bloom the Gelatin
Add 1/2 cup cold water to the bowl of a stand mixer. Sprinkle gelatin over the top. Let sit 10 minutes until spongy. Do not stir. -
Make the Sugar Syrup
In a saucepan combine sugar, corn syrup, salt, and remaining 1/2 cup water.
Heat over medium-high until boiling. Cook without stirring until it reaches 240°F / 115°C (soft-ball stage). -
Whip the Marshmallow
Turn mixer to low. Carefully pour the hot syrup into the gelatin.
Increase to high speed and whip 10–12 minutes until thick, glossy, and tripled in volume.
Add vanilla during the last minute. -
Prepare Shaping Surface
Generously dust a baking sheet with cornstarch or powdered sugar. -
Shape the Eggs
Dust hands well. Scoop about a heaping tablespoon of marshmallow and gently form an egg shape.
Place on the sheet. Repeat, re-dusting hands often.
Let sit uncovered 1–2 hours to form a light outer skin. -
Melt the Chocolate
Melt chocolate gently in the microwave in 30-second bursts, stirring between each, until smooth. Let cool slightly. -
Dip
Drop each marshmallow egg into chocolate, turn to coat, lift with a fork, and let excess drip off.
Place on parchment paper and decorate immediately if desired. -
Set
Let chocolate firm at room temperature about 1 hour or refrigerate 20 minutes.
Notes
-
A candy thermometer gives the most reliable texture
-
Dust your hands often — marshmallow is naturally sticky
-
Let chocolate cool slightly before dipping to avoid melting the marshmallow
-
Use good chocolate — it makes a big difference in flavor and finish
-
If chocolate thickens, stir in 1 teaspoon neutral oil to loosen it
A Note on Nutrition & Details
Prep Time: 30 minutes | Setting Time: 1-2 hours | Total Time: ~2 hours | Yield: About 18-24 eggs, depending on size
Nutritional Information (Per egg, approximate): Calories: 140 | Carbohydrates: 26g | Sugar: 22g | Fat: 4g | Saturated Fat: 2g | Protein: 1g | Sodium: 30mg
Remember, these are a special occasion treat, meant to be savored and shared. The joy they bring is the best ingredient of all!
Final Sweet Thoughts
And there you have it, friends—your ticket to creating the most unforgettable, fluffy, chocolatey homemade Easter treat. This recipe is more than a list of steps; it’s an invitation to slow down, get your hands a little sugary, and create something truly special. Whether you’re carrying on a family tradition or starting a brand new one, these marshmallow eggs are a delicious way to mark the season. I’d love to see your creations! Tag me @feastical or use #FeasticalEaster so I can share in your sweet success. From my kitchen to yours, Happy Easter and happy cooking!
Stay cozy,
Beau