Forget the Lumps: Your Guide to Silky, Savory, Homemade Brown Gravy
Hey friends, Beau here from Feastical! Let’s talk about something magical. It’s not a fancy sauce with a unpronounceable name. It’s not a delicate foam or a fancy reduction. Nope. I’m talking about the humble, the glorious, the absolutely essential homemade brown gravy. This is the liquid gold that brings a Thanksgiving turkey to life, that turns a pile of mashed potatoes into a meal, and that makes a simple roast chicken feel like a celebration. If you’ve ever been stuck with a packet of powdery, salty, “just-add-water” disappointment, I’m here to tell you that your days of gravy woes are over.
This recipe is my kitchen superhero. It’s rich, deeply savory, and has that silky-smooth texture that only comes from making it yourself. The best part? You probably have everything you need in your pantry right this second. We’re talking about a 15-minute miracle, my friends. No drippings required (though we’ll talk about that upgrade later!), no special skills, just a good whisk and a little bit of love. So, whether you’re prepping for the biggest food holiday of the year or just want to elevate your Tuesday night meatloaf, grab your favorite saucepan. We’re about to make a gravy so good, you’ll want to drink it from the mug.
The Gravy Boat of My Dreams
My love affair with gravy started, like most good things, at my grandma’s table. Her kitchen was a place of wonder, always smelling of roasting meat and fresh-baked bread. But for me, the main event was always the gravy boat. It was this beautiful, old, white porcelain boat that seemed to hold liquid magic. She’d let me be the official “gravy pourer,” a title I wore with immense pride. I’d carefully navigate that boat around the table, ladling its rich, brown goodness over everything on my plate—yes, even the green beans. It was the unifying force of the meal.
One year, I must have been about ten, I asked her what her secret was. She winked, pulled me into the kitchen, and showed me. It wasn’t a secret ingredient from some far-off land. It was butter, flour, broth, and knowing when to stop whisking. That moment, standing on a step-stool watching her transform simple ingredients into something extraordinary, stuck with me. It was my first real lesson in alchemy—the magic that happens in a pan. This recipe is hers, with a few of my own Beau-isms added in. Every time I make it, I’m right back in her kitchen, and that’s a feeling worth sharing.
Gathering Your Gravy A-Team
Here’s the beautiful part: the ingredient list is short, sweet, and simple. This is all about technique and flavor-building. Let’s break it down.
- ¼ cup unsalted butter – This is our fat base and what gives the gravy its rich, luxurious mouthfeel. Using unsalted lets us control the sodium level perfectly. Chef’s Insight: If you only have salted butter, that’s okay! Just taste diligently before adding any extra salt at the end.
- ¼ cup all-purpose flour – Our thickening agent. When cooked with the butter, it forms a “roux,” which is the backbone of any great sauce or gravy. Substitution Tip: For a gluten-free version, a 1:1 gluten-free flour blend works wonderfully. I don’t recommend almond or coconut flour here, as they behave very differently.
- 2 cups beef broth – The star of the flavor show. Beef broth gives us that classic, deep, brown gravy taste. Substitution Tip: Chicken or turkey broth makes a fantastic, slightly lighter-colored but equally delicious gravy. For a richer flavor, use a combination of broth and pan drippings from your roast! Vegetable broth works for a vegetarian option.
- ½ tsp onion powder & ½ tsp garlic powder – These are our flavor power-ups. They dissolve perfectly into the gravy, giving us a well-rounded savory base without any chopping required. Chef’s Insight: If you have an extra minute, sautéing 2 tablespoons of finely minced fresh onion and garlic in the butter before adding the flour is an incredible upgrade!
- ½ tsp Worcestershire sauce – Our secret weapon! This adds a complex umami depth, a little tang, and a ton of savory character. Substitution Tip: If you don’t have any, a splash of soy sauce or even a teaspoon of balsamic vinegar can provide a similar complexity.
- Salt and black pepper to taste – Essential for seasoning. Always add at the end, after your broth has reduced, so you don’t over-salt it.
- Optional: A splash of soy sauce or a dash of browning sauce – If your gravy isn’t as dark as you’d like, these are your go-to color fixers. Soy sauce adds salt and umami, while browning sauce (like Kitchen Bouquet) is purely for color. A little goes a long way!
Let’s Make Some Magic: The Foolproof Method
Ready? This is where the magic happens. It’s a simple process, but paying attention to each step is the key to lump-free, restaurant-quality gravy. Let’s do this.
- Melt the Butter: Grab a medium saucepan and place it over medium heat. Toss in your butter and let it melt completely, swirling the pan occasionally. You want it to be fully liquid and just starting to foam, but not browning. Chef’s Hack: Using a light-colored saucepan helps you see the color of your roux more easily!
- Create the Roux: This is the most important step! Once the butter is melted, add your flour all at once and immediately start whisking. You’ll create a thick paste. Keep whisking constantly for 2-3 minutes. You’re looking for it to become a light golden brown color and smell a bit nutty and toasty. This cooks out the raw flour taste and is the foundation of your gravy’s flavor. Chef’s Commentary: Don’t walk away from your roux! It can go from perfect to burnt in a flash. This is your moment to shine. Put on some music and whisk like you mean it.
- Whisk in the Broth: Now, slowly—and I mean slowly—start pouring in your broth while whisking constantly. Add just a splash at first and whisk until it’s completely incorporated into the roux. This initial patience is the absolute key to preventing lumps. Once that first splash is smooth, you can gradually pour in the rest of the broth in a steady stream, never stopping your whisking motion.
- Add the Flavor Boosters: Once all the broth is incorporated and the mixture is smooth, whisk in your onion powder, garlic powder, Worcestershire sauce, and any optional add-ins like soy sauce. Your gravy will look a bit thin at this point. That’s perfect! It needs time to thicken up.
- Simmer to Perfection: Bring the gravy to a gentle simmer, then reduce the heat to medium-low. Let it bubble away for 5-8 minutes, stirring occasionally with your whisk. You’ll feel it start to thicken beautifully on the back of your spoon. Chef’s Hack: To test if it’s ready, dip a spoon in, draw a line through the gravy on the back of it with your finger. If the line holds its shape, it’s perfectly thickened!
- Season and Serve: Take the gravy off the heat. Now is the time to taste it and season with salt and black pepper. Remember, your broth might already be salty, so start with a little and add more as needed. Give it one final whisk, and you are done!
How to Serve Your Homemade Masterpiece
You did it! You’ve created a vessel of savory deliciousness. Now, let’s put it to work. The classic move is, of course, in a warm gravy boat. Pouring that silky gravy over a mountain of fluffy mashed potatoes is a rite of passage. But let’s think bigger!
This gravy is the ultimate companion for a Sunday roast—beef, chicken, pork, you name it. Drizzle it right over the sliced meat for maximum juiciness. Don’t forget the side of roasted vegetables! A little gravy turns simple carrots and Brussels sprouts into a star attraction. Leftover turkey after the holidays? This gravy is the key to the world’s best turkey pot pie or an incredible open-faced sandwich. And honestly? Don’t discount the power of a bowl of gravy and a piece of crusty bread for dipping. I won’t judge.
Mix It Up: 5 Delicious Twists
The basic recipe is a blank canvas. Once you’ve mastered it, the world of gravy is your oyster! Here are a few of my favorite ways to play with the formula.
- The “Thanksgiving Special”: Instead of plain broth, use the pan drippings from your roasted turkey! Skim off most of the fat, then add enough broth to the drippings to make 2 cups of liquid. The flavor will be out-of-this-world good.
- Mushroom Gravy: Before making the roux, sauté 1 cup of finely chopped cremini mushrooms in the butter until they’re golden brown and have released their moisture. Then, proceed with the recipe as written. Earthy, umami-rich, and perfect for vegetarians (if you use veggie broth).
- Herb-Infused Gravy: Add a teaspoon of fresh chopped rosemary or thyme (or ½ teaspoon dried) when you add the broth. For a more subtle flavor, you can also steep a whole sprig of rosemary or a few thyme sprigs in the simmering gravy and remove them before serving.
- Spicy “Kickin'” Gravy: Add a pinch of cayenne pepper or a few dashes of your favorite hot sauce along with the other seasonings. It adds a wonderful warmth that cuts through the richness.
- Creamy Onion Gravy: Sauté a thinly sliced large onion in the butter over low heat for 15-20 minutes until deeply caramelized. Then, add your flour and proceed. Stir in a tablespoon of heavy cream at the end for extra decadence. This is incredible on sausages and mash.
Beau’s Kitchen Notes
This recipe has evolved with me over the years. I’ve made it in a tiny apartment kitchen with a wobbly stove and in the middle of a chaotic family Thanksgiving with three nephews underfoot. The biggest lesson? Don’t stress. Gravy is forgiving. If it gets lumpy, just pour it through a fine-mesh sieve—your secret is safe with me. If it’s too thin, let it simmer a bit longer. Too thick? Whisk in a splash more broth until it’s just right.
I once made a double batch for a friendsgiving and accidentally grabbed the powdered sugar instead of the flour. Let’s just say we had a very… unique sweet and savory gravy that year. We laughed it off and ordered pizza. The moral of the story? Even a “mistake” can make a great kitchen story. But definitely label your containers!
Gravy FAQs: Solving Your Saucy Problems
Q: My gravy is lumpy! What did I do wrong and how can I fix it?
A: The most common culprit is adding the broth too quickly. The roux needs time to absorb the liquid. But don’t worry! All is not lost. The easiest fix is to grab an immersion blender and give it a quick blitz right in the pot. No immersion blender? Pour the gravy through a fine-mesh strainer, pushing it through with the back of a spoon. It’ll be smooth as silk.
Q: My gravy is too thin. How do I thicken it up?
A: Just keep cooking! Simmering over low heat will continue to evaporate water and thicken it. If you’re in a real rush, you can make a “slurry.” Mix a tablespoon of cornstarch with two tablespoons of cold water until smooth, then whisk it into the simmering gravy. Let it cook for a minute—it will thicken quickly.
Q: My gravy is too thick. It’s like a paste! Help!
A> No problem! This is an easy one. Just gradually whisk in more broth, a few tablespoons at a time, until it reaches your desired consistency. Remember, it will also thicken slightly as it cools.
Q: Can I make this gravy ahead of time?
A: Absolutely! Let it cool completely, then store it in an airtight container in the fridge for up to 3 days. When you’re ready, reheat it gently in a saucepan over low heat, whisking in a little extra broth or water if it’s become too thick.
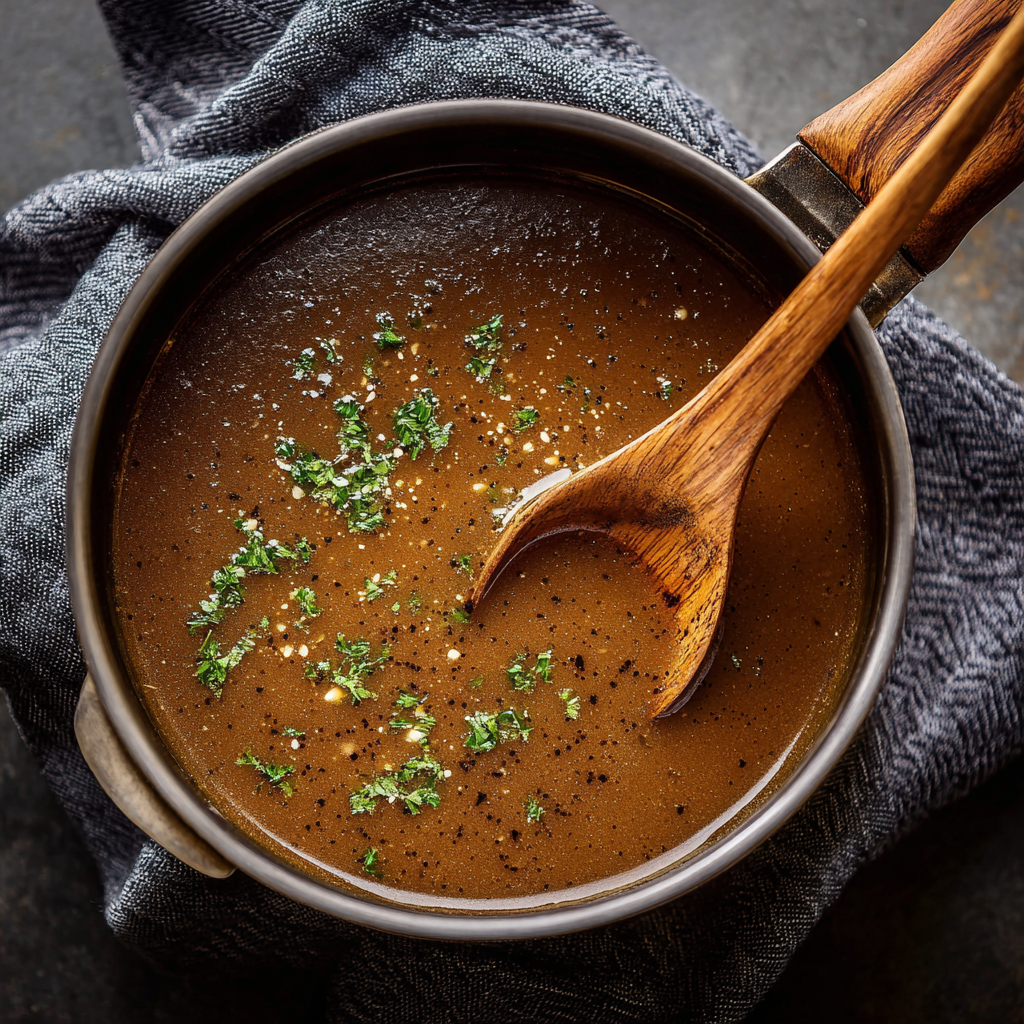
Homemade Brown Gravy
Description
Hey friends! Let’s talk about the magic of homemade brown gravy. This isn’t some fancy, intimidating sauce—this is the stuff that turns mashed potatoes into heaven, roast chicken into a feast, and leftover turkey into the stuff of dreams. With just a few pantry staples, a whisk, and 15 minutes, you can have gravy so smooth and rich you’ll want to sip it straight from a mug.
Ingredients
-
¼ cup unsalted butter
-
¼ cup all-purpose flour (or gluten-free flour blend)
-
2 cups beef broth (or chicken/turkey/vegetable broth)
-
½ tsp onion powder
-
½ tsp garlic powder
-
½ tsp Worcestershire sauce
-
Salt and black pepper, to taste
-
Optional: splash of soy sauce or browning sauce for color
Tip: For extra flavor, sauté minced onion and garlic in butter before adding flour.
Instructions
-
Melt the Butter: In a medium saucepan over medium heat, melt butter until foamy but not browned.
-
Make the Roux: Add flour and whisk constantly for 2–3 minutes until golden and nutty-smelling.
-
Add the Broth Slowly: Pour in a splash of broth, whisk until smooth, then gradually add the rest, whisking constantly to avoid lumps.
-
Flavor Boost: Stir in onion powder, garlic powder, Worcestershire sauce, and optional soy or browning sauce.
-
Simmer: Reduce heat to medium-low, simmer 5–8 minutes, stirring occasionally, until thickened.
-
Season & Serve: Taste and add salt and pepper as needed. Serve over mashed potatoes, roasted meats, or vegetables.
Notes
-
Lumpy Gravy? Use an immersion blender or strain through a fine-mesh sieve.
-
Too Thin? Simmer longer or whisk in a cornstarch slurry (1 tbsp cornstarch + 2 tbsp cold water).
-
Too Thick? Gradually whisk in extra broth until desired consistency.
-
Make Ahead: Store in fridge up to 3 days; reheat gently with a little broth if needed.
Nutrition
- Calories: 85 Cal per ¼ cup serving
- Fat: 6g
- Carbohydrates: 6g
- Protein: 1g
Nutritional Information (Per Serving)
Let’s be real—gravy isn’t a health food, but it’s a glorious condiment that makes healthy foods like turkey and vegetables even more enjoyable! This homemade version is a far better choice than store-bought packets, as you control the sodium and quality of ingredients. Here’s a rough breakdown per ¼ cup serving (recipe makes about 8 servings):
- Calories: ~85 kcal
- Carbohydrates: 6g
- Fat: 6g
- Protein: 1g
- Sodium: ~380mg (will vary greatly based on the broth you use)
Your New Kitchen Staple
And there you have it, my friends. The secret to perfect, foolproof, homemade brown gravy is out of the bag. It’s a simple process that yields incredible results and will instantly make you feel like a kitchen rockstar. This is the kind of recipe that builds confidence—the one you’ll turn to again and again for weeknight dinners and holiday feasts alike.
I hope this recipe finds its way into your kitchen and becomes a part of your own family’s story. Food is about so much more than just eating; it’s about the connection, the memories, and the joy of creating something delicious with your own two hands. So go on, give it a try. And when you do, I’d love to hear about it! Tag me @Feastical on social media so I can see your beautiful, saucy creations.
Until next time, happy cooking!