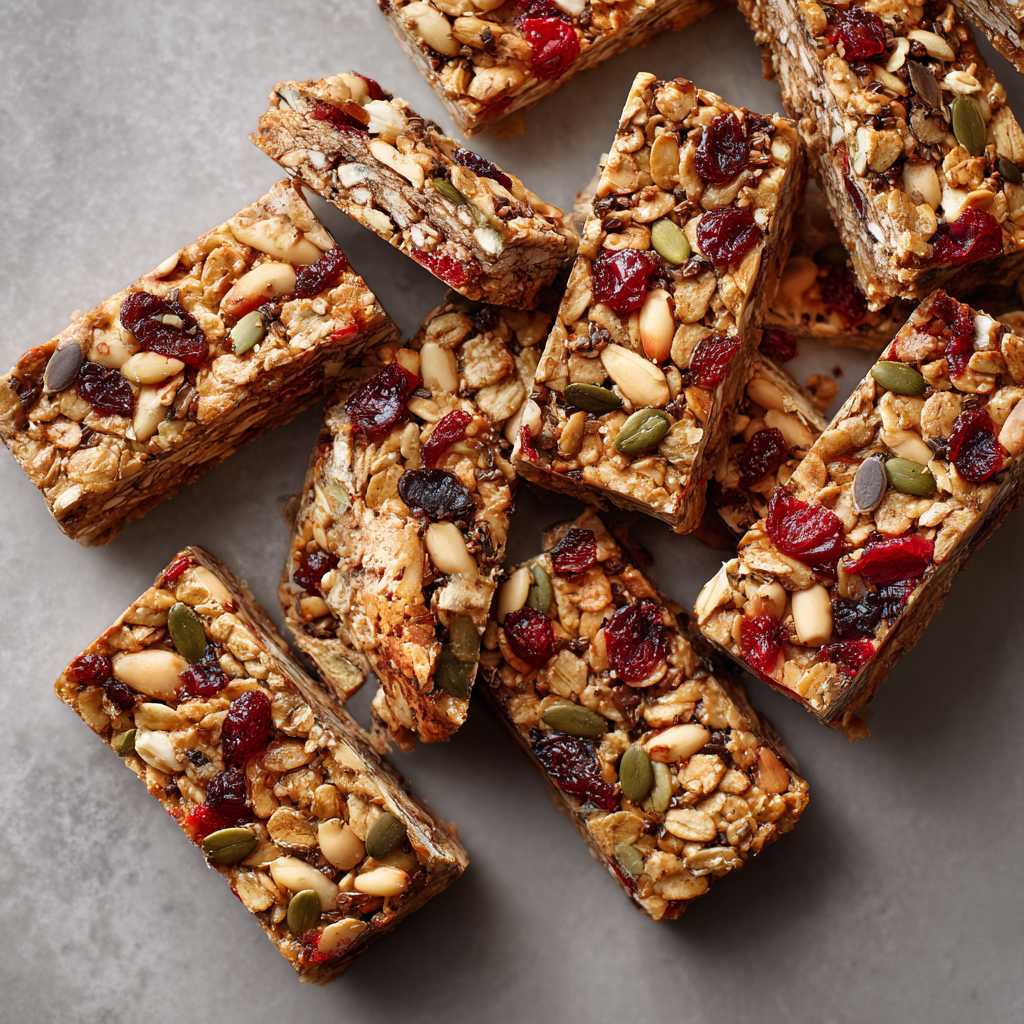
No-Bake Gluten-Free Granola Bars: Your New Favorite Grab-and-Go Snack!
Hey there, Feastical friends! Beau here, coming to you from my kitchen where the counter is currently dusted with a fine layer of gluten-free oats and there’s a jar of honey sitting suspiciously close to the edge. You know what that means—it’s snack time experimentation, and today, we’re crafting the ultimate homemade gluten-free granola bars.
Let’s be real, we’ve all been there: it’s 3 PM, your stomach is staging a full-blown rebellion, and you’re staring into the abyss of your pantry. Store-bought bars from brands like MadeGood or Kind are absolute lifesavers, and I always have a few tucked away for emergencies. But there’s something incredibly satisfying about whipping up a batch of your own. You control the ingredients, the sweetness, and you get to fill your whole house with the incredible, toasty, nutty aroma of goodness. These bars are chewy, packed with energy, and hold together perfectly without any weird binders or gums. They’re the kind of snack that feels like a treat but fuels your body right. So, tie on your favorite apron, and let’s make something delicious together!
The Trail Mix That Started It All
This recipe takes me right back to my first big hiking trip out west. I was young, overly ambitious, and my idea of “trail food” was a bag of pretzels and a questionable sandwich. About halfway up a stunning but grueling trail, a seasoned hiker saw me looking, well, pathetic. She chuckled, reached into her pack, and handed me a homemade granola bar. It was nothing like the crumbly, dry ones I’d tried before. It was dense, moist, and packed with chunks of nuts and fruit. It was pure fuel and kindness, all wrapped in wax paper. That simple bar completely changed my hike—and my perspective on portable food. I’ve been chasing that perfect bar ever since, and friends, I’m thrilled to tell you: this is the one. It’s the taste of adventure and community, right in your kitchen.
Gathering Your Gluten-Free Granola Bar Crew
Here’s the beautiful part: this recipe is more of a template. It’s incredibly forgiving! Here’s what you’ll need for the base, along with my chef-ly two cents on each one.
- 2 cups gluten-free rolled oats – This is our foundation! Make sure the package is certified gluten-free if you have a sensitivity. Regular oats are often cross-contaminated. These give us that classic chewy texture and heartiness.
- 1/2 cup nut or seed butter – This is our glue and our richness. I’m a peanut butter purist, but almond butter, cashew butter, or even sunflower seed butter (for a nut-free version!) work fantastically. The natural oils bind everything together beautifully.
- 1/3 cup honey or maple syrup – Our natural sweetener and second binder. Honey gives a slightly chewier bar, while maple syrup offers a lovely depth and keeps it vegan. Agave syrup works in a pinch, too!
- 1/4 cup sunflower seeds or chopped nuts – Hello, crunch! Sunflower seeds are my go-to for a little texture and a boost of nutrients. Chopped almonds, pecans, or walnuts are also stellar choices. Toast them lightly first for a next-level flavor explosion.
- 1/4 cup dried fruit or mini chocolate chips – The fun mix-ins! I love a combination of tart cherries and mini dark chocolate chips. Raisins, cranberries, chopped apricots—the sky’s the limit. This is where you make these bars truly yours.
- 1/2 tsp vanilla extract – The flavor enhancer. It adds a warm, sweet aroma that makes the whole kitchen smell like a bakery. Don’t skip it!
- A generous pinch of salt – The ultimate flavor balancer. It makes the sweet ingredients taste sweeter and the nutty ingredients pop. Trust me on this.
Let’s Build These Bars: A Step-by-Step Guide
This is a no-bake situation, friends. We’re talking 10 minutes of active time. You’ve got this!
Step 1: The Warm Embrace. Grab a medium saucepan and place it over low heat. Add your nut (or seed) butter and honey. Warm them together, stirring constantly, for just 1-2 minutes until they melt into a smooth, gorgeous, pourable liquid. You’re not cooking it, just warming it through! Chef Hack: Warming this mixture is the secret to a perfectly cohesive bar. It makes everything easier to mix and helps the bars hold their shape later. Remove it from the heat and immediately stir in that vanilla extract and pinch of salt. Give it a whiff. Amazing, right?
Step 2: The Big Mix. In a large mixing bowl, combine your gluten-free oats, sunflower seeds (or nuts), and your chosen dried fruit/chocolate chips. Now, pour that warm, gooey, delicious liquid from the saucepan over the dry ingredients. Take a sturdy spatula and mix, mix, mix! Get in there and make sure every single oat and seed is coated in that sticky-sweet mixture. It might take a minute, but keep going until there are no dry spots left.
Step 3: The Press & Chill. Line an 8×8-inch baking pan with parchment paper, leaving some overhang on two sides. This is your non-stick lifeline and will make removing the bars later a total breeze. Transfer your oat mixture into the prepared pan. Now, here’s the most important step: PRESS, PRESS, PRESS! Use the bottom of a measuring cup or a glass, really pack that mixture down as firmly and evenly as you can. This compacts the bars and ensures they don’t crumble when you slice them. Chef Hack: Place a second piece of parchment paper on top of the mixture before you press. This prevents the mixture from sticking to your glass or hands!
Step 4: The Patience Game. Pop the pan into the refrigerator for at least 1-2 hours, or until the whole slab is completely firm. I know, the waiting is the hardest part! But this chilling step is what sets the bars. They need time to cool and solidify into perfect, sliceable bars.
Step 5: Slice & Celebrate! Once firm, use the parchment paper overhang to lift the entire granola slab out of the pan. Place it on a cutting board and slice it into bars or squares using a sharp knife. For clean cuts, wipe your knife blade clean between slices.
How to Serve Up These Beauties
These bars are the definition of grab-and-go perfection! Wrap them individually in parchment paper or stash them in a small airtight container for a quick breakfast with your coffee, a pre-workout boost, or an afternoon pick-me-up at your desk. They’re also fantastic crumbled over a bowl of Greek yogurt or alongside a handful of fresh berries for a more complete snack. However you enjoy them, do it with a smile!
Make It Your Own: Delicious Variations
The fun doesn’t stop here! This recipe is a blank canvas. Here are a few of my favorite twists:
- Chocolate Lover’s Dream: Stir in 2 tablespoons of cocoa powder into the wet mixture and use chocolate chips as your mix-in. You could even drizzle melted chocolate on top after slicing.
- Tropical Vacation: Use coconut oil instead of nut butter, and use a mix of dried mango, pineapple, and shredded coconut for your add-ins.
- Superfood Seed Boost: Add 2 tablespoons each of chia seeds and ground flaxseed to the dry ingredients for an extra omega-3 punch.
- Apple Pie Bar: Stir in 1 teaspoon of cinnamon into the dry ingredients and use finely chopped dried apples and walnuts for your mix-ins.
- Nut-Free Zone: Use sunflower seed butter and pumpkin seeds to keep things completely nut-free for school lunches.
Beau’s Chef Notes & Kitchen Stories
This recipe has evolved more times than I can count. The first time I made them, I was so impatient I only chilled them for 20 minutes. Let’s just say I ended up with a delicious, albeit crumbly, “granola bark” that I ate with a spoon! Lesson learned. The pressing and chilling are non-negotiable for perfect bars.
Another time, my nephew was “helping” me and decided that “1/4 cup of chocolate chips” was merely a suggestion. We ended up with what we affectionately called “Chocolate Bars with Oat Surprises.” They were a mess to slice but were a huge hit. Don’t be afraid to play around and find your family’s perfect ratio!
FAQs & Troubleshooting: Your Questions, Answered!
Q: My bars are too crumbly! What did I do wrong?
A: This usually boils down to two things: 1) Not enough binding liquid, or 2) Not pressing firmly enough. Next time, try adding an extra tablespoon of nut butter or honey. And really put some muscle into pressing that mixture into the pan! If it’s already happened, no worries—you’ve got fantastic granola cereal for yogurt.
Q: Can I use quick oats instead of rolled oats?
A: You can, but the texture will be different. Rolled oats give a chewier, heartier bar. Quick oats will result in a softer, more uniform texture. Both are delicious, just be prepared for the change!
Q: How should I store these homemade granola bars?
A: Because they are naturally moist, they are best kept in an airtight container in the refrigerator for up to 2 weeks. They also freeze beautifully for up to 3 months! Just wrap them individually and toss them in a freezer bag for a ready-to-go snack.
Q: My bars are super hard after chilling. Help!
A: This likely means the wet mixture was heated a little too long or too hot, causing it to harden too much. Next time, gentle warmth is key—just enough to make it pourable. Let the bars sit at room temperature for 5-10 minutes before eating; they’ll soften up nicely.
Gluten-Free Granola Bars
- Total Time: 12 minute
Description
There’s something magical about homemade snacks—you get all the flavor, none of the mystery ingredients, and the joy of creating something that fuels your day. These no-bake gluten-free granola bars are chewy, satisfying, and endlessly customizable. Whether you need a quick breakfast, an afternoon pick-me-up, or fuel for your next adventure, this recipe has you covered. The best part? They come together in minutes, no oven required! Grab your oats, a little nut butter, and let’s build your new favorite grab-and-go snack.
Ingredients
-
2 cups gluten-free rolled oats
-
½ cup nut or seed butter (peanut, almond, cashew, or sunflower seed butter)
-
⅓ cup honey or maple syrup
-
¼ cup sunflower seeds or chopped nuts
-
¼ cup dried fruit or mini chocolate chips
-
½ tsp vanilla extract
-
Pinch of salt
Instructions
1. Warm & Whisk – In a saucepan, gently warm nut butter + honey until smooth. Stir in vanilla and salt.
2. Mix It Up – In a bowl, combine oats, seeds/nuts, and dried fruit or chocolate. Pour in warm mixture and stir until every oat is coated.
3. Press & Chill – Line an 8×8 pan with parchment. Press mixture in firmly (use another parchment sheet to keep it neat).
4. Refrigerate – Chill 1–2 hours until set.
5. Slice & Enjoy – Lift out, cut into bars, and store.
Notes
-
Chocolate Lover’s Dream – Add cocoa powder + chocolate drizzle.
-
Tropical Vibes – Mango, pineapple, coconut flakes.
-
Apple Pie Twist – Cinnamon, dried apples, walnuts.
-
Nut-Free – Sunflower seed butter + pumpkin seeds.
- Prep Time: 10 min active | 1–2 hrs chill
Nutrition
- Calories: 180 Cal per bar, approx.
- Fat: 9g
- Carbohydrates: 18g
- Protein: 4g
Nutritional Info (Approximate, Per Bar)
This is based on a recipe yielding 12 bars, using peanut butter, honey, sunflower seeds, and chocolate chips.
Calories: ~180 | Protein: 4g | Carbohydrates: 18g | Fat: 9g
Final Thoughts: Your Pantry, Transformed.
And just like that, you’re a certified gluten-free granola bar artisan! No more mystery ingredients, no more settling for a bar that’s just okay. You’ve now got the power to create a snack that’s not only bursting with real, honest ingredients but also packed with your own unique flavor twist.
This recipe is more than a list of steps—it’s an invitation to play, to customize, and to fill your kitchen with the incredible smell of toasted oats and honey. It’s a reminder that the most satisfying foods are often the simplest ones, made with intention and a little bit of love.
Whether you’re wrapping these up for a hectic week of lunches, fueling a weekend adventure, or simply satisfying that 3 PM craving with something you made yourself, I hope these bars bring you a moment of joy and a whole lot of energy.
So here’s to less pantry-staring and more bar-making. You’ve got this!