Welcome to My Favorite Holiday Bite!
Hey friends, Beau here from Feastical! Is there anything that captures the cozy, spiced-up magic of the holiday season quite like the smell of gingerbread? That warm, molasses-rich, spicy aroma that seems to hug the entire house? I’ve always believed that the best holiday memories are made not just around the dinner table, but also in the moments of creating something special with your own two hands. That’s why I’m so incredibly excited to share one of my all-time favorite no-bake treats with you today: Gingerbread Truffles.
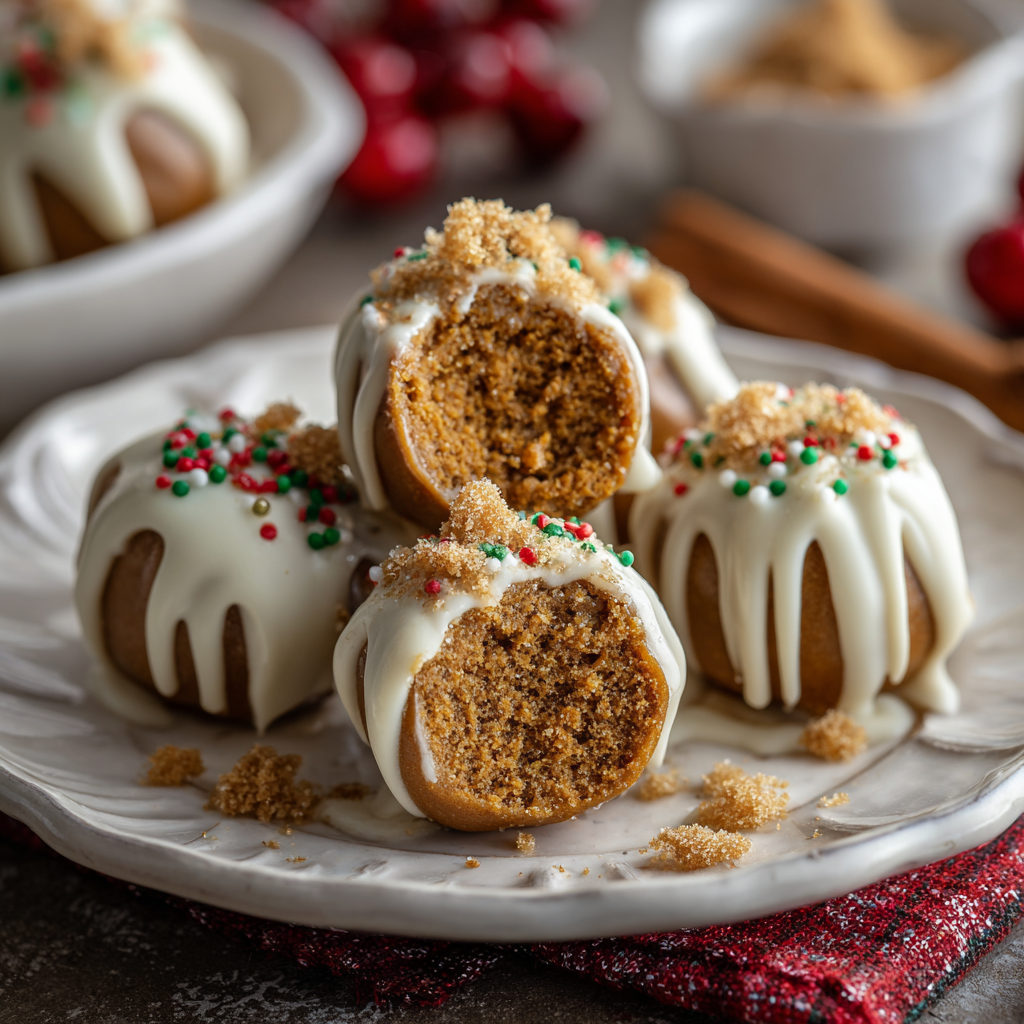
Imagine the soul of your favorite gingerbread cookie, transformed into a creamy, decadent, bite-sized truffle. We’re talking a rich, spiced center made from crushed gingersnaps and cream cheese, all enrobed in a sleek coat of sweet white chocolate. They’re the perfect little package of festive joy. Whether you’re whipping them up for a cookie swap, leaving a plate out for Santa (he’ll be thrilled, trust me), or simply treating yourself after a long day of holiday chaos, these truffles are a guaranteed mood-lifter. They’re incredibly simple to make, require zero oven time, and are an absolute blast to decorate. So, tie on your favorite apron, put on some classic holiday tunes, and let’s make some magic together. This is one recipe that’s about to become a non-negotiable part of your holiday tradition!
The Christmas Eve Kitchen Rescue
I have to tell you about the first time these truffles truly saved the day. It was Christmas Eve, and I’d ambitiously planned an elaborate seven-course dinner for my family. Everything was on schedule until I opened the oven to check on the main course… only to be greeted by the smoky remnants of what was supposed to be a glorious gingerbread Yule log. I’d completely forgotten about it! The kitchen was a disaster, my masterpiece was a charcoal briquette, and I had about two hours until guests arrived with zero dessert.
Panic mode: activated. But then, I remembered a half-eaten bag of gingersnaps in the pantry and a block of cream cheese in the fridge. In a whirlwind of inspiration (and slight desperation), I threw them together with some spices and molasses. I rolled the mixture into balls, dunked them in the only chocolate I had left—white chocolate—and frantically shoved the tray into the freezer. Twenty minutes later, I presented these hastily assembled truffles on a platter, fully expecting a polite but disappointed reception. Instead, they were the undisputed star of the night. My grandma even said, “Beau, you’ve outdone yourself this time!” I never told her they were a happy accident born from a kitchen fail. Sometimes, the best recipes come from a little chaos and a whole lot of heart.
Gathering Your Truffle Toolkit
One of the best things about this recipe is its beautiful simplicity. You likely have most of these ingredients already hanging out in your pantry, just waiting to become something spectacular. Here’s what you’ll need:
- 1½ cups crushed gingersnap cookies: This is the flavor foundation! I like to use a sturdy food processor to get fine crumbs, but a zip-top bag and a rolling pin work just as well (and can be a great stress-reliever!). Chef’s Insight: The brand of cookie matters. Nabisco’s Famous Gingersnaps have a robust spice level that I love, but feel free to use your favorite store brand or even homemade cookie crumbs!
- 4 oz cream cheese, softened: This is our binding agent, and it provides that luscious, creamy texture. Pro Tip: FULL FAT is the way to go here for the best consistency and flavor. Make sure it’s softened to room temperature to avoid a lumpy mixture.
- 2 tbsp molasses: This is the deep, rich, soulful sweetness that defines gingerbread. Substitution Tip: If you’re in a pinch, dark corn syrup or maple syrup can work, but the flavor profile will be lighter and less complex.
- ½ tsp ground cinnamon, ¼ tsp ground ginger, ¼ tsp ground nutmeg, Pinch of cloves: Our spice quartet! This is where you can really make these truffles your own. Love a spicy kick? Add an extra pinch of ginger or even a tiny dash of black pepper. Chef’s Hack: For an incredible depth of flavor, try using freshly grated nutmeg. It makes a world of difference!
- 8 oz white chocolate (for coating): I recommend using high-quality baking bars or melting wafers, as they melt more smoothly than chocolate chips, which contain stabilizers. Substitution Tip: Dark or milk chocolate would also be delicious for a different flavor twist!
- Optional garnishes: Crushed cookies, festive sprinkles, holiday-themed nonpareils, or a light dusting of cinnamon. This is your chance to get creative and have fun!
Let’s Make Some Truffle Magic: Step-by-Step
Okay, team! Let’s get our hands dirty (figuratively, and maybe a little literally). This process is simple, fun, and honestly, a little therapeutic. Follow these steps, and you’ll be a truffle-making pro in no time.
- Create the Truffle Base: In a medium-sized mixing bowl, combine your finely crushed gingersnap cookies, softened cream cheese, molasses, and all those wonderful spices (cinnamon, ginger, nutmeg, and cloves). Now, roll up your sleeves and get in there with your hands! Mix everything together until it’s completely uniform and smooth. You shouldn’t see any streaks of cream cheese or dry patches of cookie crumbs. Chef’s Hack: If the mixture feels a tad too soft to roll, pop it in the fridge for 15 minutes. This will make it much easier to handle.
- Roll and Chill: Using a small cookie scoop or a tablespoon, portion out the mixture. Then, with clean, dry hands, roll each portion into a smooth, tight 1-inch ball. Place each little ball of goodness onto a parchment paper-lined baking sheet. Once they’re all rolled, it’s crucial to let them firm up. Slide the tray into the refrigerator for at least 30 minutes, or into the freezer for 15. Pro Tip: This chilling step is non-negotiable! A cold truffle center is what will allow you to dip it into the warm chocolate without it turning into a puddle.
- Melt the Chocolate: While the truffle centers are chilling, melt your white chocolate. You can do this gently in a double boiler (a heatproof bowl set over a pot of simmering water, making sure the bottom of the bowl doesn’t touch the water) or in short bursts in the microwave. If using the microwave, heat in 20-second intervals, stirring vigorously between each burst, until it’s completely smooth and fluid. Chef’s Warning: White chocolate is notoriously finicky and can “seize” (become clumpy) if it gets too hot or if even a drop of water gets in the bowl. Keep everything completely dry!
- The Big Dip: Remove your truffle centers from the fridge. Using a fork or a specialty dipping tool, submerge one truffle ball completely into the melted chocolate. Gently lift it out, tap the fork against the side of the bowl to allow the excess chocolate to drip off, and then carefully slide it back onto the parchment-lined tray. Chef’s Hack: If the chocolate starts to thicken up too much as you work, you can gently reheat it for a few seconds.
- Garnish Immediately: This is the fun part! If you’re adding any sprinkles, cookie crumbs, or a dusting of cinnamon, you have to do it RIGHT NOW, before the chocolate shell sets. They’ll only stick to wet chocolate.
- The Final Chill: Once all your truffles are beautifully coated and decorated, return the entire tray to the refrigerator for a final 20-minute chill. This allows the chocolate coating to set completely, giving you that perfect, satisfying snap when you bite into one.
How to Serve These Little Gems
Presentation is part of the fun! These truffles are gorgeous all on their own, but a little styling goes a long way in making them feel extra special.
I love serving them piled high on a beautiful rustic wooden board or a vintage cake stand. For a truly festive touch, place them in mini paper candy cups – you can find these in holiday colors or patterns at any craft store. It makes them look professional and makes them easy for guests to grab. They are the perfect addition to a holiday dessert charcuterie board, paired with other cookies, fresh berries, and maybe even a sharp cheese. For a cozy night in, simply stack a few on a small plate next to a steaming mug of hot cocoa, coffee, or a chai tea latte. They’re also fantastic packaged in a cute box or cellophane bag tied with a ribbon as a heartfelt, homemade gift for neighbors, teachers, or friends. However you choose to serve them, just be prepared for recipe requests!
Mix It Up! Creative Variations
The classic recipe is a winner, but don’t be afraid to play with your food! Here are a few of my favorite ways to mix things up:
- The Chocolate Lover: Swap the white chocolate coating for rich, dark chocolate. The bitterness of the dark chocolate creates an incredible contrast with the sweet, spicy gingerbread center.
- Nutty Professor: Add some crunch! Mix 2-3 tablespoons of very finely chopped toasted pecans or walnuts right into the truffle base before rolling.
- Orange Zest Twist: Brighten up the deep spices by adding the zest of one small orange to the truffle mixture. The citrus aroma is a game-changer.
- Dairy-Free Delight: You can easily make this vegan! Use your favorite vegan gingersnaps (check the label), a plant-based cream cheese alternative, and vegan white chocolate bars for melting.
- Bourbon-Spiked: For an adults-only version, add 1-2 teaspoons of bourbon or dark rum to the truffle mixture. It amplifies all those warm, cozy flavors perfectly.
Beau’s Chef Notes & Kitchen Stories
Over the years, this recipe has become a living thing in my kitchen. I’ve made it with my nieces and nephews, their little hands covered in chocolate and sprinkles, and I’ve made elegant versions for fancy dinner parties. The biggest lesson? Embrace the imperfection. Not every truffle will be a perfect sphere, and that’s okay! Sometimes the ones with a little extra drizzle or a rogue sprinkle have the most character. I once accidentally used salted caramel chips instead of white chocolate for the coating—it was a happy accident that everyone loved. The point is to have fun and enjoy the process. The messier the kitchen, the better the memories. These truffles are forgiving, so don’t stress. Just pour some love into the bowl, and it’ll shine through in every single bite.
Your Questions, Answered!
Q: My truffle mixture is too sticky to roll. What did I do wrong?
A: This usually means your cream cheese was a bit too warm, or your cookies weren’t crushed finely enough. No worries! Just pop the mixture into the fridge for 15-20 minutes to firm up. You can also lightly dampen your hands with water while rolling to prevent sticking.
Q: Why did my white chocolate get thick and clumpy when I melted it?
A: Ah, the dreaded “seized” chocolate! This happens if the chocolate gets too hot or if even a tiny bit of steam or water gets into the bowl. Unfortunately, you can’t really fix it for dipping. Your best bet is to start over slowly. For seized chocolate, you can sometimes save it by stirring in a teaspoon of neutral oil (like vegetable or coconut) and using it as a drizzle instead.
Q: How far in advance can I make these?
A: They are fantastic for making ahead! Store them in an airtight container in the refrigerator for up to a week. You can also freeze them for up to 2 months. Just thaw in the fridge overnight before serving.
Q: Can I use something other than cream cheese?
A: The cream cheese is key for the texture and tang. However, for a different approach, you could use a thick, canned coconut cream (just the solid part) for a dairy-free version, though the texture will be slightly less firm.

Gingerbread Truffles
Description
Gingerbread Truffles (No-Bake Holiday Treats)
Creamy, spiced, and coated in white chocolate—perfect for the holidays!
Ingredients
Truffle Base:
-
1½ cups crushed gingersnap cookies
-
4 oz cream cheese, softened (full-fat recommended)
-
2 tbsp molasses
-
½ tsp ground cinnamon
-
¼ tsp ground ginger
-
¼ tsp ground nutmeg
-
Pinch of cloves
Coating:
-
8 oz white chocolate, melted
-
Optional garnishes: crushed cookies, festive sprinkles, nonpareils, cinnamon
Tools: Parchment paper, baking sheet, small cookie scoop or tablespoon
Instructions
1. Make the Truffle Base
-
In a medium bowl, combine crushed cookies, softened cream cheese, molasses, and spices.
-
Mix until smooth and uniform. If too soft to roll, refrigerate 15 minutes.
2. Roll & Chill
-
Scoop out 1-inch portions and roll into balls.
-
Place on parchment-lined baking sheet.
-
Chill in the fridge for 30 minutes (or freezer for 15) until firm.
3. Melt Chocolate
-
Melt white chocolate in a double boiler or microwave in 20-second intervals, stirring between bursts.
-
Keep completely dry to prevent seizing.
4. Coat Truffles
-
Dip chilled truffles into melted chocolate.
-
Let excess drip off and place back on parchment-lined tray.
-
Add garnishes immediately before chocolate sets.
5. Final Chill & Serve
-
Refrigerate for 20 minutes to set chocolate.
-
Serve on a festive board, in paper candy cups, or package as gifts.
Notes
-
Sticky mixture? Chill before rolling.
-
Seized chocolate? Stir in a tsp neutral oil and use as drizzle.
-
Cream cheese is key for texture—substitutions may alter firmness.
Nutrition
- Calories: 120 Cal
- Fat: 7g
- Carbohydrates: 13g
- Protein: 1G
Nutritional Information*
*Please note: This is an estimated nutritional breakdown based on the specific ingredients listed. Values can vary based on specific brands and measurements used.
Per Truffle (approx. 1 truffle):
Calories: 120 | Total Fat: 7g | Saturated Fat: 4g | Cholesterol: 10mg | Sodium: 60mg | Total Carbohydrates: 13g | Dietary Fiber: 0.3g | Sugars: 10g | Protein: 1g
While these are certainly a treat, it’s all about balance and joy during the holiday season! Enjoy them mindfully as part of your celebrations.
Final Thoughts from My Kitchen to Yours
Well, there you have it, my friends—my secret weapon for holiday happiness, all wrapped up in a spiced, creamy, chocolatey bite. These Gingerbread Truffles are more than just a recipe; they’re an experience. They’re about the joy of creating, the fun of getting a little messy, and the pure pleasure of sharing something delicious with the people you love.
I hope this recipe brings as much light and laughter to your kitchen as it has to mine. Remember, the best dishes are the ones made with a pinch of love and a dash of adventure. So from my Feastical family to yours, happy holidays and happy cooking! Don’t forget to tag me @feastical in your photos—I absolutely love seeing your creations.
Until next time, keep spreading joy, one bite at a time.