
Your New Favorite Holiday Cookie is Here: Gingerbread Snowball Cookies
Hey friends, Beau from Feastical here! Is there anything better than that moment your kitchen starts to smell like the holidays? You know the one—the warm, spicy, buttery aroma that wraps around you like your favorite cozy sweater. It’s pure magic. And if you’re looking to create that magic this year, I’ve got the absolute perfect recipe for you: these unbelievably delicious Gingerbread Snowball Cookies.
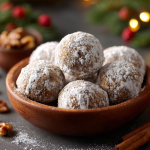
We’re taking the classic, melt-in-your-mouth tender snowball cookie (you might know them as Russian Tea Cakes or Mexican Wedding Cookies) and giving them a full-on holiday glow-up. We’re infusing them with all the warm, cozy spices of gingerbread and a hint of citrusy brightness. The result is a cookie that’s somehow both elegantly stunning and deeply comforting. They’re tender, they’re spiced, and that double dusting of powdered sugar makes them look like they’ve just been kissed by a gentle winter snow. Perfect for your cookie trays, amazing for gifting, and honestly, even better for sneaking a few (or five) straight from the cooling rack with a hot cup of coffee. So, let’s preheat those ovens and make some edible holiday cheer together!
A Snowy Day and a Sweet Tradition
This recipe always takes me back to one specific, snowed-in December afternoon at my grandma’s house. The world outside was a silent, white blanket, and inside, her kitchen was a haven of warmth and chaos. She was a whirlwind of flour, butter, and laughter, and that day, she was determined to teach me her famous snowball cookies. I remember being so meticulous, trying to make each cookie a perfect sphere, while she’d just scoop and roll with a effortless flick of her wrist, telling me, “Beau, honey, they’re supposed to look homemade, not machine-made! It’s the love that makes ‘em round.”
We’d always leave a few plain before rolling them in sugar—my grandpa claimed the powdered sugar got in his mustache, but we all knew he just wanted first dibs on the “naked” ones. Years later, when I was creating recipes for Feastical, I found myself craving that same tender, buttery cookie but with the bold, heartwarming flavor of her gingerbread cake. I started experimenting, adding a dash of this and a spoonful of that, and after a few… let’s call them “learning experiences”… I landed on this perfect fusion. It’s my grandma’s timeless technique meets my love for big, bold flavor. Every time I make them, that snowy afternoon and the sound of her laughter come right back to me. And that, my friends, is the real secret ingredient.
Gathering Your Cookie Crew: The Ingredients
Here’s everything you’ll need to bring these spiced-up snowballs to life. Don’t worry, it’s all simple stuff! I’ve included my chef-y notes and easy swaps to make this recipe your own.
- 2 cups (452g) unsalted butter, softened – This is the foundation of our tender, melt-in-your-mouth texture. I use unsalted so we can control the salt level ourselves. Pro Tip: “Softened” means cool to the touch but leaves a slight indent when you press it. Don’t let it get oily or melty!
- 1 cup (114g) powdered sugar – We’re using this in the dough for its fine texture, which helps create that delicate crumb. Plus, we’ll need a whole lot more for the snowy coating!
- 2 teaspoons vanilla extract – The sweet, aromatic backbone that makes all the other flavors sing. Use the real stuff—it makes a difference!
- 1 teaspoon salt – Crucial! This isn’t to make the cookies taste salty; it’s a flavor enhancer that makes the spices and butter pop and balances the sweetness perfectly.
- The Spice Squad: This is where the gingerbread magic happens!
- 2 teaspoons ground cinnamon
- 2 teaspoons ground ginger – The star of the show! This gives that classic, warm, slightly peppery gingerbread kick.
- 1 teaspoon ground nutmeg – Adds a warm, nutty depth.
- ½ teaspoon ground allspice – Brings in hints of clove, nutmeg, and cinnamon all in one.
- ½ teaspoon ground cloves – A powerful spice, so a little goes a long way. It adds an intense, warm aroma that screams “holidays.”
- 2 tablespoons molasses – This is the soul of gingerbread. It provides that deep, robust, almost bitter-sweet flavor and a beautiful dark color. Use light or dark molasses, but not blackstrap—it’s too strong and bitter for these delicate cookies.
- 4½ cups (558g) all-purpose flour – The structure of our cookie. For best results, fluff your flour with a spoon, sprinkle it into your measuring cup, and level it off. Don’t scoop directly from the bag or you might pack in too much!
- ½ cup finely chopped pecans or walnuts (optional) – I highly recommend these for a wonderful little crunch and toasty flavor. If you have nut allergies, just leave ’em out—the cookies are still amazing!
- Zest of 1 orange – My secret weapon! The bright, citrusy oil from the zest cuts through the richness and adds a incredibly festive, complex flavor. You won’t necessarily taste “orange,” but you’ll notice how much brighter everything else tastes.
- Extra powdered sugar, for rolling – You’ll need about another 1 to 1.5 cups for that beautiful snowy finish.
Let’s Get Rolling: The Step-by-Step Guide
Okay, team! Let’s make some cookie magic. Follow these steps and you’ll be a snowball pro in no time.
- Preheat and Prep. Fire up your oven to 350°F (175°C). This gives it plenty of time to come to a steady, even temperature. Line your baking sheets with parchment paper. Trust me on this—it prevents sticking without added grease and makes cleanup an absolute dream. No parchment? Silicone baking mats work great too.
- Creaming is Key. In a large bowl, beat the softened butter and 1 cup of powdered sugar together on medium speed for a full 2-3 minutes. We’re not just mixing them; we’re “creaming” them. This process whips tiny air bubbles into the butter, which is what gives us that lovely, tender texture. The mixture should become noticeably lighter in color and fluffy.
- Spice It Up. Reduce your mixer speed to low and beat in the vanilla extract, molasses, orange zest, salt, and all those gorgeous spices (cinnamon, ginger, nutmeg, allspice, and cloves). Mix until everything is perfectly combined and your kitchen already starts to smell incredible.
- Bring in the Flour. Now, gradually add the flour, about a cup at a time, mixing on low speed until just combined after each addition. Chef’s Hack: Once the last bit of flour is almost incorporated, stop the mixer and finish mixing by hand with a spatula. This prevents over-mixing, which can make the cookies tough. If you’re using nuts, this is the time to fold them in with that spatula.
- The Scoop and Roll. Your dough might be a little soft. If it feels too sticky to handle, pop it in the fridge for 15-20 minutes to firm up. Then, scoop up tablespoon-sized portions of dough and roll them into smooth 1-inch balls between your palms. Place them about 1-2 inches apart on your prepared baking sheets. They don’t spread much, so you can crowd them a little.
- Bake to Perfection. Bake for 10-12 minutes. You’re looking for the bottoms to be just lightly golden. The tops will still look soft and pale—that’s exactly what we want! Do not overbake! They will continue to set up as they cool. Overbaking is the number one way to end up with a crunchy, not tender, snowball.
- The Double Dusting. Here’s the secret to that gorgeous, snowy look! Let the cookies cool on the baking sheet for exactly 5 minutes. They should be firm enough to handle but still very warm. Place your extra powdered sugar in a shallow bowl. Gently roll each warm cookie in the sugar until coated, then transfer them to a wire rack to cool completely. Once they’re fully cool, give them a second roll in the powdered sugar. This first layer melts slightly into the cookie, creating a sweet shell, and the second roll gives that fresh, snowy, picture-perfect finish.
How to Serve These Holiday Stars
These cookies are stunning all on their own, but a little presentation flair never hurts! For a classic cookie tray, pile them high on a beautiful vintage platter or in a rustic wooden bowl. They look fantastic mixed with other holiday favorites like shortbread, chocolate crinkles, and peppermint bark.
If you’re gifting them (lucky friends!), stack them carefully in a cellophane bag tied with a festive ribbon or pack them snugly in a holiday tin between layers of parchment paper so they don’t lose their snowy coating.
And for serving? Oh, they are *meant* to be enjoyed with a hot beverage. The rich, spiced cookie just melts away with a sip of strong coffee, hot chocolate, or a chai tea latte. It’s a match made in holiday heaven. Place a few on a small plate next to a steaming mug for the ultimate feel-good moment.
Mix It Up: Fun Recipe Variations
Once you’ve mastered the classic, feel free to get creative! Here are a few of my favorite twists:
- Chocolate Dipped: Dip half of the fully cooled and sugar-dusted cookie into melted dark or white chocolate. Place on parchment paper and let the chocolate set completely. It adds a decadent, celebratory touch.
- Maple Kissed: Replace the molasses with pure maple syrup for a slightly different, lighter sweetness. The flavor is incredible!
- Gluten-Free Joy: You can easily make these gluten-free! Swap the all-purpose flour for a 1:1 gluten-free baking blend. I recommend one that includes xanthan gum for the best texture.
- Spice Adventurer: Add a tiny pinch of freshly ground black pepper along with the spices. It sounds wild, but it enhances the warmth of the ginger and creates a more complex, “adult” flavor profile.
- Cranberry Orange: Fold in ½ cup of very finely dried cranberries along with the orange zest for little pops of tartness and chewy texture.
Beau’s Chef Notes & Kitchen Stories
This recipe has seen a few evolutions in my kitchen. The first time I added the orange zest, it was a complete accident—I was zesting an orange for a different recipe and a big cloud of it flew right into my mixing bowl. Rather than start over, I just went with it. Best kitchen “mistake” I ever made! Now it’s a non-negotiable part of the recipe.
A funny story: I once tried to speed up the butter-softening process by microwaving it a *little* too long. I ended up with partially melted butter and my first batch of cookies spread into flat, spicy puddles. They still tasted good, but they were definitely not snowballs! My wife lovingly called them “Gingerbread Frisbees.” So learn from my error—plan ahead for room temp butter!
FAQs & Troubleshooting
Q: My dough is really sticky and hard to roll. What did I do wrong?
A: This usually happens if the butter was too soft or the kitchen is very warm. No worries! Just pop the bowl of dough into the refrigerator for 20-30 minutes to firm up. You can also chill the rolled balls on the baking sheet for 10 minutes before baking to help them hold their perfect shape.
Q: Why did my cookies spread and lose their round shape?
A: The most common culprit is butter that was too warm or even melted. Remember, “softened” not “melted”! Also, ensure you measured your flour correctly. Too little flour can lead to spread.
Q: Can I make the dough ahead of time?
A: Absolutely! This dough is great for making ahead. Prepare the dough, wrap it tightly in plastic wrap, and refrigerate for up to 3 days. You can also freeze the dough log or pre-rolled balls for up to 3 months. Just thaw in the fridge overnight and bake as directed (you might need to add a minute or two to the bake time if baking from cold).
Q: The powdered sugar coating seems to melt/disappear after I store them. How can I prevent this?
A> This is totally normal due to the moisture in the cookies! The key is that second dusting after they are completely cool. This creates a dry, stable outer layer. When storing, make sure the cookies are in an airtight container at room temperature, and avoid stacking them too high. A sheet of parchment between layers helps.
Gingerbread Snowball Cookies
Description
Hey friends! If you want your kitchen to smell like the holidays in under an hour, these Gingerbread Snowball Cookies are your golden ticket. Soft, buttery, spiced just right, and dusted with snowy powdered sugar—they’re perfect for cookie trays, gifting, or sneaking a few with a hot cup of coffee.
Ingredients
-
2 cups (452g) unsalted butter, softened
-
1 cup (114g) powdered sugar (plus extra for rolling)
-
2 tsp vanilla extract
-
1 tsp salt
-
Spice Mix:
-
2 tsp ground cinnamon
-
2 tsp ground ginger
-
1 tsp ground nutmeg
-
½ tsp ground allspice
-
½ tsp ground cloves
-
-
2 tbsp molasses
-
4½ cups (558g) all-purpose flour
-
½ cup finely chopped pecans or walnuts (optional)
-
Zest of 1 orange
Instructions
-
Prep: Preheat oven to 350°F (175°C). Line baking sheets with parchment paper.
-
Cream Butter & Sugar: Beat butter and 1 cup powdered sugar until light and fluffy (2–3 min).
-
Add Flavors: Mix in vanilla, molasses, orange zest, salt, and spices until combined.
-
Incorporate Flour & Nuts: Gradually add flour, mixing gently. Fold in nuts if using.
-
Shape Cookies: Chill dough 15–20 min if sticky. Roll into 1-inch balls and place 1–2 inches apart on sheets.
-
Bake: 10–12 min. Cookies should be pale on top, lightly golden underneath. Cool 5 min.
-
Double Dust: Roll warm cookies in powdered sugar. After completely cooled, roll a second time for a perfect snowy finish.
Notes
-
Soft, Not Melted Butter: Key to tender cookies.
-
Chill if Sticky: Refrigerate dough or rolled balls for 20–30 minutes.
-
Prevent Spread: Don’t over-soften butter; measure flour accurately.
-
Make Ahead: Dough can be refrigerated up to 3 days or frozen up to 3 months.
Optional Twists:
-
Dip in chocolate after cooling
-
Replace molasses with maple syrup for a lighter sweetness
-
Add dried cranberries for a tart pop
Nutrition
- Calories: 70 kcal Per Cookie
- Sugar: 3g
- Fat: 4g
- Carbohydrates: 8g
Nutritional Information (Approximate)
Okay, let’s be real—these are a holiday treat, meant to be enjoyed in moments of joy and celebration! But I know many of you like to have a general idea, so here’s a rough breakdown per cookie (based on a yield of 96 cookies, without optional nuts). Remember, values can vary based on specific ingredients used.
- Calories: ~70 kcal
- Fat: 4g
- Carbohydrates: 8g
- Sugar: 3g
- Protein: <1g
Final Thoughts
Well, that’s it, my friends! Everything I know and love about these incredible Gingerbread Snowball Cookies. This recipe is built for sharing, for creating memories, and for filling your home with the most wonderful scents of the season. They’re more than just a cookie; they’re a little edible hug, a token of holiday cheer, and a seriously delicious way to show someone you care.
I hope you love making them as much as I do. If you do give them a try, I’d be absolutely thrilled to hear about it! Tag me @feastical on social media or share your photos in the comments over on the blog. Seeing your creations is my favorite part of this job.
From my kitchen to yours, happy baking! May your season be bright, your cookies be tender, and your powdered sugar be plentiful.