
When a Brownie and a Cookie Fall in Love…
Hey friends, Beau here! Let’s cut right to the chase: have you ever been stuck in that delicious, agonizing dilemma of not knowing whether to bake a batch of chewy, fudgy brownies or a tray of crisp-edged, soft-centered chocolate chip cookies? What if I told you that you don’t have to choose? What if your two favorite chocolatey worlds could collide in one spectacular, soul-satisfying treat?
Well, stop the press and preheat your oven, because these Sourdough Brownie Cookies are about to become your new baking obsession. Imagine the crackly top of a perfect brownie, the rich, deep flavor of a double-chocolate masterpiece, and the delightful, portable form factor of a cookie. Now, add a secret weapon that makes them uniquely incredible: a cup of sourdough starter discard.
Before you scroll away, hear me out! That tangy, unfed starter you were maybe thinking of tossing? It’s the magic key. It doesn’t make these taste like sourdough bread; instead, it adds a subtle, sophisticated tang that cuts through the intense sweetness, making the chocolate flavor sing even louder. The result is a cookie with a crisp shell, a chewy edge, and a center so gloriously gooey it’s basically a warm, molten brownie you can hold in your hand. They’re rich, they’re decadent, and they are 100% chocolate-lovers approved. So, grab your favorite mixing bowl and let’s make some kitchen magic happen.
The Happy Accident That Started It All
I have to confess, this recipe was born from a happy little kitchen accident. It was a lazy Sunday afternoon, and a serious chocolate craving had hit. My mission was clear: bake brownies. But as I was gathering ingredients, I spotted my jar of sourdough starter discard sitting on the counter, looking a little lonely. I hate food waste more than I hate a soggy bottom on a pie, so the guilt was real.
At the same time, my next-door neighbor’s kid, Leo, popped his head over the fence and asked, “What smells so good, Mr. Beau?” with those big, hopeful eyes. I knew a whole pan of brownies was a commitment for one guy, but cookies? Cookies are for sharing. In a moment of pure, “what-if” inspiration, I decided to morph my brownie batter into cookie dough, and on a whim, I folded in that cup of discard, hoping it would add some moisture and chew.
The result was nothing short of legendary. The cookies baked up with this incredible texture—crisp on the outside, fudgy and almost brownie-like on the inside. Leo’s eyes went wide after the first bite, and he declared them “the best cookies in the whole universe.” High praise indeed! That’s when I knew this happy accident was a recipe worth sharing with all of you.
Gathering Your Chocolatey Arsenal
Here’s everything you’ll need to create these little pockets of joy. Don’t be intimidated by the list—it’s mostly pantry staples, and I’ve got some handy tips and swaps for you right here.
- 1 cup unsalted butter – This is our fat base, and it’s going to create an incredibly rich and tender crumb. Using unsalted lets you control the salt level perfectly. Chef’s Insight: If you only have salted butter, that’s okay! Just reduce the added salt in the recipe by about half.
- 3 cups semi-sweet chocolate chips – We’re using most of these melted into the batter for intense flavor, and the rest we’ll fold in for those glorious molten pockets. Substitution Tip: Feel free to use a bar of high-quality dark chocolate, chopped. A mix of milk and dark chocolate also works if you like a sweeter cookie.
- 1 cup cocoa powder – This is the one-two punch of chocolate! I prefer Dutch-process cocoa for its deeper, smoother flavor, but regular natural cocoa powder works great, too.
- 4 tsp vanilla essence – Yes, four whole teaspoons! Vanilla is the supporting actor that makes the chocolate star shine even brighter. Don’t skimp.
- 4 large eggs + 2 egg yolks – The extra yolks are our secret weapon for an ultra-rich, fudgy, and chewy texture. They add fat and moisture without too much additional structure, giving us that brownie-like center.
- 2 cups white sugar – For sweetness and that classic crisp edge.
- 1 cup packed brown sugar – The molasses in the brown sugar brings moisture, chew, and a beautiful caramel-like depth.
- 1 cup sourdough starter discard (unfed) – Our superstar! It should be at room temperature. It adds a subtle tang and amazing chew. Don’t have a starter? See the variations section below for a super easy workaround!
- 2 cups plain flour – The structure-builder. We’ll sift it with the cocoa to avoid lumps.
- 2 tsp salt – Crucial for balancing all that sweetness and making the chocolate flavors pop. Trust me on this.
- 1 tsp instant espresso powder (optional but highly recommended) – This is my favorite chef hack! It won’t make your cookies taste like coffee; it just deepens and enhances the chocolate flavor in a magical way.
- Flaky sea salt & dark chocolate chunks for topping – The grand finale. A sprinkle of flaky salt right when they come out of the oven is a game-changer.
Let’s Get Baking: The Step-by-Step Magic
Okay, team, aprons on! Let’s walk through this together. I’ll be with you every step of the way with my best tips and hacks to ensure cookie perfection.
- Preheat and Prep. First things first, get that oven heating to a cozy 350°F (175°C). This gives it plenty of time to reach the perfect, even temperature. Line your baking sheets with parchment paper. Chef’s Hack: No parchment? A light coating of baking spray works, but parchment is the MVP for easy cleanup and no sticking.
- Melt the Chocolatey Goodness. In a medium saucepan over low heat, melt the butter and 2½ cups of the chocolate chips together. Stir constantly until it’s one smooth, glossy, heavenly pool of chocolate. Take it off the heat and let it cool for about 10-15 minutes. Why? If it’s too hot, it’ll scramble our eggs when we mix it in, and we don’t want chocolate omelet cookies!
- Whip the Eggs and Sugar. While the chocolate is cooling, grab a large bowl and add the eggs, egg yolks, both sugars, and that glorious vanilla. Using a hand mixer or a stand mixer with the whisk attachment, beat this on medium-high speed for a good 3-4 minutes. You’re looking for it to become thick, pale, and beautifully glossy. This step incorporates air, which helps give our dense cookies a bit of lift.
- Combine the Wet Teams. Now, let’s unite our mixtures! Stir the room-temperature sourdough discard into the egg mixture until it’s fully incorporated. Then, slowly pour in the slightly cooled chocolate-butter mixture while mixing on low. It will look marbled and beautiful at first, then turn into a thick, dark, luxurious batter.
- Bring in the Dry Crew. In a separate bowl, sift together the flour, cocoa powder, salt, and that optional espresso powder. Sifting is key here to avoid lumps of cocoa in your finished cookies. Add these dry ingredients to the wet batter and mix on low speed just until the flour disappears. Do not overmix! Overmixed dough = tough cookies.
- The Final Fold. Switch to a spatula and gently fold in the remaining ½ cup of chocolate chips (or chunks, or nuts!). This ensures every scoop is packed with melty surprises.
- The Patience Payoff (Optional but Recommended). Here’s a pro move for you: cover the bowl and chill the dough for 30-60 minutes. Why chill? This solidifies the butter, which prevents the cookies from spreading too thin in the oven. It gives you a thicker, puffier, chewier cookie. If you’re in a hurry, you can skip it, but I promise the wait is worth it!
- Scoop and Space. Using a cookie scoop or a couple of tablespoons, drop mounds of dough onto your prepared baking sheets, leaving about 2 inches between them. These cookies need their personal space to spread and become perfect.
- Bake to Perfection. Bake for 10-12 minutes. Now, listen closely: you want to take them out when the edges look set and maybe even a little crackly, but the centers still look soft, slightly puffed, and underdone. This is the secret to that fudgy center! They will continue to cook on the hot baking sheet.
- The Grand Finale. As soon as you pull the trays from the oven, immediately sprinkle the tops with a little flaky sea salt. Let the cookies cool on the baking sheet for a full 5 minutes—this is part of the cooking process and helps them set. Then, transfer them to a wire rack to cool completely (or, let’s be real, eat a few warm and gooey right now).
How to Serve These Showstoppers
Okay, you’ve baked the most incredible cookies. How do you serve them? Let me count the ways!
For the ultimate comfort food experience, serve them still slightly warm from the oven, maybe with a cold glass of milk for the classic dunk. For a next-level dessert, crumble one over a scoop of high-quality vanilla bean ice cream – the contrast of warm cookie and cold ice cream is a religious experience.
If you’re feeling fancy, a quick dusting of powdered sugar right before serving looks beautiful. For a party, I love stacking them on a rustic wooden board or piling them high in a big, beautiful ceramic bowl. They’re so visually striking with their crackly tops that they really don’t need much dressing up. The best way to serve them? With a big smile, shared with people you love.
Make Them Your Own: Fun Flavor Twists
Once you’ve mastered the base recipe, the playground is open! Here are a few of my favorite ways to mix things up.
- The Nutty Professor: Fold in 1 cup of chopped walnuts, pecans, or even hazelnuts along with the final chocolate chips. The nutty crunch is a fantastic textural contrast to the fudgy center.
- The Peanut Butter Pocket: Press a small, frozen ball of peanut butter into the center of each cookie dough ball right before baking. As it bakes, it creates a hidden, melty peanut butter core that will blow your mind.
- Orange Zest Zing: Add the zest of one large orange to the egg-sugar mixture. The bright, citrusy aroma cuts through the richness of the chocolate in the most elegant way.
- Mint Chocolate Chip: Swap the vanilla extract for 1 tsp of peppermint extract. Fold in dark chocolate chunks and maybe even some white chocolate chips for a cookie that tastes like your favorite holiday ice cream.
- No Sourdough? No Problem! Don’t have a starter? Replace the 1 cup of sourdough discard with ½ cup of Greek yogurt or sour cream mixed with ½ cup of all-purpose flour. It will mimic the tang and moisture beautifully.
Beau’s Kitchen Chronicles
This recipe has evolved so much since that first batch for Leo. I’ve learned that the chill time is your best friend for a thick cookie, and that the espresso powder is the ultimate flavor booster. One time, I was filming a video for the site and was talking so much I completely forgot to add the brown sugar! The cookies were… fine, but they lacked that deep, caramel chew. We had a good laugh about it and dubbed them the “Flatliners.” So, learn from my mistake and double-check your ingredients! The beauty of this recipe is its flexibility and forgiving nature. It’s a true Feastical favorite, and I love hearing all your versions of it.
Your Questions, Answered!
I’ve gotten a lot of questions about these cookies over time, so here are the answers to the most common ones.
Q: My cookies spread too much and got flat. What happened?
A: The most common culprits are dough that wasn’t chilled (especially if your kitchen is warm), an oven that wasn’t hot enough, or using a baking sheet that’s still warm from a previous batch. Always use cool pans and don’t skip the chill for best results!
Q: Can I make the dough ahead of time?
A: Absolutely! You can cover the bowl and chill the dough for up to 72 hours. The flavor actually deepens the longer it rests! You can also scoop the dough into balls, freeze them on a tray, then transfer to a freezer bag. Bake from frozen, just adding 1-2 minutes to the baking time.
Q: My cookies are cakey, not fudgy. How do I fix that?
A> A cakey texture usually means you over-mixed the dough after adding the flour, or you baked them a little too long. Remember, mix just until combined, and pull them out while the centers still look soft!
Q: Is the sourdough discard necessary? What does it actually do?
A> It’s not *strictly* necessary (see the variation with yogurt above), but it’s highly recommended! The discard adds a subtle tang that balances the sweetness, contributes to a chewier texture, and gives the cookies a unique, complex flavor profile that sets them apart from any other brownie cookie.
Fudgy Sourdough Brownie Cookies (Rich, Chewy & Chocolate-Lovers Approved)
Description
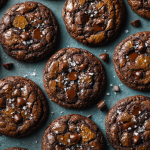
Sourdough Brownie Cookies
Crisp edges, fudgy centers, and a subtle tang from sourdough discard—your new chocolate obsession!
Ingredients
-
1 cup unsalted butter
-
2½ cups semi-sweet chocolate chips, divided
-
1 cup cocoa powder (Dutch-process preferred)
-
4 tsp vanilla extract
-
4 large eggs + 2 egg yolks
-
2 cups white sugar
-
1 cup packed brown sugar
-
1 cup sourdough starter discard (unfed, room temp; see variation below if none)
-
2 cups all-purpose flour
-
2 tsp salt
-
1 tsp instant espresso powder (optional, enhances chocolate)
-
Flaky sea salt & extra chocolate chunks for topping
Variation (no sourdough): Replace discard with ½ cup Greek yogurt or sour cream + ½ cup flour.
Instructions
-
Preheat Oven & Prep Sheets:
Preheat oven to 350°F (175°C). Line baking sheets with parchment paper. -
Melt Chocolate & Butter:
In a medium saucepan over low heat, melt butter with 2½ cups chocolate chips until smooth. Let cool 10–15 min. -
Beat Eggs & Sugars:
In a large bowl, whisk eggs, egg yolks, white sugar, brown sugar, and vanilla on medium-high speed 3–4 min until thick and glossy. -
Combine Wet Ingredients:
Stir in sourdough discard, then slowly mix in cooled chocolate-butter mixture. -
Add Dry Ingredients:
Sift together flour, cocoa, salt, and optional espresso powder. Mix into wet batter on low speed just until combined. Do not overmix. -
Fold in Chocolate Chips:
Gently fold remaining ½ cup chocolate chips (or chunks) into batter. -
Chill Dough (Optional but Recommended):
Cover and chill 30–60 min for thicker, chewier cookies. -
Scoop & Space:
Using a cookie scoop or 2 tablespoons, drop dough 2 inches apart on prepared sheets. -
Bake:
10–12 min until edges look set but centers still appear soft and slightly puffed. -
Finish & Cool:
Immediately sprinkle with flaky sea salt and extra chocolate chunks. Cool 5 min on the sheet, then transfer to wire rack.
Notes
-
Chill dough up to 72 hours—flavor improves over time.
-
Freeze scooped dough balls; bake from frozen, adding 1–2 min.
-
Store baked cookies in an airtight container up to 4 days.
Nutrition
- Calories: 180 Cal Per cookie
- Sugar: 15g
- Fat: 10g
- Carbohydrates: 22g
Nutritional Info (For Your Inner Fact-Checker)
Okay, let’s be real—we’re not eating these for our health, we’re eating them for our soul! But I know some of you like to keep track, so here’s a general breakdown. Remember, these are estimates and can vary based on specific ingredients and cookie size.
- Prep Time: 20 minutes (+ 30-60 min optional chill time)
- Cook Time: 10-12 minutes per batch
- Yield: About 36 glorious cookies
Per Cookie (Approximate):
- Calories: ~180
- Fat: 10g
- Carbohydrates: 22g
- Sugar: 15g
- Protein: 2g
Final Crumbs of Wisdom
And there you have it, my friends—the complete guide to what might just be the perfect chocolate cookie. They’re a little bit brownie, a little bit cookie, and 100% a feel-good food masterpiece. The sourdough discard trick is one of my favorite ways to reduce waste and create something truly special, and I hope it becomes a staple in your kitchen, too.