
Frozen Grapes: Your Secret Weapon for a Sweet, Healthy Crunch
Hey friends, Beau here! Let’s talk about a universal truth: we all get those mid-afternoon (or mid-morning, or post-dinner…) cravings for something sweet, cold, and satisfying. You’re staring into the fridge, willing a magical, guilt-free snack to appear. You’ve been there, right? I know I have. Maybe you reach for a cookie, a scoop of ice cream, or a sugary drink, only to be hit with that inevitable crash and a side of regret. What if I told you the perfect solution is already hiding in your produce drawer, waiting to be transformed?
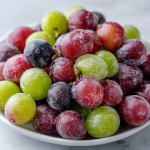
Enter the humble grape. But not just any grape—a frozen grape. This isn’t just a snack; it’s a revelation. It’s nature’s answer to popsicles, a healthier stand-in for candy, and the ultimate hot-day refresher, all rolled into one tiny, bursting package. The process could not be simpler: wash, dry, freeze. That’s it. But the result? Pure magic. The texture transforms into a sorbet-like, juicy mini-ice pop that’s insanely refreshing and naturally sweet.
Today, I’m not just giving you a “recipe” (though we’ll get to the perfect method). I’m handing you a kitchen hack, a wellness tip, and a little bit of joy, all in one. This is for the busy parent needing a quick kid-pleaser, the fitness fanatic looking for a post-workout cool-down, or anyone who just wants to feel good about what they’re munching on. So, let’s turn off the oven, put away the complicated gadgets, and celebrate the stunning simplicity of frozen grapes. Your freezer is about to become your new best friend.
The Grape Escape: A Memory in Every Bite
My love for frozen grapes isn’t new. It’s rooted in sticky summer afternoons at my Grandma Ellie’s house. Her backyard felt like a kingdom, and her kitchen was the throne room. She wasn’t a fussy chef, but a wizard of simple, feel-good food. One blisteringly hot day, after my cousins and I had worn ourselves out running through the sprinkler, we stumbled inside, parched and begging for ice cream.
Grandma just smiled, said “I’ve got something better,” and pulled a mysterious metal bowl from the freezer. Inside were what looked like jeweled marbles—deep purple and dusted with a faint frost. Skeptical, I popped one in my mouth. The crunch gave way to an intense, cold burst of sweet-tart juice that instantly cooled me from the inside out. We were hooked. We’d race to see who could make a bowl last longer, savoring each one like a precious treasure. It felt like we’d discovered a secret, a loophole in the rules of snacks. It wasn’t just food; it was an experience, a tiny moment of pure, unadulterated joy. To this day, every time I hear the rattle of frozen grapes in a bowl, I’m ten years old again, feeling that first shocking, delightful chill. That’s the power of a simple food done right.
Your One-Ingredient Wonder: Choosing the Perfect Grapes
Here’s the beautiful part: the ingredient list is gloriously short. But as with all simple things, the quality of your one ingredient makes all the difference. Let’s break it down.
- 1 bunch of seedless grapes (red, green, or black) – This is your canvas!
- Chef’s Insight: Don’t just grab the first bag you see. Give the bunch a gentle shake. The grapes should feel firm and plump, not soft or wrinkled. They should be firmly attached to their stems—a sign of freshness.
- Flavor Guide: Red grapes are the classic sweet choice, freezing into something reminiscent of fruity candy. Green grapes offer a brighter, tangier pop, like a natural sour patch kid. Black grapes tend to be the sweetest and have a deeper, almost wine-like flavor when frozen. My personal favorite? A mix of all three for a flavor and color party!
- Pro Tip: If you can find them, “Cotton Candy” grapes are a game-changer for an extra-sweet treat. They freeze into literal, well, frozen cotton candy flavor. It’s wild!
That’s it. Seriously. No sugar, no syrup, no additives. Just pure, unadulterated fruit ready for its icy makeover. The magic is in the natural sugars and high water content—physics and nature doing the heavy lifting for you.
Step-by-Step: From Grape to Great (The No-Fail Method)
Okay, you could just toss a bag of grapes in the freezer. But for the *perfect* texture—where each grape is a distinct, non-sticky, glorious little ice gem—follow these steps. Trust me, the two extra minutes are worth it.
- Wash & De-Stem: Place your grape bunch in a colander and rinse thoroughly under cool water. We want to wash away any lingering natural yeasts or residues. Gently pluck the grapes from their stems. This is a perfect mindless task to do while chatting on the phone or listening to a podcast. Chef’s Hack: No need to painstakingly pinch each one. Hold the main stem in one hand and use the scissors of your other hand (thumb and forefinger) to gently “strip” the grapes off into your colander.
- The CRUCIAL Dry: This is the step that separates good frozen grapes from *great* ones. Spread the washed grapes on a clean kitchen towel or a stack of paper towels. Pat them gently but thoroughly until they are completely dry. Why it matters: Any leftover water on the skin will freeze into pesky ice crystals that glue the grapes together into one solid, grape-sicle lump. We want free-flowing, individual bites!
- Spread & Flash Freeze: Line a baking sheet, plate, or any flat tray with a piece of parchment paper (not wax paper!). This prevents sticking. Spread your dry grapes in a single, even layer, ensuring they aren’t touching. Pop the tray into the freezer, uncovered. Chef’s Commentary: This “flash freezing” step is our secret weapon. Freezing them individually first ensures they won’t fuse together later. It also helps them freeze faster, preserving that perfect juicy interior.
- Patiently Await Magic (3-4 Hours): Let nature do its thing! Freeze for at least 3-4 hours, or until the grapes are completely solid. You’ll know they’re ready when they feel hard like marbles and make a delightful “clink” sound when you shake the tray.
- Bag ‘Em Up: Once fully frozen, quickly transfer the grapes into a reusable freezer-safe bag or airtight container. Squeeze out excess air, label it if you’re fancy (I just write “🥶” on mine), and return it to the freezer. Final Tip: They’ll keep their best texture for about 2-3 months, but let’s be real—they’ll be gone long before then!
Serving Your Frosty Jewels: More Than Just a Handful!
Of course, eating them by the handful straight from the bag is a perfectly acceptable (and highly encouraged) method. But let’s get creative! Here are a few ways to serve frozen grapes that feel a bit more special:
- The Ultimate Cheese Board Accent: Scatter a handful of frozen red grapes on a charcuterie board next to sharp cheddar, brie, and nuts. The cold, sweet burst cuts through the rich cheese beautifully.
- Natural Drink Chiller: Drop a few frozen green grapes into your glass of white wine, sparkling water, or lemonade instead of ice cubes. They chill without diluting your drink, and you get a tasty snack at the end!
- “Ice Cream” Sundae Topper: Want to fancy up a bowl of vanilla yogurt or a scoop of sorbet? Top it with frozen black grapes and a drizzle of honey. The temperature and texture contrast is incredible.
- Pretty Party Bowl: For gatherings, serve a big bowl of mixed frozen grapes. They look stunning, stay cold for ages, and are a refreshing palate cleanser between richer foods.
Mix It Up! 5 Flavorful Twists on the Classic
Once you’ve mastered the basic, why not play with flavors? These simple additions take your frozen grapes to a whole new level with barely any extra effort.
- The Citrus Zest: After washing but BEFORE drying, toss your still-damp grapes in a bowl with the juice of half a lime or lemon and a teaspoon of zest. Toss to coat, then pat dry and freeze as usual. The citrus creates a light, tangy shell that’s irresistibly bright.
- Jolly Rancher Vibes: This is a kid (and adult) favorite. Dissolve one 3-oz package of Jell-O powder (like strawberry, lime, or orange) in a large zip-top bag. Add dry grapes, seal, and shake vigorously until evenly coated. Freeze on the tray as directed. They taste like grown-up, fruit-forward candy.
- Sweet & Salty: For a sophisticated snack, lightly mist your dry grapes with water (just a spritz!) and roll them in a mixture of fine sugar and a tiny pinch of flaky sea salt or Tajín chili-lime seasoning before freezing. The sweet-salty-spicy combo is addictive.
- Herbal Infusion: Soak your washed grapes in a simple syrup (equal parts water and sugar, heated until dissolved) that you’ve steeped with fresh rosemary or mint for 30 minutes. Drain, dry thoroughly, and freeze. The herbal note is subtle and incredibly refreshing.
- Frozen Grape Slushie (Bonus “Recipe”!): Add 2 cups of frozen grapes to a high-powered blender with a splash of coconut water or plain water. Blend until you get a slushie consistency. Pour into a glass for an instant, all-natural sorbet-style drink.
Beau’s Kitchen Notes: A Grape Evolution
This “recipe” has been my kitchen constant for decades. It’s evolved from my grandma’s simple bowl to a tested-and-perfected method. I’ve learned that the drying step is non-negotiable (I learned that the hard way after chiseling a grape boulder out of a bowl). I’ve also discovered that frozen grapes are a secret weapon for smoothing out a too-strong smoothie—just toss a handful in instead of ice!
The funniest kitchen story? The time I brought a giant container of frozen grapes to a potluck, labeled as “Adult Snacks.” Let’s just say a few guests were… surprised… by their non-alcoholic nature, but everyone absolutely raved about them. They were the first thing to disappear, even next to the fancy dips and desserts. It just goes to show that sometimes the simplest ideas, executed with care, are the biggest hits. Don’t overthink it—just freeze the grapes.
Frozen Grape FAQs: Solving Your Icy Dilemmas
Q: Why are my frozen grapes mushy/squishy inside instead of firm?
A: This usually means they didn’t freeze fast enough or long enough. Ensure your freezer is at 0°F (-18°C) or below, and always use the “flash freeze on a tray” method. Also, older grapes that are starting to lose firmness won’t freeze as well. Start with the freshest, crispiest bunch you can find.
Q: Can I freeze grapes with the stems on?
A: You can, but I don’t recommend it. The stems can become brittle and unpleasant, and the grapes won’t freeze as evenly. Taking them off pre-freeze is the way to go for the best snacking experience.
Q: My grapes are all stuck together in a big block! How do I fix it?
A: Don’t panic! You have two options. 1) Let the container sit at room temperature for just 2-3 minutes, then whack it firmly on the counter—they should break apart. 2) If they’re lightly stuck, you can run warm water over the *outside* of the bag/container for a few seconds to loosen the icy glue. Next time, remember the single-layer dry freeze!
Q: Are frozen grapes a choking hazard for little kids?
A: For toddlers and very young children, it’s safest to cut grapes in half (lengthwise) before freezing to mitigate any risk, just as you would with fresh grapes. For older kids and adults, they’re perfectly safe—just encourage mindful eating and savoring each one.
Frozen Grapes : The Easiest Healthy Snack You’ll Ever Make
Description
Your Secret Weapon for a Sweet, Healthy Crunch
A one-ingredient snack that eats like a popsicle, feels like candy, and cools you down instantly. Frozen grapes are nature’s simplest glow-up—no sugar, no prep stress, just pure refreshment.
Ingredients
1 bunch seedless grapes
(red, green, black, or a mix)
Instructions
-
Wash & De-Stem
Rinse grapes thoroughly under cool water and remove from stems. -
Dry Completely (Important!)
Spread grapes on a clean kitchen towel or paper towels. Pat dry until no surface moisture remains. -
Flash Freeze
Line a baking sheet or plate with parchment paper.
Arrange grapes in a single layer so they aren’t touching. -
Freeze Until Solid
Freeze uncovered for 3–4 hours, or until fully firm. -
Store
Transfer frozen grapes to a freezer-safe bag or airtight container.
Store up to 2–3 months for best texture.
Notes
-
Dry grapes = loose grapes. Any water causes icy clumps.
-
Single layer matters. This keeps them from freezing into a block.
-
Use fresh, firm grapes. Soft grapes freeze mushy.
-
Mix colors for flavor variety. Sweet, tart, and deep notes in one bowl.
The Sweet Deal: Nutritional Perks of Your New Favorite Snack
Let’s talk about why this snack feels so good, beyond just the taste. One cup of frozen grapes (about 150g) has approximately:
- Calories: ~100
- Fat: 0g
- Carbohydrates: 27g (primarily natural fruit sugars)
- Fiber: 1g
- Protein: 1g
- Vitamins & Minerals: A good source of Vitamin K and Vitamin C, plus antioxidants like resveratrol (especially in red/purple grapes).
The beauty is in the natural packaging. The freezing process doesn’t destroy these nutrients, so you’re getting all the benefits of fresh fruit. Because they’re so cold and take time to eat, they naturally slow down your snacking pace, helping with portion awareness. The high water content also helps with hydration. It’s a snack that truly nourishes and refreshes.
Final Thoughts: Your Freezer Awaits
So there you have it, friends—the complete guide to the easiest, most satisfying healthy snack in your culinary arsenal. Frozen grapes are more than a trick; they’re a mindset. They’re a reminder that incredible food doesn’t have to be complicated, that health and indulgence can absolutely shake hands, and that sometimes the best recipes are the ones with just one ingredient.
I hope this inspires you to see that humble bunch of grapes in a whole new light. Give it a try this week. Wash, dry, freeze, and experience that first magical, crunchy, juicy bite. I have a feeling your future self, on a hot day or during a snack attack, will thank you.
Did you try a fun variation? Have a kitchen story of your own? I’d love to hear about it! Drop a comment over on the blog at Feastical.com and let’s keep the conversation going. Now, if you’ll excuse me, I have a date with a bag of frosty, purple goodness.
Stay cool and keep it flavorful,
Beau