Creamy Garlic Shrimp & Parmesan Veggie Orzo—ready in 25 mins! Juicy shrimp, velvety orzo, roasted veggies & lemon. Weeknight luxury bowl!
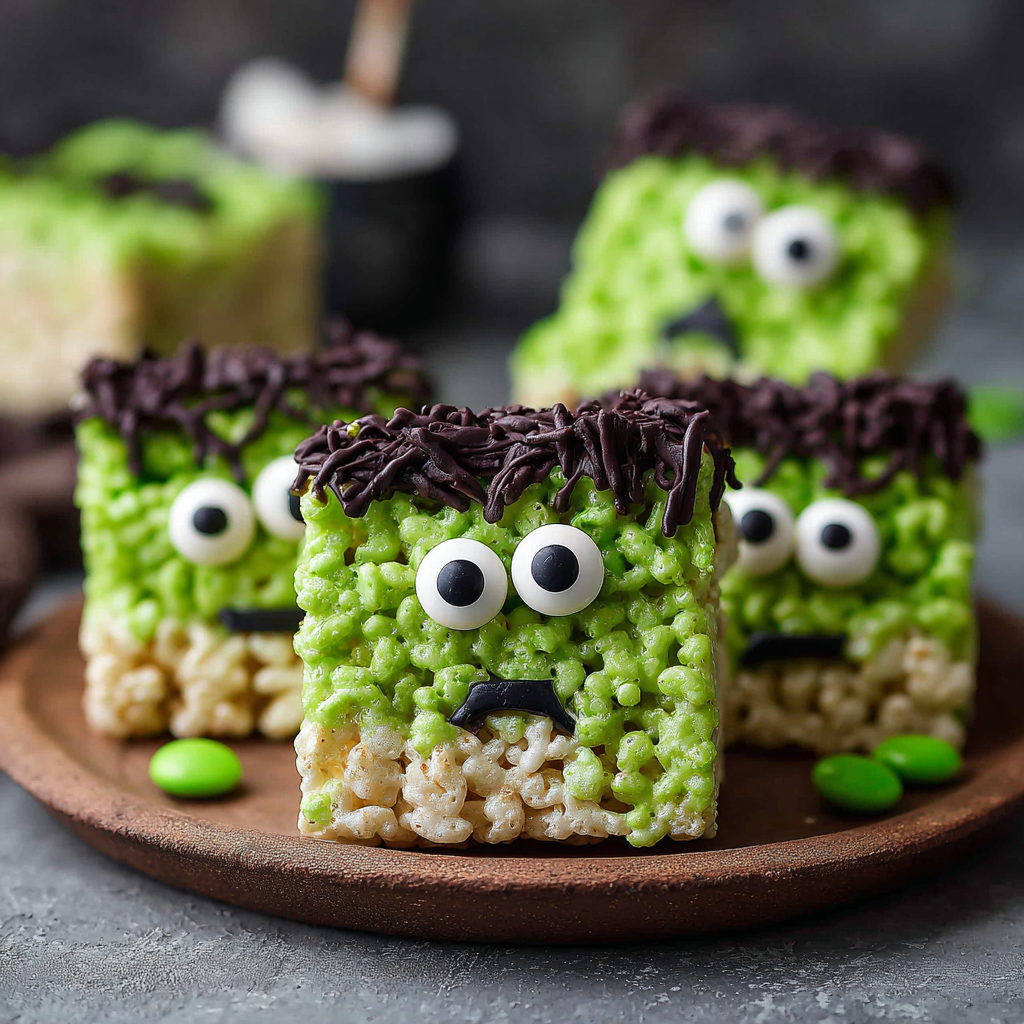
Frankenstein Rice Krispie Treats: Your New Favorite Spooky Sweet! Hey there, Feastical family! Beau here, coming at you from a kitchen that’s currently sprinkled with more green candy coating than I’d care to admit. But you know what? That’s the sign of a good time, and it’s exactly the kind of happy, delicious mess I live for. With Halloween just around the corner, my brain is buzzing with all things spooky, silly, and spectacularly sweet. And let’s be real, while I love a complicated baking project, sometimes you just need a treat that’s a total scream to make without any of the spooky stress. That’s where these little guys come in. We’re taking the classic, no-bake, crowd-pleasing magic of Rice Krispie Treats and giving them a monstrous makeover that’s perfect for parties, classroom snacks, or just a fun family night in. These Frankenstein Rice Krispie Treats are the ultimate edible craft. They’re soft, chewy, and ridiculously cute. The best part? You don’t need to be a pastry chef to pull these off. Whether you’re a seasoned kitchen wizard or this is your first time wielding a spatula, I’ve got your back. We’re going to create something unforgettable, one marshmallowy, green-dipped square at a time. So put on your favorite Halloween playlist, grab your little monsters (the human kind!), and let’s make some magic happen! The Monster Mash-Up That Started It All This recipe takes me right back to my nephew Leo’s first-grade Halloween party. The sign-up sheet was filled with things like “vegan, gluten-free, nut-aware, spooky ghost cupcakes,” and my head was spinning. I wanted to bring something that every single kid could eat, something that was an activity in itself, and most importantly, something that would taste absolutely amazing. I remembered the universal joy of a classic Rice Krispie Treat—no allergies, no fuss, just pure marshmallow-y bliss. But I wanted to *wow* them. As I was brainstorming, I saw an old Frankenstein movie playing on TV, and it clicked. Those iconic green skin, the crazy hair, the bolts! It was so simple, so visual. That afternoon, my kitchen turned into a mad scientist’s lab. We had green chocolate everywhere, candy eyes staring up from the counter, and the sound of little voices debating who had given their Frankenstein the best hair. The treats were the hit of the party, and Leo declared me the “coolest uncle ever.” That’s a win in my book. Now, it’s a Halloween tradition, and I’m so excited to share that same silly, sweet joy with you and your family. Gathering Your Monster-Making Supplies Here’s the beautiful part: you probably have most of this already in your pantry! This is a simple list, but each ingredient plays a key role in creating our delicious little monsters. 6 cups Rice Krispies cereal: The classic! This is the crisp, airy backbone of our treat. That iconic snap, crackle, pop gives us the perfect texture. Chef’s Insight: Make sure your cereal is fresh for the best crunch. A stale box will make for a sad, soft monster. 1 (10 oz) bag mini marshmallows: The glue that holds our monster together. Minis melt down faster and more evenly than large marshmallows, which is why I always recommend them. Substitution Tip: For a different flavor, you can use marshmallow fluff (about 4 cups) instead. 3 tbsp unsalted butter: This adds richness and, crucially, prevents the marshmallows from turning into a sticky, cement-like glob on your pot. Using unsalted lets you control the flavor. Chef’s Hack: Grease your spatula and your hands with a little extra butter before pressing the mixture into the pan—it’s a lifesaver for preventing stickiness! 12 oz green candy melts (or white chocolate tinted green): This is our monster’s signature green skin! Candy melts (also called candy wafers) are designed to melt smoothly and set with a firm, snappy shell. Substitution Tip: If you can’t find green ones, use white candy melts and mix in a few drops of green gel food coloring. Gel works better than liquid, as it won’t seize up the chocolate. 1/2 cup chocolate chips or black candy melts (for hair/bolts): We’ll melt these down to create Frankenstein’s wild hair and those iconic neck bolts. Black candy melts give a more dramatic, cartoonish look, but semi-sweet chocolate chips work perfectly too and taste delicious. Candy eyes: The pièce de résistance! You can find these in the baking aisle. They bring our monsters to life (literally!). Chef’s Insight: If you can’t find them, you can make your own by dabbing a little white frosting and adding a mini chocolate chip pupil. Building Your Monster: A Step-by-Step Adventure Alright, team, let’s fire up the lab! Follow these steps, and you’ll have a squad of adorable Frankensteins in no time. Read through all the steps once before you start—it’s my number one chef hack for any recipe. Step 1: Prep Your Pan. First things first, grab that 9×13-inch baking pan. Use a little butter or non-stick spray to generously grease it. This is your insurance policy for getting the treats out later without a fight. You can also line it with parchment paper, leaving a little overhang on two sides, which acts like a sling for super-easy removal. Set it aside. Step 2: Melt & Meld (The Butter & Marshmallows). In a large pot (I mean large—this mixture expands!), melt your 3 tablespoons of butter over low heat. I can’t stress the low heat enough. We’re melting, not frying! Once it’s melted, dump in the entire bag of mini marshmallows. Stir constantly with a wooden spoon or silicone spatula until they are completely melted and smooth. This should take about 5-7 minutes. You’ll know it’s ready when there are no more lumpy bits. Chef’s Hack: Take the pot off the heat right when there are just a few unmelted marshmallows left. The residual heat will finish the job without risking burning. Step 3: The Big Mix. As soon as the marshmallow mixture is smooth, remove it from the heat. Immediately pour in all 6 cups of Rice Krispies cereal. Now, fold and stir like your life depends on it! You want every single piece of cereal to be lovingly coated in that gooey marshmallow goodness. Work relatively quickly, as the mixture will start to set as it cools. Step 4: Press and Impress. Immediately transfer the mixture into your prepared pan. Now, here’s the pro tip: take another small piece of parchment paper or butter the palms of your hands lightly. Use this to press the mixture firmly and evenly into every corner of the pan. Pressing it down firmly is what gives you those dense, chewy bars that hold their shape when you dip them later. If you press too lightly, they’ll be crumbly. Step 5: The Cool Down. This is the hardest part: patience! Let the pan cool completely at room temperature. Do not, I repeat, DO NOT try to speed this up in the fridge. That can cause the treats to sweat and become too hard when you dip them. Let nature take its course. Go watch a scary movie. This will take about an hour. Step 6: Slice and Dice. Once completely cool, turn the giant slab of treats out onto a cutting board. Using a sharp knife, cut it into rectangles. I usually aim for about 12 bars, but you can make them smaller for kiddo-sized portions. Wipe your knife clean between cuts for the cleanest edges. Step 7: The Green Dip of Destiny. Now for the fun part! Place your green candy melts in a microwave-safe bowl. Microwave them in 30-second bursts, stirring well between each burst, until completely smooth and melted. Don’t over-microwave! Hold a treat by its base and dip the top into the melted green candy. Gently shake off any excess and place it right-side-up on a sheet of parchment paper. Repeat with all treats. Chef’s Hack: If your melted candy is too thick, add a tiny, tiny amount of coconut oil or vegetable shortening (like 1/4 tsp) to thin it out for a smoother coating. Step 8: Bring Him to Life! While the green coating is still wet, gently press on your candy eyes. Then, melt your chocolate chips or black candy melts (same microwave method). Spoon the melted chocolate into a small Ziploc bag, snip off a tiny corner, and pipe on crazy hair across the top and two little bolts on the sides of the neck. You can also add a stitched mouth or scars. This is where you get creative! Let them set completely at room temperature until the chocolate is firm. How to Serve Your Spooky Squad Presentation is everything, especially when your food is this cute! Pile these Frankenstein Rice Krispie Treats high on a fun platter or a rustic wooden board. They’re the perfect centerpiece for any Halloween party spread. For a real showstopper, arrange them so they’re all looking in different directions—it looks like a whole monster crew coming to life! They’re fantastic as a party favor, packed into treat bags for trick-or-treaters (lucky kids!), or as a sweet surprise in a school lunchbox. Pair them with a tall glass of cold milk or a warm cup of apple cider for the ultimate fall flavor combo. Monster Mash-Ups: Creative Twists Feel like playing mad scientist? Here are a few fun ways to mix up this recipe: Cookies & Cream Monster: Replace 2 cups of the Rice Krispies with roughly crushed chocolate sandwich cookies (like Oreos) for a cookies-and-cream base with a spooky look. Peanut Butter Lover: Add a 1/2 cup of creamy peanut butter to the marshmallow mixture when you melt it. It adds a rich, salty flavor that pairs amazingly with the sweet chocolate. Minty Fresh Frank: Use Andes mint baking chips instead of chocolate chips for the hair. The mint and green chocolate combo is a classic and oh-so-refreshing. Gluten-Free Ghoul: Ensure your Rice Krispies cereal is a certified gluten-free brand (many are!) and you’re good to go for your GF friends. Vampire Edition: Use red candy melts for the coating and give him a little red chocolate blood drip from the mouth for a different kind of monster! Beau’s Chef Notes & Kitchen Stories This recipe has evolved so much since that first batch. I used to struggle with the dipping—my first Frankensteins had such lumpy, thick green coats they looked like they had a skin condition! The trick is truly in the temperature of your candy melts and not over-microwaving. I also used to try and pipe the hair with a fancy tip, but honestly, a Ziploc bag with the corner snipped off gives you the best, messiest, most perfect crazy hair texture. One of my favorite kitchen memories is of my friend’s daughter, who decided her Frankenstein needed a unibrow. She meticulously piped one giant, continuous eyebrow across all of them. They were the most serious-looking monsters I’ve ever seen, and we laughed until we cried. That’s the spirit of this recipe—it doesn’t have to be perfect. It just has to be fun. So if your monster’s eyes are crooked or his hair is a little wild, embrace it! He’s just got more personality. Frankenstein FAQs: Solving Your Monster Problems
Q: My Rice Krispie Treats are rock hard! What did I do wrong? A: The most common culprit is overheating the marshmallows. If you cook them for too long or on too high a heat, they become tough and hard when they set. Always use low heat and take the pot off as soon as the marshmallows are just melted. Also, pressing them too firmly can compact them too much. A firm press is good, but don’t use all your might!
Q: My candy melts are too thick and clumpy. How can I fix them?
A: This is usually caused by overheating, which seizes the cocoa butter in the melts. The best fix is to add a very small amount of paramount crystals, coconut oil, or vegetable shortening (start with 1/4 teaspoon) and stir vigorously. This can often bring them back to a smooth, dippable consistency. If they’re truly scorched, you might need to start over, sadly.
Q: Can I make these ahead of time? A: Absolutely! These are a fantastic make-ahead treat. Once fully assembled and set, store them in a single layer in an airtight container at room temperature for up to 3 days. I don’t recommend refrigerating them, as it can cause the chocolate to sweat and the treats to become stale faster.
Q: The treats are too sticky to cut. Help!
A: This likely means they weren’t fully cooled. Patience is key! If you’re in a pinch, you can pop the whole pan in the freezer for about 15 minutes to firm them up quickly, but room temperature cooling is best. Also, make sure you grease your knife lightly with butter or cooking spray for clean cuts.
Print
Frankenstein Rice Krispie Treats
- Total Time: 1 hr 20 mins
Description
✨ Spooky, silly, and oh-so-sweet! These marshmallowy Rice Krispie squares get a monster makeover with green candy coating, candy eyes, and wild chocolate hair. They’re quick, kid-friendly, and guaranteed to steal the show at any Halloween party. Think of them as edible crafts—messy hands, big laughs, and a tray full of Frankensteins ready to come alive!
Ingredients
-
6 cups Rice Krispies cereal
-
1 (10 oz) bag mini marshmallows (or 4 cups marshmallow fluff)
-
3 tbsp unsalted butter
-
12 oz green candy melts (or white + green gel food coloring)
-
½ cup chocolate chips or black candy melts (for hair/bolts)
-
Candy eyes
Instructions
1. Prep Pan: Grease or line a 9×13″ pan with parchment.
2. Melt Base: Over low heat, melt butter, add marshmallows, stir until smooth. Remove from heat.
3. Mix: Fold in Rice Krispies until evenly coated.
4. Press: Press mixture firmly into pan. Cool 1 hour at room temp.
5. Cut: Turn out slab, cut into rectangles (~12 pieces).
6. Dip: Melt green candy melts. Dip tops of treats, shake off excess, place on parchment.
7. Decorate: Add candy eyes while green coating is wet. Melt chocolate, pipe on hair, bolts, and stitches. Let set until firm.
Notes
-
Cookies & Cream Monster: Swap 2 cups cereal for crushed Oreos.
-
Spicy Frank: Add cinnamon candy eyes for a fiery twist.
-
Vampire Edition: Use red melts + chocolate “fangs.”
- Prep Time: 20 mins
Nutrition
- Calories: 190 Ca Per Treat
- Carbohydrates: 32g
- Protein: 2g
Nutritional Information*
Per treat (approx., based on 12 treats): Calories: 190 | Protein: 2g | Carbs: 32g | Fat: 6g | Fiber: 0g
*Please note: This is an approximate estimate based on the ingredients used. Values can vary significantly based on specific brands and any substitutions you make.
Final Thoughts: Your Monster Masterpiece Awaits
And there you have it! What started as a simple solution for a school party has become one of my all-time favorite Halloween traditions. These Frankenstein Rice Krispie Treats are more than just a dessert; they’re a tiny, edible project filled with laughter, creativity, and that unbeatable homemade taste.
So don’t be afraid to get a little messy, to make a monster with lopsided eyes, or to let the kids take the lead with the piping bag. The magic isn’t in perfection—it’s in the joy of creating something together. These little Frankensteins are guaranteed to bring a smile to everyone who sees them (before they devour them, of course!).